Ingredients
- 12 oz dark or milk chocolate, chopped
- 3 oz melting white chocolate, chopped
- Orange food coloring oil-based (dissolves in chocolate)
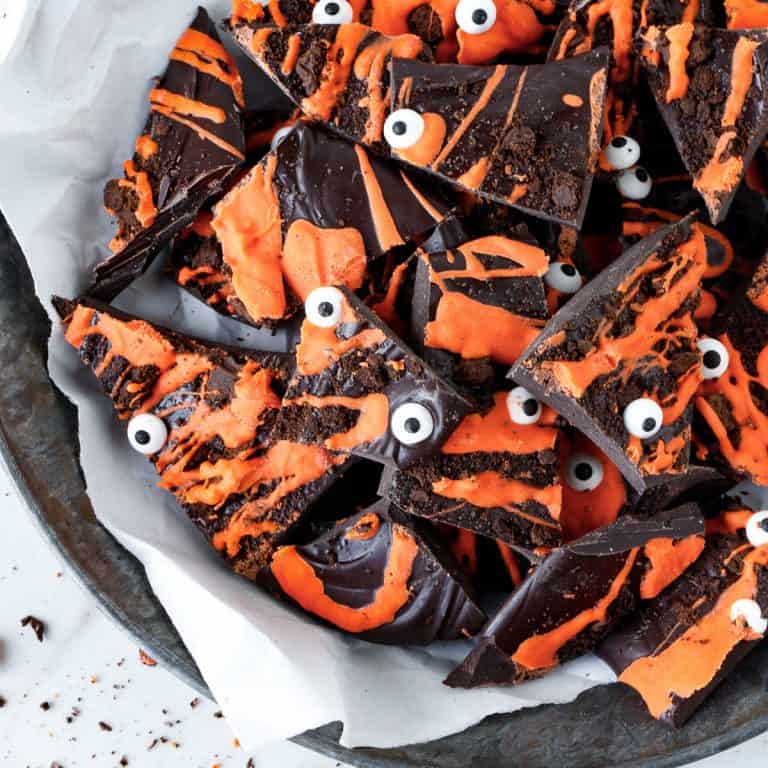
- 1/3 cup crushed plain chocolate cookies or wafers
- Candy eyes or other Halloween edible decoration
Instructions
- Line a baking sheet with wax paper that will fit in your refrigerator.
- Melt both chocolates separately in different bowls. I use the microwave (10-second spurts mixing well between each). Or use a double boiler.
- Spread the dark chocolate on the paper with an offset spatula, knife, or the back of a spoon. Don't make it too thick, or it will be hard to break up. Between 1/8 and 1/4 inch is what you want.
- Sprinkle the crushed wafers.
- Mix the orange color with the melted white chocolate. Depending on your brand of coloring (mine was a powder, Dustcolor), you might need more or less to get the type of orange you want. Start small, with a pinch, mix well and add more if necessary.
- Drizzle the orange chocolate across the dark rectangle, leaving streaks and not covering it completely.
- Top with the candy eyes before it sets.
- Refrigerate for about 20 minutes until completely hardened. Depending on the thickness of the orange-colored chocolate, it might take more time to solidify.
- Separate the cold chocolate rectangle carefully from the paper.
- Break into pieces by hand and keep in tins with a tight lid or another airtight container.
Notes
- Organization: read the recipe first and ensure you have ingredients at the correct temperatures, equipment, and enough workspace. This will make the process so much easier!
- Food coloring: make sure it's oil-based, or it will not dissolve in chocolate! I use powder color, but you can use gels.
- Chocolate: I like to use melting chocolate, such as Mercken's melting chocolate wafers. Or use a chocolate bar that melts well. I use Callebaut 54% chocolate wafers. If you want a sweeter bark, use milk chocolate (like milk chocolate melting wafers).
- White chocolate: melting chocolate wafers work well, or any white chocolate you already use that you know melts well. Mercken's coating melting wafers, Callebaut white chocolate wafers, or a white chocolate baking bar.
- Decoration: Candy eyes or maybe a mix of Halloween sprinkles.
- Refrigerator: chilling the bark is the easiest and fastest way to solidify it. You can also leave it at room temperature, which will take a while (sometimes hours). The freezer also works if you're in a hurry, but be careful it doesn't get too cold, and it's hard to break up.
- Breaking up the bark: I recommend waiting for about 20 minutes before you cut or break it up with your hands; it'll be easier.
- Prep Time: 15 minutes
- Refrigeration time: 20 minutes
- Category: Candy - Sweets
- Method: Mixing + Refrigerating
- Cuisine: American
Nutrition
- Serving Size: 1/25
- Calories: 96
- Sugar: 6.9 g
- Sodium: 6.5 mg
- Fat: 6 g
- Carbohydrates: 9.5 g
- Fiber: 1.1 g
- Protein: 1 g
- Cholesterol: 1.3 mg