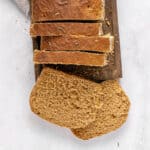
Homemade Rye Sandwich Bread
This recipe makes a balanced sandwich bread that's hearty enough to stand up to pastrami and mustard, yet mild enough for your morning toast. With a blend of rye and whole wheat flours, this isn't a dense or heavy rye. It can be made by hand or with a stand mixer.
Servings 1 loaf
Ingredients
- 1 tablespoon active dry yeast
- ¼ cup warm water
- 1 cup rye flour finely milled
- 1 cup whole wheat flour finely milled
- 2 teaspoons salt
- ¾ cup buttermilk at room temperature
- 2 tablespoons malt syrup or molasses
- 1 tablespoon honey
- 2 tablespoons sunflower oil or other vegetable oil
- 2 teaspoons caraway seeds crushed or coarsely ground, optional
- 1 teaspoon fennel seeds crushed or coarsely ground, optional
- 1 cup bread flour or all-purpose flour
Instructions
- Grease one 9x5 inch (23x13cm) loaf pan. Set aside.
- In a small bowl mix 1 tablespoon active dry yeast and ¼ cup warm water and let foam for a few minutes while you prepare the next step.
- In the bowl of a stand mixer (or a large bowl if kneading by hand), add 1 cup rye flour, 1 cup whole wheat flour, 2 teaspoons salt, ¾ cup buttermilk, 2 tablespoons malt syrup, 1 tablespoon honey, 2 tablespoons sunflower oil and yeast mixture. Mix with a wooden spoon until the mixture integrates. Attach the dough hook and mix at medium to low speed until a shaggy dough is formed.
- Add 2 teaspoons caraway seeds and 1 teaspoon fennel seeds, if using, and 1 cup bread flour, a few tablespoons at a time.
- Knead for 6 to 8 minutes at medium speed, until the dough is elastic but not too stiff. If it's too sticky, add a few more tablespoons of bread flour, but don't overdo it. It needs to retain some stickiness. If kneading by hand, lift and fold it onto itself until it comes together. At first, it's extremely sticky and messy, but it will firm up with each turn. A dough cutter or bench scraper is a good tool for this part.
- Transfer the dough to an large oiled bowl, turning to grease on all sides. Cover with plastic wrap and let rise until doubled, about 1 hour. Depending on the temperature of your kitchen, it can take more time.
- Gently punch the dough down, transfer it to the floured counter and knead for a minute. Form a rectangle and roll it to form a loaf (like cinnamon rolls), pinching the seams with each turn so there are no air pockets.
- Place it in a loaf pan that is lightly floured or sprinkled with oats. Slightly flatten the top with your hand to level the dough, cover with a clean kitchen towel and let it rise until almost doubled, 1 to 1 ½ hours.
- About 20 minutes before baking, preheat the oven to 375ºF (190ºC).
- Bake the loaf for about 40 minutes, until the top is dry and firm to the touch, and the bottom sounds hollow when lightly tapped with your fingers.
- Let cool on a wire rack, and run a smooth-bladed knife if any parts are stuck to the sides before removing the bread from the pan. Invert onto a wire or cooling rack and let cool completely before cutting to avoid clumping.
Notes
For the dough to rise and double in size, it's essential to place the bowl in a warm, not cold, space. I sometimes wrap the bowl in a blanket (or even a sweater!) if the kitchen is too cold. The time frame is very important, because if the dough takes too long to rise, it loses some of its strength and will not bake well.
Baking time: Please note that all ovens and pans can vary, even if they appear similar. The baking time in my recipes is as accurate as possible, but it might take you more or less time. You can use an oven thermometer to check that your oven is at the right temperature. I recommend tracking how your oven works and identifying any minor details that may need adjustment.
Store it at room temperature for a few days, covered or wrapped to prevent dryness, or refrigerate it for up to a week. After that, I recommend freezing it, well wrapped and sliced for easier use. Warm slightly in a medium oven before eating.