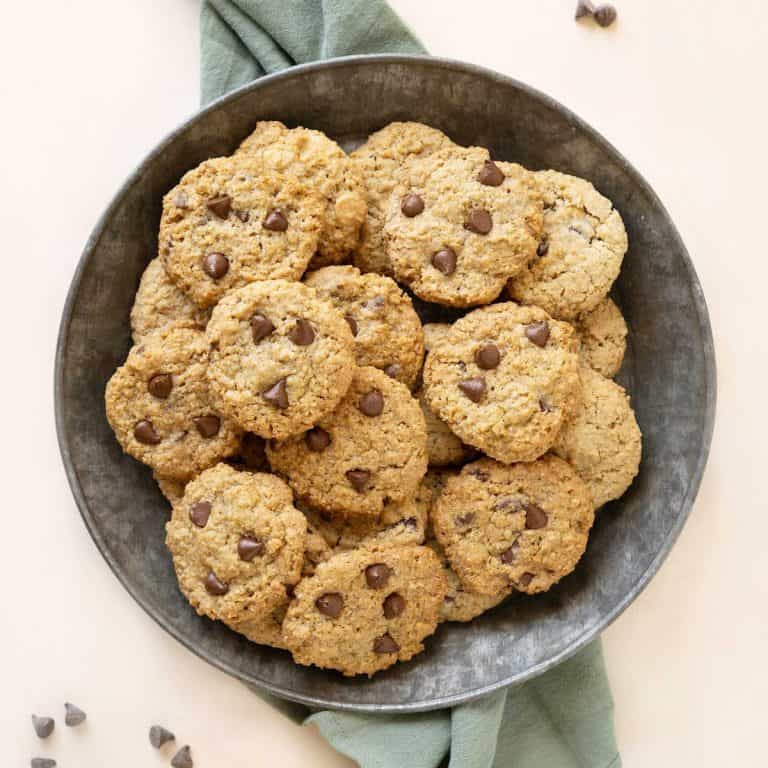
These are soft and chewy oatmeal cookies full of chocolate chips. It's a super easy one-bowl recipe that comes together in minutes so that you can have freshly baked cookies in 30 minutes. Or make the cookie dough ahead and freeze it for when the craving hits!
As an Amazon Associate, I earn from qualifying purchases. Read my disclosure policy.
After trying different recipes for years, I found the perfect chewy oatmeal cookie.
For me, it's a no-fail, straightforward recipe. That sounds like a lot, but it delivers.
Adding chips takes them to another level of sweetness and flavor.
It makes them a sibling to our popular oatmeal chocolate chip walnut cookies and a cousin to one of my favorites, the carmelitas bars. It all stays in the family.
We like to underbake them slightly and eat them warm. You get a gooey cookie with melting chips; so delicious.
Why you'll love them
- Very easy to make: you simply mix the ingredients in one bowl. I recommend an electric mixer to make the process easier and faster, but you can make them by hand with a whisk, a large bowl, and some arm muscle.
- Flavor: the mix of sugars and butter makes delicious cookies. They have a caramel undertone and just enough sweetness to let the flavors of the oats and chips come through.
- Chewy texture: if stored properly, the texture remains wonderful for a few days. The key is baking them just until they are still slightly soft in the center.
- Make ahead: you can keep the cookie dough refrigerated for up to a day before baking it. Or freeze the unbaked cookie balls for up to a month and bake them directly; no need to thaw them!
Ingredients
- Oats: rolled oats (also called traditional oats or old-fashioned oats) are the best for this recipe because they add texture. But you can use instant oats.
- Unsalted butter.
- Sugar: white granulated sugar and brown sugar are used in this recipe.
- Egg: fresh, large.
- Milk: I use whole milk, but you can use low-fat or almond milk.
- All-purpose flour.
- Baking soda: make sure it's not expired.
- Vanilla: I use pure vanilla extract or pure vanilla paste when available, but a good vanilla essence (artificially flavored) also works.
- Salt: I like to use kosher salt when baking. But regular table salt works just fine.
- Chocolate chips: use your favorite semisweet chip. I love Ghirardelli premium baking chocolate chips, and Nestle toll house semisweet chips.
Type of oats to use
There are 2 types of oats good for making oatmeal cookies:
- Rolled oats - also called traditional or old-fashioned oats, are medium-sized and shaped like irregular discs (image below). It's the one in the box we grew up with that is used to make porridge, the best granola recipe, or oatmeal muffins. This is the most commonly used oat and a sure way to get good results.
- Instant oats - also known as quick oats, are more processed than the ones above. I find that they lack enough texture, but you can use them.
One of my favorite things about this oatmeal cookie recipe is that the base mixture (similar to chocolate chip cookies) is simple to make.
- Mixers: using an electric or stand mixer with the paddle attachment will make this process much easier. The cookie dough must be mixed for several minutes in the beginning, which is harder to do by hand.
- Creaming: the butter must be soft (not greasy or starting to melt) and mixed with the sugar until very creamy. Add the sugars gradually to incorporate better, especially if using a handheld electric mixer.
- Adding the egg: don't overlook this step, and take the time to beat it for several minutes. It will help the cookies' texture and shape. The dough should be soft and creamy. After this step, add the rest of the wet ingredients (milk and vanilla).
- Adding the flour mixture: also called dry ingredients, includes flour, salt, and baking soda. Add them at low speed. We don't want to develop the gluten in the flour, so it needs to be mixed until well incorporated, but no more than that.
- Preheated oven: ensure it's at the right temperature when you put in the cookies.
- Cookie sheets: I recommend turning the baking pan around (back to front) halfway through baking, so the cookies bake better. Ovens transfer heat differently, and this is the easiest way to bake them evenly, especially if you use a large baking sheet.
- Preparing the pan: after years of baking homemade cookies, I butter the pan lightly. It works well for me. But you can use parchment paper, a silicone mat, or some other type of lining.
- Should you slightly flatten the tops before baking? If making them right away, it's not necessary. If refrigerating the dough for several hours or days and you like soft, chewy cookies, I recommend it because it will be firmer and drier (the oats will have absorbed more liquid), so they might not expand well and take too long to bake fully.
- How long should you bake them: it depends on the texture you like. I like chewy cookies with crisp edges, so I underbake them a tiny bit and take them out when the center is still very soft. For crunchier cookies all around, bake them for a few minutes more, depending on the size. You can do a test run and bake a few cookies first and find your sweet spot regarding baking time and texture.
Topping
I add extra chocolate chips the second the cookies are out of the oven.
It adds another layer of flavor that is fantastic! And makes the cookies a little messy to eat if they're still warm, but it's part of the fun.
The way to make a large batch and have freshly baked cookies any time you want is to freeze them individually.
It takes 3 simple steps:
- Measure and freeze: pretend you're about to bake them, measure them (with a cookie scoop), and place them on a cookie sheet, no need to leave much space between them. Pop the cookie sheet into the freezer.
- Transfer to a bag: once the raw cookie balls are frozen rock solid, transfer them to a plastic bag or freezer container. That way, you won't have the cookie sheet stuck in the freezer until you decide to bake.
- Bake straight from the freezer: when you want fresh oatmeal walnut cookies, take the number of frozen cookie balls you want to bake, place them on a cookie sheet, and bake them as directed in the recipe below. They might take an extra minute or two due to their freezing temperature when you put them in the oven.
Kitchen notes
- Organization: read the recipe first and ensure you have ingredients at the right temperatures, equipment needed, and enough workspace. This will make the process so much easier!
- Baking time: keep in mind that all ovens and pans are different, even if they look the same or very similar. The baking time in my recipes is as accurate as it can be, but it might take you more or less time. Use a thermometer inside the oven (like the OXO oven thermometer) to check that the temperature is right. I recommend you keep track of how your oven works and what tiny details you might need to adjust.
- Measuring the cookies: Use an ice cream or cookie scoop so that you're cookies bake evenly. Leave roughly a 1 or 2-inch separation between each (depending on the size), so they can spread comfortably during baking.
- Refrigerating the dough: I don't chill it, I bake the cookies directly, and the texture is fantastic. But the type of oats you use might differ from mine as they can vary depending on what part of the world you live in and what brand you buy. You should not have issues using quick-cooking oats because it hydrates quickly. With rolled oats, I recommend you test-bake a few cookies first and see how they come out. Letting the dough rest from 1 hour to a day will help to make moister and softer cookies. The oats will soften with the extra hydration time.
- Batching and freezing: Make a large batch (double this recipe) and freeze them. It will save you time and always have freshly baked oatmeal cookies.
- Flavorings: boost the flavor of these cookies by adding ground nutmeg, orange zest, or a tablespoon of Frangelico or some other nut liqueur. For soft cookies with a hint of molasses, use only dark brown sugar.
- Storing: cookie jars or tins are ideal for keeping any cookie. But plastic bags can work well too.
- Variations and substitutions: use half dark chocolate chips and half milk chocolate chips or white chocolate chips for a sweeter cookie. Use dried fruit and make white chocolate cranberry cookies or chocolate chips walnut oat cookies.
- Run out of granola? Crumble a few of these over your bowl of yogurt and fruit.
- Want to play around with your crumble recipes? Omit the milk in the recipe and use this cookie dough as a topping for apple crumb bars, raspberry apple bars or cherry crumble.
- Make sandwich cookies: if you make small-sized cookies, you can fill them with dulce de leche and have awesome alfajores cookies.
Related recipes you might like:
Let me know in the comments below if you made this recipe and loved it and if you had issues so we can troubleshoot together. I love to hear what you think, always. Thanks for being here. It's much appreciated.
You might also consider subscribing to our FREE email series 'Baking the Best' and our regular newsletter. Or connect via Facebook, Instagram, and Pinterest.
Chewy Chocolate Chip Oatmeal Cookies
Ingredients
- 3 cups 255g rolled oats
- 1 ¼ cups 165g all-purpose flour
- ½ teaspoon baking soda
- ¼ teaspoon salt
- ¾ cup 170g unsalted butter, at room temperature
- ¾ cup 155g brown sugar
- ¾ cup 150g white sugar
- 1 egg, at room temperature
- 2 tablespoons whole milk, at room temperature
- 1 ½ teaspoons vanilla extract or 1 teaspoon vanilla paste
- 1 ½ cups semisweet chocolate chips or chocolate chunks
- Extra chocolate chips for topping, optional
Instructions
- Preheat the oven to 350°F/180°C.
- Butter cookie sheets or line them with parchment paper.
- Beat butter in a large mixing bowl until smooth, about 20 seconds.
- Gradually add sugars and beat for 2 minutes, until creamy, scraping the sides of the bowl as needed.
- Add the egg and beat at medium speed for 3 minutes, scraping the sides of the bowl a few times.
- Add the milk and vanilla. Mix until incorporated.
- Add the flour, baking soda (both sifted to avoid lumps), and salt to the butter mixture. Mix at low speed just until well blended and no dry spots remain. Don't overbeat at this point.
- Mix in the oats in two parts so they're easier to incorporate.
- Add the chocolate chips and mix well. I use a rubber spatula for this part. Make sure no flour remains in the bottom of the bowl.
- At this point, the cookie dough can be refrigerated for up to a day. See note below.
- Scoop out portions onto the prepared baking sheet, leaving space between them, an inch or two, depending on the size of the cookie. I flatten them slightly with my fingers tips so they bake faster with soft centers. This is important if making larger cookies so there's less chance of the center taking too long to bake while the edges brown too quickly. If you're unsure if you want to flatten them or not, do a test bake with two dough balls, leaving one whole and flattening the other, and see which one you like best.
- Bake for 10-12 minutes, depending on the size, until golden brown and still soft in the center. I use a 1.5-inch cookie scoop and bake them for exactly 10 minutes.
- Smack the pan on the counter immediately after you take it out of the oven. It will deflate the cookies a little and help with the texture.
- Sprinkle them immediately with extra chocolate chips and finely chopped walnuts if desired.
- Let them cool on a wire rack (or cooling rack) before lifting them carefully from the paper and cooling them completely.
- Once they cool down completely, transfer cookies to jars or an airtight container.
Notes
- Organization: read the recipe first and make sure you have ingredients at the right temperatures, equipment needed, and enough workspace. This will make the process so much easier!
- Baking time: keep in mind that all ovens and pans are different, even if they look the same or very similar. The baking time in my recipes is as accurate as it can be, but it might take you more or less time. Use a thermometer inside the oven (like the OXO oven thermometer) to check that the temperature is right. I recommend you keep track of how your oven works and what tiny details you might need to adjust.
- Measuring the cookies: Use an ice cream or cookie scoop so that you're cookies bake evenly. Leave roughly a 1 or 2-inch separation between each (depending on the size), so they can spread comfortably during baking.
- Refrigerating the dough: I don't chill it, bake the cookies directly, and the texture is fantastic. But the type of oats you use might differ from mine as they can vary depending on what part of the world you live in and what brand you buy. You should not have issues using quick-cooking oats because it hydrates quickly. With rolled oats, I recommend you test-bake a few cookies first and see how they come out.
- Should you slightly flatten the tops before baking? If making them right away, it's not necessary. If refrigerating the dough for several hours or days, and you like soft chewy cookies, I recommend it because it will be firmer and drier (the oats will have absorbed more liquid), so they might not expand well and take too long to fully bake.
- Batching and freezing: Make a large batch (double this recipe for example) and freeze them. It will save you time and always have freshly baked oatmeal cookies.
- Flavorings: boost the flavor of these cookies by adding ground nutmeg, orange zest, or a tablespoon of Frangelico or some other nut liqueur. If you like a sweeter cookie, substitute half of the dark chocolate chips for milk chocolate chips or white chocolate chips. Use dark brown sugar for soft cookies with a hint of molasses.
- Storing: cookie jars or tins are ideal for keeping any cookie. But plastic bags can work well too.
Rate and review this recipe