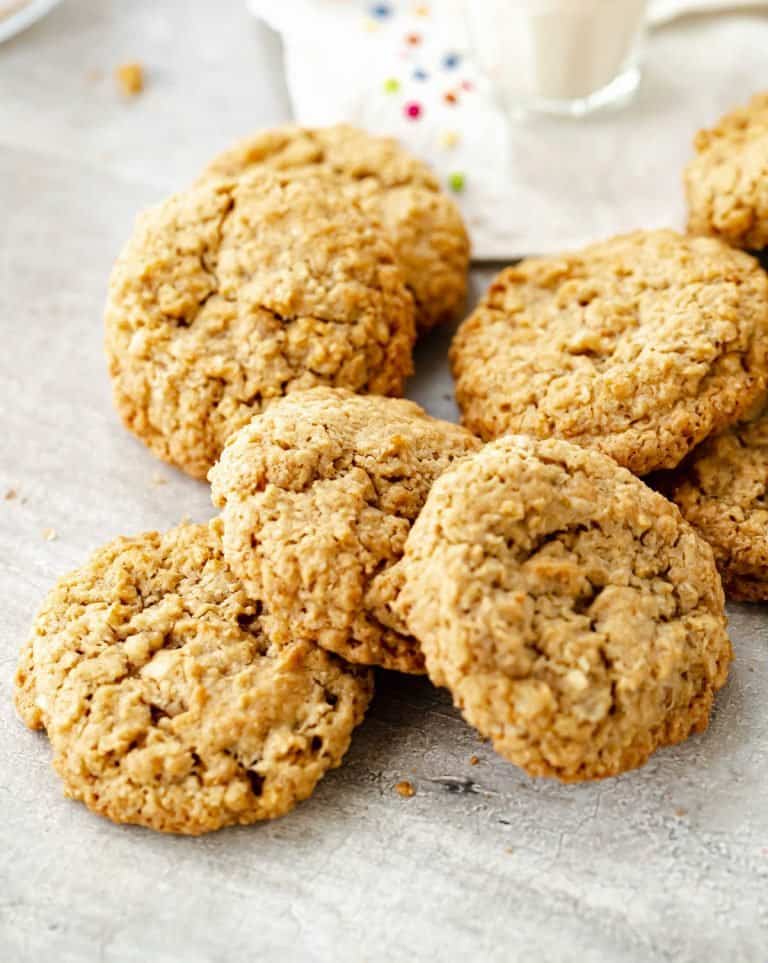
Ingredients
Units
- 3 cups (255g) old-fashioned rolled oats
- 1 1/4 cups (165g) all-purpose flour
- 1/2 teaspoon baking soda
- 1/4 teaspoon salt
- 3/4 cup (170g) unsalted butter, at room temperature
- 1 cup (210g) brown sugar
- 1/2 cup (100g) white sugar
- 1 egg, at room temperature
- 2 tablespoons whole milk, at room temperature
- 1/4 teaspoon ground cinnamon
- 1 teaspoon vanilla extract or paste
- 1 cup chopped walnuts, about 4oz (measured after chopping)
Instructions
- Preheat the oven to 350°F/180°C.
- Butter cookie sheets or line with parchment paper.
- Beat butter in a large mixing bowl until smooth, about 20 seconds.
- Gradually add sugars and beat for 2 minutes, until creamy, scraping the sides of the bowl as needed.
- Add the egg and beat at medium speed for 3 minutes, scraping the sides of the bowl a few times.
- Add the milk, cinnamon, and vanilla. Mix until incorporated.
- Add the flour, baking soda (sifted to avoid lumps), and salt and add to the butter mixture. Mix at low speed just until well blended and no dry spots remain. Don't overbeat at this point.
- Mix in the oats in two parts so they're easier to incorporate.
- Add the walnuts and mix well. I use a rubber spatula for this part. Make sure no flour remains in the bottom of the bowl.
- At this point, the cookie dough can be refrigerated for up to a day. See note below.
- Scoop out portions onto the prepared sheets, leaving space between them, an inch or two depending on the size of the cookie. If making larger cookies I flatten them slightly with my fingers tips so there's less chance of the center taking too long to bake and the sides being too brown.
- Bake for 10-12 minutes, depending on the size, until golden brown and still soft in the center. I use a 1.5-inch cookie scoop and bake them for exactly 10 minutes.
- Smack the pan on the counter immediately after you take it out of the oven. It will deflate the cookies a little and help with the texture.
- Let cool on a wire rack before lifting them carefully from the paper and cooling them completely.
- As soon as they cooled down completely, transfer the cookies to jars or an airtight container.
Notes
- Organization: read the recipe first and make sure you have ingredients at the right temperatures, equipment needed, and enough workspace. This will make the process so much easier!
- Baking time: keep in mind that all ovens and pans are different, even if they look the same or very similar. The baking time in my recipes is as accurate as it can be, but it might take you more or less time. Use a thermometer inside the oven (like the OXO oven thermometer) to check that the temperature is right. I recommend you keep track of how your oven works and what tiny details you might need to adjust.
- Oats: rolled oats (also called old-fashioned oats or traditional oats) are the best for this recipe because they add texture. But you can use quick oats which are finer if that's what you have.
- Refrigerating the dough: I don't chill it, bake the cookies directly, and the texture is fantastic. But the type of oats you use might be different from mine as they can vary depending on what part of the world you live in and what brand you buy. If using quick-cooking oats you should not have issues because it hydrates quickly. If using rolled oats, I recommend you test bake a few cookies and see how they come out. If you want them to be softer and moister, letting the dough rest from 1 hour to a day will help. The oats will soften with the extra hydration time.
- Measuring the cookies: Use an ice cream or cookie scoop so that you're cookies bake evenly. Leave roughly a 1 or 2-inch separation between each (depending on the size) so they can spread comfortably during baking.
- Baking: underbake them a tiny bit, when the center is still very soft, and they will be chewier. If you want crunchier cookies, bake them a few minutes more, depending on the size. You can do a test run and bake a few cookies first and find your sweet spot when it comes to baking time and texture.
- Batching and freezing: make a large batch (double this recipe for example) and freeze them. It will save you time and you'll always have freshly baked oatmeal cookies.
- Keeping: cookie jars or cookie tins are ideal for keeping them. But plastic bags or airtight plastic containers work well too.
- Prep Time: 10 minutes
- Cook Time: 10 minutes
- Category: Cookies
- Method: Baking
- Cuisine: American
Nutrition
- Serving Size: 1/30
- Calories: 162
- Sugar: 8.2 g
- Sodium: 84.6 mg
- Fat: 7.6 g
- Carbohydrates: 19.5 g
- Fiber: 1.4 g
- Protein: 3.1 g
- Cholesterol: 19.3 mg
