Ingredients
Units
- 4 cups flour
- 1 1/4 teaspoons baking soda
- 1 teaspoon salt
- 2 tablespoons sugar
- 4 tablespoons butter
- 1 3/4 cups buttermilk
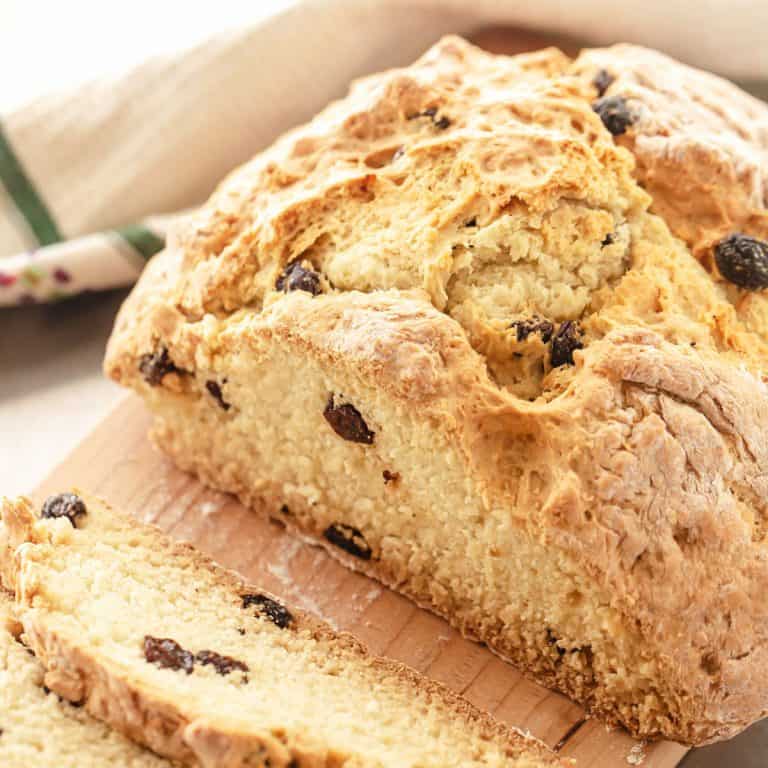
- 3/4 cup seedless raisins or currants
Instructions
- Preheat the oven to 400°F/200°C.
- Have ready a baking sheet dusted with flour.
- Stir together flour, sugar, salt, and baking soda in a large bowl. It's important to sift the baking soda as it can get clumpy and it won't dissolve during baking.
- Scatter the cold butter pieces on top of the flour mixture and work them into it. You can use your hands or a pastry cutter. The butter should be roughly the size of peas. Don't overwork it, you want the butter to remain as cold as possible.
- Add the raisins and mix to incorporate them.
- Add the buttermilk and mix with a wooden spoon until it's all moistened. This should be quick, several strokes and that's it. We don't want to overwork the dough. If it's not enough liquid add a tablespoon or two more. If in doubt, use a tablespoon more than less. If the dough doesn't have enough liquid it will crumble too much when you cut it. (Flour absorbs liquid differently depending on the type, the weather, etc. That's why we don't add the whole amount of buttermilk at once).
- Flour the counter and dump this shaggy mass.
- Sprinkle the top of the dough with extra flour and bring it all together, folding it quickly onto itself a few times, and forming it into a loose, rustic ball. It will be uneven. Don't be tempted to make it into a smooth ball, it's meant to be rustic and a bit flabby.
- Place it on the prepared pan (I help myself with a spatula or dough scraper).
- Slash the top of the bread with a sharp knife, making a cross pattern, cutting it about half-inch deep at most, and immediately put the pan in the oven. Baking soda starts acting when you add liquid, so you want to start baking the bread as soon as possible.
- Bake for 10 minutes and turn the oven temperature down to 350°F/180°C.
- Continue baking for 35 to 40 more minutes, until it's golden and firm to the touch. You can open it slightly, carefully lifting the top with a fork, and make sure it's completely baked inside because it turns golden after 20-30 minutes but, usually, the crumb inside is still raw, so make sure. If it's browning too quickly cover the top with a piece of aluminum paper and keep baking it (I do this at about 25 minutes). Also, turn the bread over and tap the bottom with your knuckles, it should make a hollow sound when fully baked.
- Let cool on a wire rack for 15 minutes before slicing.
- Eat warm or at room temperature. It's best eaten the same day it's baked (first few hours preferably).
- Freeze it sliced and well wrapped (first in plastic wrap and then aluminum foil) or in an airtight container and use it for morning toast.
Notes
- Baking time: keep in mind that all ovens and pans are different, even if they look the same or very similar. The baking time in my recipes is as accurate as it can be, but it might take you more or less time. You can use a thermometer that is placed inside the oven (like the OXO oven thermometer) to check that your oven is at the right temperature. I recommend you keep track of how your oven works and what tiny details you might need to adjust.
- Cold ingredients: this is essential to make this bread work. So keep butter and buttermilk in the refrigerator until the last minute. I put the butter pieces in the freezer five minutes before adding them to the flour and sometimes the mixing bowl too.
- Light touch: don't overwork the dough when you're forming the ball and don't knead it, at all, as that will result in a tough bread. It should have a rustic look both before and after going into the oven.
- Hot oven: since this recipe uses only baking soda as a leavening, it needs a hot oven in the beginning for that initial burst. Then the oven temperature needs to be lowered in order to let the interior bake fully.
- Homemade buttermilk: if you can't access store-bought, you can easily make your own: simply add a tablespoon of fresh lemon juice or white vinegar to a cup and then add whole milk. Stir, wait 5 minutes when it will curdle or thicken, and there you have your buttermilk. Keep refrigerated.
- Pan: I always use a regular baking sheet, but you can use a cast-iron skillet or round cake pan to make this easy soda bread recipe.
- Prep Time: 10 minutes
- Cook Time: 45 minutes
- Category: Bread
- Method: Baking
- Cuisine: International