
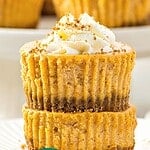
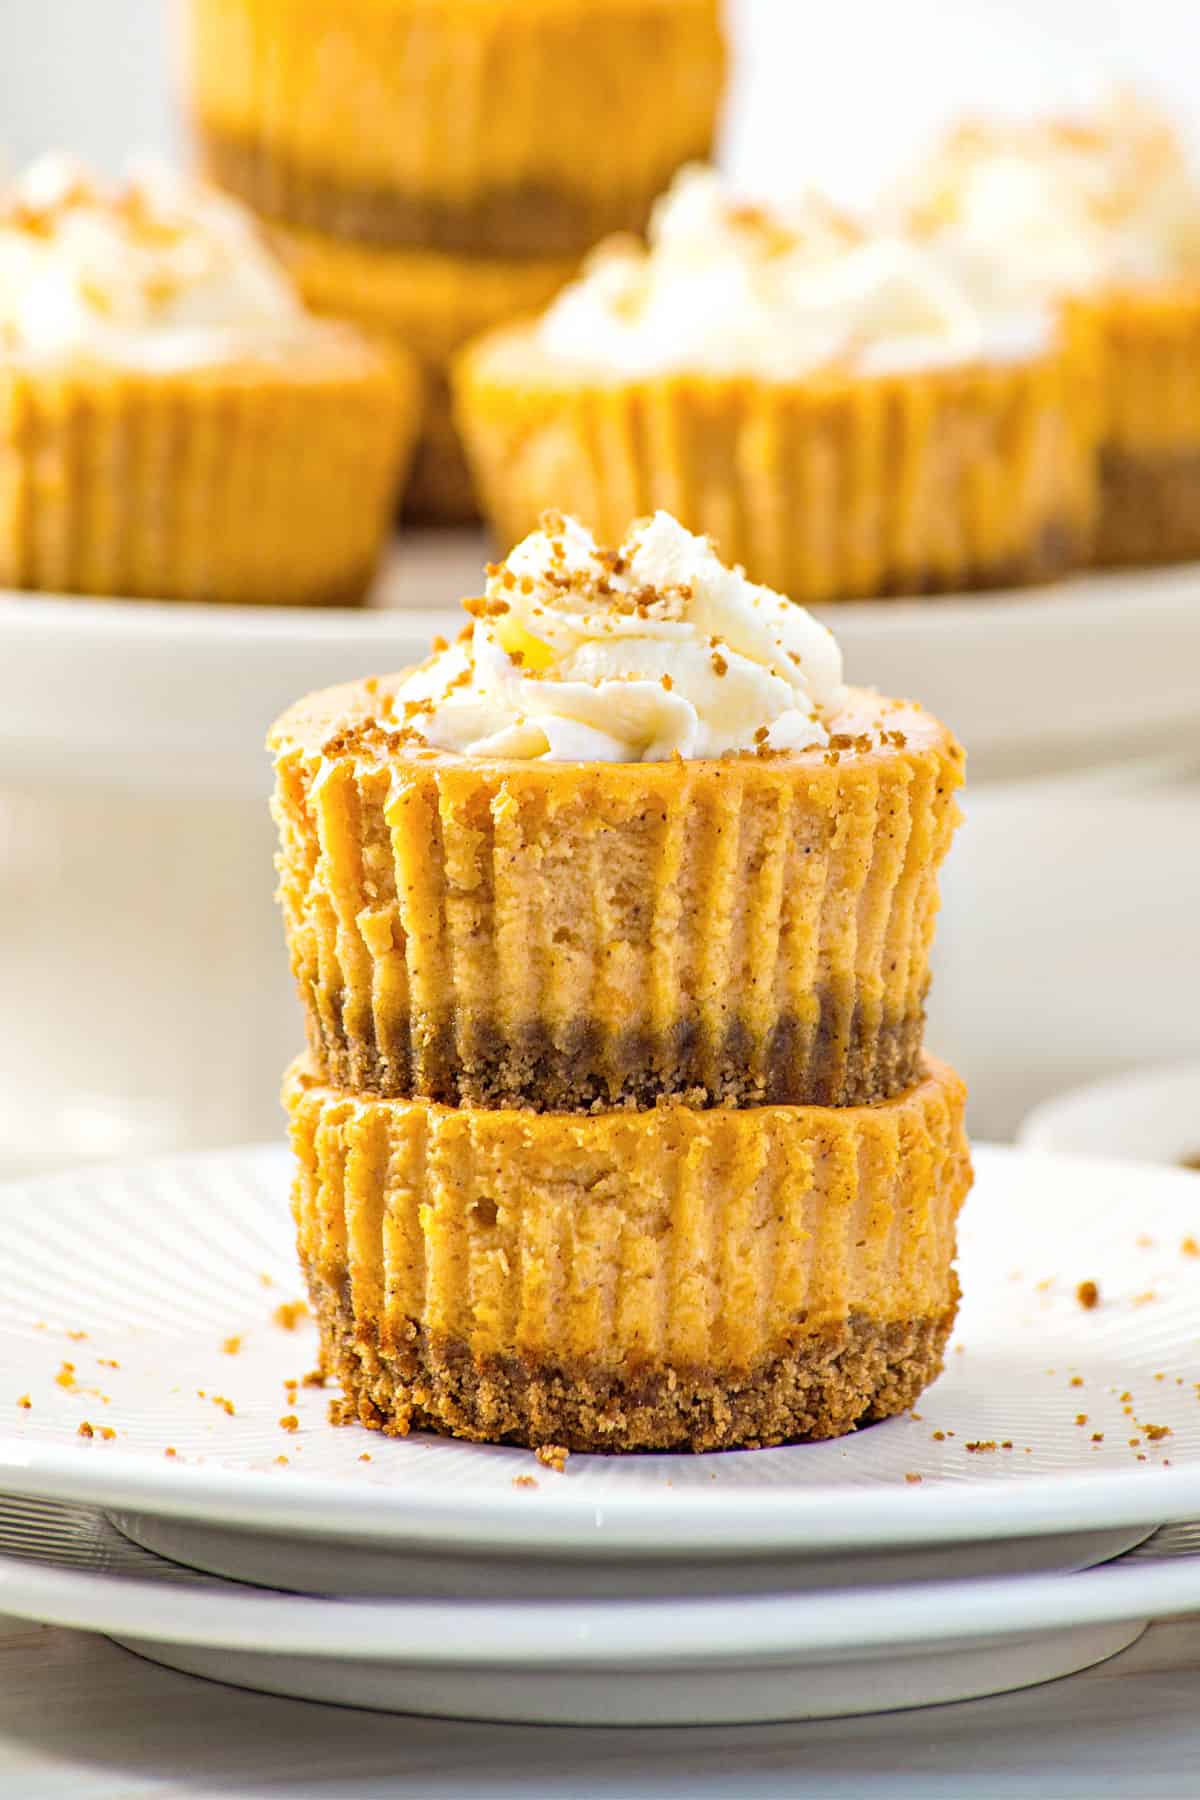
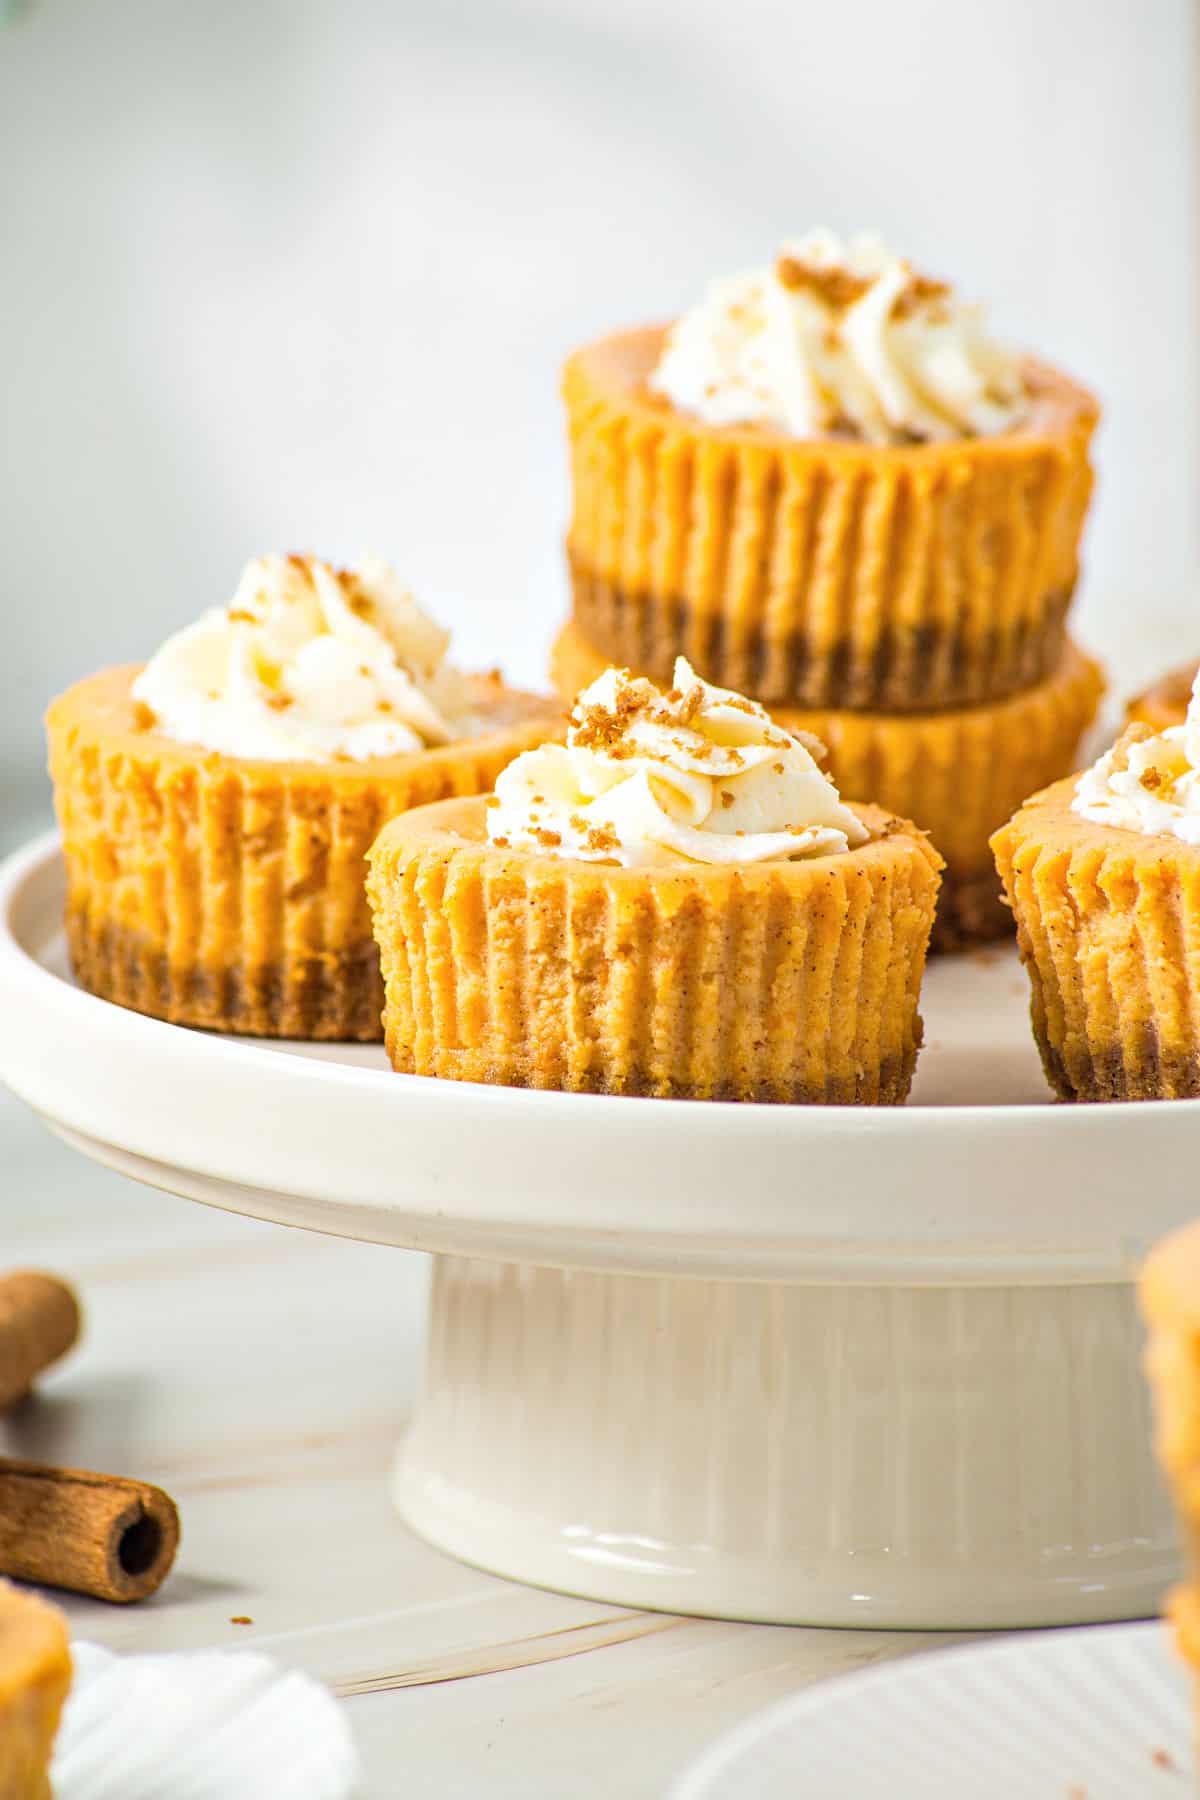
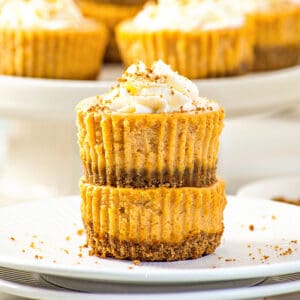
These mini cheesecakes bake evenly, don't require a water bath, cool faster than full-size versions, and freeze beautifully. They're a great make-ahead dessert for fall with warm spices and a creamy texture. You get the neatness of individual portions that are ideal for Thanksgiving dessert tables or fall gatherings.
I bake them in a muffin tin lined with paper cups (no need for special pans), which keeps cleanup simple and prevents sticking. The crust is graham cracker crumbs, but you can swap it for gingersnaps or vanilla wafers if you like extra spice or sweetness.
Pumpkin cream cheese bites
If you need finger desserts or individual servings for a gathering, these mini pumpkin cakes are the perfect alternative to a large pumpkin cheesecake.
Even though they need chilling time to set well, they are simple to put together.
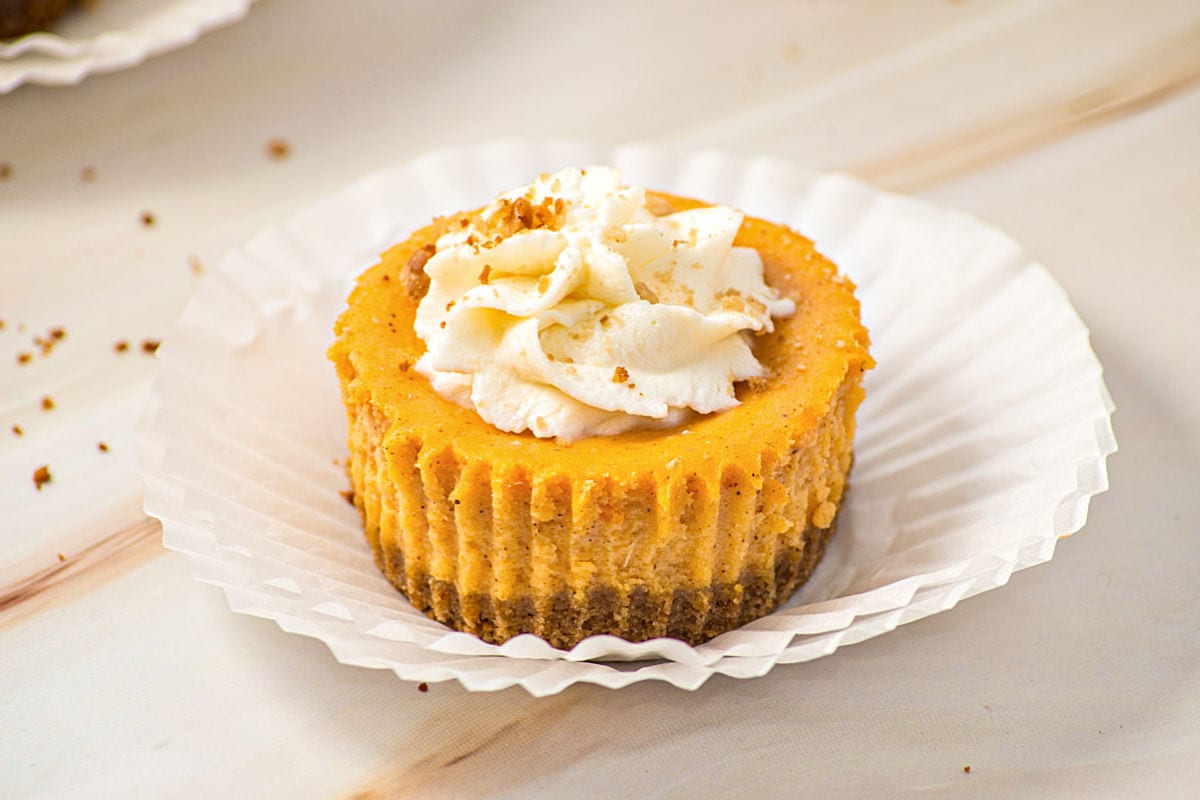
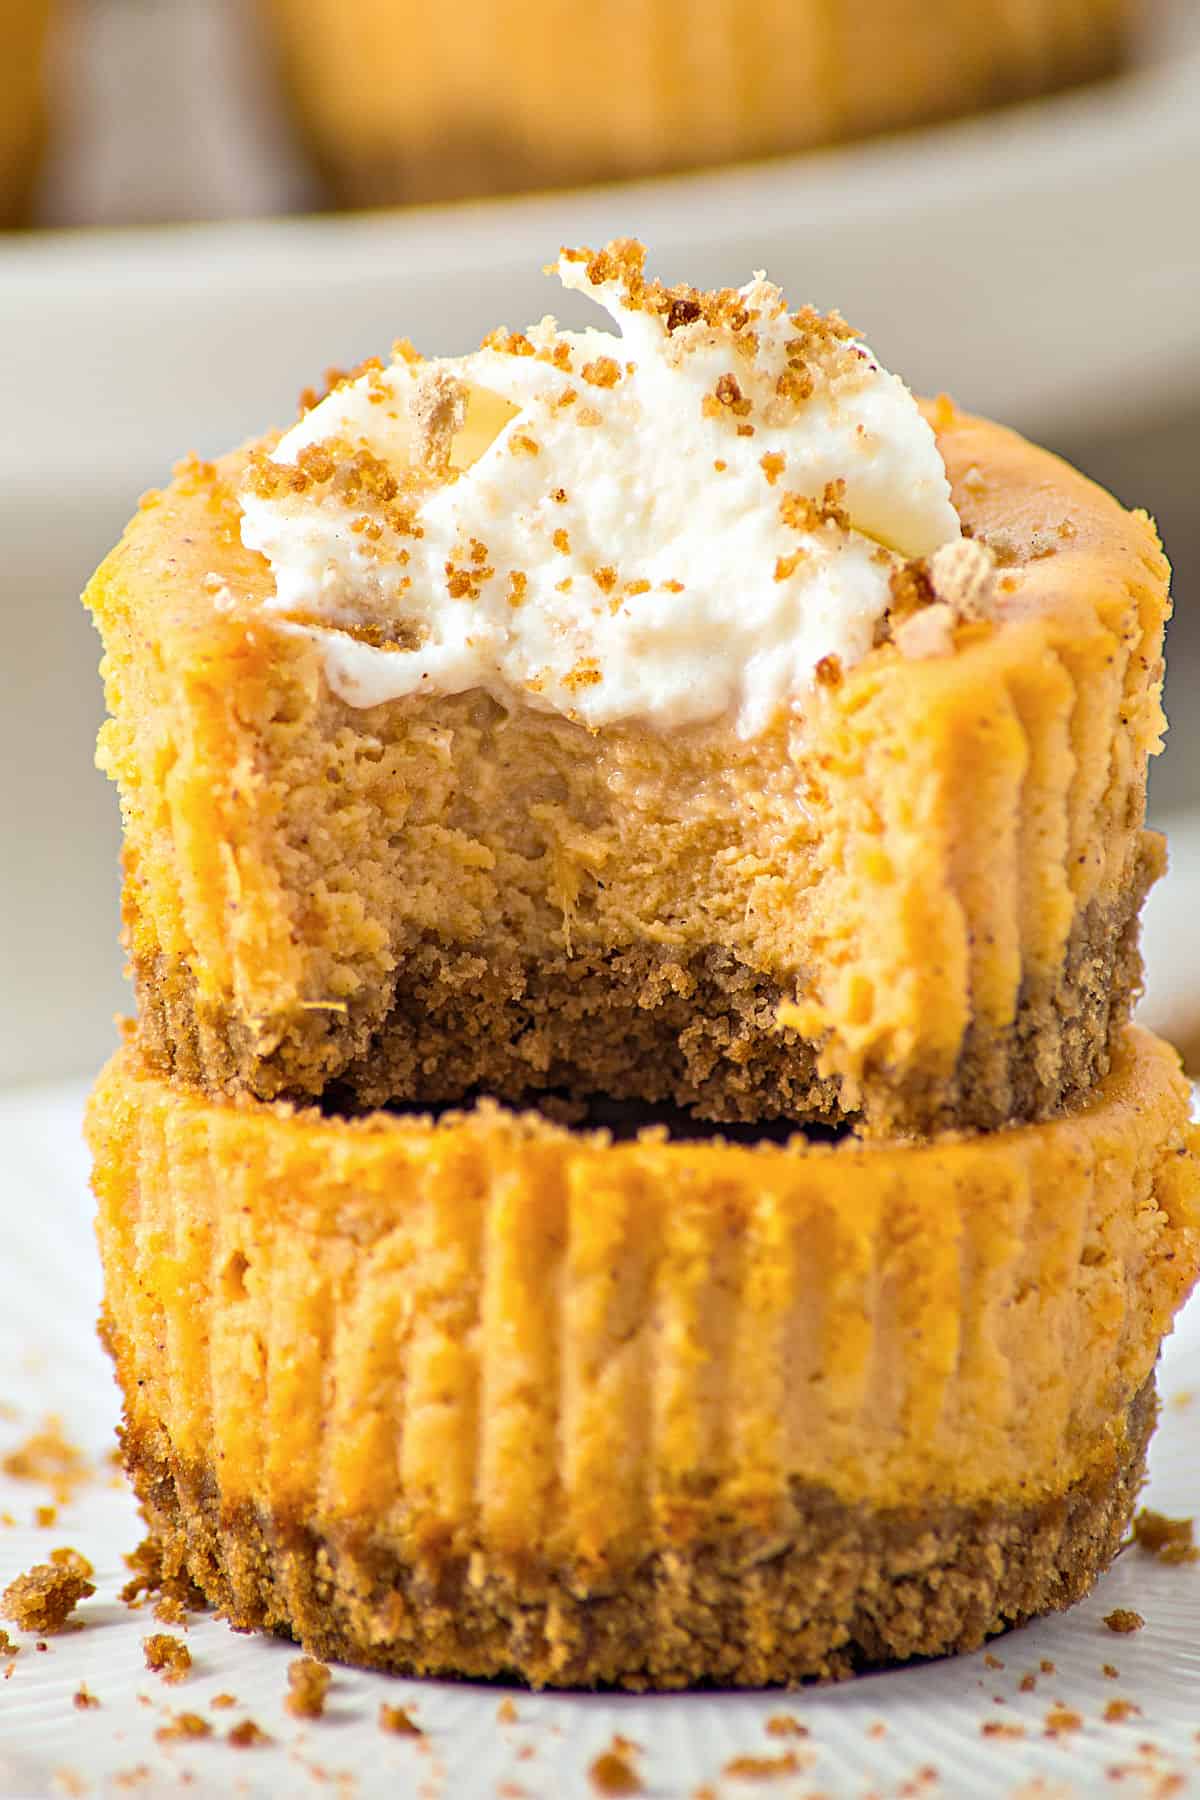
They can be served on their own, but look impressive with whipped cream and sometimes a drizzle of gooey caramel sauce, or even a spoonful of this cooked apple pie topping that turns it into the ultimate Fall dessert; it's sure to impress, let me tell you.
They're the way to go if you need finger desserts for the holidays, especially a Thanksgiving dessert table.
Testing notes
I always use and recommend regular, full-fat cream cheese for cheesecakes. If you use low-fat cream cheese, dairy-free substitutions or something along those lines, it may affect the texture and, most of all, the richness of the cheesecake.
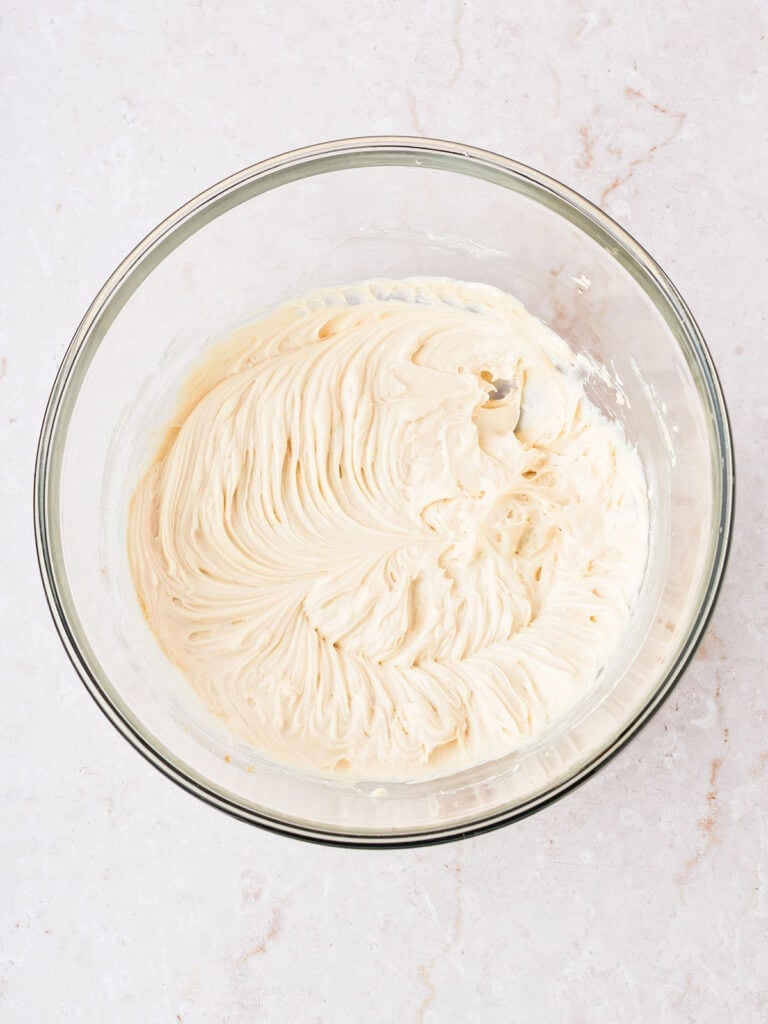
Properly softened cream cheese: Allow the cream cheese to reach room temperature before mixing to ensure a smooth and lump-free texture in your cheesecake filling. An electric mixer is used to make it faster, but if the cheese is softened correctly, it should be easily combined with a whisk or spatula. I don't recommend a blender, as the filling is too thick, and it can be challenging to remove it from the jar.
The key is not to overbake them. The centers should look just set but still jiggle slightly; they'll finish cooking as they cool.
The cooling and refrigeration steps are essential! I can't stress this enough. Cheesecakes don't like sudden changes of temperature. For a creamy filling and a great flavor, let the small cakes cool completely on a cooling rack before chilling. And I always recommend a day for cheesecakes before eating. If you can't, plan for at least 6 hours.
Mini cheesecake pans. Though they're an option, I use a regular muffin tin. They work very well for creating mini cheesecakes that are a three-bite dessert without needing an additional type of pan.
Use cupcake or muffin liners (also called paper cups), or it will be almost impossible to remove the mini cakes from the pan. And the liners act as small paper plates for people to grab.
Variations
- Use sweet potato or yam puree instead of pumpkin.
- Crust: Experiment with different crusts, such as Oreos, ginger cookies, chocolate wafers, or other crumb bases that suit your taste.
- Gluten-free: Use GF cookies or wafers instead of graham crackers, and make sure the topping you use is free of gluten.
- Nuts: Add chopped walnuts, almonds, or pecans to the crumb base or the filling.
Process steps

Crumb crust
Divide the graham cracker mixture evenly and press into the paper cups. Chill before adding the filling.
Cheesecake filling
Using an electric mixer is the easiest way to achieve a smooth filling without a lot of arm work.
Don't overbeat after adding the cream, as you don't want to curdle the preparation.
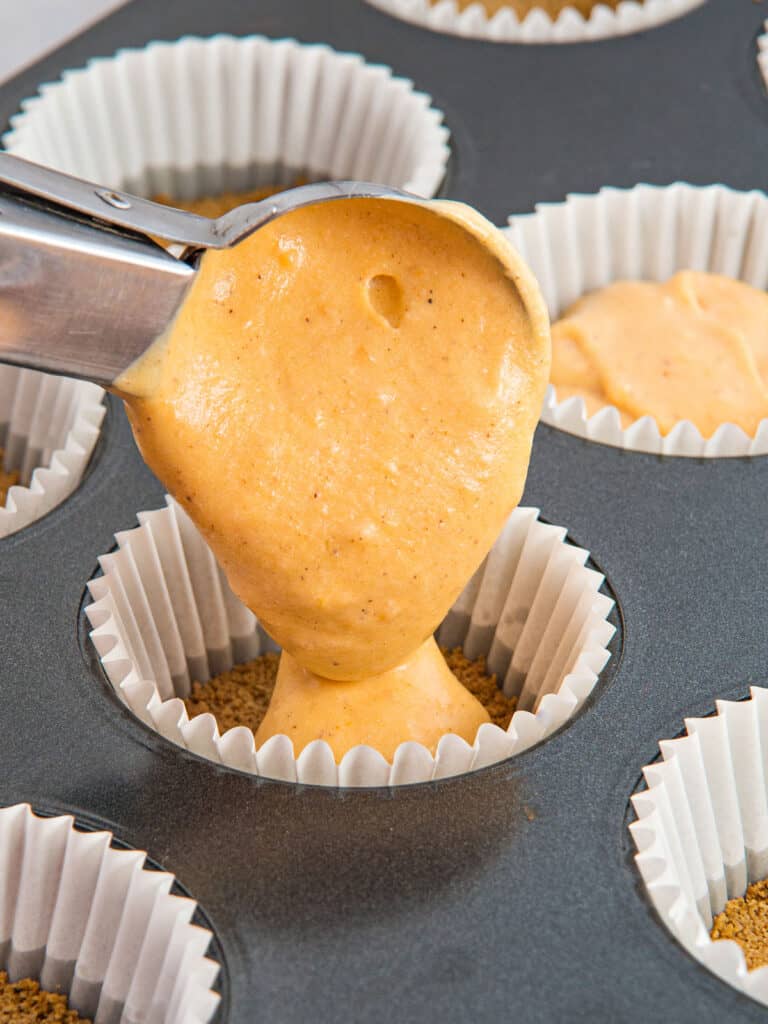
Fill the paper liners
Divide it evenly among the paper cups. A cookie scoop is probably the easiest way, but you can use a spoon.
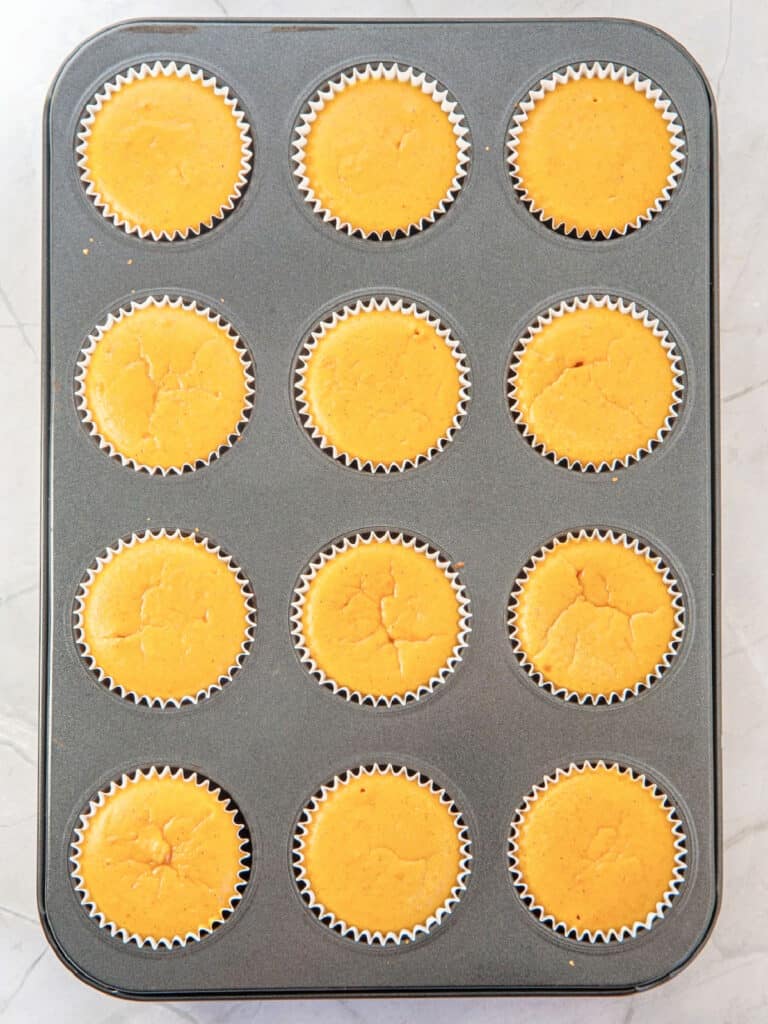
Bake
The center should jiggle but barely. They might've puffed a little, but will deflate as they cool on a wire rack.
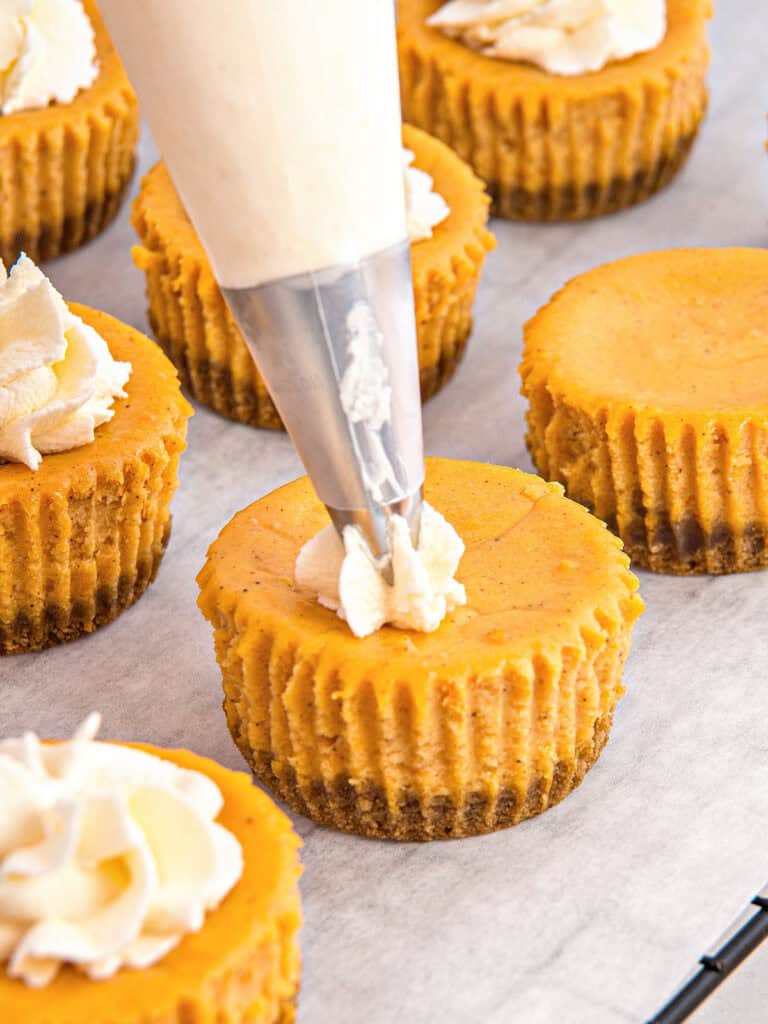
Chill and decorate
Letting the cakes cool and refrigerating them for several hours before eating is non-negotiable.
If you don't want to go through the hassle of piping, spoon some whipped cream and top with chopped nuts or caramel.
Freezing mini cheesecakes
First refrigerate: after cooling completely at room temperature, chill the cheesecakes for at least 3-4 hours. Cover the pan with plastic wrap and freeze until solid (it might take several hours). Remove from the muffin pan and transfer them to an airtight freezer-safe container or bag, being careful not to crush them. Use parchment paper if you need to separate rows. Place them in a flat place so they don't lose their shape.
To thaw, transfer to the refrigerator overnight or let them thaw at room temperature, not fully unwrapped, but leaving an opening so the air can circulate. Don't let them soften much. Serve them cold.
If you made this recipe and loved it, you can comment below and leave a 5-star ⭐️ review. Also, if you had issues, let me know so we can troubleshoot together.
You can also subscribe to our FREE email series 'Baking the Best' and our regular newsletter. Or follow and save my recipes on Pinterest.
As an Amazon Associate, I earn from qualifying purchases. Read my disclosure policy.
Baked Mini Pumpkin Cheesecakes
Ingredients
Crumb crust:
- 2 cups ground graham crackers
- ½ cup unsalted butter, melted
Pumpkin filling:
- 2 cups regular cream cheese, about 16 ounces, at room temperature
- 1 ½ cups pumpkin purée
- ¼ cup white sugar
- ½ cup light brown sugar
- 3 eggs, at room temperature
- ½ cup heavy cream, at room temperature
- 1 ½ teaspoons pumpkin spice
- 1 teaspoon vanilla extract
- ½ teaspoon salt
Whipped cream topping:
- ¾ cup heavy or heavy whipping cream, cold
- 1 tablespoon powdered sugar
- caramel sauce, optional, to decorate
- ground cinnamon or graham crackers, optional, to decorate
Instructions
- Preheat the oven to 350°F (180°C).
Prepare the crust:
- If you have whole graham crackers, process them until finely ground. Measure 2 cups ground graham crackers and transfer to a bowl. Add ½ cup unsalted butter, melted, and stir to incorporate very well until you have a sandy texture. There should be no dry spots left.
- Place about a tablespoon of the mixture into each muffin liner. Press firmly with your fingertips or the back of a small spoon to form the crust.
- Bake for about 8 minutes, until beginning to dry. Let cool on a wire rack while you prepare the filling.
Prepare the filling:
- In a large bowl, beat softened 2 cups regular cream cheese with 1 ½ cups pumpkin purée, ¼ cup white sugar and ½ cup light brown sugar until smooth and no lumps remain.
- Add 3 eggs and whisk until fully integrated. I don't use an electric mixer from this point, but if you do, do so at the lowest speed. The less air you incorporate after adding the eggs, the creamier the filling will be after baked.
- Add ½ cup heavy cream and mix until well incorporated. Don't overbeat or you might curdle the cream.
- Add 1 ½ teaspoons pumpkin spice, 1 teaspoon vanilla extract and ½ teaspoon salt, and mix again until evenly colored.
- Pour the filling onto the prepared crusts in each muffin tin, filling it almost to the top. Using a cookie scoop helps you distribute it evenly.
- Bake at 350°F (180°C) for 20-25 minutes or until the center is almost set. It should jiggle slightly.
- Remove from the oven and let cool completely to room temperature on a wire rack before wrapping the whole pan in plastic wrap and refrigerating the mini cheesecakes for at least 4 hours and up to 3 days. I like them better the next day.
Make the whipped topping:
- In a medium bowl, beat ¾ cup heavy or heavy whipping cream, cold, with 1 tablespoon powdered sugar until almost firm peaks form. Don't overbeat, or it might curdle.
- Before serving, pipe a rosette, or with whipped cream or spoon a dollop on top of each cheesecake, and add a drizzle of caramel sauce or a sprinkle of ground cinnamon or graham crackers if you want to.
Rate and review this recipe