

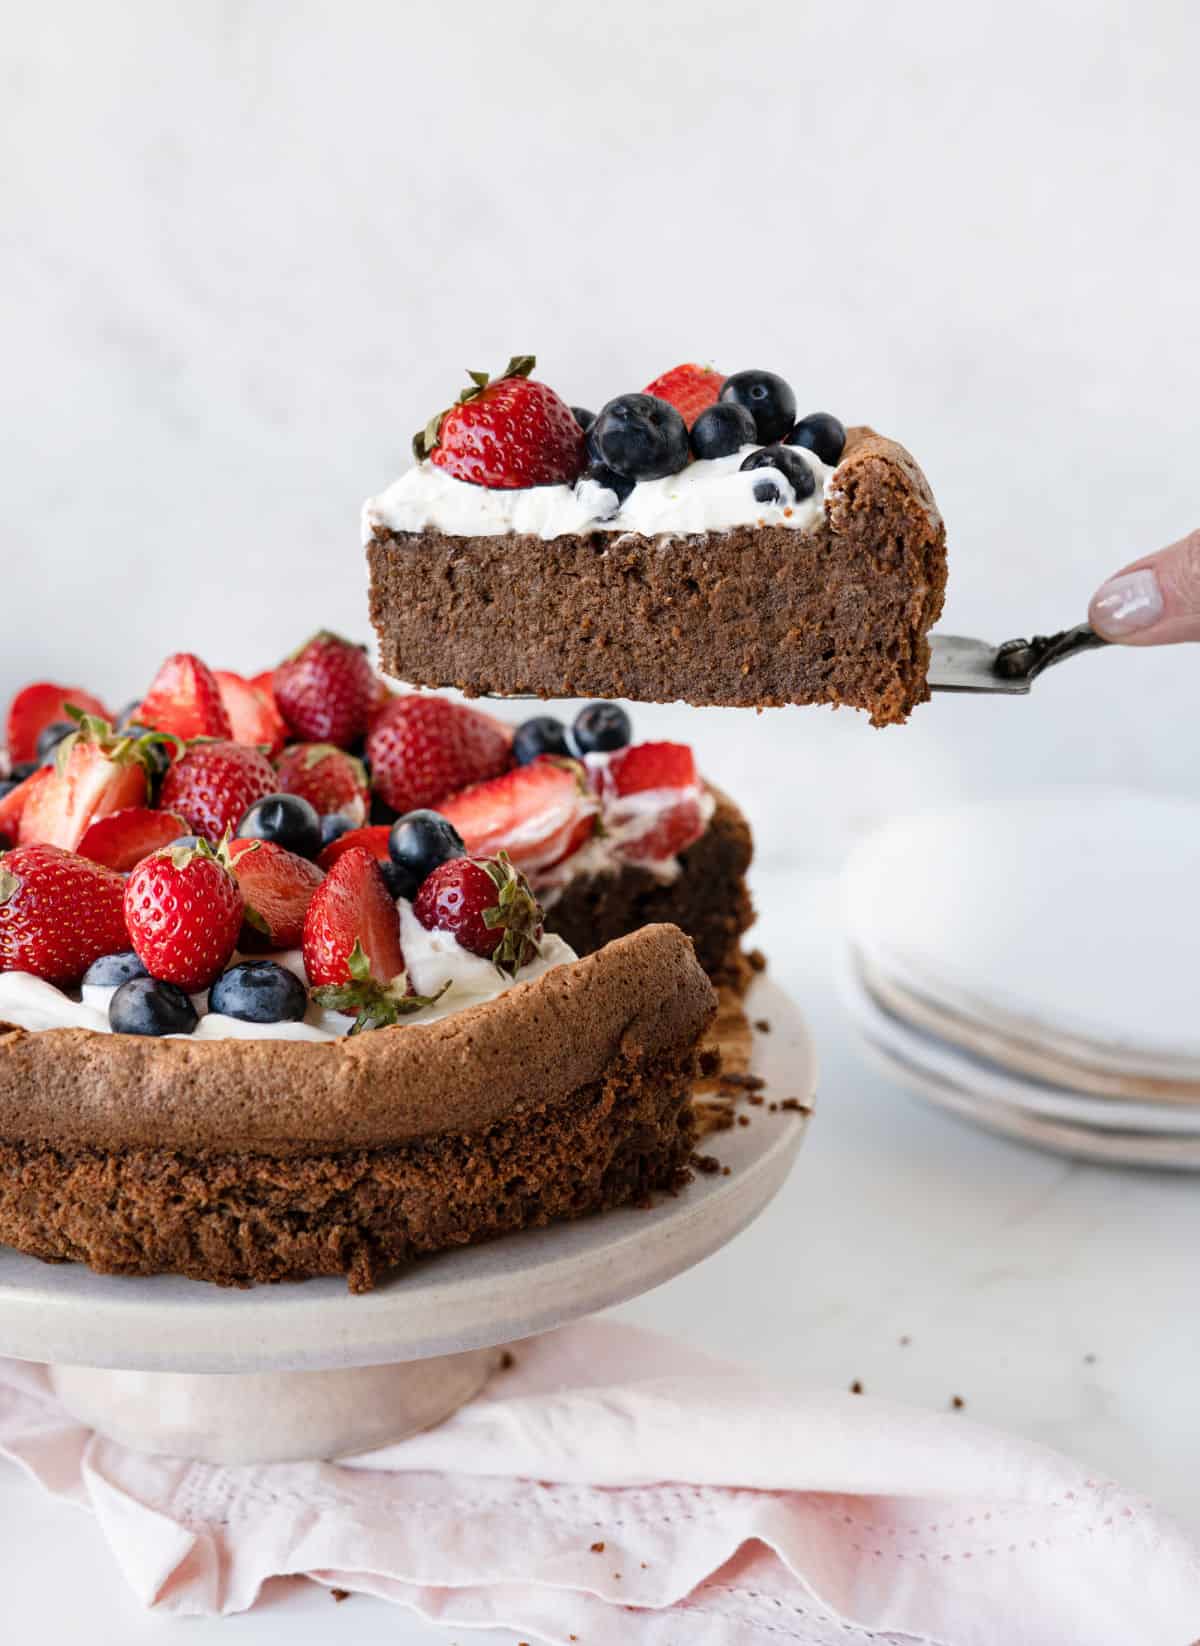
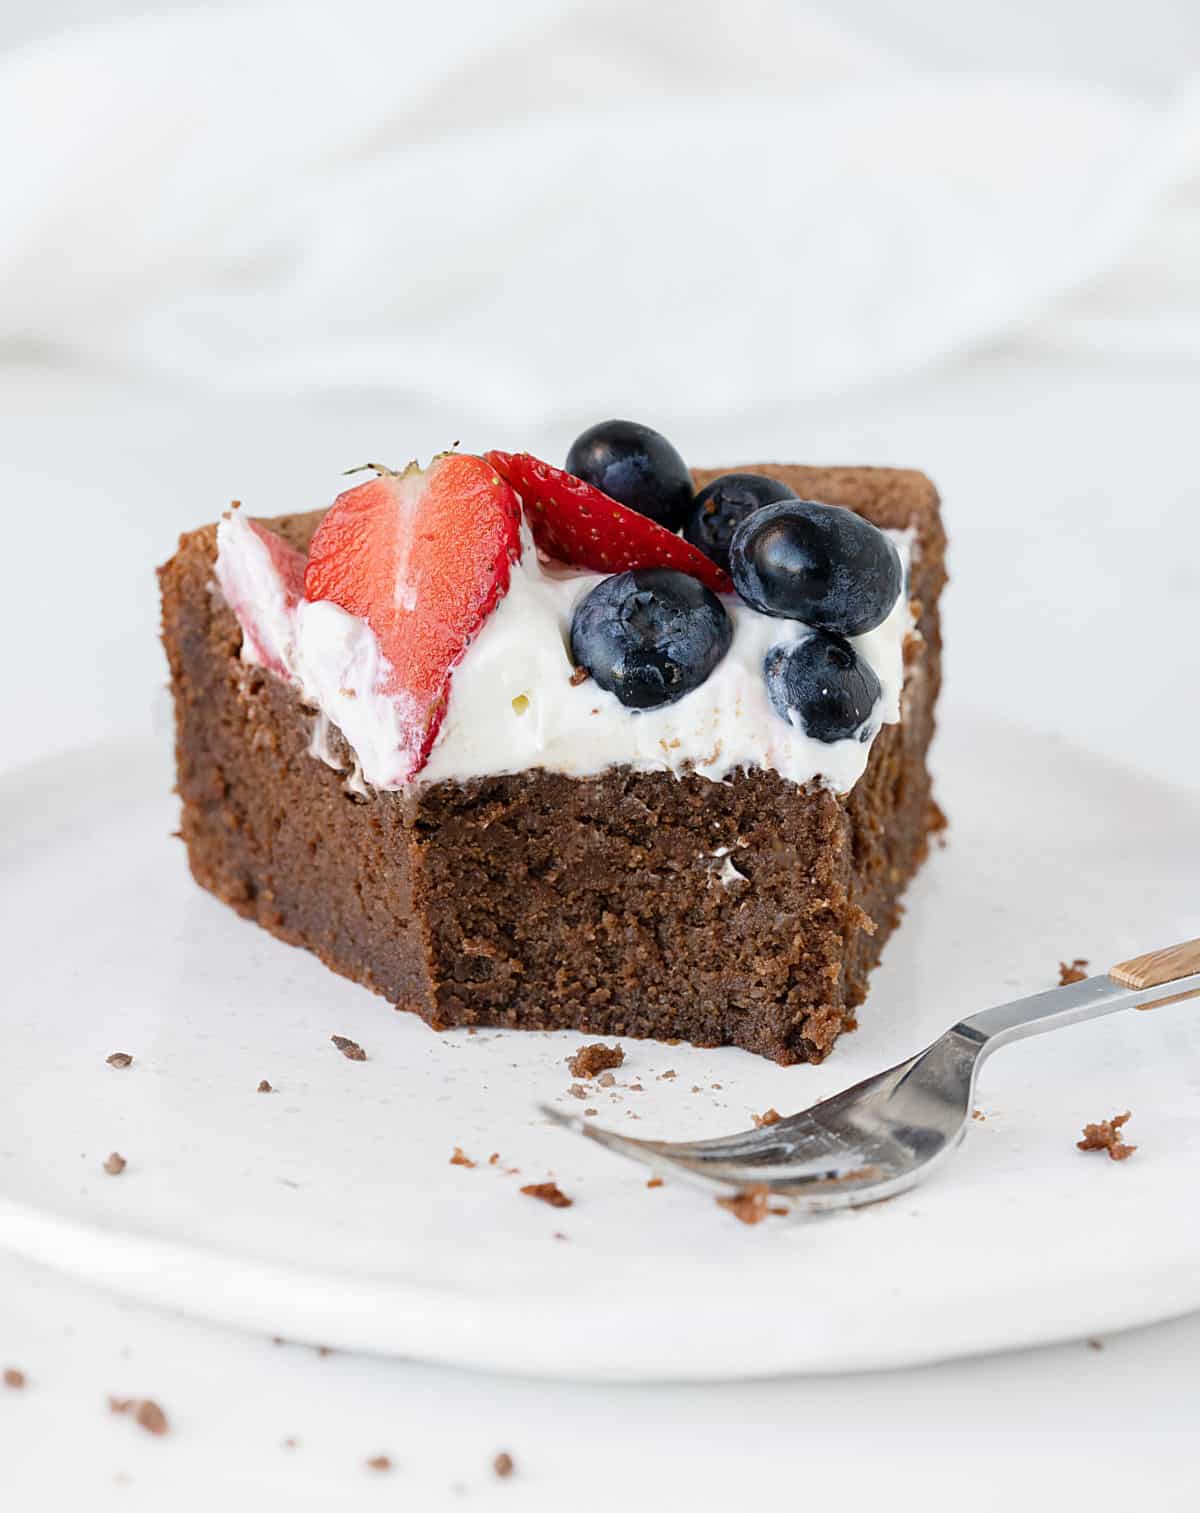
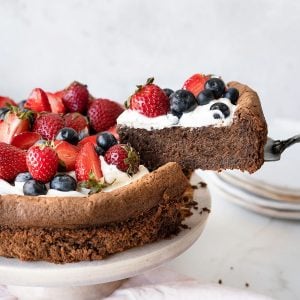
If you're craving a rich and showstopping chocolate dessert that's not hard to make, this old-fashioned torte (a European classic) with semisweet chocolate and almonds will do the trick. It's flourless, cuts like a dream, and can be made a few days ahead. It's stunning served with whipped cream and berries, but also on its own.

SAVE THIS RECIPE
Decadent dessert
Torte means cake in German, but usually refers to fancier ones. This chocolate torte recipe has no flour, texture from the addition of almond flour and contains liqueur, which mostly evaporates during baking, leaving behind a rich flavor that sets it apart.
Sometimes it reminds me of a giant chocolate financier, where the lack of flour and the addition of ground nuts create a wonderful, fudgy texture that is soft and creamy. It's part of why I love this recipe.
It's easier to make than it looks. Sometimes, the idea of beating egg whites for structure and not using flour makes us nervous that the cake will fall or not have the right consistency. You'll be fine if you follow the instructions, read the recipe first, and organize the space and utensils.
This chocolate dessert can be used year-round but is especially great for the holidays. Just like this rich chocolate cake (probably my favorite cake) or this variation on pecan pie with chocolate, it has a deep but not too sweet flavor, with a faint boozy taste that complements the chocolate wonderfully.
Testing Notes
The better the chocolate, the better the flavor of the cake. Links to my favorite brands are in the recipe card towards the end of this post. For a more intense flavor, substitute half for bittersweet chocolate.
Beating egg whites: an electric mixer will make your life easier. Squeaky-clean and dry bowl and beaters are essential for a good result. Make sure they don't have traces of grease or water.
Flourless chocolate tortes need to be made with attention and a gentle hand. Due to the lack of starch, a lot depends on the egg whites, the folding, and the baking. So I recommend you read the recipe first and ensure you have ingredients at the correct temperature, utensils and equipment needed, and enough workspace before starting. This will make the process so much easier.
Cooling down and refrigerating the torte: both steps are essential for a creamier and firmer torte, so plan before starting to make sure you have enough time.
Coffee: the cake doesn't taste like coffee; it enhances the chocolate flavor without overpowering it. Use instant coffee powder and dissolve it in the liqueur.
Liquor adds character to this cake. I generally use Kahlúa or Tia María, which are both coffee liqueurs, with the occasional Italian Amaretto, which is more intense and almond-flavored. Don't want to use liquor? Use the same amount of prepared coffee.
Use hazelnuts instead of almonds. This is a variation I really loved, especially when paired with Frangelico, a fantastic hazelnut liqueur.
Ingredients
Quantities are listed in the recipe card towards the end of this post. The Ingredients page has more details and lists the brands we use.
Almond flour: You can make your own by finely grinding whole almonds or use store-bought almond flour, the one used for macarons. It can be labeled as almond meal in some countries, but be careful, as meal is sometimes made with the residue after making almond milk, so it's too airy with a thinner texture.
Spiced variation: add a ground spice like cinnamon or cardamom to the chocolate batter.
Process steps
Electric mixer: It will make your life easier, especially when beating egg whites. A clean and dry bowl and beaters are essential for a good result.
Large bowls: you'll need to fold fluffy whites into the chocolate mixture.
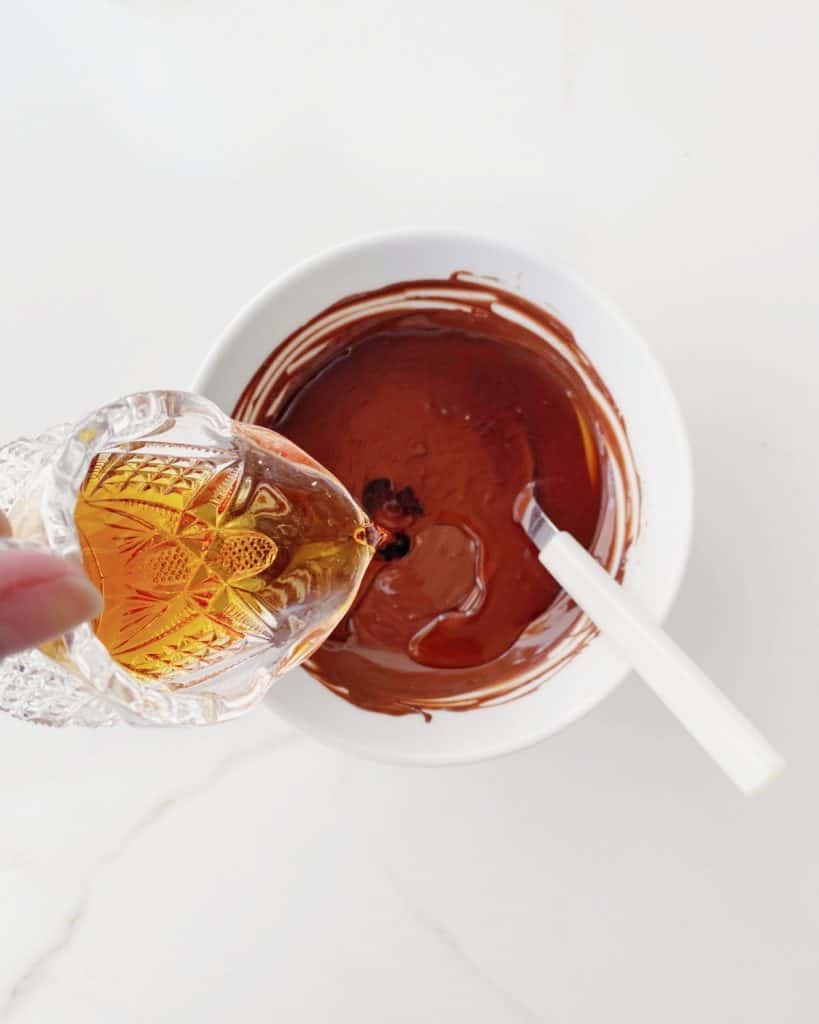
Melt and mix
Pour the liqueur into the warm melted chocolate and mix to incorporate fully. The mixture will be smooth and shiny.
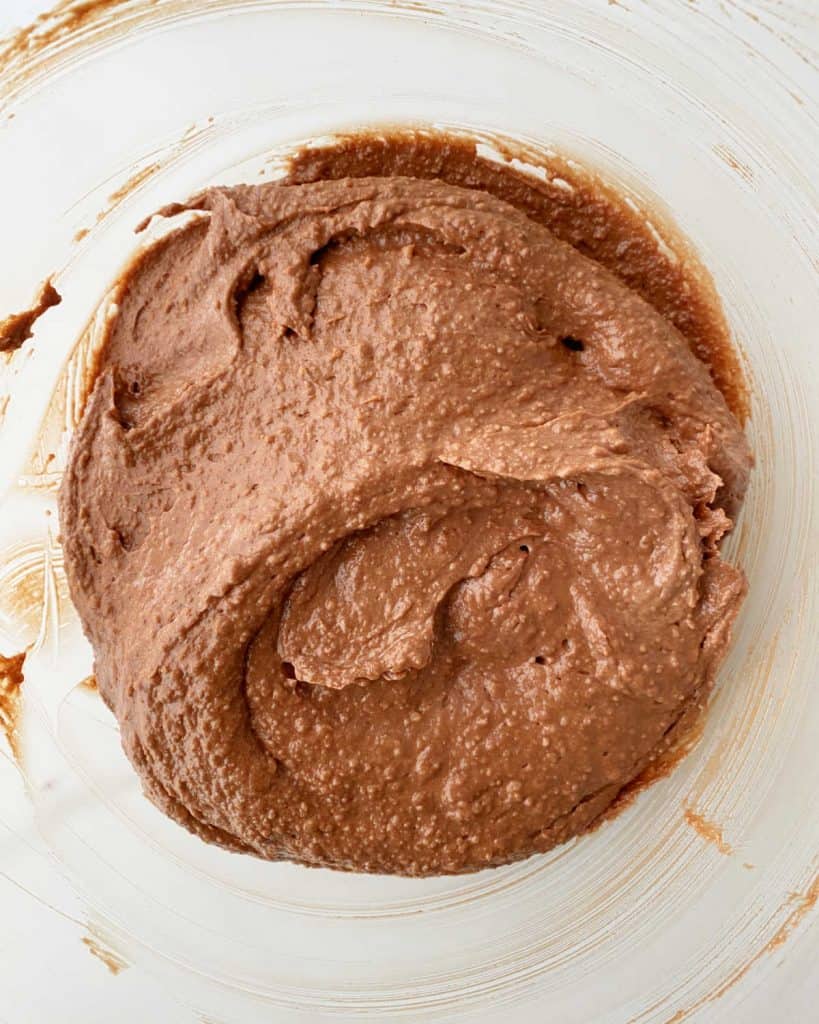
Almond flour
The chocolate batter will be thick and textured after you add the almond flour. We still need to add the meringue to soften it.
Vintage Kitchen Tip
It's essential to use a squeaky-clean bowl and beaters when beating egg whites. If they have a trace of grease or water, they might not grow in volume as necessary.
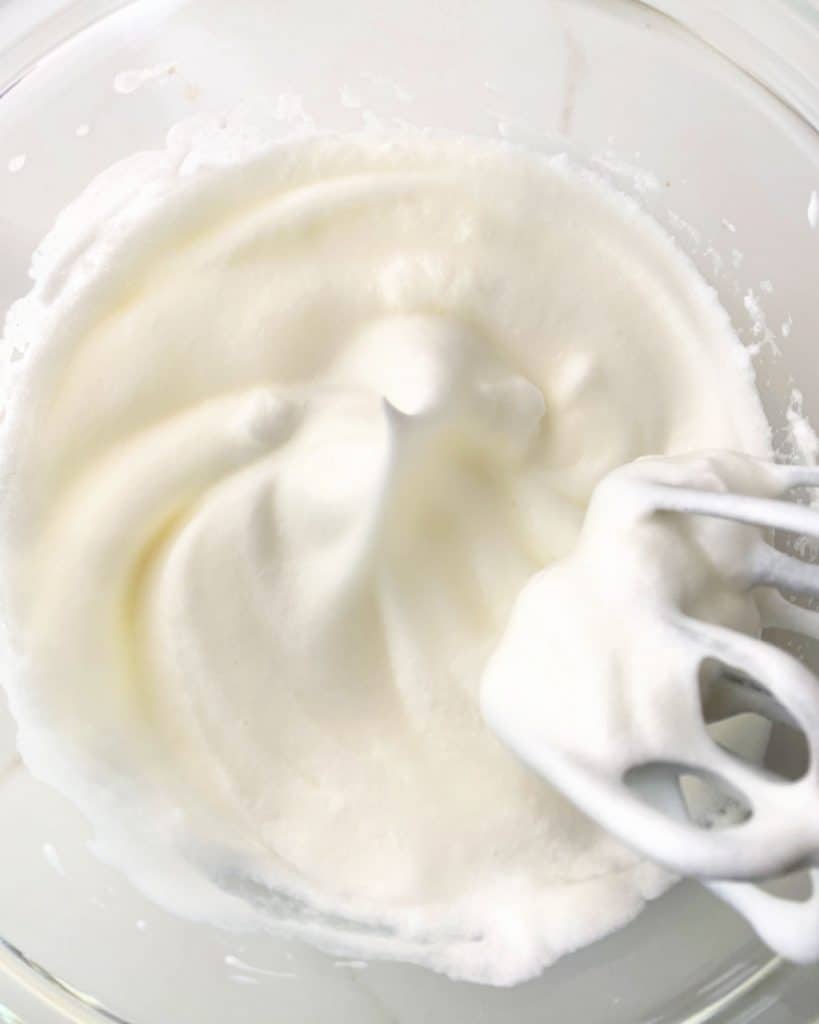
Beaten egg whites
The meringue is ready when stiff peaks form. If the peak folds onto itself, keep beating for a minute or two more.
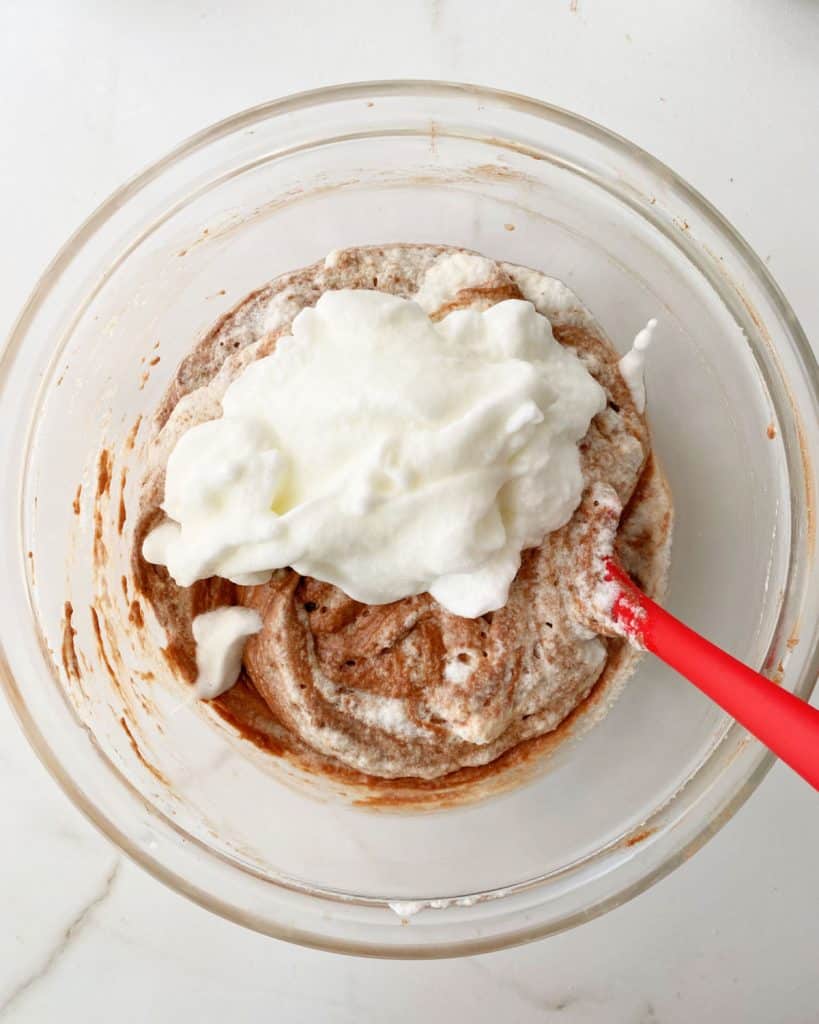
Mix both preparations
Add a third of the whites (eyeball it) and mix until no white streaks remain. This first part lightens up the chocolate mixture, making the rest of the meringue easier to incorporate.
Fold the remaining meringue in two parts, adding the last one before the other is completely incorporated.
Final cake batter
The final chocolate batter is even in color. Make sure no streaks of white remain, but don't overmix it so the meringue flattens as little as possible.
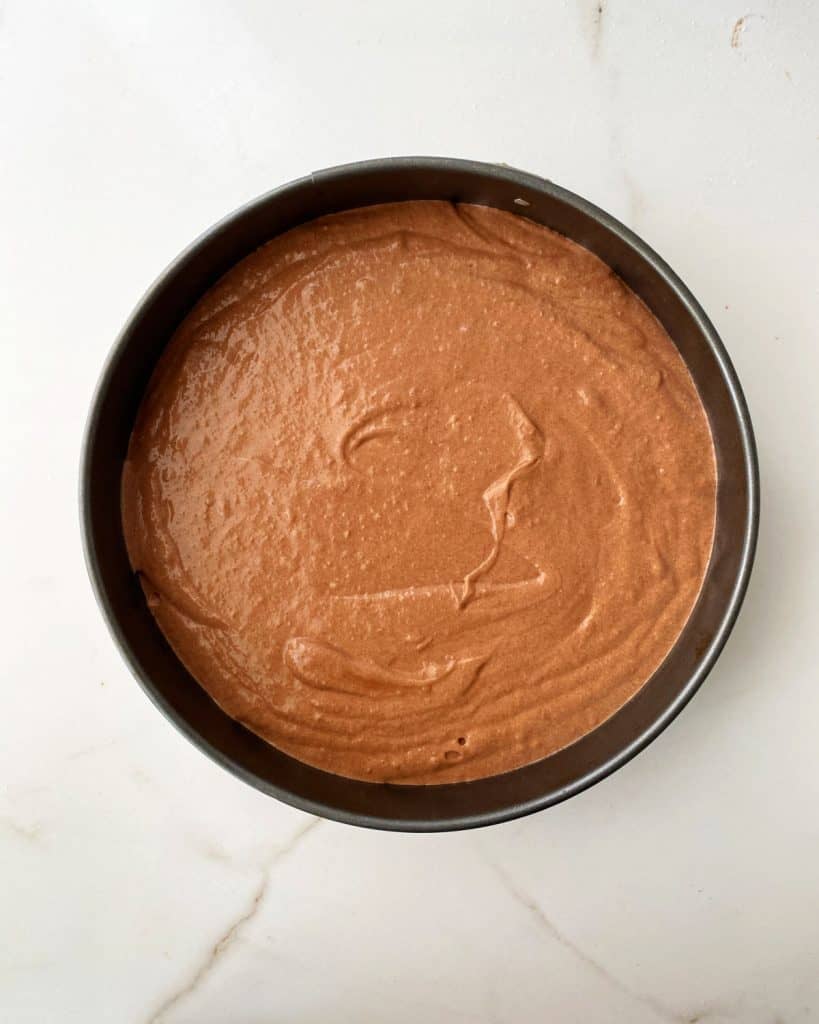
Bake
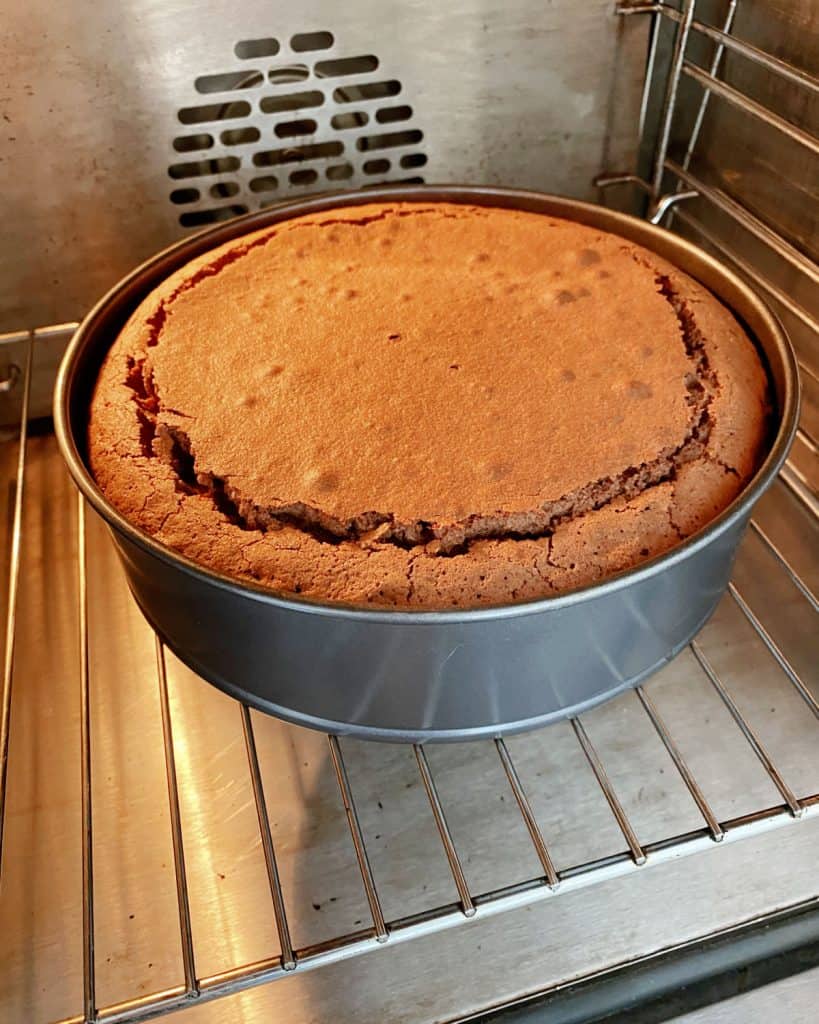
The cake will puff and rise in the oven and crack around the edges. After it's cooled down, it will sink, and that is fine.

Cool down
This is an important step.
The oven door is left ajar (opened a little, I use a wooden spoon) after it's turned off to allow the cake to bake a little longer with the residual heat.
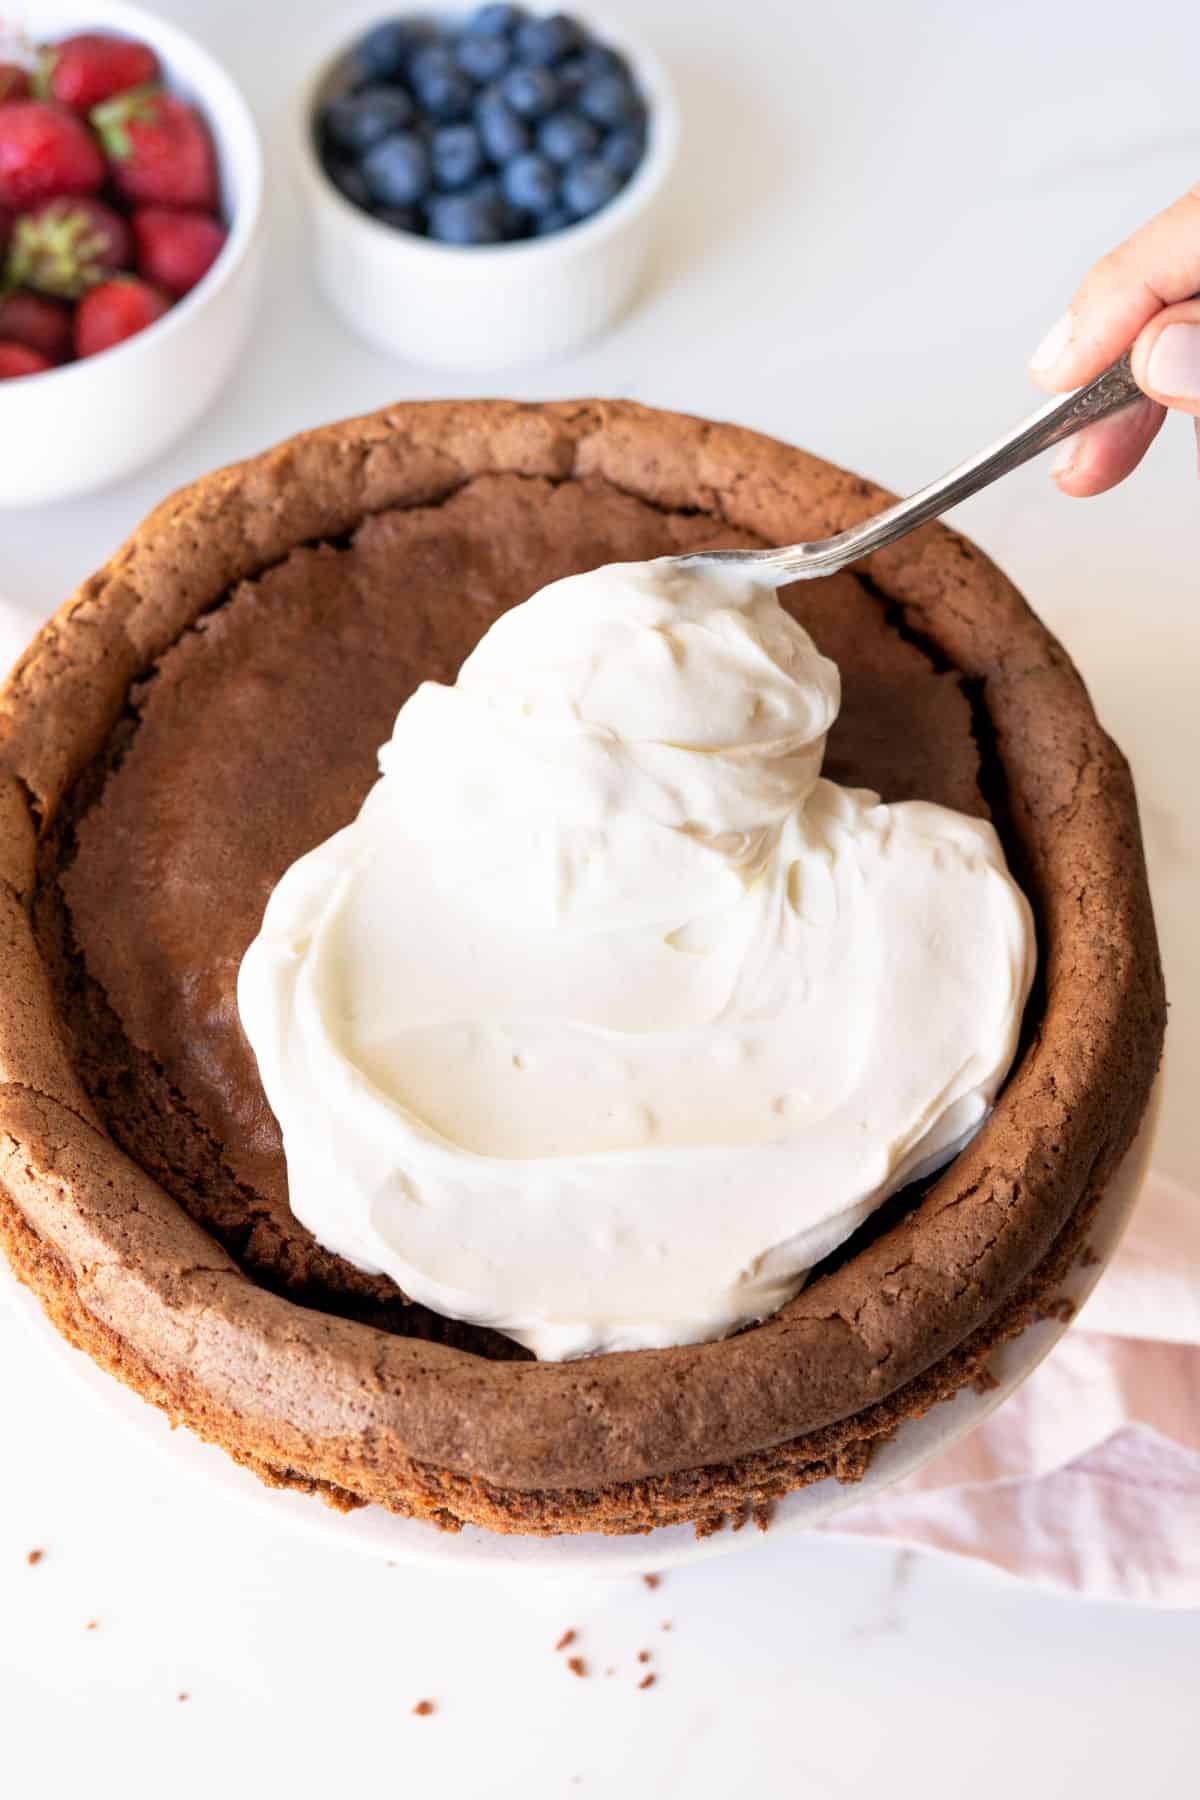
Topping
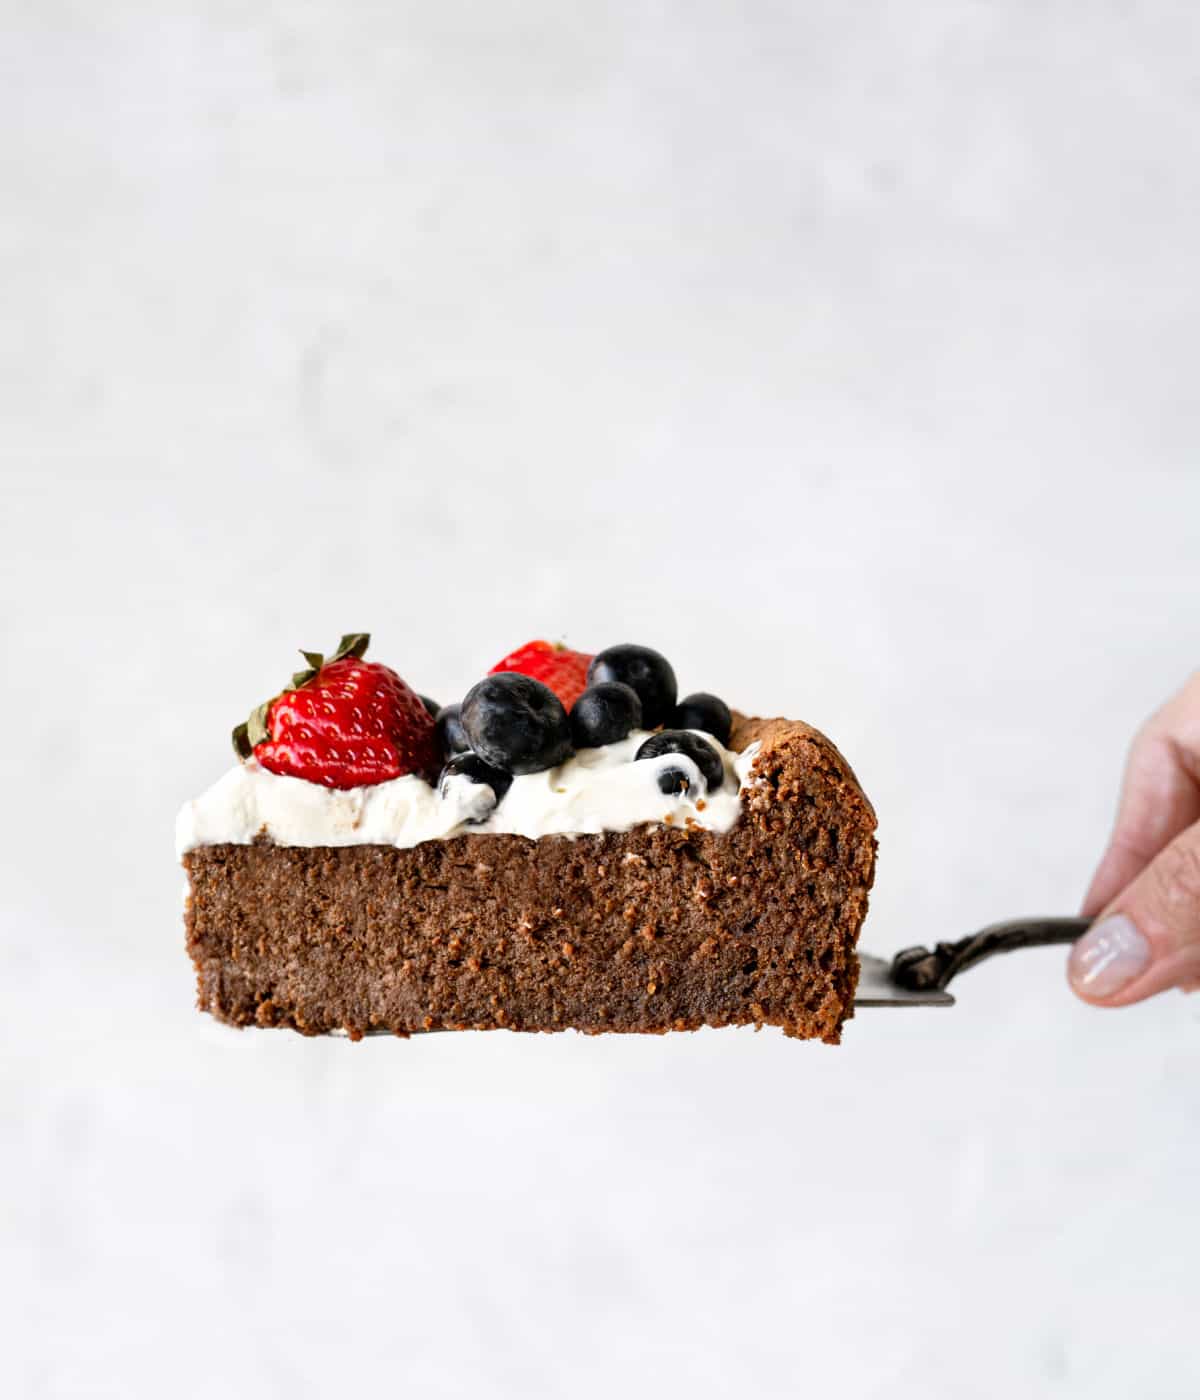
Whipped cream and fresh berries take this chocolate dessert to the next level. You can whip it the day before and refrigerate it in an airtight container.
- Stabilized whipping cream: I add a few tablespoons of cream cheese to the cold cream for a firmer result. I find that the flavor is amazing, and it keeps well for a few more days.
- Berries: Fresh is better, but you can use frozen ones if that's all you have. Make sure they don't have ice around them and add them at the last minute, as they will start to drip.
Storage
- Chocolate cake: can be kept refrigerated in the pan for 3 days before assembling. Cover it with plastic wrap.
- Whipped cream: can be made 2 days ahead and kept in an airtight container in the refrigerator.
- Assembled torte: eat it the same day it's made for the best results. Leftovers need to be refrigerated. The berries will lose shine in a day or two.
As an Amazon Associate, I earn from qualifying purchases. Read my disclosure policy.
Flourless Chocolate Torte with Whipped Cream and Berries
Ingredients
For the cake:
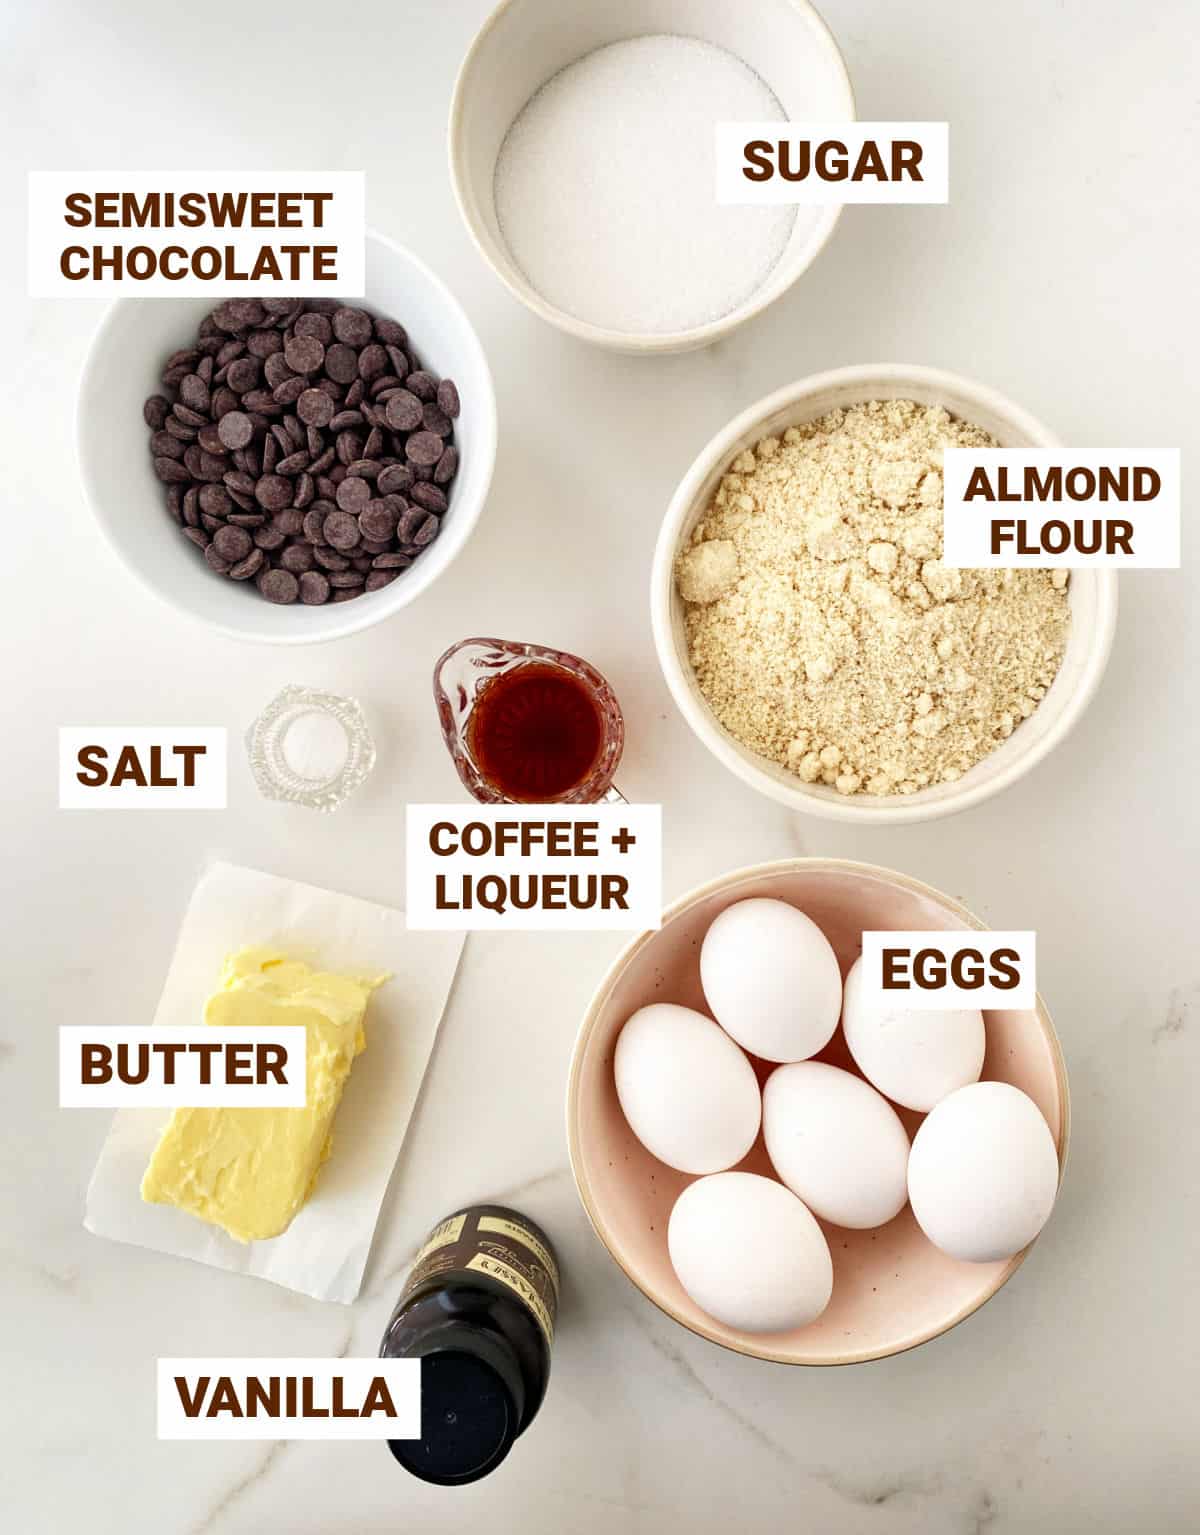
- 6 ounces semisweet chocolate, finely chopped
- 2 teaspoons coffee powder
- ¼ cup coffee liqueur, I used Kahlua
- ½ teaspoon vanilla extract, optional, but good for overall flavor
- ¾ cup unsalted butter, at room temperature
- ¾ cup sugar, sugar
- 6 egg yolks, at room temperature
- 6 egg whites, at room temperature
- ¼ teaspoon salt
- 1 ⅔ cups almond flour, 6 ounces. You can use finely ground almonds
For the topping:
- 1 cup heavy cream, or heavy whipping cream, cold
- 2 tablespoons cream cheese, at room temperature
- 3 tablespoons powdered sugar
- 2 cups fresh berries
Instructions
For the cake:
- Preheat oven to 375ºF (190ºC). Butter or spray and flour a 9-inch (24cm) springform pan. Line the bottom with a circle of parchment paper.
- Melt 6 ounces semisweet chocolate in a bowl over a double boiler or in the microwave. Dissolve 2 teaspoons coffee powder in ¼ cup coffee liqueur and ½ teaspoon vanilla extract, and add it to the chocolate. Stir to mix and reserve.
- Subtract 2 tablespoons from the total sugar and reserve for the meringue.
- In a large mixing bowl, beat ¾ cup unsalted butter until creamy. Slowly add the remaining sugar to the butter and beat until the mixture is light and creamy. Scrape the sides of the bowl as needed.
- Add 6 egg yolks, one at a time, beating well between each, and beating an extra minute after the last one.
- Mix in the chocolate mixture until smooth. Fold in 1 ⅔ cups almond flour until incorporated.
- In another large clean bowl beat 6 egg whites with ¼ teaspoon salt until they begin to stand in soft peaks. Use an electric or stand mixer.
- Add the reserved 2 tablespoons of sugar and beat until glossy and stiff peaks form.
- Add a third of the whites into the chocolate mixture and fold with a spatula.
- Add the rest of the whites in 2 additions, mixing carefully but thoroughly. Don't beat or overmix. As soon as there are no streaks of white, stop mixing. Make sure you scrape the bottom with the spatula to make sure.
- Pour into the prepared pan, turn the oven down to 350ºF / 180ºC and bake for 15 minutes.
- Turn down the oven to 325ºF / 160ºC and bake for another 45-50 minutes, or until a cake tester or toothpick inserter in the center comes out dry. The cake will be puffed and cracked. Don't overbake it.
- Turn off the oven and leave the cake in it, with the door ajar for another 30 minutes.
- Transfer to a wire rack and cool, in the pan, to room temperature.
- Cover the pan in plastic wrap and refrigerate for several hours before removing. This will make it firmer and creamier.
- When ready to serve, slide a flat knife or spatula around the sides of the pan, release the springform, and carefully transfer the cake to the serving plate.
For the topping:
- Place 1 cup heavy cream and 2 tablespoons cream cheese in a medium or large mixing bowl.
- Add 3 tablespoons powdered sugar and beat with an electric hand mixer at medium speed until firm peaks (stiff peaks) form, it will take about 4-5 minutes, depending on the speed of your beaters and the size of the bowl (smaller bowls take longer).
- Beating: if using the stand mixer with the whisk attachment, beat at low speed, especially towards the end so you don't curdle the topping. I use a wire whisk for this reason. Important: whipped cream can curdle very quickly when overbeaten. To avoid this, I always beat it at medium-high speed until soft peaks start to form, lower the speed to medium and continue beating until medium-firm peaks form. Then, I finish beating by hand with a whisk until I get stiff peaks. It takes a bit of arm muscle, but it's hard to overbeat cream by hand.
Assemble the torte:
- Top the cake with the whipped cream, spreading it to cover the sunken middle.
- Scatter 2 cups fresh berries on top and serve. Keep leftovers refrigerated, well covered in plastic wrap or airtight container.
Notes
Chocolate cake: It can be refrigerated in the pan for 3 days before assembly. Cover it with plastic wrap.
Whipped cream: can be made 2 days ahead and kept in an airtight container in the refrigerator.
Assembled torte: For the best results, eat it the same day it's made. Leftovers need to be refrigerated. The berries will lose their shine in a day or two.
Lauren says
Can this cake be made with a non dairy butter substitute?
Paula Montenegro says
Hi Lauren, I don't know really, because I never tried it with butter substitutes.
Steff says
This looks so amazing for my gluten-free son's 22nd birthday! Do you think a torte pan would work as well as a springform pan? Thanks, Steffani
cooking with curls says
That tart looks amazing! I have never made a tart before, I think I should:)
Cocoa and Lavender says
What a fun post and so many fun recipes! I love how people's minds work in relating certain foods to movies. One of my favorite references was to the raspberry cordial from Anne of Green Gables. I also realized that I have seen all thé movies except the Life of Pi and Joe vs the Volcano. Hard to imagine Joe as a chef, but maybe I need to watch it! 🙂 Chocolat is one of my absolute favorite films and we watch it every Easter, as we watch Love actually every Christmas. They are such feel good and well crafted flicks. Your chocolate torte sounds amazing and I may have to make it this week for guests. And I love that something this good is GF! Thanks, Paula! ~ David
Cakelaw says
OMG - how gorgeous is this!
Amy Kim (@kimchi_mom) says
Love and care always make a difference! Hope you are doing better!
Sarah | Curious Cuisiniere says
This looks delicious. You can't go wrong with raspberries and chocolate in my book. Beautiful pictures!
Lisa says
I was just telling Lora last night how incredibly talented you are, and once again, your talent shines with this beautiful, perfectly fudgy and and undoubtedly delicious flourless chocolate torte! I wish you liced closer! ;D
Conni Dahl Smith says
Oh my heavens, my stomach literally growled at me when I saw this! What a fantastic recipe - and great movie pick! 🙂
Nicole @ Daily Dish Recipes says
Oh my goodness Paula, this is absolutely beautiful.
I've been thinking about you and praying for you and so very relieved that things are starting to look up and better.
Have missed you!
xoxo
Shelby | Diabetic Foodie says
Glad to hear your life is getting back to normal after the flood. My chocoholic stepdaughter would love this torte!
Beth says
What a great theme for this month!
I'm so sorry to hear about the flood. Sending best wishes your way - I'm glad things are coming together again.
Medeja says
I think this is a wonderful torte! Chocolate torte with raspberries such a great combination.
Eva Sánchez says
Omg!! Es increible, mejor no te podia haber quedado!!! Adoro el chocolate y se me está haciendo la boca agua!!
Besos
Stacy says
So glad to hear that you all are getting your lives back in order, Paula. Flooding is so devastating because the damage is much more than just a storm passing through. What a gorgeous chocolate torte! I am not much of a sweet eater but dark chocolate anything always lifts my spirits. This one makes me smile for sure.
Marissa | Pinch and Swirl says
So glad to hear that things are going better and that your spirits are lifted!
Your cake looks fabulous. And, Chocolat! I love that movie - it's magic. Wonderful soundtrack too.
yummychunklet says
What a silky chocolate torte!
Averie @ Averie Cooks says
This is a gorgeous looking torte! And I also saw your congo bars on Alice's site. Between those and this, I am loving the chocolate theme!
Megan Wood says
This looks delicious. I have never made a torte before but would love to give it a try with this recipe.