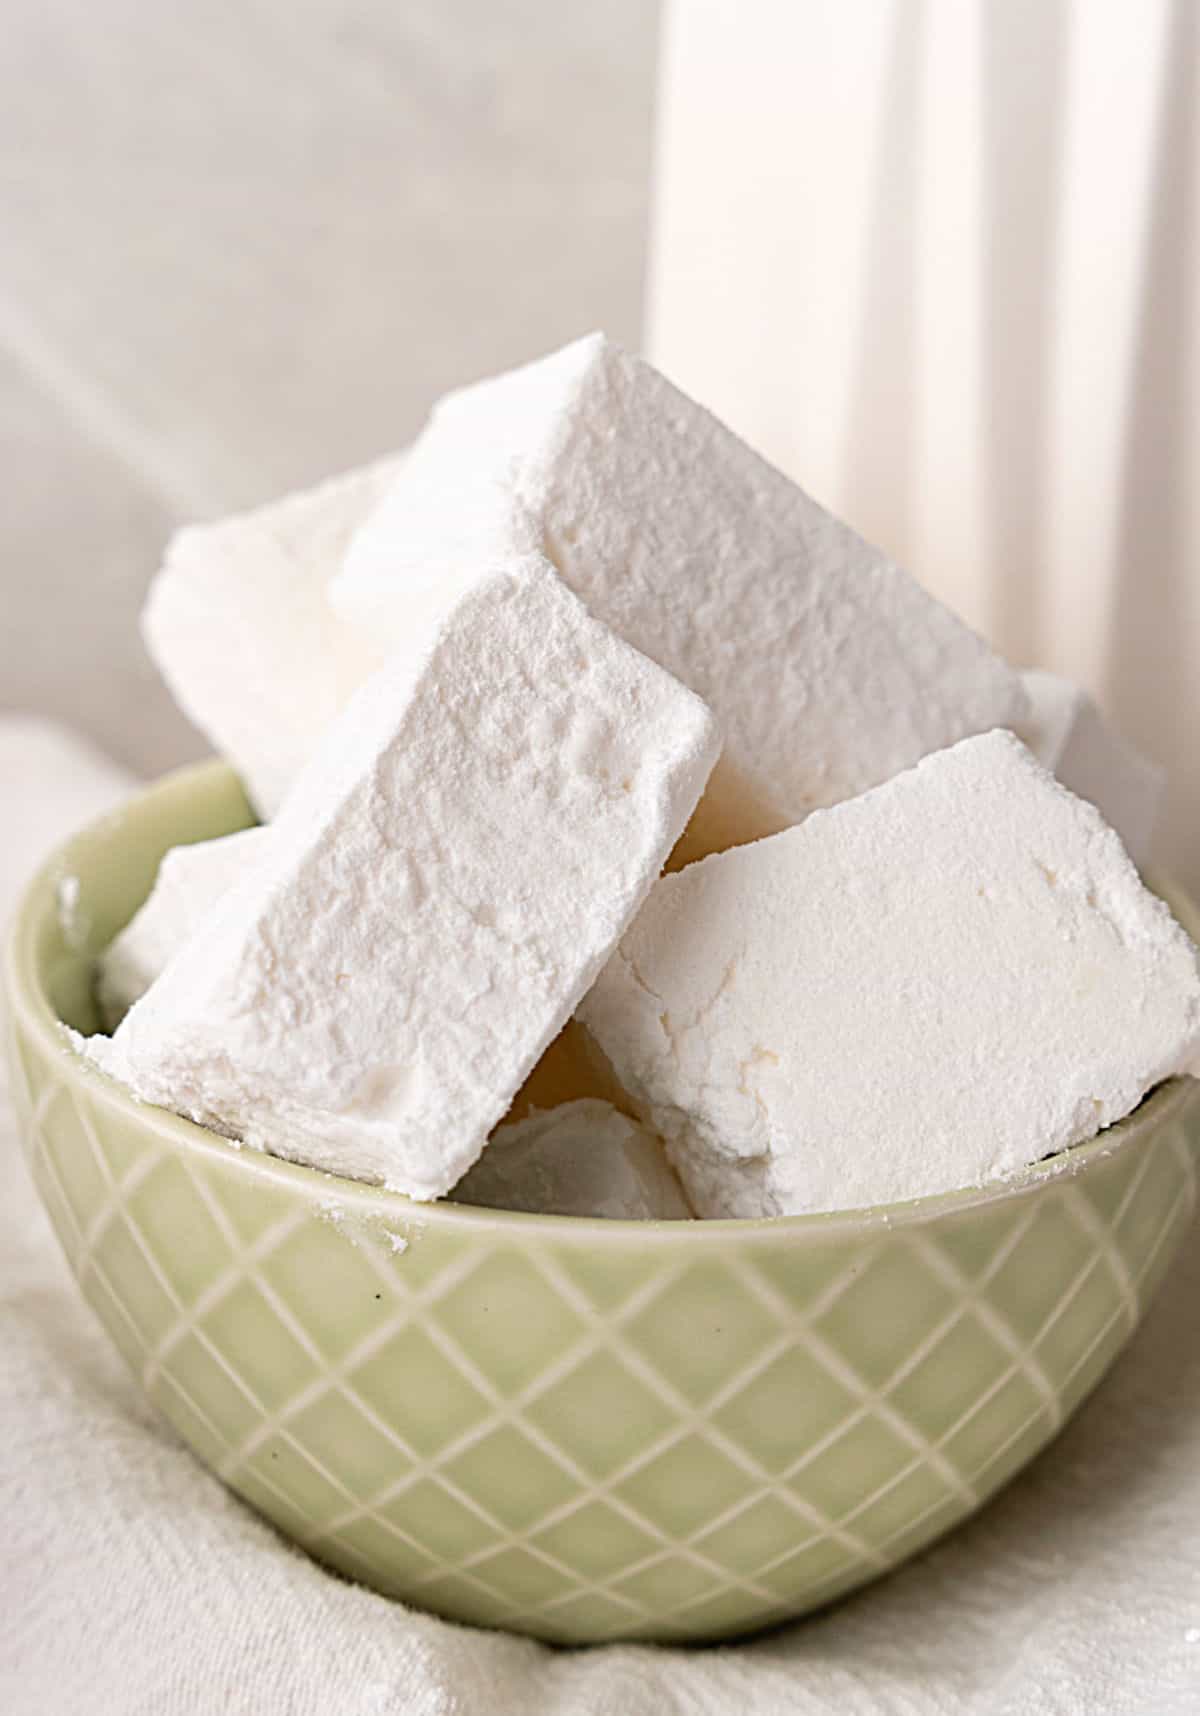
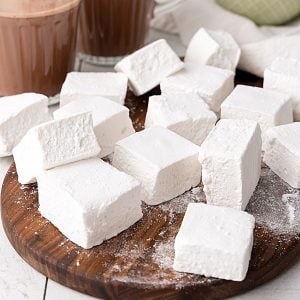
Once you make homemade marshmallows, there's no turning back. These fabulous, vanilla-flavored soft, fluffy, bouncy pillows are not hard to make if you organize your ingredients and space beforehand. They can be stored for a month.

A game changer
Forever on my bucket list, I gathered my thermometer, bought some corn syrup, got to work, and made homemade marshmallows with step-by-step images to share with you.
This is a superb marshmallow recipe with only 5 ingredients and a far cry from the commercial ones we're used to eating.
Use them to make classic s'mores with graham crackers, bake these popular and easy s'mores bars, or top a steaming mug of minty hot chocolate during the holidays.
Making marshmallows is not hard, but it takes focus and some organization, just like other old-fashioned recipes like pralines and my favorite best candied almonds. But doesn't everything?
A stand mixer is highly recommended, as you need to add the syrup while the machine is running, and that is pretty complicated with a handheld electric mixer. It also makes it easier to beat the preparation afterward.

Kitchen notes
- Organization: read the recipe first and ensure you have ingredients at the correct temperature, utensils and equipment needed, and enough workspace. This will make the process so much easier.
- Stand mixer: is highly recommended. Making them with an electric mixer can be done, but you'll have to add the syrup in a thin stream while beating the gelatin mixture, which can be a little challenging.
- Corn syrup or glucose? The latter is stickier, so I choose corn syrup whenever I can. Tip: lightly coat the measuring cup with spray or oil before measuring it. That way, it will slide out more easily.
- Candy thermometer: it's essential for this recipe as the syrup needs to reach a certain temperature, and it's hard to eyeball it. Use high heat when making the syrup; otherwise, getting to the right temperature will take forever. It takes about 10 minutes anyway.
- Lining the pan: use parchment paper and cooking spray to coat the paper's sides and the spatula you're using to spread the mixture.
- Top coat: the marshmallows are left to dry for a while and then powdered sugar is sprinkled on top and sides. This way, they can easily be eaten and stored.
- As left in the comments, attempting these on high-humidity days might be extra challenging.
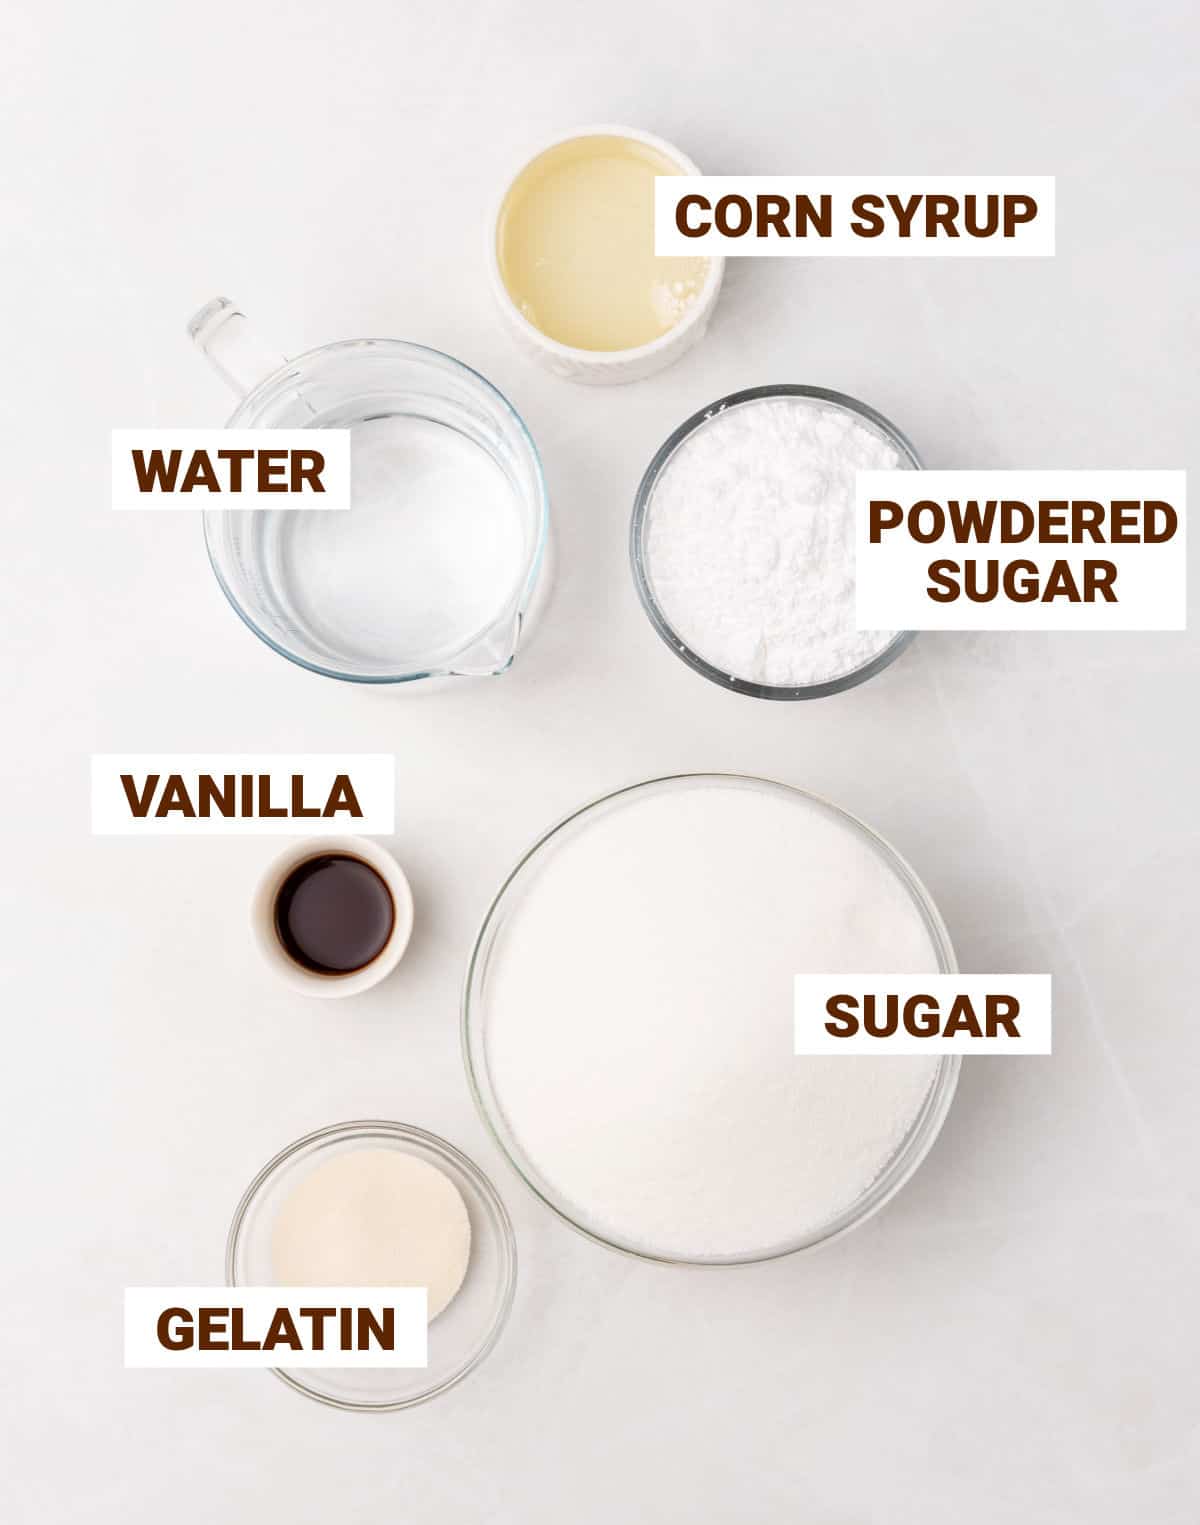
Ingredient Notes
Quantities are listed in the recipe card towards the end of this post. The Ingredients page has more details and lists the brands we use.
- Gelatin: it gives them structure. Use unflavored gelatin powder.
- Light corn syrup: it's transparent in color, so the marshmallows remain white and not yellowish, as can happen with the darker types.
- Powdered sugar: also called confectioners or icing sugar, depending on where you are.
Equipment
Candy thermometer: is essential for this recipe. You can buy them online, like the OXO Glass Candy thermometer and KT Thermo instant read candy thermometer.
Stand mixer: is highly recommended. Making them with an electric mixer can be done, but you'll have to add the syrup in a thin stream while beating the gelatin mixture, which can be a little challenging. I use a Kitchen aid stand mixer.
How to make marshmallows
- Gelatin: it needs 5 times its weight in cold water to hydrate.
- Syrup: use a candy thermometer.
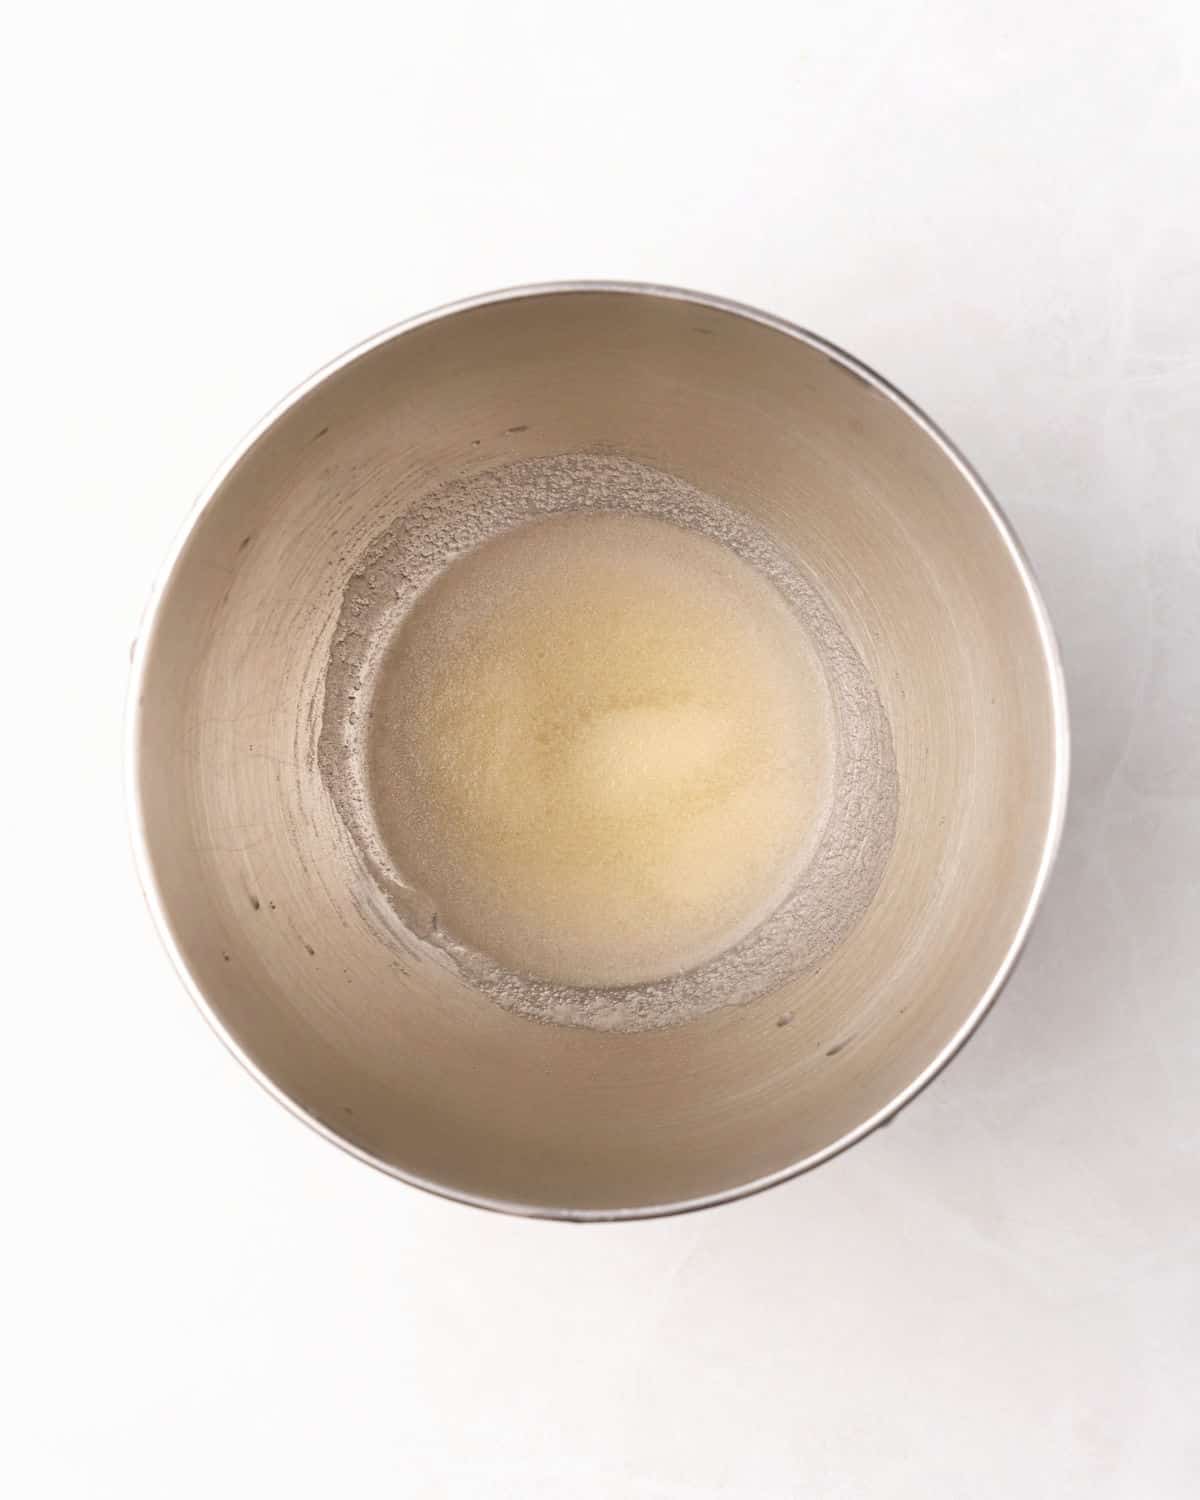
- Add water to the mixing bowl and sprinkle the gelatin on top. Let hydrate while making the syrup.
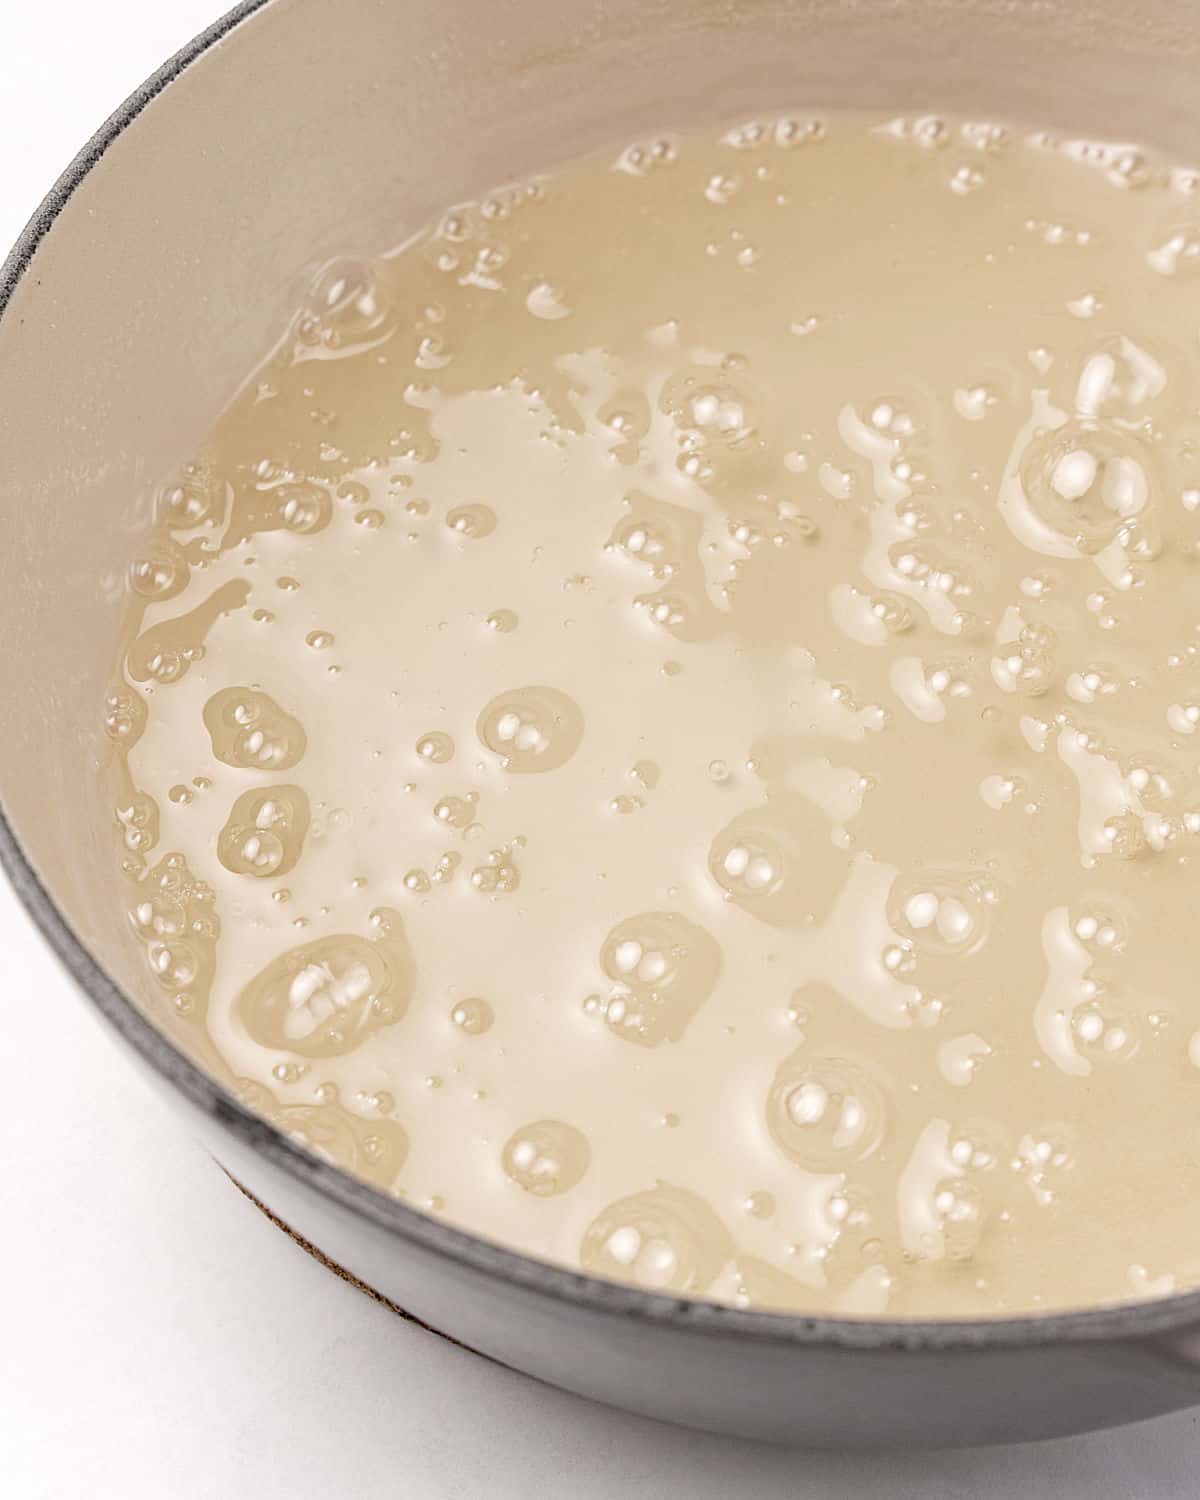
- Sugar, water, and corn syrup are cooked until they reach a certain temperature.
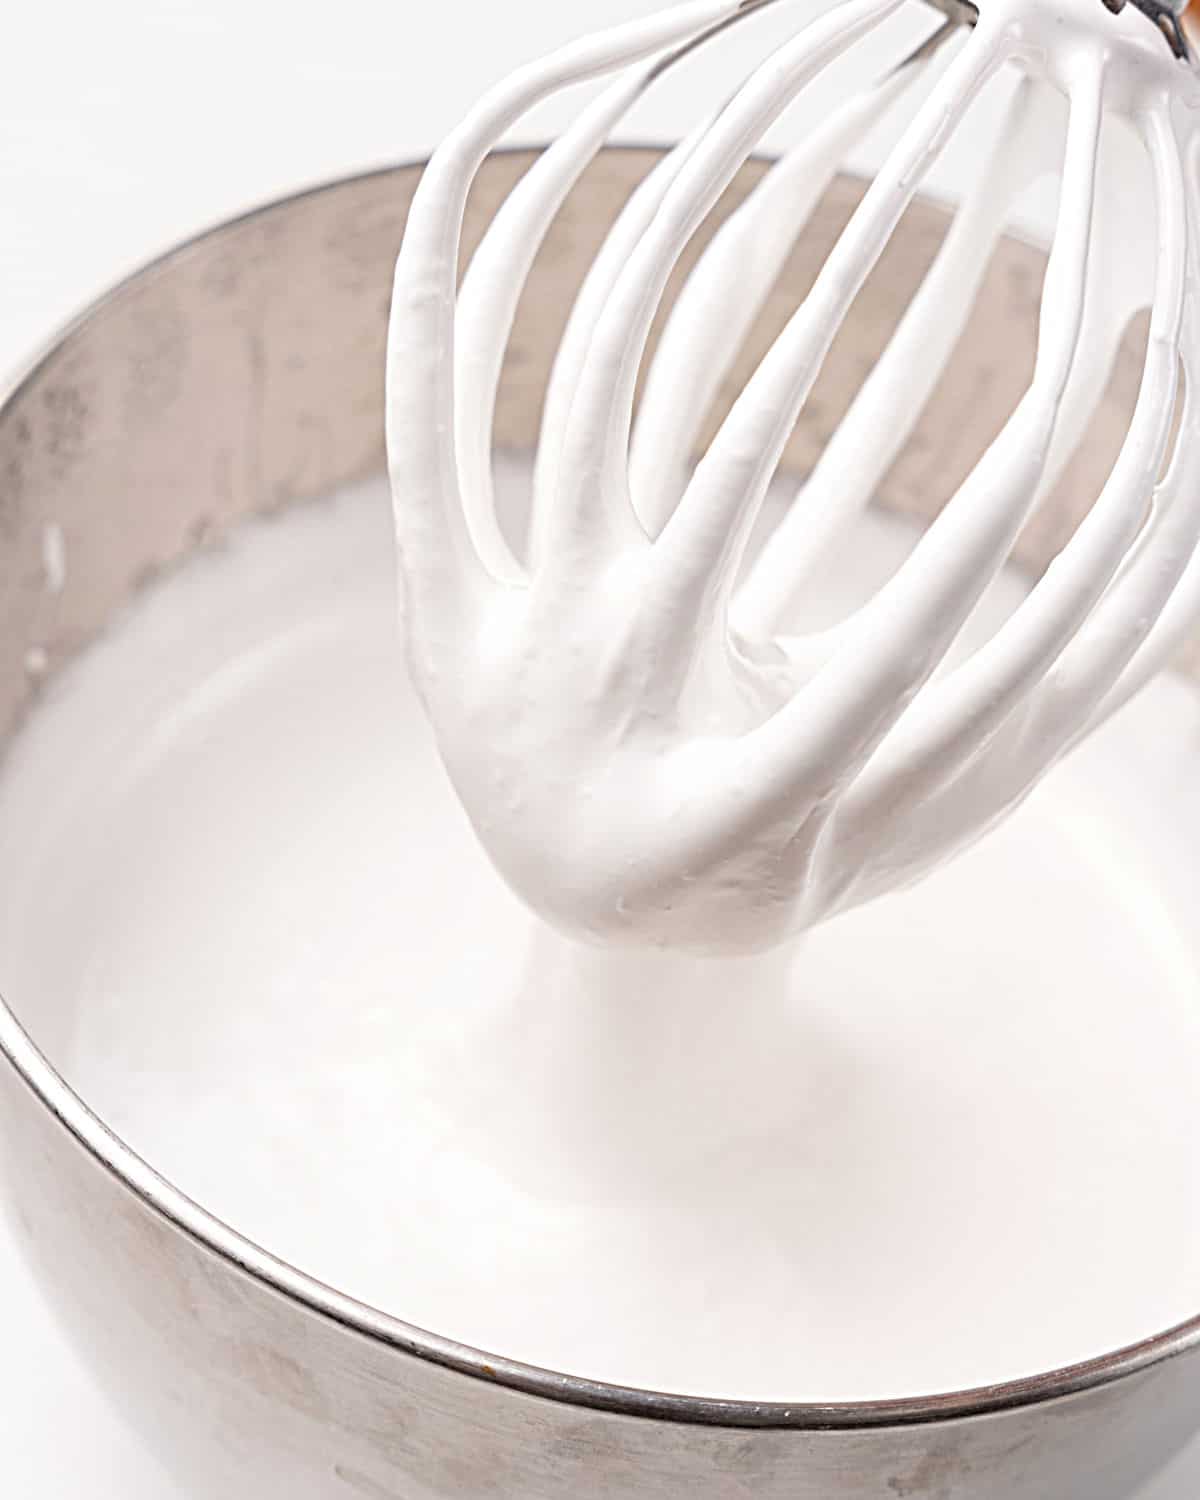
- The hot sugar mixture is added to the gelatin mixture and beaten until fluffy and shiny. It should make medium peaks when the beaters are lifted.
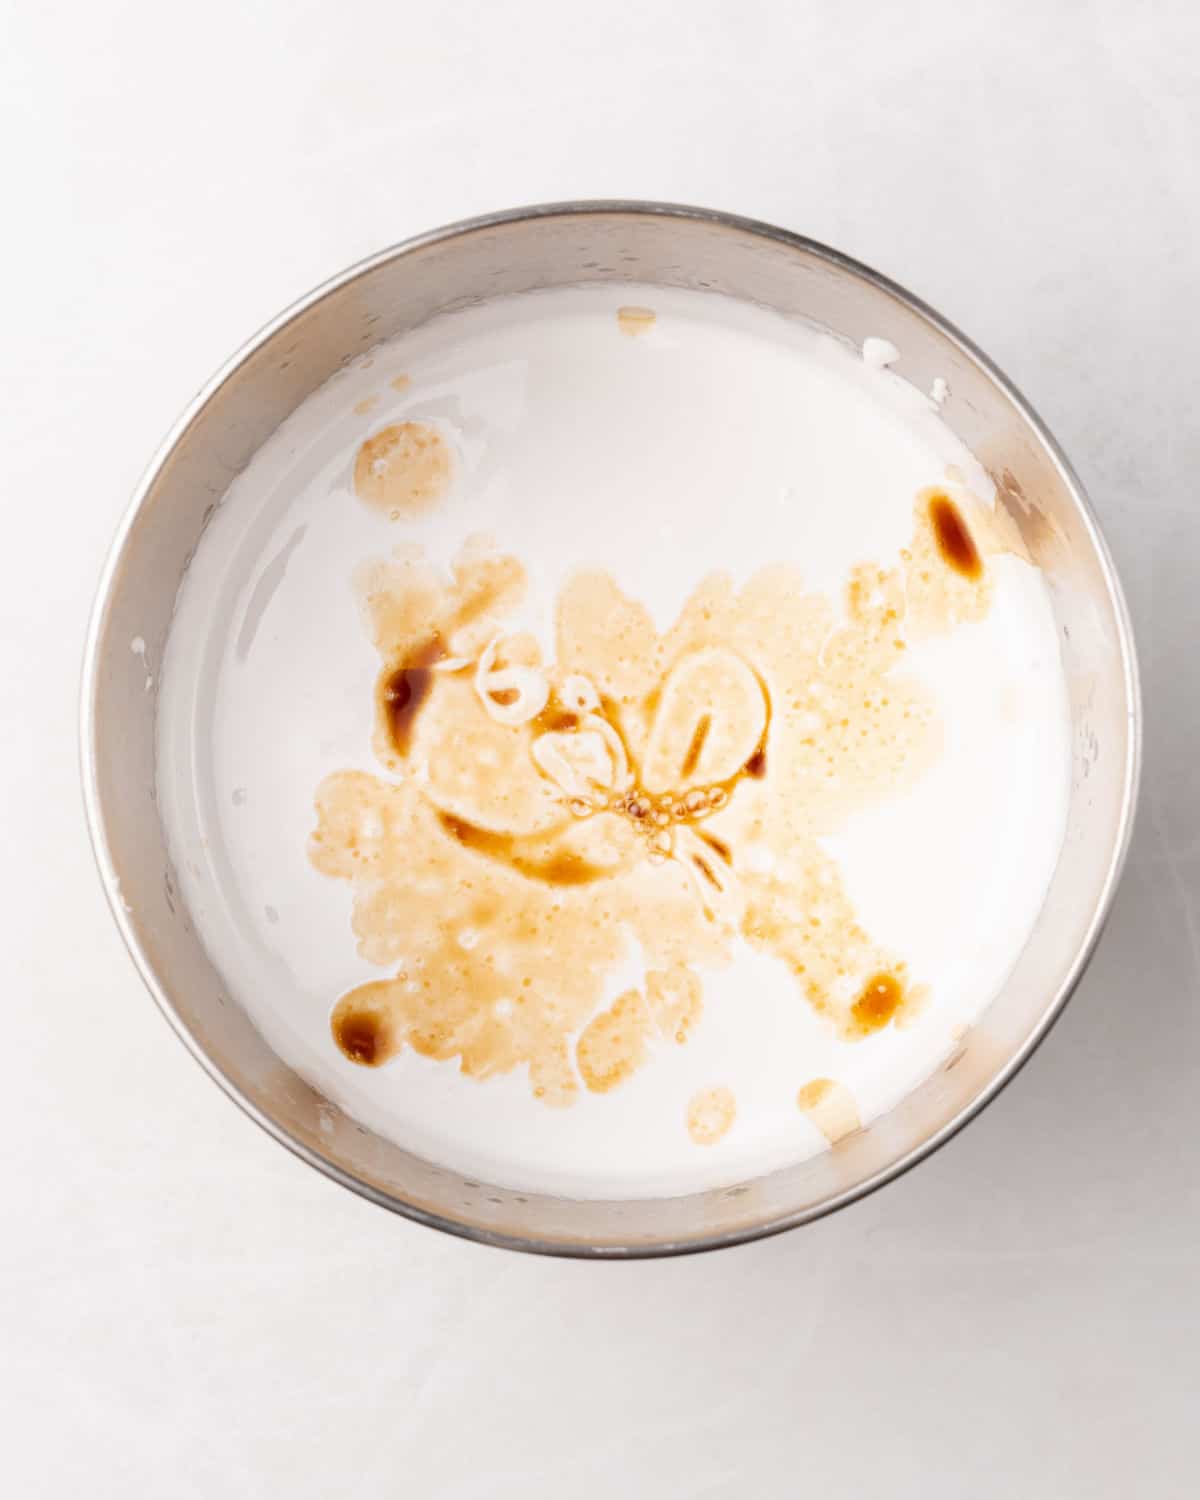
- The vanilla extract is added last and stirred until completely incorporated.
Drying the marshmallow mixture
- Baking pan: use a rectangular sheet cake pan for best results. The marshmallows will be a good height and dry well.
- Parchment or wax paper: use it to line the pan, at least the bottom, and two long sides. It makes it easier to remove the whole block of marshmallows from the pan.
- Cooking spray: use it to coat the paper and sides of the pan that are not lined. Go easy on the spray. The first time I added a heavy coat because I was afraid of not being able to remove the marshmallows, and ended up having yellow spots.
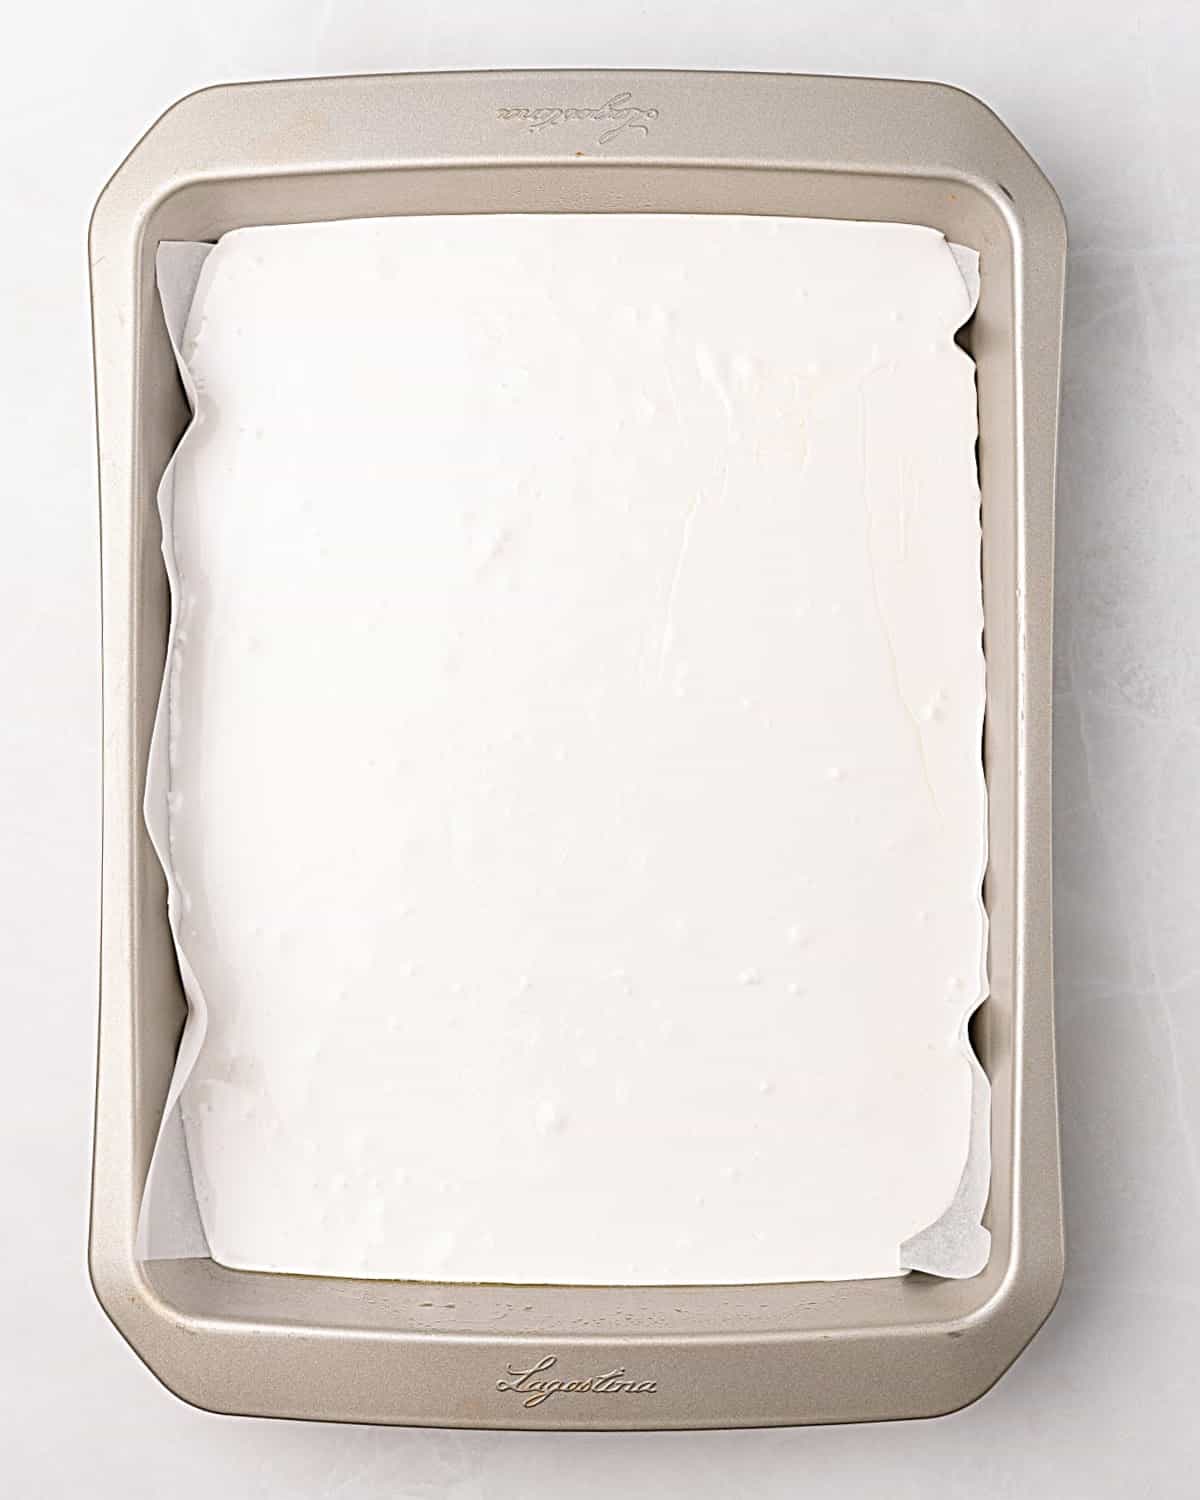
- The mixture is spread on the prepared baking pan and left to dry for an hour.
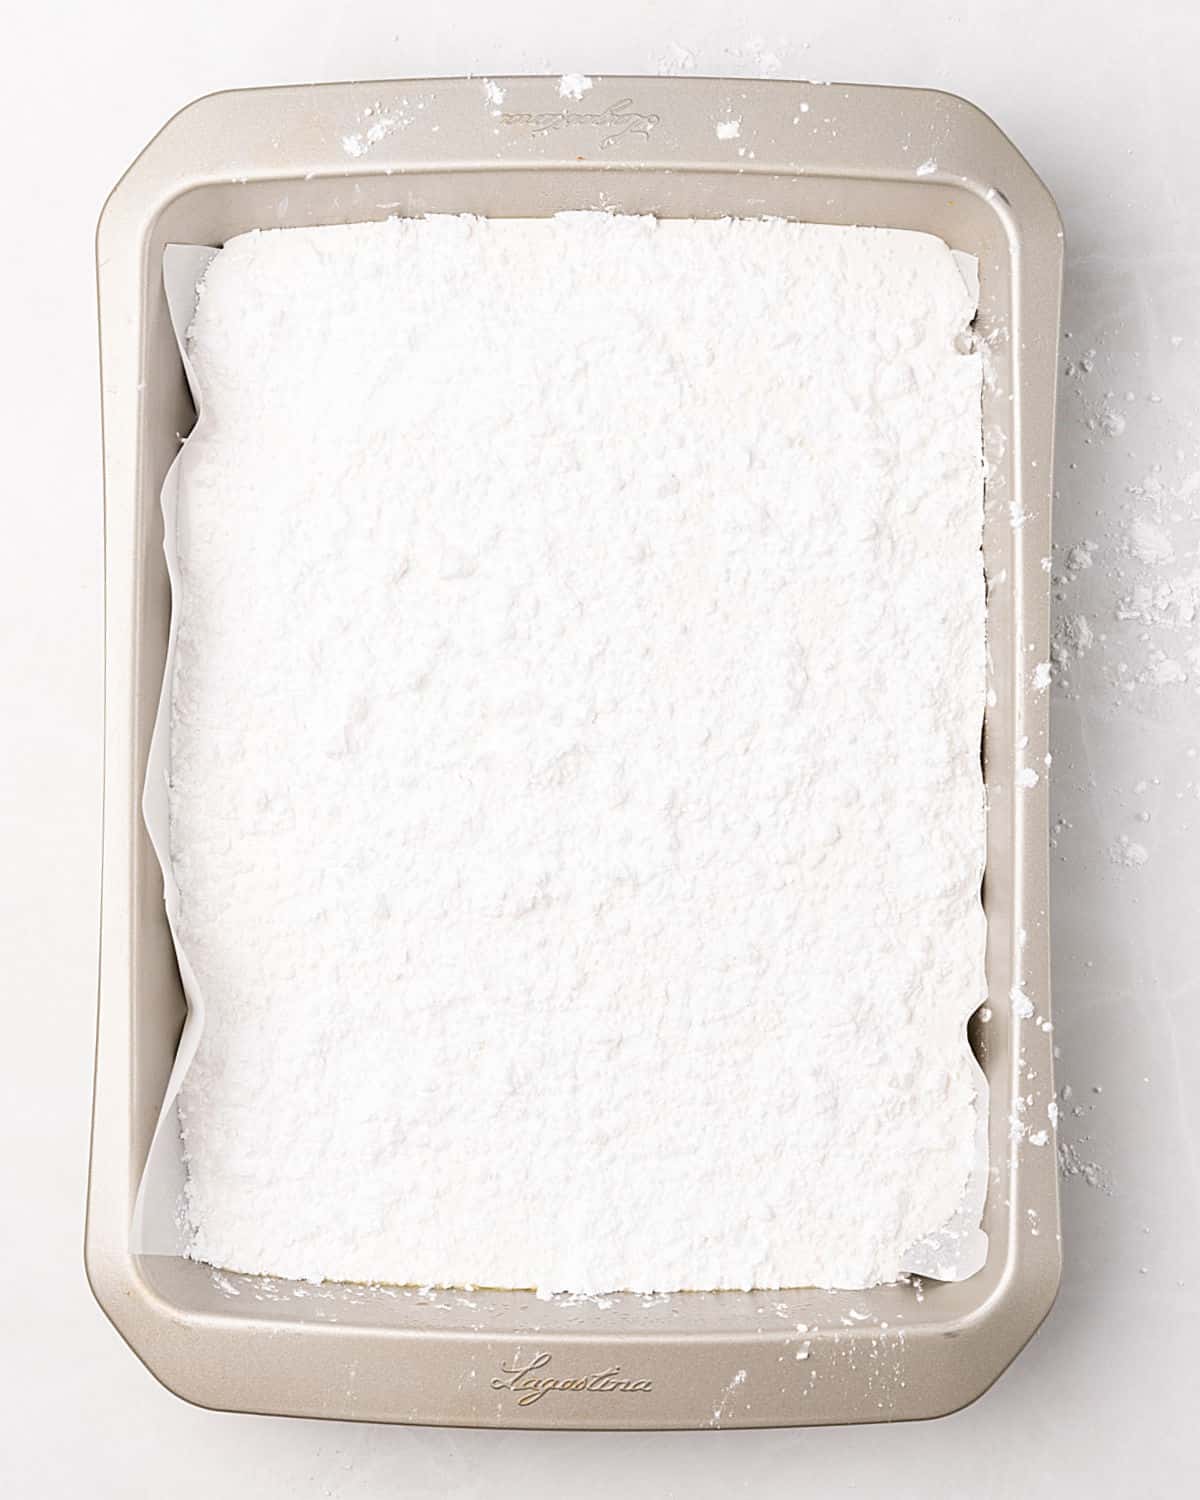
- It's then coated with powdered sugar to make them easier to cut and eat.
Vintage Kitchen Tip
Make sure the pan is sprayed and lined so the marshmallows can be easily removed and cut. Also, be cautious when making marshmallows on very humid days, as the mixture might not dry and be too sticky to manipulate.

How to store homemade marshmallows
They have a shorter shelf life than store-bought ones since they don't have preservatives or additives.
- Airtight container: like a mason jar or plastic container with a tight-fitting lid. Place them with wax paper between them and ensure they're not squeezed. They last for about a month.
- Plastic bag: use Ziploc-style bags. Make sure they're not overlapping so they're not squeezed.
- Room temperature: choose a cool, dry place, like the pantry.
- Refrigerator: you can store them in the fridge, but there's really no need. I find they don't keep as well.
So it's homemade vanilla marshmallows for me or nothing.
After making this recipe, knowing there is no sticking involved if I'm careful, I can say I envision different flavor possibilities for the future.
Some recipes use egg whites too. This recipe doesn't use them and it's easier.
They come out fantastic.
If you made this recipe and loved it, you can comment below and leave a 5-star ⭐️ review. Also, if you had issues, let me know so we can troubleshoot together.
You can also subscribe to our FREE email series 'Baking the Best' and our regular newsletter. Or follow and save my recipes on Pinterest.
As an Amazon Associate, I earn from qualifying purchases. Read my disclosure policy.
Vanilla Marshmallows
Ingredients
- 2 tablespoons unflavored gelatin powder
- ½ cup cold water, for the gelatin
- 2 ¼ cups granulated sugar
- ½ cup corn syrup , or glucose (I try to avoid it as it's incredibly sticky, but it also works)
- ¾ cup water, for the syrup
- 1 ½ teaspoons vanilla extract
- 1 cup powdered sugar, for dusting (don't use cornstarch, see Notes below)
Instructions
- Put the first ½ cup cold water in the bowl of a stand mixer. Sprinkle 2 tablespoons unflavored gelatin powder on top and let it hydrate.
- Line a baking pan with 2-inch sides with parchment paper and spray the entire surface with vegetable spray. Reserve.
- In a medium saucepan, put 2 ¼ cups granulated sugar, ½ cup corn syrup (or glucose), and the remaining ¾ cup water.
- Cook over medium heat until it dissolves, brushing the sides of the pan, just above the mixture, with a wet pastry brush so that sugar crystals don't form. Increase the heat to high, put the candy thermometer on the pan, and boil until it reaches 248ºF (120ºC), between the soft-ball and hard-ball stages.
- Attach the bowl to the stand mixer with the whisk attachment and start beating the gelatin in the bowl.
- Slowly, but constantly, pour the sugar syrup into the gelatin while beating at high speed. Try not to pour it directly over the whisk but between the side of the bowl and the whisk, that way the most syrup will reach the gelatin and not be stuck in the beaters or sides of the bowl.
- Keep beating for some minutes until the consistency is fluffy, like a thick meringue. But don't let the bottom of the bowl cool completely, as that means the mixture is too stiff and the marshmallows will be tougher than we want.
- Add 1 ½ teaspoons vanilla extract and stir to mix.
- Immediately transfer the marshmallow mixture to the prepared pan, and smooth the top with an oiled or sprayed spatula.
- Let dry at room temperature for 1 hour and sift 1 cup powdered sugar over the marshmallow mixture. Let dry for a few hours until it's no longer sticky and can be removed.
- When ready, lift the parchment paper, and use an oiled or sprayed kitchen knife to cut it. You can also use an oiled pair of scissors. Dust each square completely with powdered sugar.
- Store in an airtight container for up to a month in a dry, cool place.
Notes
Airtight container: like a mason jar or plastic container with a tight-fitting lid. Place them with wax paper between them and ensure they're not squeezed. They last for about a month.
Plastic bag: use Ziploc-style bags. Make sure they're not overlapping so they're not squeezed.
Room temperature: choose a cool, dry place, like the pantry.
Refrigerator: you can store them in the fridge, but there's really no need. I find they don't keep as well.
David Scott Allen says
I totally agree - homemade marshmallows are best and there is no substitute! I made them once, Year as ago, and have lost the recipe. But now I have yours!
Jay says
Can I whisk it in a food processor using the whisking blade?
wp_vknotes_admin says
Hi Jay,
You can use a handheld electric mixer. I don't recommend a food processor.
marina says
one other thing: do you know if they can be store on the freezer?
una cosa mas: sabes si puedo freezarlos?
marina says
gracias!
marina says
hola Paula,
where did you get the corn syrup? (yes, here in Buenos Aires...)
marina says
si, le escribi a Unilever (dueños de Maizena, quienes lo producian) y me confirmaron que ya no existe. extraño el maple syrup 🙁
voy a ver entonces si consigo eso, que creo que tambien puede haber en Doña Rosa...
gracias
Leanne says
I am experienced at hard candy making and my thermometer has recently proven accurate. Inquiry into other marshmallows recipes displayed a small variety of temperatures as well. So, I doubt the temperature was this situation's failing. However, after having reviewed other recipes it does seem more likely that the agar agar was at fault. I will order a different gelatin substitute, try again, and keep you posted.
Leanne says
I tried making a vegan batch of these, as per the instructions, twice. Both batches resulted in a sticky gelatinous mess that would never reach the described fluffy meringue-like texture. I used agar agar in place of gelatin. Agar agar is usually a fantastic replacement for gelatin. So, I'm forced to wonder if the recipe is bad or if if the agar agar just didn't work for this situation.
mkakudo says
Paula, that scene from your favorite comic book is hilarious! glad you and your kitchen did not turn out that way during your marshmallow adventure. thanks so much for checking in on me from time to time. 😉
Abbe@This is How I Cook says
Hi Paula. I make marshmallows once a year. They are for my daughter and lucklily they last quite a long time as they still taste good when dunked in chocolate. That is my time test requirement!
yummychunklet says
Yum!
Stacy says
I loved Asterix as a child too, Paula! Marshmallows are on my bucket list as well. I have always been intimidated by the mess they might create as well so I am grateful for your explicit instructions. You have motivated me to give them a try. So beautiful!
Rhu Sam says
You made marshmallows at home??!! That's great. I ate tones of them as a child, I wanna try too (not sure if they will look as gorgeous as yours).
Nancy @ gottagetbaked says
Way to go, Paula! I wish I had your bravery, both in and out of the kitchen. These marshmallows look divine - you could sell these babies, that's how perfect they look. And thanks for all the tips and tricks in this post. That's one reason why I love food blogs so much - we tell it like it is, no sugar coating (pun intended) 😉
Sarah Reid says
I haven't done mallows in AGES, need to do it again, there's no comparison