Homemade croissants take time and patience, but the results are out of this world! Follow the steps and have sweet, buttery, puffy pastries anytime.

I think any laminated dough, be it french all butter croissants, puff pastry, danish, is one of baking's great accomplishments when made at home.
It is a project. This is no last-minute idea, especially if you take the traditional way of mixing and folding.
I make a danish dough in the food processor and it's a dream, but there's no escaping the laminating if you want the puffy look. And you absolutely want the puffy look when it comes to croissants.

The recipe is very traditional, though there are some that add an egg.
Not this one, just flour, sugar, milk, salt, and of course, a lot of butter.

I have made French all-butter croissants dozens and dozens of times. Back when I was living my other life, which included a big kitchen and a lot of stepkids, making croissants was fairly normal.
When you're a baking freak like I am, having a lot of teenage mouths willing to devour anything you make is like a dream come true. So I would bake a ridiculous amount of whatever I wanted since it always found a willing tester. Or many.
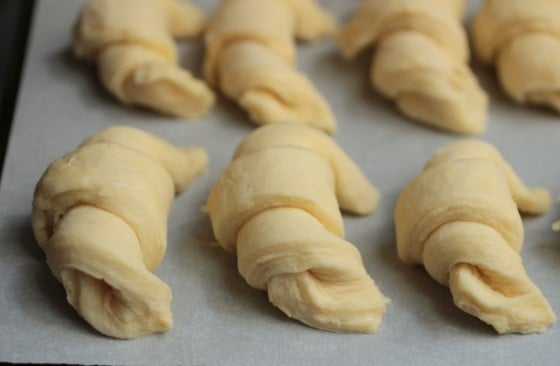
In theory, this is a very simple yeast dough that is kneaded. After resting overnight, a block of somewhat softened butter is added, and the process of folding and resting begins.
As with many masterpieces of the baking world, it needs some focus and organization. Prepare enough counter space, a good rolling pin, a knife to cut the triangles, enough time to let the dough mark the step and not the other way around, and read the recipe thoroughly before starting.

It takes time because the dough has to rest for at least one hour between each envelope-style folding.
The reason for this is the yeast. The gluten activates when you handle the dough, and if it's not allowed to rest it becomes impossible to work with. Just like any yeast dough.
And it's important to mark the dough by making an indentation with your thumb between folds so as not to lose track of them. You don't want to find yourself in the middle of the kitchen, trying to figure out if you are going to make the final turn or if you already made it.
So you mark the dough. Just press your thumb when the fold is done. After the second turn, press your thumb twice. And so on.
Since croissants need three foldings, the last one a four-layer turn, it will take a few hours to complete. And then it has to rest again, otherwise, you won't be able to roll it thin enough to cut the triangles that will become the croissants.

To laminate is to alternate layers of dough and butter, by folding the dough onto itself, thus creating a final dough that looks like a stack of sheets.
They will puff up dramatically in the oven due to that layering effect and the water that
evaporates as steam during baking.
So the layers have to be distinctive, otherwise, the effect will be lost and you will have a mess consisting of flour and butter. If you didn't manage to make puff or croissant pastry rise at some time, you know exactly what I mean. A pool of butter and uncooked dough.
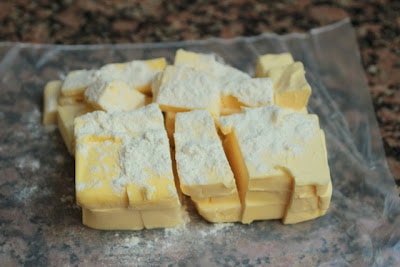
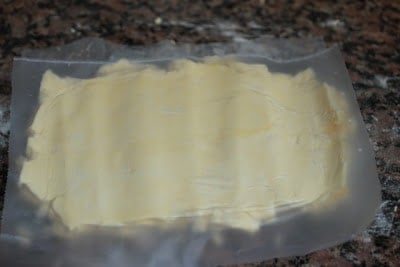
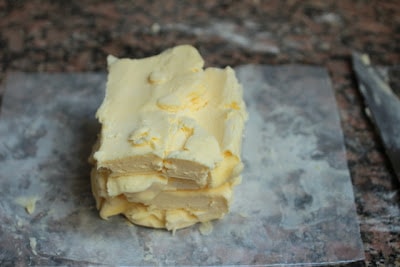
In this recipe, the butter is mixed with a few tbs of flour before being shaped into a square. The book suggests using the mixer, but I never do that, because I don't want to wash a bowl and beaters full of greasy butter.
I simply put the butter in pieces over a piece of plastic (I use freezer sheets), sprinkle the flour, add another sheet on top, and pound with the rolling pin. You pile it up again and repeat. It takes three or four times for the flour to mix. But the mess is minimal as you can see in the pictures.
I have to say that the mixing, folding, and shaping were pretty uneventful since I was familiar with it. The dough had a bit of resistance, even after resting for hours, something that happened to me on occasion before. So they didn't roll as thin as I wanted.
But the lamination came out really good, as seen in the pictures. The shape, not so much. And here I have to say that after 20 minutes in the oven, the croissants had puffed and were turning a gorgeous golden, but they were also dripping in butter—dripping, as in a lot of melted butter in the tray.
So much so, that I transferred the parchment paper with the croissants to another tray so they could dry out a bit more while they finished baking.

You can clearly see that they kind of flattened and couldn't hold their shape so much.
I used top-brand butter, so there was no reason for this to happen. And though I have never used this recipe before, it doesn't appear to have a different butter ratio than others. It's one of those mysteries.
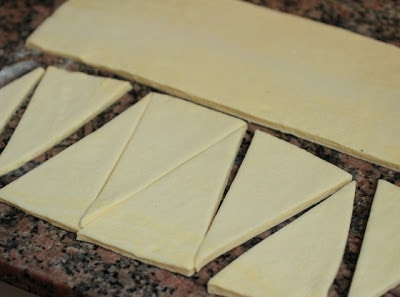
When you cut the triangles, be sure to use a sharp kitchen knife. The cuts should be precise and neat; no sawing motions, or you'll disturb the layers, which will affect the puffiness.
I brushed them with simple syrup (sugar covered with water and boiled for two minutes) right out of the oven because I never glaze them before baking. I just don't like it. But the syrup gives them a nice shine and adds a very slight sweetness.
The flavor was amazing, really buttery (what else!) and crunchy, the way a good laminated dough can be.
I like making small croissants for several reasons, one of them being that they never get soggy and have a lot of golden, flaky crunchiness. In this case, I made different sizes to see how they baked. By far, the best ones were the smaller croissants. They had a perfect bite.

I'm feeling the croissant bug start to crawl inside my mind, so I'll be seeing a lot of them this year. Of course, I will make my tried-and-true recipe from Nancy Silverton again and maybe give this one another try. I have to get that dripping butter business settled once and for all.
And I still have half of this recipe in the freezer. We must tackle variations on this dough, like pain au chocolat and almond croissants. I'm so looking forward to that.

French Croissants (all-butter)
Ingredients
Yeast mixture:
- 1 ¼ teaspoon active-dry yeast, about ½ package
- 3 tablespoons water, tepid, barely warm
- 1 teaspoon sugar
Croissant dough:
- 1 ¾ cups bread flour
- 2 teaspoons sugar
- 1 ½ teaspoon salt
- ½ cup milk
- 2 tablespoons vegetable oil, I use sunflower or canola oil
- ½ cup 1 stick chilled, unsalted butter
- 1 egg, for egg wash
Instructions
For the yeast mixture:
- Mix the yeast, warm water and teaspoon of sugar in a small bowl.
- Set aside and let foam up a little.
For the croissant dough:
- Heat the milk until tepid and dissolve in the salt and sugar.
- Place the flour in a large bowl. Add the oil, yeast mixture, and milk mixture. Stir all the ingredients together using the rubber spatula or wooden spoon, just until the flour is incorporated.
- Turn the dough out onto a floured surface, and knead the dough several times. Place the dough in a clean bowl, and cover tightly with plastic wrap. Leave for 2 to 3 hours, or until the dough has tripled in size. The time depends on the temperature of the room.
- After the dough has tripled in size, remove it gently from the bowl, pulling it away from the sides with your fingers. Place it on a lightly floured surface, and roll it into a rectangle of about 8x12 inches (20x30cm).
- Fold the dough rectangle in three, like a book or letter, first the top third down until it reaches the middle of the remaining dough, and then the bottom third up.
- Cover the dough in plastic wrap and place on a cookie sheet to rise for another hour or so, or until it has doubled in size. This second rise can be made overnight in the fridge.
For the butter block:
- Place the stick of chilled butter on a piece of parchment paper and, using a rolling pin, lightly pound the butter to flatten it. It will have ridges at first, but pound on the too. It should measure about 10x8 inches (20x25cm).
- Cover with plastic or another piece of parchment paper, and place the butter rectangle in the fridge to chill while the dough is on it's second rise.
Continue with the croissant dough:
- After the dough has doubled, cover in plastic wrap and chill it in the fridge for about 30 minutes.
- Transfer it a lightly floured surface and let it rest for 1 or 2 minutes. Roll the dough again into a rectangle about 15x8 (20x38cm) inches.
- Place the cold butter rectangle in the middle of the rolled dough. Fold the bottom third of the dough up and the top third of the dough down. Turn the dough package 90 degrees (quarter turn), so that the top flap opens to your right, like a book.
- Roll out the dough (gently, so you don’t push the butter out of the dough) until it is again about 15x8 inches (20x38cm). Again, fold the top third down and the bottom third up. Cover in plastic wrap, and place it in the fridge for 2 hours.
- Place the cold dough on the lightly floured surface. Tap the dough with the rolling pin, to deflate it a little. Let the dough rest for about 10 minutes.
- Roll it to a 15x8 inch (20x38cm) rectangle. Fold in three again. Turn it 90 degrees (quarter turn) with the top flap to your right, and roll out again to a 15x8 inch (20x38cm) rectangle.
- Fold in three for the last time, wrap well in plastic, and return the dough to the fridge for two more hours.
Cut and shape the croissants:
- Lightly butter your baking sheet.
- Take the dough out of the fridge and let it rest for 10 minutes on the lightly floured surface.
- Roll the dough out into a 20x15-inch (50x38cm) rectangle.
- Fold the dough in half, bringing the top half down. With a pizza wheel or a large kitchen knife cut it into triangles (as shown in the video.). You’ll have stacked triangles.
- Open the stack and place the top triangles on top. Half will be fully cut, half will still be joined. Cut the ones that are joined down the middle so you have individual triangles.
- Working with one triangle at a time, hold it from the top with one hand and with the other stretch it out a little to lengthen it. Be careful not to tear it.
- Make small balls of dough from the scraps and place a ball of dough at the wide end of the triangle. This is optional but it gives the croissants volume. I don’t usually do it, but I’m more experienced; it’s your call.
- Starting at the wide end, roll the triangle up towards the point, and curve into a crescent shape. Place the unbaked croissant on the baking sheet. I like to anchor the ends by pressing gently onto the sheet.
- Repeat the process with the remaining dough. The video shows filled croissants, but that’s not what we’re making today.
- Leave the tray of croissants to rise for 3 hours.
Bake the croissants:
- Preheat the oven to very hot 475°F (245°C).
- For the egg wash: mix the egg with a teaspoon of water. Brush across the tops of the croissants.
- Bake for about 20 minutes, until the tops are golden brown, rotating the baking sheet after 10-12 minutes so they bake more evenly. If they’re browning too quickly, decrease the oven temperature to 375°F (190°C). They should have golden bottoms and not be doughy.
- Place the baking sheet on a rack to cool for 10 minutes before serving.

Mary Hirsch says
Paula, What an amazing and well-written Post topped only by your delicious looking croissants. I had to put Julia on the backburner while I sold my house and then got moved but I will be returning soon. Unlike you, I have never made croissants before so I was very interested in your thorough explanation. Lots of work, huh? Lots of calories, also. Wow, you are some baker.
loavesandstitches says
Beautiful! I love the sheen you get from the sugar syrup. These weere tasty.
Laura (Tutti Dolci) says
Your croissants are beauties! Wish I had one right now :).