
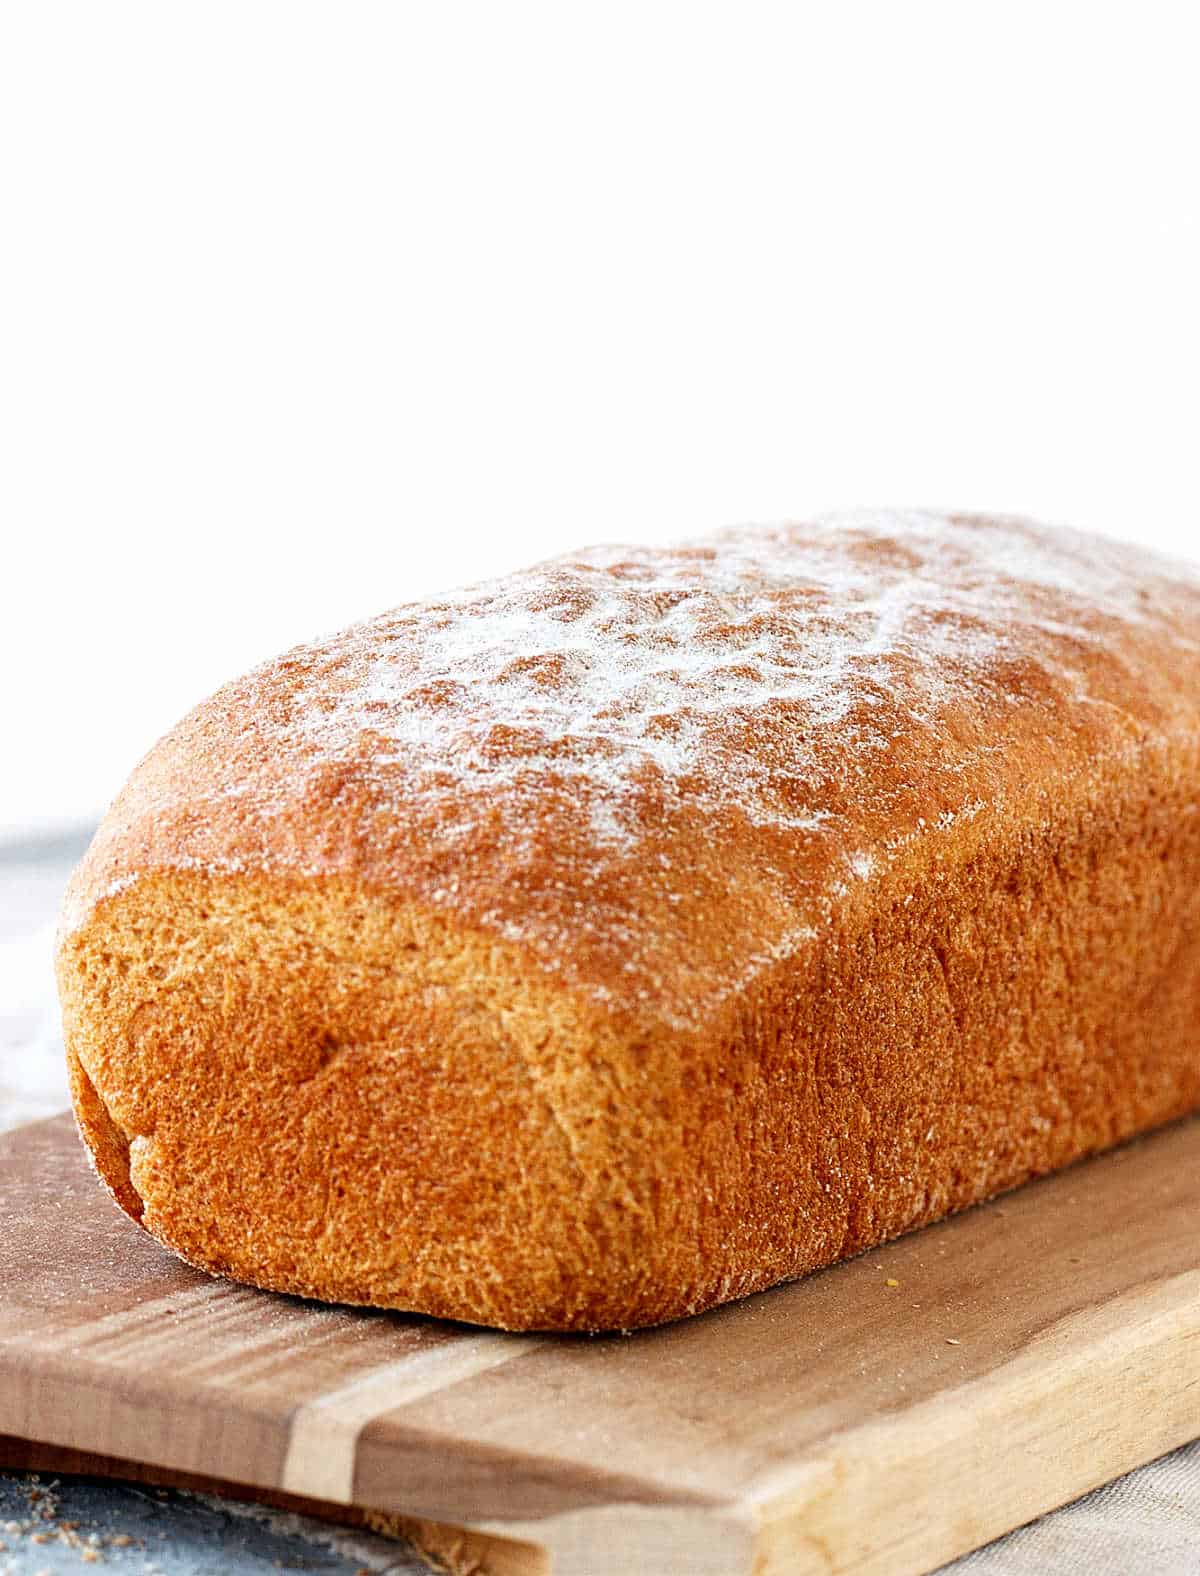
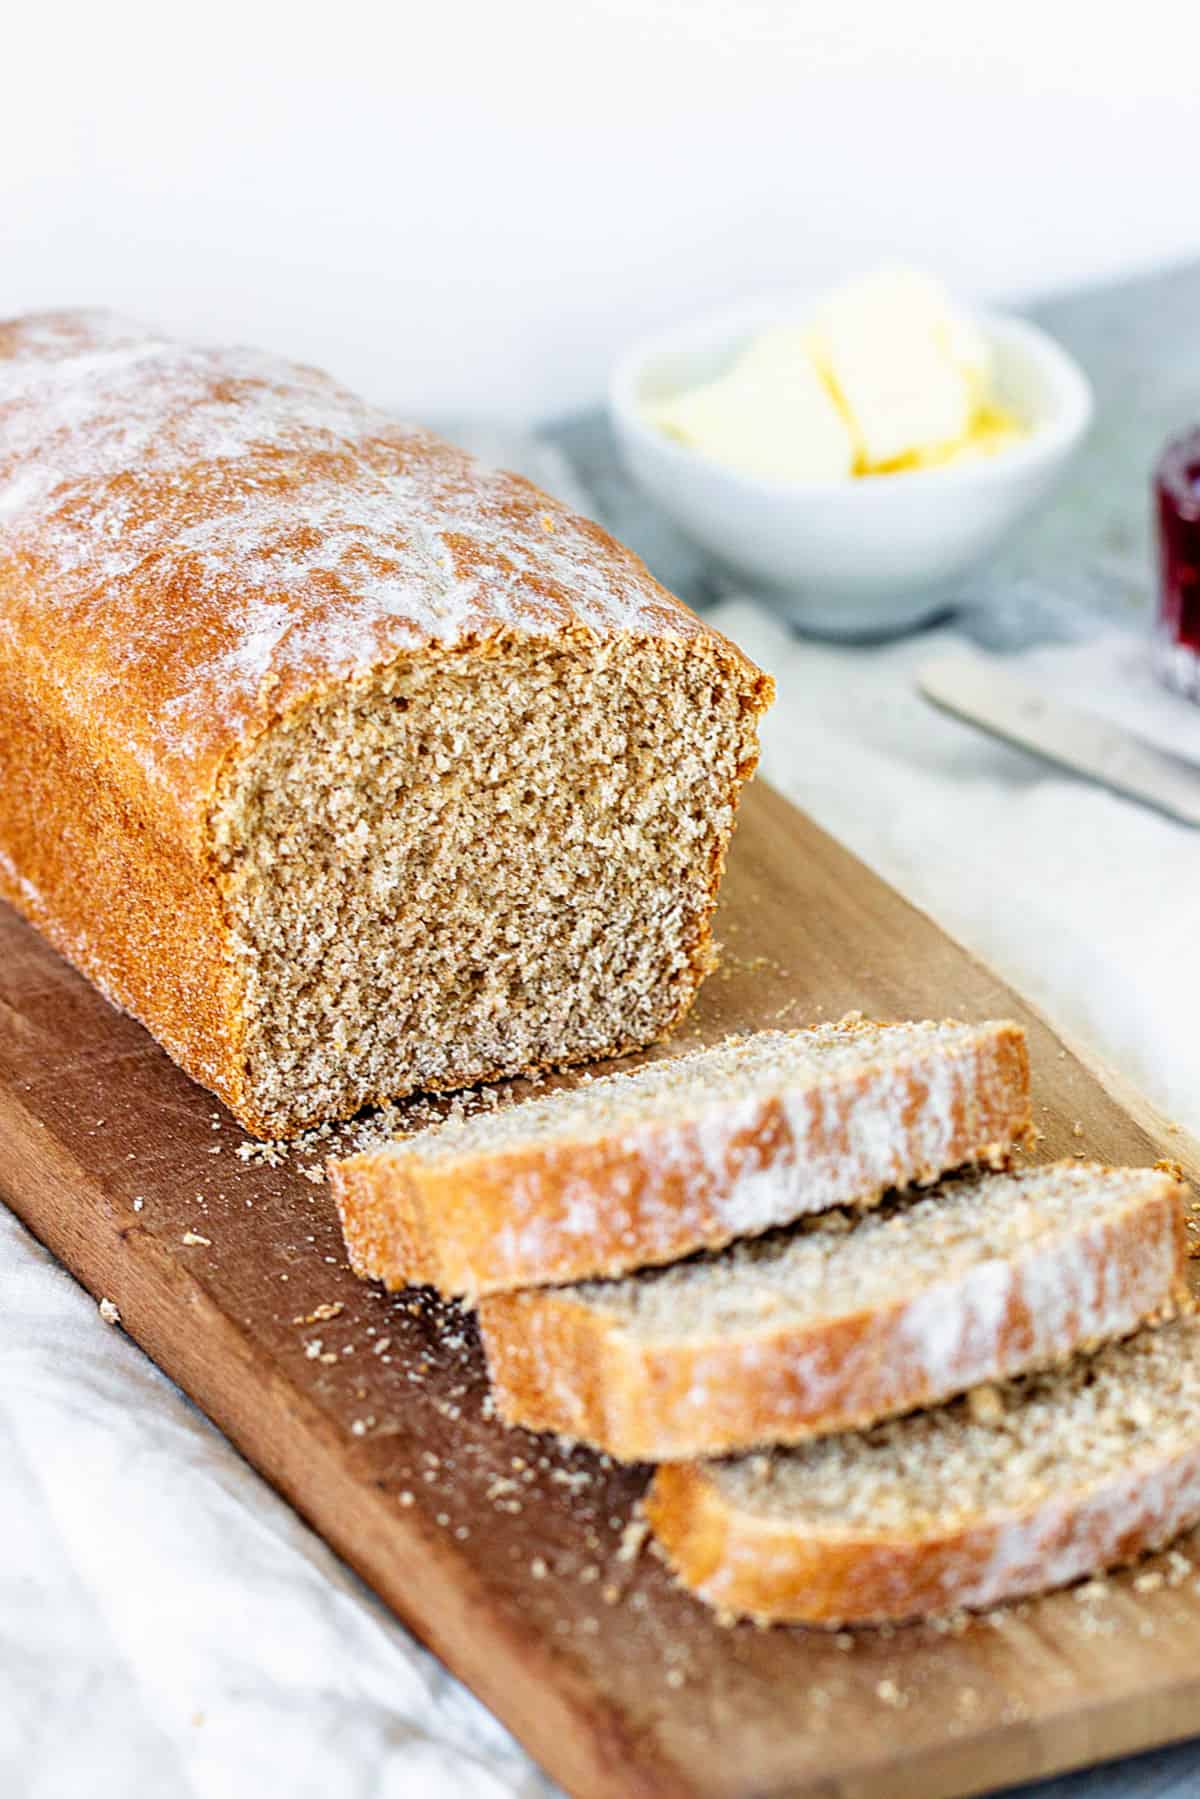
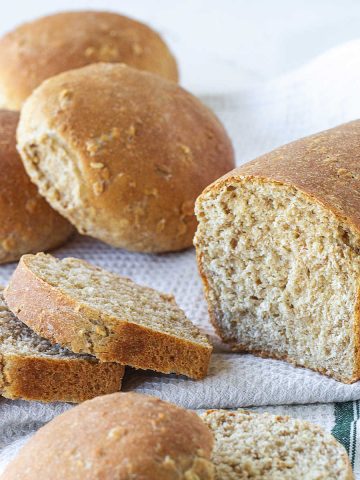
A yeasted bread recipe for everyday toast and sandwiches made only with whole wheat flour! The process is quite traditional, with little hands-on work if you use a stand mixer. The crumb is soft and delicious, and it's the perfect bread to have sliced and frozen at all times.

SAVE THIS RECIPE
A game changer
This homemade bread changed my mornings.
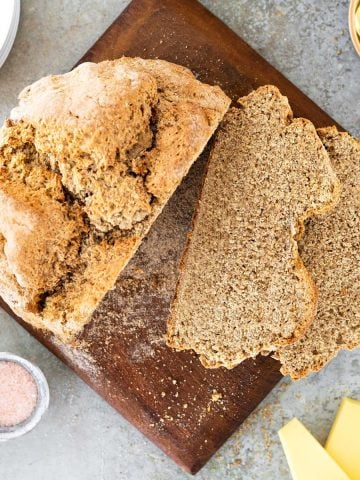
My experience with 100% whole wheat bread was that it was difficult to create a soft crumb. The bread usually ended up being too dense and tight.
This is because whole wheat flour is much heavier and has less gluten than its white counterpart.
Well, this recipe came along and put an end to that!
- Soft crumb that's not too dense or heavy as many breads that don't contain white flour.
- Clean, balanced wheat flavor, not too coarse, and just a whiff of sweetness from the honey.
- Versatile. It can be made in loaf pans and as individual rolls, similar to the Whole wheat Oatmeal bread recipe. And it freezes wonderfully!
I'm not much of a breakfast eater, but I love freshly made toast with my morning coffee. And if the bread used is more wholesome than the regular white type, so much better. This all-whole-wheat sandwich bread is exactly that.
I also like the whole wheat mountain bread and this easy rye sandwich bread, but they now hold second and third place behind this recipe.
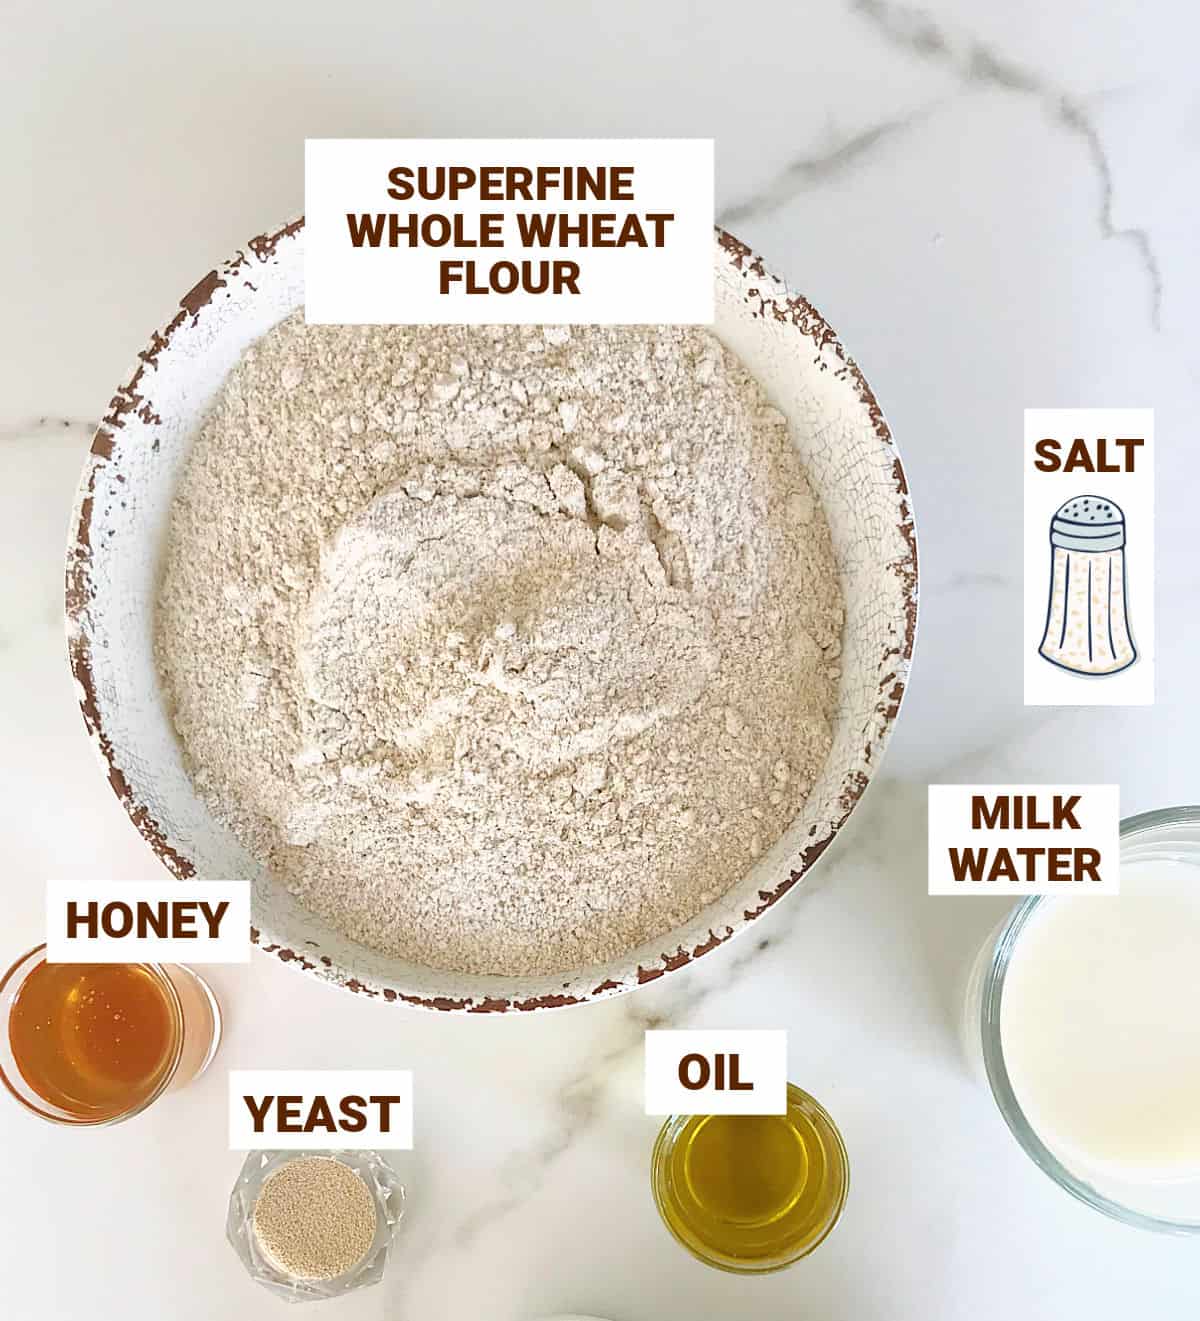
Ingredient list
- Yeast: I use active-dry or instant dry yeast.
- Whole wheat flour: superfine or finely milled is the type you want to achieve a tender crumb.
- Oil: any type works. I use sunflower or olive oil. Melted butter also can be used.
- Honey: it works well with whole wheat. But sugar can also be used.
- Milk: any type, regular or low-fat
- Water.
- Salt.
Quantities are listed on the recipe card towards the end of this post. The Ingredients page has more details and lists the brands we use.
Equipment
You can make it by hand, but these tools make bread-making much easier.
- Stand mixer: this is a super handy small appliance for making bread if you don't want to knead it by hand. Depending on the amount of bread dough I make, I use the Kitchen Aid Artisan mini mixer or the Kitchen Aid Artisan classic mixer.
- Dough scraper: it's a lifesavor when kneading by hand to scrape the pieces of dough stuck to the counter. It's also great for handling and cutting the dough when mixing and forming the loaves.
Steps to make whole wheat bread
This is a yeast bread that requires making a sponge first. It takes little time: just a minute to mix and then 10 more minutes to activate.
Yeast
I use active dry yeast, which needs to be hydrated beforehand (foamed). You can use instant yeast (¾ of the amount given for active dry) and add it directly to the flour, then add the liquid; no need to foam it first. If using fresh yeast (the ratio is 3:1 to dry), and is used in the same way as the active-dry, you need to hydrate it first and let it foam.
Mixing and kneading
- By hand: you need about 10 minutes and some arm muscle. Doughs with only whole wheat flour, even superfine, are heavier to knead than regular white bread.
- Stand mixer: this is a great way to make bread often if you don't want to knead by hand. Use the dough hook for about 7-8 minutes at medium speed. The dough will form a ball and leave the sides of the bowl.

Sponge
For the sponge, stir some of the flour, a little honey, yeast, and liquid to make a shaggy, wet mixture.
It gets the yeast going, and then you add the rest of the ingredients.

Kneading
The dough is mixed until thick and you can't incorporate any more flour with a spoon. Then you start kneading by hand or in a stand mixer with the dough hook.
When is the dough ready? You must make sure it is not dry. If it is, add a little more water, a tablespoon at a time, until you have a smooth but slightly sticky dough.
Vintage Kitchen Tip
Always err on a wetter dough rather than a dry one. By wetter, I mean that you add an extra tablespoon of water because you're not sure, not an extra half cup. The dough must be supple and manageable.

First rising
The dough must rest and proof (double its size) in a large bowl.
Carefully deflate it with your fist before stretching and forming it.

Forming the loaf
Make a rough rectangle with the dough the width of the pan you're using. Start rolling it from the long side (similar to cinnamon rolls), sealing it before making the next roll. This will prevent air bubbles from forming as much as possible during baking and creating holes in the crumb.

Loaf pan
Sprinkle the bottom of the pan with oats, polenta, or whole wheat flour. This will prevent the bread from sticking.
Kitchen Notes
- Organization: read the recipe first and ensure you have ingredients at the correct temperature, utensils and equipment needed, and enough workspace. This will make the process so much easier.
- Baking time: consider that all ovens and pans are different, even if they look similar. The baking time in my recipes is as accurate as possible, but it might take you more or less time. You can use a thermometer(like the OXO oven thermometer) to check that your oven is at the right temperature. I recommend tracking how your oven works and what tiny details you might need to adjust.
- Yeast: if the sponge doesn't bubble and/or puff up in some way, that means that it's not working, so don't go ahead with the rest of the recipe because the bread will not rise. Buy new yeast and start again.
- Resting time: it's important to let the yeast do its job and double the size of the bread dough. The place where you put the bowl has to be tempered, that is mild temperature. If it's too hot it will rise too quickly, and if it's too cold will not rise as much as it should. Both situations are not good. I sometimes put it inside the turned-off microwave or wrap the bowl in a blanket or sweater (yes, I do) when the kitchen is too cold.
- Kneading: knead the dough until soft and smooth yet slightly sticky. This is fine because, after the first rise, it will lose most of its stickiness. Knead for 10 minutes by hand or for about 8 minutes in the stand mixer because the gluten needs to develop for the bread to rise as it should.
- Storing: the bread keeps well for a week in the refrigerator and a month in the freezer. In both cases, make sure it's well-wrapped so that it doesn't dry out quickly. If freezing, I highly recommend slicing it first. That way, you can make fresh toast whenever you want. Otherwise, you will have to defrost the whole bread.
Related recipes you might like:


If you made this recipe and loved it, you can comment below and leave a 5-star ⭐️ review. Also, if you had issues, let me know so we can troubleshoot together.
You can also subscribe to our FREE email series 'Baking the Best' and our regular newsletter. Or follow and save my recipes on Pinterest.

100% Whole Wheat Sandwich Bread
Ingredients
For the sponge:
- ½ cup water, warm
- 1 tablespoon dry yeast
- 1 teaspoon honey
- 1 cup whole wheat flour, superfine or finely ground
For the dough:
- 1 cup milk, warm
- ¼ cup runny honey
- ¼ cup vegetable oil, or melted butter
- 4 to 5 cups whole wheat flour, superfine or finely ground
- 2 teaspoons salt
- 1 cup water, warm
Instructions
For the sponge:
- By hand, put ½ cup water, 1 cup whole wheat flour, 1 teaspoon honey, and 1 tablespoon dry yeast in a bowl and stir to mix. Leave for 10 minutes. The mixture will bubble and become spongy. If it doesn't look active, don't go any further; it means the yeast is not working.
- Stand mixer: mix the sponge in the mixer bowl directly.
For the bread dough:
- Stir the sponge and add 1 cup milk, ¼ cup runny honey, ¼ cup vegetable oil, 2 cups of the flour, and mix a little.
- Add 2 teaspoons salt and ½ cup warm water.
- Mix well and add 2 to 3 cups whole wheat flour until it becomes a dense dough, adding the rest of the ½ cup water as needed. You might not use all the liquid, maybe a tablespoon or two less. The batter will be thick but soft and not floury.
- By hand: turn onto a lightly floured counter and knead for 8-10 minutes. It will be a little sticky, but add flour only if necessary.
- Stand mixer: attach the dough hook and knead for about 8 minutes at medium speed, adding extra flour only if needed if the dough is not pulling out from the sides after 5-6 minutes.
- Put in an oiled or greased bowl, turn so that the entire surface is greased, cover, and let rise until it doubles in volume in a draft-free, tempered place.
- Transfer the dough to a clean countertop and punch down lightly to let out the gas.
- Divide the dough into two parts and sprinkle two loaf pans with oats or polenta.
- Form the dough into logs, rolling it (as for cinnamon rolls) but pressing the edges with each roll to ensure there are no (or very few) air holes when the bread is baked. The post above includes a video showing the step-by-step process to form the loaves.
- Put the formed logs in the prepared pans, cover, and leave to rise until doubled or very puffed, about 30 to 40 minutes. Being all whole wheat, this bread will rise significantly, very little in the oven so allow it to rise well this last time.
- Turn the oven to 350°F (180°C) about 15 minutes before baking.
- Bake loaves for about 50 minutes or until golden brown and dry, and the bottoms sound hollow when lightly tapped.
- Let cool completely on a wire rack before cutting.
Jo says
I love this bread. Who can resist soft, perfectly baked bread especially when made at home! A sandwich using 100% whole wheat bread - i can eat it all day.
Melanie says
Made this bread tonight, I couldn't wait for it to cool down... I ate it still warm, it was super yummy!
Tammy says
What a soft and beautiful loaf! There is nothing more comforting than homemade bread...beautiful recipe!
Veronika says
I love making homemade bread! There is something therapeutic about it. Going to try your recipe soon and will let you know how it came out!
Tristin says
I love a good wheat bread recipe and this one is fabulous. My bread came out perfect thanks to your easy to follow instructions. Thanks for this Paula!
Paula Montenegro says
Happy to hear that Tristin!
Leslie says
I love this whole wheat bread recipe! So perfect for EVERYTHING! Good tip on storing in the refrigerator too! Thanks!
Amanda Dixon says
I really love how this bread turned out! Unlike some whole wheat breads, this one had the perfect tender crumb, which is a must for me when it comes to bread. Love this -- will definitely make again!
Kathryn says
This is my new go-to sandwich bread! I always love buying whole wheat bread and I'm so glad I can make my own at home. Thank you for the easy step-by-step instructions- they were very helpful!
Candice says
So much easier than I thought it would be... and it came out great! Will be making this one again soon. Thanks for the great recipe!
Marta says
I love this bread for my sandwiches. It's simple to make and tastes amazing.
angiesrecipes says
Perfect! Although it's 100% wholewheat, it looks very soft and fluffy.