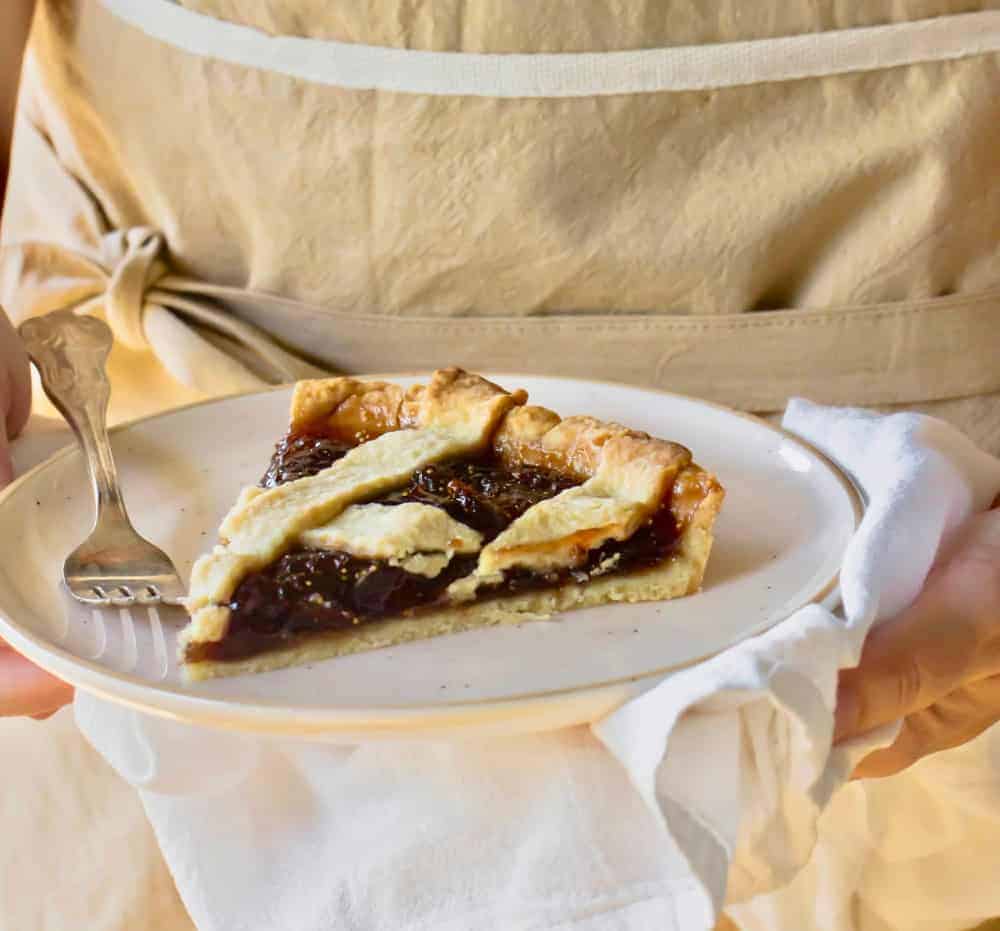
This is a wonderful fig tart. An Italian crostata recipe, it's a simple sweet treat to eat with a cup of coffee or take on a picnic. It lasts for a few days, and you'll find the step-by-step instructions for making both the sweet dough from scratch and homemade fig jam (but you can use store-bought).
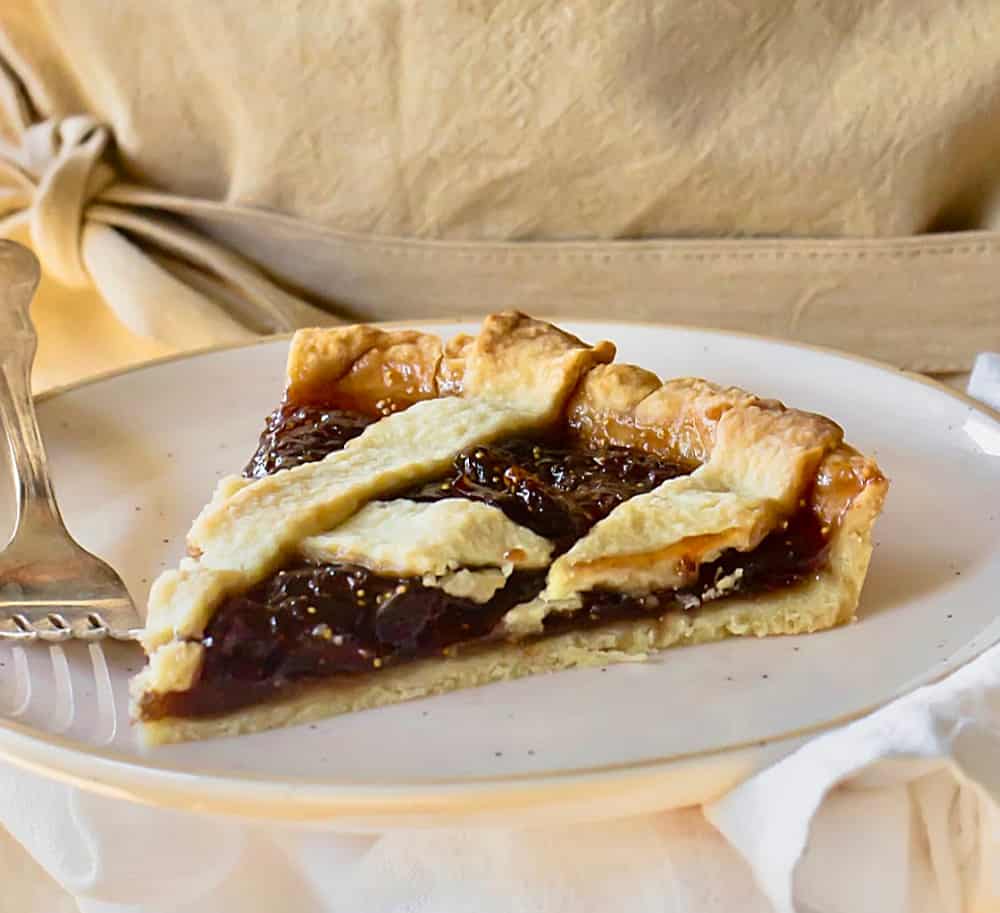
Lattice pie or crostata
I've been making this tart, or crostata, for a long time with different fillings.
I have a strong Italian heritage as many of my recipes do, and uses the traditional pasta frolla dough. Lattice pie is wildly popular, but traditionally made with quince paste.
Today we're changing that and using homemade fig jam (made by my mom!) and using what is probably my favorite sweet dough, the one I use for the popular lemon ricotta pie, which is easy to make and versatile.
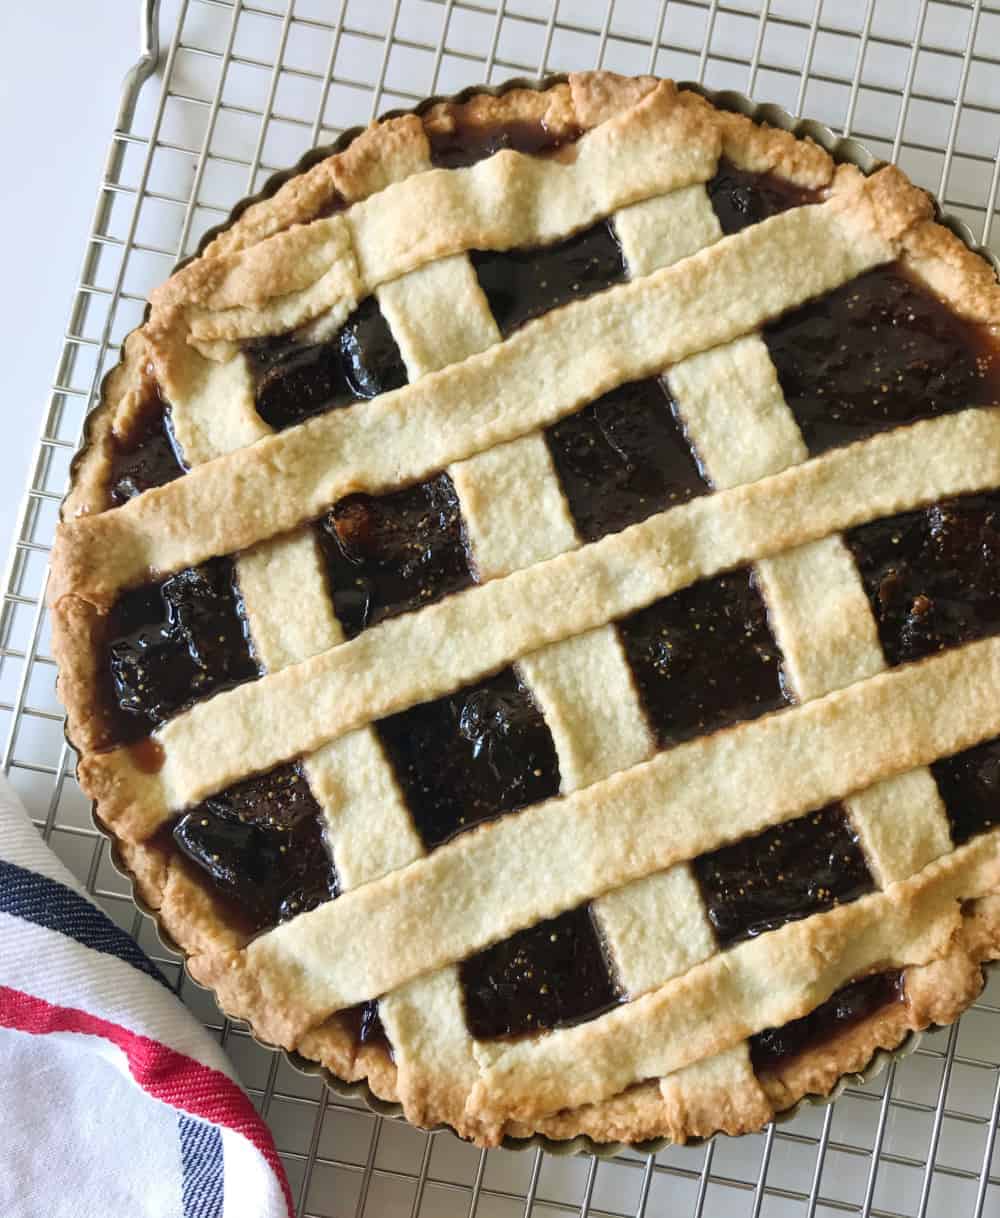
Lattice is the name given to the strips of dough placed in a crisscross pattern that leaves diamond shapes in between and is used in many tarts or pies.
Pasta frolla or sweet Italian crust?
It's a simple sweet dough made with flour, butter, egg, and sugar. Flavorings are sometimes added. You might also find some with a pinch of baking powder among the ingredients.
This dough is as easy to make as any other sweet dough recipes. I use the processor for the first part, but you can easily make it by hand.
Tips for making pie dough:
- Butter, have it cold and in pieces. This is very important so it mixes a bit with the flour but is not completely incorporated into it. Some pieces of butter the size of peas should remain to ensure flakiness when baked. I use a food processor for this part, but you can easily make it in a bowl with a dough cutter or use your hands, always being careful not to overwork the butter and heating it up too much (due to warm hands). If that happens, return the bowl as is to the fridge for 10 minutes, and then continue.
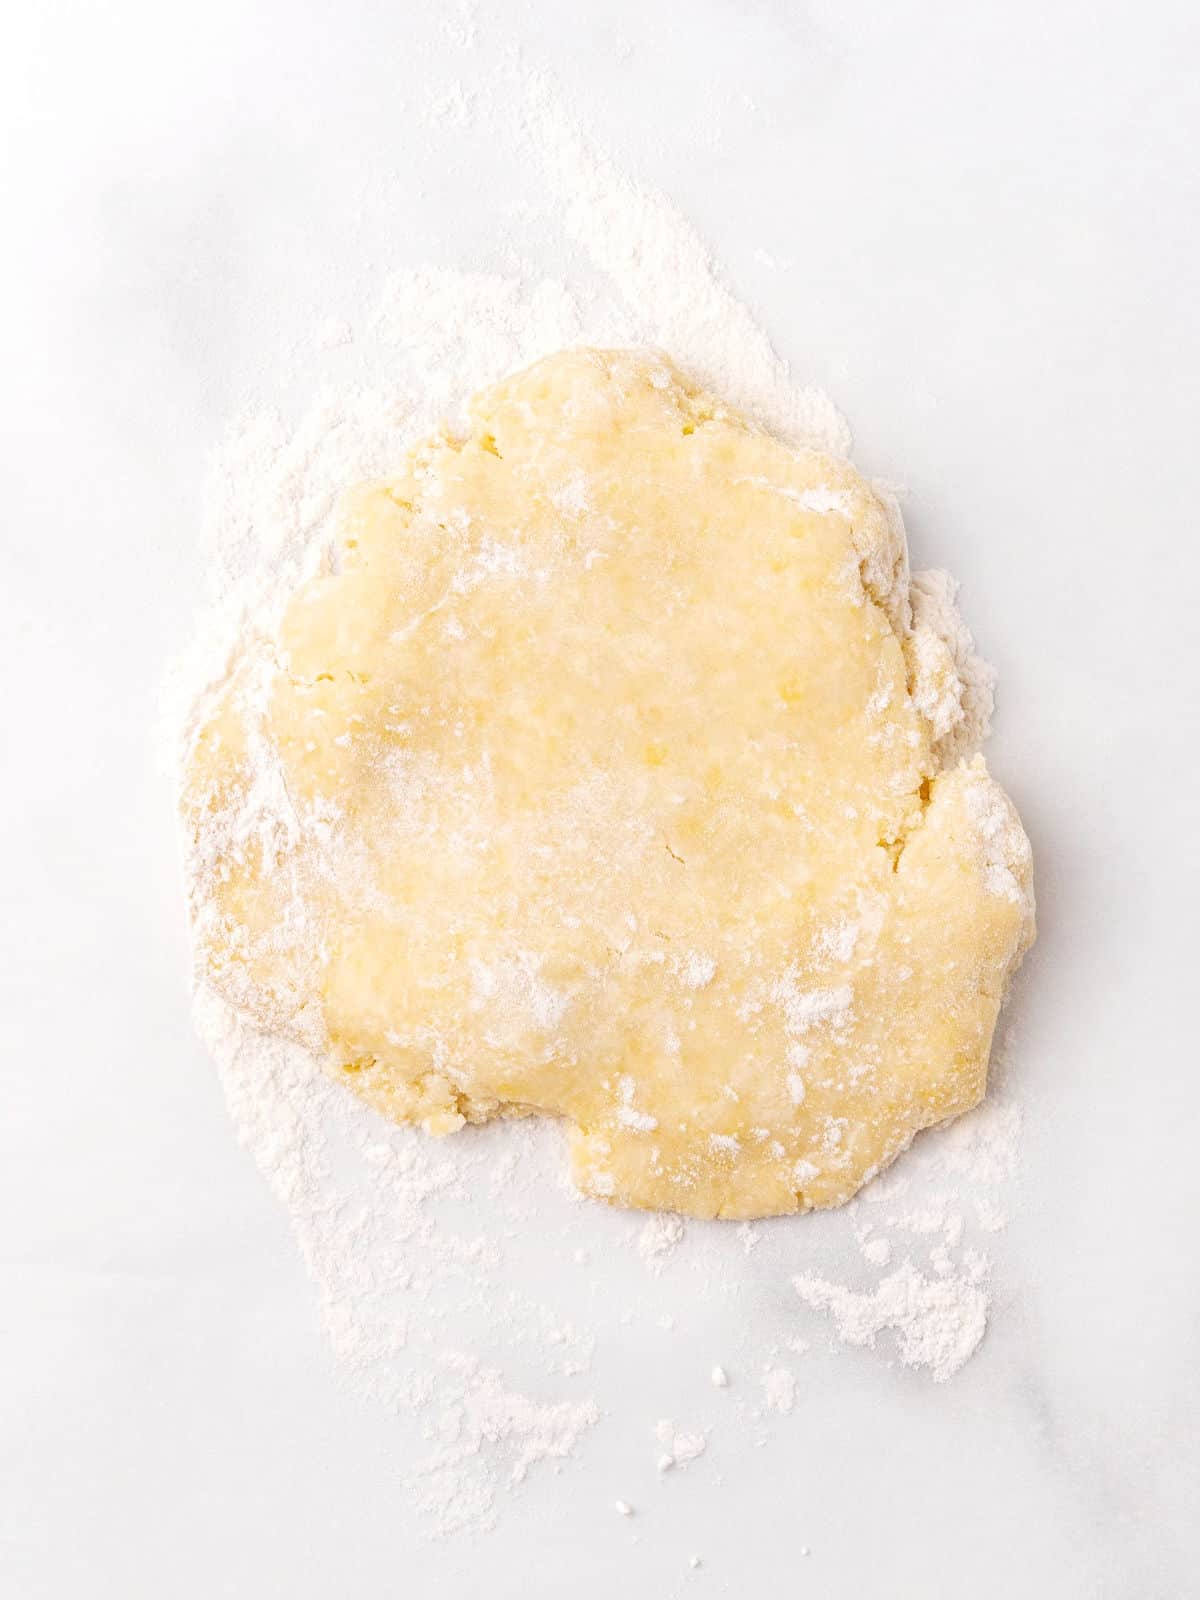
- Don't overwork the dough after adding the flour. This is a critical step if you want a tender, light dough. Once the flour is added, don't overwork it, it doesn't need to be kneaded. It needs to be mixed until there are no visible streaks of flour (image below).
- Always let it rest in the fridge before rolling it. This step is essential. Even if you didn't work it much when assembling it, the dough will have developed some gluten (great for bread for example but not for doughs), so it needs to relax in the cold refrigerator before it is rolled. Otherwise, it will be difficult to stretch and too elastic, making it shrink as it bakes and be tough.
Steps for making tart dough:
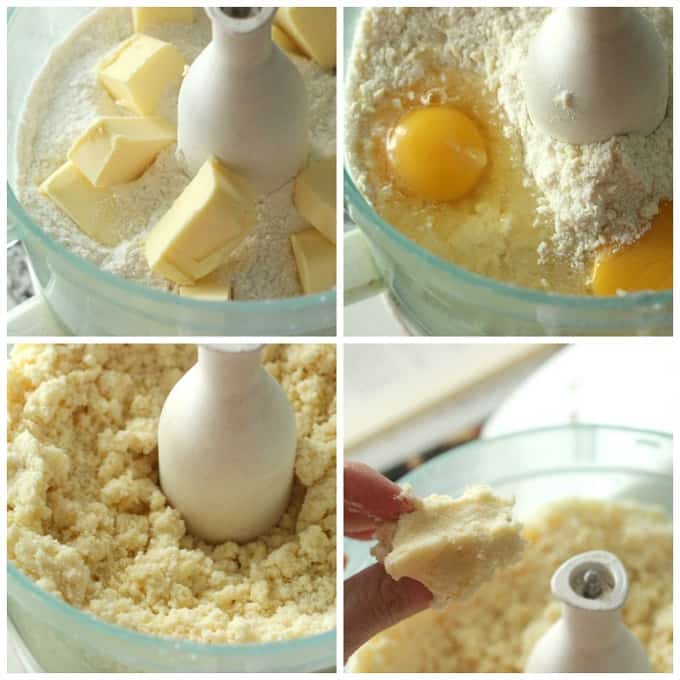
- Mix cold butter (image 1) with dry ingredients until you have a crumbly mixture, with butter pieces no larger than peas.
- Add egg (image 2) and mix just until it moistens the flour mixture but don't let it turn into a ball in the processor (image 3).
- To test if the amount of liquid is right, press a bit with your palm and if it comes together it is done (image 4).
The final dough should come together easily.
Organize your space
Make sure you have ample space in your counter, some flour ready to lightly dust the surface, the rolling pin, the pan and, ideally, a cornet (dough scraper or bench knife) to help you lift it after it's rolled.
The dough should be rolled a few inches larger than the tart pan to easily fit into the pan.
Then it should be blind baked, which means that the dough is pre-baked so that the crust dries a bit, and when the filling is added, it doesn't seep into the dough, or at least not much (instructions in the recipe).
Rolling the dough
Always start with cold dough.
Keep it in the fridge up until you have everything set up. You want to keep it as cold as possible while rolling it so it's easy to manipulate and doesn't break when you line the pie pan.
Keep in mind that sweet doughs (this or similar ones with eggs and sugar) are more delicate than, for example, a basic pie dough made with just flour, butter, and water.
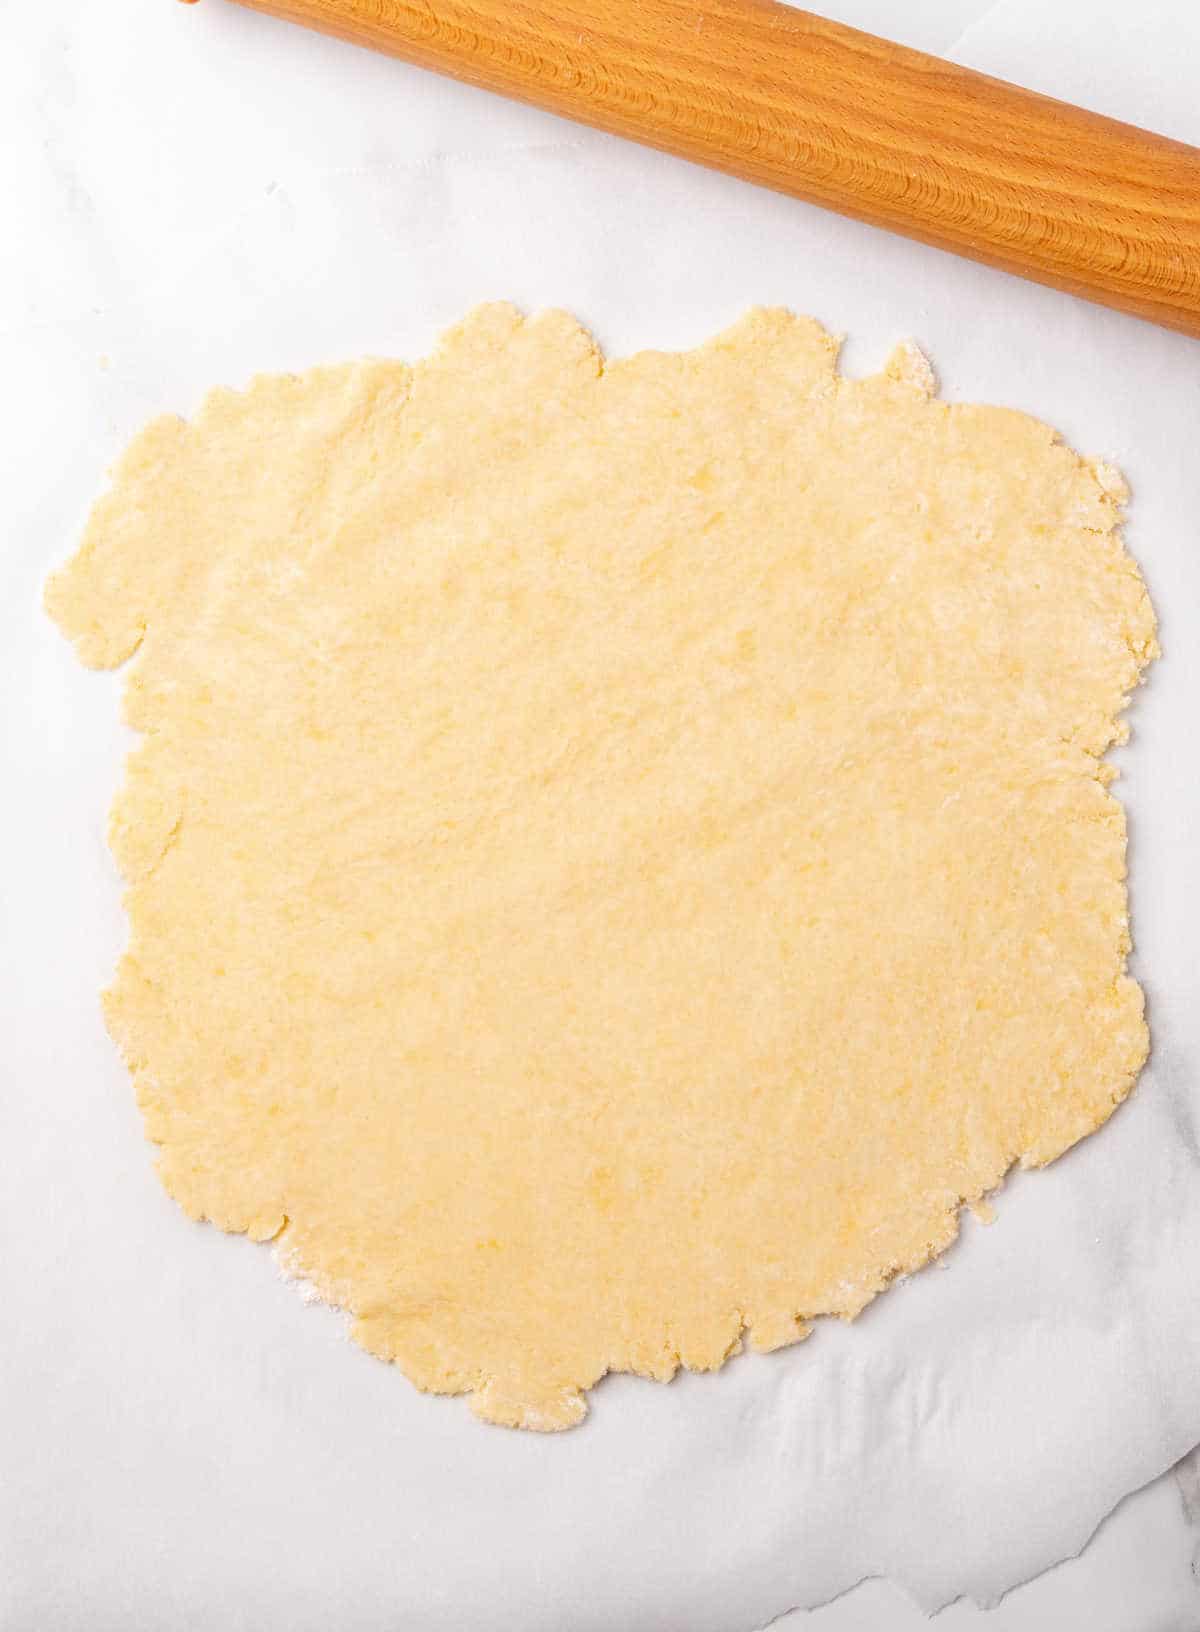
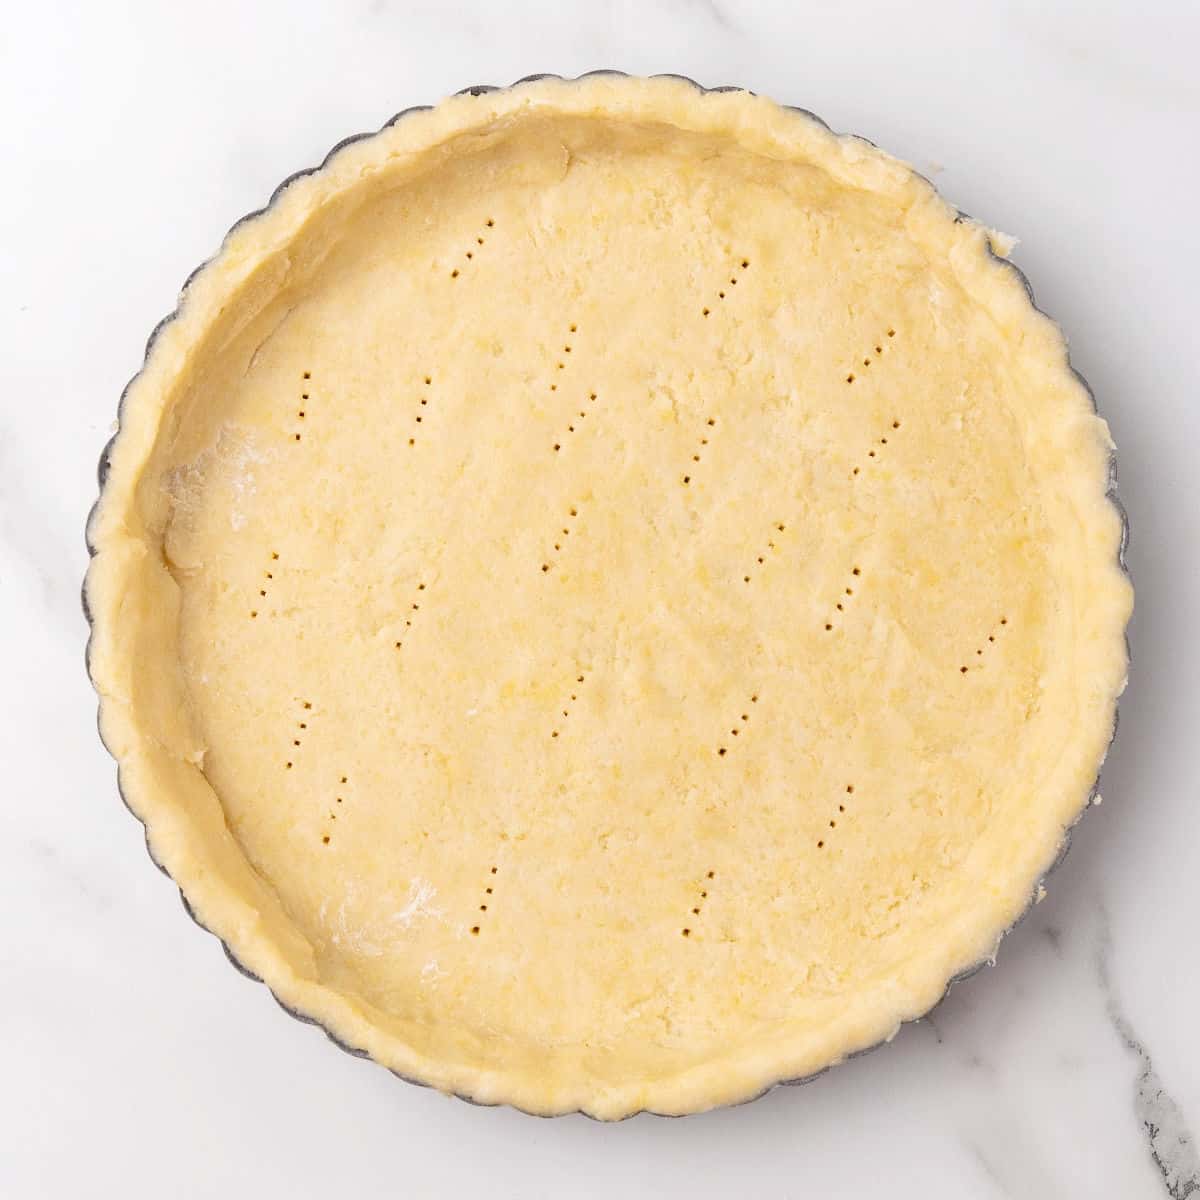
Fig jam filling
You can fill it with jam, sweet paste, and even Nutella or dulce de leche.
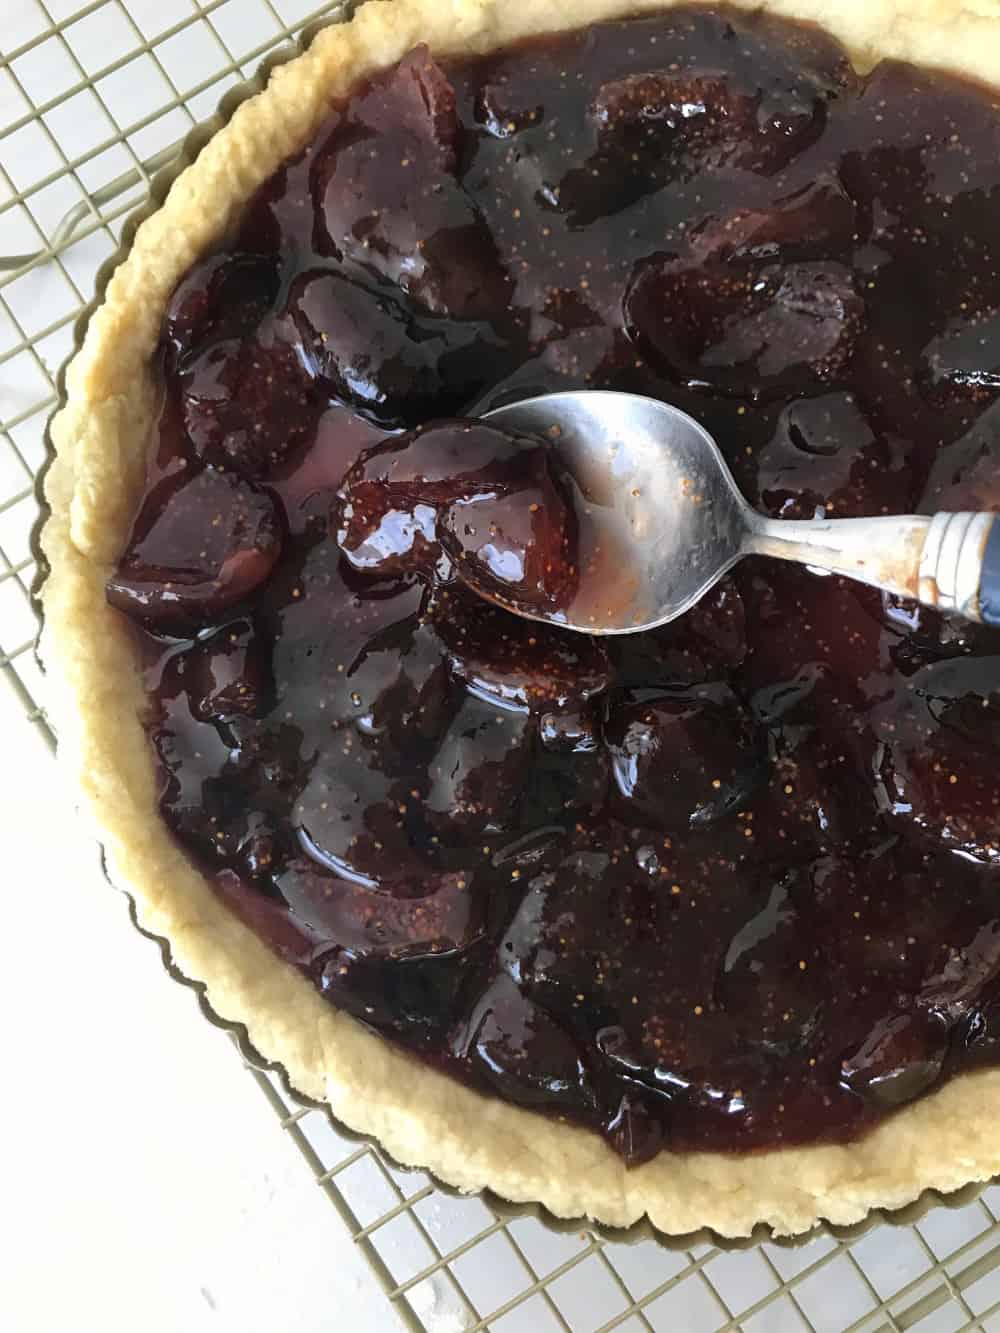
The traditional here is with quince paste, but today I'm using my mother's homemade fig jam (recipe below). She makes some for me yearly and I usually eat it directly from the jar or with cheese.
The figs are in big chunks, and the syrup is sticky, sweet, and plain awesome.
So a fig tart or crostata was dancing in my mind, and it finally happened. Let me tell you, it's a phenomenal combination.
Lattice top
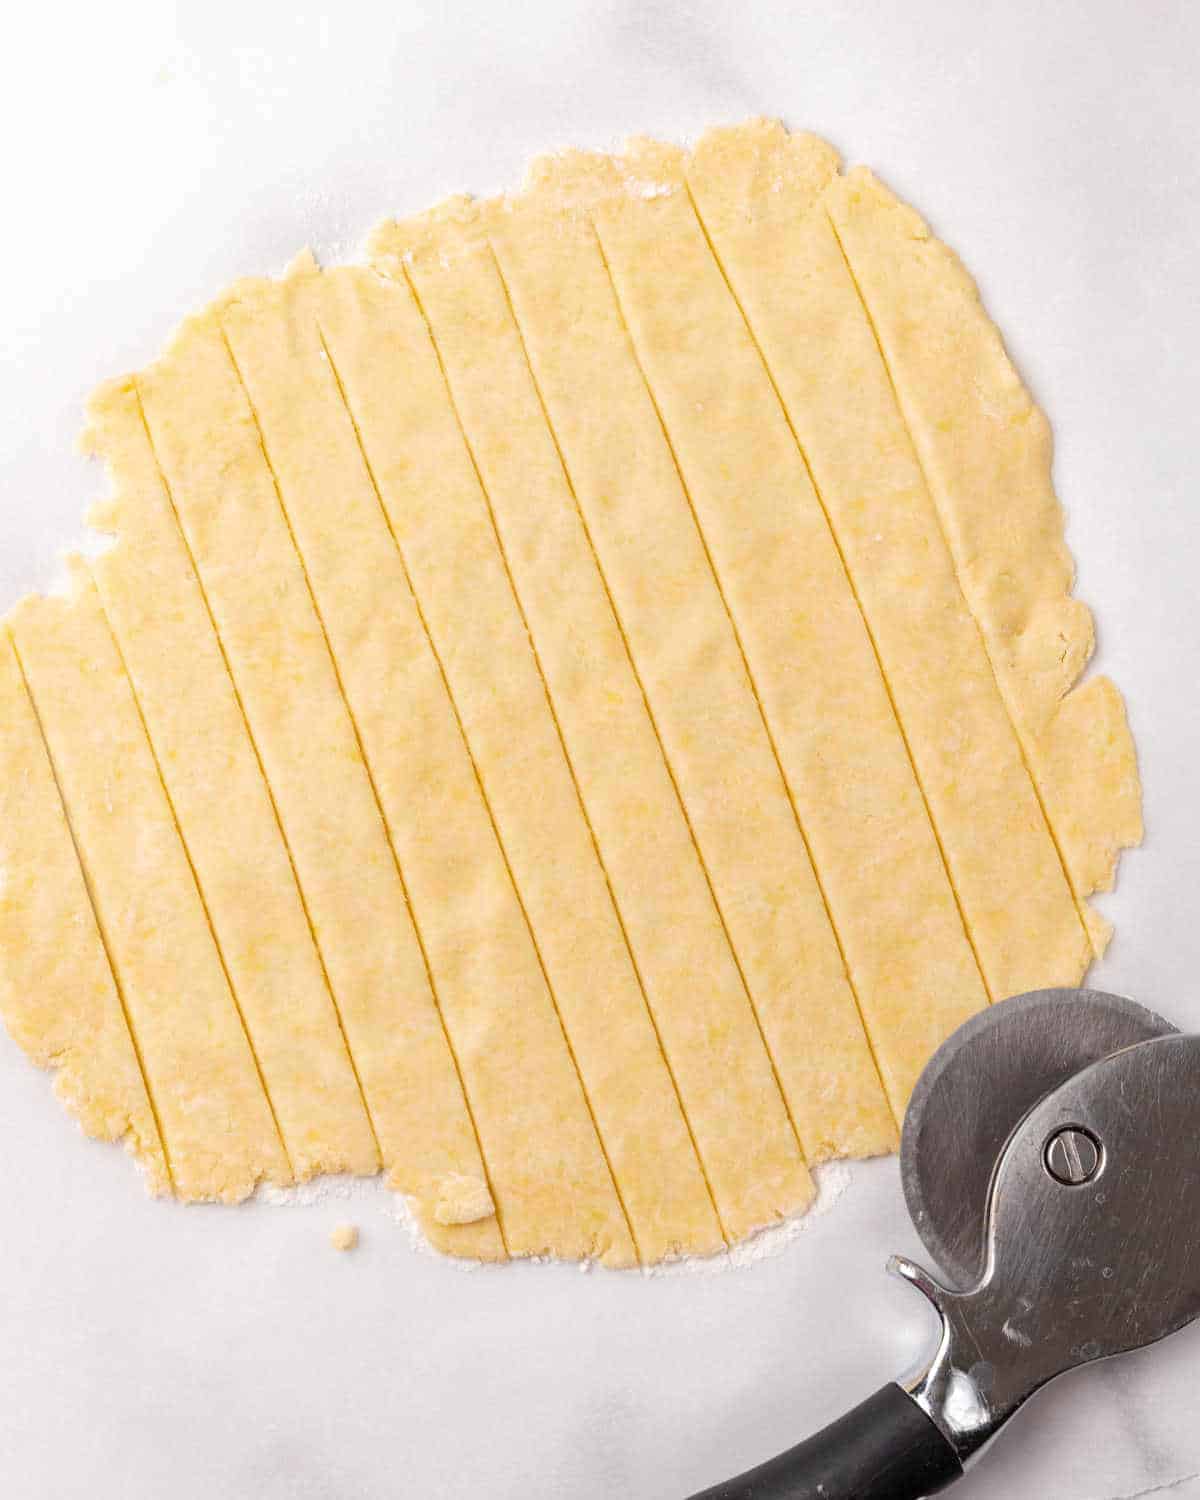
Finally, the lattice, those strips of dough that are put on top of the filling in a crisscross pattern.
They are easily made by rolling dough and making strips with the pizza cutter (my choice). You can use a large kitchen knife too. My lattice is always rustic. Always. I never take the time to make perfect strips. It is what it is.
Kitchen notes
- Organization: read the recipe first and ensure you have ingredients at the correct temperature, equipment, and enough workspace. This will make the process so much easier.
- Baking time: consider that all ovens and pans are different, even if they look similar. The baking time in my recipes is as accurate as possible, but it might take you more or less time. You can use a thermometer (like the OXO oven thermometer) to check that your oven is at the right temperature. I recommend tracking how your oven works and what tiny details you might need to adjust.
- Dough: make sure you follow the instructions carefully for making the pie dough and blind baking it. You'll find more tips in the note section of the recipe below.
- Fillings: you can use a homemade jam or a good store-bought one. The quality will add (or subtract) from the final product. Quince paste, fig jam and dulce de leche are my favorites.
- Keeping: this type of tart keeps for a few days at room temperature. It can also be frozen and will last, well wrapped, for a month.
Related recipes you might like:
Before you go
If you made this recipe and loved it, you can comment below and leave a five-star ⭐️ review. Also, if you had issues, let me know so we can troubleshoot together.
You can also subscribe to our FREE email series 'Baking the Best' and our regular newsletter. Or follow and save my recipes on Pinterest.
As an Amazon Associate, I earn from qualifying purchases. Read my disclosure policy.
Fig Crostata (fig jam tart)
Ingredients
For the dough:
- 2 ¼ cups all-purpose flour
- ½ cup sugar
- pinch salt
- 1 cup unsalted butter, cold and in pieces
- 1 egg
- 1 egg yolk
For the homemade Fig Jam:
- 2 pounds fresh black figs
- 3 cups sugar
- 2 strips orange or lemon peel, or one of each
- large pinch ground cinnamon
- ½ to 1 cups water
Instructions
For the dough:
- In a food processor pulse a few time to mix 2 ¼ cups all-purpose flour, ½ cup sugar and pinch salt.
- Scatter 1 cup unsalted butter pieces on top and mix until you have butter the size of peas.
- Add 1 egg and 1 egg yolk and process using on/off until it starts to come together. Don’t let it form a ball. It should come together when you pinch it with your fingers.
- Turn it onto the counter and press it together to form a flat disk. Or do like I do, and put it inside a plastic bag and aid yourself with the bag while pressing your knuckles until it comes together. That way you don’t touch the dough unnecessarily.
- Refrigerate for 1 hour and up to 2 days.
- When ready to bake, cut the dough in two pieces, one larger than the other (about ⅓ of the amount for the small piece) and roll the large one on a lightly floured counter until a few inches bigger than the pie plate. Keep the small piece covered and refrigerated.
- Carefully line the pan and pinch the edges. You might need to cut a few overhanging pieces.
- Prick the bottom and refrigerate or freeze (better).
- Preheat oven to 350ºF (180ºC).
- To blind bake: cover the dough with a large piece of aluminum foil or parchment paper and add weight: ceramic baking balls, uncooked rice, beans, chickpeas, flour. Anything that will hold the paper and can go into the oven.
- Bake for 15 minutes and carefully lift the paper with the weight. The dough should be somewhat dry and have held its shape. Bake it for another 5-10 minutes, until no streaks of butter remain in the bottom and the surface is dry. Let it cool on a wire rack while you prepare the lattice.
Assembling the tart:
- Fill the pre-baked tart dough with fig jam, covering the whole surface but don't overdo it. Some jam will not be used.
- Roll out the small amount of dough that was in the fridge on a lightly floured counter to a thickness of half an inch or so. You want the center to be an inch larger than the pie plate. Remember you need two of each length.
- With a pizza wheel or a large kitchen knife, cut strips and make a lattice on top of the fig jam.
- To do that, begin with the longest strip in the middle and work your way to the edges, using shorter strips as you approach the sides. Pinch the edges to seal both doughs.
- Repeat to make a crisscross pattern. Pinch together broken strips or if you miscalculated and are short. Rustic is the way to go.
- Bake for about 30 minutes, until the dough is golden and the jam bubbly.
- Let cool on a wire rack, remove from the pan and serve plain or with a dollop of whipped cream.
- Leftovers can be kept at room temperature for a day or two, wrapped in plastic or under a cake dome.
For the homemade fig jam:
- Have a large saucepan ready.
- Wash 2 pounds fresh black figs, cut out stems and cut them in 3-4 pieces each, depending on their size. We need large chunks not bite-size pieces.
- Put them in the saucepan and add the whole amount of sugar. Leave them to macerate (release their natural juices due to the sugar added) for ½ an hour.
- Add ½ cup water, 2 strips orange or lemon peel and large pinch ground cinnamon.
- Put the saucepan over low heat, really low heat and stir so that ingredients mix a bit, but careful not to break up the fig pieces.
- Stir every 15 minutes or so until it thickens and the liquid starts to become syrupy. It does need to be somewhat liquid, you don’t need for all the water to evaporate and leave you with a thick syrup. Because this will mean the figs are too dry.
- It will take 50-60 minutes approx.
- You can add an extra ½ cup of water and that will speed up the process but the figs will disintegrate more (maybe you don’t mind) and you’ll be left with a whole lot of fig syrup. Your call.
- While still hot put in sterilized jars and keep refrigerated. For sterilizing jars this is a good tutorial with different methods. Use sterilized jars if you're planning on keeping them for a long time (always refrigerated). They last for a week or so if using regular, unsterilized jars.


Daniela Vella says
I'm making it now how long do i cook it for when i put the figs and rest of dough on ?
Paula Montenegro says
Hi Daniela, you have to cook it for another 30 minutes or so, until the crust is baked and golden.
Juliana says
Amazing step by step! Great recipe, I'm gonna make it soon.
ali randall says
What a beautiful tart. I love love fogs and anytime in a dessert I want a piece. This would be ideal for the holidays!
David Scott Allen says
It is just about time for fresh figs here - I can't wait to try this Paula! I made a fig tart last year and it has a wonderful buttermilk later. Love the darkness of this one!
Paula Montenegro says
Hi David, glad you like it! Figs are such a great part of the summer season.