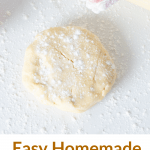

The perfect shortcrust pastry (or basic pie crust) is not hard to make if you follow the instructions in this post. This recipe needs only three ingredients (not counting water) and some resting time in the refrigerator. Use it for sweet and savory pies, quiches, and galettes. Homemade pie dough makes all the difference.
SAVE THIS RECIPE
A versatile dough
Pie-making season is here, and we're ready with homemade shortcrust pastry (pate brisée in French), a simple pie crust suitable for different fillings from mushroom quiche to tomato galette.
This is the basic recipe, the only one you'll ever need. It's very neutral, meaning it can go for savory and sweet pies. I like to use it for sweet fillings, where a sweeter dough might add too much sweetness.
What is shortcrust pastry?
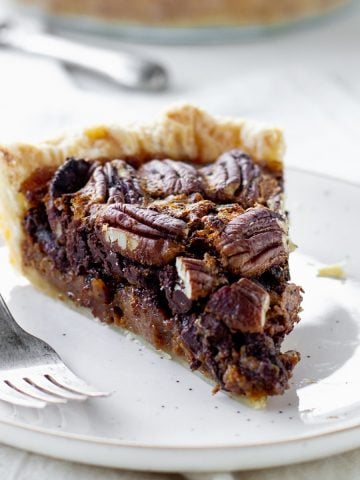
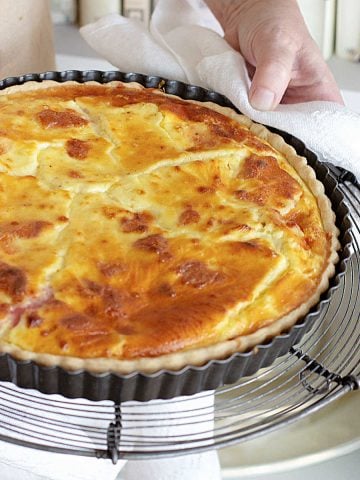
It's a basic pie dough with few ingredients that can be used for sweet and savory dishes, from ham cheese quiche to bourbon pecan pie.
Shortcrust means the fat content (butter in this recipe) is high, and the baked result will be flaky and crusty. In French, it would be pate brisée.
Different from sweet shortcrust pastry that's used exclusively for sweet dishes.
Step-by-step VIDEO
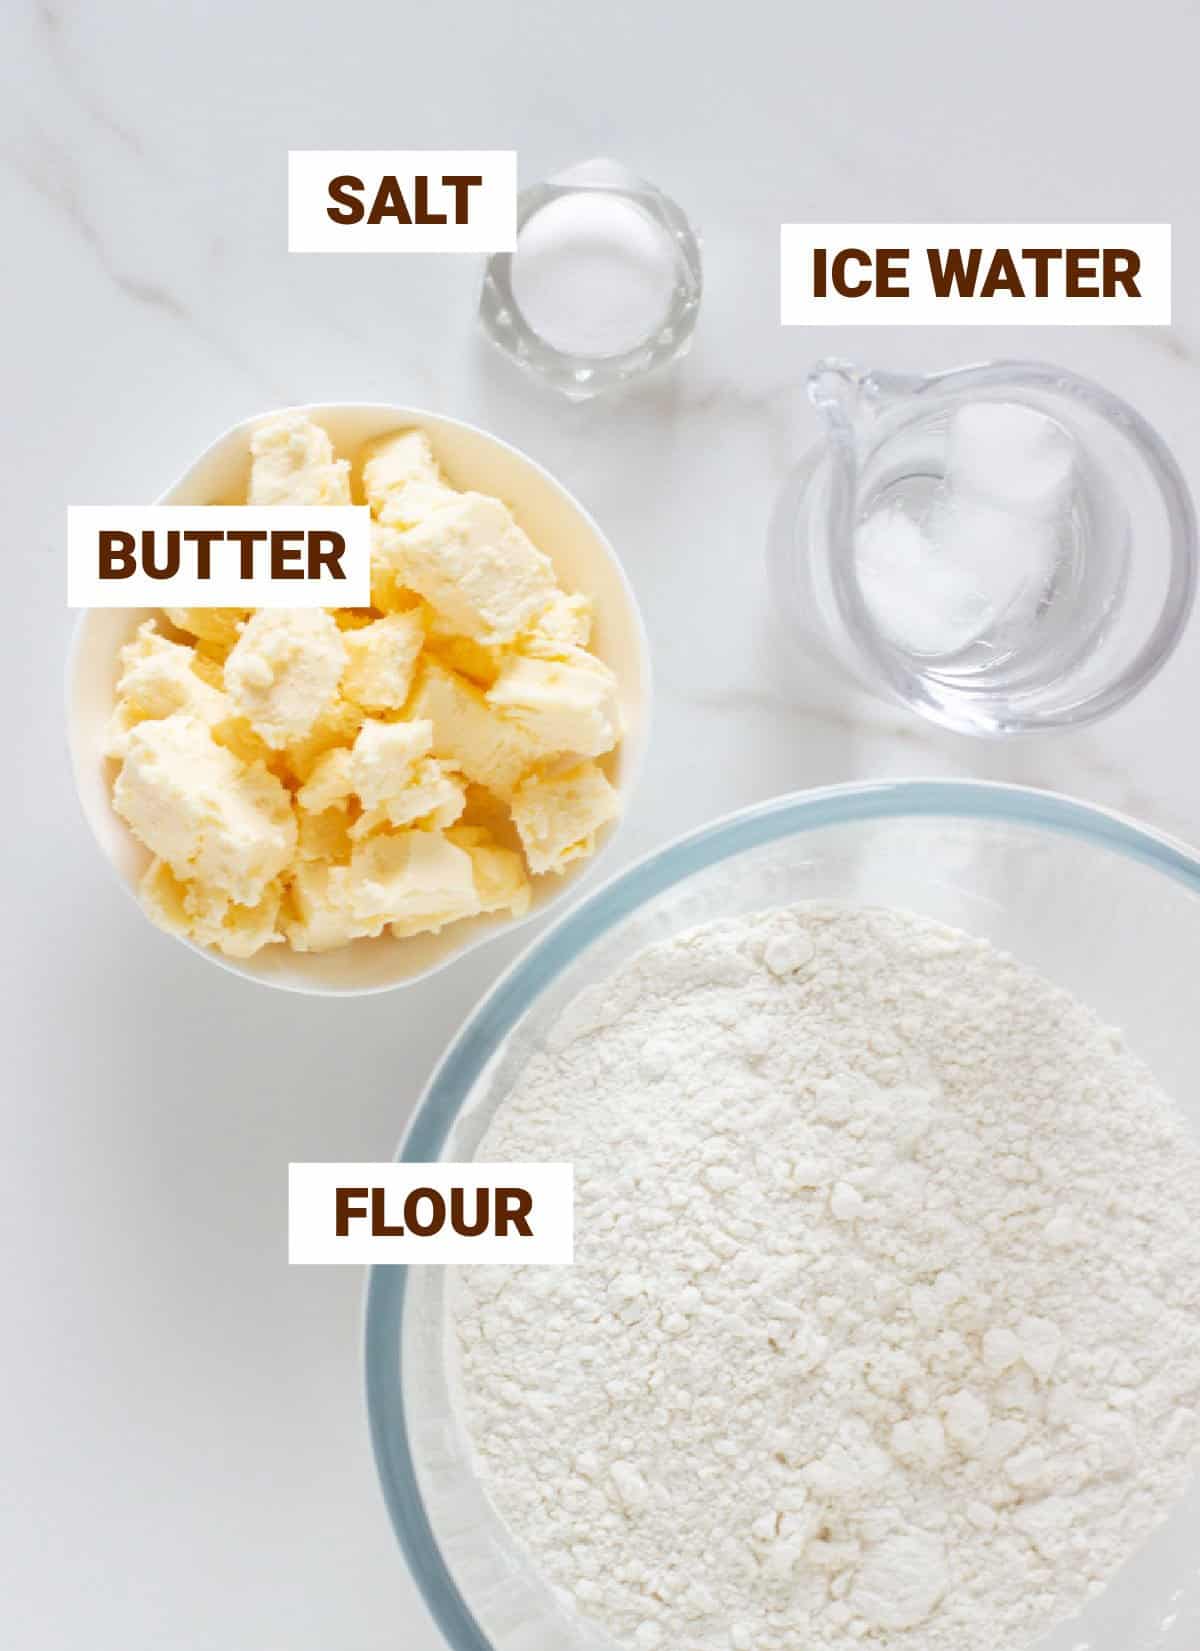
Ingredient list
It has only three ingredients, not counting water.
- Unsalted butter.
- All-purpose flour.
- Salt.
- Ice water: add water to a glass with ice in it and let it stand for a few minutes.
Quantities are listed in the recipe card towards the end of this post. The Ingredients page has more details and lists the brands we use.
Steps to make pie crust
The step-by-step recipe here is made by hand.
I strongly believe that learning this way is how we learn the most. If you know how to make pie crust by hand, making it with a mixer is a piece of cake. But if needed, you can always make it with a bowl and a spoon.
You can use a stand mixer with the paddle attachment, but be careful not to overwork it once you add the flour.
If you mix it too much, the gluten develops, which is not good. The dough will not stretch as it should, and the result will not be tender and flaky.
- Have all ingredients measured and ready. Make sure you add the ice to the water and that the butter is as cold as possible.
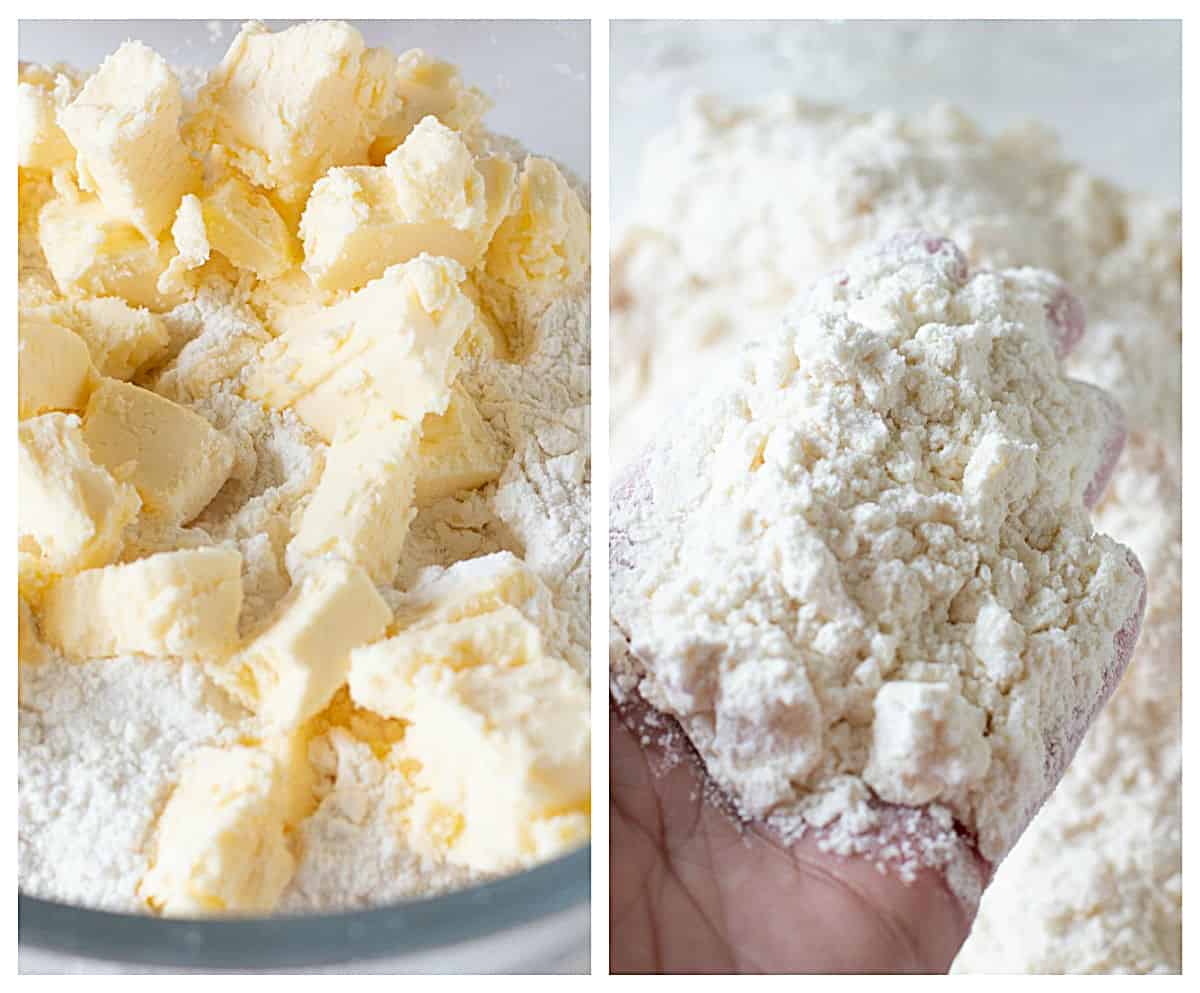
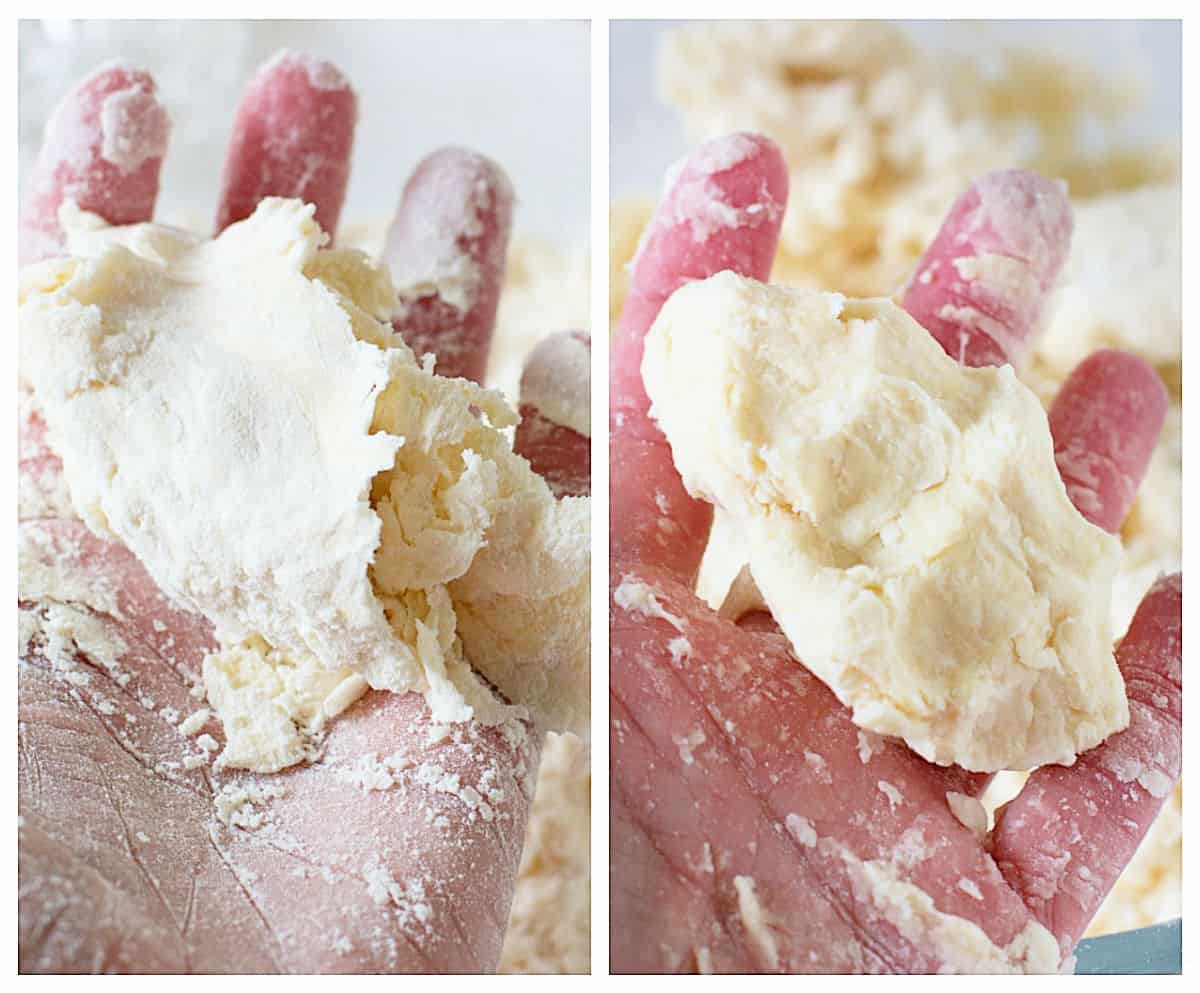
- Mix flour with salt and add the cubed butter (image below, left).
- Mix with your hands, taking the time to break the butter cubes and mix them with the dry ingredients. This will take a few extra minutes if you use almost frozen butter. The mixture will be uneven, with different sizes of butter pieces, but as a guide, they should not be larger than red beans (image below, right).
- Add ice water, a few tablespoons, and mix with a fork and then with your hands. Add some more water and stir again.
- The amount should be enough for a cohesive dough that comes together when pressed in your palm. The image below on the left needs more water, and the one on the right is fine. You should not have a crumbly dough.
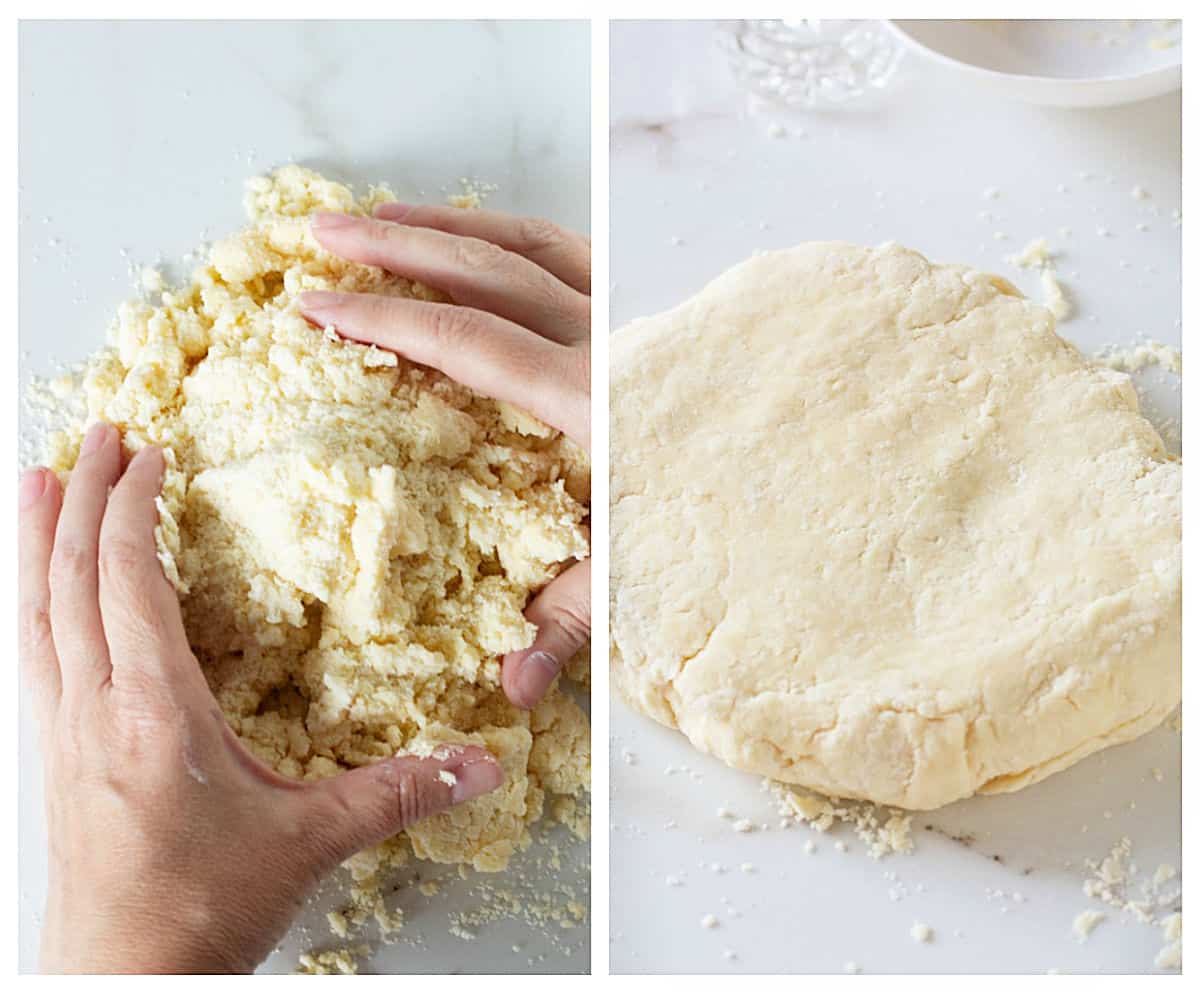
- Give it a few turns in the bowl, and turn the mixture onto a clean surface.
- Bring it together, giving it a few turns, until you have a dough ball. You must try to touch it as little as possible but have a dough that comes together and can be rolled. Don't knead it as you would bread.
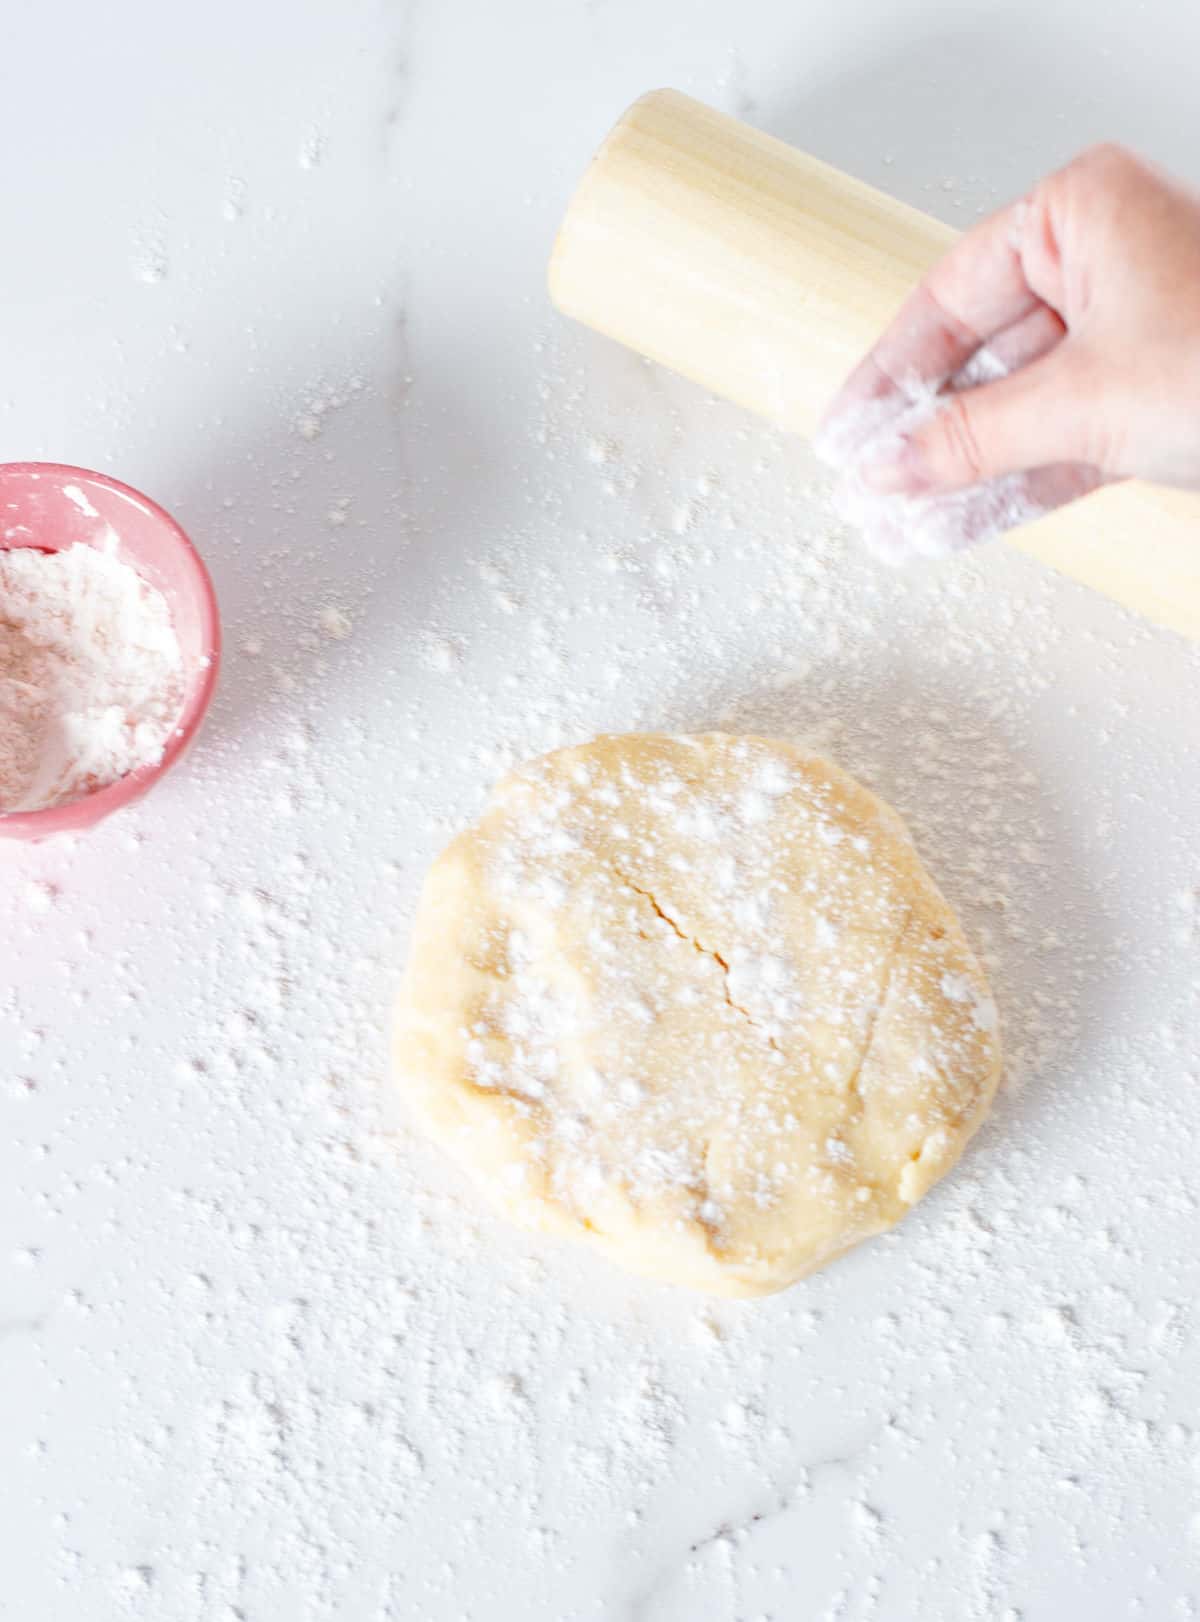
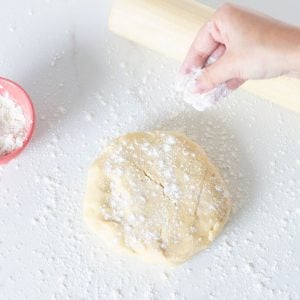
- Flatten into a disc (image below).
- When you have a smooth flat round of dough, wrap it in plastic, making sure no spots are left open (image below). This is important so the dough stays soft. If air enters into contact with an unwrapped part of the dough, it will form a dry crust. If this happens, cut off that dry spot before rolling.

Resting time
The dough needs to rest in the refrigerator for 1 hour or in the freezer for 20 minutes.
After the resting period, you're ready to roll!
Or, you can freeze this shortcrust pastry for up to a month. Wrap it well, label it with the date and freeze it.
IMPORTANT: this is an essential step if you want the pie dough to roll easily and be tender and crisp after it's baked. The resting time allows it to relax, making it easier to roll without stretching.
Defrosting frozen dough
For best results, defrost or thaw it in the refrigerator. It will take hours.
I do it from one day to the other. Simply place the wrapped packet with the frozen dough in the fridge.
You can defrost it at room temperature if you're in a hurry. Let it reach a point where it's still very cold but can be rolled.
Be careful it doesn't get too soft because it won't give you the tender and flaky desired result. You should roll it out while still very cold.
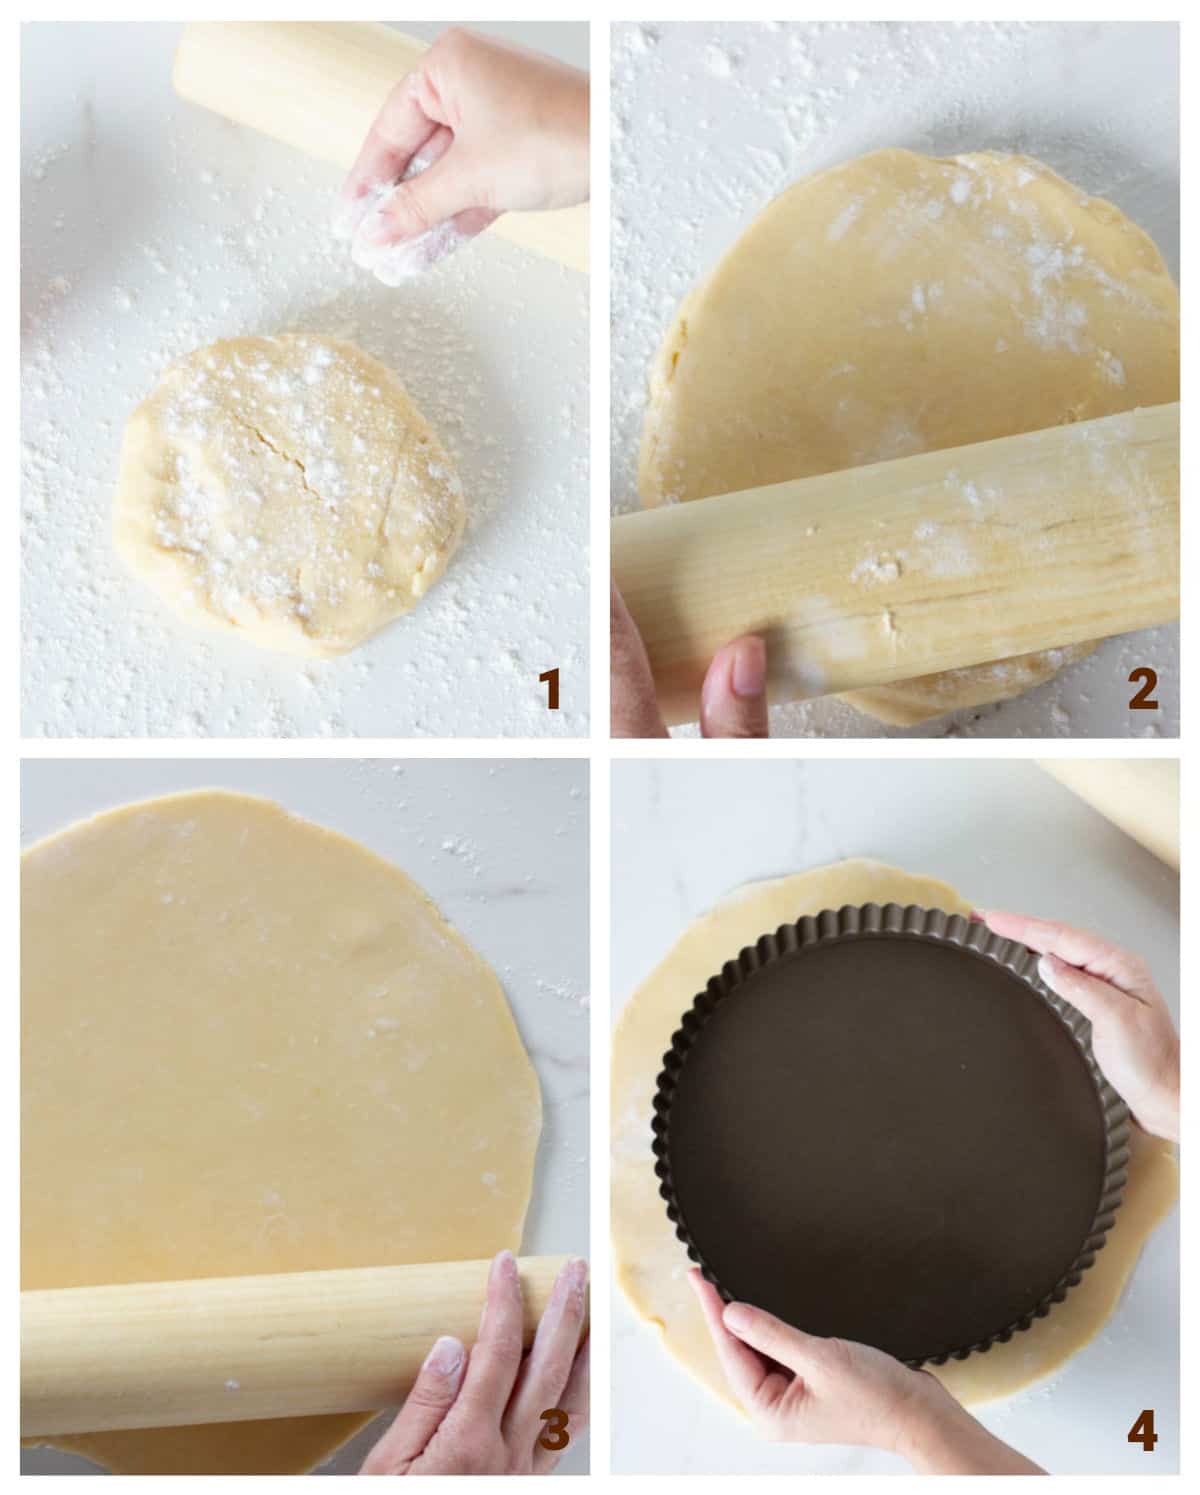
Rolling the crust
This is the second part of this recipe. You have your shortcrust pastry and want to bake a pie or tart.
Lining the pan
This basic pastry or pâte brisée is suitable for any pie pan but works best in metal pans with removable bottoms. With taller or shorter sides depending on what recipe you're making.
WATCH THE VIDEO TUTORIAL >>> Rolling and lining pie dough.
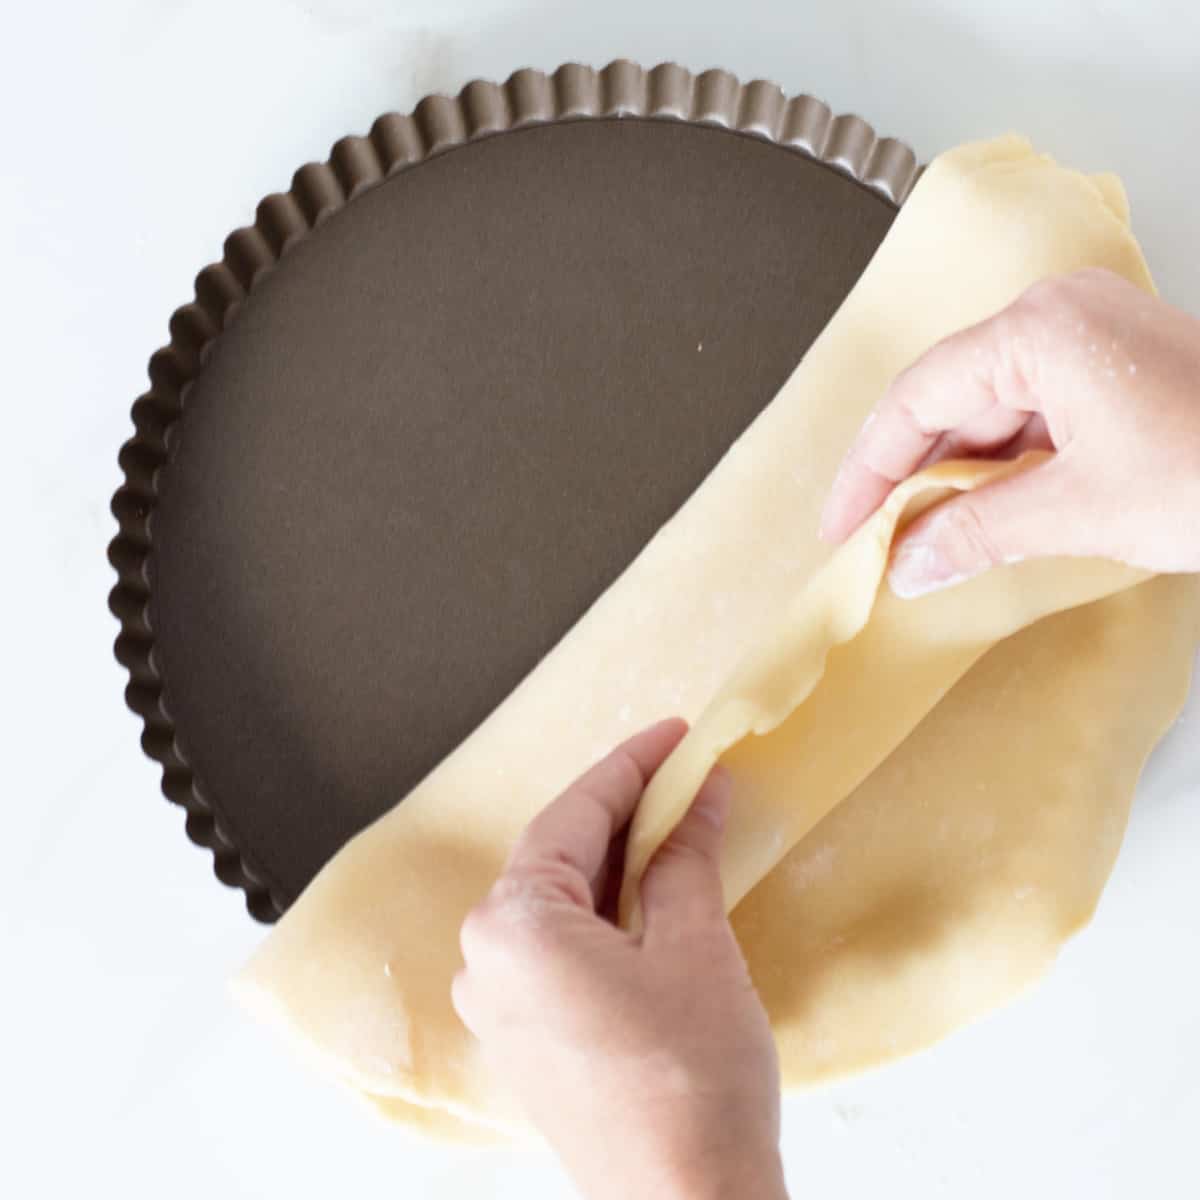
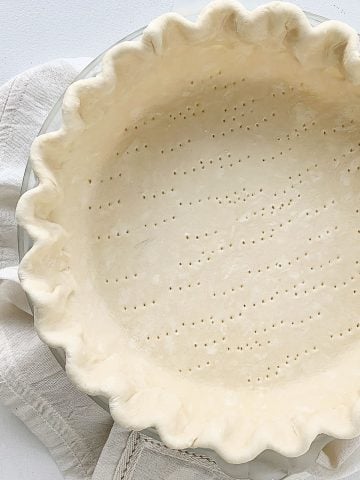
- Work quickly: once you have the rolled pie dough to fit your pan, fold it in half, lift it with both hands, and place it in the middle of the pan.
- Unfold the dough to cover the whole pan, and let it ease into the pan, don't stretch it to fit. This is important, so the dough shrinks as little as possible during baking. Help by adhering it to the sides with your hands, but never stretching it. Remember that.
- Excess pastry: the final lined pan will have some excess pastry around.
Blind baking
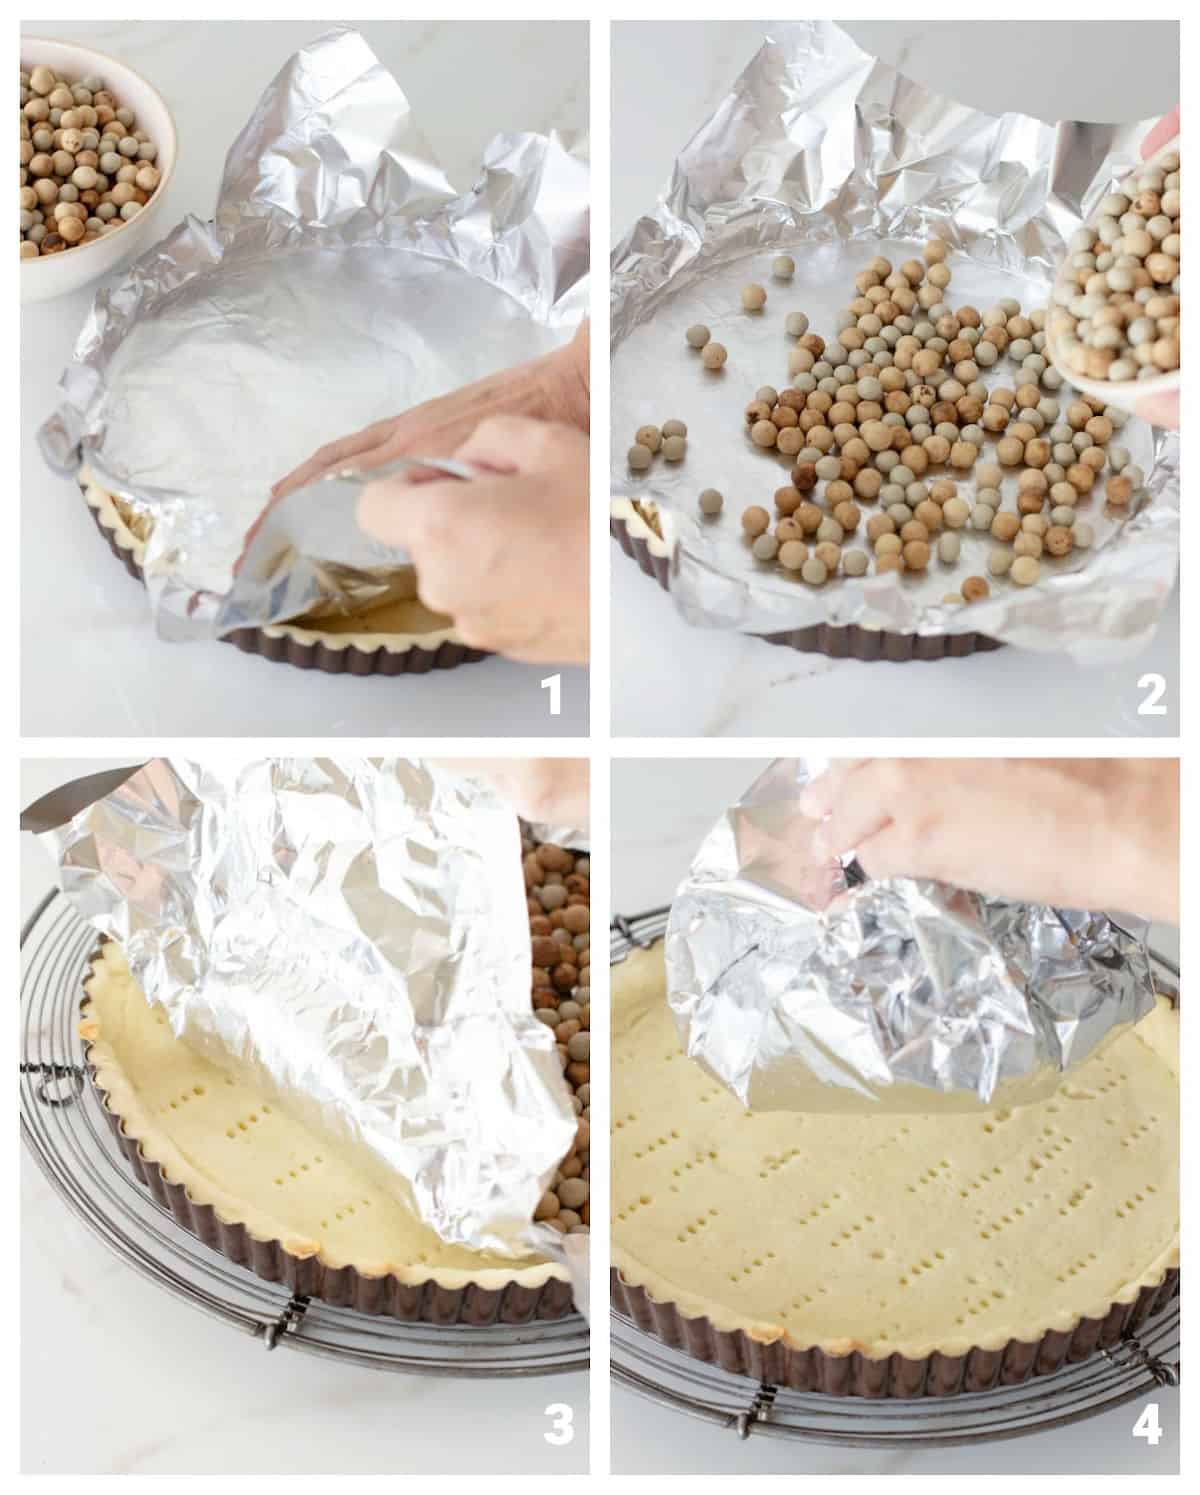
Blind baking is pre-baking the dough with weight on top. It is called blind because the raw pie dough is completely covered with paper (aluminum foil or parchment paper).
Why is this step recommended?
- To prevent a soggy crust: some fillings tend to seep into the unbaked dough while baking, so this step ensures that the dough develops a dry layer before the tart is filled and is not soggy after it is baked.
- To keep the shape: if left to chance without refrigerating, pricking, and blind baking, the pie dough will puff and shrink as it bakes. We don't want that. We want it to keep its shape and have enough space for the filling.
How to blind bake a crust
Preheat the oven to 350°F and remove the lined pan from the refrigerator or freezer (always my first choice).
- Cut a piece of aluminum or parchment paper larger than the tart pan. Cover the cold dough with it, adjusting it so that it takes the shape of the dough. You can also use parchment paper, but it's usually coarser and more challenging to make it take the shape of the pan and cover the dough well.
- Add weight. I use ceramic pie weights that you can buy online, but raw grains and legumes, such as beans, lentils, rice, or even flour, can be used. Simply fill the aluminum paper with flour or rice or whatever you're using until you have added a layer of weight that will be enough to keep the paper down during baking.
- Bake for 15 minutes. It might be a few minutes, more or less, depending on the type of pie crust, but the idea is to let the dough bake and dry out enough so that we can lift the aluminum paper without having bits of raw dough attached to it. The paper should lift easily, and the dough below should be half-baked and slightly wet.
- Bake it for 5 more minutes. Just until it loses its shine and is dry. Don't let it bake completely unless you're using a no-bake filling.
Kitchen notes
- Organization: read the recipe first and ensure you have ingredients at the correct temperature, equipment, and enough workspace. This will make the process so much easier.
- Baking time: consider that all ovens and pans are different, even if they look similar. The baking time in my recipes is as accurate as it can be, but it might take you more or less time. You can use a thermometer (like the OXO oven thermometer) to check that your oven is at the right temperature. I recommend you keep track of how your oven works and what tiny details you might need to adjust.
- Don't overwork the dough: for tender crusts, you need to work them as little as possible but integrate the ingredients very well. A food processor or pastry blender and scraper (if making it by hand in a bowl) can help with the first step, where the cold butter is mixed with the flour.
- Resting time: is essential if you want the pie dough to roll easily and be tender and crisp after it's baked. The resting time allows it to relax, making it easier to roll without stretching.
- Make ahead: you can keep this homemade pastry in the fridge for 5 days or frozen for up to 1 month. Always well wrapped to prevent dryness.
Related recipes you might like:

If you made this recipe and loved it, you can comment below and leave a 5-star ⭐️ review. Also, if you had issues, let me know so we can troubleshoot together.
You can also subscribe to our FREE email series 'Baking the Best' and our regular newsletter. Or follow and save my recipes on Pinterest.
As an Amazon Associate, I earn from qualifying purchases. Read my disclosure policy.
How to Make Basic Shortcrust Pastry (pie crust)
Ingredients
- ½ cup ice water, approximately
- 2 ½ cups all-purpose flour
- 1 cup unsalted butter, very cold
- ½ teaspoon salt
- 1 tablespoon sugar, optional (for sweet pies)
Instructions
- For the ½ cup ice water, put ice 4 or 5 ice cubes in a measuring cup and fill it with cold water to about a cup. Reserve while preparing the rest of the recipe and measure when needed.
- Cut 1 cup unsalted butter into small pieces. Keep it refrigerated if while measuring the rest of the ingredients.
- By hand: place 2 ½ cups all-purpose flour, ½ teaspoon salt and 1 tablespoon sugar in a large mixing bowl and stir to combine. Scatter the cold butter pieces and integrate until the butter is the size of pean and beans. It will be irregular. Use your hands or a pastry cutter or dough blender. Add about ½ cup of ice water and stir to mix with a fork. Add ¼ cup more ice water and mix to integrate until it barely comes together.
- In a food processor: put 2 ½ cups all-purpose flour, ½ teaspoon salt and 1 tablespoon sugar if using. Add the cold diced butter and pulse on/off until the butter is the size of peas and beans. Add about ½ cup of ice water and pulse a few times. Add ¼ cup more ice water and pulse until it barely comes together.
- Check the dough. Even though it's crumbly and dry, if you take some and squeeze it with your hand, it should come together. If it doesn't come together, add a teaspoon more at a time. Be careful of adding too much water. It should not be wet and sticky.
- Transfer dough to a barely floured surface and gather it together into a ball. Don't overwork it or the dough will be tough. Wrap in plastic and refrigerate for an hour or up to 3 days.
Lining the pan:
- When you're ready to use it, roll it on a lightly floured surface, starting from the middle and making sure the size is at least 1 inch bigger than the pan you're using.
- Carefully place in the ungreased pie pan. Trim edges, prick the surface and refrigerate for 1 hour or freeze for half an hour. This resting period helps with achieving a flaky pastry.
Blind-baking:
- Preheat oven to 350ºF (180ºC)
- Put foil and weights (I use dried beans) covering the dough surface and bake for 10 to 15 minutes. Lift foil and weights and continue baking for 10 more minutes, or until it's dry and starting to color.
Ilona says
Really tasty and flaky. Easy to do and definitely worth the time and effort. Be sure to allow time for and follow the resting steps.
We made a rich beef and mushroom filling in the slow cooker which when combined with the buttery pastry was delicious.
Vollmer says
Great recipe. Very detailed explanation. Thank you.
Jane says
Thankyou so so much for the easy detailed instructions for making this pastry. I'm feeling so much more confident now to give it a try. I've always bought my pastry as did'ent have a recipe or instructions that gave me the confidence to make it myself. I'll let you know how it all goes. Again many thanks for taking the time to help non confident cooks like myself do things we would'ent otherwise. God Bless you heaps.
Paula Montenegro says
Hi Jane! Thanks for the comment, it means a lot. Let me know if you have additional questions and always remember that we all started from scratch, without skills, and practiced until it turned out the way we wanted. Don't be discouraged and have fun in the process!
Romina says
Thank you for sharing this! Nothing beats handmade pastry
Bintu | Recipes From A Pantry says
Such a handy guide. We love making our own shortcrust pie pastry in our house!
Demeter says
Homemade is always so better! This recipe couldn’t have come at a better time with the upcoming holidays quickly approaching.
Julia says
Homemade shortcrust pastry is so easy to make, isn't it! Plus it tastes so good! Love your step by step photos and video!
Kushigalu says
Thanks for sharing all the tips and tricks. I would love to make this for holidays. Bookmarked!