


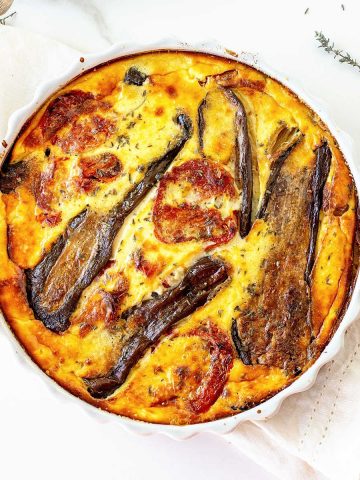
Galette is a free-form pie or tart that requires no pie dish. This one has a layer of cheese mixture, a buttery herb crust, and ripe tomatoes bursting with flavor in every bite. We always use homemade pie dough, but you can use a purchased one for convenience.

SAVE THIS RECIPE
A savory galette is great as an appetizer or light lunch with a simple green salad.
They're usually sweet, like the apple galette, and eaten as you would a pie for dessert. But a savory galette recipe is a fantastic iteration. And so delicious!
This version involves juicy tomatoes in a buttery crust with a creamy cheese filling that complements them wonderfully.
It has herbs to enhance the flavor of the dough, making it ideal for seasonal Summer tomatoes.
What is a galette?
A galette is a free-form pie (or tart). That means that the pie crust is rolled, the edges of the dough turned inwards leaving some filling exposed in the center, and the pie is baked directly on a parchment paper or oven sheet (no pie pan needed).
If you want to enjoy a homemade pie crust with little fuss involved, this is the type of recipe you need. They can be savory or sweet like the apple galette or the rustic peach galette.
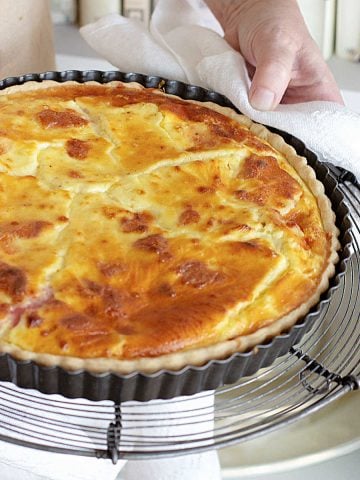
The fact that there's no lining of the pan makes it way easier than a traditional quiche for example.

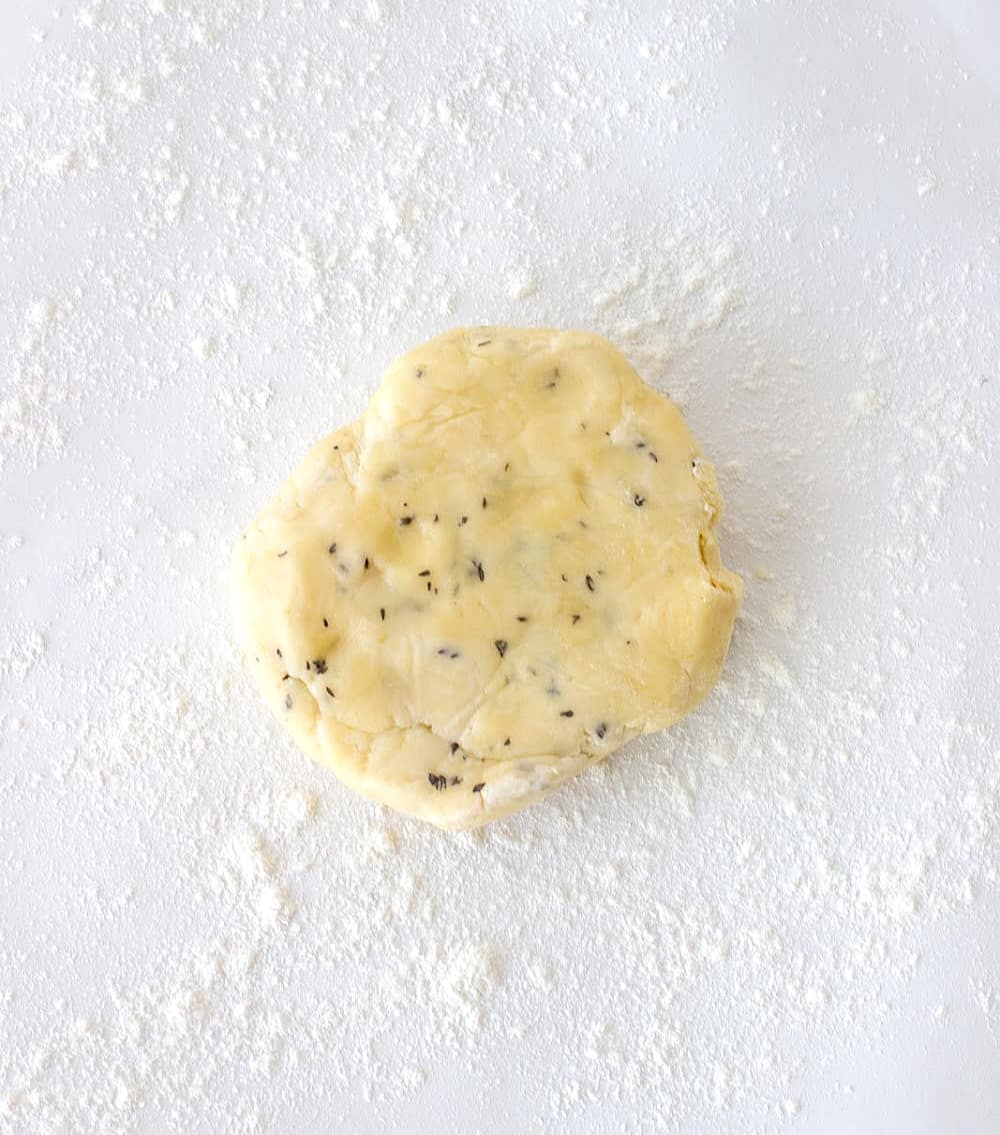
Homemade pie crust
This is the first step toward a fantastic galette.
Our homemade crust (a.k.a basic shortcrust pastry) is buttery, easy to make, and a key component of this tomato tart. You can use store-bought of course, but we tend to think that making your own brings this recipe up several notches.
You can also use the traditional flaky pie crust that's popular during the holidays.
For this savory galette, we jazzed it up by adding some thyme and oregano, two herbs that pair wonderfully with tomatoes.
Filling ingredients
We kept it simple and flavorful.
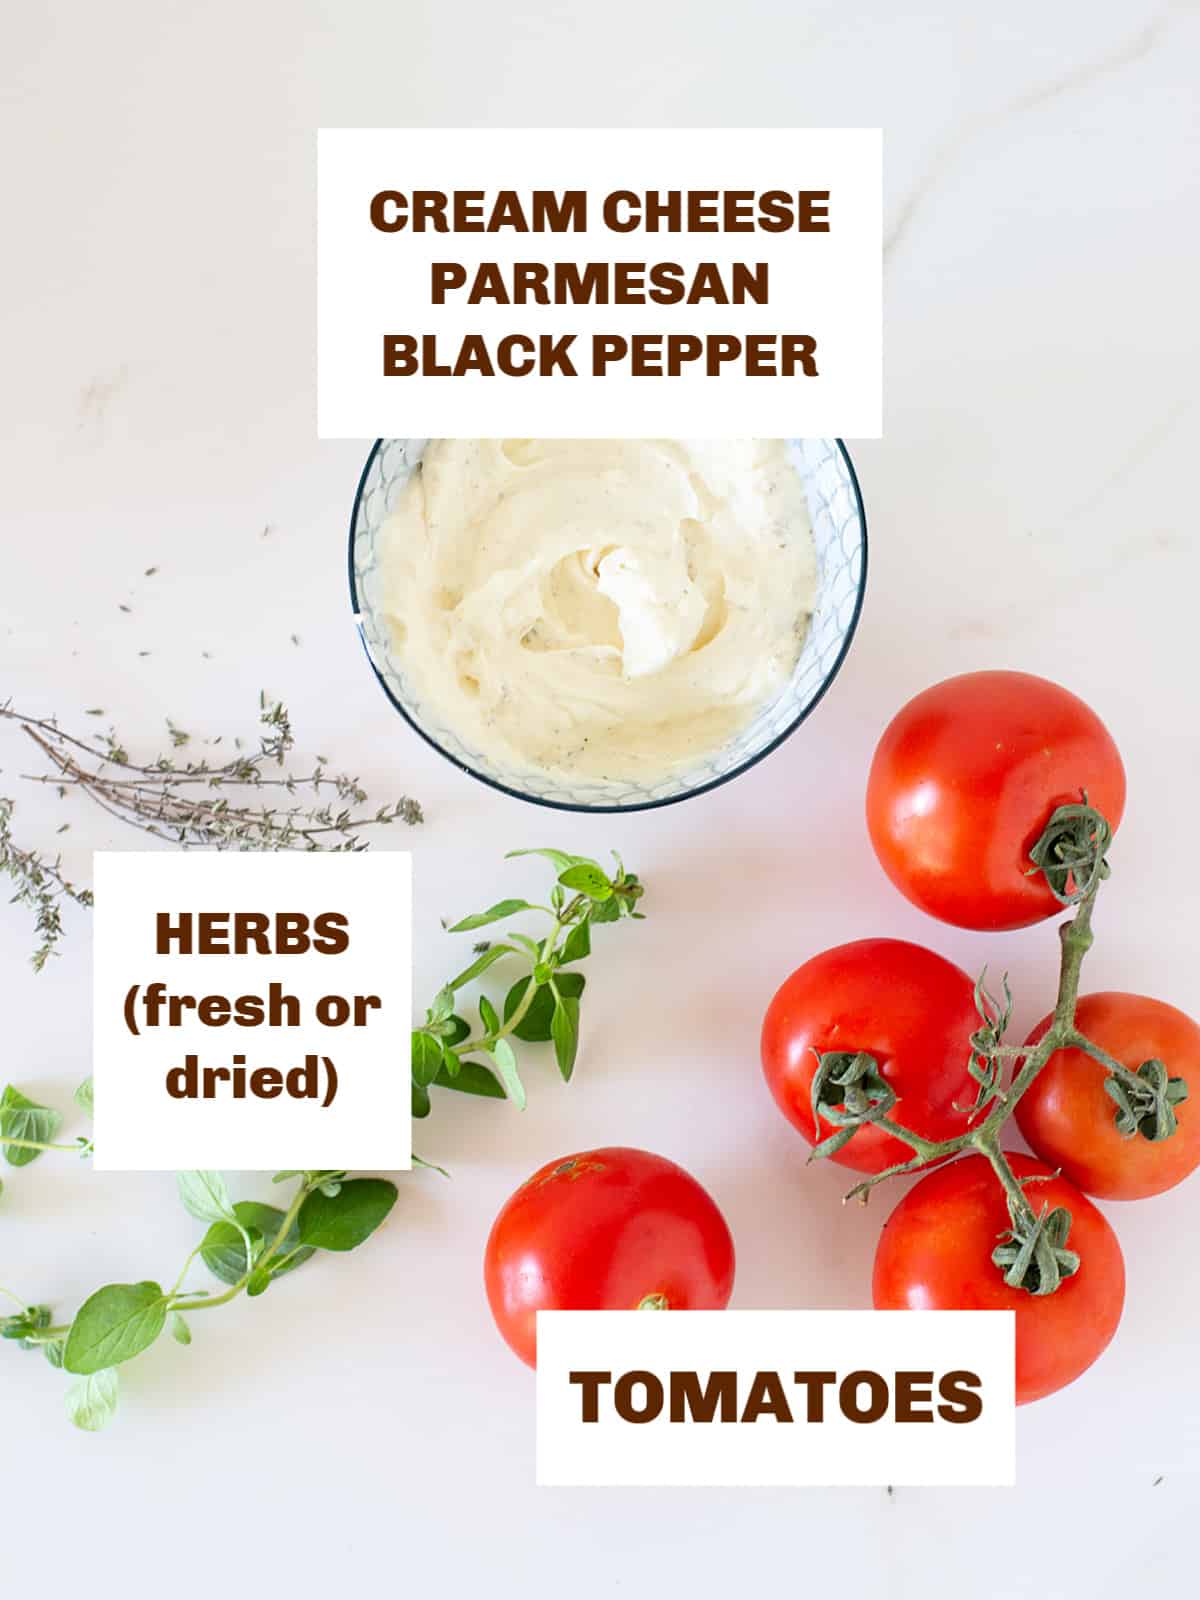
- Tomatoes: use your favorite fresh variety or a mix of several. Juicy heirloom tomatoes really shine with dishes like this one.
- Soft cheese: you'll need a soft, spreadable cheese. I use regular cream cheese or creamy goat cheese when available. Both are unctuous, salty, and perfect. Ricotta cheese can also be used and has more texture. Make sure any extra liquid is drained to avoid sogginess.
- Hard or semi-hard cheese: parmesan is a great choice as it adds a lot of flavor and sharpness. But you can use fontina or gruyere cheese also. Or a similar one that will add flavor and sort of a kick.
- Seasonings: always season it very well. Don't skimp on the salt and pepper. Adding more salt after it's baked is not the same thing. For a spicier galette, add some heat like smoked paprika (Chilean Merken seasoning is my favorite), chili pepper powder, or harissa seasoning powder.
- Herbs: they're added to the filling. Fresh basil, thyme, and oregano go very well with tomatoes. You can use one of several.
Assembling a galette
There is no right or wrong way to put together your tomato galette. It will look more or less rustic, but the truth is, perfect edges kinda clash with the whole idea of free-form.
The great thing about a galette is that you can adjust as you go along. The edges will be larger or smaller depending on the dough left. And it's fine whatever way it turns out!
Vintage Kitchen tip: work with cold dough. Have all filling ingredients ready and work quickly once you have the pie crust rolled so the moistness of the filling doesn't seep into it (or as little as possible) before you bake it.
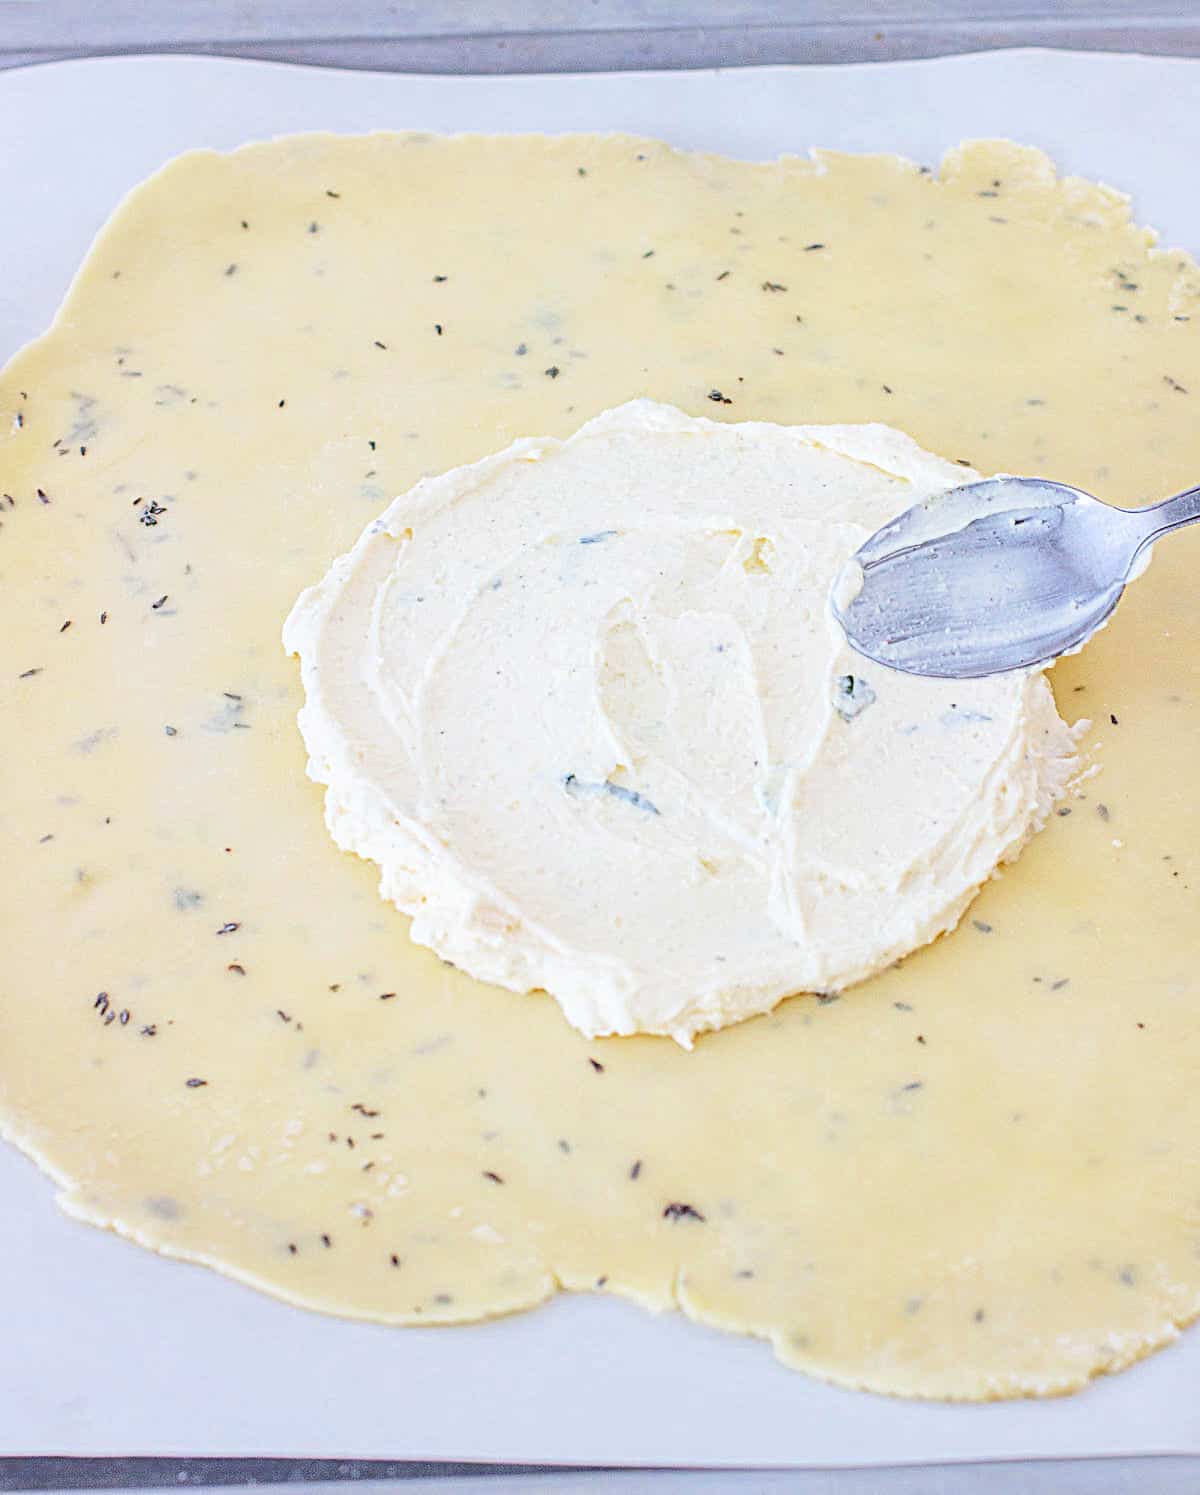
Start with a large round of pie crust and spread the cream cheese mixture in the middle, leaving a 2-3 inch border.
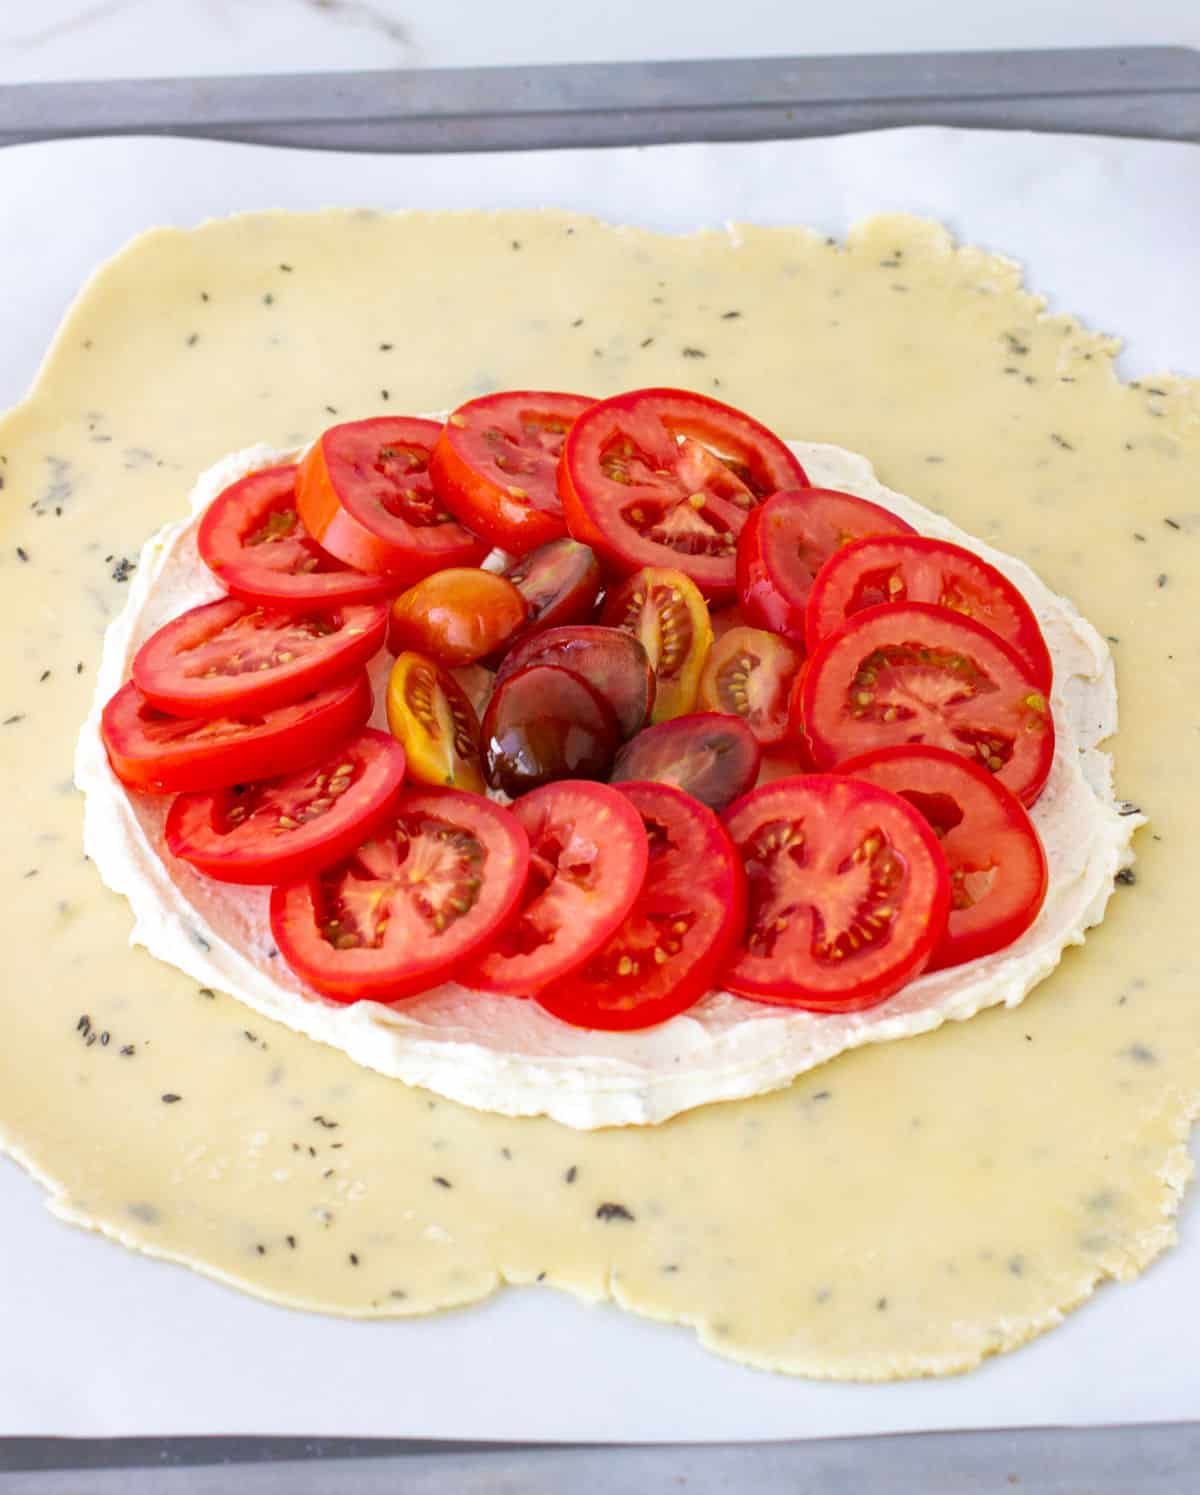
Add the tomato slices on top, overlapping slightly.
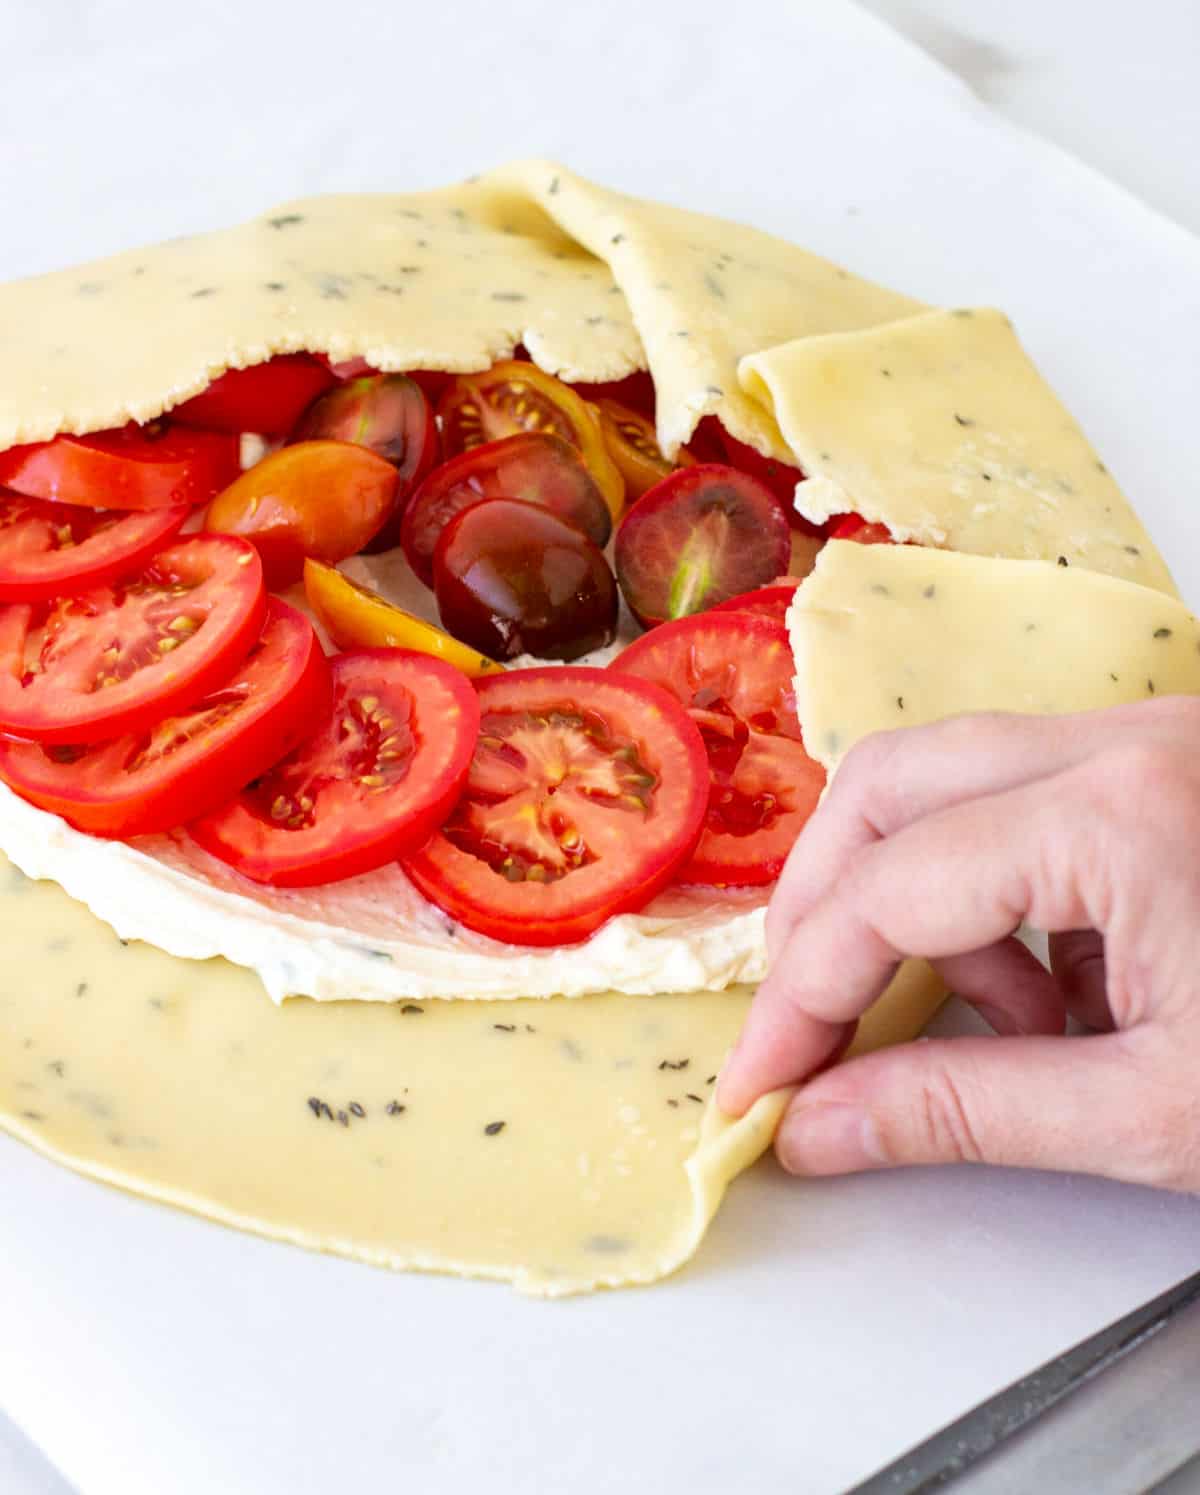
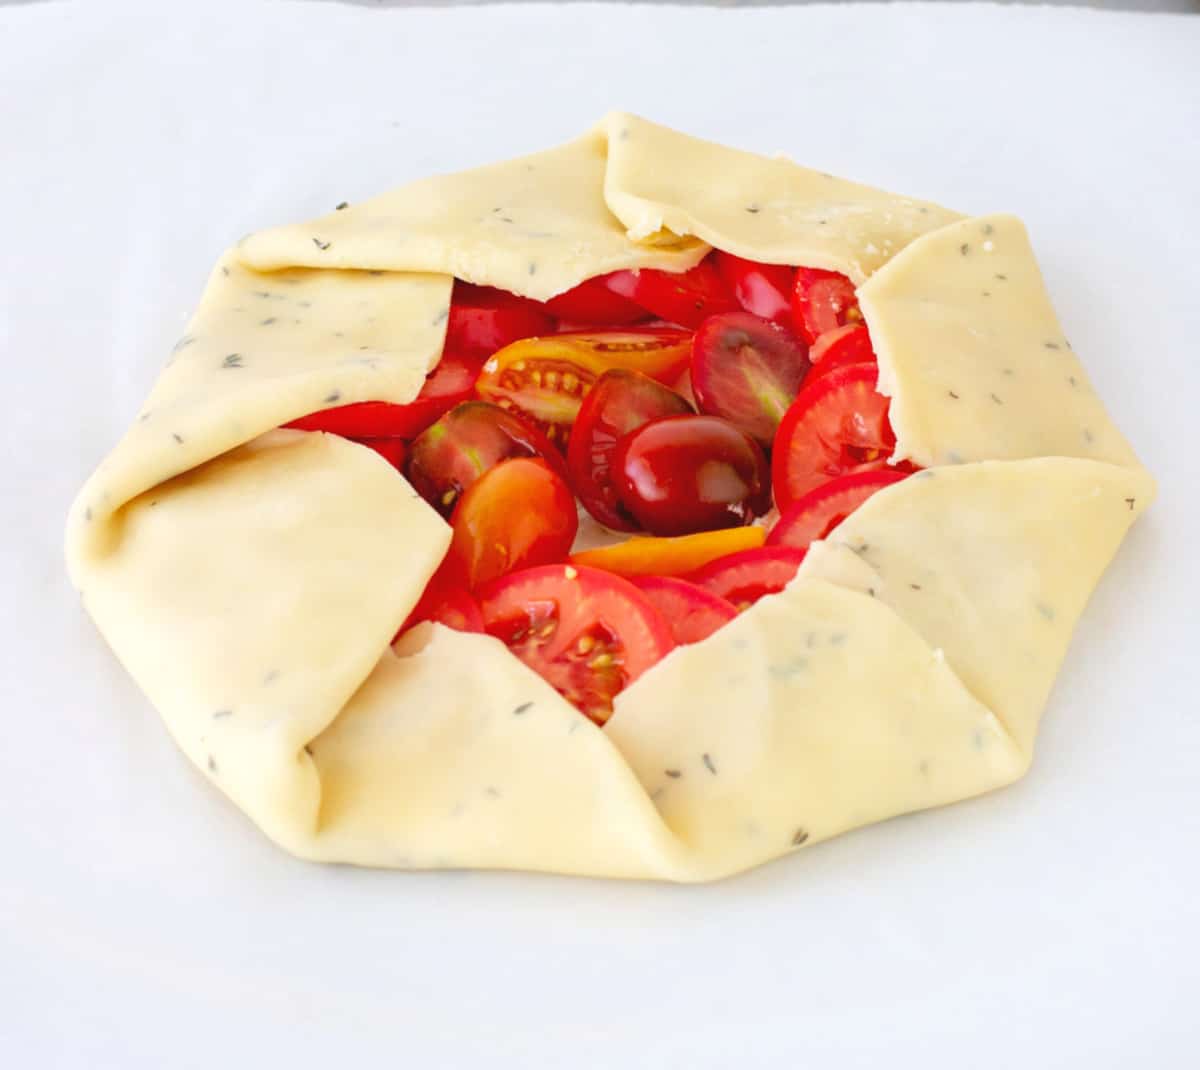
With your hand, lift the outer edge and fold it inward towards the tomatoes, partially encasing them.
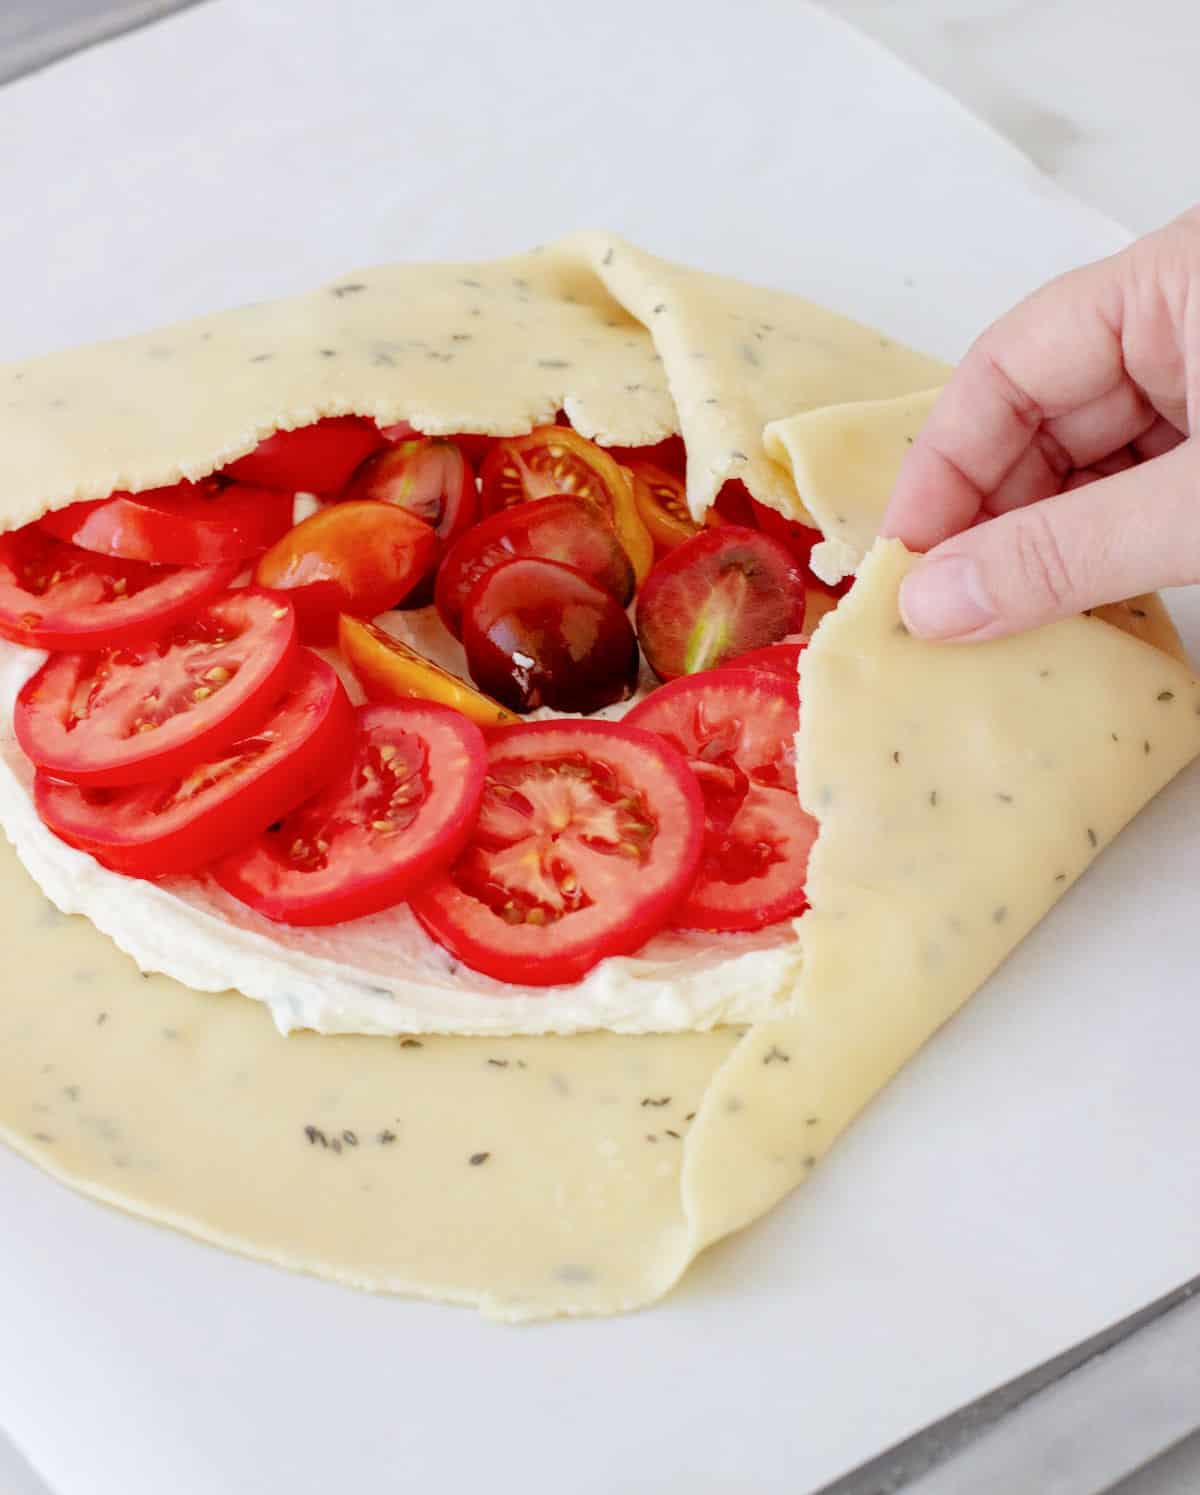
The center of the filling should be exposed and not covered by the crust.
Vintage Kitchen tip: directly assemble the galette on parchment paper or a baking sheet. It won't be easy to transfer it from the counter to the baking tray after it's filled without breaking or tearing.
Baking
Oven: make sure it's preheated and at the right temperature, which in this case is rather high. It's the best way to bake a dry, flaky pie crust without it turning out soggy.
When the filling (which is humid) touches an unbaked pie crust, it always transfers some of the humidity. So a high oven and a cold pie will make a difference.
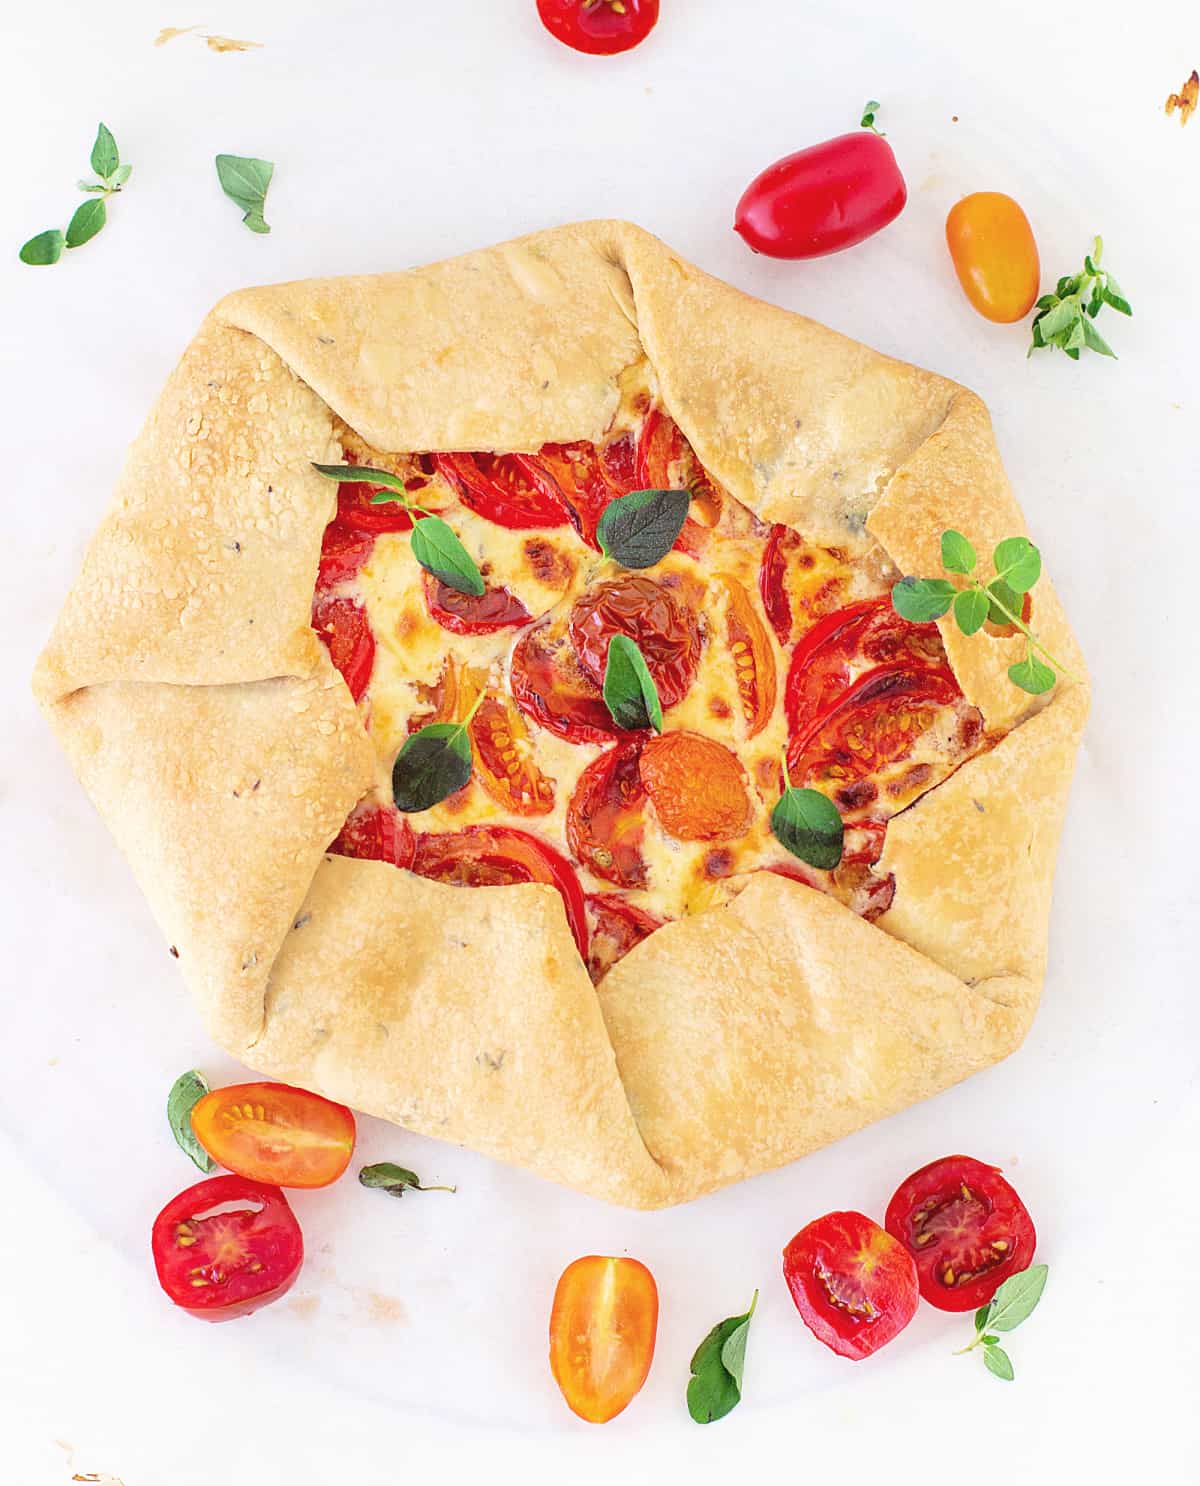
When is a galette done? The crust will be dry and golden brown and the tomatoes will be shriveled, maybe a little charred in places, and the cheese will be bubbling.
Kitchen notes
- Organization: read the recipe first and ensure you have ingredients at the correct temperature, equipment, and enough workspace. This will make the process so much easier.
- Baking time: consider that all ovens and pans are different, even if they look similar. The baking time in my recipes is as accurate as it can be, but it might take you more or less time. You can use a thermometer(like the OXO oven thermometer) to check that your oven is at the right temperature. I recommend you keep track of how your oven works and what tiny details you might need to adjust.
- Crust: work with cold pie dough. If it gets warm while you're rolling it, pop it into the fridge for a while and then resume assembly.
- Filling: use any soft cheese (cream cheese, ricotta, sour cream, goat cheese) and season it well. I love grated parmesan because it has so much flavor, but asiago, or even fontina or gruyere work. Mix it before rolling the dough and have it in the refrigerator up until you need it so it's as cold as possible.
- Oven: a preheated oven is essential! You want the pie crust to bake dry and flaky.
- Storing: you can make the dough ahead and have it in the refrigerator for up to a week or in the freezer for up to a month (well covered in plastic wrap). The baked galette can be kept in the fridge for 3-4 days (maybe more), always covered or in an airtight container to prevent dryness. You can also freeze it, but I don't recommend it as the tomatoes will have a different texture after it's thawed. If you do, warm it in a medium oven before eating it.
Variations
- Herbs: add different herbs to the dough. Fresh or dried, they all work.
- Spices: jazz up a simple dough with some smoked paprika, curry, or any other spice that works with tomatoes.
- Crust: use a plain crust, it works fantastic also.
- Garlic: if you're a fan add some finely chopped or roasted garlic to the cheese mixture.

Related recipes you might like:

If you made this recipe and loved it, you can comment below and leave a 5-star ⭐️ review. Also, if you had issues, let me know so we can troubleshoot together.
You can also subscribe to our FREE email series 'Baking the Best' and our regular newsletter. Or follow and save my recipes on Pinterest.
As an Amazon Associate, I earn from qualifying purchases. Read my disclosure policy.

Easy Fresh Tomato Galette (with homemade crust)
Ingredients
For the galette dough:
- Ice Water, 1 cup tap water with several ice cubes
- 2 ½ cups all-purpose flour
- 1 cup unsalted butter, very cold
- ½ teaspoon salt
- 1 tablespoon fresh herbs, chopped. I use thyme, oregano, and sometimes basil (or you can add it to the cheese mixture; it's simpler, and you still get the flavor)
For the filling:
- ¾ cup cream cheese or soft goat cheese
- ¼ cup grated Parmesan cheese, or Asiago or white Cheddar
- 1 tablespoon olive oil
- Freshly ground black pepper
- Salt
- Tomatoes, about 3 cups (I used about 3 round tomatoes and ½ cup of cherry halves)
- Cherry tomatoes and fresh herbs, optional for serving
Instructions
For the galette dough:
- Put ice 4 or 5 ice cubes in a measuring cup and fill with cold water to about a cup.
- In a food processor put flour, salt, and herbs and pulse once or twice to combine.
- Scatter the cubed butter on top and pulse using on/off until the butter is the size of peas.
- Add about ½ cup of ice water and pulse a few times.
- Add ¼ cup more ice water and pulse until it barely comes together. Check the dough. Even though it's crumbly and dry, if you take some and squeeze it with your hand, it should come together. If it doesn't, add more ice water, a teaspoon or two at a time until it does. Don't overprocess it!
- By hand, use a large bowl to combine flour, salt, and herbs.
- Add the cold butter pieces and work them into the flour with your hands or a pastry cutter until the size of peas and beans. They will be irregular and that is fine.
- Add ice water and stir with a fork until it moistens the flour mixture. It will still be crumbly and look dry in places. Check and adjust with more water if needed as explained in Step 5 above.
For both methods:
- Transfer dough to a barely floured surface and gather it together into a ball. Don't overwork it or the dough will be tough. Wrap in plastic and refrigerate for an hour or up to 3 days.
For the filling:
- Preheat the oven to 350°F (180°C).
- In a small bowl mix cream cheese or goat cheese, grated cheese, olive oil, and black pepper. Add some extra salt if you feel you want to. This is very personal to your palate.
Assembling the galette:
- Use a rolling pin to roll the cold dough on a lightly floured surface until you have a round of about 14 inches in diameter.
- Transfer it carefully to a piece of parchment paper placed on a baking sheet.
- Spoon the cheese mixture on the center of the rolled pie dough and spread with the back of a spoon, making a circle of about 9 or 10 inches and leaving an edge of several inches (2-inch border at least) of dough without filling.
- Cut fresh tomatoes into slices and blot with paper towels to avoid adding too much liquid to the galette. Place the tomatoes on top of the cheese in whatever pattern you want to, just don't mound them too high.
- Lift the edge of the dough and fold it inward, covering some of the filling. Keep doing that with all of the dough until you have a circular tart with an exposed center.
- If you feel the pie is too warm or starting to look shiny, you may want to pop it in the freezer for 5-10 minutes, no more, before going into the oven. A cold dough helps prevent a soggy crust.
- Sprinkle with salt and pepper if desired, drizzle with olive oil and bake for about 40 minutes, or until it's golden and dry and the filling is bubbly and slightly burnt.
- Let cool slightly and eat warm. Or let cool completely and eat at room temperature.
- Refrigerate leftovers, well covered in plastic wrap or in an airtight container.
Veronika Sykorova says
I'm so happy that summer is finally coming and tomato season is here! I'm gonna try this in the next couple weeks! 🙂
Debbie says
I had a bunch of ripe tomatoes and made this wonderful galette. The crust was so flaky and full of flavor. A new summer fave for sure.
Analida Braeger says
This galette had the most incredible flavors! My whole family loved it. Thanks so much for sharing!
Juliana says
So easy and delicious, a great summer recipe
Tara says
Making and eating this galette was my favorite thing I did this week. The combination of the creamy filling and roasted tomatoes was to die for! Delicious!
Candice says
This galette is heavenly! It so much easier than making a pizza, with just the same amount of pay-off. It turned out great, and can't wait to make it again!
Anna says
I can't wait for our garden tomatoes to be ready so we can enjoy delicious, homemade galettes. It just tastes like summer! Your photos are so beautiful, just looking at them makes my mouth water!
Tatiana says
This galette made my dinner better yesterday! Super easy to make, and the filling is out of this world!
Phenie says
Thank you for this recipe! It's the second time I've tried something like this and I must say that it turned out waaaay better this time around. So much more buttery and yum!