


This is the perfect French sweet crust that I've been using for years! It's not hard to make if you follow the detailed, step-by-step instructions and videos in this post. Use it for tarts, pies, and galettes. It can be made ahead and frozen for a month. Homemade dough makes all the difference, no matter what type of dessert you're baking!
SAVE THIS RECIPE
Easy French recipe
Do you make your own pastry or sweet pie crust? If you don't, I urge you to give it a try. Once you master the details of great homemade dough, it makes a huge difference.
This is the best sweet tart crust recipe (or shortcrust pastry) I know, and the one you find in French fresh fruit tarts. I use it for the pear frangipane tart and the chocolate raspberry tart. And sometimes for rustic free-form tarts like the fresh peach galette.
And just so you know, scraps or leftover dough make great cookies!
Making any pie crust is not hard, but it takes some organization and practice. Read this post and recipe carefully before starting, and make sure you have enough counter space and the ingredients ready.
- Jackie ⭐️⭐️⭐️⭐️⭐️
Love love this recipe 😍 this is the preferred crust for all my fruit pies. I usually add a little bit of cinnamon into the mix though ❤️
- Rebecca ⭐️⭐️⭐️⭐️⭐️
Fabulous recipe. I made this tonight for a custard and fruit tart that I'm bringing to a dinner party tomorrow. It turned out perfectly. Thank you so much!
- Megan ⭐️⭐️⭐️⭐️⭐️
Thanks for a great recipe and all the steps on how to make shortcrust. Your recipe is so good, I may just be able to get the hubster to follow it to make pies lol. Thanks for sharing!
About sweet short pastry or pâte sucrée
Shortcrust means that the fat content (butter in this recipe) is high, and the baked result will be flaky and crumbly. Pâte sucrée in French translates to sweet dough.
So this is an all-butter, sweet tart dough, with a much higher sugar content than the traditional flaky pie crust used in the US, which is more neutral.
As usual with basic recipes, different recipes might have slight variations in the ingredient ratio. And sometimes in the ingredients themselves. This recipe uses whole egg and no liquid, but you might find others use egg yolk and sometimes cold water.
Step-by-step VIDEO
Paula's Testing Notes
The small details that make the biggest difference when baking this recipe.
Organization: read the recipe first and ensure you have ingredients at the correct temperature, utensils and equipment needed, and enough workspace. This will make the process so much easier.
Though this short dough works with any pie plate, in my experience, it's best for metal pans with removable bottoms. With taller or shorter sides, depending on the type of recipe you're making.
Food processor: You can use this small appliance. It's important not to overprocess it once the flour is added, or gluten will start to develop. We don't want that as it prevents the dough from stretching well when rolled, and the result will not be a tender crust after baking.
Stand mixer: If using it with the paddle attachment, be very careful not to overwork it once you add the flour, just as with the food processor. Always mix on low speed and just until mixed. I recommend it for large quantities, if you double or even triple the recipe.
Using only egg yolks: You can use 2 egg yolks instead of 1 whole egg. The pastry shell will be very crisp. This is great for mini-tarts that are one or two bites.
Flavorings: add ground spices (a pinch of cinnamon or cardamom), vanilla extract, or any citrus (lemon zest, orange zest) to the butter mixture before adding the flour.
Uses for this crust
This recipe is best suited for French-style sweet tarts or those that don't have a large amount of filling, though you absolutely can.
- Fruit tarts: they include fresh fruit ones with cream fillings (like pastry cream or whipped cream), as shown in this strawberry cream tart or baked ones like a pear frangipane tart.
- Individual tartlets or mini tarts: Since the dough can be rolled very thin, it's ideal for small tarts.
- French chocolate tart: This tart has an intense filling, so there's not a lot of it. Our raspberry chocolate tart is a great example.
- Lemon tarts are usually made with lemon curd and sometimes served with a dollop of whipped cream. A lemon meringue pie is great with this homemade pastry, but not what's usually used in the US.
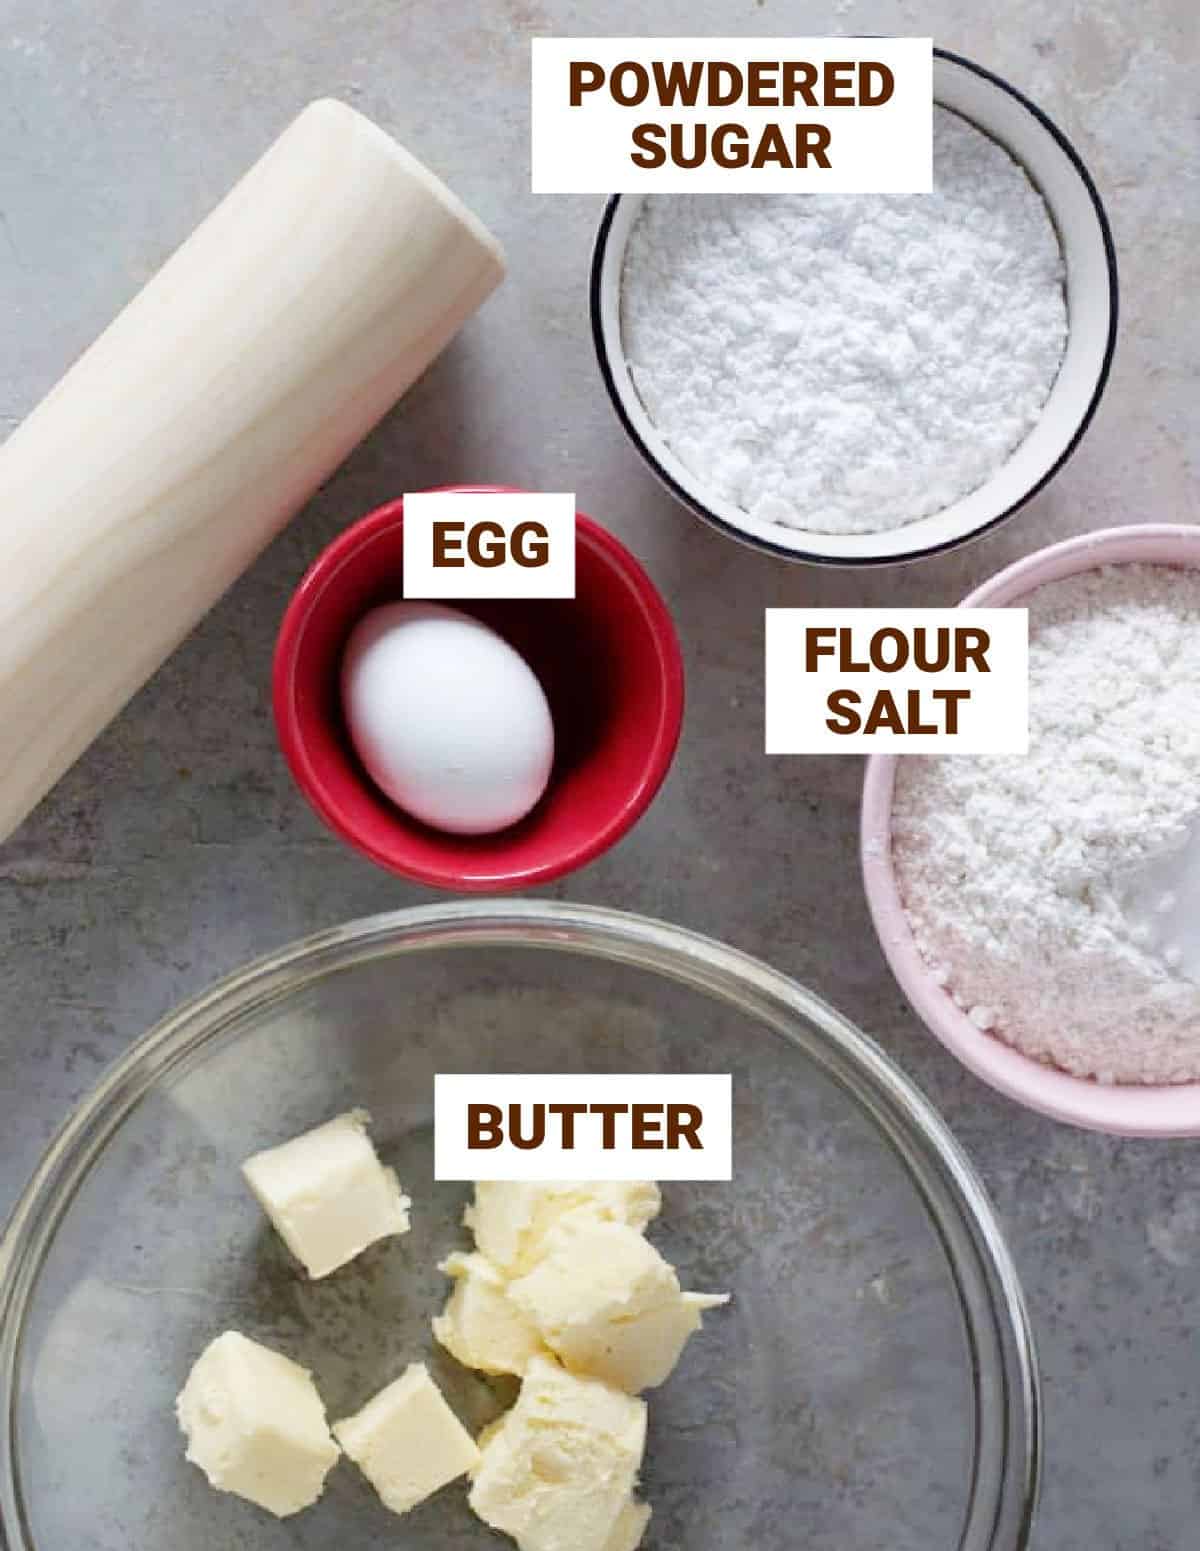
Ingredients
Quantities are listed in the recipe card toward the end of this post. The Ingredients page has more details and lists the brands I use.
- Flour: the most common is all-purpose flour, but, depending on the country, cake flour can also be used, which is more refined (more powdery) and sometimes has a small amount of cornstarch or a similar product, making it softer.
- Powdered sugar, also called confectioners' sugar or icing sugar.
How to make pie dough by hand
The step-by-step recipe tutorial will guide you through the process of making the dough with a bowl, a spatula, and your hands.
- Large bowl: I like using glass, but any material that is apt for food works.
- Room temperature butter: Most traditional doughs use cold butter, but this is not the case. Butter at room temperature is easier to mix and creates a soft dough.
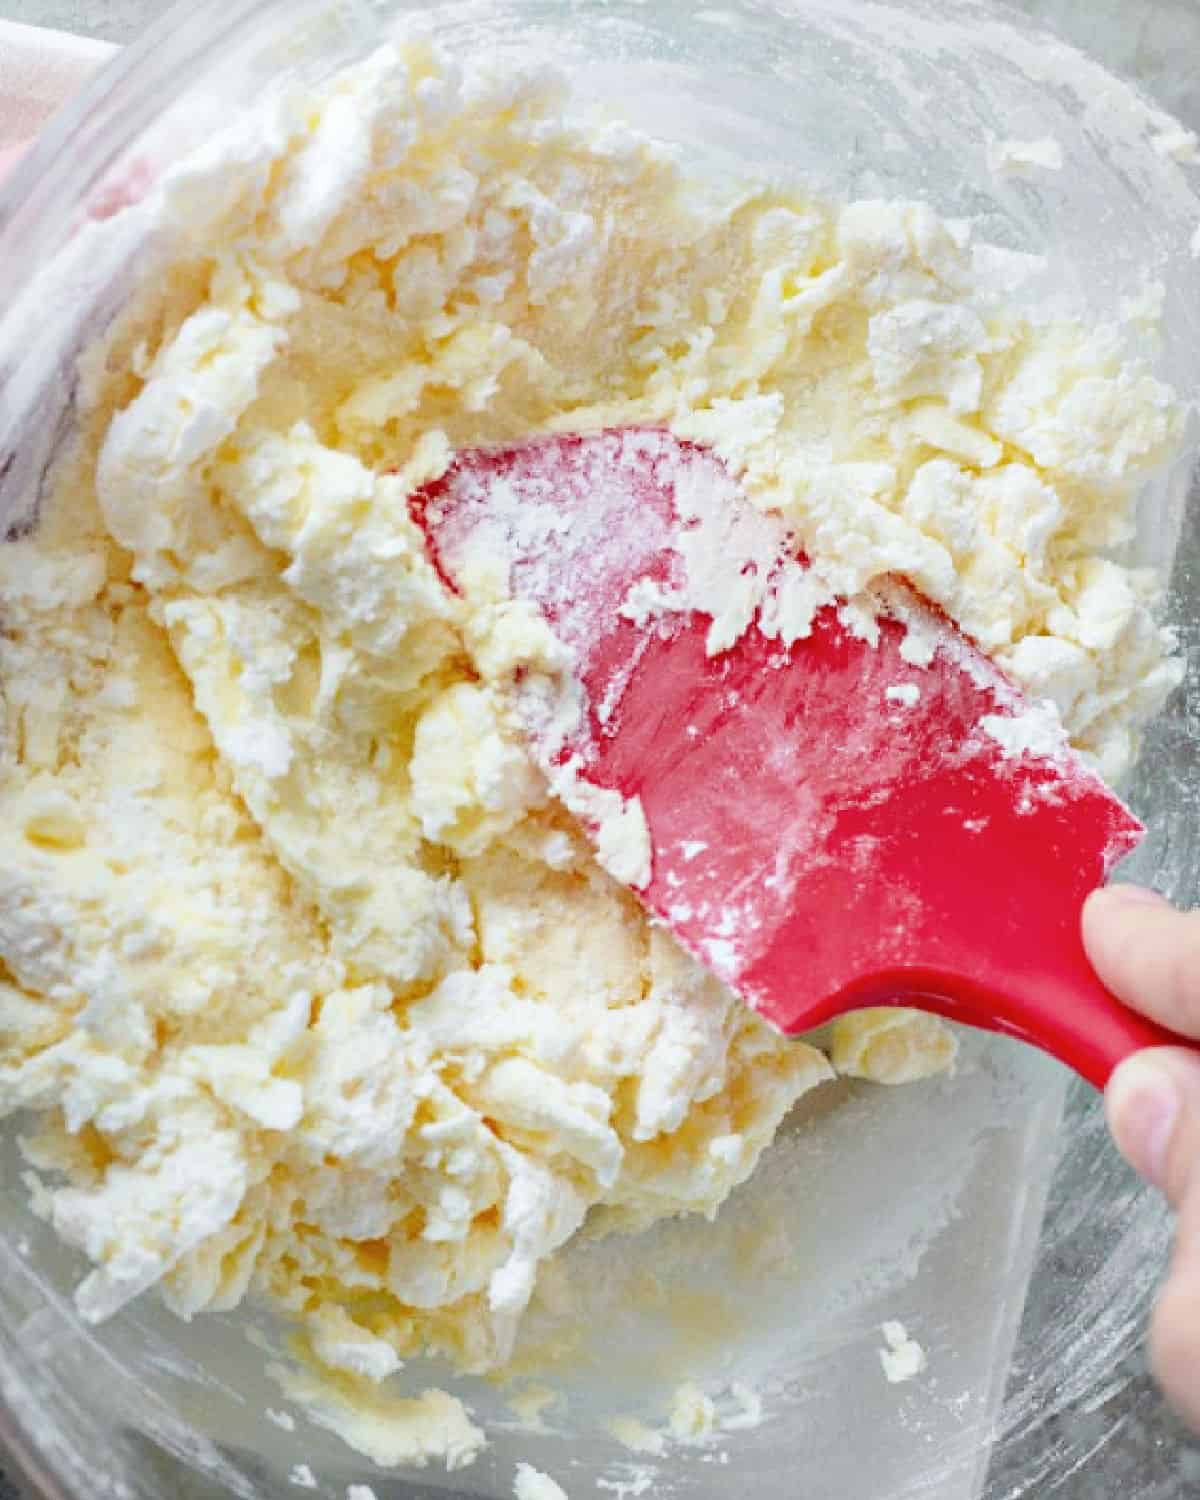
- Creaming method: Use a spatula or a wooden spoon to incorporate the powdered sugar into the butter. It takes several minutes, and I use a rubber spatula.
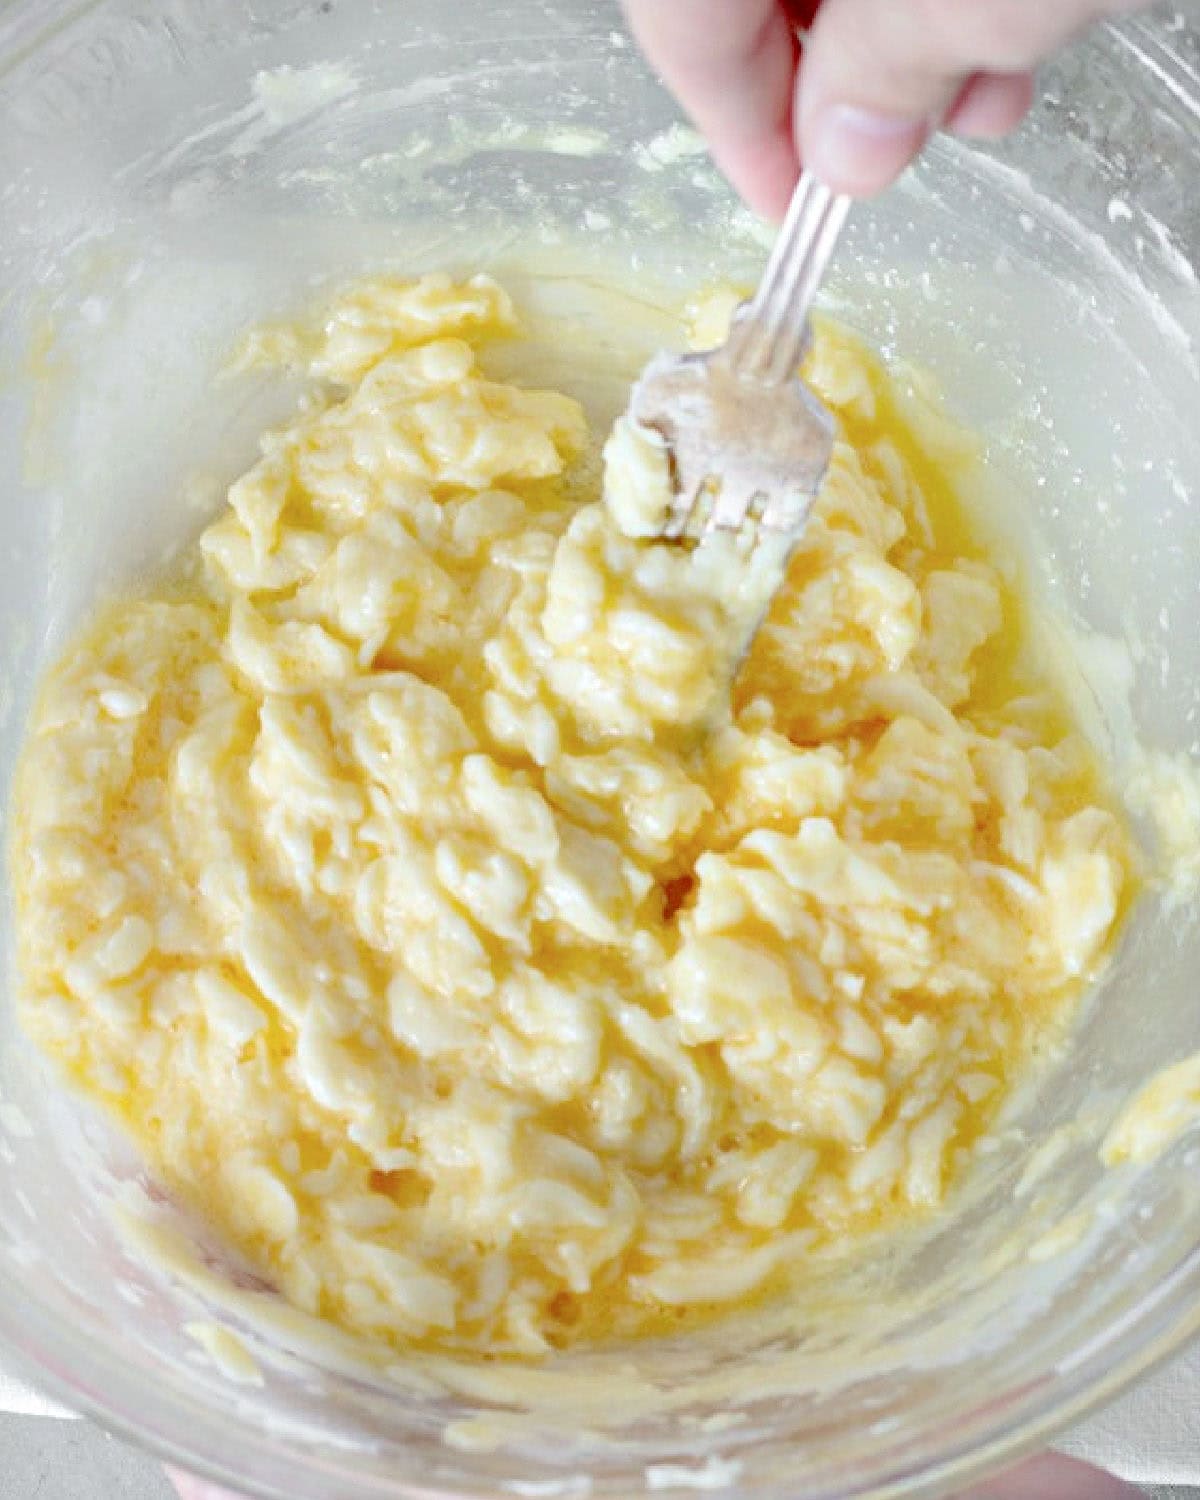
- Adding the egg: the mixture will be soupy and lumpy at first, and you don't have to mix until it's completely smooth.
- Dry ingredients: add the flour and salt and mix with a fork or spatula until no dry spots remain. It will be a shaggy mass.
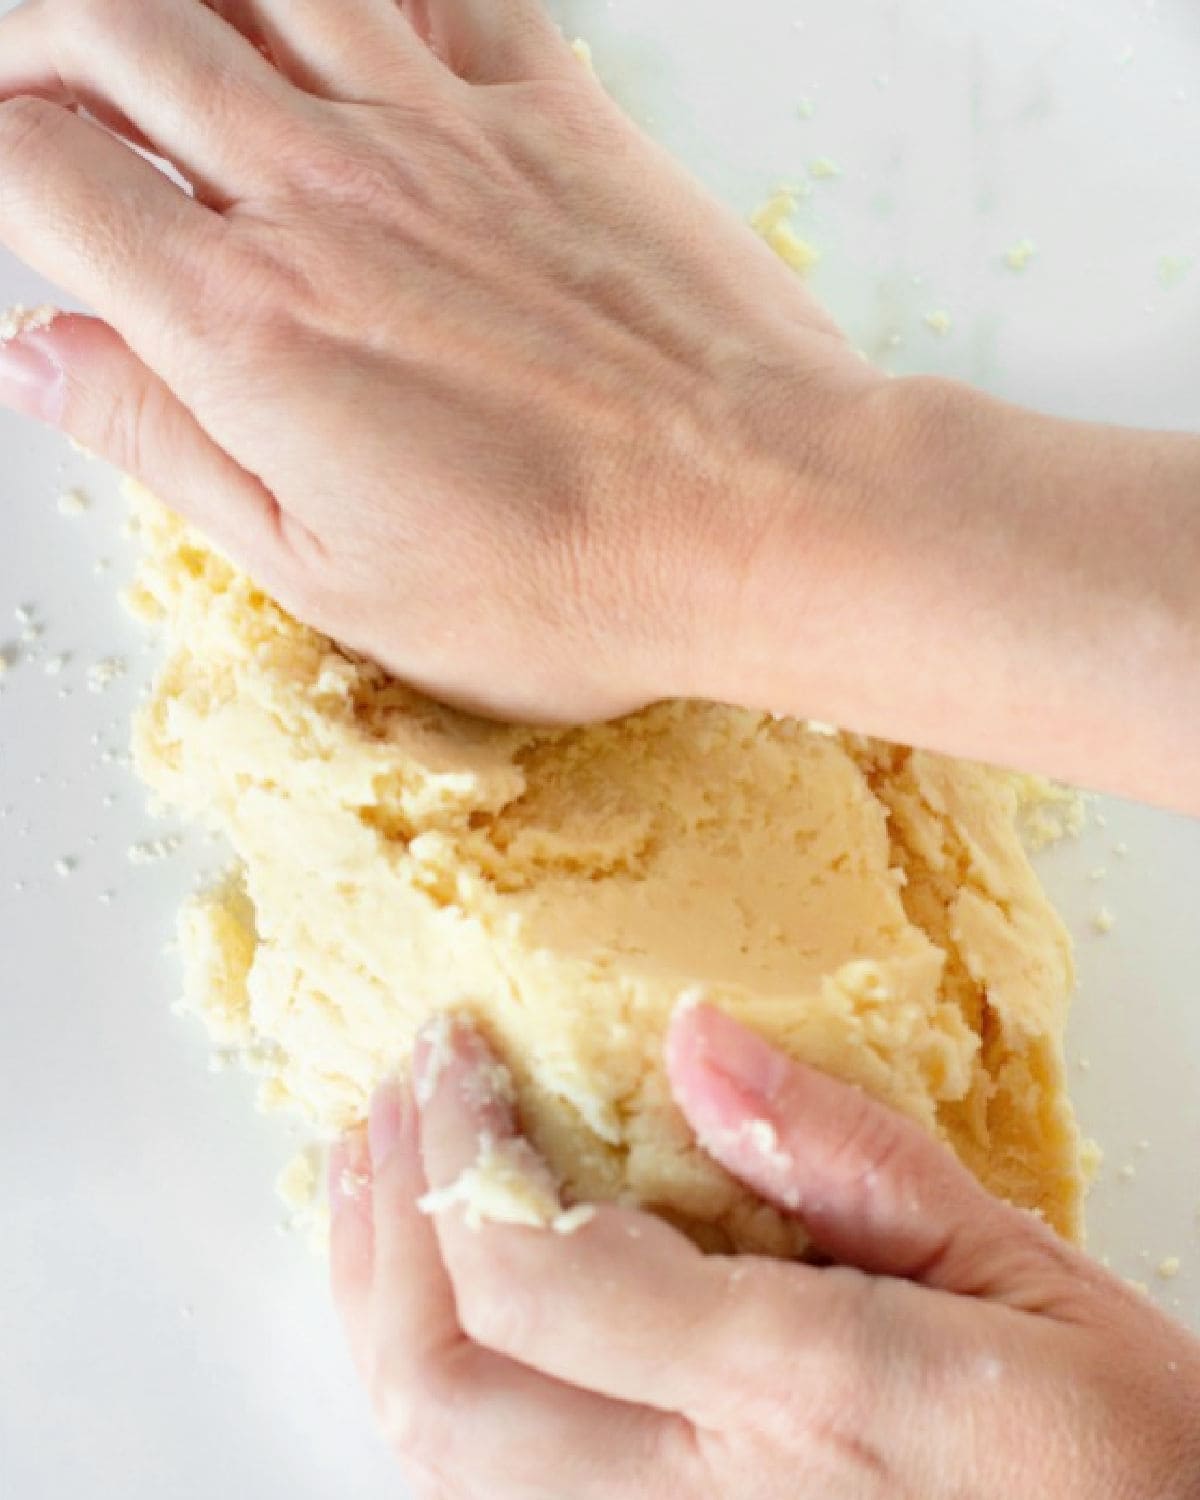
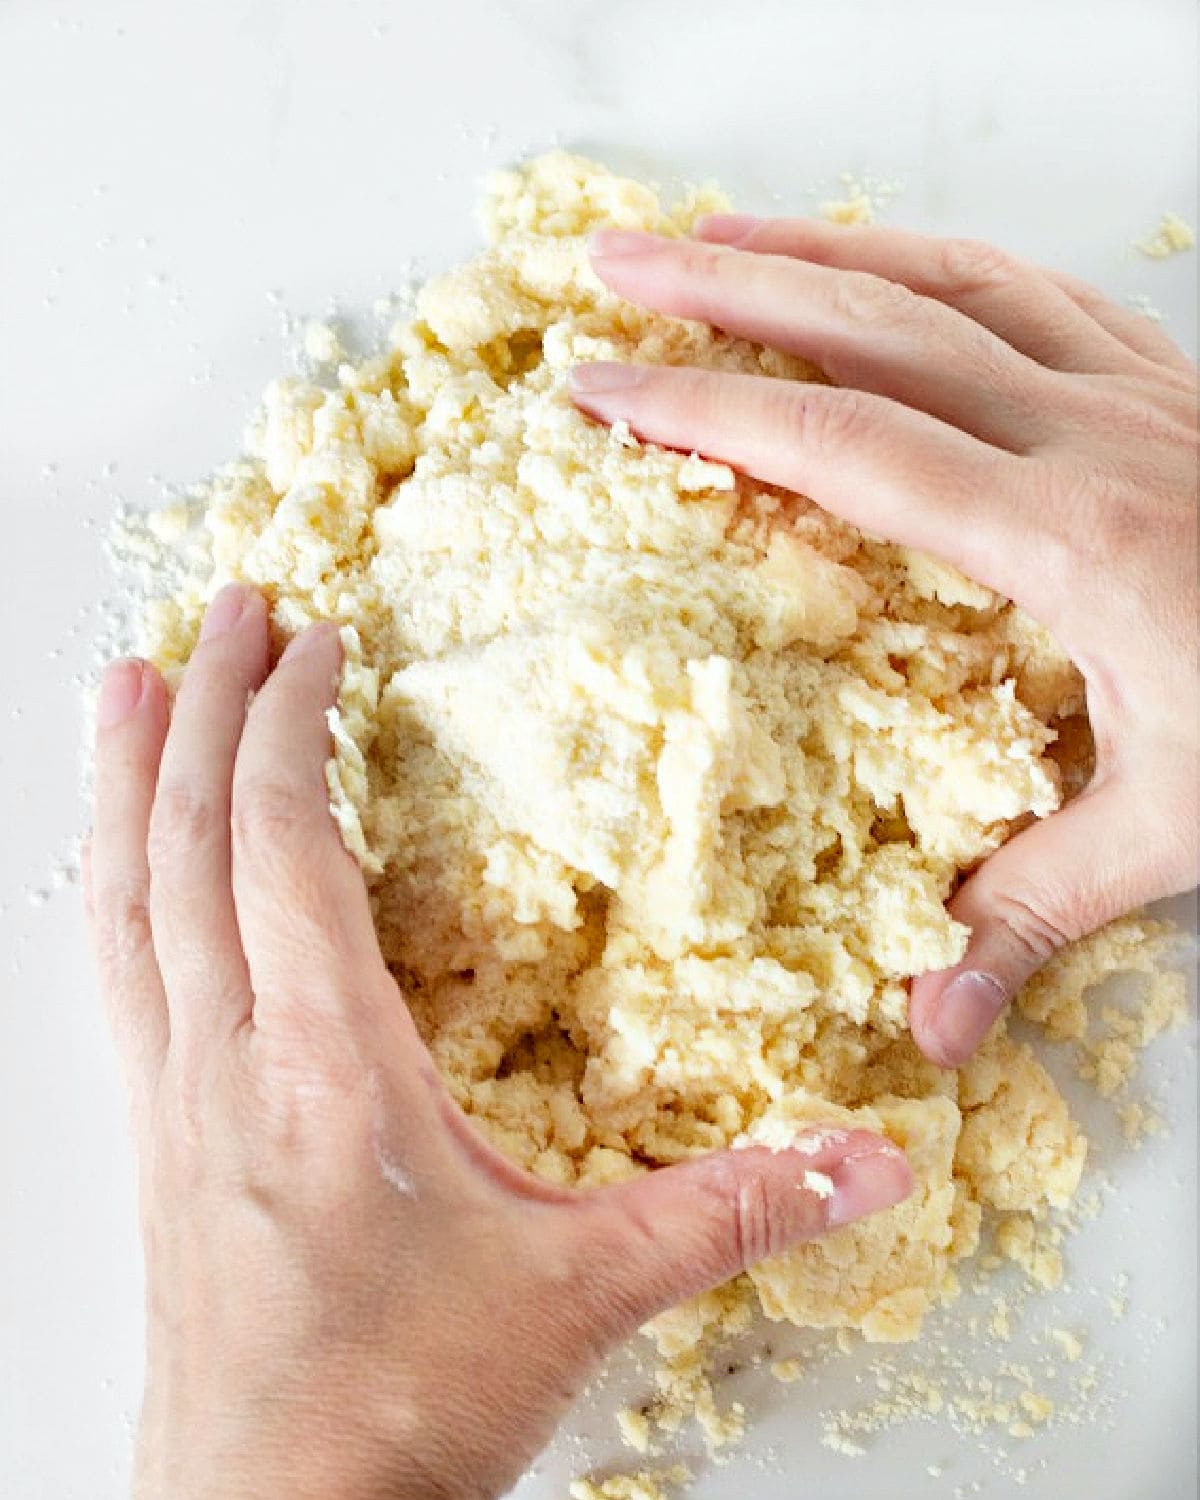
- Don't overwork the dough! Start gathering it together with your hands. You can do this on the counter or in the mixing bowl. Use the heel of your hand, sliding it downwards (called fraisage), to help the flour and butter come together with the least amount of manipulation. You don't want to warm the dough more than necessary, but it should have no dry parts.

- You should have a cohesive dough, but it might not be completely smooth, and that is fine. The less you touch it, the better the texture will be after you bake it.
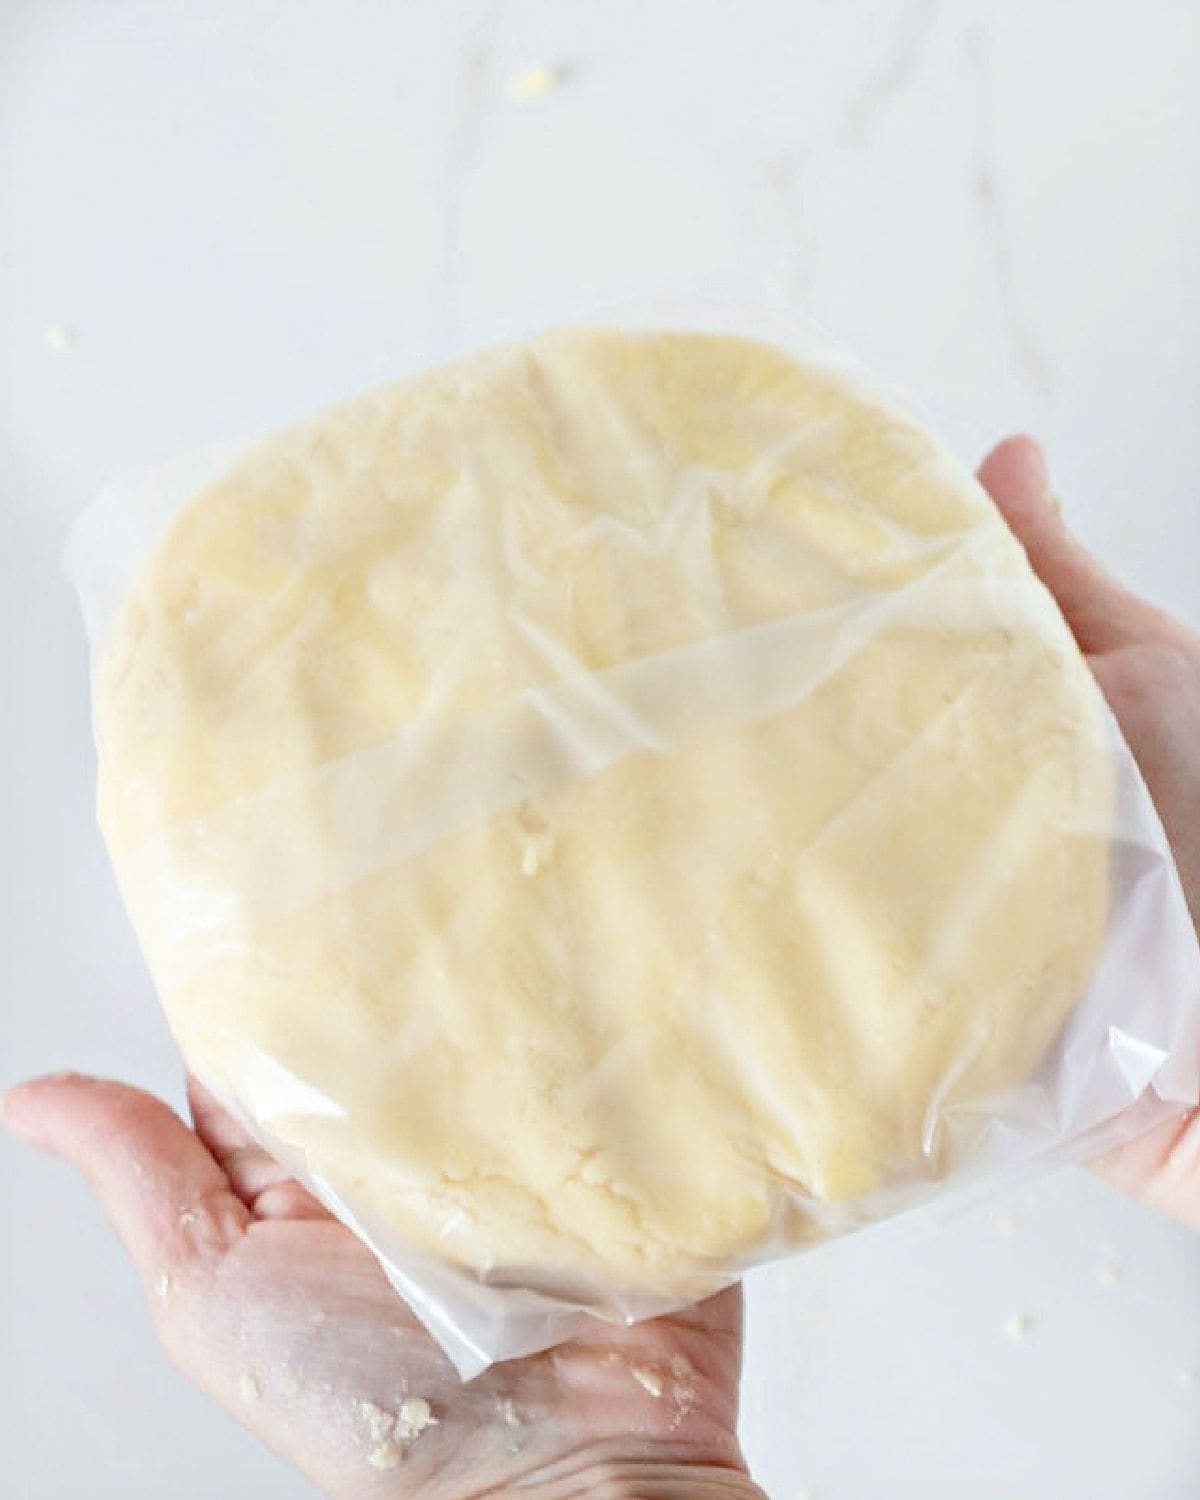
- Final dough disc: Flatten the round piece of dough and use plastic wrap, cling film, or freezer sheets to wrap it well before refrigerating it. There should be no open places where air can get in. Chill for at least 1 hour and up to 2 days.
Roll and line the pan
Dough rest: this is a crucial step if you want it to be rolled easily and be tender yet crisp after it's baked. The sweet shortcrust pastry dough needs to rest in the refrigerator for 1 hour or in the freezer for 20 minutes before you continue.
Once the dough has rested, you're ready to roll it. WATCH THE VIDEO TUTORIAL >>> Rolling and lining pie dough.
- Cold dough: make sure the pie dough is softened enough to be rolled but still cold, as cold as possible. This can be tricky. Usually, you'll feel it's still too hard, but it will soften quickly once you start manipulating it.
- Prepare the working table: make sure you have enough cleared counter space and a floured rolling pin.
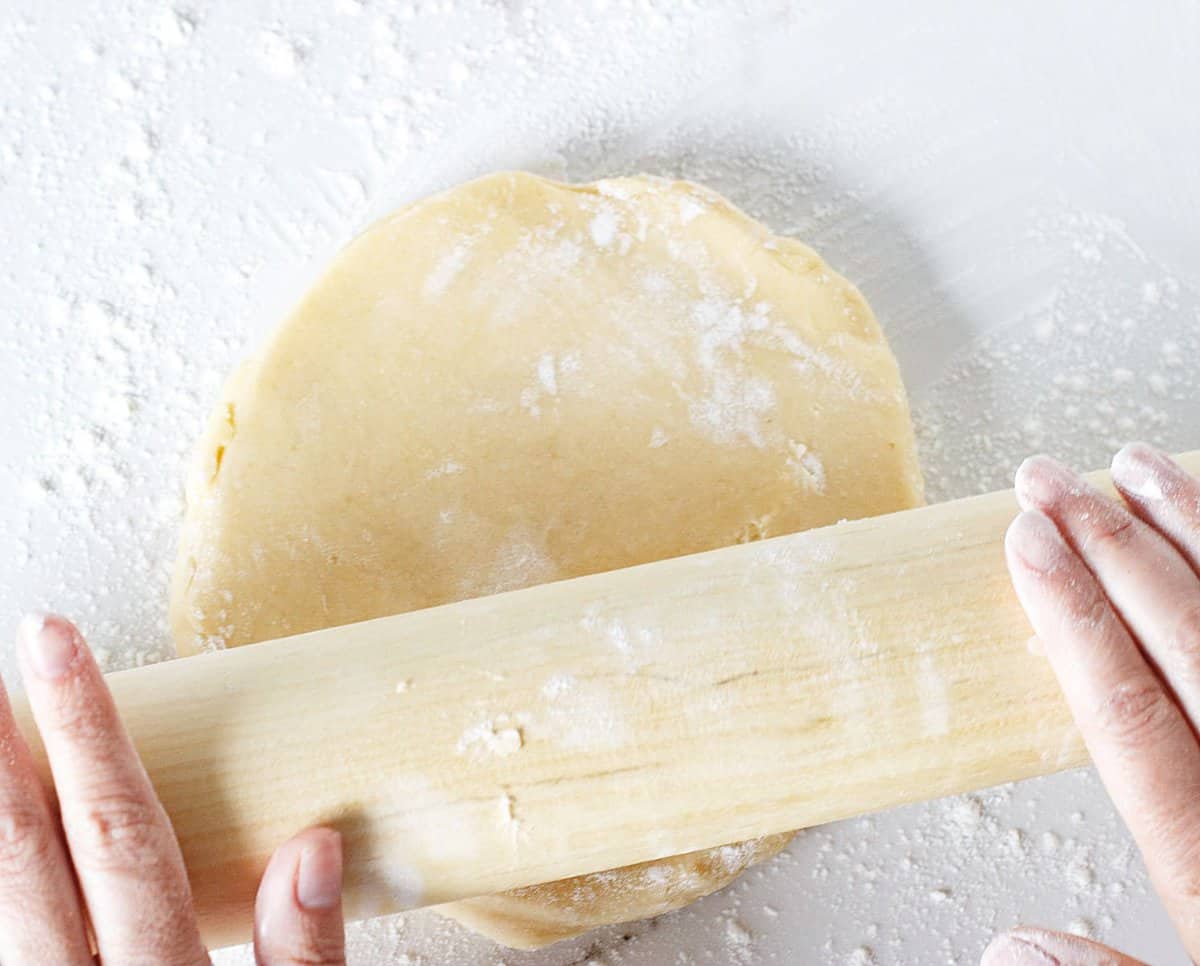
- Working surface: before starting to roll, lightly flour a clean surface that is large enough for you to work comfortably.
- Turn the dough and use extra flour if needed. Start rolling and make sure you do a quarter turn often (I do it to the left). That means making a few rolls and then lifting the dough and turning it a little to the left. This ensures that the dough never sticks too much to the counter and, if it does, you fix it by adding some flour. If you roll it without checking if it needs more flour, it might soften too much, stick to the surface, and it won't be easy to lift it without tearing it.
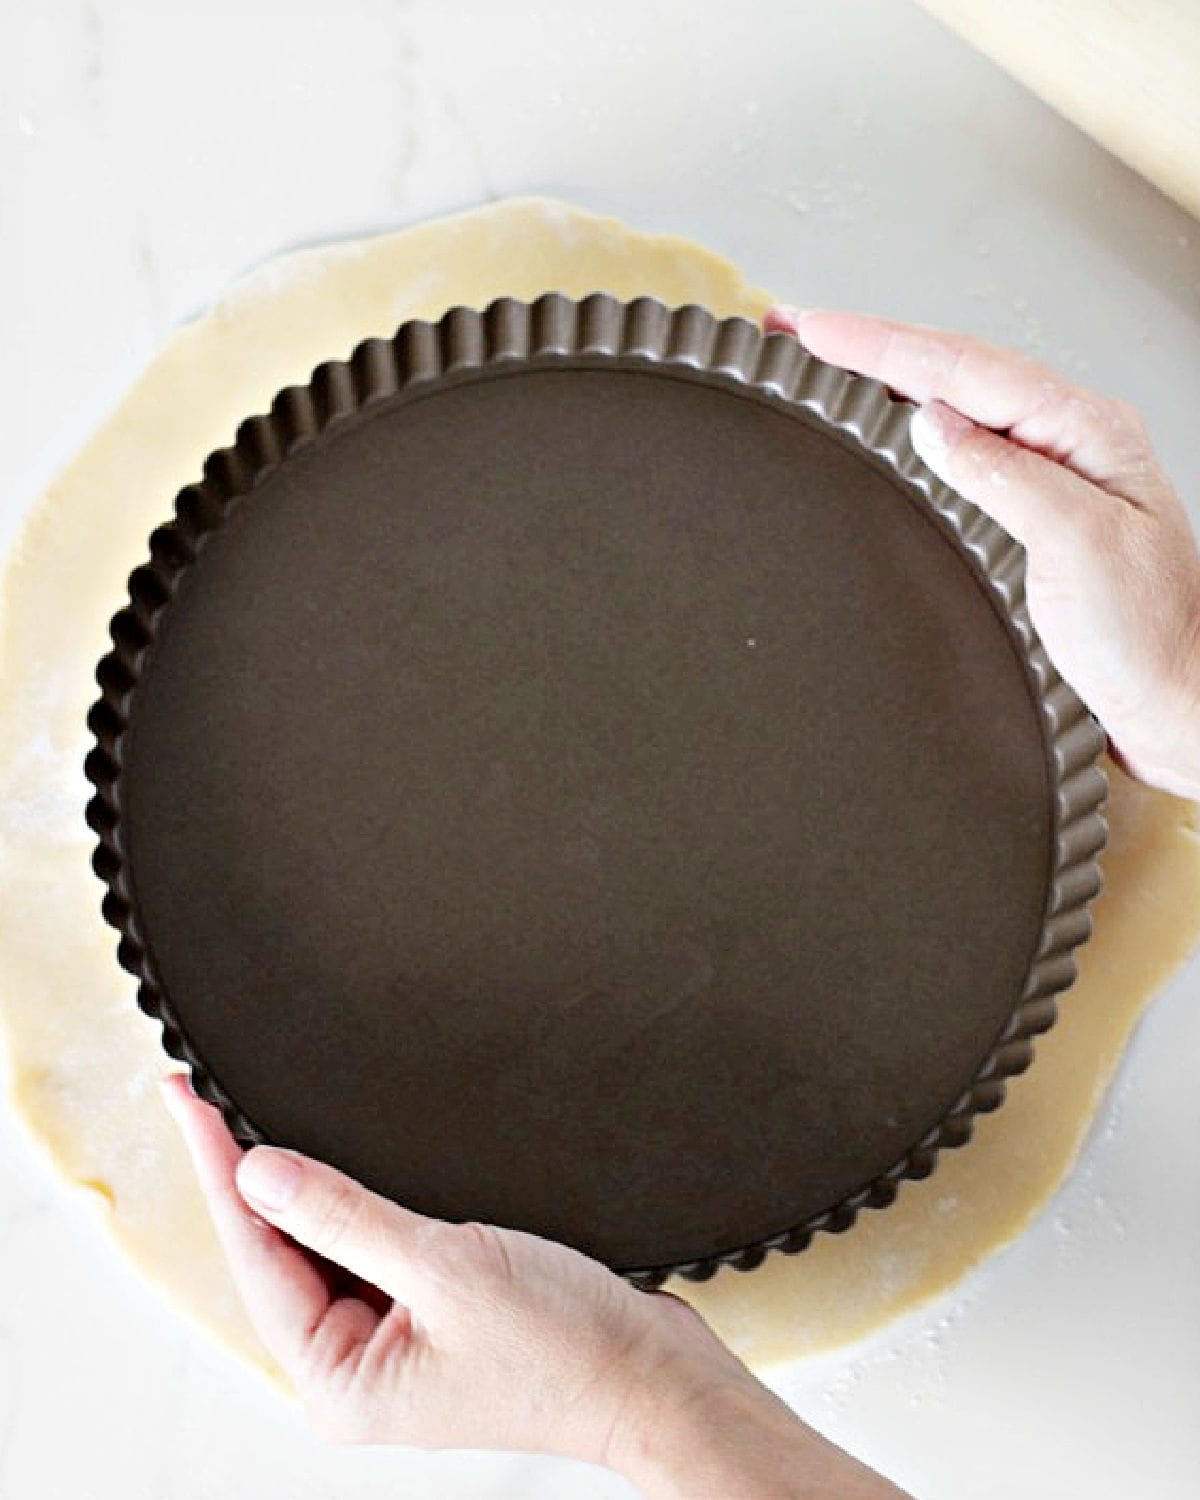
- Measure the pan: when the dough is a few inches larger than the pan you're using, stop rolling. Make sure the crust is even in thickness. Adjust if needed.
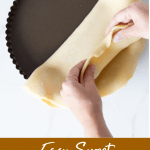
- Work quickly: once you have the rolled pie dough to fit your pan, fold it in half, lift it with both hands, and place it in the middle of the pan.
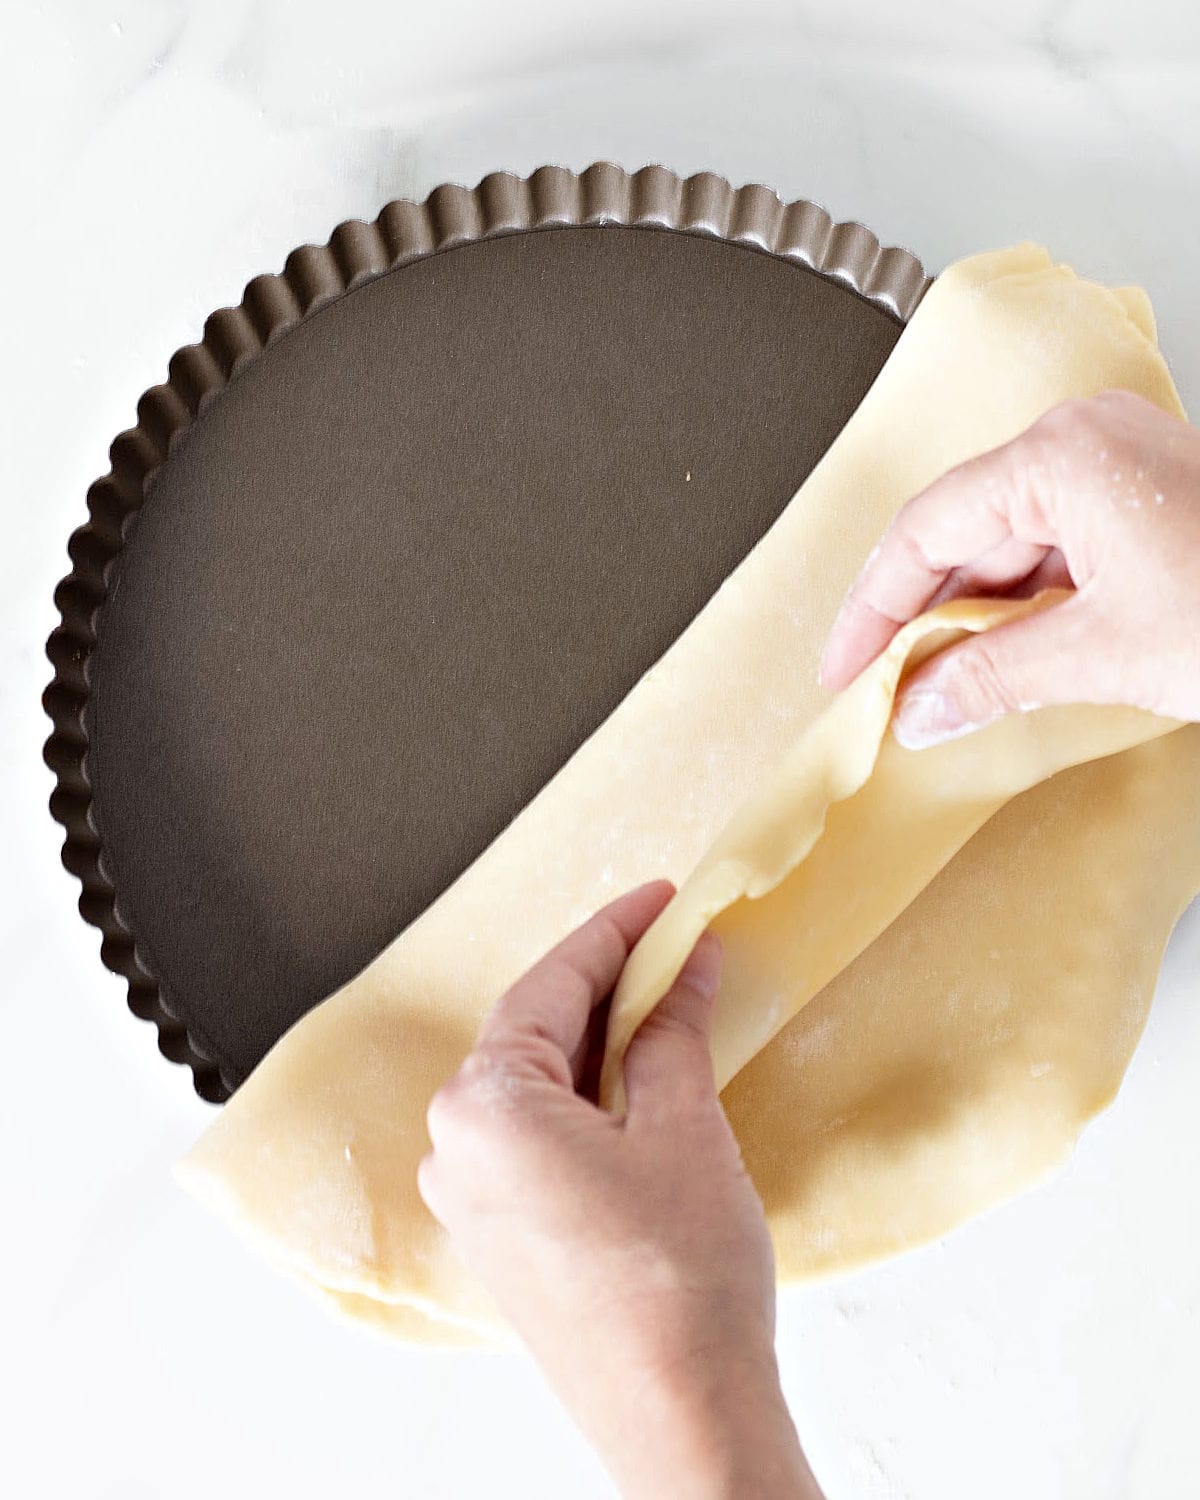
Unfold the dough to cover the whole pan, and let it ease itself into the pan; don't stretch it to fit. This is very important so the dough shrinks as little as possible during baking. Help by adhering it to the sides with your hands, but never stretching it, remember that.
Removing excess pastry
The final lined pan will have some excess pastry around.
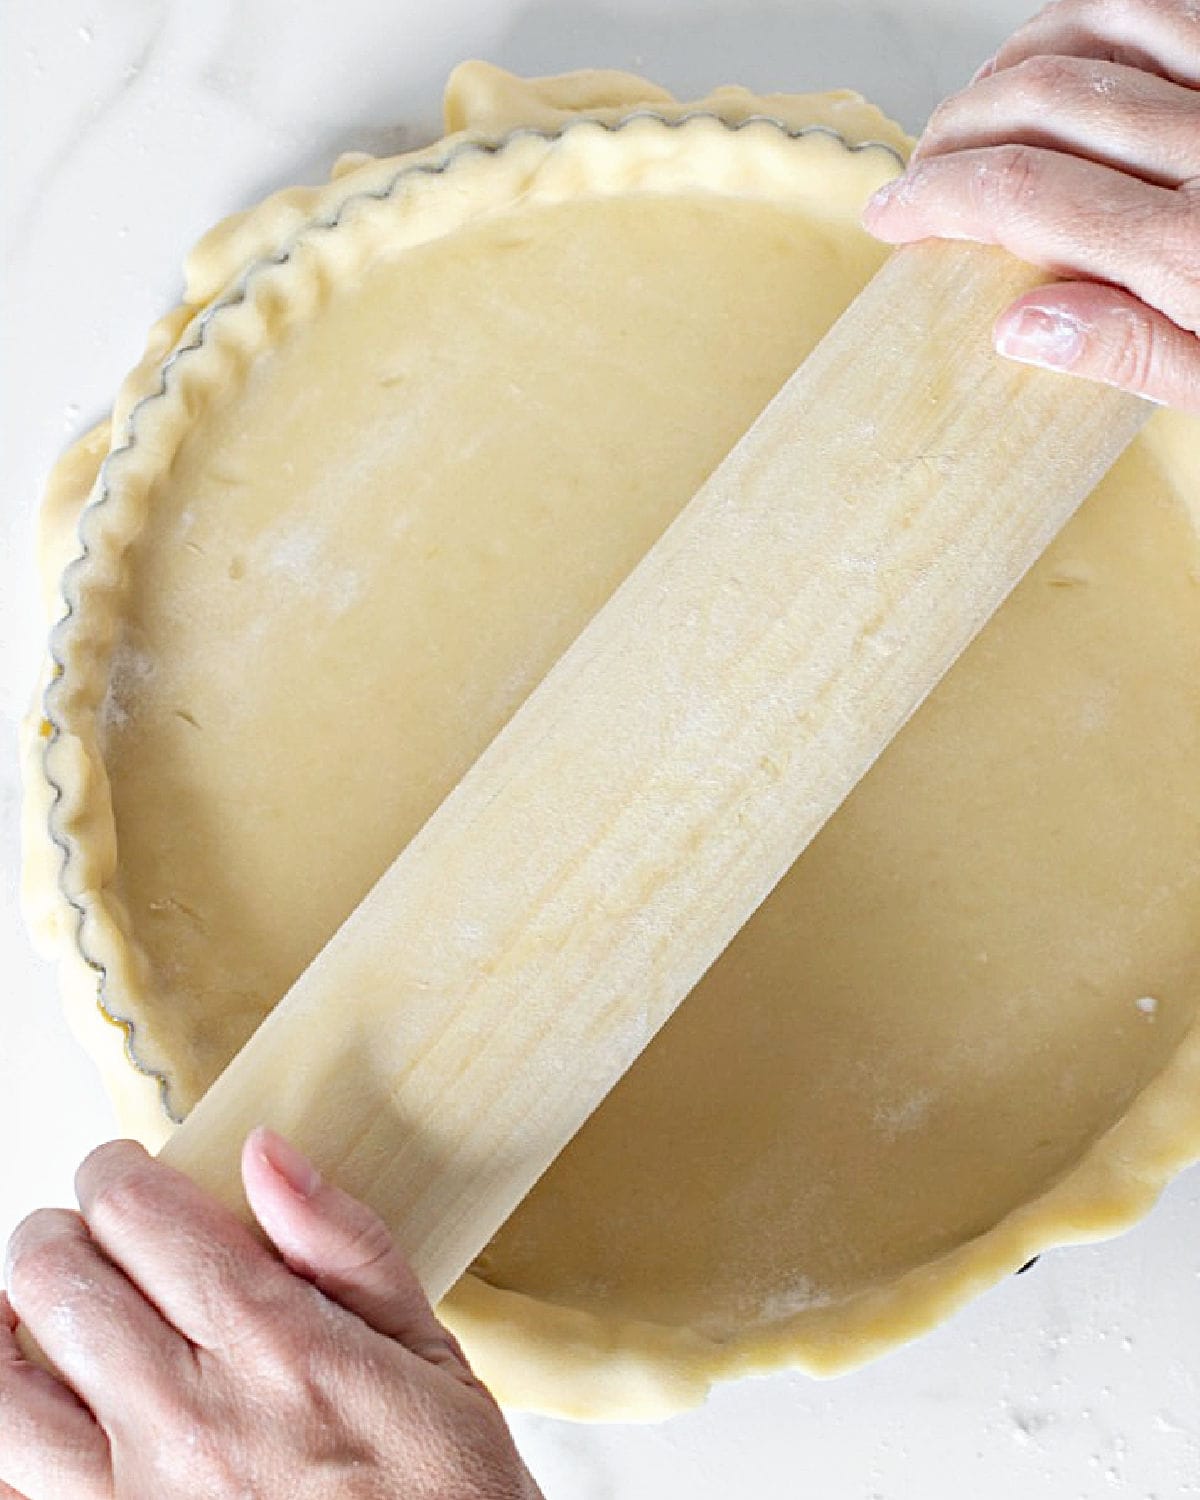
- Rolling pin: My favorite method when using metal tart or pie pans is to use a rolling pin. Roll from one side to the other, and the weight of the pin will cut the dough. Remove any excess dough still clinging to the pan, and you're set.
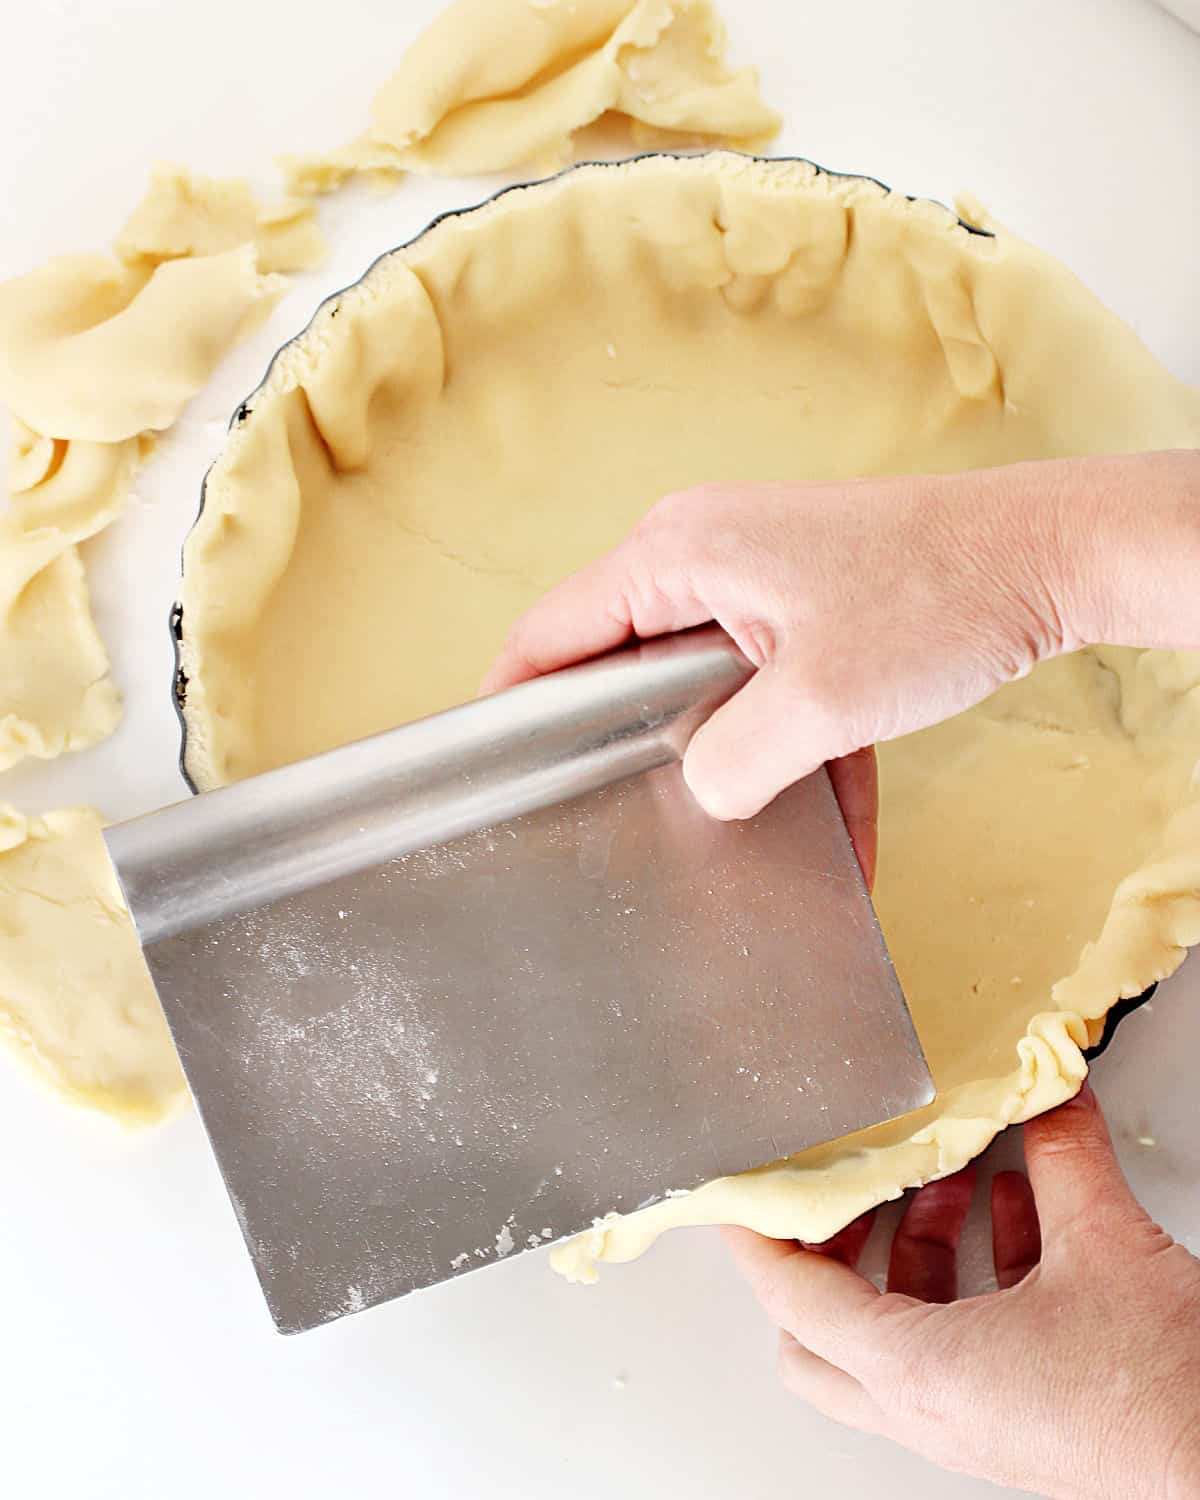
- Dough scraper or smooth-bladed knife: You can also cut the excess dough with a scraper or a knife. This is a good option, but the cut is more uneven than the first option. You will have to finish it by hand, smoothing it after you scrape it.
After this step, you have to flatten the sides again with your hands so the dough is well adhered.
What is blind baking?
Blind baking is pre-baking the dough with weight on top. It is called blind because the raw pie dough is completely covered with paper (aluminum foil or parchment paper).
It's only for pies where the filling will be baked. It's not for no-bake fillings.
Why is this step recommended?
- To prevent a soggy crust: some fillings tend to seep into the unbaked dough while baking, so this step ensures that the dough develops a dry layer before the tart is filled and is not soggy after it is baked.
- To keep the shape: if left to chance without refrigerating, pricking, and blind baking, the pie dough will puff and shrink as it bakes. We don't want that. We want it to keep its shape and have enough space for the filling.
Blind-baking steps
Preheat the oven to 350°F and take out the lined pan from the refrigerator or freezer (always my first choice).
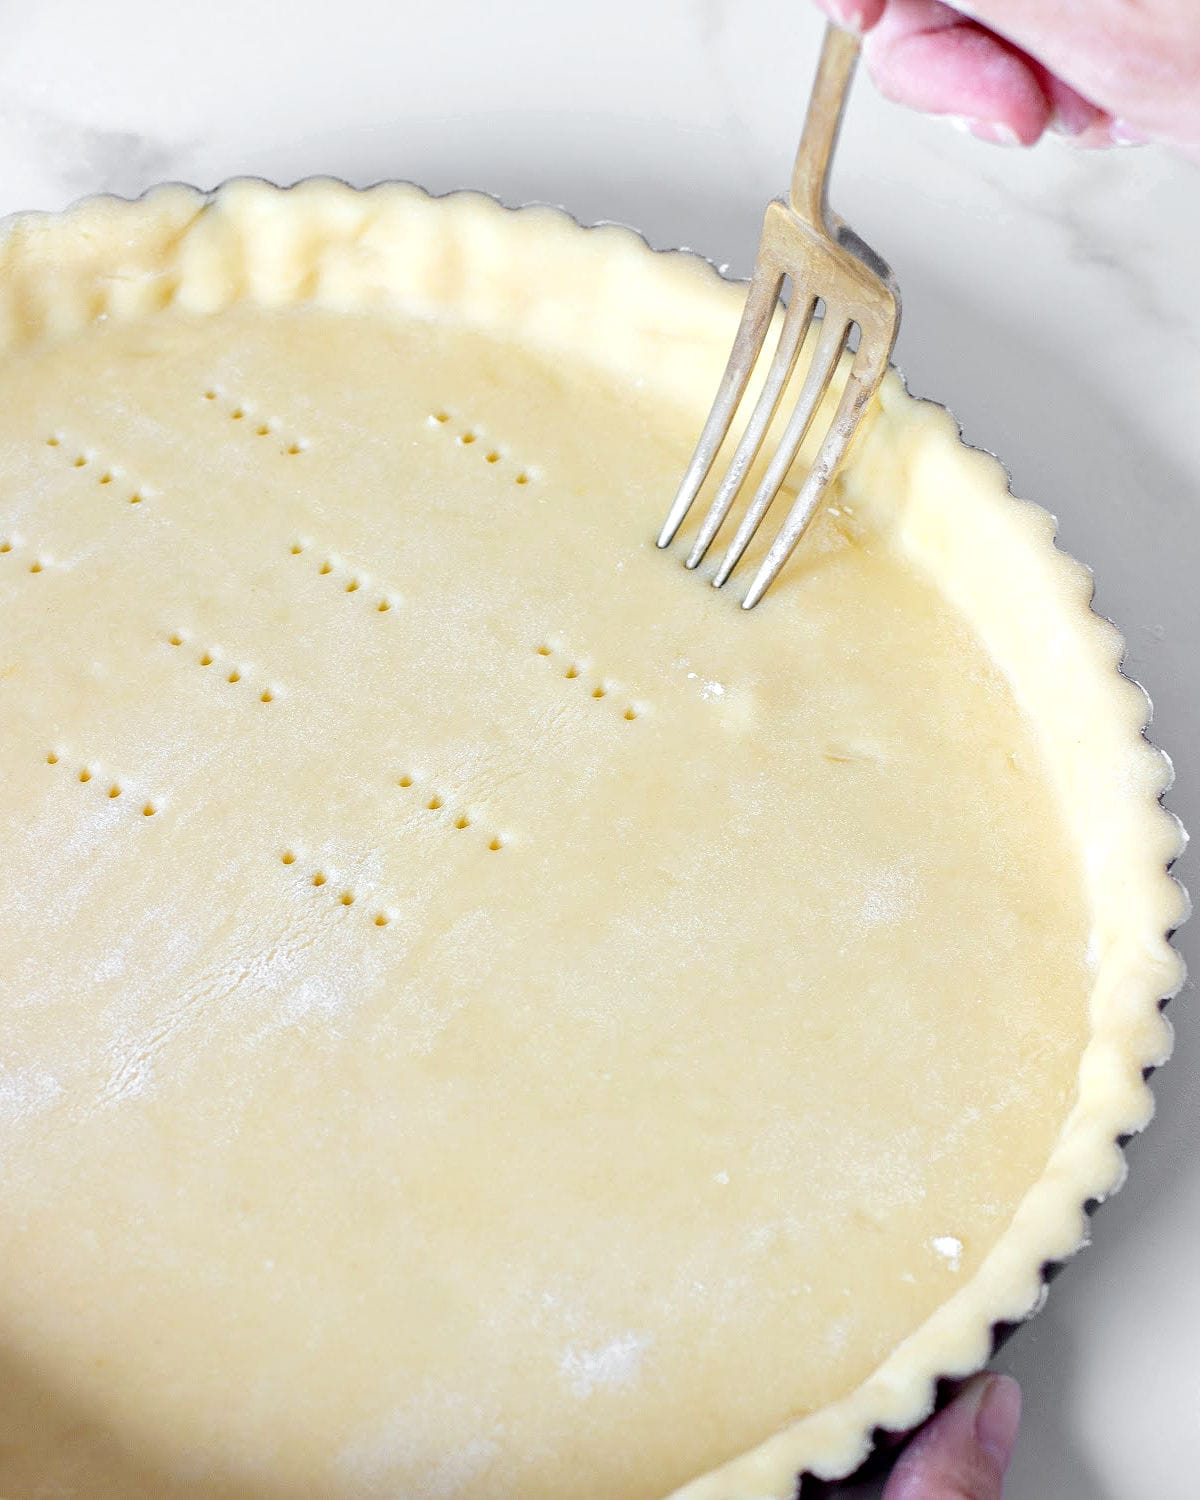
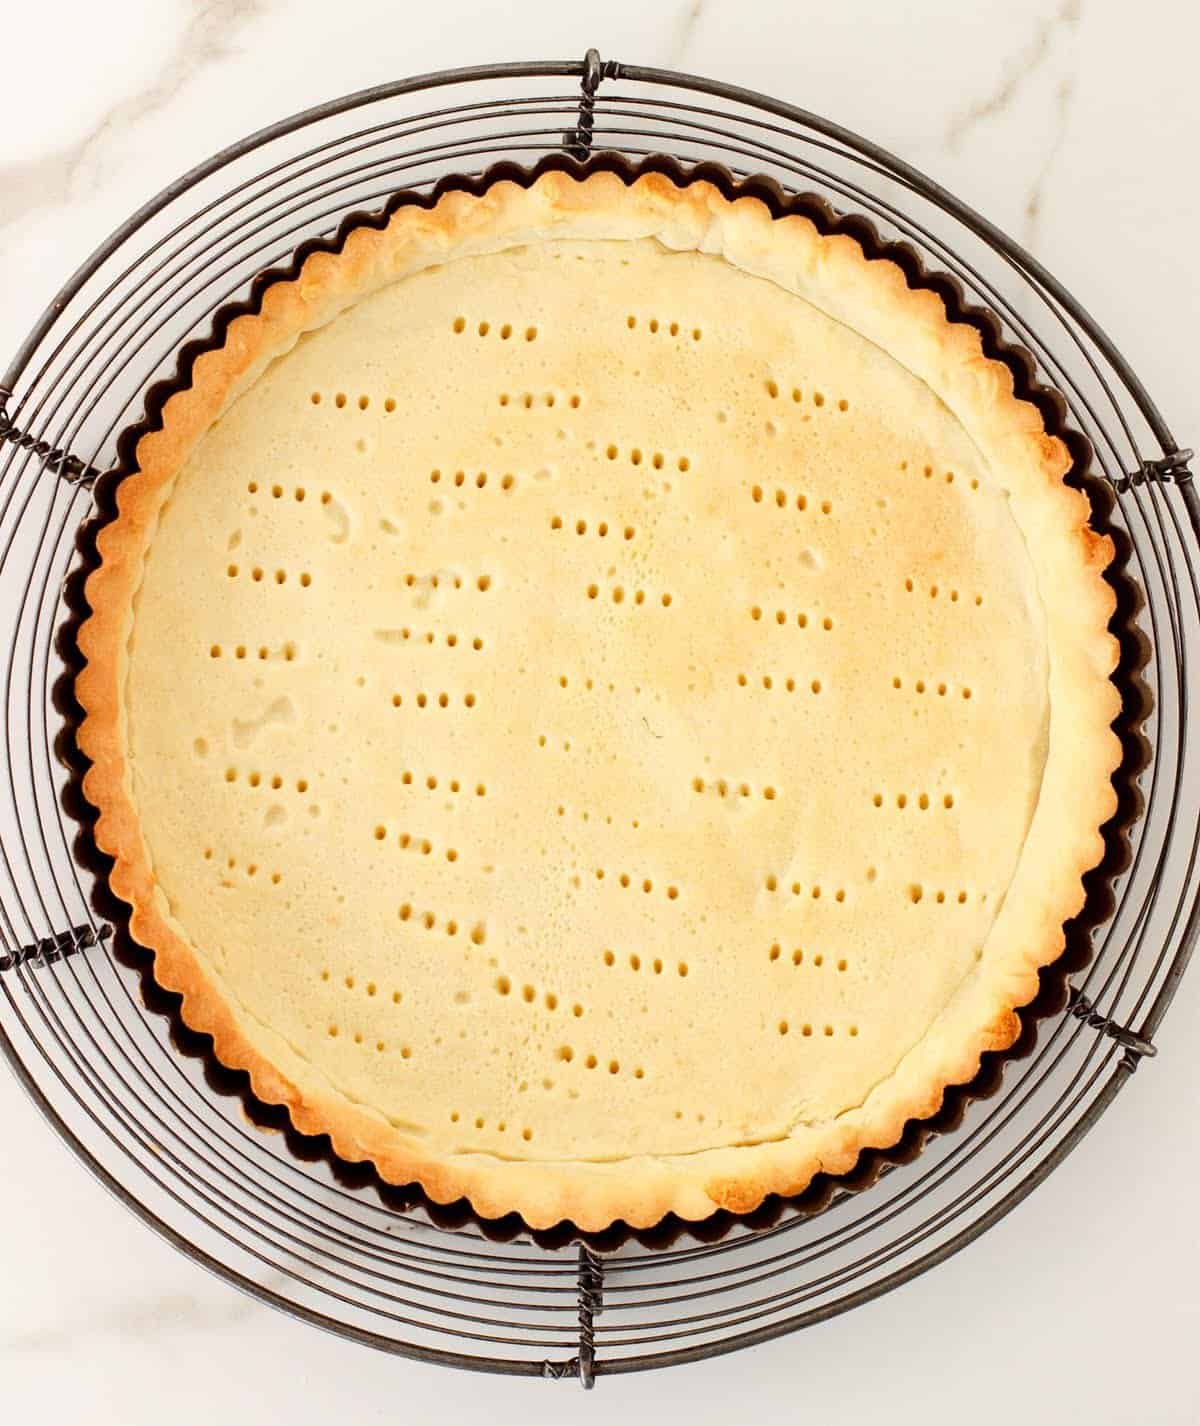
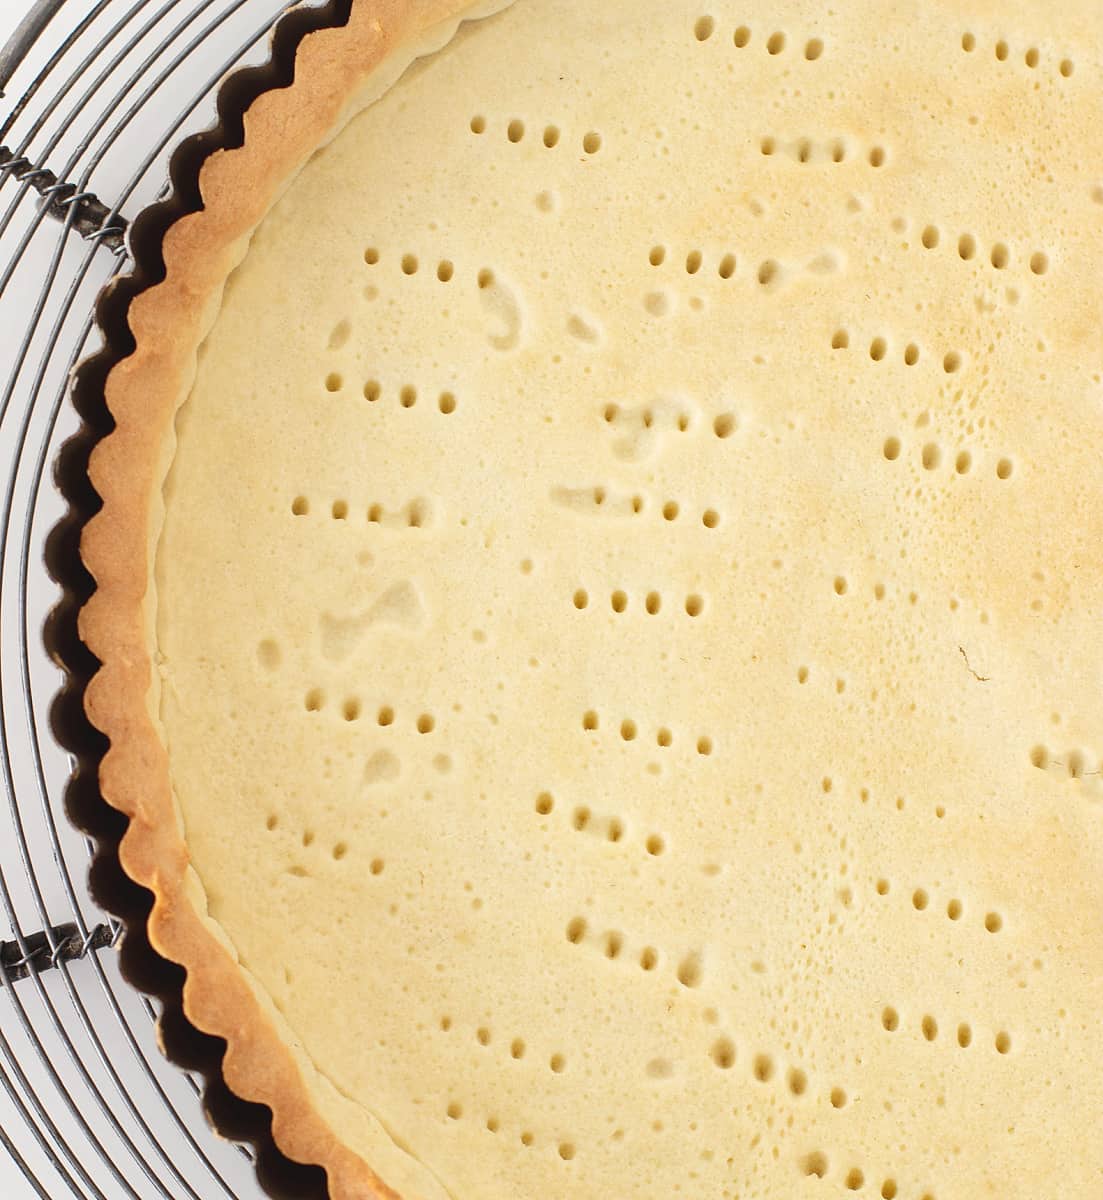
- Once the pie pan is lined and the excess dough removed, we need to prick the bottom of the pan with a fork (or dock a pie crust as we say).
Why do we do this? In the oven, the dough will try to grow and puff up too much, reducing the amount of space left for the filling. Piercing the bottom helps it stay put and not grow as much because the air trapped inside can escape through the holes. This, combined with blind baking, is what we do to have a flat tart shell with a crisp texture.
- Cut a piece of aluminum or parchment paper that is larger than the tart pan. Cover the cold dough with it, adjusting it so that it takes the shape of the dough. You can also use parchment paper, but it's usually coarser and more challenging to make it take the shape of the pan and cover the dough well.
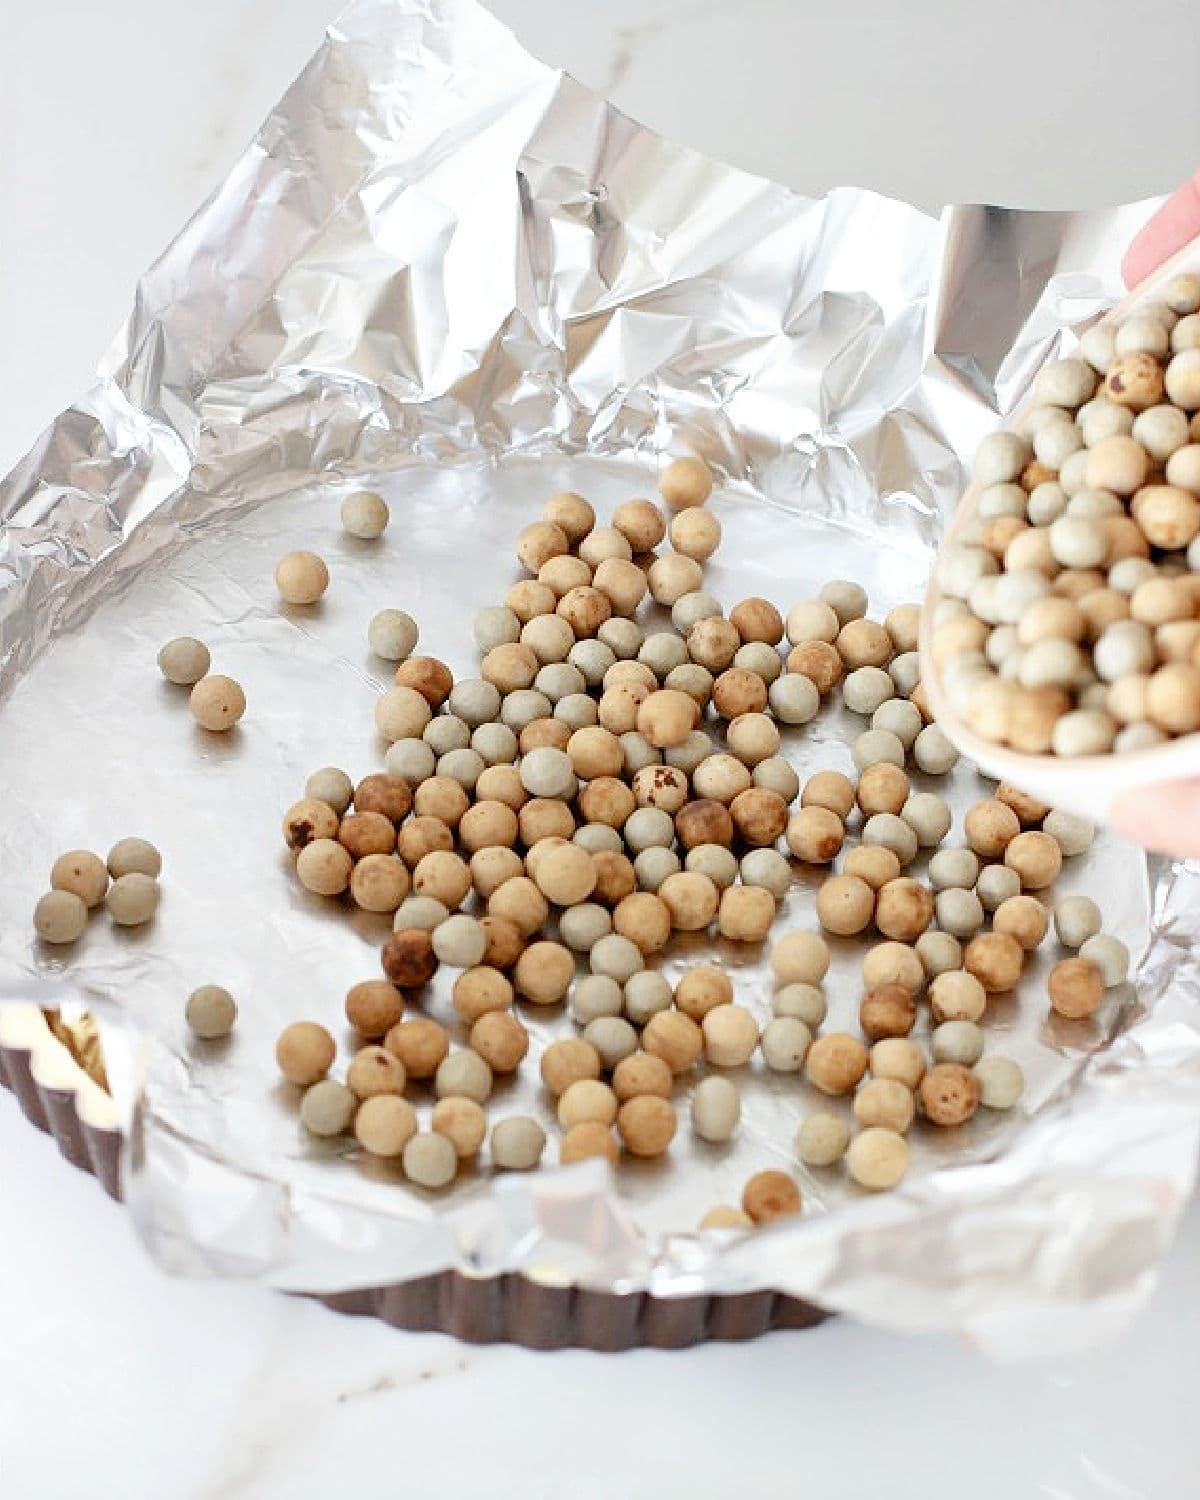
Add weight. I use round ceramic pie weights that you can buy online, but any raw grains and legumes can be used, such as beans, lentils, rice, or even flour. Fill the aluminum paper with flour, rice or whatever you're using until you have added a layer of weight that will be enough to keep the paper down during baking.
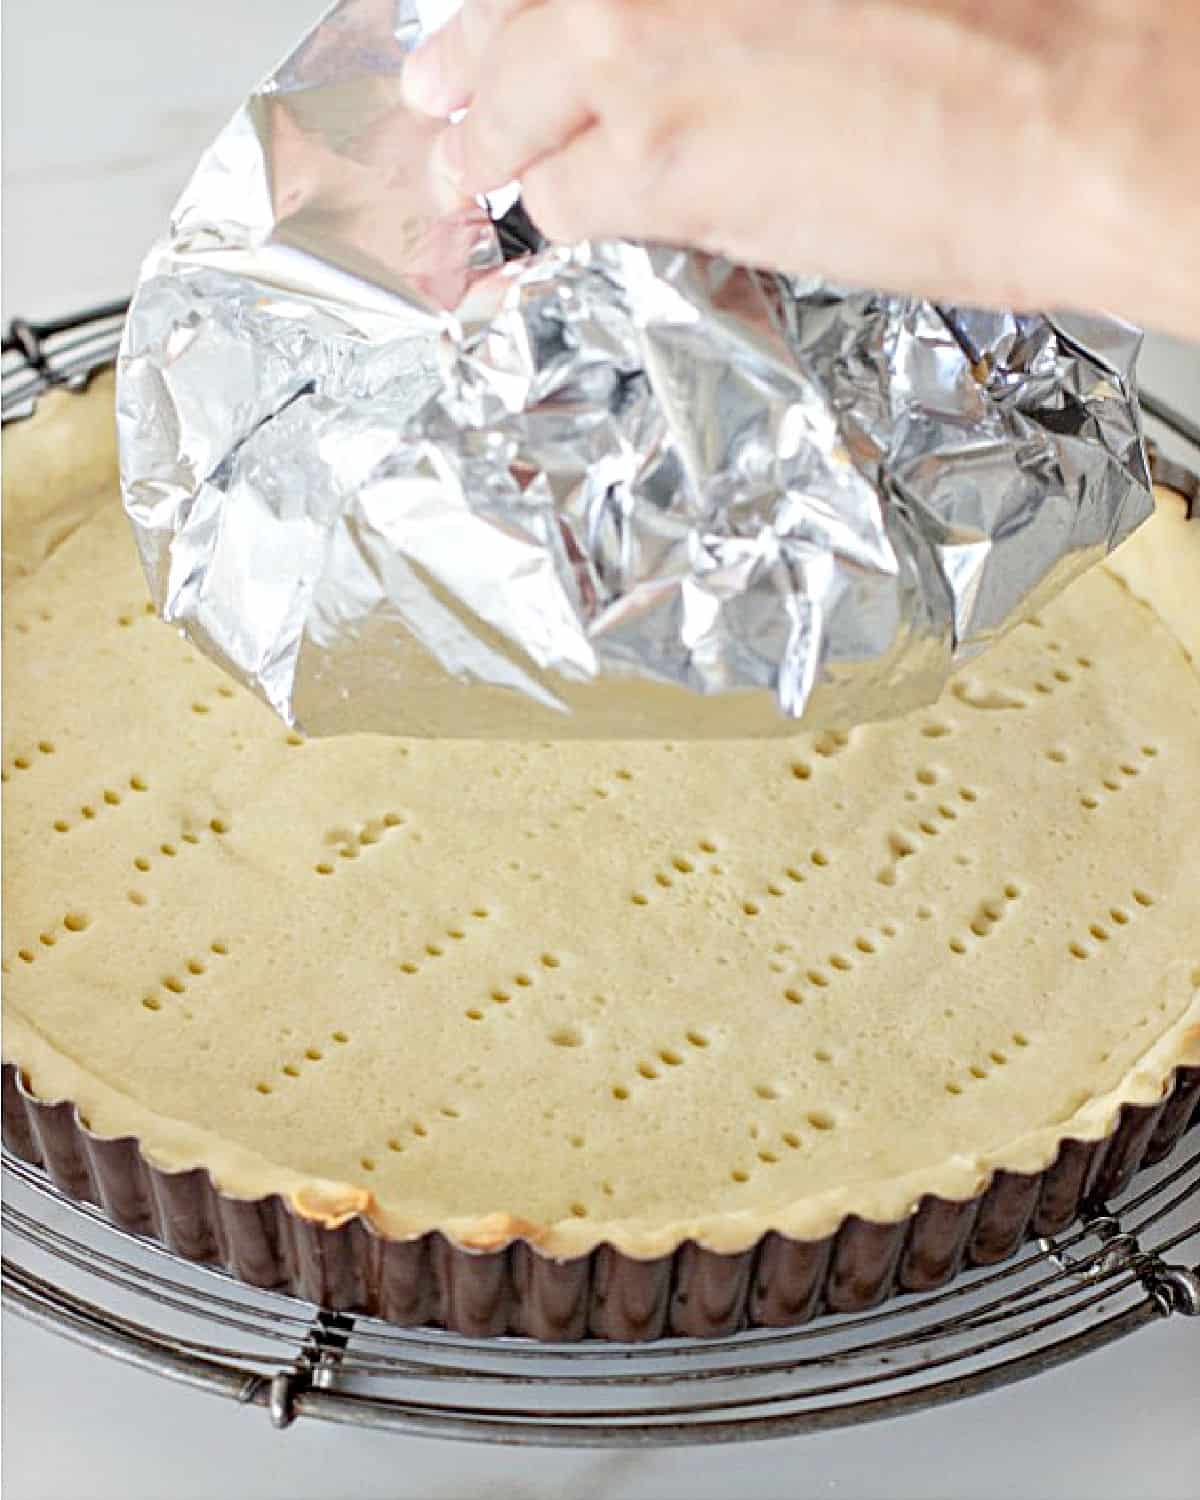
- Bake for 15 minutes. It might be a few minutes more or less, depending on the type of pie crust, but the idea is to let the dough bake and dry out enough so that we can lift the aluminum paper without having bits of raw dough attached to it. The paper should lift easily, and the dough below should be half-baked and maybe slightly wet still.
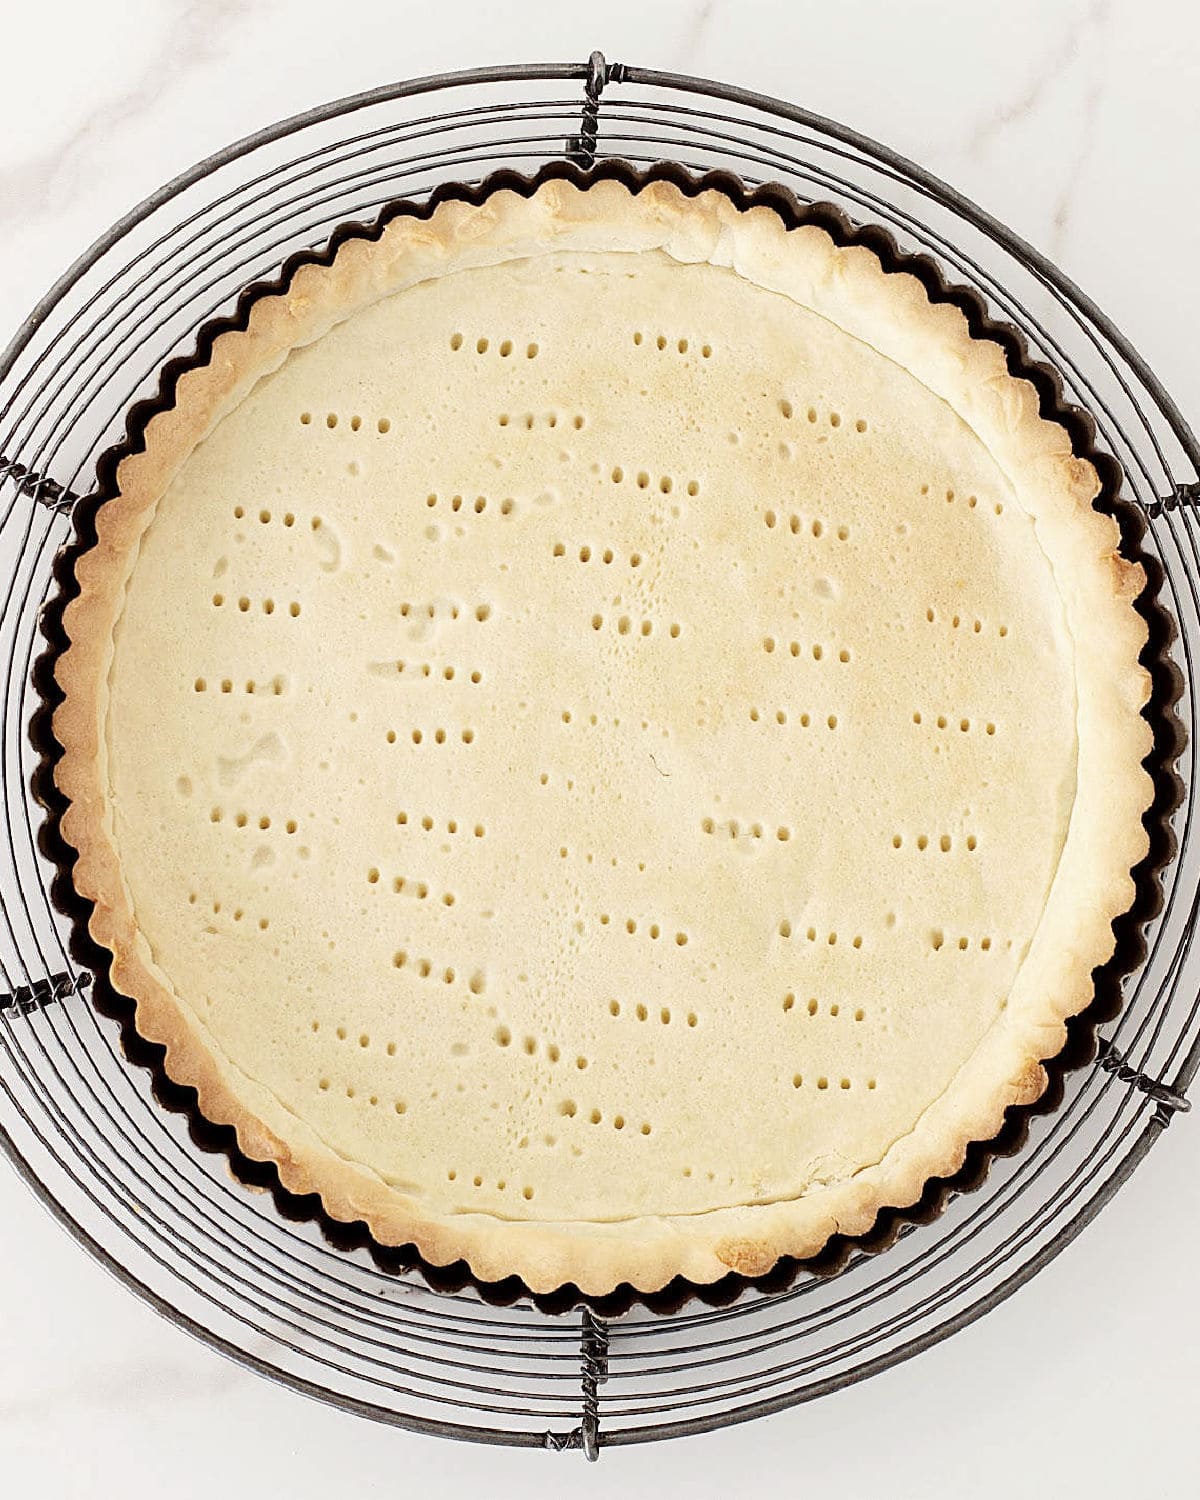
- Bake it for 5 more minutes, just until it loses its shine and is dry. Don't let it bake fully unless you're using a no-bake filling.
Pan types and sizes
Depending on the tart or pie you're making is the pan you'll need.
- Metal: These pans are my favorites because they conduct heat better and the crust bakes evenly. They usually come with a removable bottom (springform pan), which is great when serving tarts. This shortcrust pastry dough is perfect for these pans, whether it's a shorter quiche-like pan or a metal pie pan with high sides.
- Traditional pie dishes: the most popular ones are the ceramic pie dish and the glass pie pan, which don't have removable bottoms and act as serving dishes. This dough works with these pans, but is not ideal for them IMO because you don't achieve the crimping that is so traditional.
- Pan sizes: this recipe makes enough for a 9-inch round tart, an 8-inch lattice tart, or a deep-dish 8-inch pie.
Freezing it
- Well wrapped: this is essential to prevent dryness and unnecessary freezer burn. I put it in airtight bags or cover it well with plastic wrap (cling film) twice.
- Lasts a month: at least. I've had doughs for two months and used them and they were perfect.
- Label it: make sure you put what type of dough it is and the date you made it.
- Lined pan: many times I line the pan and then freeze it, well wrapped. I did this once with a dough I didn't use and it turned out so well that now I tend to have a ready-to-be-baked pie pan in the freezer. It saves a lot of time because you blind bake it directly, no need to defrost it.
Defrosting dough disks
For rounds of dough that have been frozen, the best way to defrost them is in the refrigerator. It will be gradual, they will thaw more evenly, and the dough will be cold when you roll it.
It will take several hours. I put the wrapped packet with the frozen dough in the fridge from one day to the other.
If you're in a hurry, you can defrost it at room temperature. Let it come to a point where it is very cold and barely softened. Again, be careful it doesn't get too soft because it won't give you the tender and flaky pastry crust you want.
It's best that you roll it out while it's still very cold.
If you made this recipe and loved it, you can comment below and leave a 5-star ⭐️ review. Also, if you had issues, let me know so we can troubleshoot together.
You can also subscribe to our FREE email series 'Baking the Best' and our regular newsletter. Or follow and save my recipes on Pinterest.
As an Amazon Associate, I earn from qualifying purchases. Read my disclosure policy.
Sweet Tart Crust (Pate Sucree)
Ingredients
- ½ cup + 1 tablespoon unsalted butter, at room temperature
- ¾ cup powdered sugar
- 1 egg, at room temperature
- 1 ¾ cups all-purpose or cake flour
- pinch of salt
Instructions
- In a large bowl, cream ½ cup + 1 tablespoon unsalted butter with a spatula until smooth. Add ¾ cup powdered sugar and mix until incorporated.
- Add 1 egg and mix with the spatula or a fork. It will not be smooth or completely incorporated, and that is fine.
- Add 1 cup of the flour and a pinch of salt. Mix it, but don't wait until the flour is completely incorporated and add the remaining ¾ cup flour. Now, mix it until lumpy and a few dry spots remain.
- Turn it onto a clean surface or counter and mix with your hands, trying to make it come together but kneading it as little as possible. The more you handle it, the softer the butter gets and the tougher the crust becomes after it's baked. So, a quick, light touch is the best. Don't knead it like you would bread.
- When you have a smooth dough ball, wrap it in plastic and refrigerate for at least 1 hour and up to 2 days.
- When ready to roll, take the dough from the fridge and let barely soften at room temperature. The dough must still be cold. Simply wait until you can start to roll it, but not until it is very soft. This is important to ensure a tender dough.
- On a lightly floured counter, start rolling the dough disc, making sure you do quarter turns (I do them to the left) often to ensure the dough is not sticking and adding more flour to the counter if it is sticking.
- Once you have rolled the dough a few inches larger than the pan, fold it in half and place it in the middle of the pan. It's soft, so handle with care.
- Open the dough and line the pan, being careful not to stretch the dough. Use your hands to lower the dough and reach the union between the bottom and sides of the pie pan.
- Go over the rim of the pan with the rolling pin to remove excess dough.
- Prick the bottom with a fork, freeze for 20 minutes, or put it in the refrigerator for 1 hour. At this point, you can leave the dough frozen in the pan for up to a month, wrapped in plastic.
- Or you can blind-bake it or bake it completely, depending on what you're making. Every pie and tart recipe in this blog has the steps to bake the pie crust. This post is about how to make and store the pastry.
- Preheat the oven to 350°F (180°C).
- How to prepare a pie crust for blind baking: Take out the cold lined pie pan from the fridge or freezer.
- Cut a piece of aluminum paper that is larger than the tart pan. Line the inside of the pan by covering the cold dough with it and adjusting it so that it takes the shape of the dough. You can also use parchment paper, but it's usually coarser and more difficult to make it take the shape of the pan and cover the dough well.
- Add weight. I use round ceramic weights that you can buy online, but you can add any raw grains and legumes such as beans, lentils, rice or even flour (simply fill the aluminum paper with flour or rice or whatever you're using until you have added a layer of weight that will be enough to keep the paper down during baking.
- Bake for 15 minutes. It might be a few minutes more or less, depending on the type of pie crust, but the idea is to let the dough bake and dry out enough so that we can lift the aluminum paper without it attaching to the raw dough. The paper should lift easily, and the dough below will be half-baked, very lightly golden. Fill and bake further following instructions in the recipe for the tart or pie you're making.
- To completely bake the shortcrust pastry: first, follow the steps to blind bake it, above. After removing the paper and weight, return the pan to the oven and bake for another 10-15 minutes, depending on how golden brown you want it. The crust should be dry. Let cool on a wire rack.
- If fully baked it will keep for a few days in a metal tin or at room temperature if the place is dry and cool. But I suggest you bake it the day you're filling it.
Jackie says
Love love this recipe 😍 this is the preferred crust for all my fruit pies 🤤. I usually add all lil bit of cinnamon into the mix though ❤️.
Anne Lindley says
I am pleased that I found this pastry recipe. It works perfectly. I will now look for a savoury pastry as good as this!
Nancy Larson says
Would this pie crust be good for an italian ricotta pie? I make a sugar cookie dough crust and it always turns out wet and disintegrates after baking with filling.
Paula Montenegro says
Hi Nancy, we use the Italian pie crust for the ricotta pie. But you can use this one. It's a little snappier and sweeter.
Karin says
I'm planning to use the recipe for Christmas mince pies and wondering if it's possible to blind bake then freeze the individual cases. Or would the baking time for added filling and pastry tops result in overcooked bottoms? Anyone tried this?
Paula Montenegro says
Hi Karin, you can blind bake and freeze pie crust. Wrap the cases well after they're completely cooled. The bottoms should not be overcooked after baking them with the filling.
Karin says
Thank you
James Clowers says
I am looking to use this pastry to make individual pumpkin tarts would I be able to get away without baking them blind or should I still continue with this step?
Paula Montenegro says
Hi James! I always blind-bake it. But, you can make a test run with a small tart and see how it goes. Make sure the dough is cold when you add the filling.
Richard McCandless says
Very helpful. Thanks
Julie says
Good day, would this pastry crust be the best one when making a banana cream pie? Would a crust made from vanilla wafers be better? Thanks in advance. I appreciate any suggestions.
Paula Montenegro says
Hi Julie! A cookie crust with wafers is way easier and faster to put together. I would recommend that one if you don't want the hassle of making pie crust from scratch. If you are making it yourself, you can use this sweet one, or the Flaky Pie Crust, which is less sweet. That will depend on how sweet you like your desserts. I use the latter, since the filling of banana cream pie is already very sweet. But that's personal taste. Also, you can buy a good quality pie crust. Hope this helps. Have a great week!
Ana says
Can a hand mixer be used? Or did you use a spatula the whole time? Does it make a difference?
Paula Montenegro says
Hi Ana, a hand mixer can be used but don't beat the dough once you add the flour, or the crust will be tough. You only need to mix the ingredients, not beat or knead them, that's why I use a spatula and my hands.
You can use a food processor (a better alternative than the mixer). You might want to check out the recipe for Italian Pie Crust that has both the steps for making it by hand and in the processor.
Hope this helps, but let me know if you have more questions.
Sadaf Ahmed says
Hey thanks for sharing this recipe the time of baking is not mentioned please let me know that.
TIA
Paula Montenegro says
Hi Sadaf, I added more info to the recipe card and included it there. Hope it helps!
Daniela says
Such a useful pastry post!!! I adore all your pictures and will definitely be putting this to use this Holiday season!
Megan Ellam says
Thanks for a great recipe and all the steps on how to make shortcrust. Oh how I love pastry! Your recipe is so good I may just be able to get the hubster to follow it to make pies lol. Thanks for sharing!
Kate says
This was such a thorough and helpful tutorial on how to make shortcrust pastry! I thought the pictures were really helpful of illustrating the proper kneading technique as well.
Lizzy says
This is such a useful recipe, with so many delicous uses. Thanks for sharing!
Kelly Anthony says
This is a great step by step post on how to make sweet shortcrust. The video makes making this recipe foolproof.
Rebecca Blackwell says
Fabulous recipe. I made this tonight for a custard and fruit tart that I'm bringing to a dinner party tomorrow. It turned out perfectly. Thank you so much!
Paula Montenegro says
So glad you liked it Rebecca!
Gloria | Homemade & Yummy says
What a GREAT post. Shortcrust is my FAVOURITE of all. Easy to make, and turns out perfect.
Chichi | www.chichiuguru.com says
This is a very helpful tutorial. Shirt crust pastry can be very tricky. Thanks for sharing this with us.
Iryna says
Love this detailed tutorial! Doesn't look difficult at all.
Genevieve @fittyfoodlicious says
This recipe looks detailed and is very informative. Saving for later!
Chris Collins says
I've always wondered how to make sweet shortcrust pastry so this is right up my street! Absolutely love the step by step photos too 🙂
Juliana says
Wow! What a complete post, so useful information you share here. Thanks!