

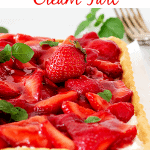
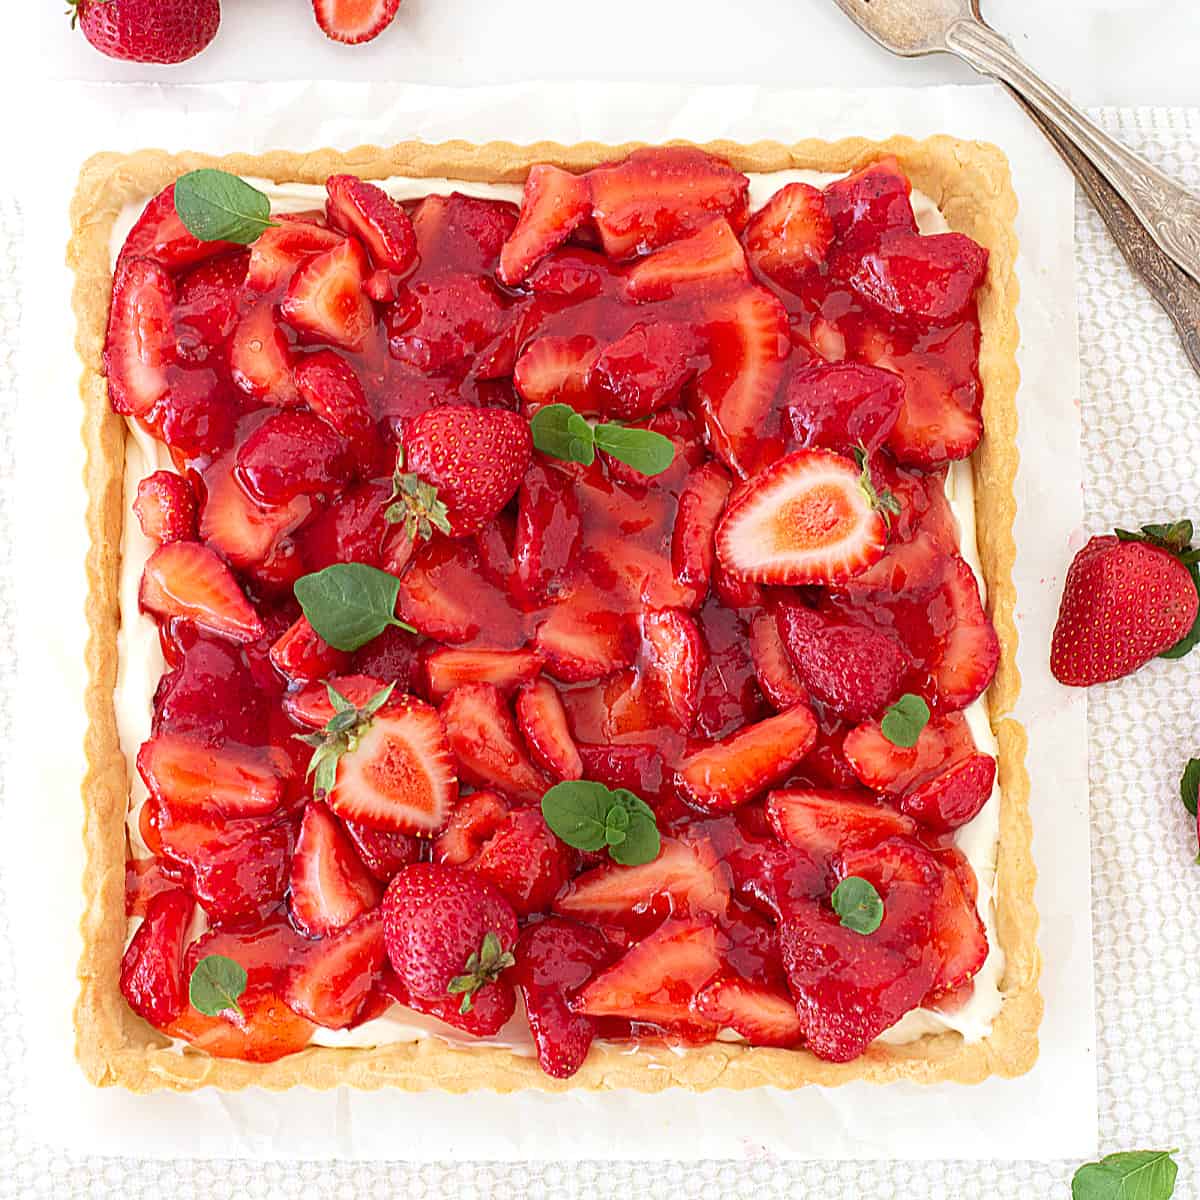
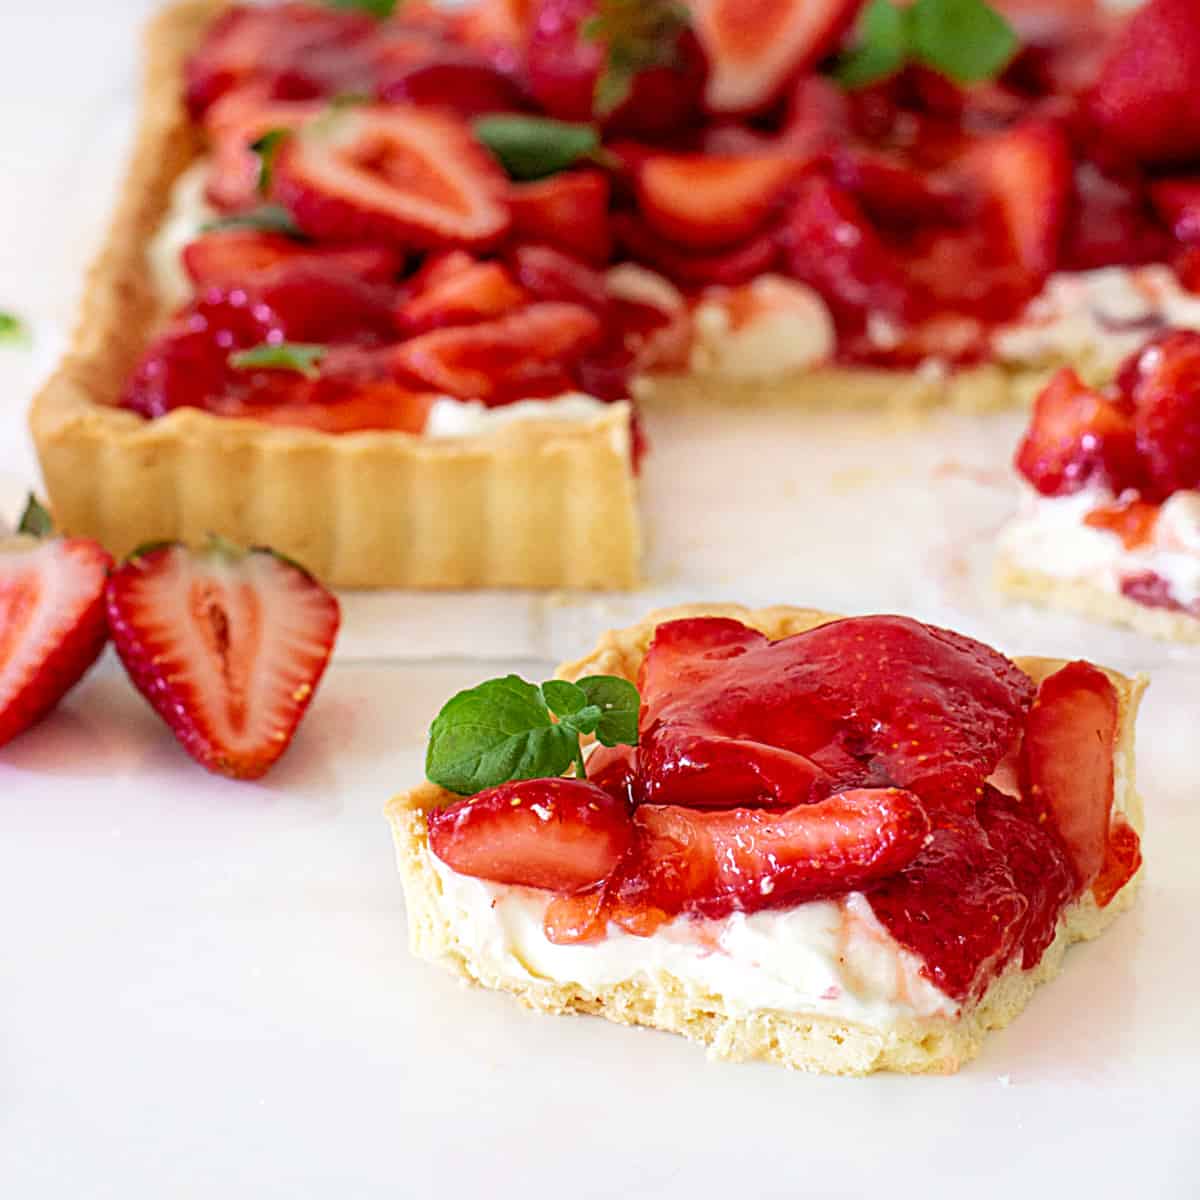
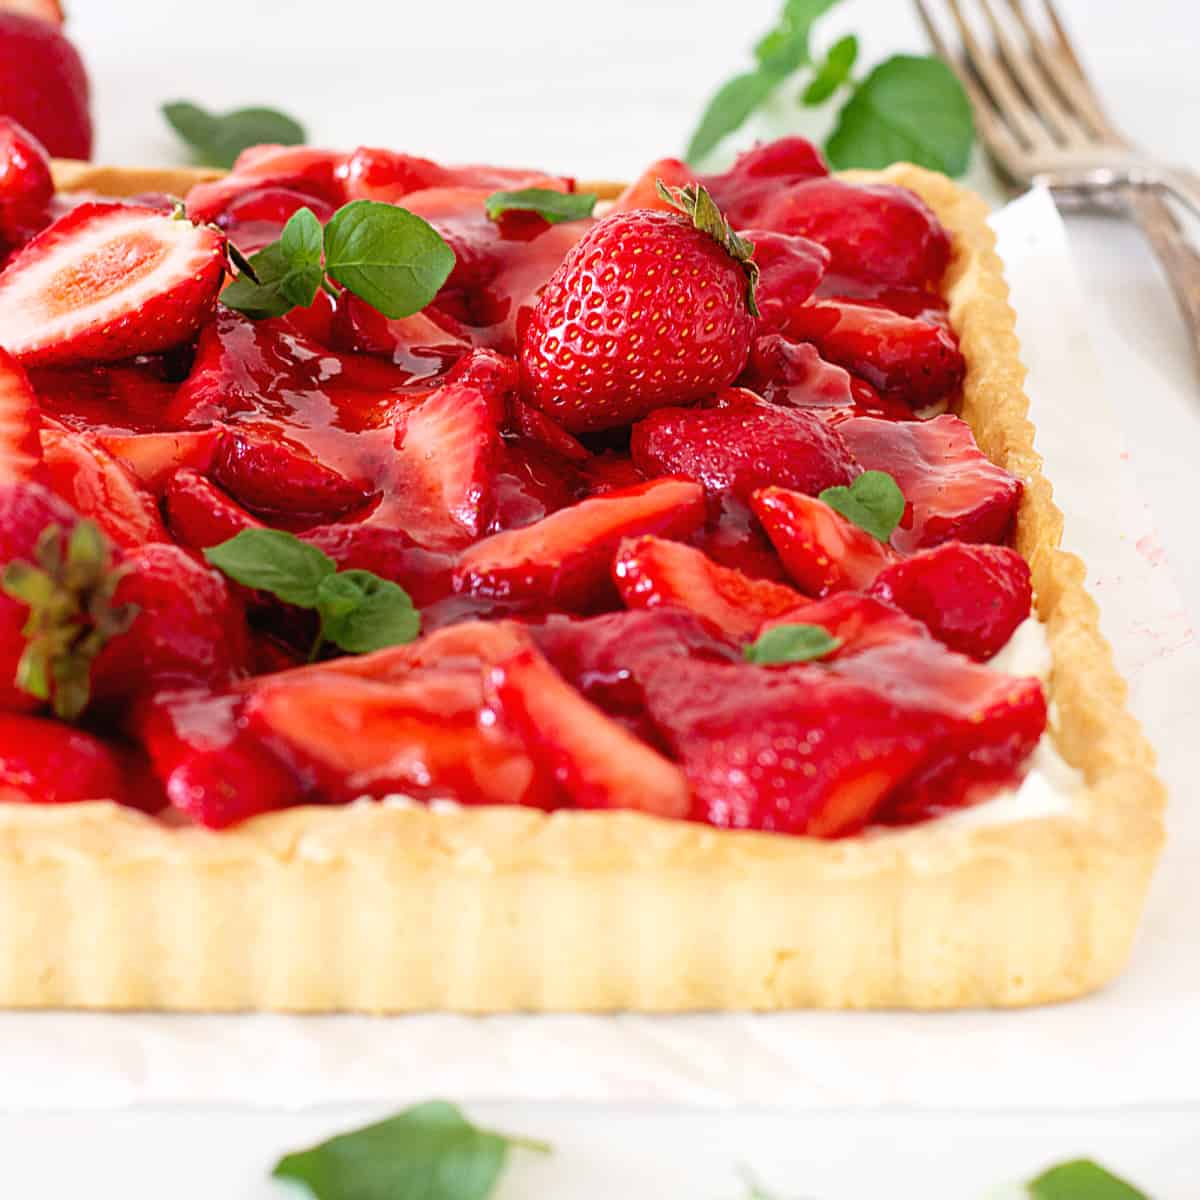
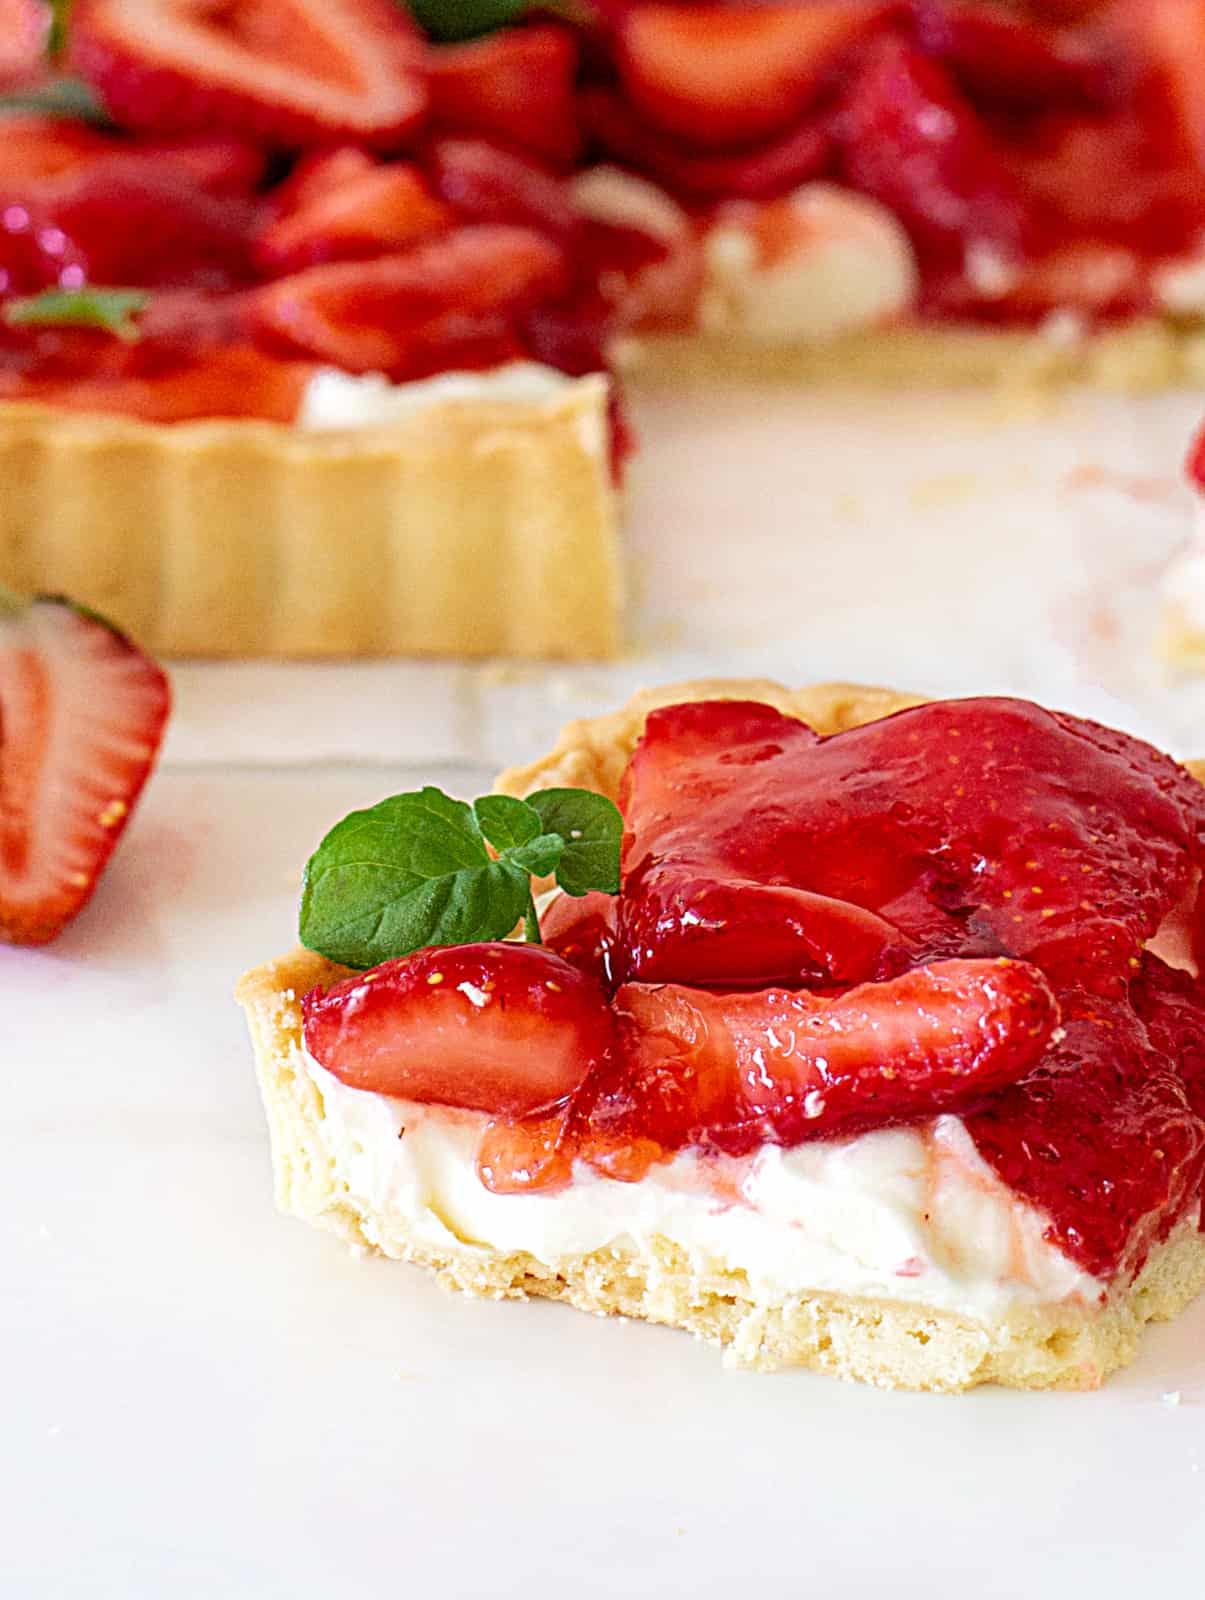
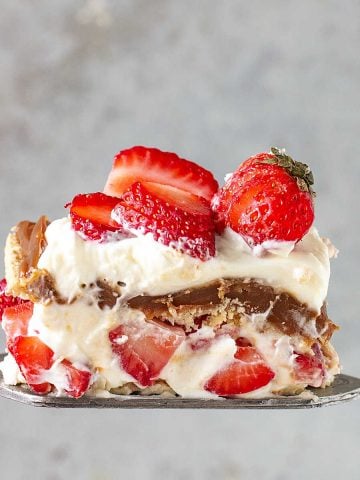
A homemade buttery tart crust containing a thick layer of whipped cream, fresh strawberries, and a jelly-like topping made with the juice from the berries. A crowd-pleaser with simple flavors and utterly delicious.
SAVE THIS RECIPE
My grandma's recipe
This is a favorite tart recipe around here and a family request for many gatherings.
Simple flavors with a jellied syrup on top made with the juices from the strawberries.
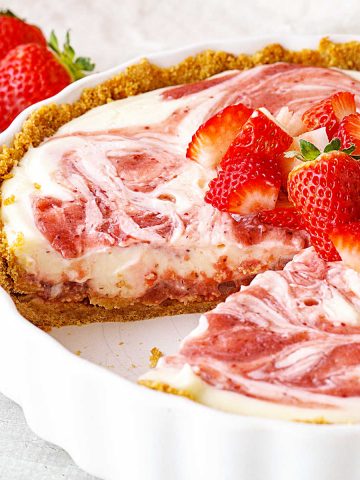
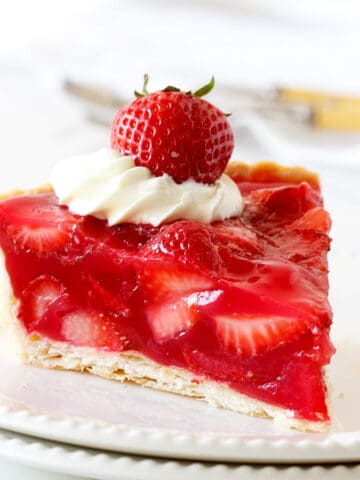
Quite different from the strawberry pie with jello, one of the most popular recipes on this blog.
It's an improved version of the strawberry pie I grew up with. My grandmother used sweetened sour cream for the filling and cornstarch for the topping.
It was simpler, but this recipe packs more strawberry flavor.
If you want to make it, I'm sharing the original version at the end of this post. Either way, it's fabulous!
The crust
I use my favorite sweet tart dough, a pie crust that is easy to make and bakes to a wonderful golden crust. It's a whole post dedicated to how to make this pie crust, with step-by-step images and instructions, and also a video!
If you have another favorite pie crust, by all means, use it.
And a graham cracker crust works well if you're short on time.
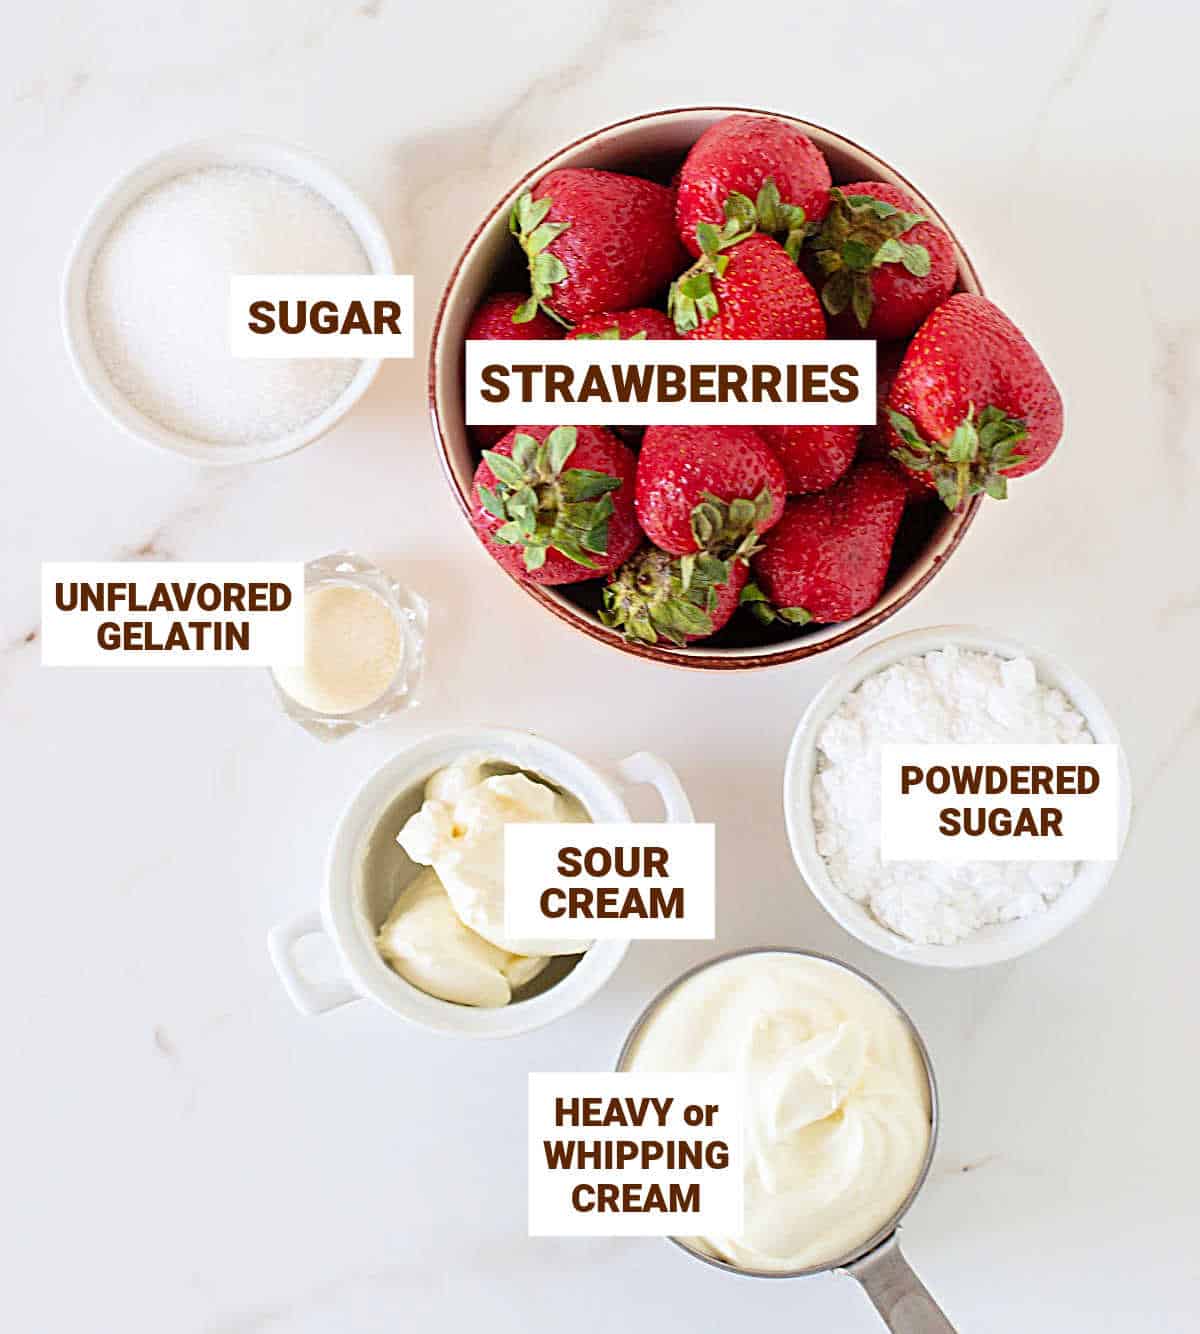
The filling
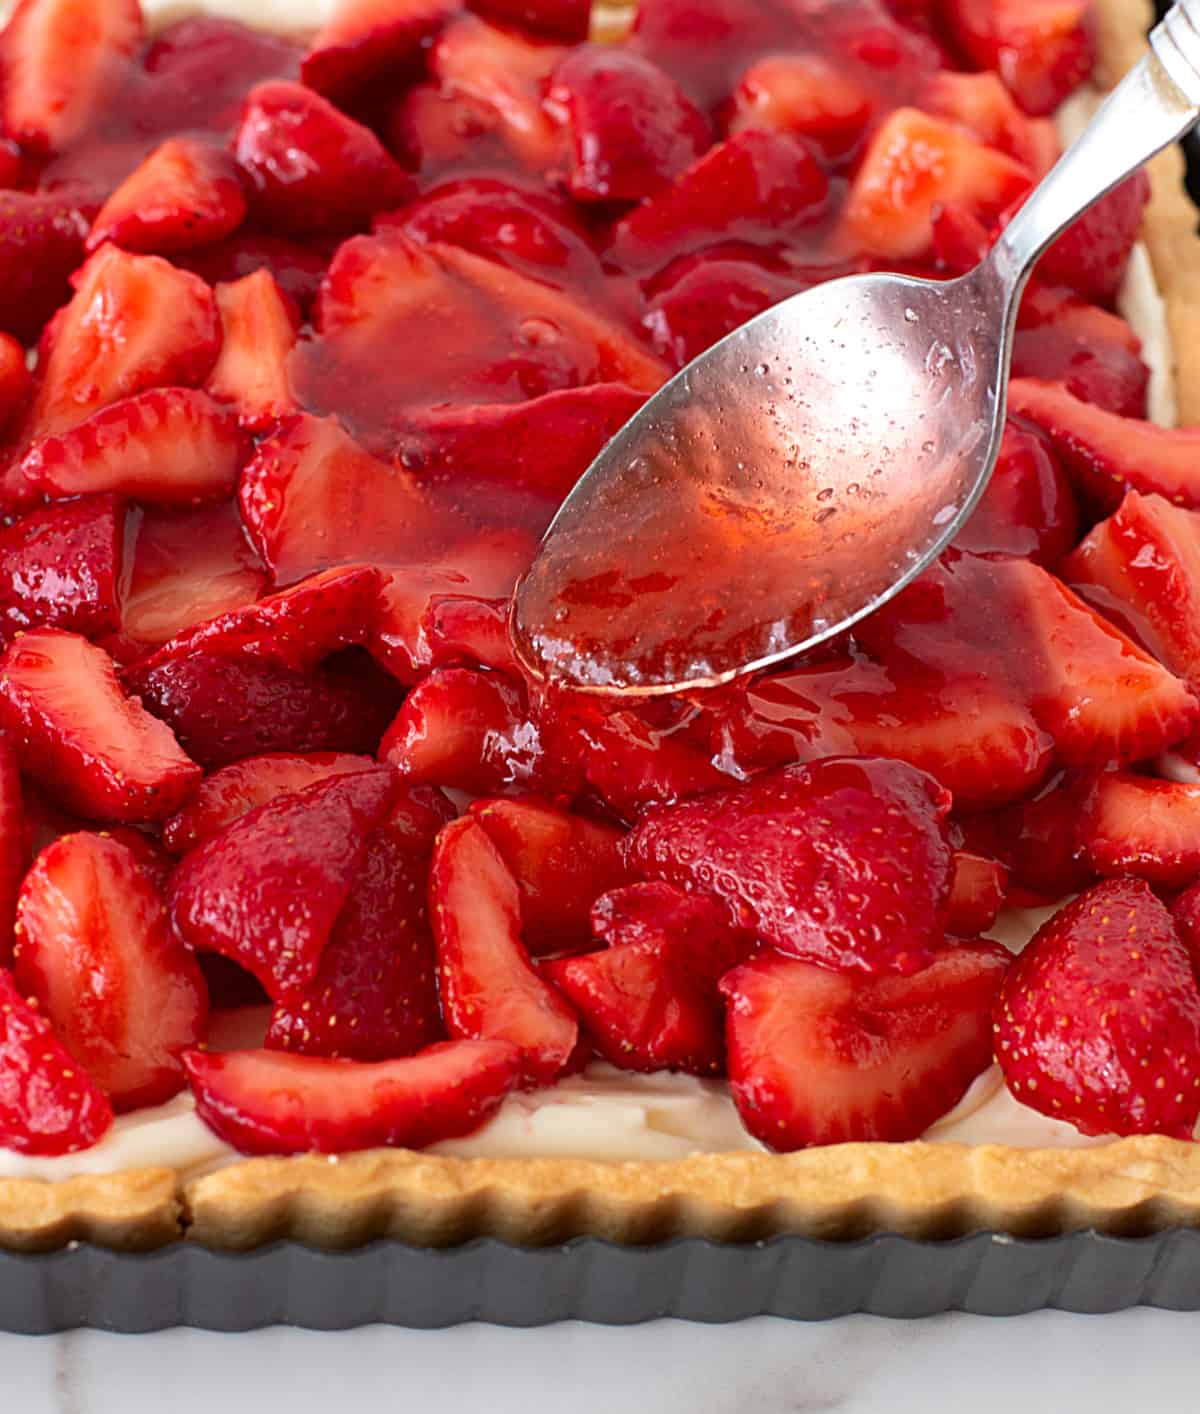
- Strawberries: fresh is the way to go, as this is a seasonal pie. Cut them into bite-sized thick slices or chunks and use whole strawberries to decorate.
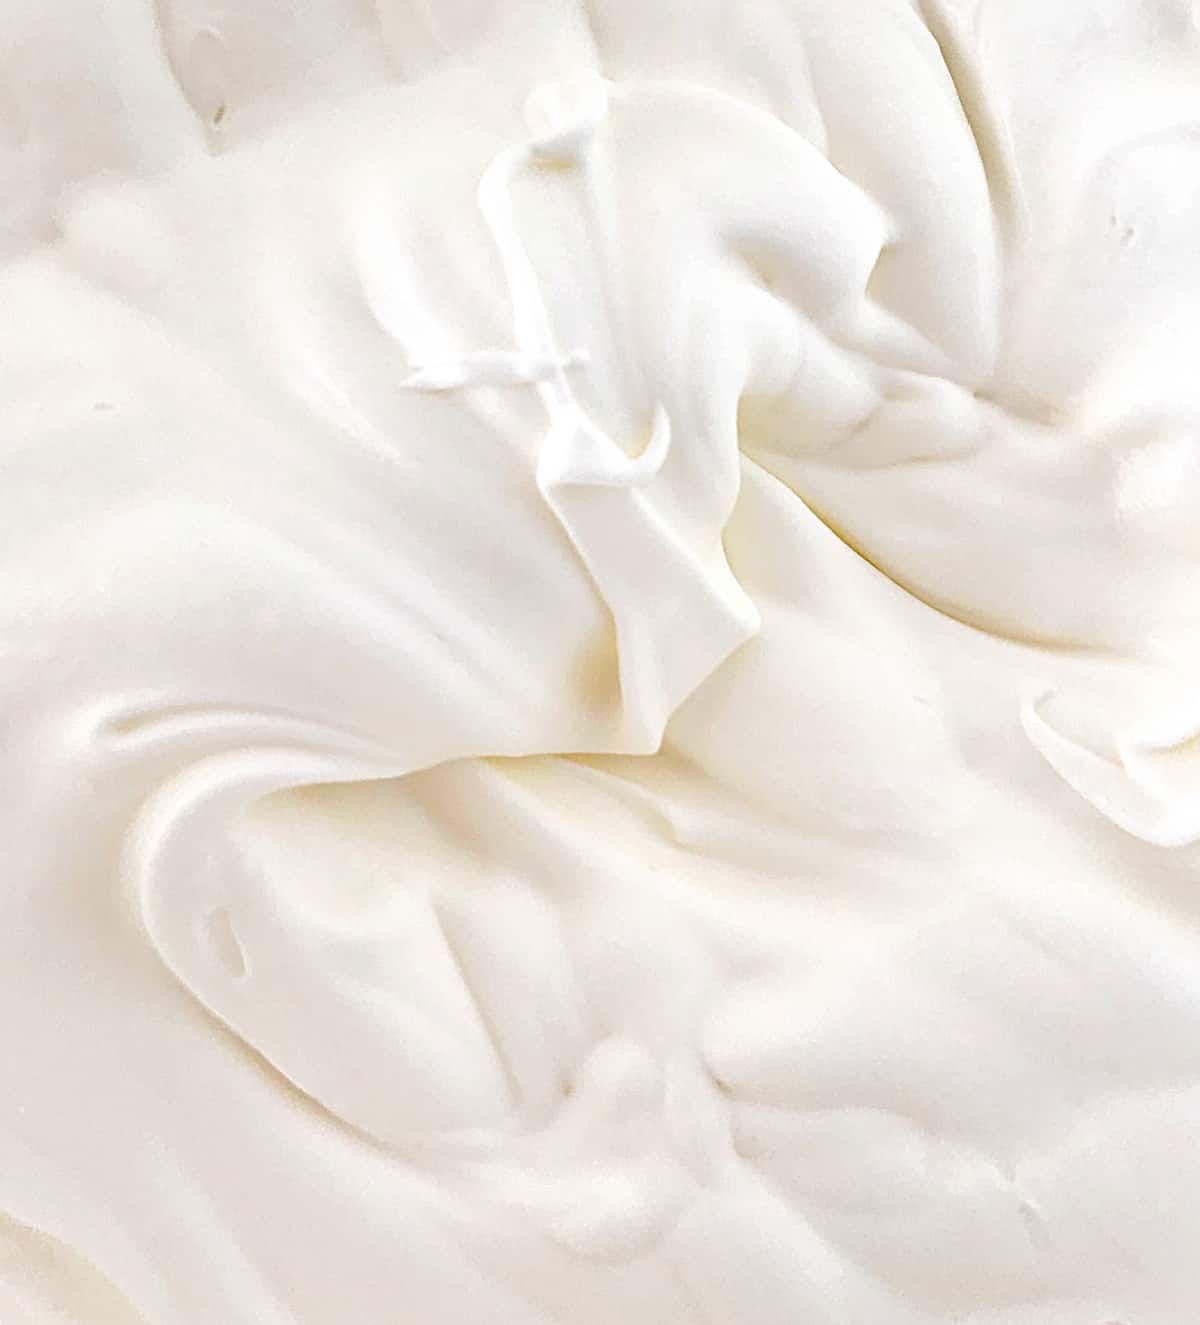
- Whipped cream: this creamy filling is made firmer by adding a few tablespoons of sour cream or cream cheese. It adds structure and a slight tanginess that is great for overall flavor balance. You can omit it but I recommend it.
- Unflavored gelatin: the original version used cornstarch, and I talk about it at the end of this post. I opt for unflavored gelatin so the topping is clear and shiny with no floury aftertaste.
Preparing the strawberries
Always use washed and dried berries.
Stem the strawberries you will use in the filling, leaving a few nice ones for decoration.
The strawberry juice will be mixed with the gelatin and used in the jelly-like topping. This way, the flavor is all fresh strawberries!
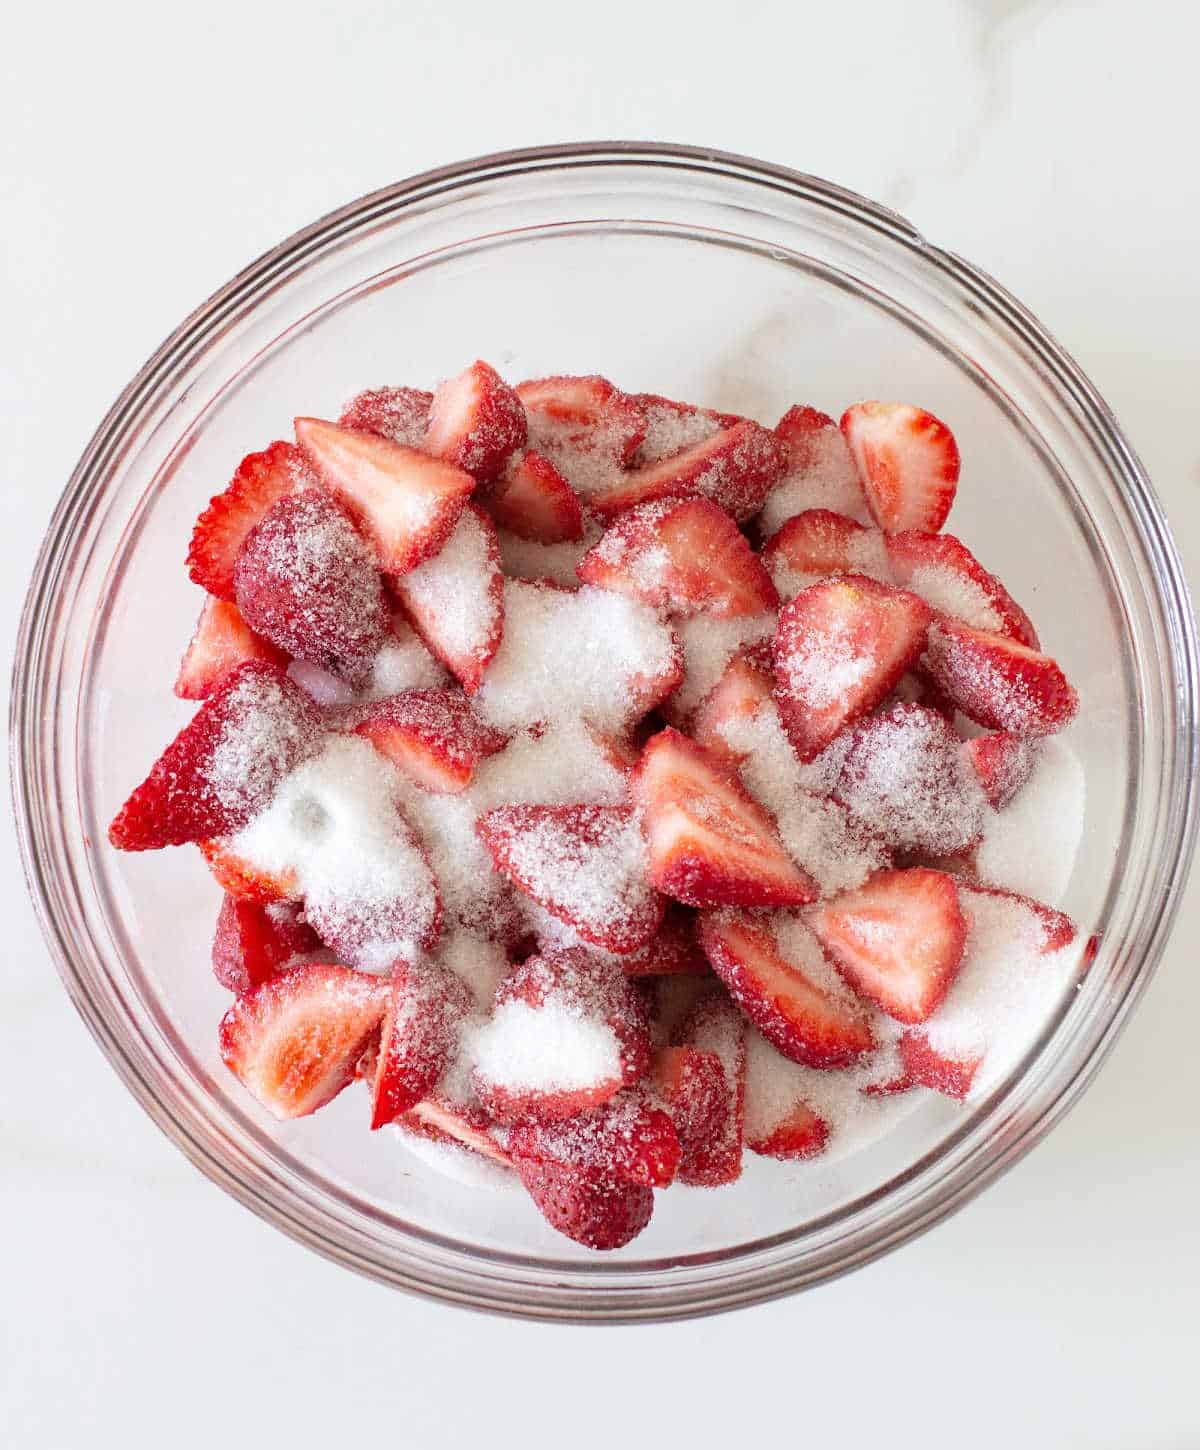
Macerating: the strawberries are cut and mixed with sugar and left to macerate for a while. They will release their natural juices that will be part of the topping.
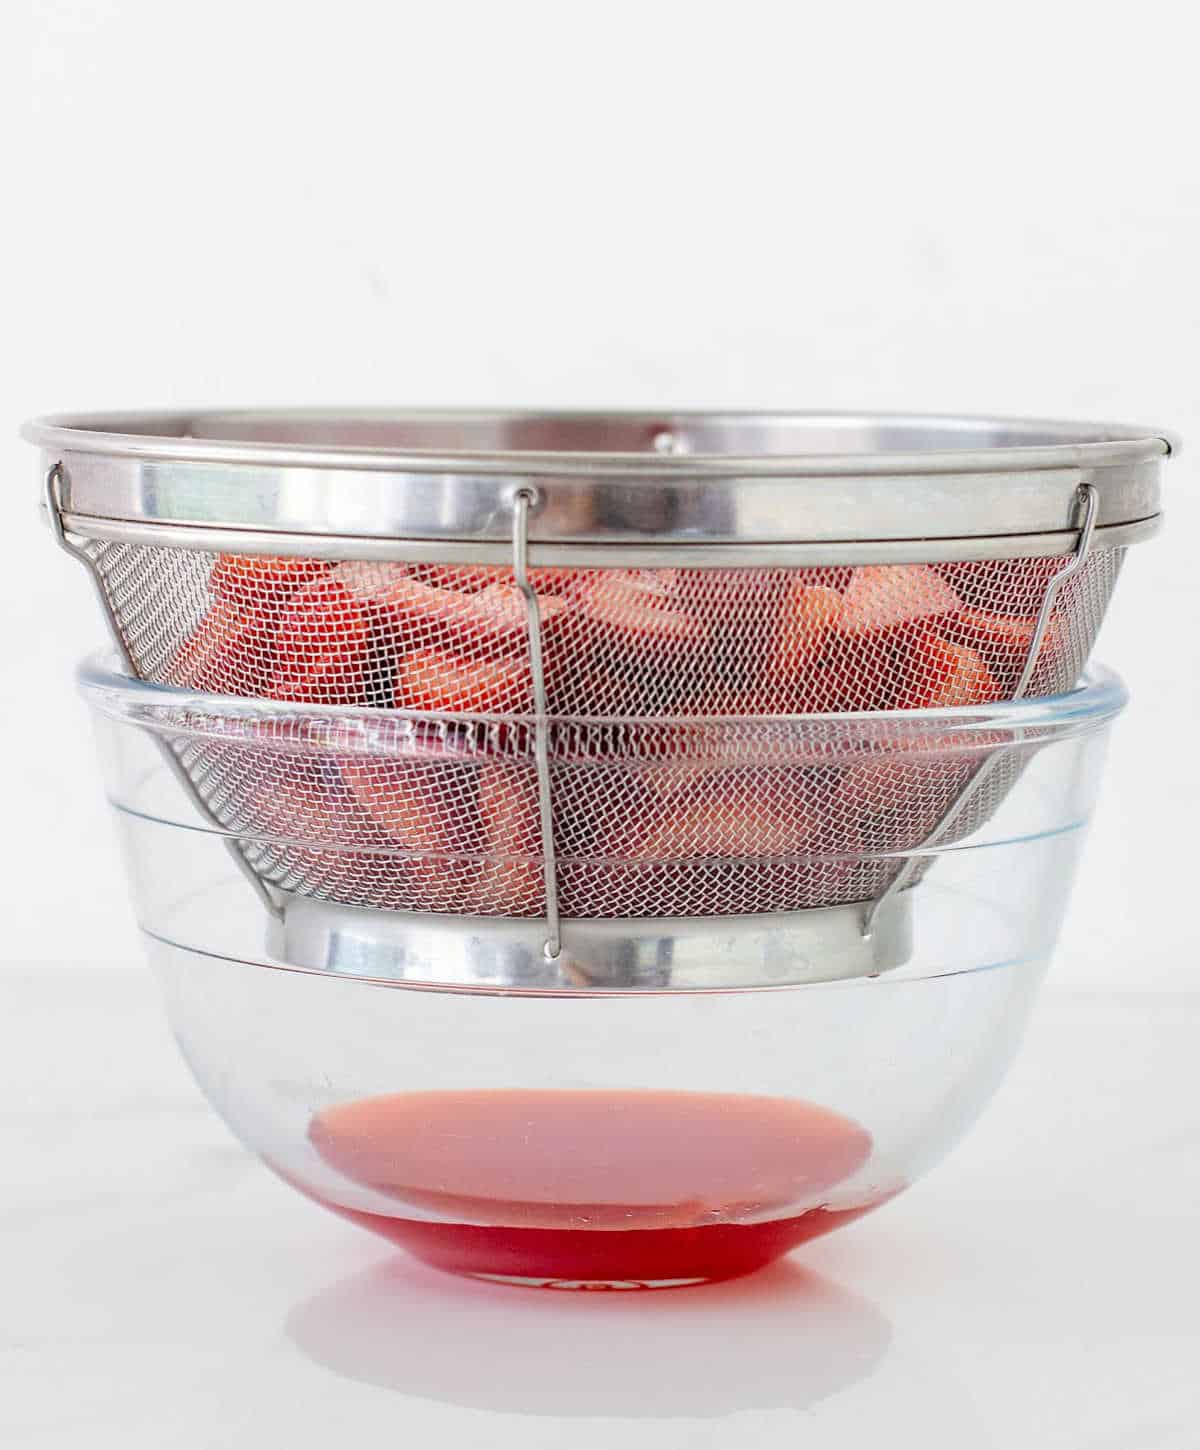
Draining the juice: put the macerated strawberries in a bowl that will later fit the colander you use, with space to let the juice fall without touching the strawberries.
Using gelatin
Many people don't want to use gelatin because they fear messing up or think it's complicated.
But in this recipe, it is hydrated in cold water and added to the hot juice. So you don't have to dissolve it by itself, which can be tricky.
The standard ratio to hydrate gelatin is 5:1, that is, five parts of water for every part of gelatin. This recipe uses 1 teaspoon of unflavored gelatin powder, so we hydrate it in 5 teaspoons of cold water.
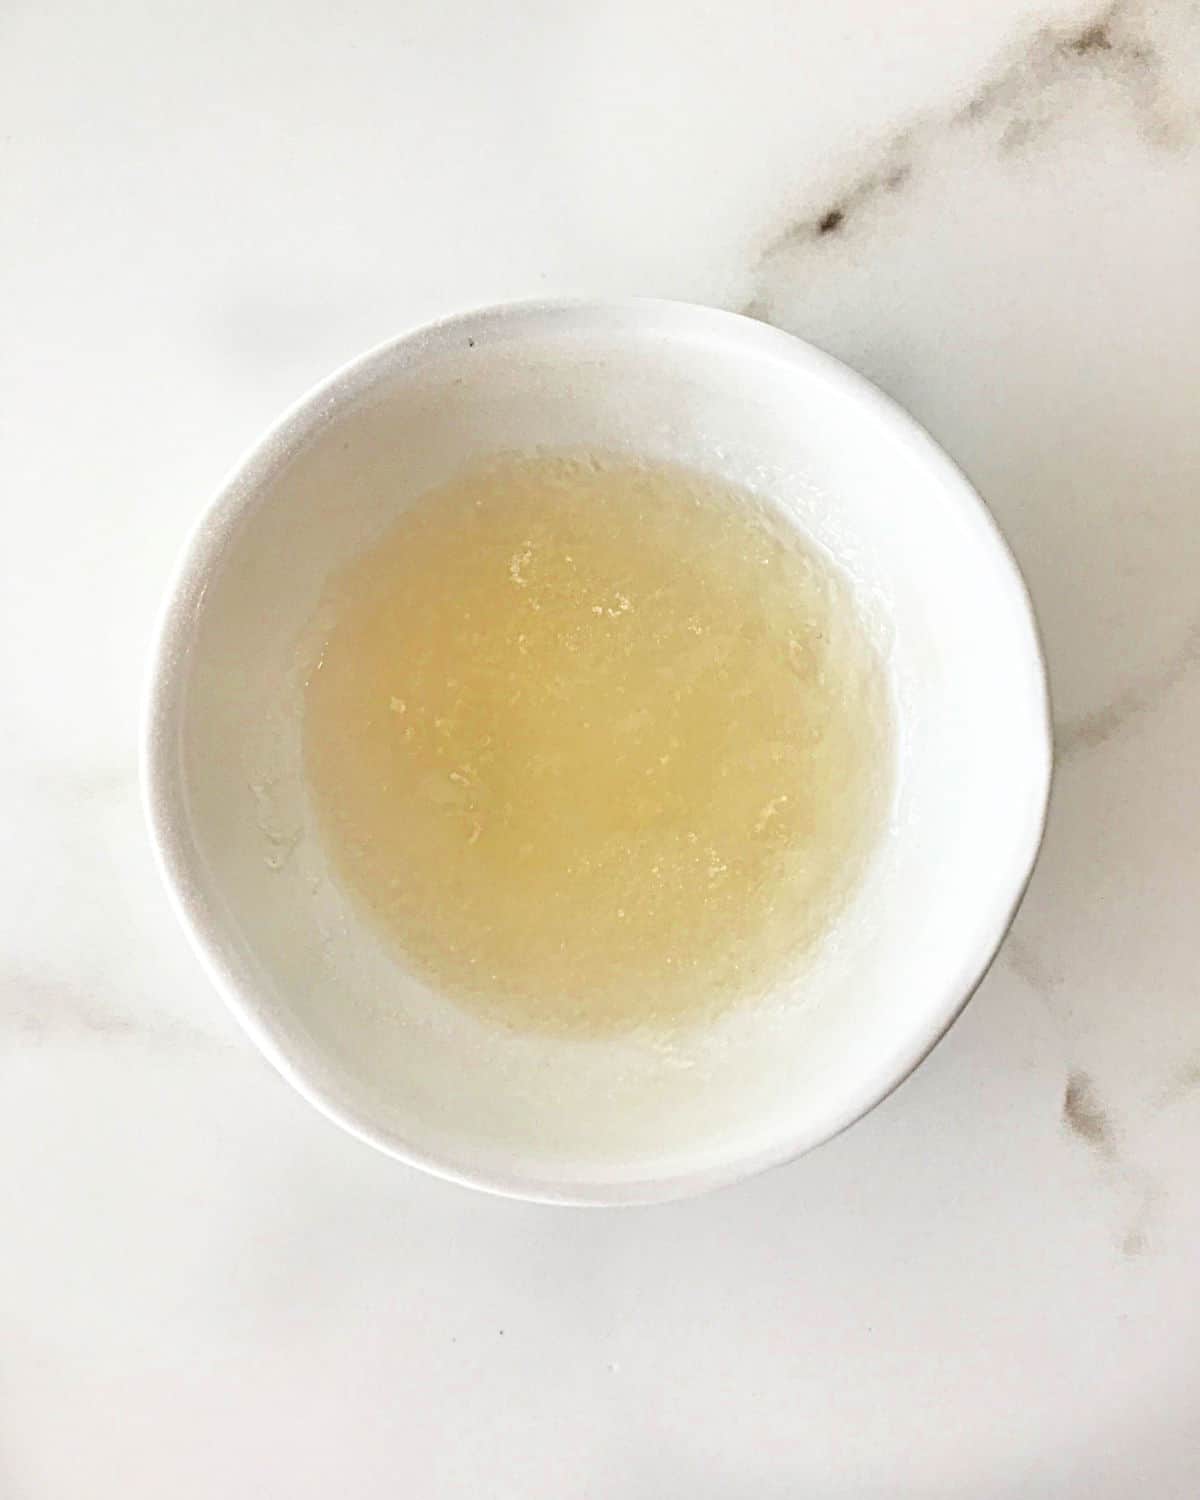
Sprinkle the gelatin as evenly as possible. Don't add it all in the same place because it will have difficulty absorbing the water. You'll see as the gelatin slowly absorbs all the water. When the powder has disappeared, it's ready to use.
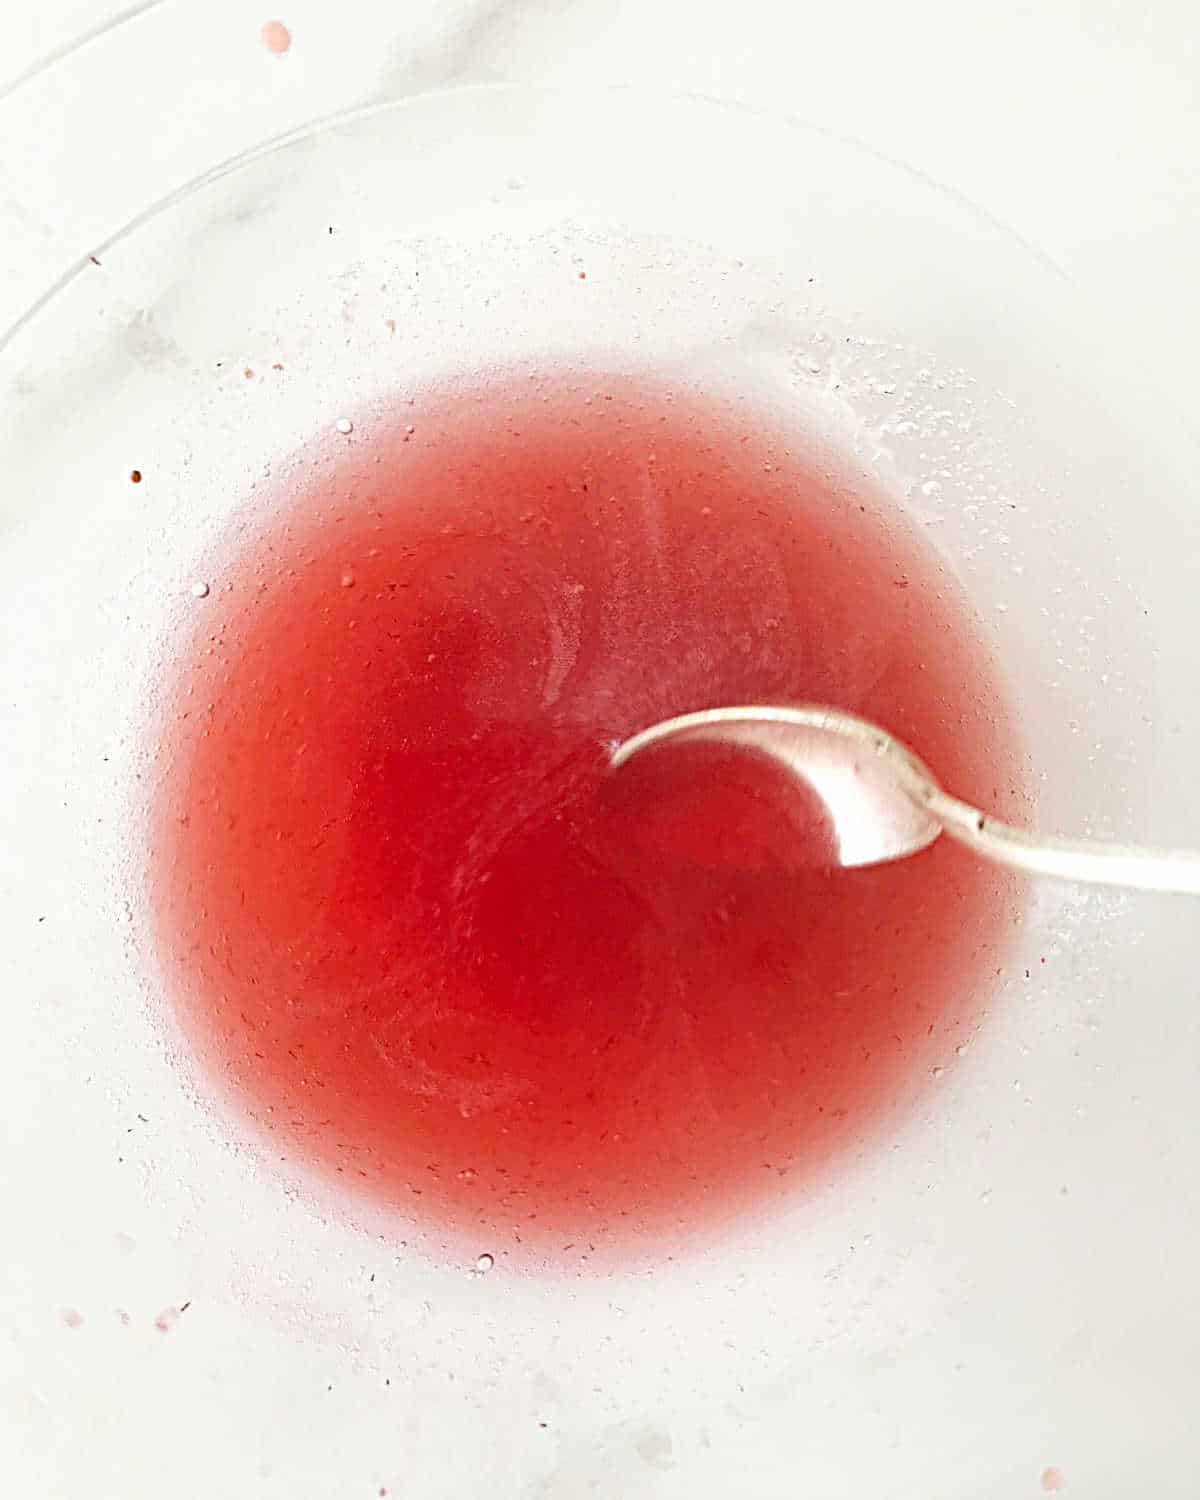
Add it to the hot strawberry juice. We use cold gelatin to simplify the process. So it must be added to a hot liquid that will dissolve it properly.
Vintage Kitchen Tip
Don't let the strawberry juice thicken too much or you won't be able to spread it easily. Let it stand until it barely begins to thicken.
Whipped cream
- Cold ingredients: make sure both the cream and the sour cream are cold. Keep them in the refrigerator until ready to use.
- Powdered sugar: we use it for whipped cream toppings because it's softer and dissolves well. Sift it before adding it so it's easier to incorporate.
- Medium peaks: this refers to the point of the cream, how soft or firm we choose to whip it. Use medium-firm peaks, that hold themselves enough to accommodate the strawberries on top. Whipped cream firms up when refrigerated, so it will have more structure when you eat it.
- Cream layer: spread it evenly on the baked, cold pie shell.
Pie assembly
Assemble it a few hours before serving, and refrigerate it until then. Why? Because the cream starts to moisten the crust, softening it in a good way.
Make ahead: the sweet tart crust and the whipped cream can be made up to 2 days before you plan to serve it.
Gelatin topping
As explained before and in the recipe card, the cold gelatin is mixed into the hot strawberry juice. When it dissolves, wait for it to thicken slightly before pouring over the strawberries.
You can leave it at room temperature, which will take some time. Or you can speed it up by refrigerating it. Be careful here because you must stir it frequently while cooling in the fridge. Otherwise, the sides will solidify too much before the center thickens.
Vintage Kitch Tip
You want to add the jello topping while thick and cool but still pourable. It won't cover the strawberries as it should if it's too firm.
Original pie recipe
As I told you at the beginning of this post, this is my grandmother's recipe, and the original version was slightly different, yet also delicious.
- Pie crust: she used this flaky pie crust recipe.
- Sour cream: she used it instead of heavy cream, resulting in a tangier filling and not requiring whipping. I changed that because strawberries and cream are crowd-pleasers.
- Cornstarch: it's used instead of gelatin to thicken the strawberry drippings. Cook the strawberry juice with the dissolved cornstarch on low heat until thickened, similar to lemon curd. The finish will be a cloudy pink, as the cornstarch's whiteness and starchness overpower the juice's bright color.
Storing leftover pie
My best recommendation is to eat it the day you make it. It will be fresh and with a crisp crust.
That said, this pie needs to be kept refrigerated and covered.
- The crust will start to soften (and create some sogginess as the days go by) from the cream and juices it's in contact with.
- The strawberries will wilt and dry out a little bit every day in the refrigerator. Covering the tart will partially delay it.
Related recipes you might like:
If you made this recipe and loved it, you can comment below and leave a 5-star ⭐️ review. Also, if you had issues, let me know so we can troubleshoot together.
You can also subscribe to our FREE email series 'Baking the Best' and our regular newsletter. Or follow and save my recipes on Pinterest.
As an Amazon Associate, I earn from qualifying purchases. Read my disclosure policy.

Strawberry Cream Tart
Ingredients
For the sweet tart dough:
- Use an 8-inch square pan or 9-inch round pan.
- 9 tablespoons unsalted butter, ½ cup + 1 tablespoon, at room temperature
- ¾ cup powdered sugar
- 1 egg, at room temperature
- 1 ¾ cups all-purpose flour
- pinch of salt
For the filling:
- 1 pound fresh strawberries, washed, stem cut off and sliced thick
- ¼ cup sugar
- 1 teaspoon unflavored gelatin
- 2 tablespoons cool tap water
- ¾ cup heavy or whipping cream, cold
- 3 tablespoons sour cream, cold
- ¼ cup powdered sugar
- mint leaves, for garnish
Instructions
For the sweet tart dough:
- In a large bowl, cream 9 tablespoons unsalted butter with a spatula or wooden spoon until it is smooth.
- Add ¾ cup powdered sugar and mix until all is incorporated.
- Add 1 egg and stir with a fork. It will not be smooth or completely incorporated. That is fine. Add half of the flour (eyeball it) and a pinch of salt.
- Mix it but don't wait until the flour is completely incorporated before adding the second half. Then, mix it until lumpy and a few dry spots remain.
- Turn it onto a clean surface or counter and mix it with your hands, making it come together but touching it as little as possible. Don't overmix it. It should not be kneaded, only gathered into a disc or ball.
- When you have a smooth dough ball, wrap it in plastic and refrigerate for at least 1 hour and up to 2 days.
- Use an 8-inch square pan or 9-inch round pan.
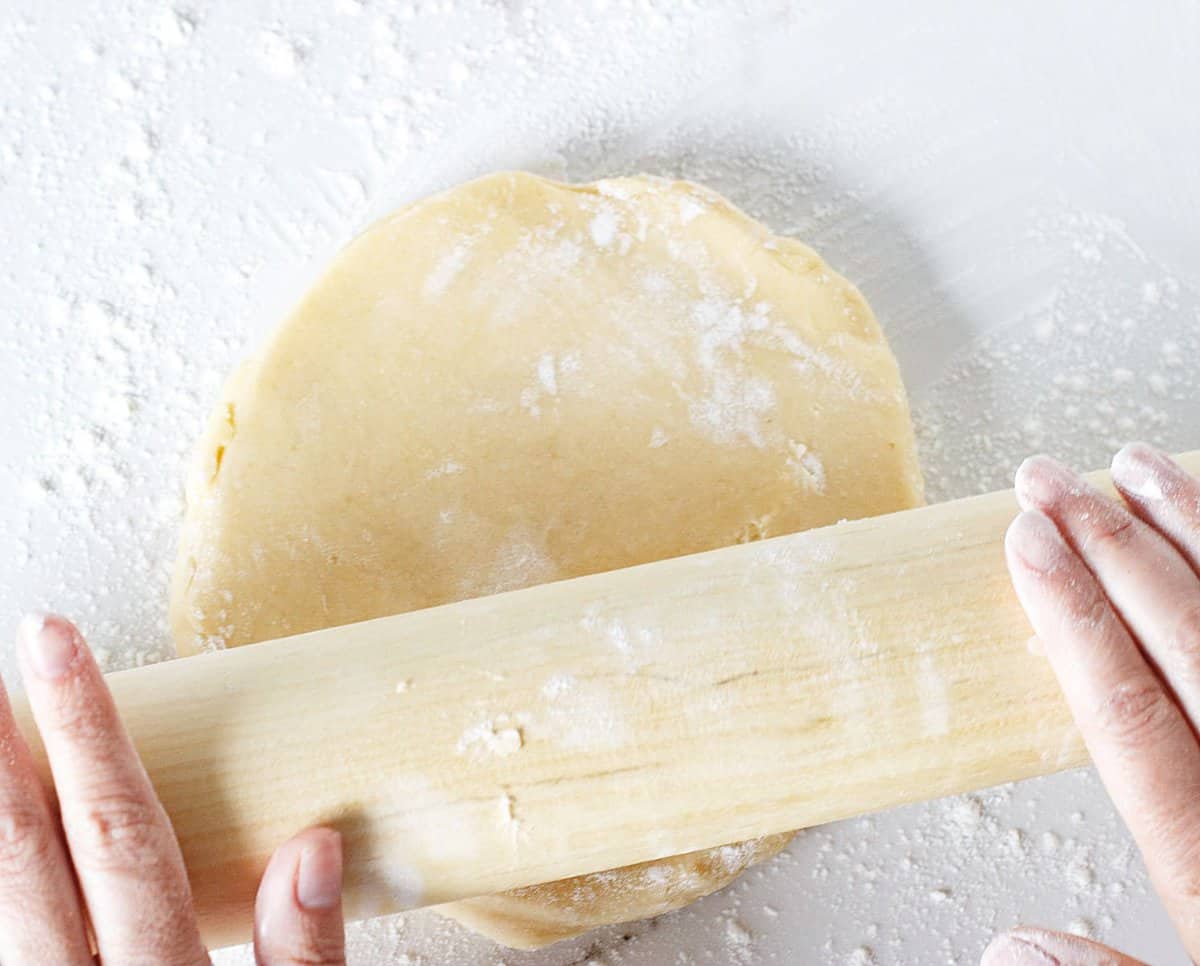
- When ready to roll, take the dough from the fridge and let barely soften at room temperature. The dough must still be cold. Simply wait until you can start to roll it, but not until it is very soft. This is important to ensure a tender dough.
- On a lightly floured counter, start rolling the dough disc, making sure you do quarter turns (I do them to the left) often to ensure the dough is not sticking and adding more flour to the counter if it is sticking.
- Once you have the dough rolled a few inches larger than the pan, fold it in half and place the fold in the middle of the pan.
- Open the dough and line the pan, being careful not to stretch the dough. Remove excess dough by rolling over the rim of the pan with the rolling pin.
- Prick the bottom with a fork, freeze for 20 minutes, or put it in the refrigerator for 1 hour.
- Preheat the oven to 350ºF (180ºC).
- Line the tart pan with a piece of aluminum foil and add beans or pie weights, covering the bottom evenly.
- Bake the tart shell for 15 minutes. Remove the foil carefully and continue baking for 10 to 15 minutes more until the dough is fully baked.
- Let cool completely on a wire rack. Remove from the pan and transfer to the serving plate.
For the filling:
- Put 1 pound fresh strawberries with ¼ cup sugar in a large bowl (I like glass), stir a little, cover with a kitchen towel, and leave to marinate at room temperature for at least 1 hour, until the fruit juices are fully released.
- Put 2 tablespoons cool tap water in a small cup or bowl. Sprinkle 1 teaspoon unflavored gelatin and let it hydrate for a few minutes. Do not stir.
- In a small saucepan, put all the juice that the strawberries released, reserving the fruit for later. Heat over low heat until it's about to break to a boil. Remove from the fire.
- Add the cold hydrated gelatin to the hot strawberry juice and mix until dissolved. Transfer to a bowl and let thicken a bit, either at room temperature or in the refrigerator (stirring it often) until it begins to thicken, but don't let it set.
- Beat ¾ cup heavy or whipping cream with 3 tablespoons sour cream and ¼ cup powdered sugar in a large bowl until medium peaks form.
- Spread on the bottom of the cooled, baked crust.
- Carefully distribute the macerated pieces of strawberry left from before, spreading over the entire surface.
- Slowly and carefully add the thickened gelatin syrup on top of the strawberries, trying to cover as much as possible.
- Let the cake set in the refrigerator for 15 minutes, garnish with mint leaves and serve.
Deborah Burchette says
What size of pan?
Paula Montenegro says
Hi Deborah, use an 8-inch square pan or 9-inch round pan.
Alena says
I was wondering what to do with all my extra strawberries and this is the perfect solution. Such a delicious and beautiful tart!
Jo says
Strawberry and cream - enough said! How pretty and delicious those tarts looks! In love with it.
Jagruti's Cooking Odyssey says
This is such a gorgeous looking tart and its loaded with strawberries - one of my top fav fruits! This recipe is just in time for the strawberry season here and I cannot wait to make your recipe.
Ramona says
Definitely a mouthwatering recipe and I will be making it this coming week as I have all the ingredients and I have been fancying something like this for quite some time. Looks absolutely irresistible.
paige says
This SO reminds me a tart my Mom always made! Love this and so pretty too, really great..
Elaine says
The look of this delicious recipe makes my mouth water... immediately! Love how easy it is to make and can't wait to give it a try. Perfect for this weekend, too!
Tammy says
You had my attention at strawberries and cream! What a beautiful seasonal dessert!!
Juliana says
Love strawberrys, and this dessert it's so simple! Love it
Sharon says
If you have a cookout planned for the summer, make this dessert! It is a showstopper and absolutely delicious.
Chef Dennis says
I can't believe I am drooling right now! This Fresh Strawberry Cream Pie definitely got me. Sooo mouthwatering!
Gloria says
What a delicious way to enjoy strawberry season. This is the perfect dessert of a bbq party. I know my guests would devour this. Great as an item on the brunch menu too.
Mama.Mommy.Mom. says
Your tart crust looks beautiful! I'm a huge fan of sangria, especially white sangria, and I bet it would go beautifully with the tart!
Jamie @ http://www.mamamommymom.com
Terra says
I love your addition of bananas in your sangria! I never thought to add some bananas, but what a great flavor combination! You tart seriously is just beautiful! Hugs, Terra