
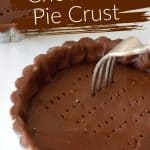
We all need a simple yet richly flavored chocolate dough to make the best chocolate tart shells. This recipe resulted from several experiments until I got what I wanted: a deep chocolate taste in an easy-to-roll dough and good for pies, tarts, and cookies. It freezes well so that you can make it ahead.

SAVE THIS RECIPE
A versatile tart dough
This recipe produces a solid chocolate dough that can be used with a myriad of pie recipes, from individual black forest tarts to chocolate sandwich cookies.
Though we love pies, they can appear daunting because making homemade pie crust can be challenging, especially when you're starting out.
Practice makes perfect, and that is true when it comes to baking. Having good recipes is the other part you need to master pie dough making.
This one took a long time to perfect, as I used too much cocoa powder at first, making it borderline bitter and astringent.
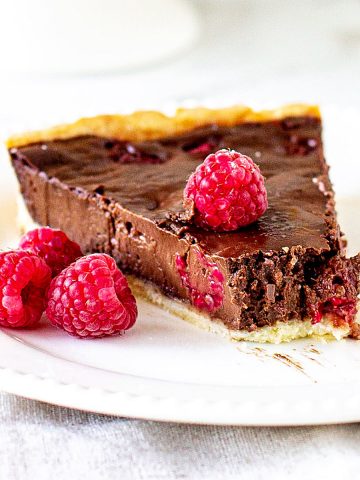
Replace your favorite traditional crust with this one for an extra dose of chocolate. It's especially good for recipes with chocolate in the filling, like the chocolate raspberry tart.
Uses for a chocolate tart crust
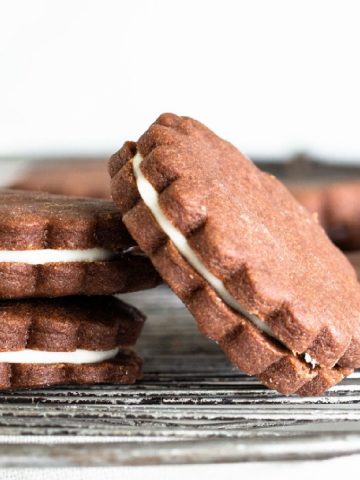
- Pies and tarts. Any filling with chocolate and/or berries is great for a chocolate crust. Replace cookie crusts with it and use it for a simple cheesecake pie or the easiest chocolate mint mousse pie.
- Cookies. Roll, cut, and bake as you would any other cut-out cookie. They are amazing and can be glazed or sandwiched. Make them rectangular for the famous chocotorta from Argentina.
- Cobblers. There is a type of cobbler that is made with a pie crust topping. You can make a simple lattice on top of the fruit like this easy peach cobbler, or use cut-outs like with this plum cobbler. That way, the fruit bakes and bubbles around the crust.
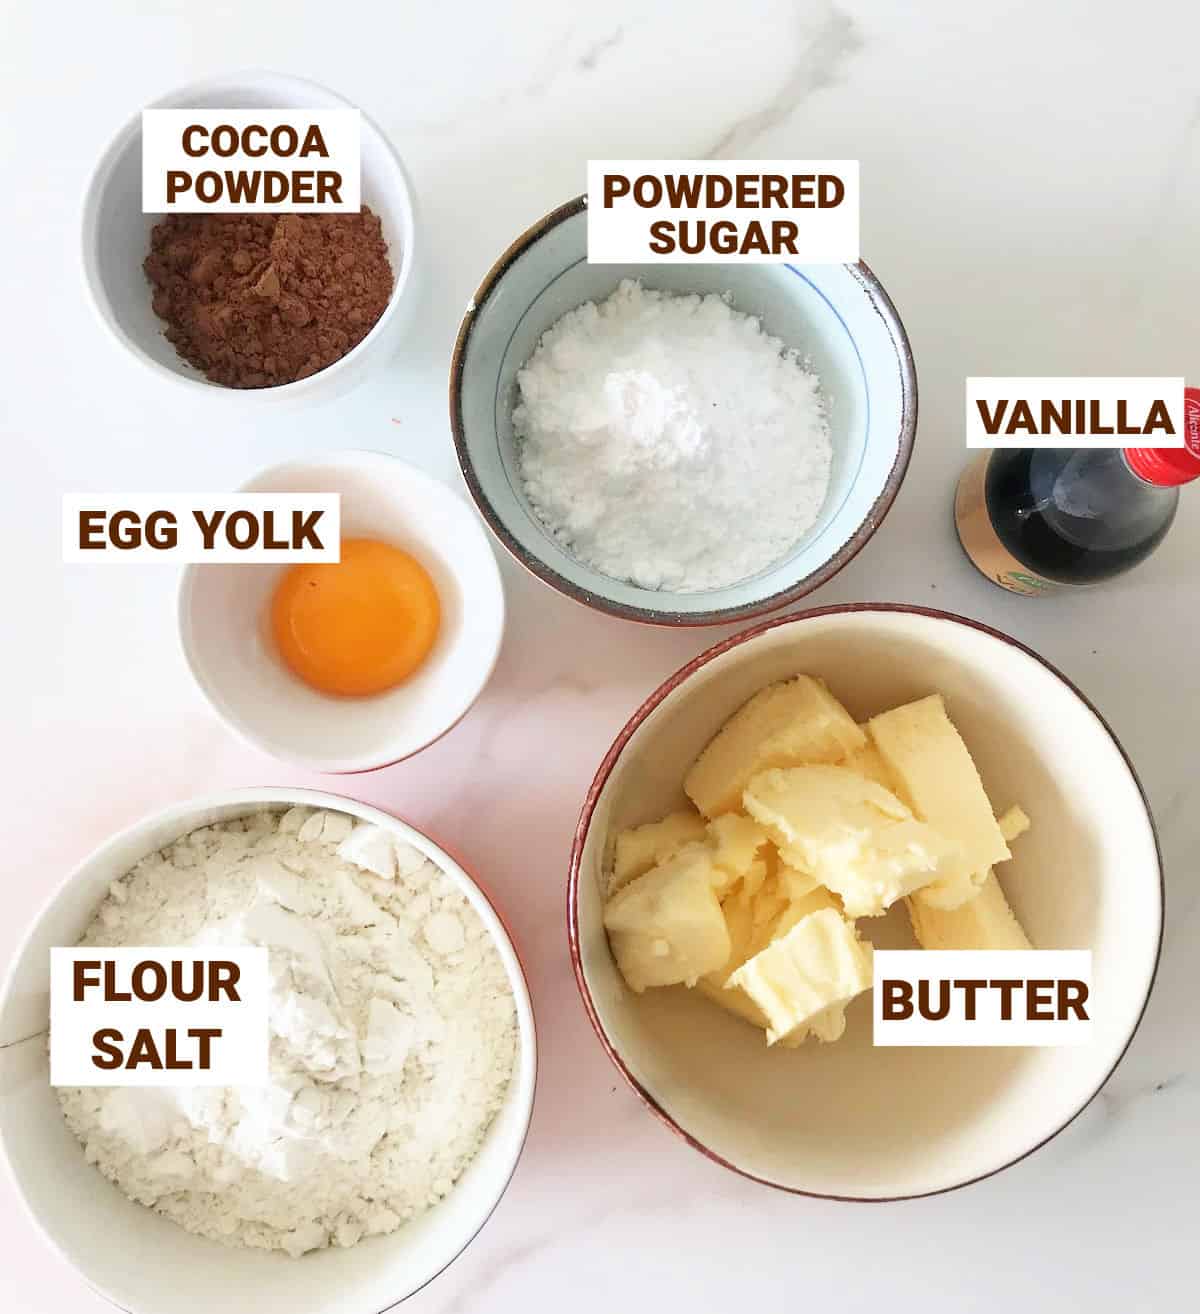
Ingredient list
- Cocoa powder: always use unsweetened.
- Unsalted butter.
- Egg yolk: binds the dough together, adds richness and makes it more pliable and easy to handle.
- Powdered sugar: also called confectioners or icing sugar.
- All-purpose flour.
- Salt.
- Vanilla extract.
Quantities are listed in the recipe card towards the end of this post. The Ingredients page has more details and lists the brands we use.
How to make tart crust
For the first part I use the food processor, where the butter is worked into the dry ingredients until you get a crumble. It saves time, and I can make a double batch (this will depend on the size of your processor).
But it can be easily made by hand in its entirety.
Both are finished by hand on the counter.
By hand:
- Put dry ingredients in a large bowl. Mix to combine.
- Scatter butter cubes on top. Use your hands or a pastry cutter (also called pastry blender) to incorporate the butter into the flour until it's roughly the size of peas.
- Add the egg yolk and vanilla if using and mix with a fork until it is moistened. The dough will be more irregular than image 4, as it's harder to incorporate it evenly by hand.
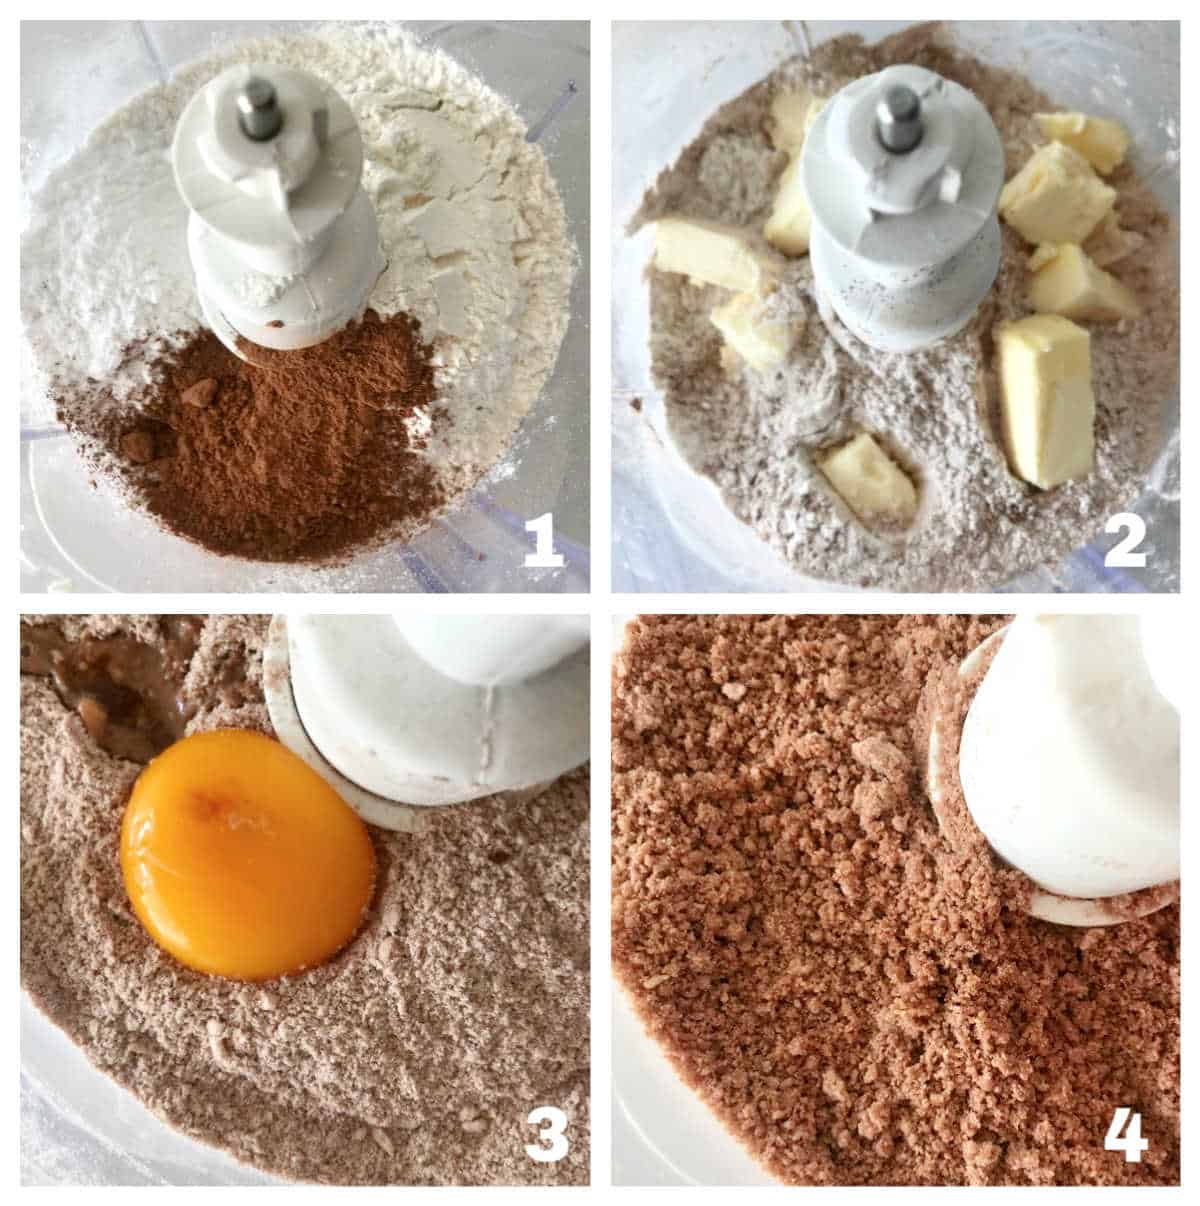
In the food processor
- Put dry ingredients in the bowl of the processor (image 1). Mix to combine.
- Add butter cubes (image 2) and pulse a few times to mix. The butter should be the size of peas, roughly.
- Add the egg yolk and vanilla if using (image 3) and pulse a few times until it moistens the mixture (image 4) but be careful not to start making a ball.
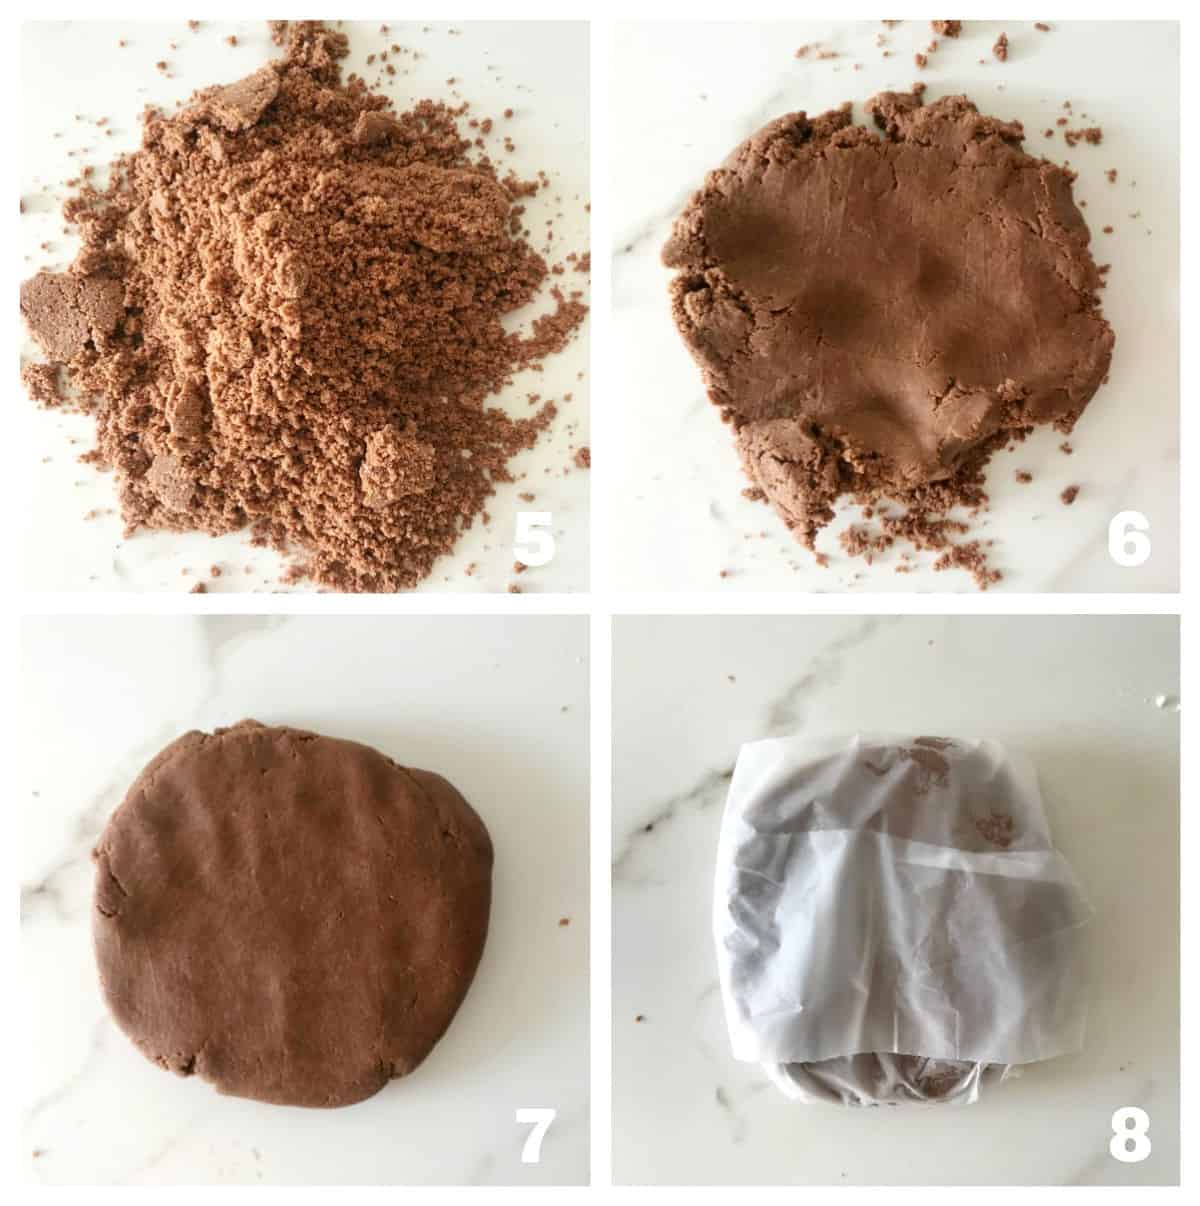
For both methods:
- Dump the shaggy mass onto a counter or working surface (image 5).
- Start bringing it together with your hands. At first, it will appear as though it will never bind or come together properly (image 6). But it will.
- Keep turning it onto itself until you have a solid dough (image 7).
- Wrap it in plastic wrap or in a freezer bag (image 8) and refrigerate for at least 1 hour. This is a crucial step for getting tender and flaky dough. It can be kept in the fridge for several days or frozen for a month.

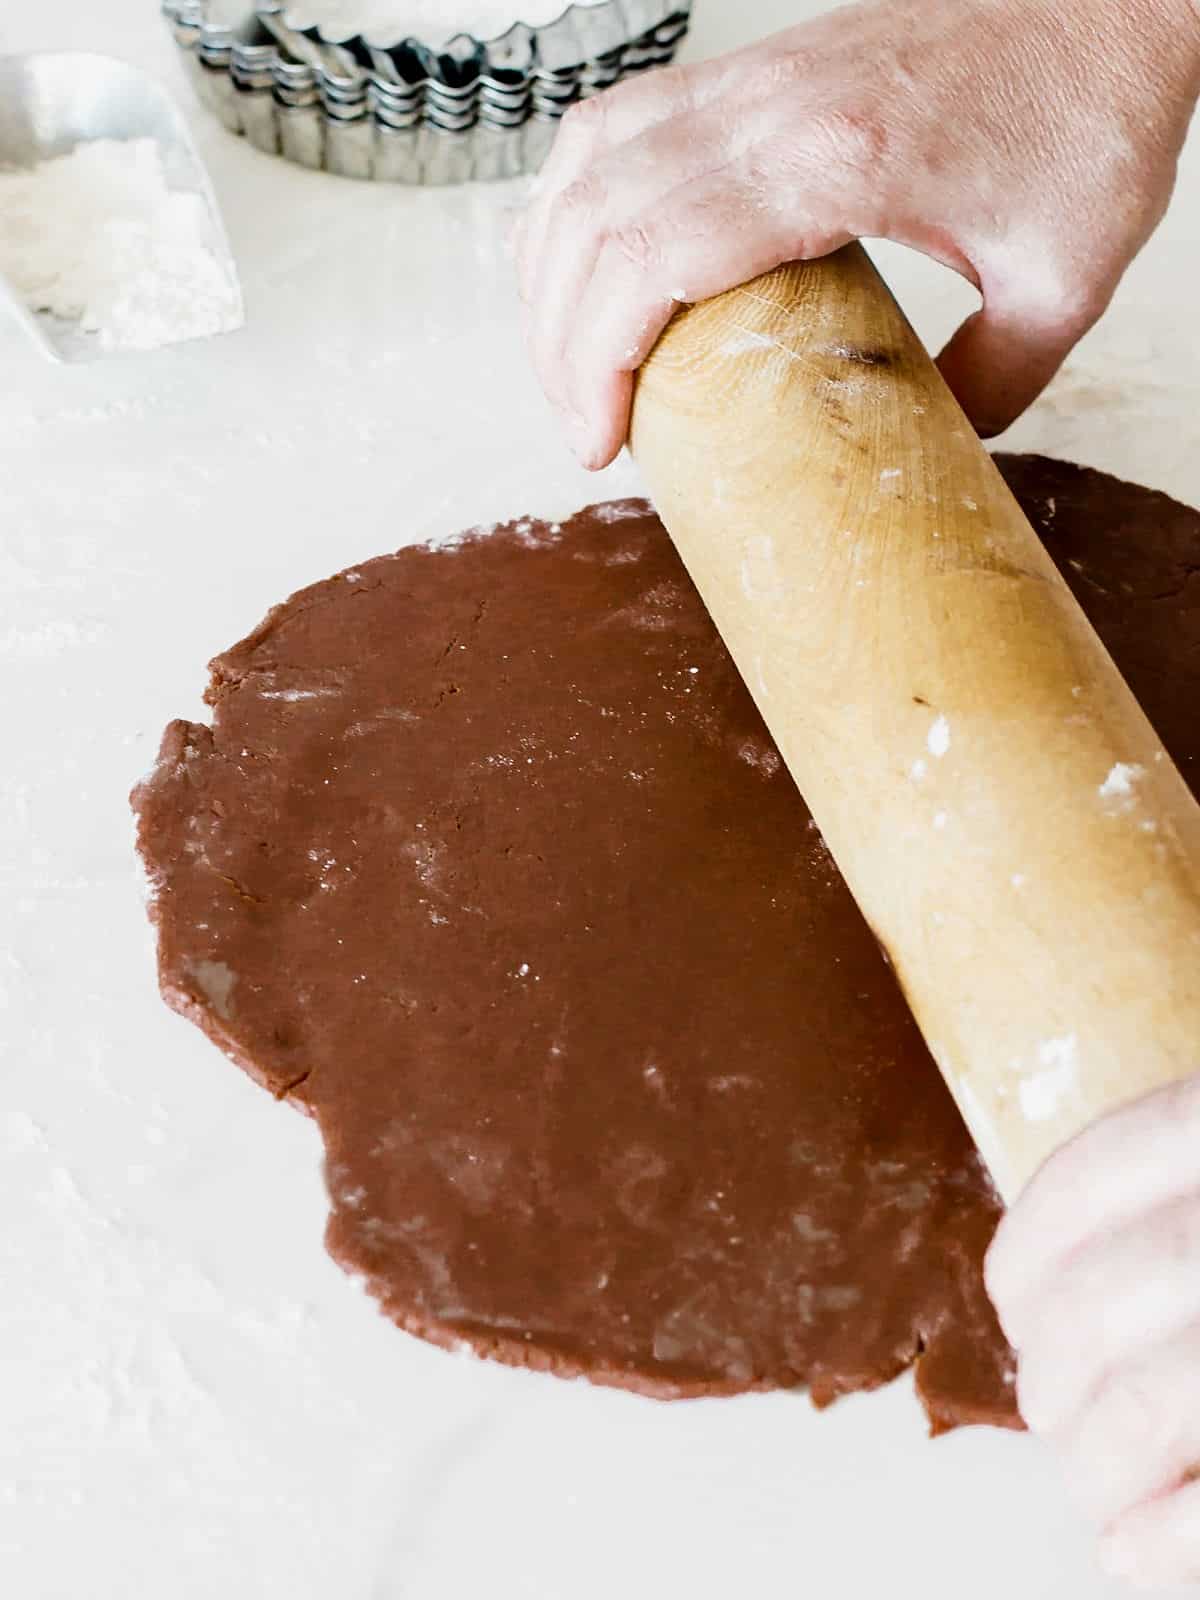
Rolling the chocolate dough
- Lightly flour a clean counter or surface, and unwrap the cold dough.
- Start rolling (use a rolling pin) and make sure you do a quarter turn often (I do it to the left), that is you roll a few times and then lift the dough and turn it a little to the left. That will ensure that the dough never sticks too much to the counter and, if it does, you fix it by adding some flour.
But don't roll it a lot without checking if it needs more flour. If you do, it will soften too much and stick to the surface, making it difficult to lift without tearing it. At this point, the dough might have softened too much, and we don't want that. - Roll the dough until it is a few inches larger than your pie plate. Measure it so you have enough to go up the sides.
Vintage Kitchen Tips
Make sure the dough has rested before rolling. Start rolling it while still cold; it will soften enough as you do. If it gets too soft at any point, return it to the refrigerator for 15 minutes or freezer to firm it up again.
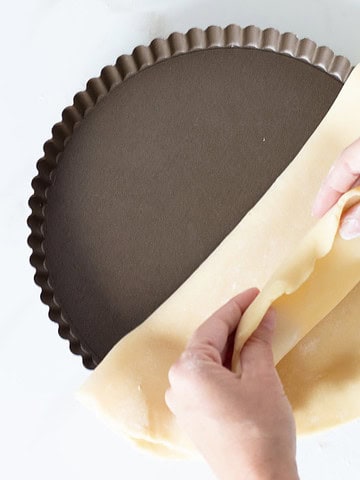
Lining a pie pan
This chocolate dough is good for one large 8 or 9-inch tart pan or for 4-6 individual tartlets, depending on the size you use.
Most pie doughs are similar when it comes to rolling, lining the pan, and baking. So for very detailed instructions go to the post for Sweet Shortcrust Pastry. There are videos and images to guide you.
Vintage Kitchen Tip
When lining a tart pan (or pie plate), let the rolled dough ease into it; don't stretch it to fit. If you force it, it will shrink when baked. I highly recommend freezing the lined pan for 15 minutes before baking. It will help it keep its shape as much as possible.

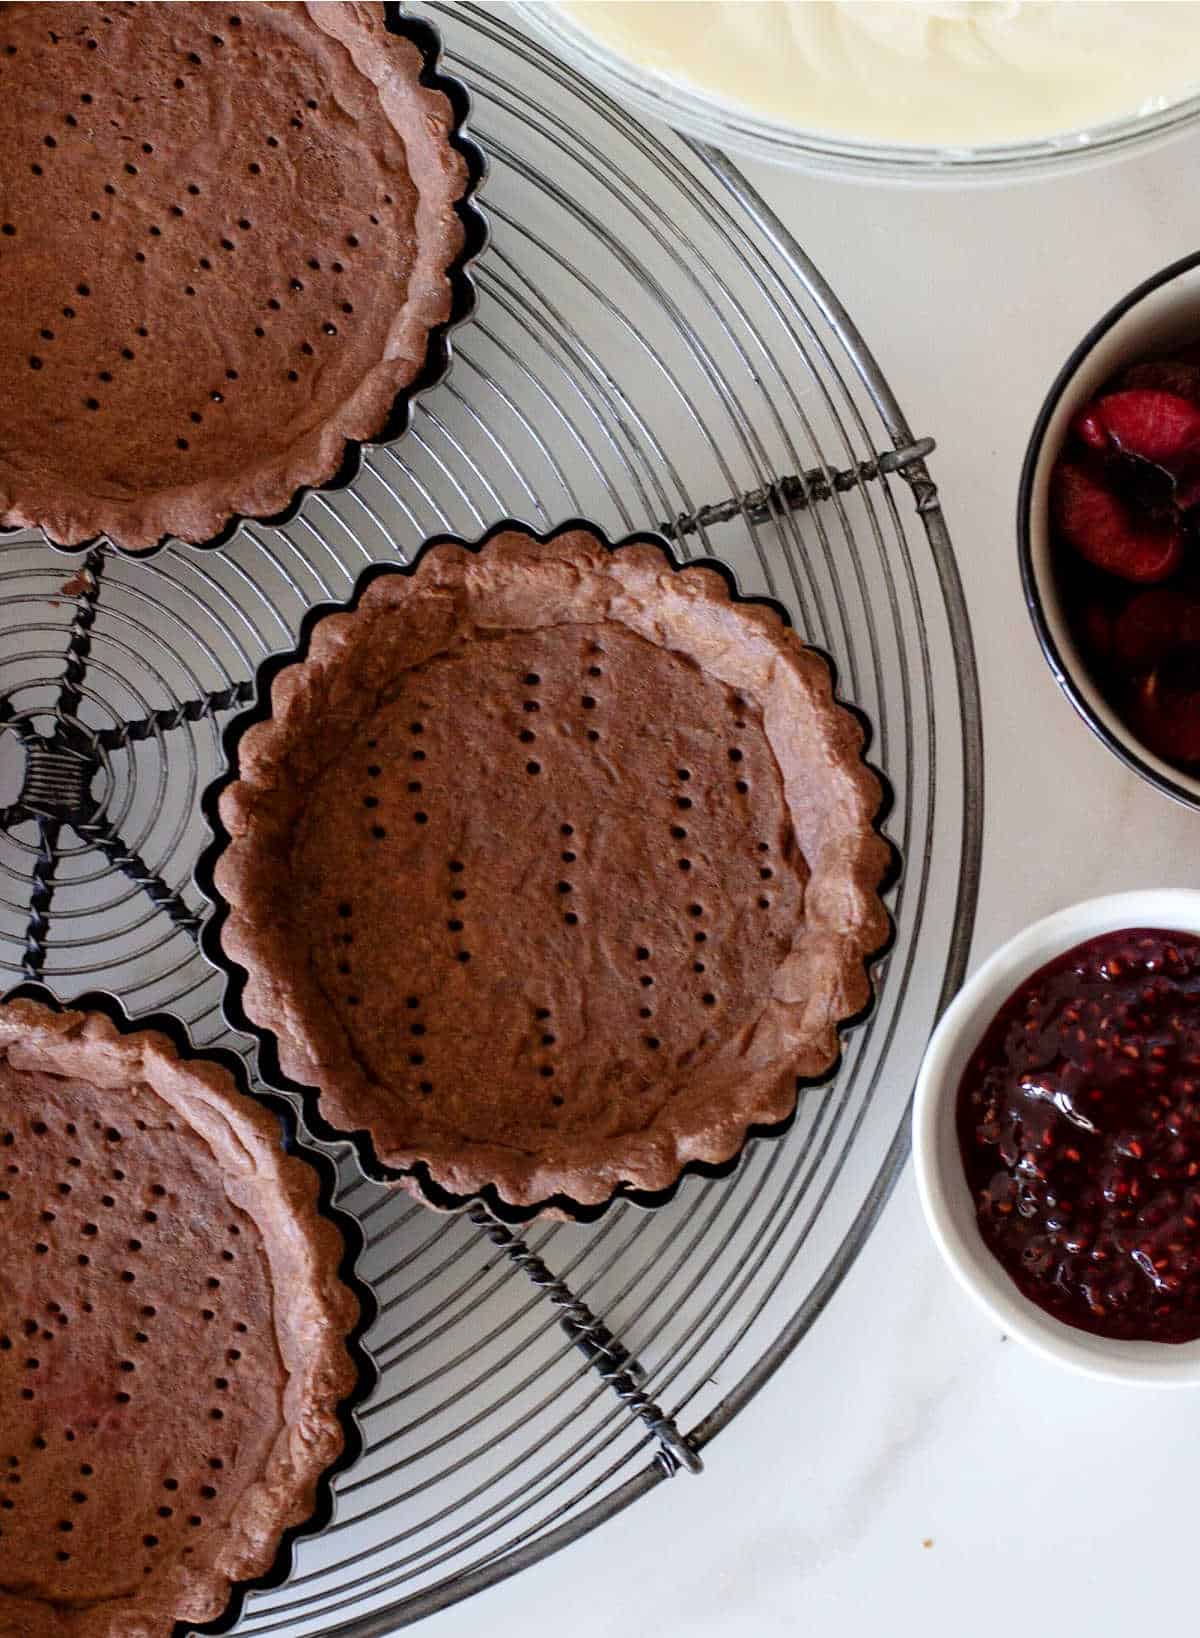
Baking
A few steps will help you get a flat tart shell with a crisp texture.
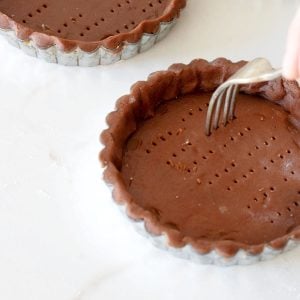
- Pricking the crust: once the tart pan is lined and the excess dough is removed, we need to prick the bottom of the pan with a fork (dock a pie crust, as it's called).
Why do we do this? The dough will try to grow and puff up too much in the oven, reducing the space left for the filling.
Piercing the bottom helps it stay put and not grow as much because the air trapped inside can escape through the holes. - Blind baking: this step is pre-baking the dough with weight on top (pie weights, rice, beans, flour; there are many options with what you have at home). It is called blind because the raw dough is completely covered with paper (aluminum foil or parchment paper).
Why do we do this? To prevent a soggy crust and help it retain its shape as it bakes. Instructions in this link: steps for bling baking pie dough.
Related recipes you might like:

As an Amazon Associate, I earn from qualifying purchases. Read my disclosure policy.
How to make Chocolate Tart Crust
Ingredients
- 1 ¼ cups all-purpose flour
- 2 tablespoons unsweetened cocoa powder
- pinch salt
- ⅓ cup powdered sugar
- ½ cup unsalted butter, cold and in small pieces
- 1 egg yolk
- ½ teaspoon vanilla extract
- ice water , if needed, see Notes below
Instructions
In the food processor:
- Put 1 ¼ cups all-purpose flour, 2 tablespoons unsweetened cocoa powder, pinch salt and ⅓ cup powdered sugar in the bowl of the processor. Mix to combine.
- Add ½ cup unsalted butter in cubes and pulse a few times to mix. The butter should be the size of peas, roughly.
- Add 1 egg yolk and ½ teaspoon vanilla extract, if using, and pulse a few times until the mixture moistens. Be careful not to start making a ball.
By hand:
- Put 1 ¼ cups all-purpose flour, 2 tablespoons unsweetened cocoa powder, pinch salt and ⅓ cup powdered sugar in a large bowl and stir to combine.
- Scatter ½ cup unsalted butter in cubes on top. Use your hands or a pastry cutter to incorporate the butter into the flour until it's the size of peas.
- Add 1 egg yolk and ½ teaspoon vanilla extract if using, and mix with a fork until moistened. The dough will be irregular, as it's harder to incorporate it evenly by hand.
For both methods:
- Dump the shaggy mass onto a counter or working surface.
- Start bringing it together with your hands. At first, it will appear to never bind or come together properly. But it will. Keep turning it onto itself until you have a solid dough. If needed, add ice water , 1 teaspoon at a time to make a cohesive dough. See Notes below.
- Wrap it in a plastic or freezer bag and refrigerate for at least 1 hour. This is a crucial step for getting tender dough.
Rolling the dough:
- When ready to roll, take the dough from the fridge and let barely soften at room temperature. The dough must still be cold. Simply wait until you can start to roll it, but not until it is very soft. This is important to ensure a tender dough.
- On a lightly floured counter, start rolling the dough disc, making sure you do quarter turns (I do them to the left) often to ensure the dough is not sticking and adding more flour to the counter if it is sticking.
- Once you have the dough rolled a few inches larger than the pan, fold it in half and place the fold in the middle of the pan.
- Open the dough and line the pan, careful not to stretch the dough. Use your hands to lower the dough and reach the union between the bottom and sides of the pie pan.
- Go over the rim of the pan with the rolling pin to remove excess dough.
- Prick the bottom with a fork, freeze for 20 minutes, or put it in the refrigerator for 1 hour. At this point, you can leave the dough frozen in the pan for up to a month, wrapped in plastic.
- Or you can blind-bake it or bake it completely, depending on what you're making. (Every pie or tart recipe in this blog has the steps to bake the pie crust. This post is about how to make and store the pastry).
Baking this dough:
- Preheat the oven to 350°F (180°C).
- How to prepare a pie crust for blind baking: take the cold dough from the fridge or freezer.
- Cut a piece of aluminum paper that is larger than the tart pan. Line the inside of the pan by covering the cold dough with it and adjusting it so that it takes the shape of the dough. You can also use parchment paper, but it's usually coarser and more difficult to make it take the shape of the pan and cover the dough well.
- Add weight. I use round ceramic weights that you can buy online, but you can add any raw grains and legumes such as beans, lentils, rice or even flour (simply fill the aluminum paper with flour or rice or whatever you're using until you have added a layer of weight that will be enough to keep the paper down during baking
- Bake for 15 minutes. It might be a few minutes more or less, depending on the type of pie crust, but the idea is to let the dough bake and dry out enough so that we can lift the aluminum paper without it attaching to the raw dough. The paper should lift easily, and the dough below will be half-baked, very lightly golden. Fill and bake further following instructions in the recipe for the tart or pie you're making
- To completely bake the chocolate crust: first, follow the steps to blind bake it, above. After removing the paper and weight, return the pan to the oven and bake for another 10-15 minutes. The crust should be dry. Let cool on a wire rack.
- If fully baked it will keep for a few days in a metal tin or at room temperature if the place is dry and cool. But I suggest you bake it the day you're filling it.
Jessica says
For some members of my family I can't use confectioner sugar. I sub with Splenda and corn starch. (Corn starch is one of the ingredients of confectioner sugar) and the sugar substitutes don't add moisture.
Vickie Gomez says
The recipe is easy to follow. However, I'm not seeing a temperature setting.
Paula Montenegro says
Hi Vickie, I added instructions for rolling and baking the dough. I omitted them in the beginning because each pie has its own intructions, but it's better this way. Thanks for the comment.
Allison says
Good flavor but needs ice water. I ended up adding probably 1/4 cup total just a little at a time to achieve a usable texture.
Paula Montenegro says
Hi Allison! The recipe specifies adding more water if needed because flours are different, the weather and other things are a factor and it's hard to specify the amount of water that will work every time. Have a great holiday season.
Kathleen Q says
The dough turned out very dry for me. I ended up pressing it in a pie plate instead of rolling it out.
Chrlsry says
What temperature do I cook this at?
Paula Montenegro says
Hi Chrlsry, it depends on the recipe, but at 350° for 15-20 minutes (with foil and weight on top), then you remove the weight and continue for 10 minutes if you're going to bake it again with filling, and 15 or so if you will use it completely baked.
Scott says
I want to make smaller tarts. Can you tell me what size tart pans I need to make 8 of them? Also, if making 8 smaller ones how do I handle the dough for 8? Do I roll out the dough and use a cutter?
Paula Montenegro says
Hi Scott, with one recipe I make 8 individual 4-inch tarts. You can see them in the Black Forest Tarts post.
I recommend you first divide the dough into 8 equal pieces, and work with each one at a time, keeping the rest refrigerated, well wrapped so they don't dry out. After you line the pans and prick the dough, put them in the freezer or refrigerator until you have all of them ready to be baked. No need to wrap them this time. Then, see how many fit in your oven (place them on a baking sheet for easier handling) and bake them in batches if necessary. Only take out from the refrigerator those that you're baking.
Let me know if you need anything else. Hope this helps.