
This is an Italian sweet pie crust known as pasta frolla. Perfect for making ricotta pie, crostata and galette. It is a simple and rich dough used in many traditional recipes that can be made ahead, as it freezes wonderfully!
It uses baking powder, which is not a regular ingredient in classic pie dough, but lends softness after baking, and helps with a finer, more tender texture. I'm used to this crust, which is sweeter than regular American recipes, and I use it regularly, so I have all the tips to share with you.
SAVE THIS RECIPE
Sweet pie dough
I regularly make Italian desserts, so I use this pie crust recipe a lot. So much so that I decided it deserved its own post.
FABULOUS pastry! ⭐️⭐️⭐️⭐️⭐️
That's what Stacey, a reader, commented. And I couldn't agree more.
It resembles other dough recipes, like our favorite sweet shortcrust pastry, with details that make it unique, like using baking powder.
Some call it crostata dough and galette crust, as it's an excellent base for those desserts, as well as tarts in general, which have less filling than classic pies.
It can be flavored by using some orange or lemon zest, a dash of spice, vanilla extract or others like anise or almond.
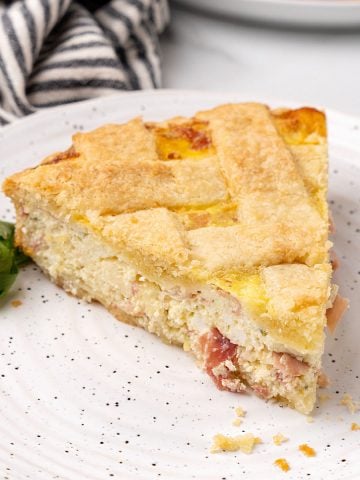
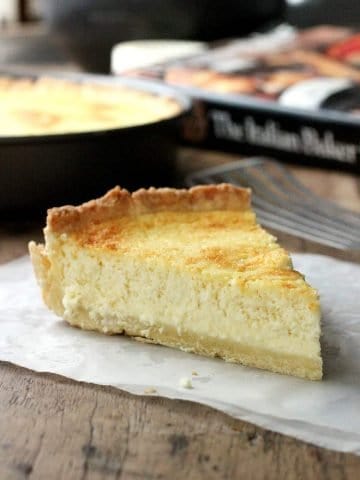
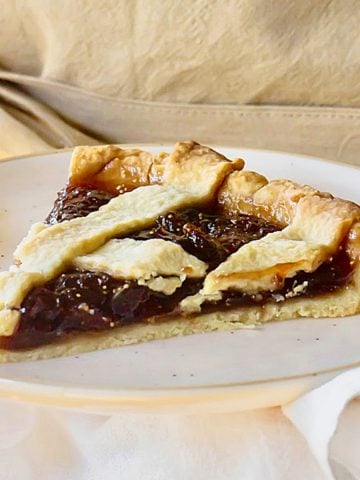
You have already seen it in this blog in the very popular lemon ricotta pie and the fig crostata (that also features my mom's homemade fig jam!). It's so versatile that it's also found in some savory dishes like this savory ricotta pie.
Testing notes
Paula's baking tips that make a difference.
Butter, have it cold and in pieces. This is very important, so it mixes a bit with the flour but is not completely incorporated into it. Some pieces of butter the size of peas should remain. You can use a food processor for this part, or make it by hand.
Use the baking powder; don't skip it. It helps with softness to create a more tender crust and balances the richness of the eggs and butter.
Be careful not to overwork the butter with the flour that it starts softening or melting (due to warm hands, usually). If that happens, cover the bowl (or wrap the dough if it's on the counter) and return it to the fridge for 20-30 minutes or the freezer for 10-15 minutes, and then continue.
Don't overwork the dough after adding the flour. This is a critical step if you want a tender, light dough. Once the flour is added, don't overwork it; it doesn't need to be kneaded. It needs to be mixed until there are no visible streaks of flour.
Always let it rest in the fridge before rolling it. This step is absolutely essential. Even if you didn't work it much when assembling it, the dough will have developed some gluten (great for bread, for example, but not for doughs), so it needs to relax in the cold refrigerator before it is rolled. Otherwise, it will be difficult to stretch and too elastic, making it shrink as it bakes and be tough.

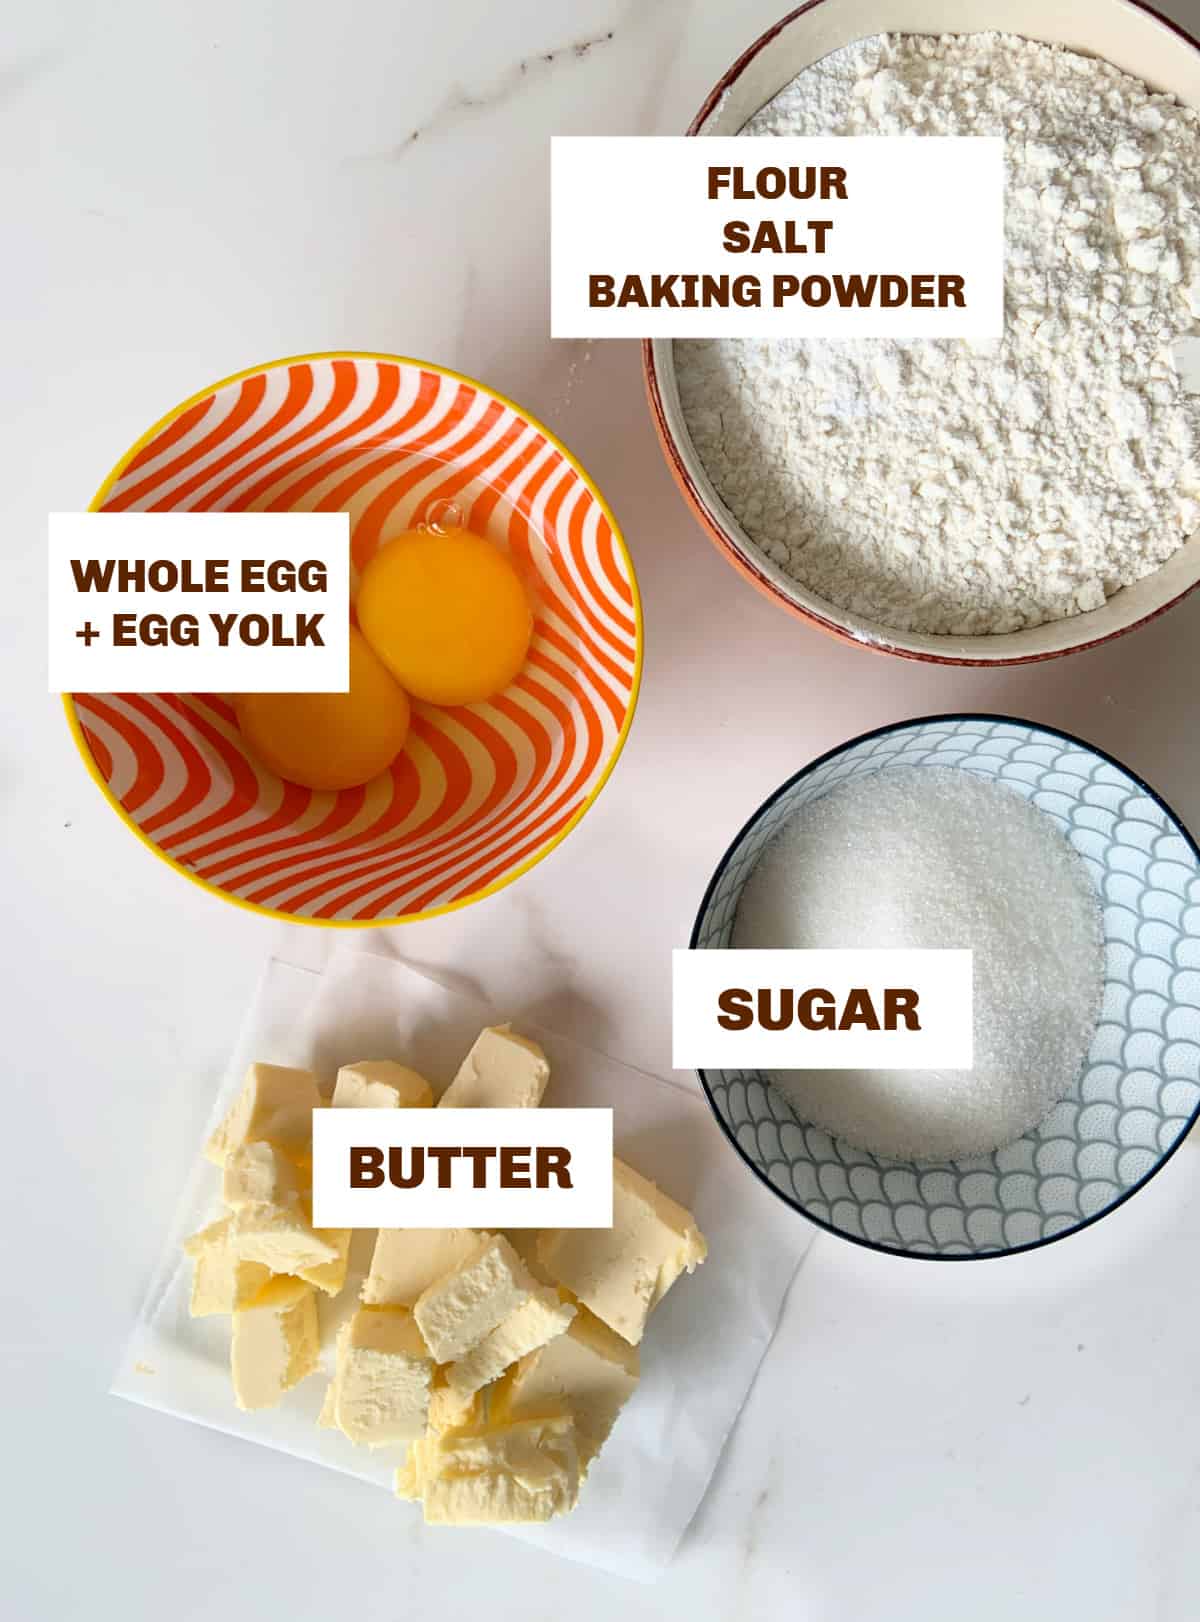
Ingredients
Quantities are listed on the recipe card towards the end of this post. The Ingredients page has more details and lists the brands we use.
- Eggs. Fresh, large, grade A whenever possible. The extra egg yolk makes it wonderfully rich and more crunchy.
- Flour. All-purpose flour always works well, and cake flour for a softer, finer dough.
- Baking powder: make sure it's active. It's an unexpected ingredient that gives it a kind of spongy, sugar cookie texture. That's why I love it for crostatas. You can omit it; you'll still have a rich, sweet pie crust.
Steps to make pasta frolla
By hand: for the amount of dough this recipe makes, I generally make it by hand. But I bake all the time, so I'm used to it. If you're a beginner, I do recommend this method to understand how homemade crust works and get the feel of it.
In the food processor: When making a large batch of dough for several pies, I like using this small appliance because it's easy and fast.
In the food processor
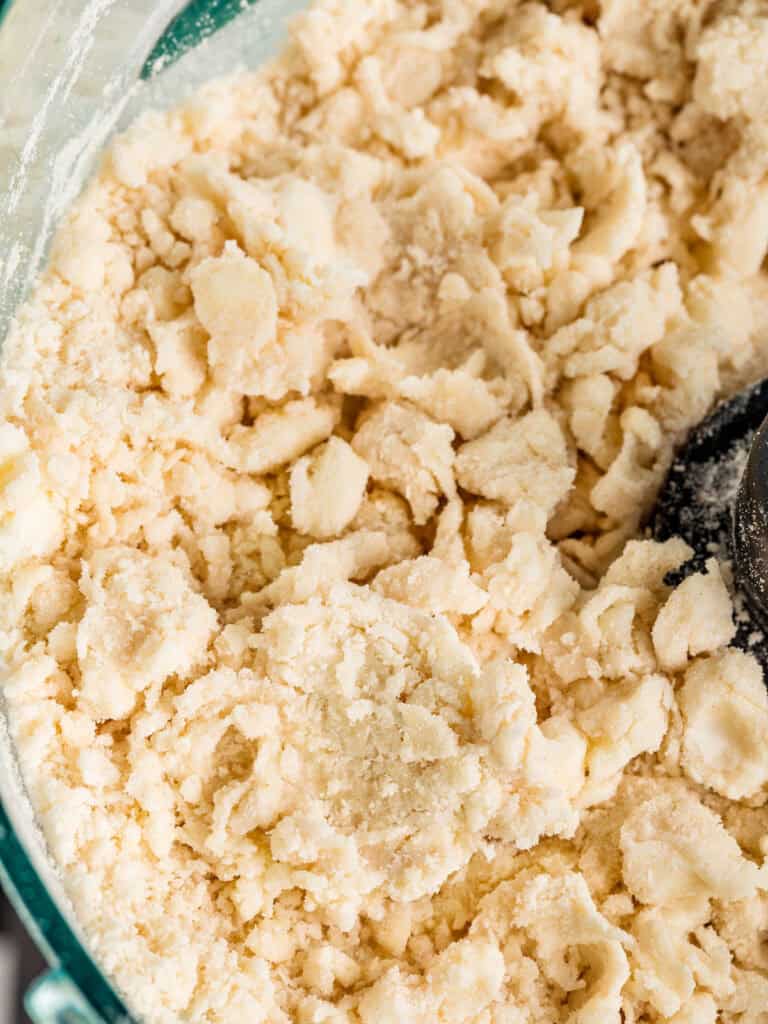
Pulse to mix
The dough will be crumbly, and you don't want to process it until it forms a ball. Stop periodically and test to see if it's ready.
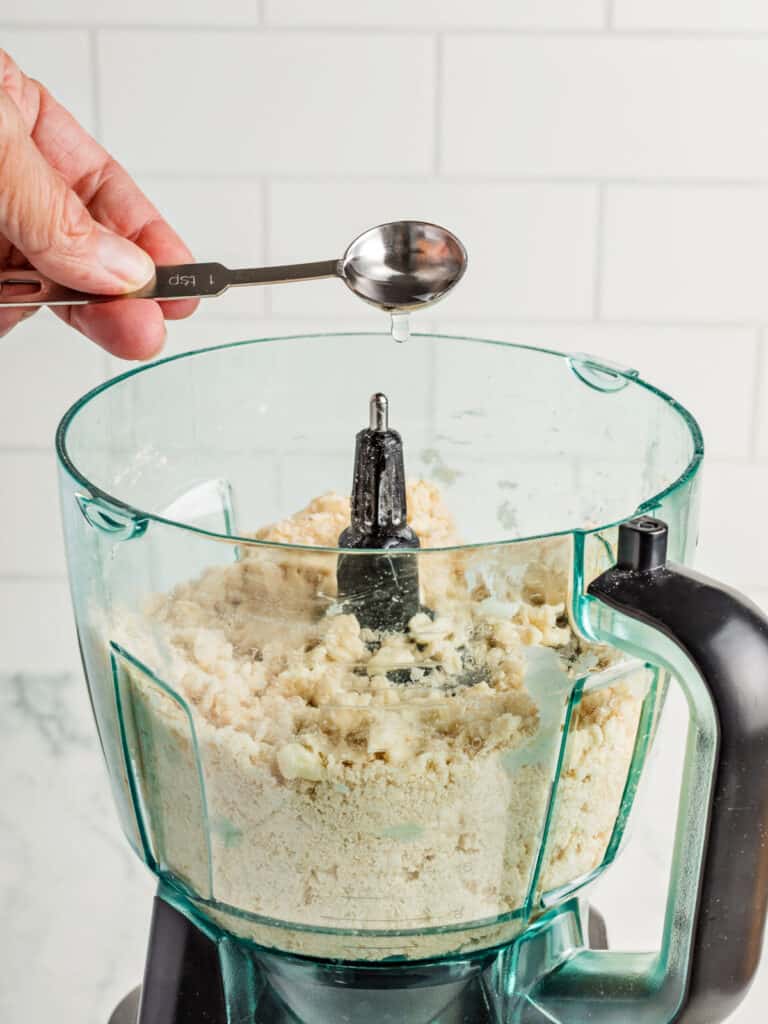
Add more water if needed
This is important if the dough is dry, but be careful of adding too much. One teaspoon at a time. Pulse once or twice and check, using the squeeze test below.
Pie dough by hand:
I also love making it from scratch with my hands. It's like going to flour therapy.
Step-by-step VIDEO
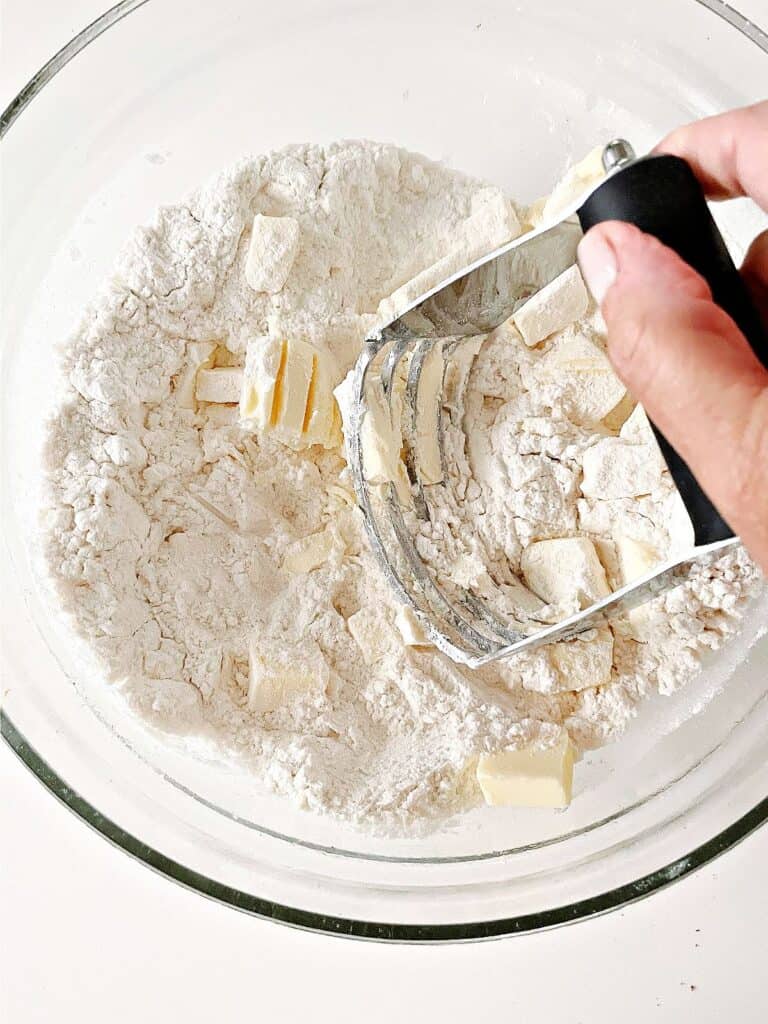
Work in the butter
Use a dough cutter or your hands to work the cold butter cubes into the flour mixture. It should be the size of peas or small beans.

Bite-sized pieces
Drizzle ¾ of the amount of ice water, stir with a fork and add more, a tablespoon at a time, until you pass the squeeze test below. Don't underestimate the amount of water; it might look very crumbly, but when you squeeze it, it might come together.
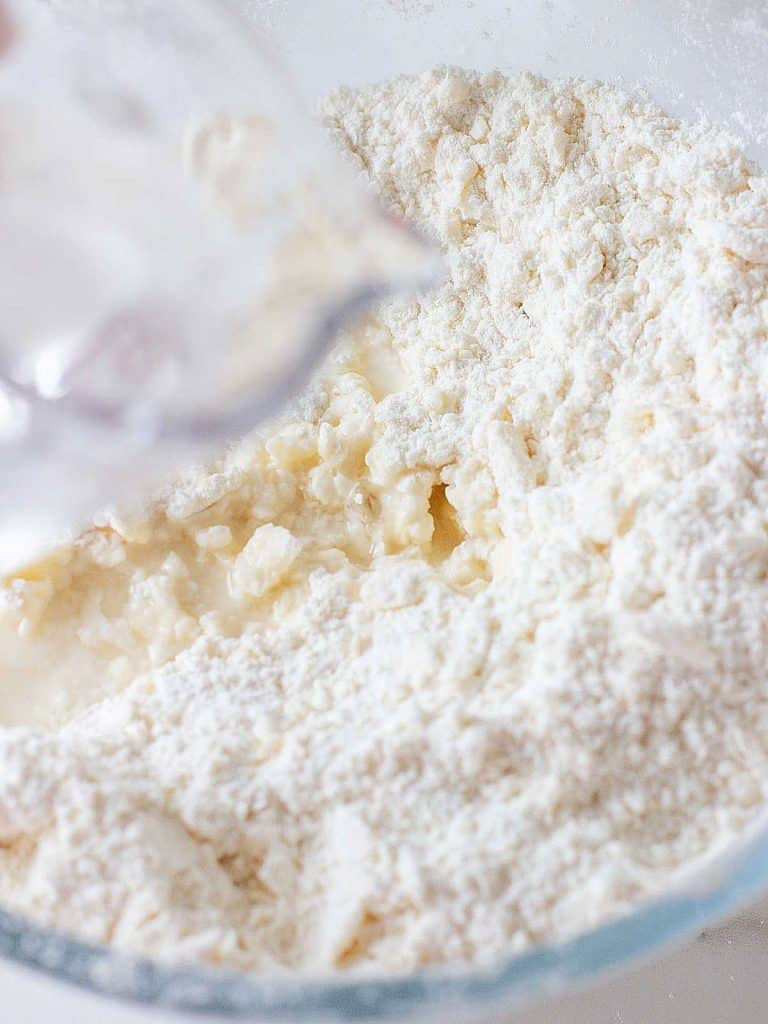
Add water
Drizzle ¾ of the amount of ice water, stir with a fork and add more, a tablespoon at a time, until you pass the squeeze test below. Don't underestimate the amount of water; it might look very crumbly, but when you squeeze it, it might come together.
For both

Check consistency
Take a piece with your hand, and squeeze it in your palm. If it has too many dry spots and doesn't quite come together, it needs more water.
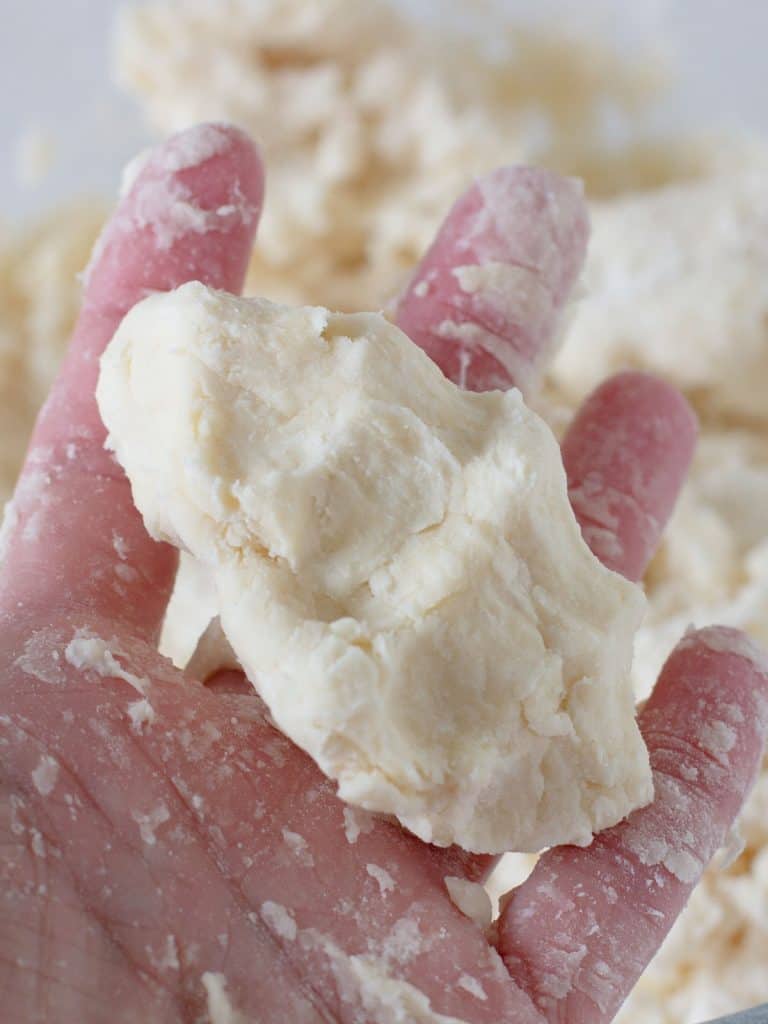
Squeeze test
The dough is ready when you take a bit, and it comes together with no dry spots when you squeeze it in your palm.
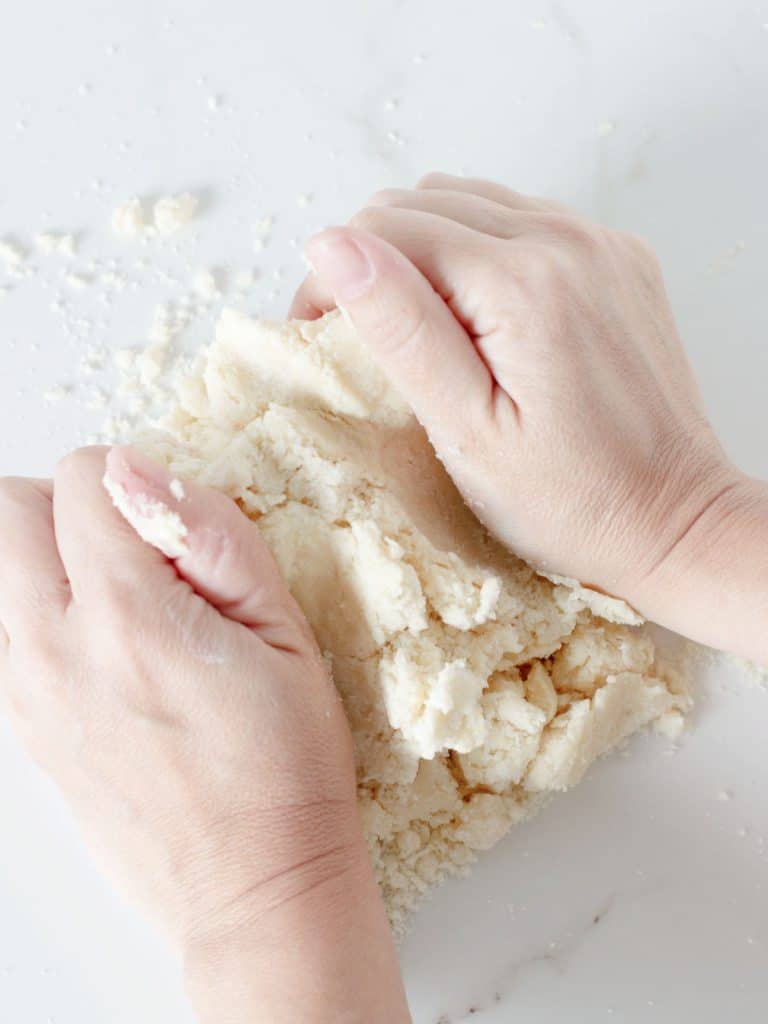
Gather into a ball
It will be a shaggy mass at first, but it will eventually come together. Don't overwork it. As soon as you have it in a rather smooth ball, stop.
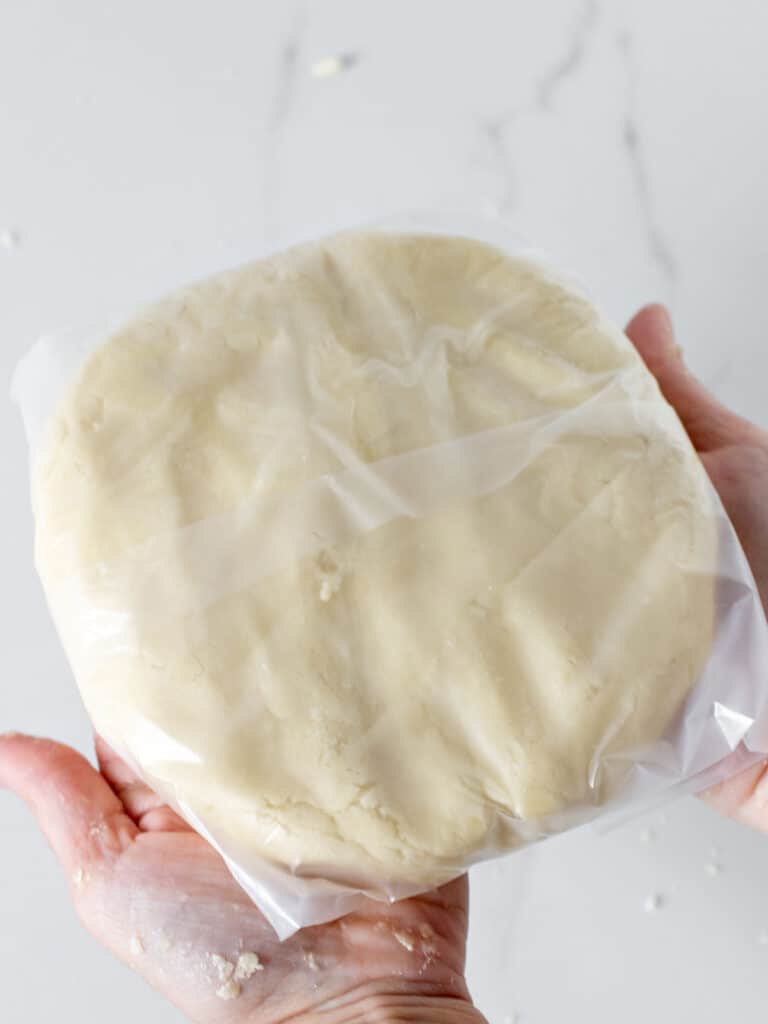
Refrigerate
Flatten it into a disc, cover it tightly with plastic wrap or a large freezer sheet and chill for at least 1 hour or up to 5 days.
As with most crusts (there are exceptions like this cherry tart), pie doughs need to be refrigerated before use. They need to relax so that they can be rolled out properly without shrinking.
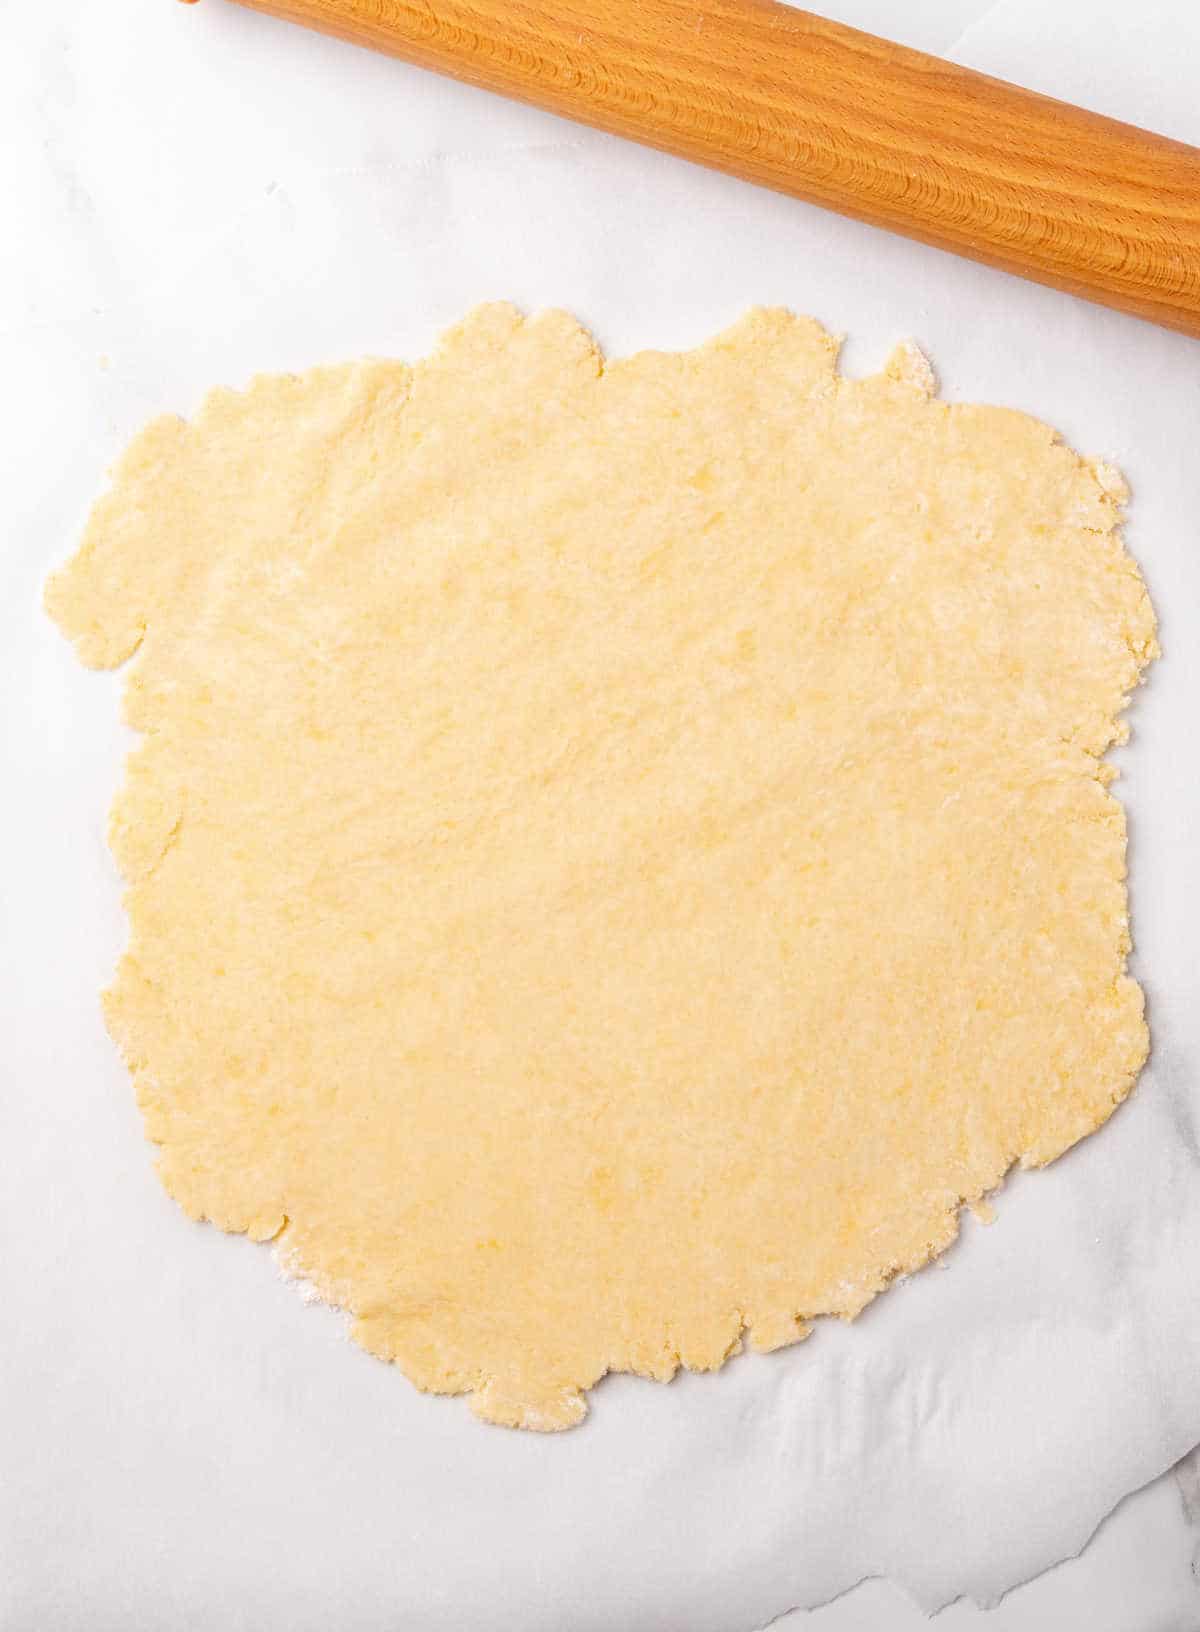
Rolling pie crust
Always roll cold dough. Even if you think it's too cold and needs to be at room temperature until it becomes pliable, check it often while you're waiting for it to be ready.
Start rolling it as cold as you can; it will soften quickly. You don't want the butter to start softening too much because it will make the final crust tougher.
Here's a short video about how to roll pie crust.
Storage
- Refrigerating: after you make the dough ball, wrap it well and keep it in the fridge for up to a week. Make sure no part of the dough is left unwrapped, as it will dry out. I wrap it in double plastic or freezer paper and then in a Ziploc bag.
- Freezing: follow the same wrapping procedure as for the refrigerator. Label and date it. It can be frozen for about two months.
If you like homemade pie crusts, check our Basic Recipes category. There are posts with detailed instructions, videos, and photos.
If you made this recipe and loved it, you can comment below and leave a 5-star ⭐️ review. Also, if you had issues, let me know so we can troubleshoot together.
You can also subscribe to our FREE email series 'Baking the Best' and our regular newsletter. Or follow and save my recipes on Pinterest.
As an Amazon Associate, I earn from qualifying purchases. Read my disclosure policy.
Italian Pasta Frolla (pie crust for crostata and galette)
Ingredients
For the dough:
- 2 ¼ cups all-purpose flour
- ½ teaspoon baking powder
- ½ cup sugar
- pinch of salt
- ¾ cup unsalted butter, cold and in pieces
- 1 egg
- 1 egg yolk
Instructions
For the dough:
- If using a food processor, pulse the dry ingredients: 2 ¼ cups all-purpose flour, ½ teaspoon baking powder, ½ cup sugar and a pinch of salt, a few times to mix. Scatter ¾ cup unsalted butter, cold and in small pieces on top, and mix until you have butter the size of peas.
- If making it by hand, stir to mix 2 ¼ cups all-purpose flour, ½ teaspoon baking powder, ½ cup sugar and pinch of salt in a large bowl. Scatter ¾ cup unsalted butter, cold and in small pieces on top and mix until you have butter the size of peas.
- For both methods, add 1 egg and 1 egg yolk and process using quick on/off pulses, or stir with a fork, until it all starts to come together. If processing it, don't let it form a ball. If you take a little and squeeze it with your hand or pinch it with your fingers, it should come together.
- Turn the rough pastry dough onto the counter and gather it together several times, pressing it to form a rather smooth dough ball. Don't overwork it, or the crust will be tough when you bake it. The butter must remain cold. I put it inside a plastic bag and aid myself with the bag while pressing my knuckles until it comes together. That way, I don't touch the dough unnecessarily.
- Press the dough into a flat disk. Cover with plastic wrap and refrigerate for 1 hour and up to 3 days. wrap it well. Make sure no part of the dough is left unwrapped, or it will dry out. I wrap it in double plastic or in freezer sheets, and then in a Ziploc bag.
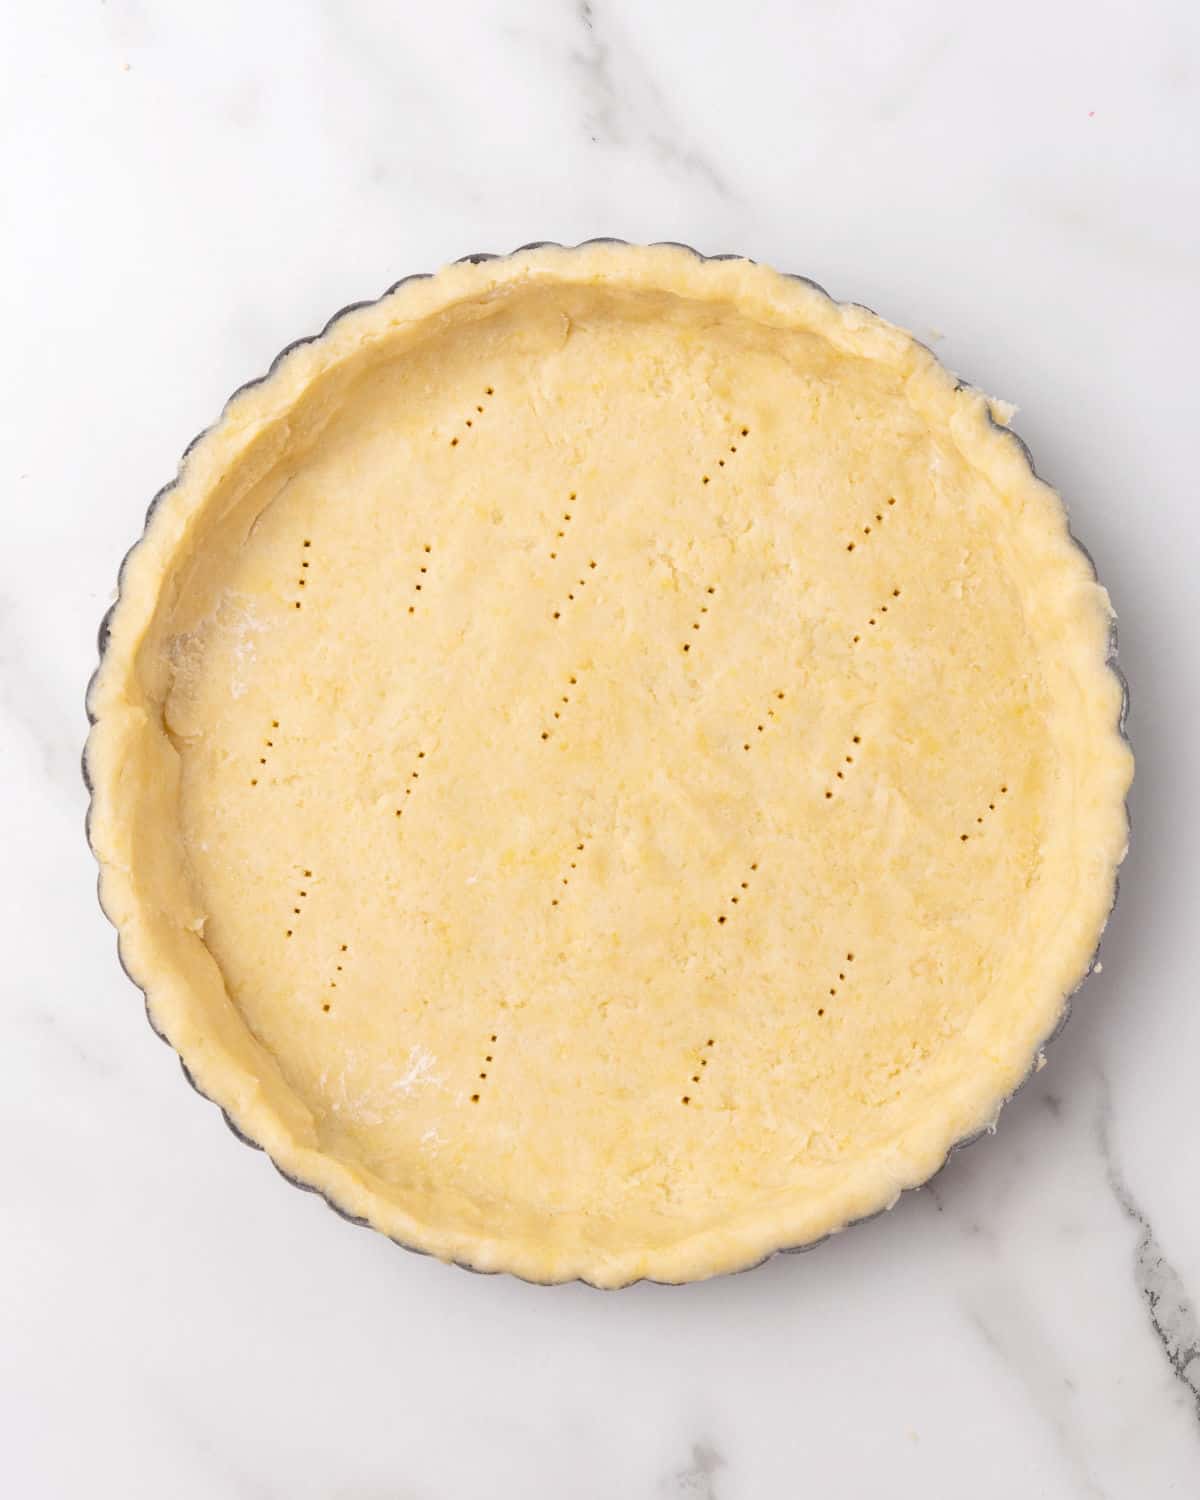
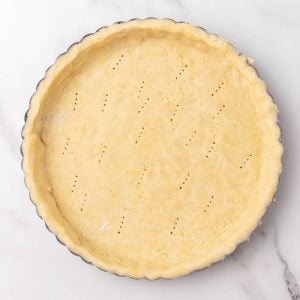
- When ready to use, roll the cold dough with a rolling pin until it's thin and larger than the pie or tart pan you're using. Prick the bottom with a fork and place it in the fridge to chill for 1 hour before baking it. Always fill it cold; don't bake or use it at room temperature. Follow blind baking instructions if the recipe calls for it.
Stacey says
FABULOUS pastry!
patricia says
Thanks for sharing. I'm inclined to use shortening instead of butter. Your thoughts? Thanks, Pat
Paula Montenegro says
Hi Patricia, I like butter, but there are several pie doughs made with shortening. And the substitution is 1:1, same amount.
Lauren says
Hi Paula,
I am making a pastia with this dough. Should Ibake before addng the filling?
Thanks for the recipe!
Paula Montenegro says
Hi Lauren! You might want to prebake (blind bake) the dough first so the filling doesn't moisten it before baking.
Hilary says
Hi Paula when you jump to the recipe you don't' have baking powder down so i didn't put it in ! I hope it will be ok.
Paula Montenegro says
Hi Hilary! Yes, it will still be a great sweet dough. I corrected it in the recipe card. Thanks for the heads up! Even though I check the recipe several times and sometimes have others do so too, a typo or a missing ingredient once in a while happens. Have a great weekend.