
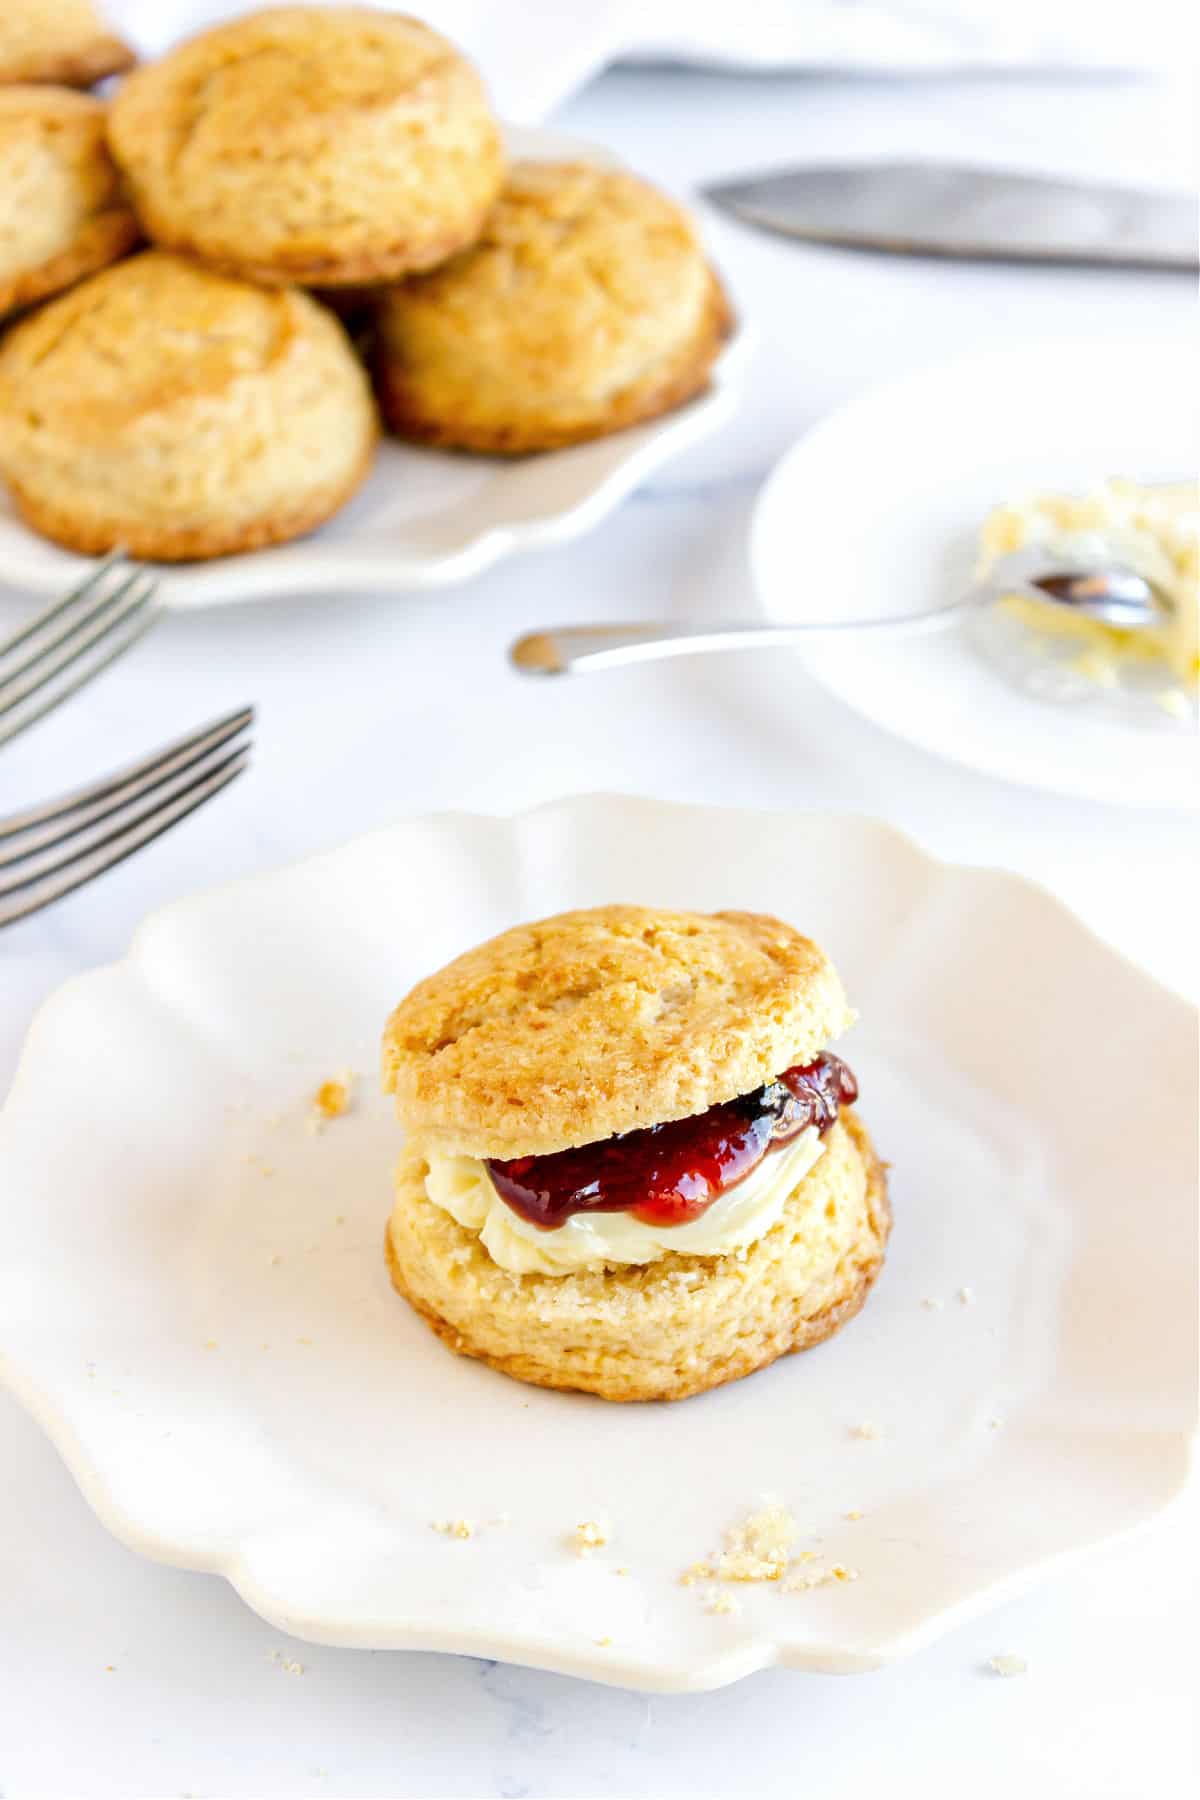
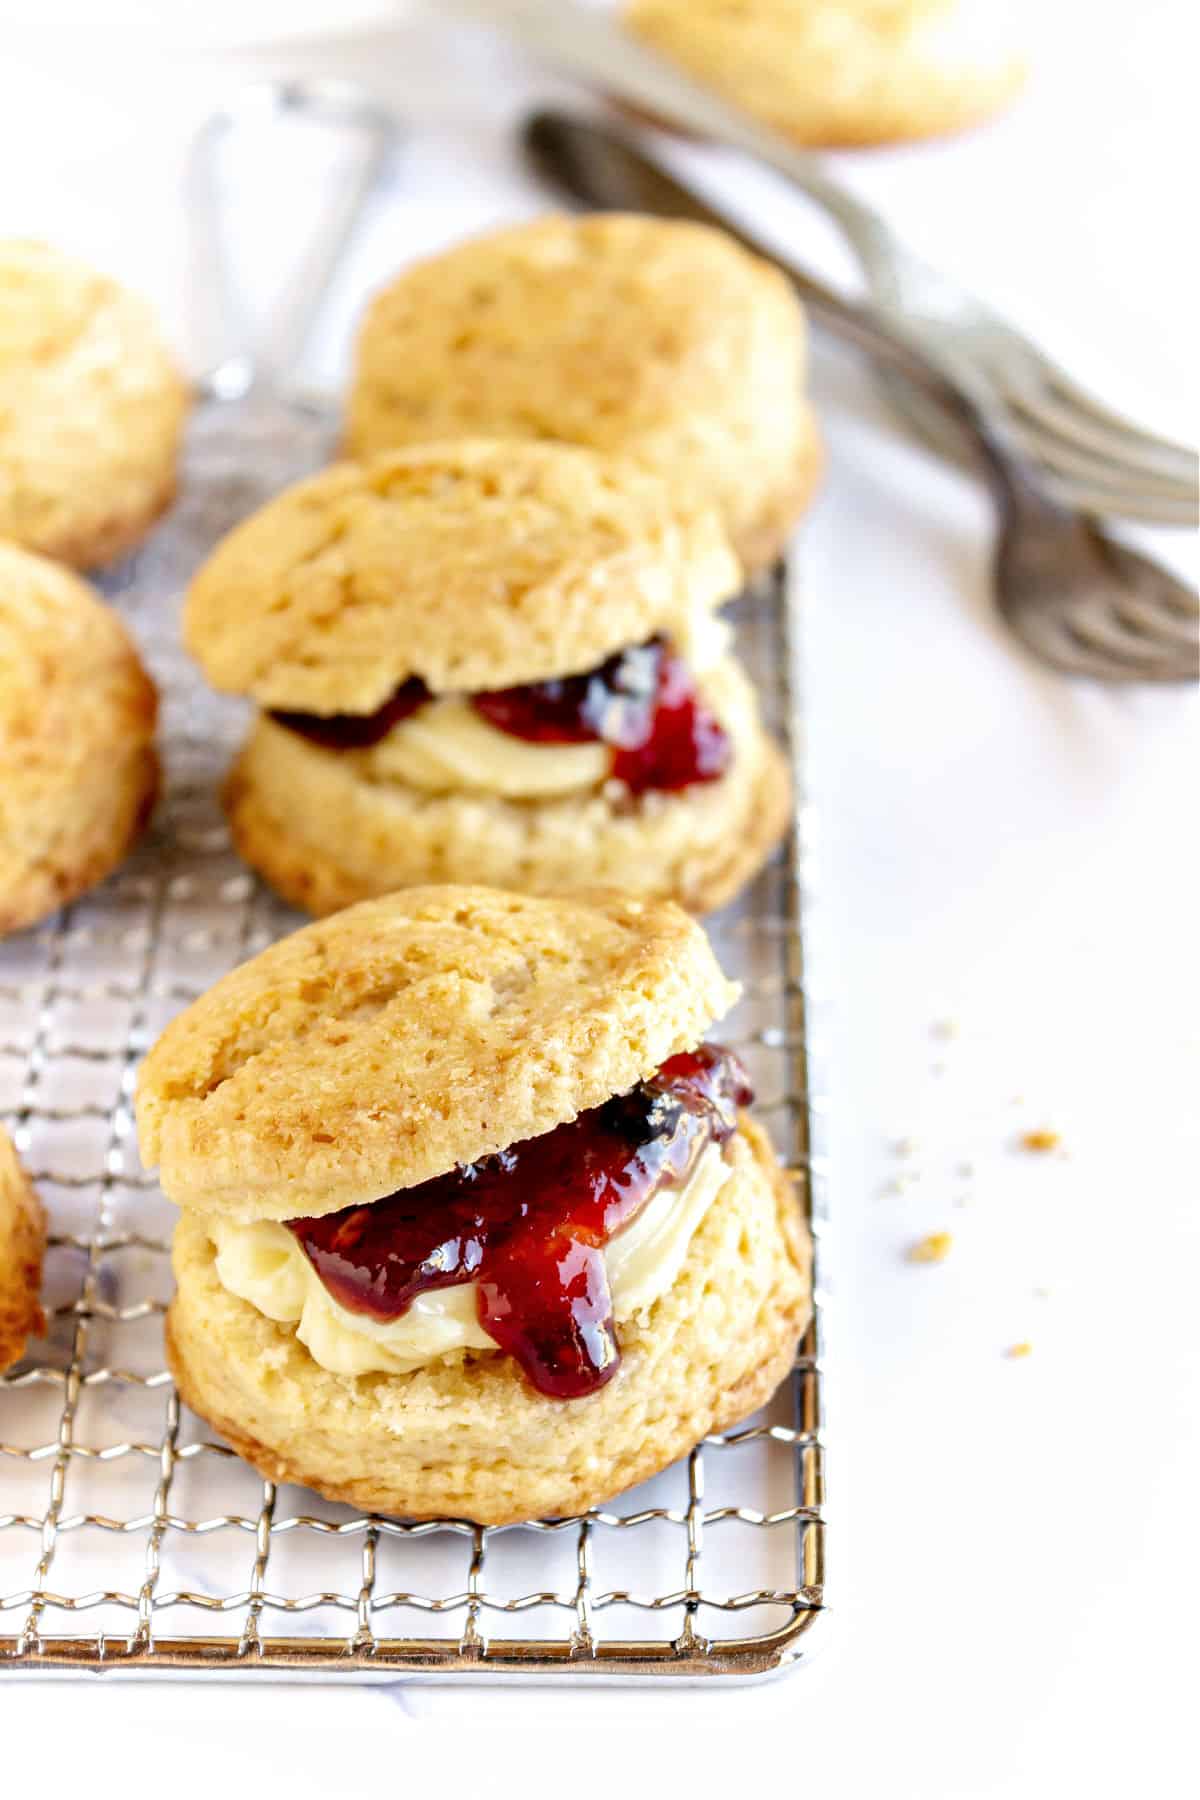
Soft, tender and buttery, these mini cream scones can be out of the oven in 45 minutes. And they freeze beautifully, too. Their size makes them perfect for afternoon tea and a brunch table. And if you're new to scone baking and apprehensive about making them from scratch, this post has all the tips and process shots to guide you.
SAVE THIS RECIPE
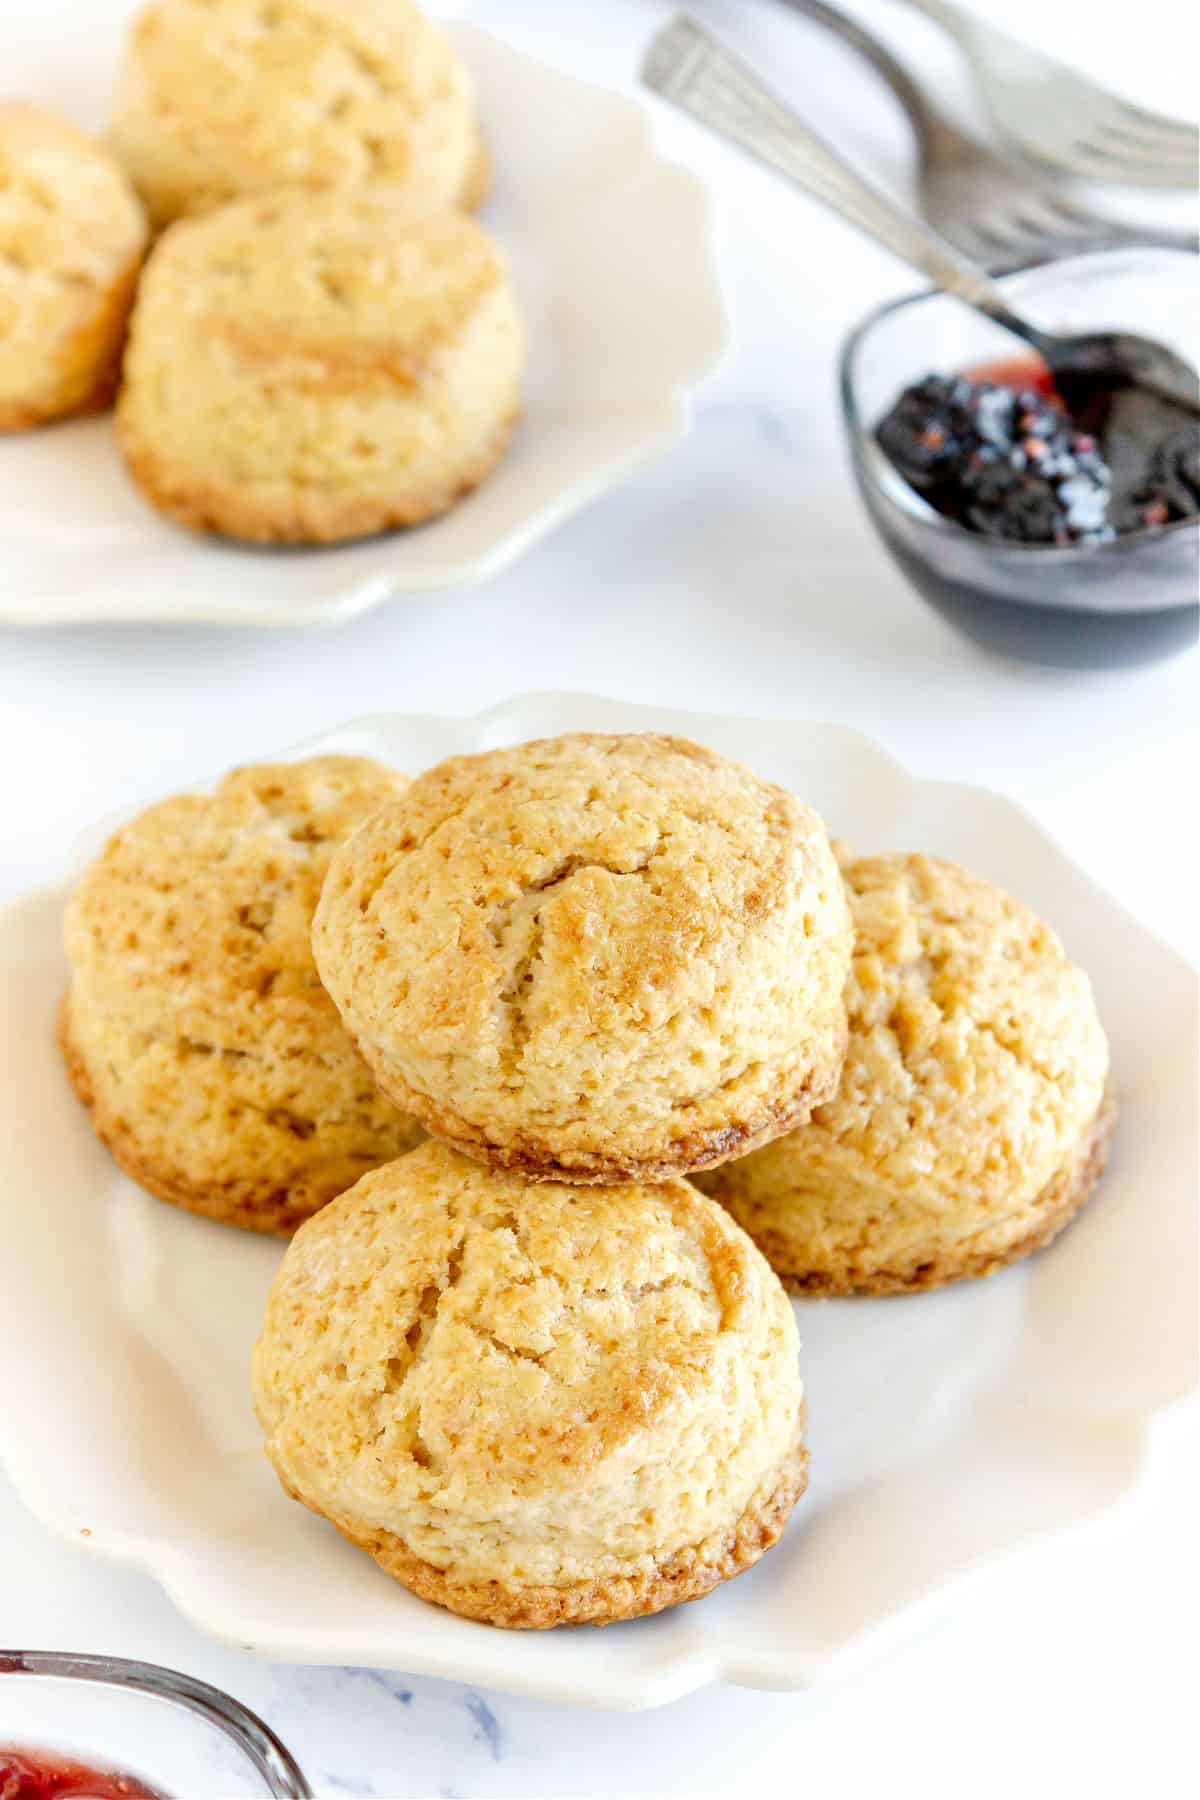
Soft and buttery
If you turn on the oven now, in an hour, you can have the kitchen smelling amazing with a plate of cream mini scones standing beside your mug of tea or coffee. Unapologetically rich and buttery, they're quite different from these classic raisin scones, which use less butter and are more in the English style.
If there was a tea time tradition in my family (as explained in the post on strawberry buttermilk scones), it was to eat freshly baked scones. This made me a scone fan, both baking and eating them.
I used to make these orange-flavored scones (and you can, of course), but I realized they're a wonderful master recipe for basic mini scones. You can flavor them with citrus like lemon zest, a dash of vanilla extract, some ground cinnamon or other spices.
How to serve mini scones
- Warm: if not serving them right away, warm them up in the oven for a few minutes so they're soft and tender.
- Soft butter: a pat on a warm scone completely changes the flavor and makes it irresistible.
- Clotted cream: the English way of eating this classic recipe.
- Fruit jam and butter: Perfect for afternoon tea, breakfast and brunch.
- Make small sandwiches: ham and cheese, smoked or cured salmon with sour cream and dill, or roasted tomatoes with mozzarella and basil are just a few ideas.
Tips for scones and biscuits
- Baking powder: It's essential to help the scones rise, so make sure it's not expired.
- Very cold ingredients: I'm not kidding when I say very cold butter. I cut it and put the pieces in the freezer for 5 minutes before using it. And don't take the liquid ingredients out before you start mixing the scones. They belong in the fridge until you need them.
- Don't work the dough much. It should come together but might still have floury patches. You don't need to work it until it's smooth, like pie dough. It is uneven, with dry spots sometimes, and that's good for flakiness later.
- A rather high oven is necessary: they need that extra heat (and baking powder) to rise. If you happen to forget to turn the oven on before you start mixing, please don't leave the baking sheet with the cut scones waiting on the counter. Put them in the fridge or freezer for the ten or fifteen minutes it takes for the oven to reach its temperature.

Steps to make scone dough
Scones have very simple ingredients, but a few pointers should be followed if you want to achieve soft, tender ones, nicely risen.
The first part of this recipe can be made by hand or in the food processor.
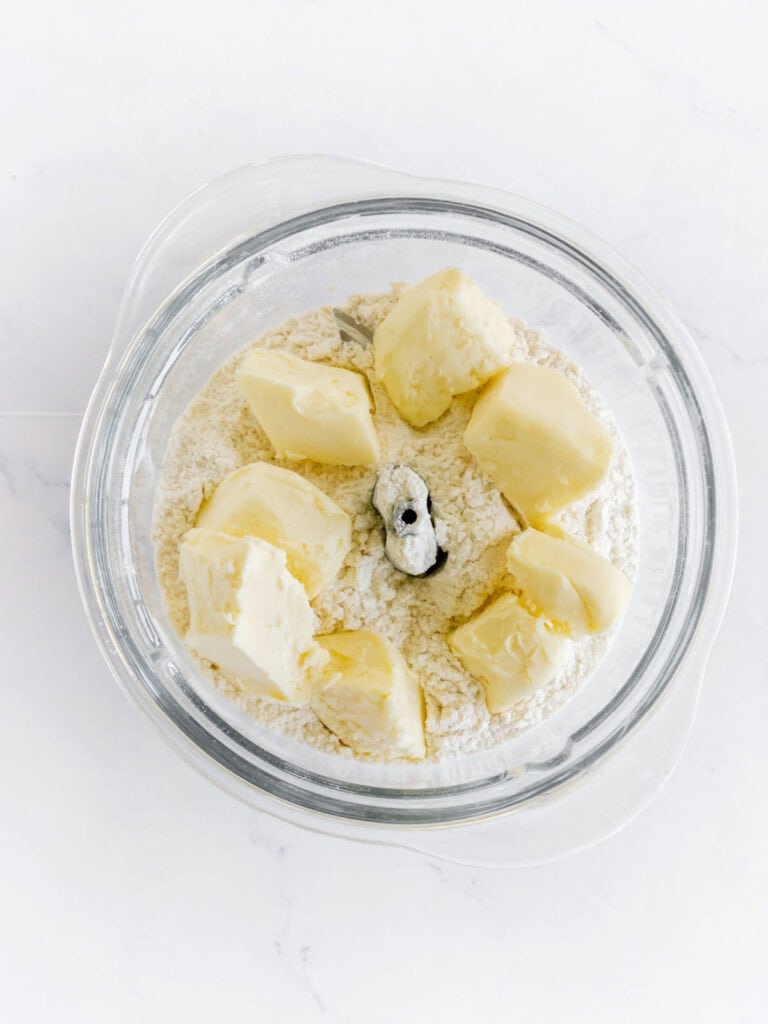
Food processor
Put the flour and other dry ingredients in the bowl of the food processor. Pulse to mix.
Scatter the cold butter pieces. Pulse a few times, just until the butter is the size of peas. It will be irregular. Don't overwork it.
This is a good idea when making a large batch and you have a large processor.
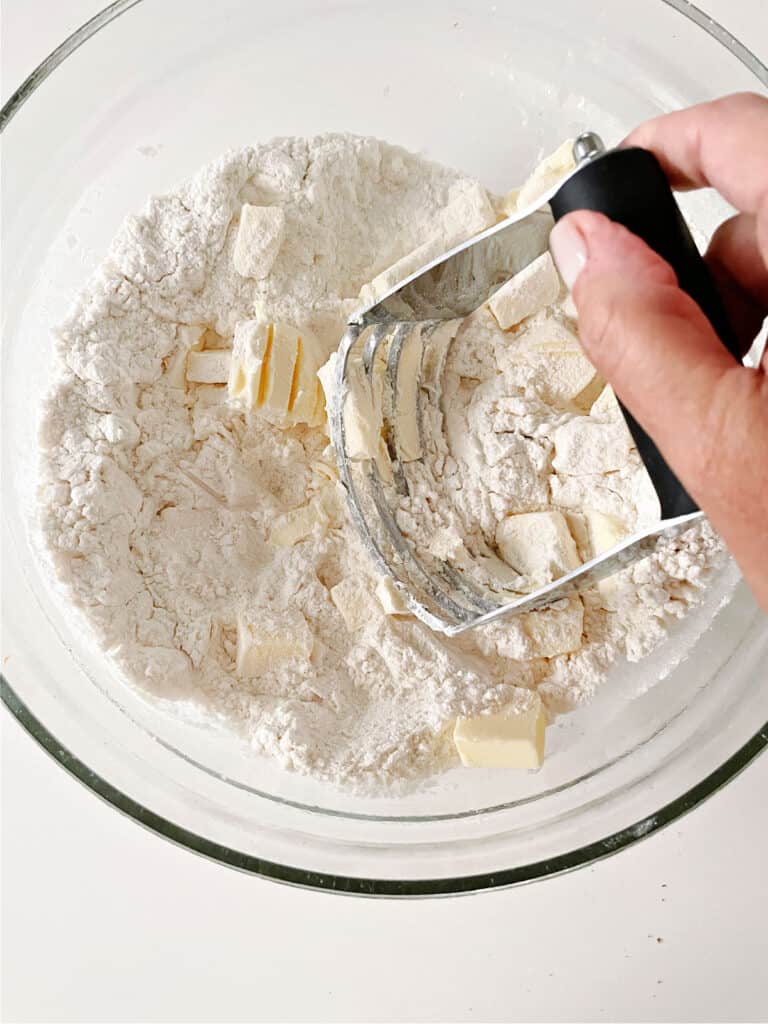
By hand
Stir the dry ingredients in a large bowl. Scatter very cold butter in small pieces to ensure a great result. This is important if you integrate it by hand (as opposed to using a pastry cutter) because it will take a few minutes, and you don't want the butter to start warming up and melting.
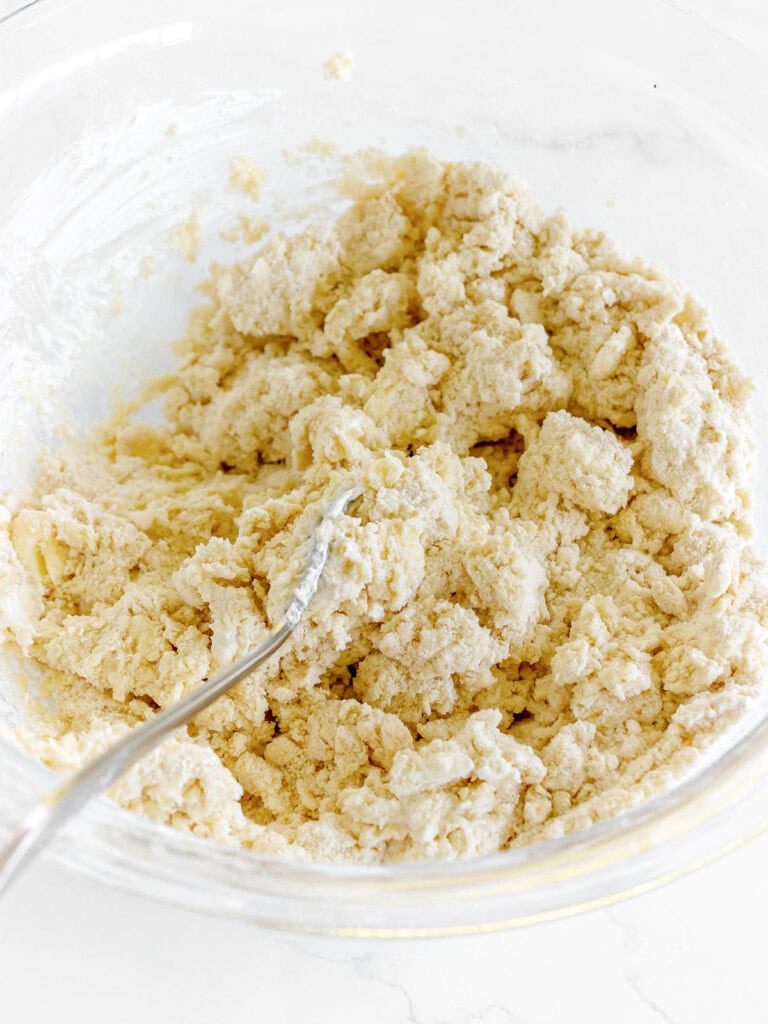
Transfer to a bowl
In both cases, transfer the crumbly mixture to a bowl and add the liquid. Stir with a fork until you have a barely cohesive dough. Don't overwork it.
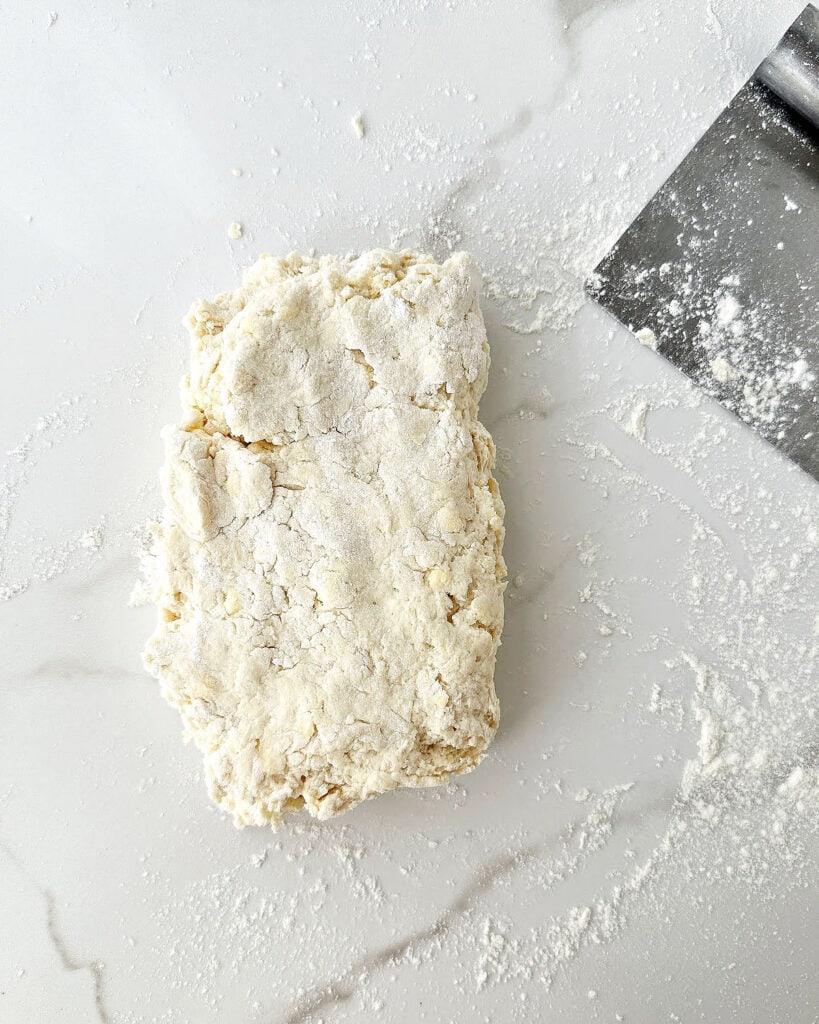
Form a rough rectangle
Transfer the dough to a lightly floured surface and use your hands to make an irregular, rustic ball. Don't overwork it like you would pie dough. A dough or bench scraper is a handy tool for this.
It might be more or less floury. Don't overwork it until it's smooth, or you'll have tough scones.
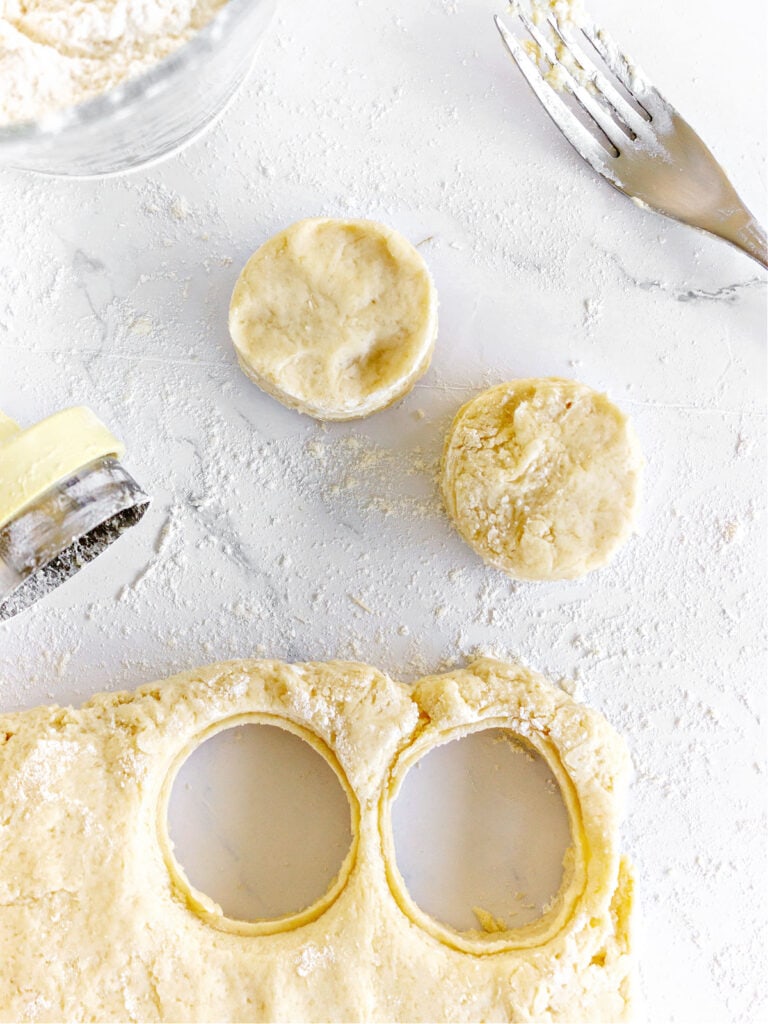
Cutting rounds
Roll the dough lightly to about 1 inch or 1.5 inches. Don't press it much. For mini scones, use a small round cookie cutter. Mine is 1.57 inches (4cm).
You can also cut small triangles with a sharp knife and avoid scraps.
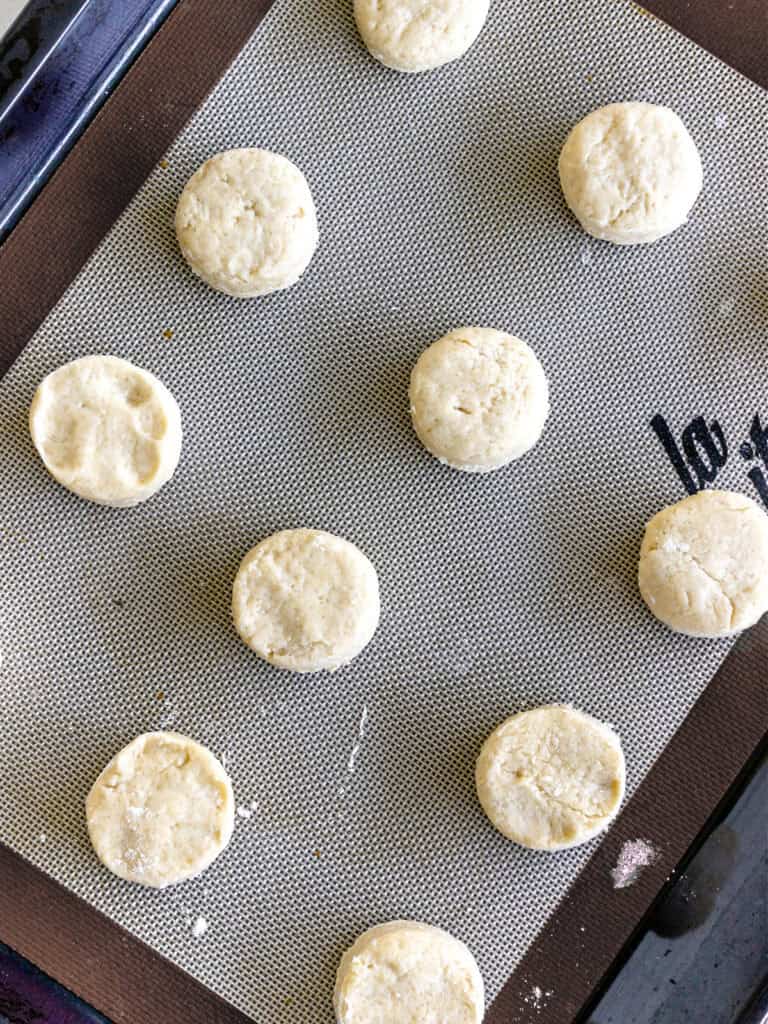
Baking
Separate the rounds so they have space to expand during baking.
You can line the baking tray with a silicone mat or parchment paper, but these scones can also be baked directly and will not stick.
Brush the tops of each scone with milk and sprinkle turbinado sugar or regular white sugar.
Storing
- Room temperature: keep them in an airtight container for a day or two. Warm slightly in the oven before eating so they are soft and tender.
- Freezing scones: cut them and put them on a baking sheet. Freeze until solid and transfer to a freezer-safe container or bag for two months (so you liberate the tray and have more space in the freezer). When ready to bake, take as many as you want and bake directly as instructed in the recipe card below.
This is one of my favorite scone recipes. And it's not a surprise since it's adapted from Nancy Silverton, one of my most admired bakers ever.
As an Amazon Associate, I earn from qualifying purchases. Read my disclosure policy.

Mini Cream Scones (soft and buttery)
Ingredients
- 2 ¼ cups all-purpose flour
- ⅓ cup sugar, plus some extra for sprinkling before baking
- 1 tablespoon baking powder
- ⅛ teaspoon salt
- 6 ounces unsalted butter, cut into 1-inch cubes and almost frozen
- ¼ cup whole milk, very cold
- ½ cup heavy or heavy whipping cream, very cold, plus extra for brushing the tops of the scones
Instructions
- Preheat oven to 350ºF (180ºC).
- Grease or line with parchment paper two baking sheets.
- In the bowl of a food processor, put 2 ¼ cups all-purpose flour, ⅓ cup sugar, 1 tablespoon baking powder and ⅛ teaspoon salt. Process for a few seconds, just to mix.
- Scatter 6 ounces unsalted butter over this mixture and pulse a few times until the butter is the size of peas. If making by hand use a large bowl and cut the butter with your hands or a pastry cutter. Then follow the recipe below.
- Transfer the mixture to a large bowl. Pour ¼ cup whole milk and ½ cup heavy or heavy whipping cream and stir quickly with a fork, mixing everything until most of it is moistened.
- Dump it onto the kitchen counter and quickly give it a few turns to avoid very dry spots. Some dry parts will remain and that is OK. The more you touch it and mix it, the tougher the baked scones will be.
- Pat the mixture about 1 to 1.5-inches high.
- With a round, small cookie cutter cut scones (you might need to dip the cutter periodically in flour to aid with this) quickly and arrange them on the baking sheets.
- Brush the tops lightly with additional cream and sprinkle with sugar.
- Bake for about 20 minutes, until they're puffed, the tops are golden and the insides are fully baked. If in doubt, lift one with a fork and check that the crumb is dry and not still wet.
- Eat warm. Store leftovers in a tin or airtight container and warm briefly in the oven before eating.
Notes
Adapted from Pastries from the La Brea Bakery, by Nancy Silverton
Create Amazing Meals says
Truly lovely! I've missed you and now I must try these scones with all the lovely citrus in SoCal jus now.
Nancy @ gottagetbaked says
You deserved that vacation, Paula! What a beautiful place, I loved living vicariously through your photos. I can almost feel that sun on my face! I'm making these scones this weekend - I've got all the ingredients at home (yay!). I love how tall and fluffy they look. Orange flavoured anything is totally my jam.
Abbe@This is How I Cook says
These are gorgeous scones. But I love where you are eating them from better. Wow!
Kathy says
Nice to see you back, Paula! Your vacation photos are lovely! I do enjoy a good scone, and these look perfect…a must try.
Medeja says
They would make such a wonderful breakfast.. 🙂
Kitchen Riffs says
Mini scones! Orange? Yes! Love the idea. Glad you had a good time. We'll have a good time eating these. 🙂 Fun post, loved the pictures. Thanks.
yummychunklet says
I just had afternoon tea last Saturday, but your delicious looking scones are making me want to go back!
The Ninja Baker says
Very clear, Paula, that your orange and cream mini scones are the cat's meow. Looking forward to my tray of the lovely teatime treats...Speaking of which, Patagonia looks to be a well-deserved treat after hard work =)
Pink Patisserie says
What a lovely scones! And your vacation photos! Swoon worthy! I am very much longing for summer right about now!
Vero Palazzo says
que ricos Paul!!! super tentadores... y la zona de los 7 Lagos, que placer!!! Ya te sigo en IG 🙂
Un beso!
Bam's Kitchen says
Delicious and buttery orange mini scones, light and flaky... oh yeah, count me in. So good to see you back for a bit. Your vacation spot looks blissful. I would never want to leave it. Wonder if they have wifi there?
Choc Chip Uru @ Go Bake Yourself says
These vacation sounds magnificent my friend 😀 Well deserved!
Now these scones - wouldn't mind a big bite out of them!
Cheers
Choc Chip Uru
Marissa | Pinch and Swirl says
You seriously make the best scones, Paula! And how have I NOT been following you on Instagram? All fixed now. xoxo
Dana @ Simply Romanesco says
These scones look delicious and the pictures of Patagonia are absolutely gorgeous! What a breathtaking region 🙂
Liz Berg says
A well deserved vacation in such a picturesque area!!! Your scones look amazing---you haven't lost your baking (or photography) mojo!!! xoxo
Easyfoodsmith says
Have never tried scones and your handy tips will definitely be of help when I give them a try in my kitchen. Thanks for sharing.
mividaenundulce says
Ahhh...los Lagos del Sur, es uno de los lugares que tengo que ir antes de morir, no, nada de drama, pero es un hecho.
Oye, lindos tus scones, qué paciencia para hacerlos pequeñitos, y ya imagino el olor en tu cocina, simplemente provocativos.
Norma Cecilia. says
Ya veo que has admirado la belleza del sur de Argentina, trata de visitar el sur de mi país - Chile- otra maravilla. de una belleza increíble.y disfruta de los ricos kuckens de frutas en Frutillar por ejemplo.. Lugar donde disfrutamos de la hora del té. con estos ricos postres de origen alemán.
También mucha abundancia de corderos asados al palo.en el sur de Chile.
Saludos.
Cocoa and Lavender says
These definitely look amazing, Paula, as did your photos of Patagonia! I am so happy for you that you got a real vacation! And thank you for mentioning hot chocolate after all the suggestions of coffee and tea! We cocoa drinkers love our scones. Abrazos, David
Alice @ Hip Foodie Mom says
Paula! you have me so excited with these scones!!! I'm channeling myself to your kitchen where I can smell these buttery, mildly sweet orange and cream mini scones!! The 7 lake area in the south of Argentina looks amazing and so peaceful. . I could use a little of that right about now 🙂 so good to connect with you today, Paula!!! I miss you!!
Renee says
Oh Paula! You make me smile every time I see a new post from you in my stream. I know it will be fabulous and can't click to it fast enough. I'm imagining how delightful these scones must smell and taste. Mmmmm.....