

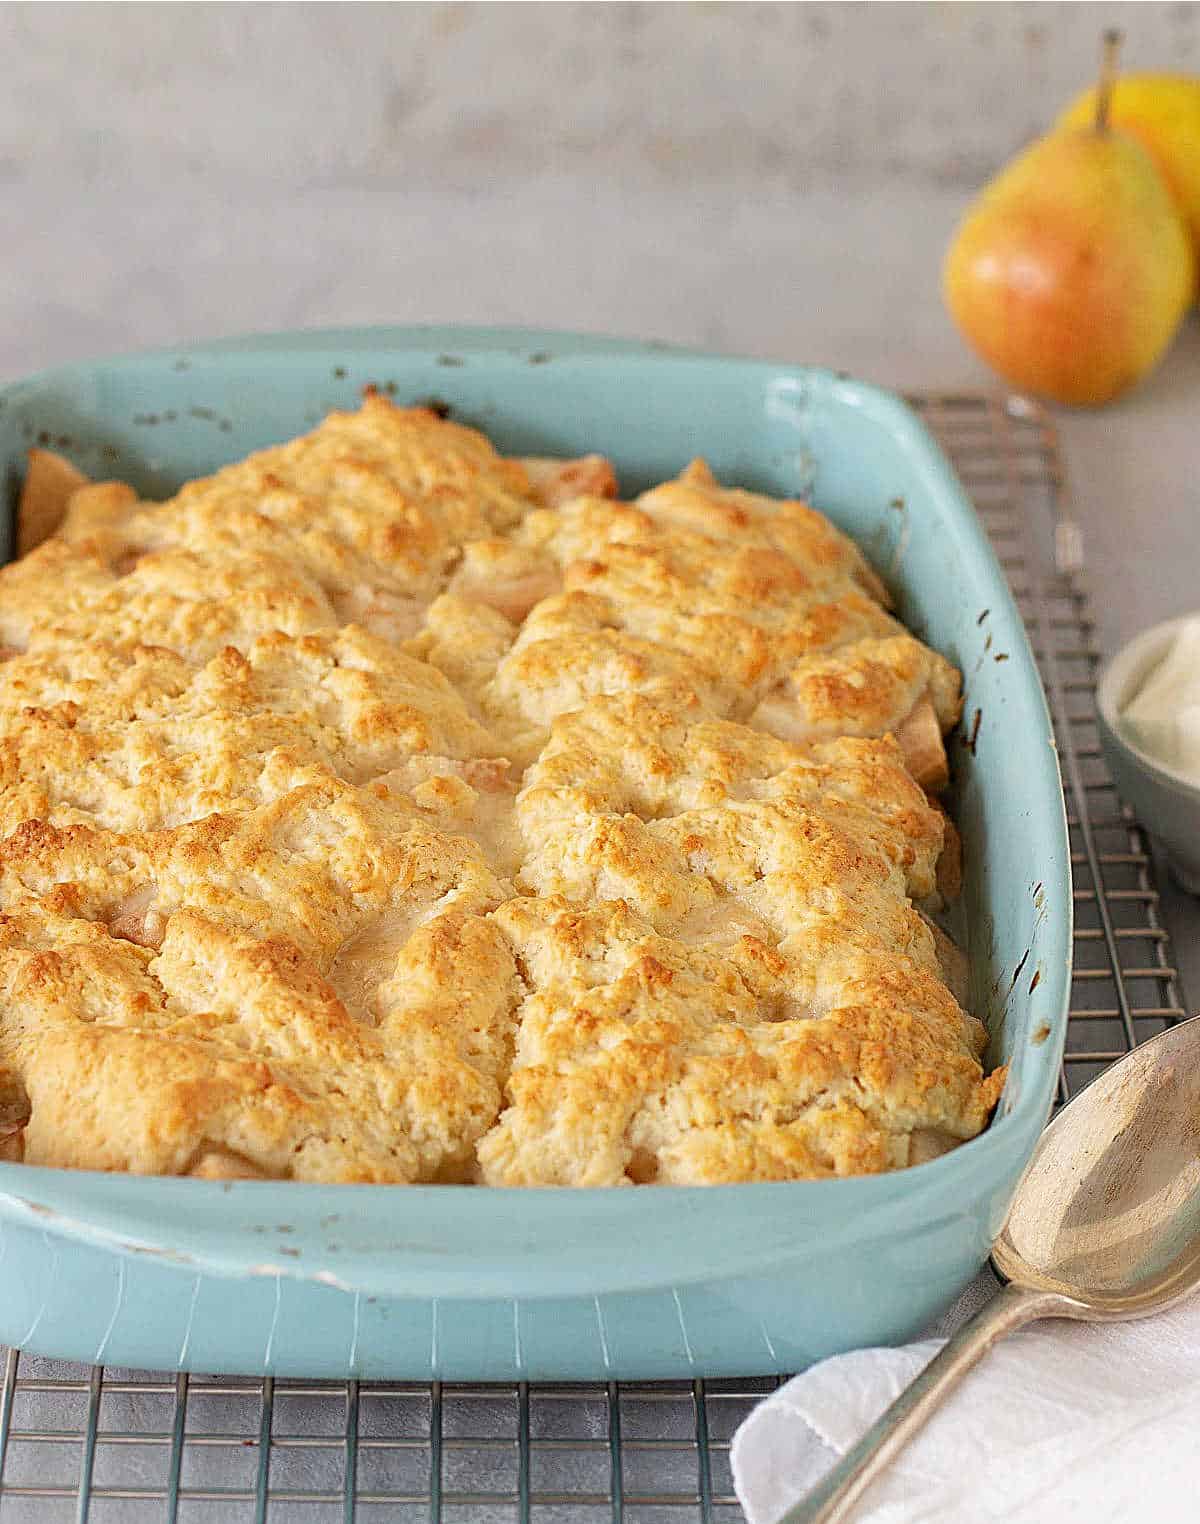
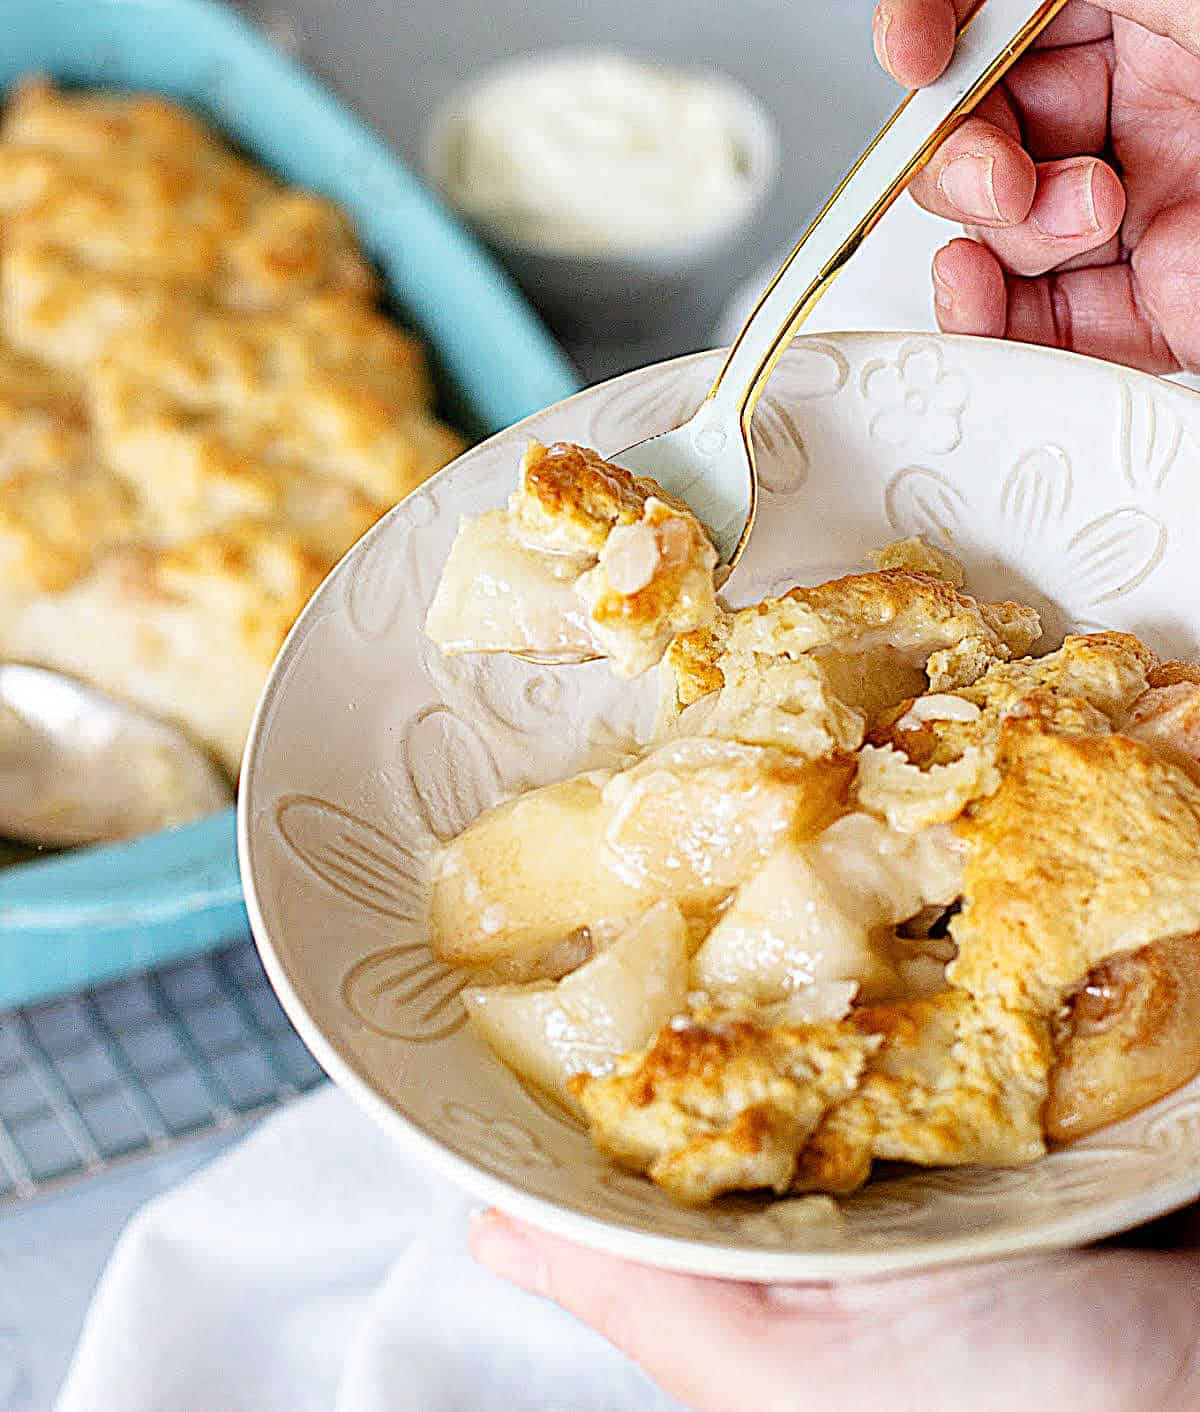
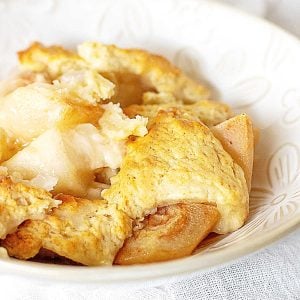
As soon as Fall starts, I highly recommend making this pear cobbler recipe for dessert. It has a bottom layer of sweet, juicy, fresh pears smothered with an amazing tender biscuit topping! It's a fantastic fall dessert and one of our best pear recipes. I'm sure you'll want to repeat it often during the season.
SAVE THIS RECIPE
Must Fall bake
Cobblers are old-fashioned, comforting desserts that have been around for ever. And are one of the easiest desserts to have on hand.
The day I made one for the first time, it was this peach cobbler. I was 15 (a million years ago) and decided on the spot that it was one of my favorite desserts.
Many, many decades later, this fresh pear cobbler falls under the dessert savior or rescue recipe category, the type that saves the meal because it comes together quickly, is a total crowd-pleaser, travels well if needed, and can be made year-round.
Today, we're making what can be considered a basic cobbler recipe with everyday ingredients you probably have at home.
Though I use fresh pears when available, you can also make a pear cobbler with canned pears. It's explained in the recipe card at the end of this post.
- Mili ⭐️⭐️⭐️⭐️⭐️
This recipe is EXCELLENT. Extremely delicious and easy to put together. It has become our fall favorite.
- Alicia ⭐️⭐️⭐️⭐️⭐️
Absolutely delicious! I followed the recipe exactly and my family loves it. I made 3 ramekins…I should have made more.
- Mary ⭐️⭐️⭐️⭐️⭐️
I made this cobbler a few days ago and it was superb! The biscuit topping is the best. I'll definitely continue to use this recipe!
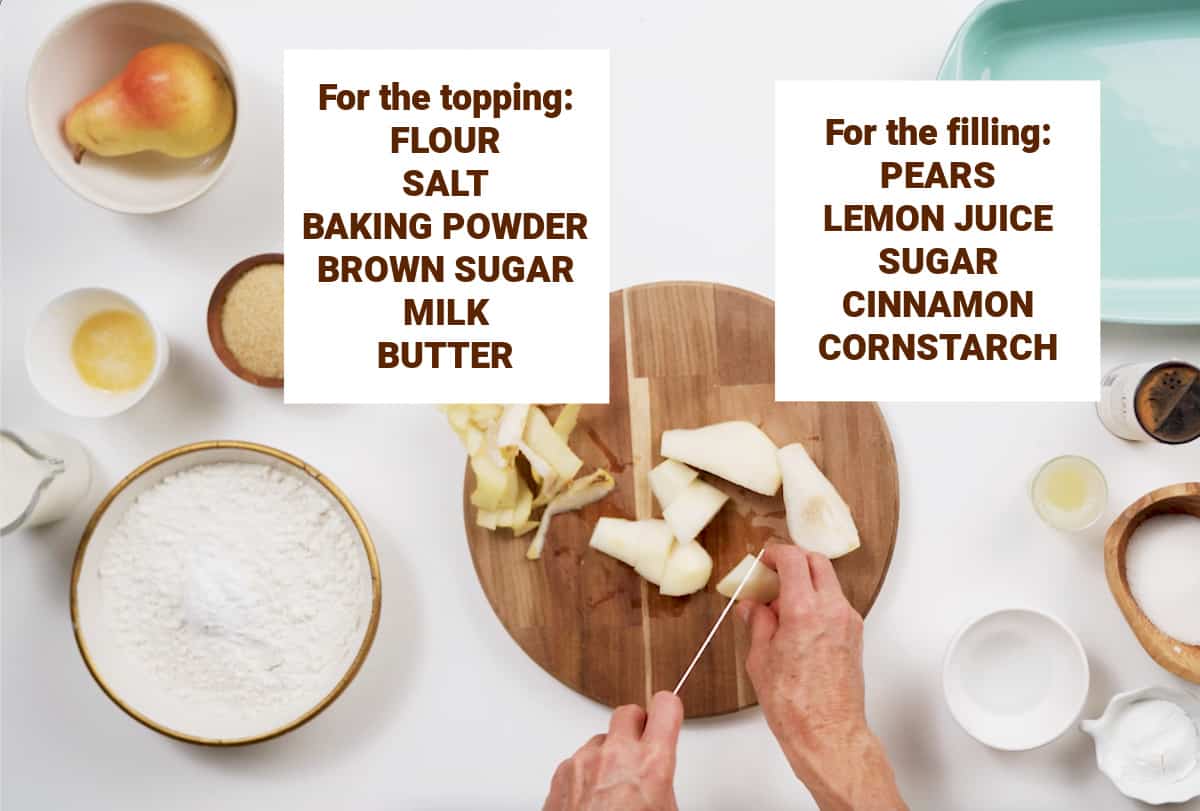
Ingredient Notes
Quantities are listed in the recipe card towards the end of this post. The Ingredients page has more details and lists the brands we use.
- Pears: choose ones that are just ripe, not mushy or overripe.
- Lemon juice: fresh is recommended. It adds flavor and good acidity.
- Cornstarch: it's used as a thickener.
- Flour: all-purpose flour or cake flour, both work.
- Baking powder: make sure it's not expired.
- Brown sugar: light or dark.
- Milk: use whole or almond milk.
Variations
- Fruit: use apples instead of pears, or a mixture of both. Add some berries to the mix.
- Citrus: Add chopped candied ginger or lemon zest to the biscuit mixture.
- What spices go well with pears? Ground cinnamon is one of the best. Also, nutmeg, mace, ground ginger, and cardamom. Most spices that go well with other fall flavors (known as fall spices), like apples and pumpkin, can be paired with pears.
Types of pears to use
I use Anjou pears, English or Bartlett pears, which are very common and hold their shape well when baked. Any type of pear you usually bake with works.
Don't mistake them for comice pears, which sometimes look similar. They're not the best for baking, as they don't hold their shape as well as the other two. At least that's my recommendation.
How ripe should they be? Look for just ripe pears that are not too soft.

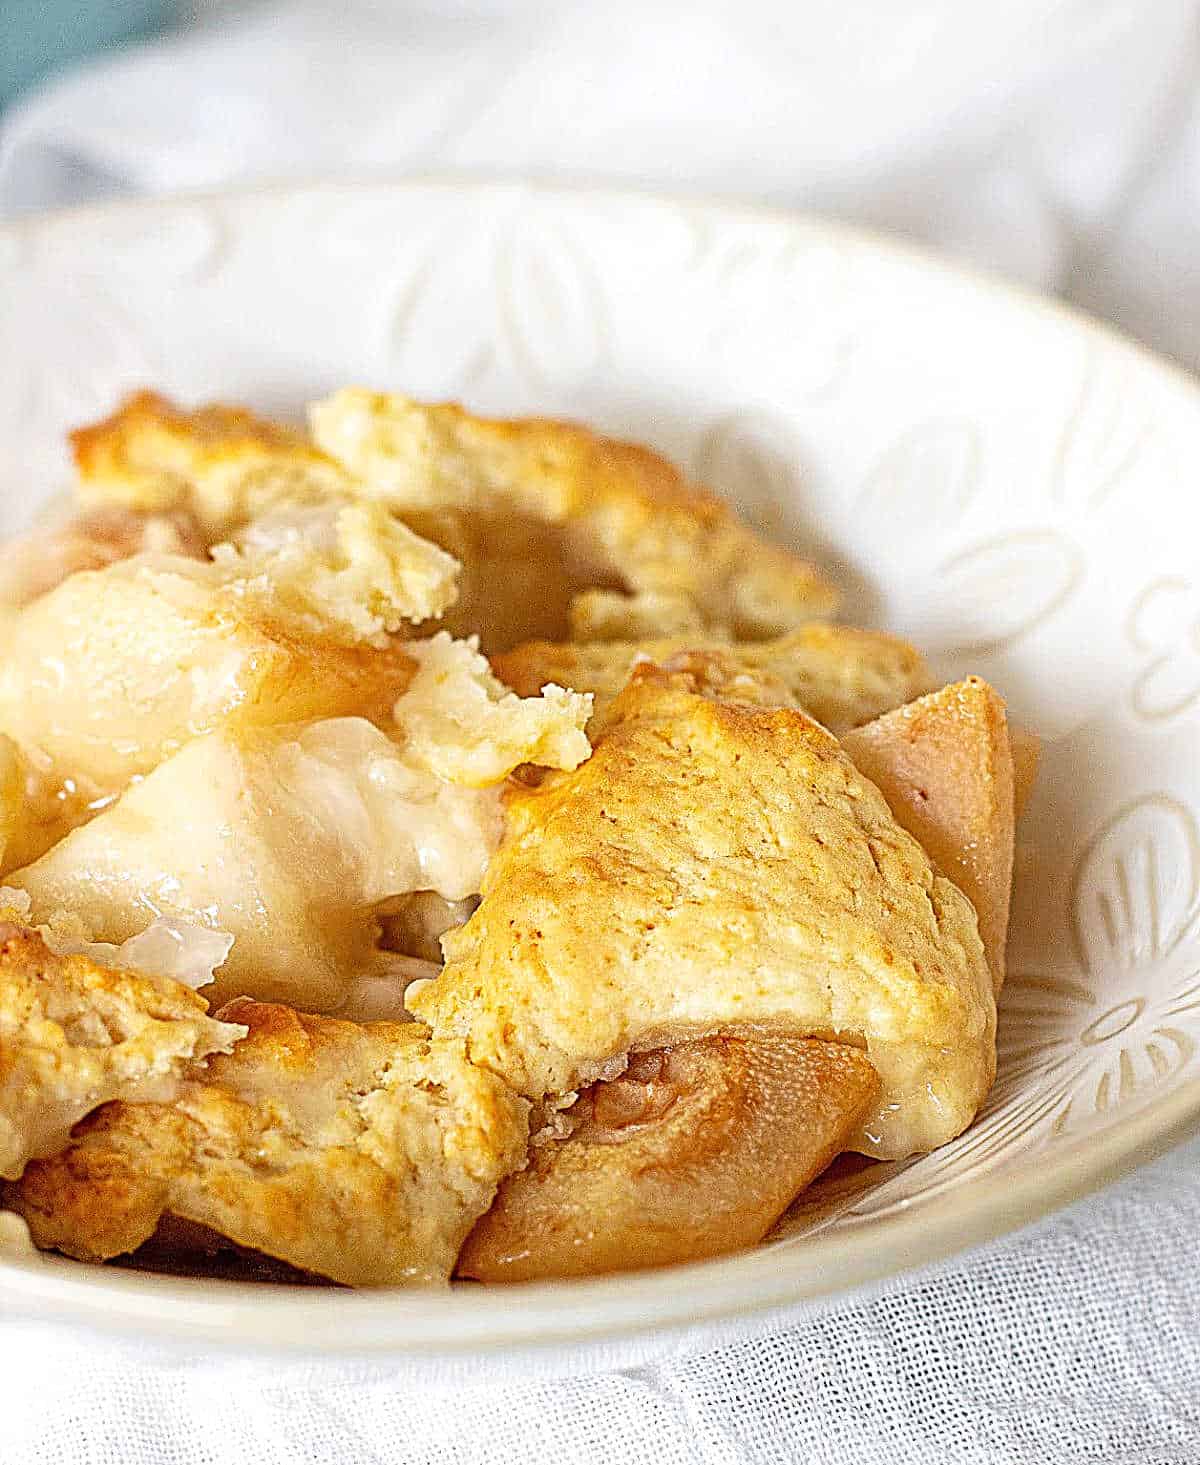
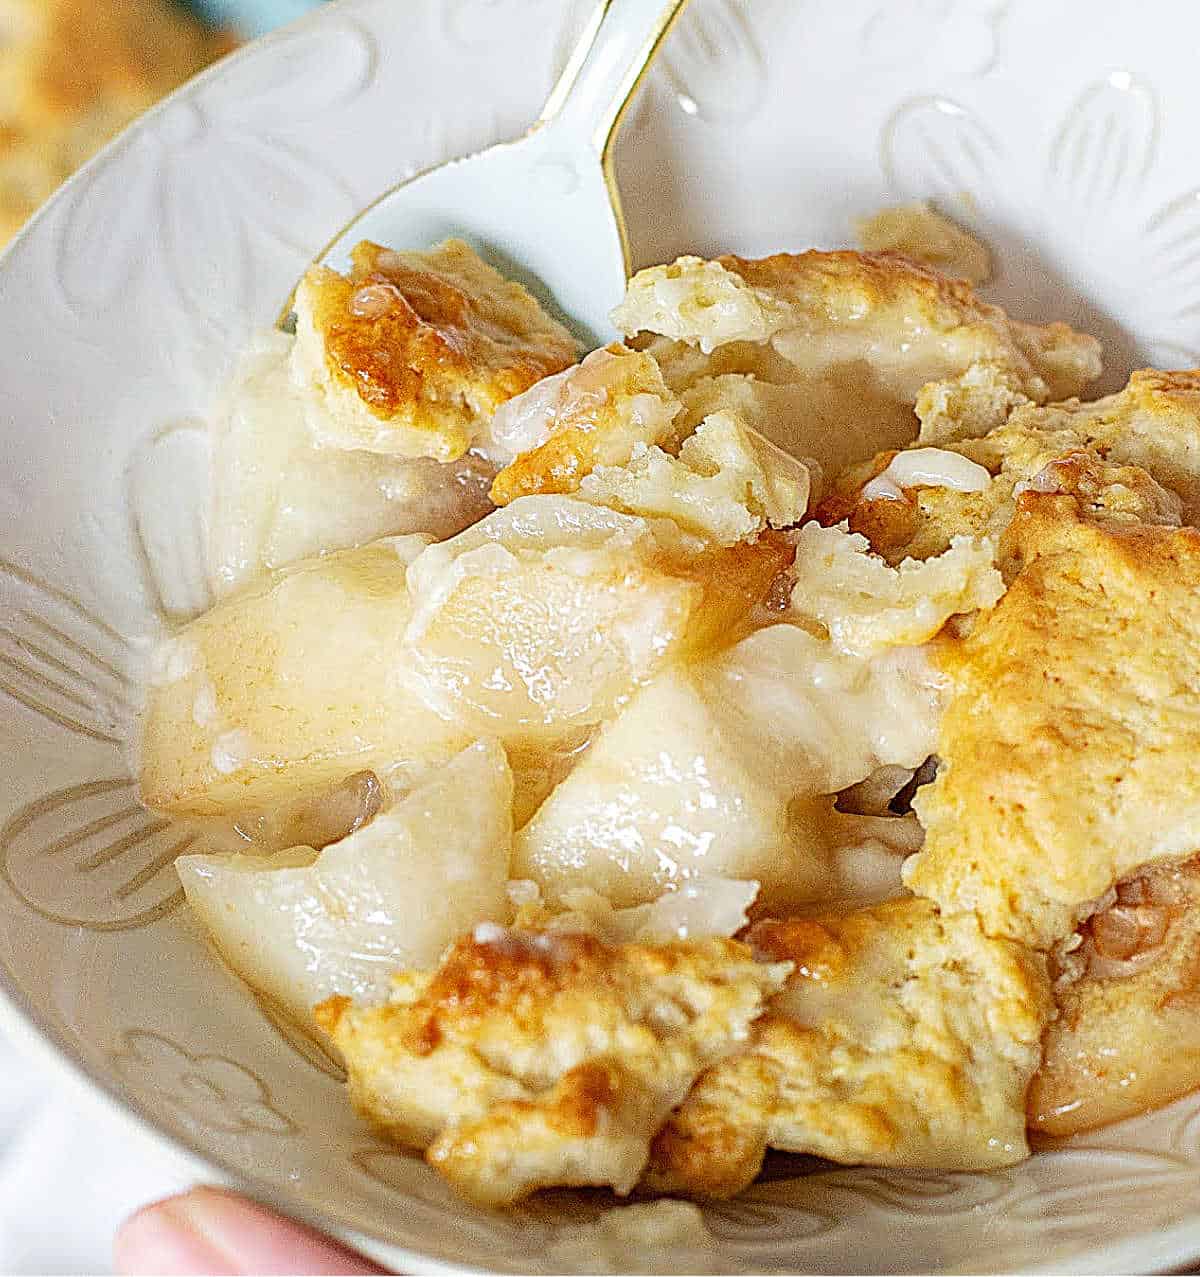
The fruit layer
- Lemon: I find the drizzle of lemon juice essential in most cobblers and crumbles. No matter what fruit I use, they all benefit from citrus, which balances the butter and sugar. Pears are sweet by themselves, so I find it even more necessary to add lemon juice.
- Sugar: Some sugar is added to the pears before the topping. It mixes with the cornstarch and liquid to create a thick juice, much like it does in a pie. You can add more or less sugar, depending on your sweet tooth. You can also use brown sugar, both in the pear mixture and/or the cobbler topping.
- Cornstarch: This ingredient acts as a thickener and creates a wonderfully thick syrup that blends with the natural juices released from the pears as they bake.
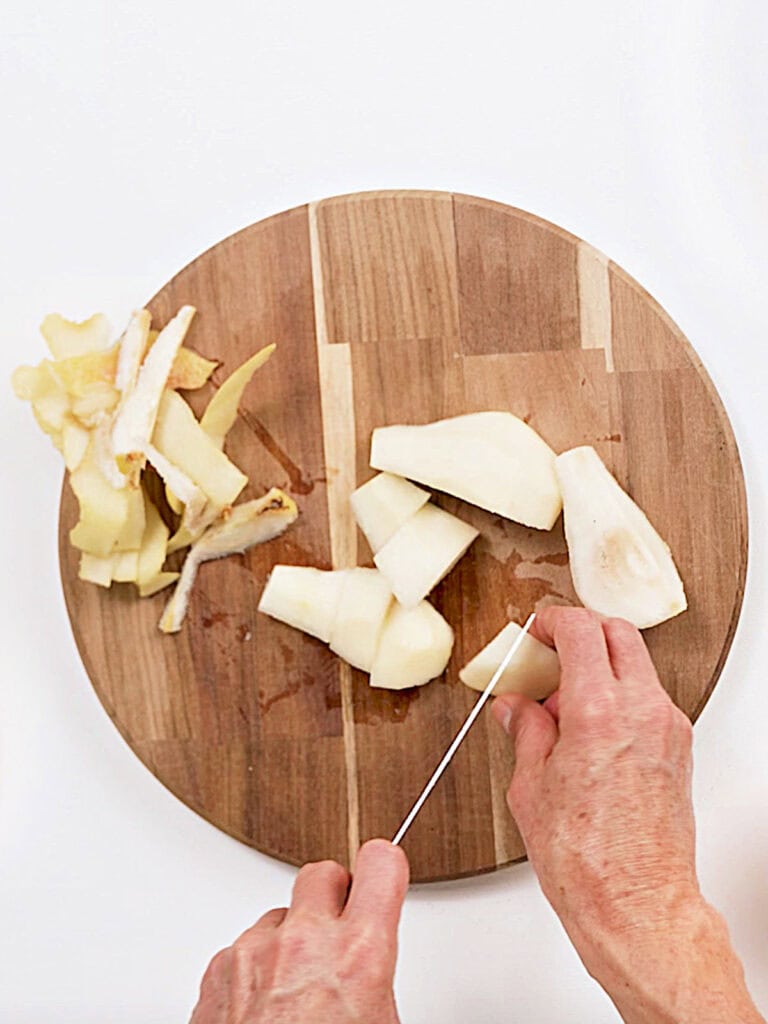
Cut the pears
Peel and cut them into chunks. They make good-sized bites and hold their shape well after baking. I'd rather cut large pieces than risk the pears disintegrating too much, which is bound to happen if you cut very small dice. But it's up to you.
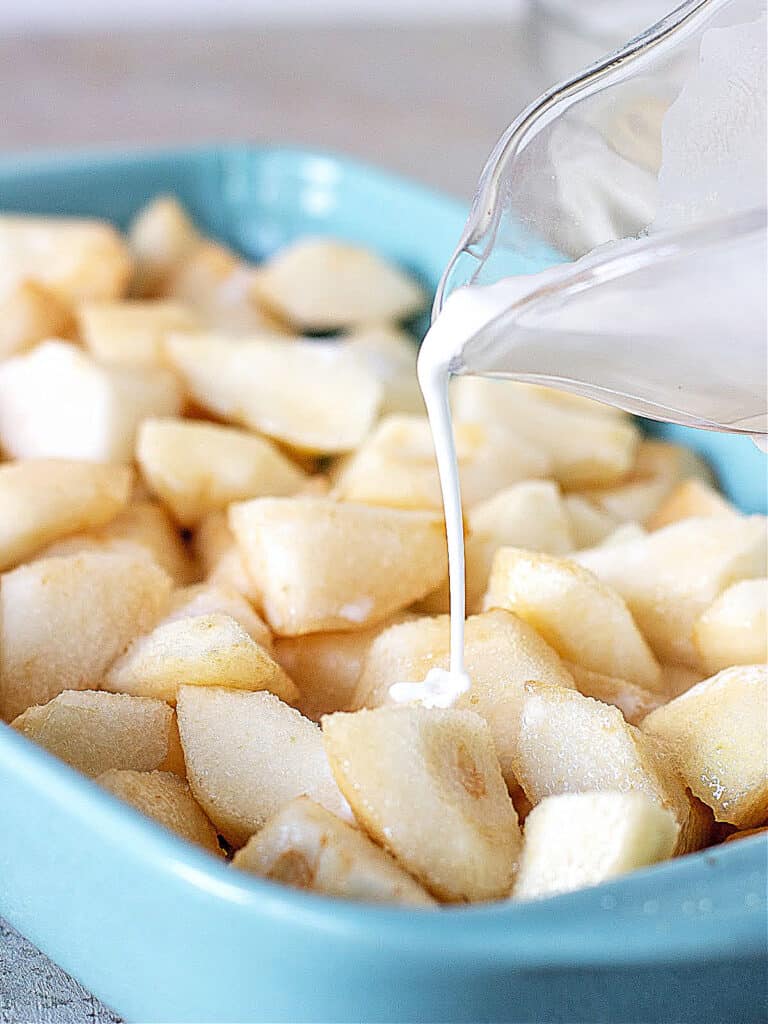
Cornstarch slurry
Dissolve the cornstarch in water to create a slurry before drizzling it over the topping. This will avoid undissolved lumps of cornstarch.
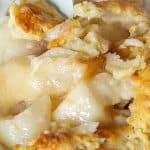
Biscuit topping
This is my favorite part, as I love biscuits and scones.
The recipe is similar to drop scones, an old-fashioned recipe from Ireland, if you ask my grandmother, but many claim it is from Scotland or England. That is a question for another moment.
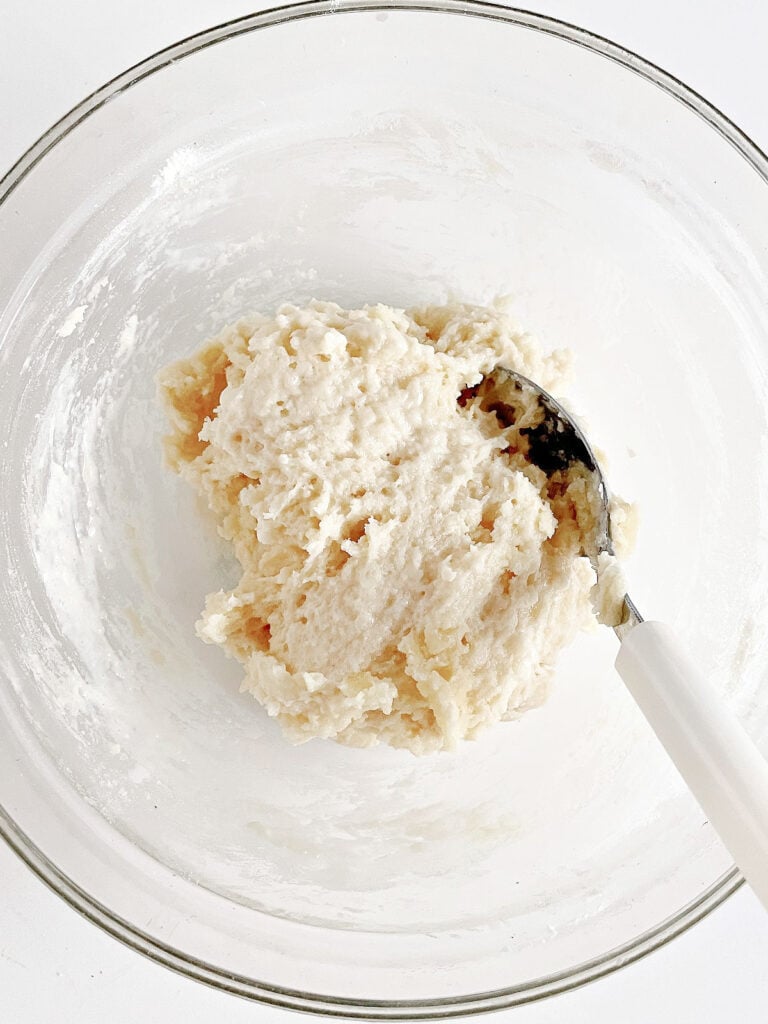
This topping is easy to make. It's a one-bowl mixture that comes together in no time. It's rustic and irregular, with different textures in every bite.
It bakes into a fluffy, starchy, and tender biscuit that pairs wonderfully with the warm and syrupy fruit.
Quick and easy
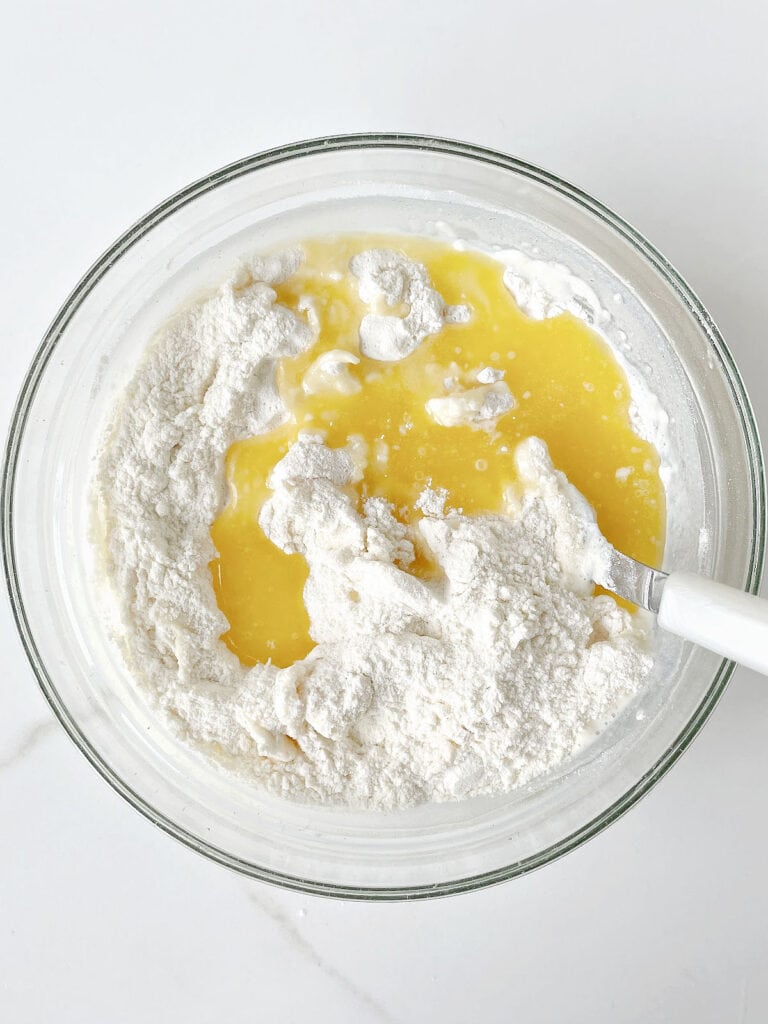
Mix the dry ingredients in a large bowl and add the melted butter and milk.
Don't overmix it
This is key for a fluffy topping! Just a few stirs with a spoon until the ingredients integrate you have a thick batter, like a wet scone.
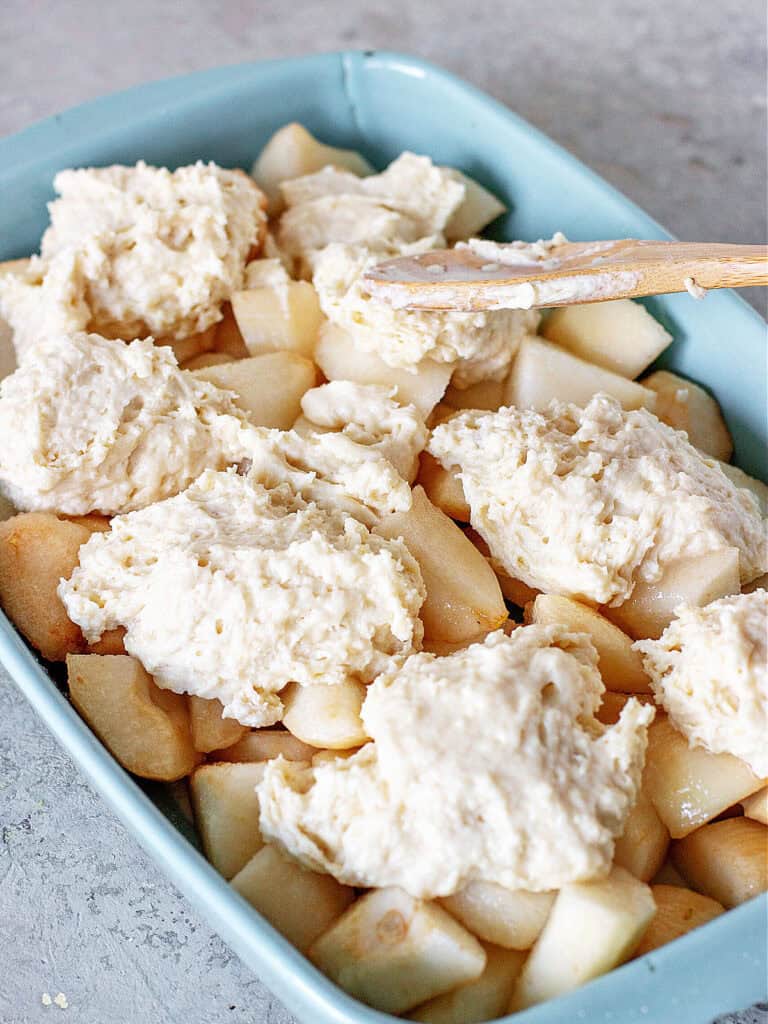
Two ways to apply the topping:
For this specific cobbler, I tend to choose the second option, spreading the dough a little so it bakes faster and the pear filling doesn't soften too much.
For other types of fruit, like this strawberry cobbler or the fresh cherry cobbler, I leave the mounds almost untouched, as the fruit hold better, or I don't mind them softening more.
Individual biscuits
Drop mounds of the biscuit batter roughly marking the servings. Flatten them slightly if they're too high. They will bake like regular biscuits, but it will take longer.
Spread the mixture
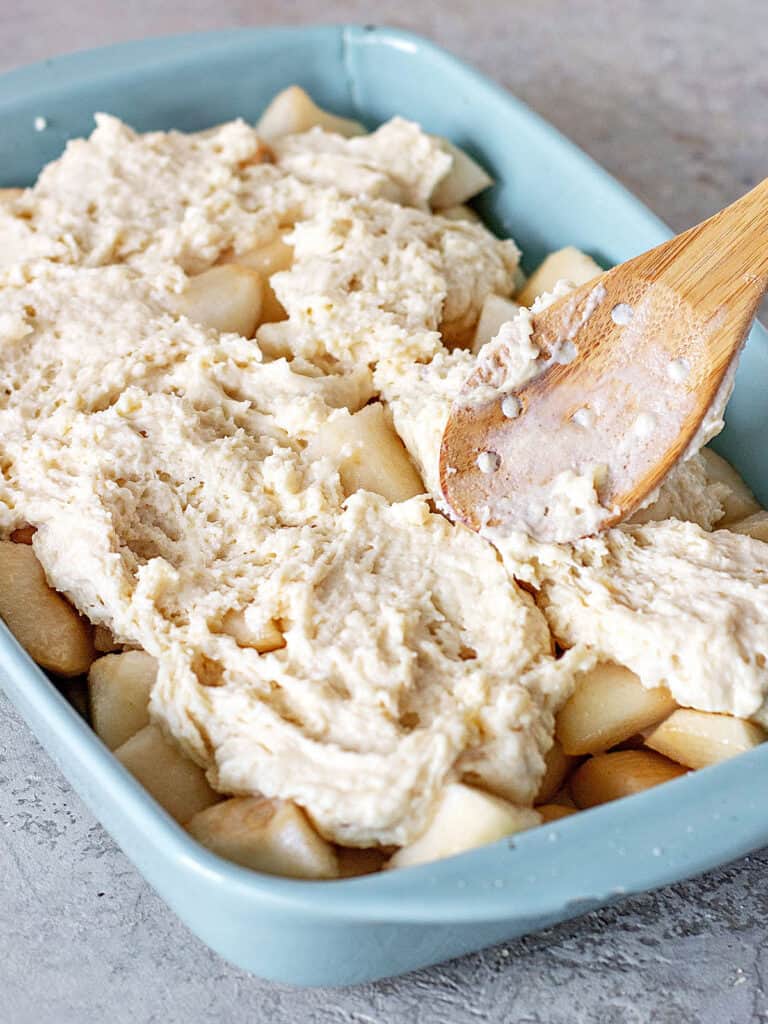
Spread the topping a little, ensuring it doesn't cover the whole surface. Some pears should be exposed so the juices have space to bubble up and the topping can thoroughly bake.
Freezing a cobbler
Yes, you can freeze this dessert, which lasts 2-4 weeks in the freezer, well covered in plastic wrap and aluminum foil. Or in an airtight container.
To defrost, put it in the fridge overnight or leave it at room temperature before warming it in a 325°F oven (this goes for both methods).
You can keep it in the refrigerator for several days, well covered to prevent dryness. Warm it before eating.
Serving it
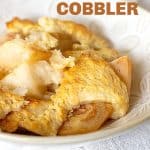
- Individual servings: To make individual cobblers, use small ramekins. They are ideal for a dinner party.
- Whipped cream: this is how my father eats it, warm with barely sweetened whipped cream or plain, unsweetened cream straight from the container.
- Ice cream: My favorite way to serve it is warm with a big scoop of vanilla ice cream, sometimes with toasted sliced almonds on top.
Kitchen notes
- Organization: Read the recipe first and ensure you have the ingredients at the correct temperature, the utensils and equipment needed, and enough workspace. This will make the process so much easier.
- Baking time: Consider that all ovens and pans are different, even if they look similar. The baking time in my recipes is as accurate as possible, but it might take you more or less time. You can use a thermometer (like the OXO oven thermometer) to check that your oven is at the right temperature. I recommend tracking how your oven works and what tiny details you might need to adjust.
- Sugar: It's added to the pears before the topping. It mixes with the cornstarch and liquid and creates syrup, much like pie. You can add more or less sugar, depending on your sweet tooth.
- Baking dish: this is a family-style recipe, and you're taking it to the table. Here are some ideas for dishes I use for family-style desserts.
As an Amazon Associate, I earn from qualifying purchases. Read my disclosure policy.
Pear Cobbler (easy recipe)
Ingredients
For the filling:
- 3.5 pounds pears
- 1 tablespoon lemon juice
- ¼ cup sugar, you can use up to double the amount if you like sweeter desserts
- ¼ teaspoon cinnamon, for other spices, see Notes below
- 3 tablespoons water
- 1 tablespoon cornstarch
For the topping:
- 1 ½ cups all-purpose flour
- ⅓ cup brown sugar
- 1 tablespoon baking powder
- ¼ teaspoon salt
- ⅔ cup milk, I use whole, but reduced-fat or 2% milk can be used
- 3 tablespoons unsalted butter, melted and warm
Instructions
- Preheat oven to 375°F (190°C).
For the pear filling:
- Peel, core and cut 3.5 pounds pears in chunks.
- Put on an 8x11-inch ceramic or glass dish, drizzle with 1 tablespoon lemon juice and sprinkle with ¼ cup sugar and ¼ teaspoon cinnamon.
- Mix 3 tablespoons water with 1 tablespoon cornstarch until well dissolved and pour over the spiced pears. Stir lightly again and reserve.
For the biscuit topping:
- In a bowl, mix 1 ½ cups all-purpose flour, ⅓ cup brown sugar, 1 tablespoon baking powder and ¼ teaspoon salt.
- Add ⅔ cup milk and 3 tablespoons unsalted butter, melted and warm, and stir lightly until moistened. Don't overmix.
- Drop this topping over the pear filling in mounds.
- Spread each mound a little with the back of a spoon or spatula, but don't cover all the pears.
- Bake for about 25 minutes, until golden and fully baked inside. Check the biscuits by slightly lifting the dough and checking if it still has unbaked parts. It might be dry and browned on the outside but still wet inside. Tent with foil if necessary (to avoid browning too much) and continue baking.
- Turn the oven down to 325°F (165°C) and bake another 15 minutes, or until very golden and the biscuit topping is dry and done.
- Remove from the oven and let cool on a wire rack.
- Serve warm with whipped cream or ice cream.
- You can keep it refrigerated for 3 days, covered. Or frozen for 2 weeks, well wrapped.
- Warm before eating.
Beth says
I followed the recipe exactly and it came out amazing. Only thing I had to change was adding 10 extra minutes at the end at 325 degrees to insure biscuits were fully baked but this could be my oven. All In all, it was enjoyed by everyone who tried it (warm with vanilla ice cream).
Oaklandrater says
I thought a TABLESPOON of baking powder must be a typo, but the usual egg was not included in biscuit batter so maybe not? I found the biscuit topping baked up VERY dry and the pear liquid not enough to compensate. Next time, I would use an egg and less BP. Good idea to cut pears into chunks.
Paula Montenegro says
Hi! There's no egg; it's an old-fashioned biscuit topping with enough baking powder to make it grow despite the heavy filling below. This is a very tested and popular reader's recipe, so I'm surprised it was dry and had little juice. How did you measure the ingredients, metric or US? As for the liquid, the pears might've been on the dry side; it's all I can think of.
Denise says
Wish I had used slices. I cut my chunks smaller than yours look (quite a bit smaller) but after following the recipe exactly, the pears pieces are not baked through—still crunchy. I am going to cover with Al foil and bake at 350 maybe 15 min. more. Hope it turns out. Smells divine but disappointed. Making it for my in-laws and have to finish baking it there.
Paula Montenegro says
Hi Denise, where your pears too firm and not ripe? That might take them longer to bake.
Christie says
Followed the recipe exactly, and it turned out great. I added a little ginger and nutmeg. A delicious way to use up my slightly pithy pears.
Mary says
Everybody does Peach Cobbler, but you are using pears! I love pears! I never thought cobbler, but I'll be making this one soon. Thank you. Do you happen to have a recipe for Pear Mincemeat? I lost everything in a fire and I'm trying to get at least some of them back.
Paula Montenegro says
Let me know how the cobbler turns out Mary! As for mincemeat, I don't have any recipe at the moment, but will be adding some this year.