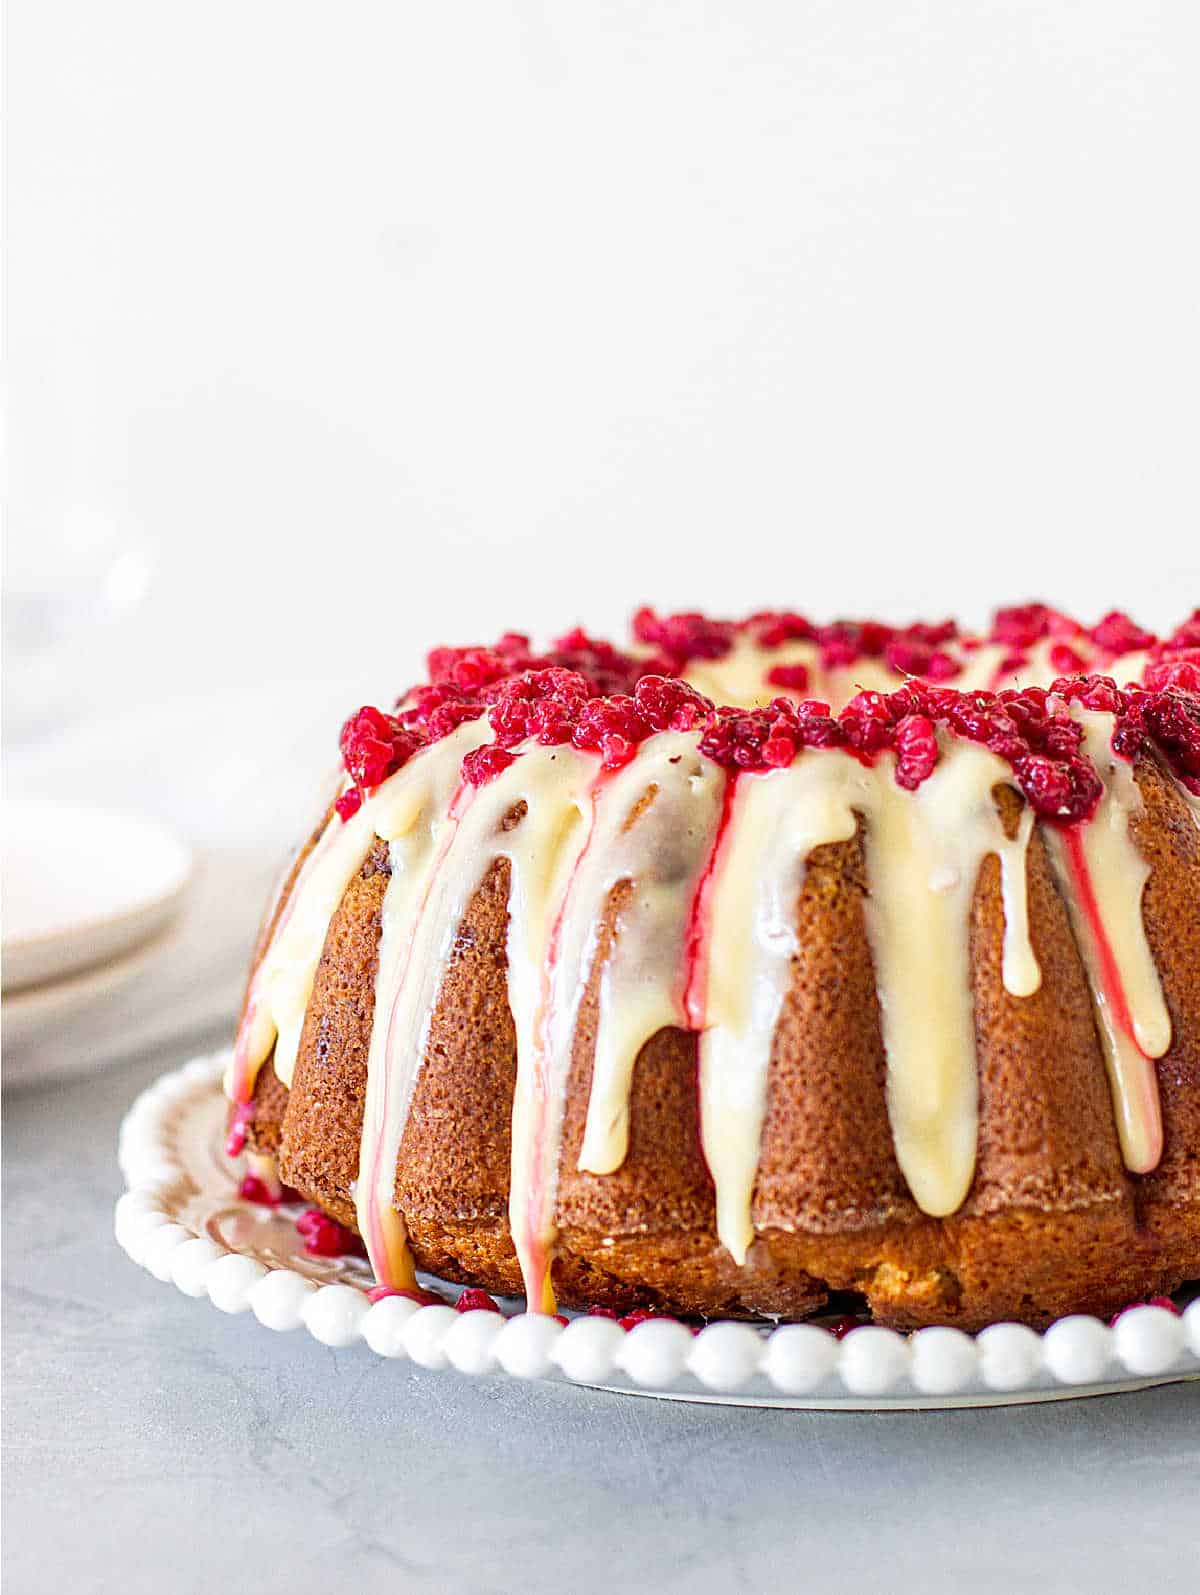
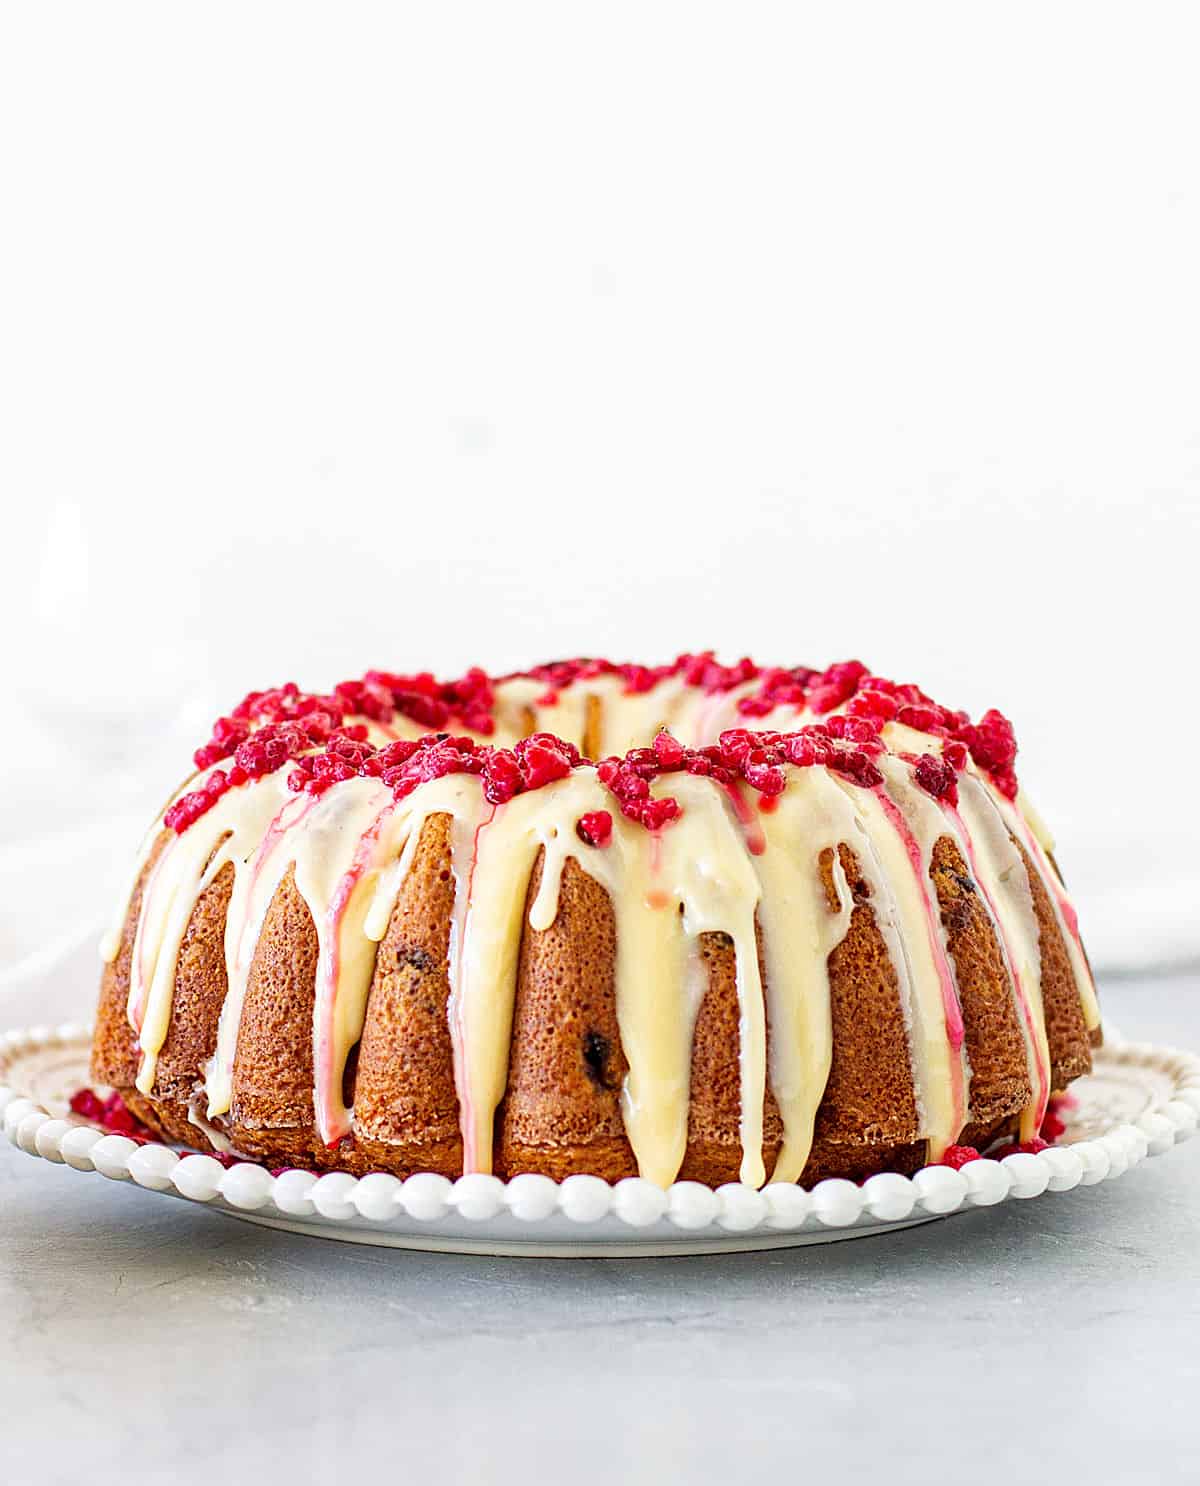
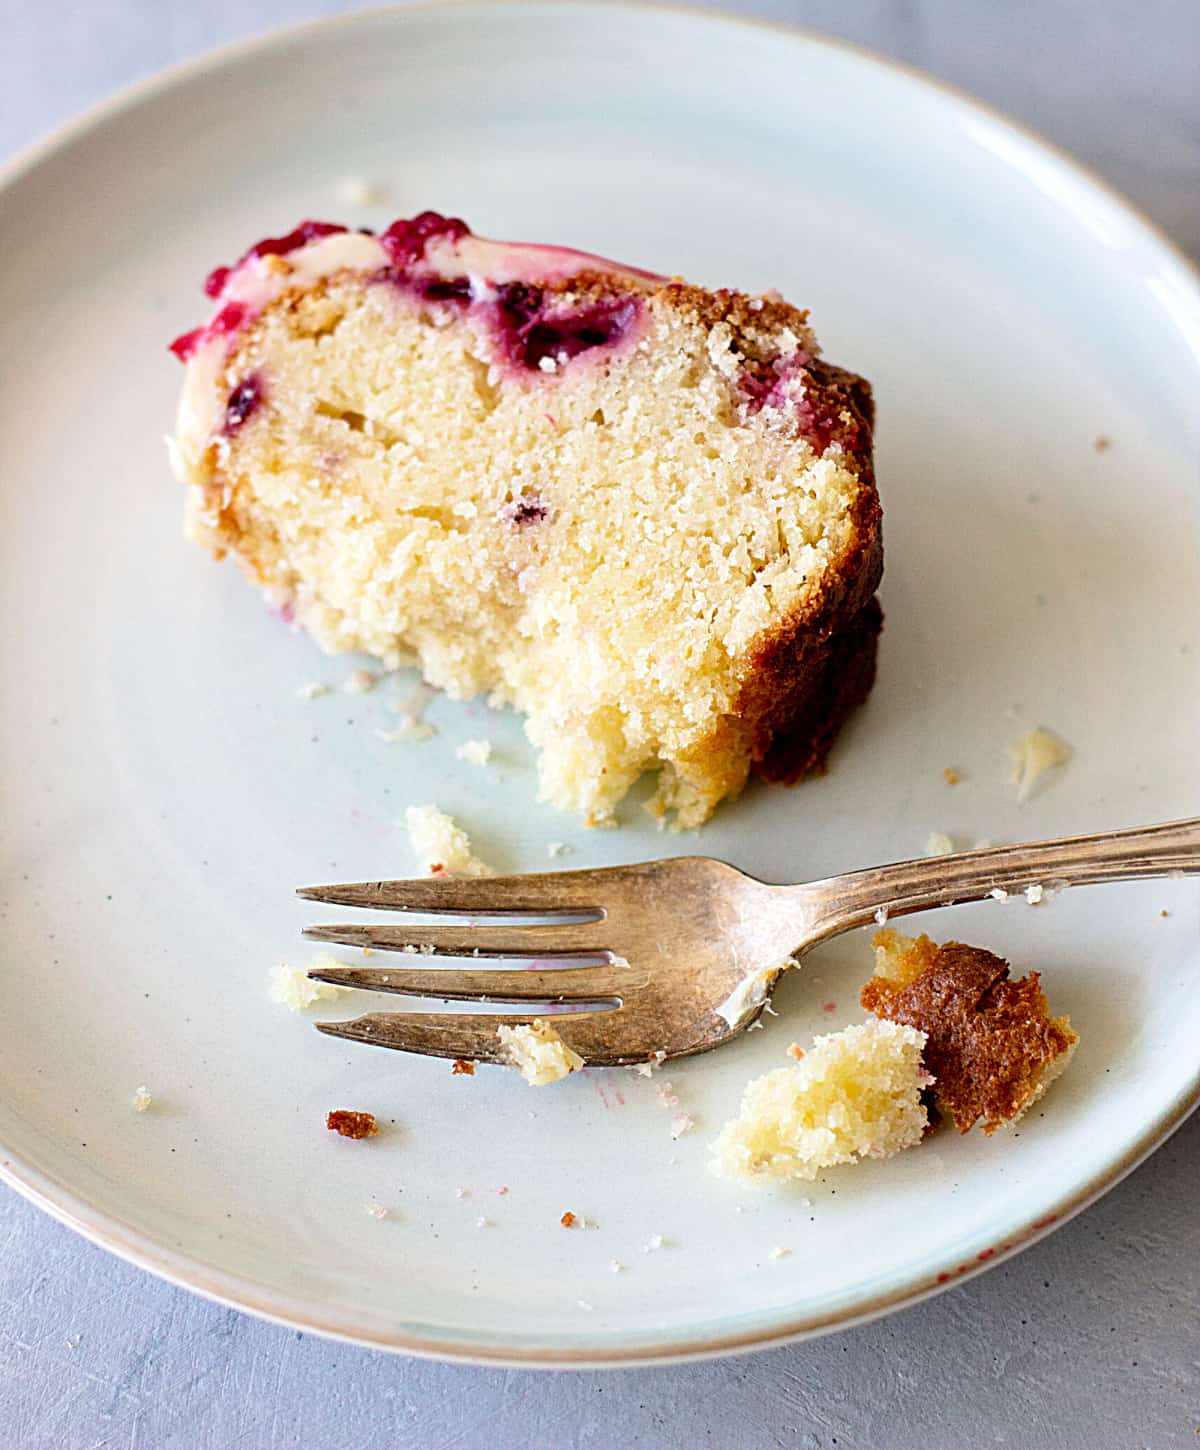
One of the most popular recipes in this blog, with dozens of 5-star reviews, this bundt cake will make you a fan of white chocolate and raspberries! The flavors are present but don't overwhelm each other. The crumb is dense and tender, and the cake lasts for several days. The white chocolate ganache on top makes it scrumptious!
SAVE THIS RECIPE
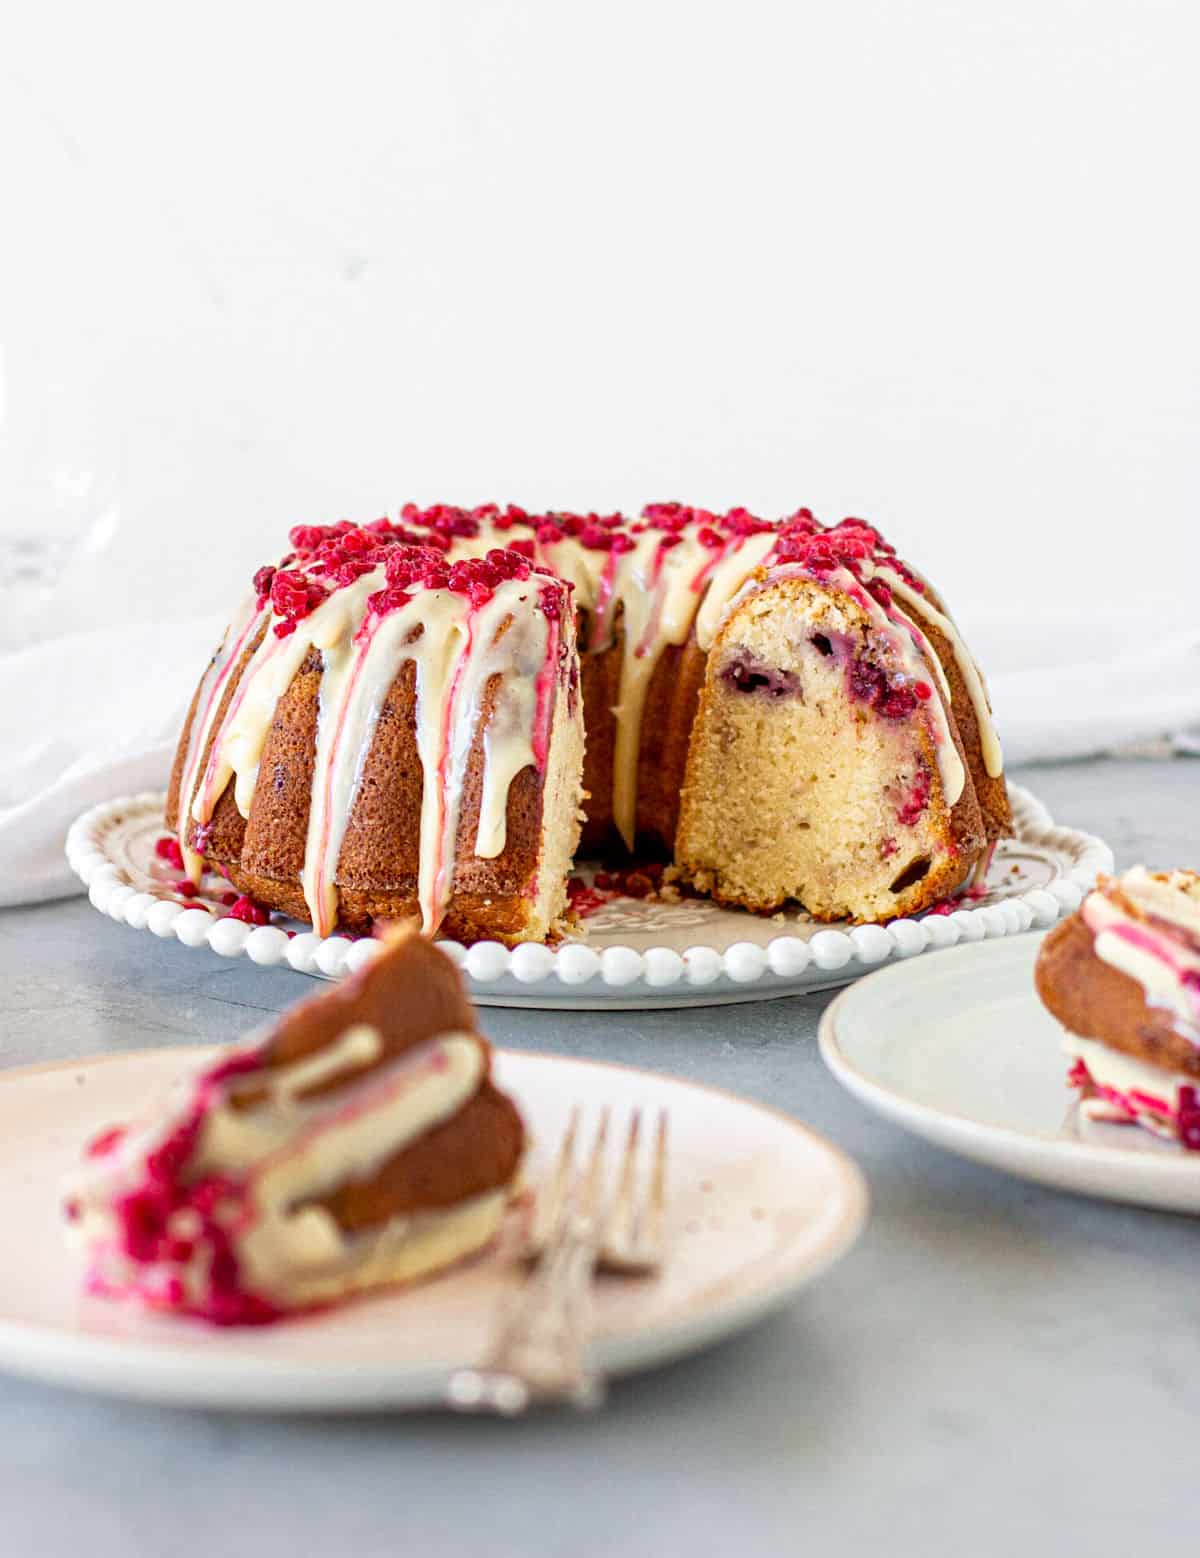
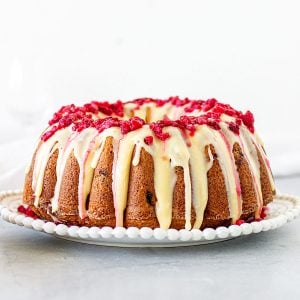
A showstopper cake
If you haven't tried the combination of white chocolate and raspberries in a cake, this recipe will be a nice surprise. It's a wonderful and festive burst of flavors.
The starting point was this simple vanilla cake (if you omit the cardamom and lemon), which got dressed for the occasion with add-ins.
I didn't see the need to look for a completely new recipe to save myself from the possibility of an epic failure, given that the times of year this cake gets done on repeat are hectic holiday months or in the Summer when I get fresh raspberries, a time when turning on the oven is not something I look forward to.
This is one of the first bundt cake recipes I posted, and still the most popular one.
Serving it: You can decorate the serving plate with extra fresh raspberries or fill the middle hole with mint leaves for a touch of green. It's very festive and great for special occasions. I like it at a cool room temperature because the flavors are more vivid.
White chocolate in cakes
Through the years, I have tried to achieve different types of crumbs in cakes. And, at some point, I realized that adding some melted white chocolate made them incredibly tender without compromising the overall flavor if the amount was small.
In this bundt cake recipe, I use it finely chopped or shaved (from a block with a kitchen knife), and the result is amazing. There is some white chocolate flavor and a silky crumb, the best of both worlds.
- Nishka ⭐️⭐️⭐️⭐️⭐️
I baked this cake, and OMG, it was one of my best cakes! Excellent crumb, super moist and delicious. I used the Nordic Ware tiered heart pan, and wow.
- Cindy ⭐️⭐️⭐️⭐️⭐️
I currently work at Nothing Bundt Cakes, and the white chocolate raspberry is my favorite there. But once I came across this recipe, I HAD to try it, and honestly, I love it so much! It's so delicious, this is now my favorite cake ever!!
- Liz ⭐️⭐️⭐️⭐️⭐️
I made this cake as a surprise for my friend's birthday. It went together like a dream. Your instructions are so clear and helpful. Every crumb was eaten, and it was a beautiful presentation. Thanks so much. It added a little extra joy to a special evening.
- Jen ⭐️⭐️⭐️⭐️⭐️
This recipe is sooooo good! I made mini bundt cakes, and they tasted and looked amazing!!!!
Testing notes
White chocolate: grate it, chop it very finely or process it. You can use white chocolate chips, too. The idea is for the chocolate to become part of the crumb, which is why we need it to be finely ground.
Raspberries: I use fresh when available, and frozen the rest of the time, because I always have some in the freezer. Make sure frozen raspberries are not clumped; they should be frozen individually. They will bake as they want inside the cake, here and there. Use a tablespoon or two of the flour in the recipe to coat fresh raspberries before adding to the batter. This will help them to distribute better and not sink to the bottom and sides of the cake.
Liquid: I love buttermilk because it tenderizes the crumb and adds a tanginess that balances the sweetness of the chocolate and sugar, but you can easily substitute it. You can make it at home, and it's explained in the recipe notes.
Batter: Take the time to cream butter and sugar well, but refrain from mixing it too much after adding the chocolate and berries unless you want the raspberries to stain the whole cake. It might be fun, too.
Bundt pan: my favorite way of preparing the pan that never failed me is to use soft shortening and patiently grease the pan well, every sharp angle or pattern detail. Then flour it, shaking off excess. Reserve until ready to fill.
Storage: This cake keeps well for several days, wrapped in plastic wrap, and freezes beautifully for a month. But I recommend freezing the plain cake for best results, and glazing it when you plan to eat it. The plastic wrap will crush the raspberries, and the ganache will lose its shine. But if you need to freeze leftovers, just know what will happen. The cake will still be delicious.
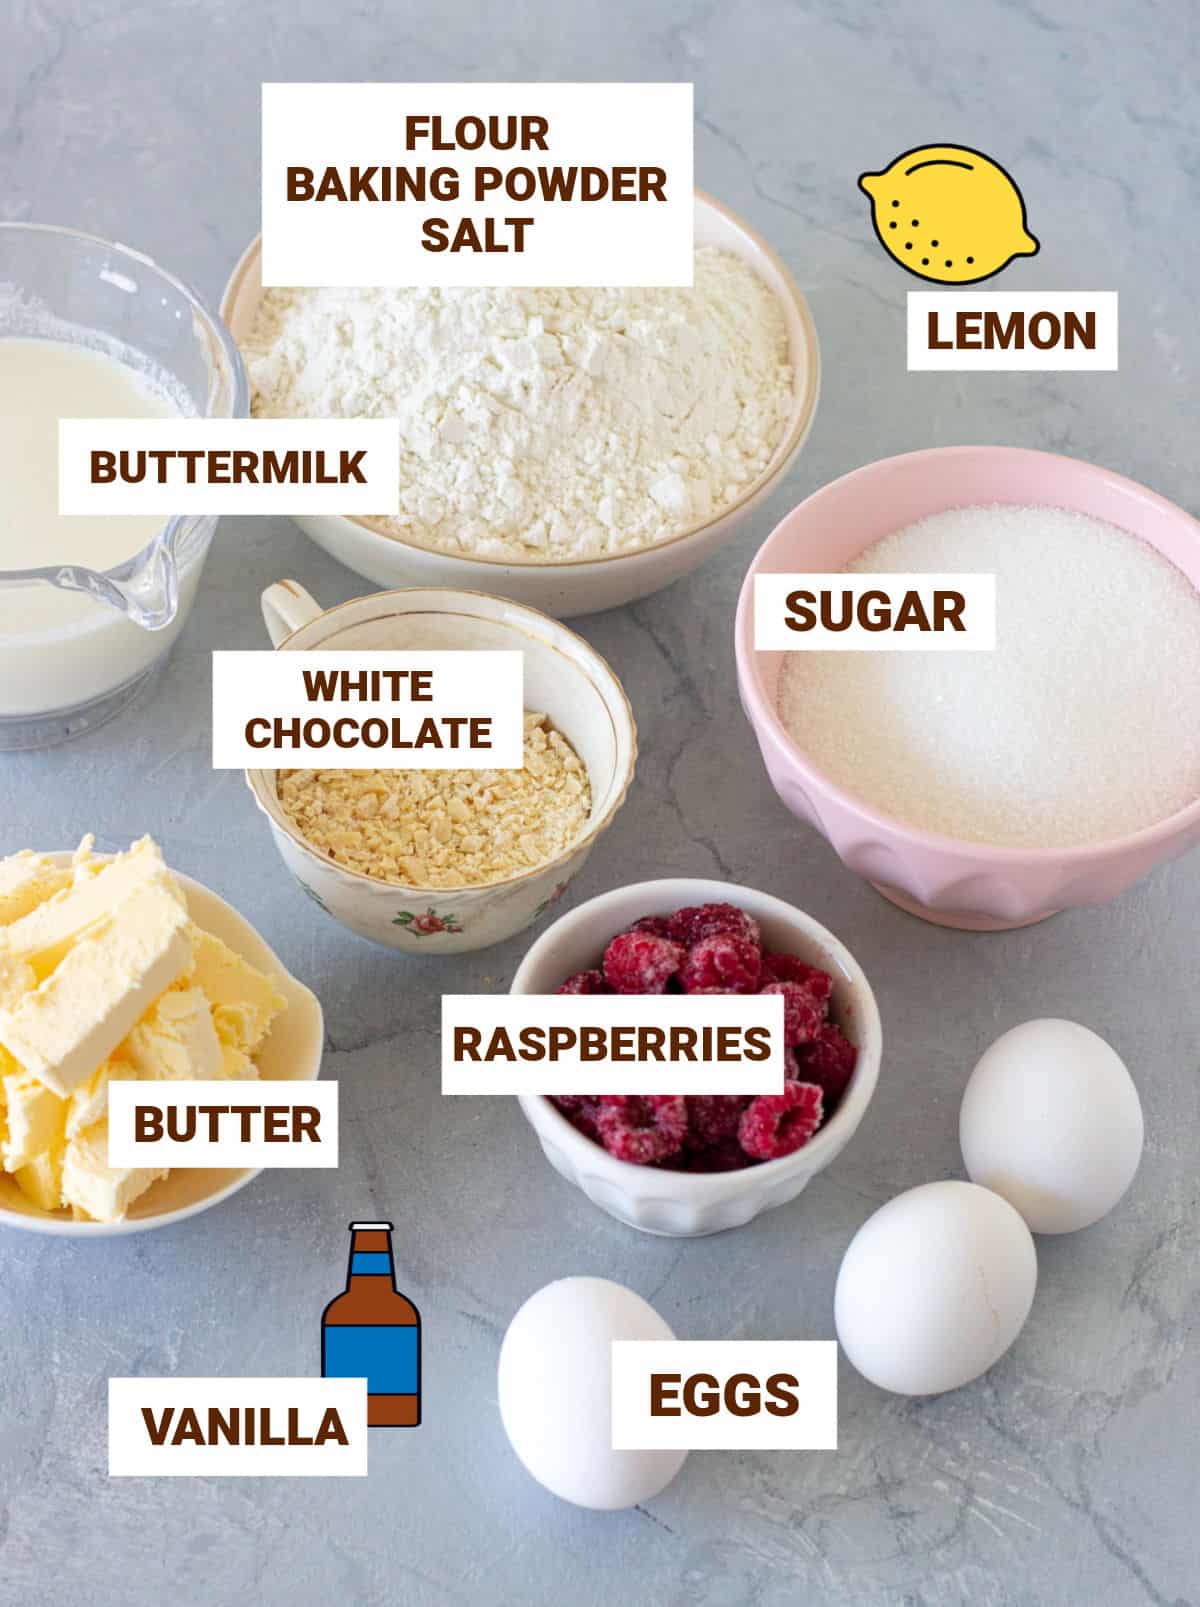
Ingredients
Quantities are listed on the recipe card towards the end of this post. The Ingredients page has more details and lists the brands we use.
- White chocolate: Use your favorite baking bar, finely chopped. White chocolate chips were used by a reader with great results (I haven't tried them yet).
- Raspberries: My first choice is always fresh raspberries because they're sweeter and have less water content. But frozen raspberries work just as well, and I use them a lot because I make this cake year-round.
- Buttermilk: it adds a tangy undertone and creates that tender, wonderful crumb we love about this cake. If you can't find it fresh, make your own; instructions in the Notes section of the recipe card.
- All-purpose flour, or cake flour, which I often use.
- Baking powder: make sure it's not expired.
Variations & substitutions
- No buttermilk? Use ⅓ unsweetened natural yogurt or sour cream and ⅔ whole milk of the whole buttermilk amount given in the recipe. You can also make your own buttermilk by mixing 1 tablespoon of lemon juice per cup of milk. Stir, let rest 5 minutes and use. It might curdle, and that is fine.
- Light brown sugar: use it instead of white. The cake will have a slight caramel hue.
- Other berries: white chocolate pairs very well with strawberries, blueberries and blackberries.
Preparing the bundt pan
If you bake bundt cakes often, you've likely had one stick to the pan. It's frustrating, but preventable. Here are three reliable methods:
- Shortening and flour: Coat the pan thoroughly with soft shortening using your fingers or a brush, making sure to reach every corner, including the center tube. Dust with flour, rotating the pan to cover evenly, then tap out the excess over the sink.
- Cake goop (pan-release paste): Mix equal parts shortening, flour, and oil into a paste. Brush it onto the pan. Store leftovers in a jar-1 month at room temp or up to 3 months in the fridge. This is one of my favorite methods.
- Baking spray with flour: Only use baking spray that includes flour. Regular cooking spray isn't enough and often leads to sticking. I rarely use this anymore.
The recipe matters too: When I find a bundt cake that releases cleanly, even without perfect prep, I hold onto it-it's a keeper.
Steps to make this bundt cake
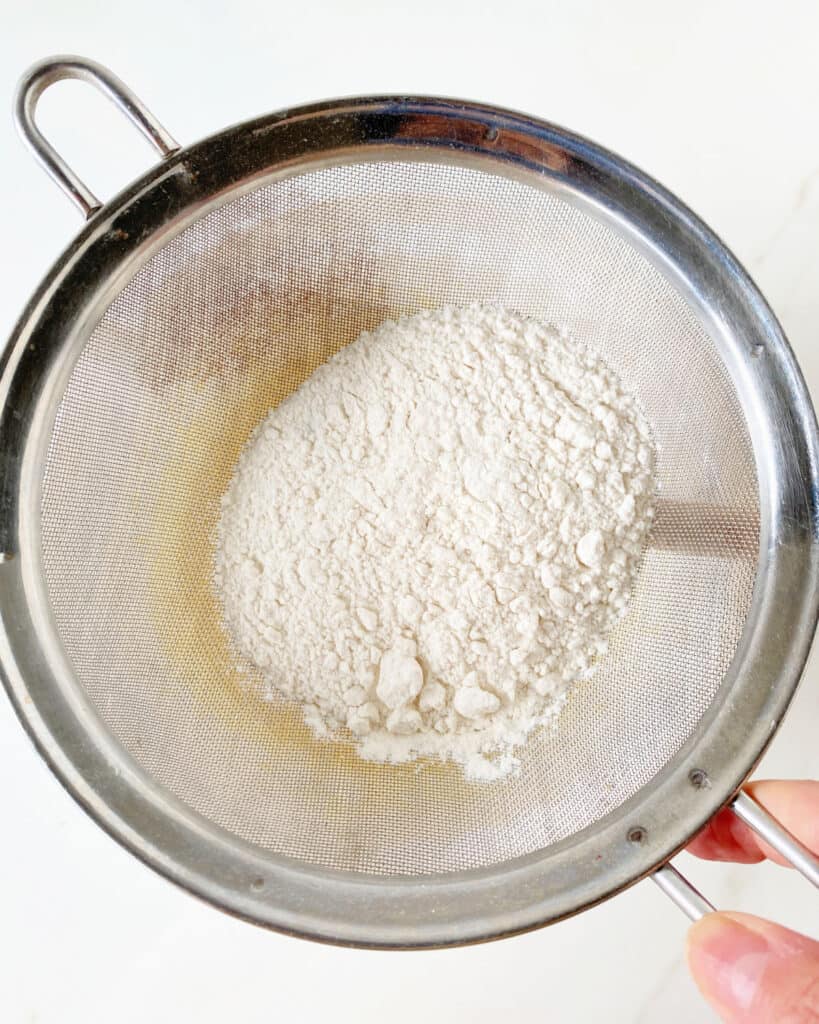
Dry ingredients
It's important to sift the flour mixture to avoid clumps or impurities. And it helps with fluffiness.
You can sift them before or have the ingredients measured and sift them directly over the butter mixture (my choice).
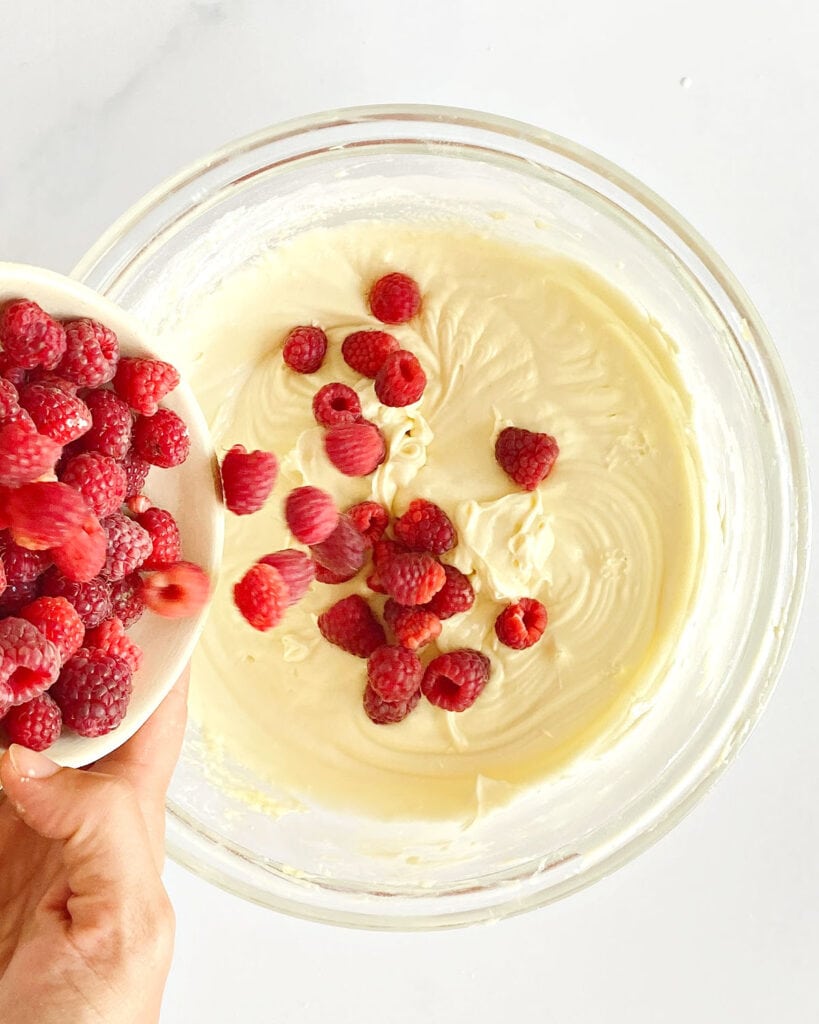
Raspberries
The dry and wet ingredients are added in parts, alternating between the two, as it helps to integrate them better.
The berries and chocolate are folded in at the end. Go easy so you crush the raspberries as little as possible.
Vintage Kitchen Tip
After incorporating flour into a cake batter, we don't want to develop gluten, as it will toughen the baked cake. So mix *just* until it's all well incorporated, but don't overbeat. I like to end mixing with a silicon spatula to ensure the ingredients are fully integrated.
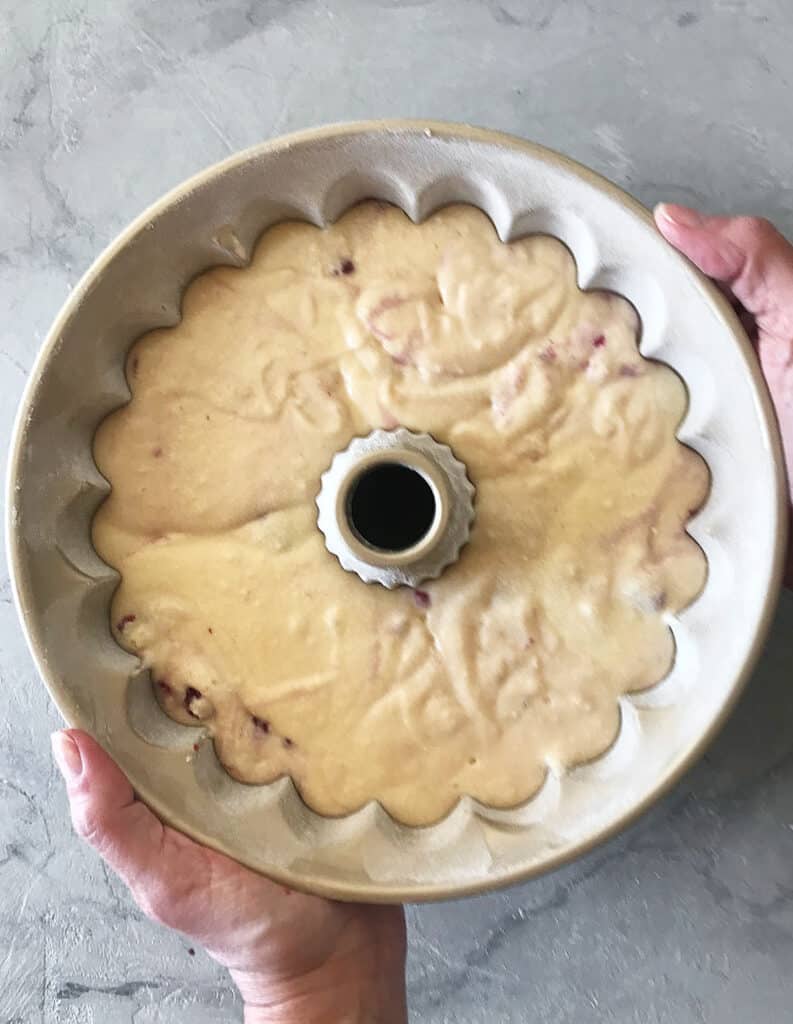
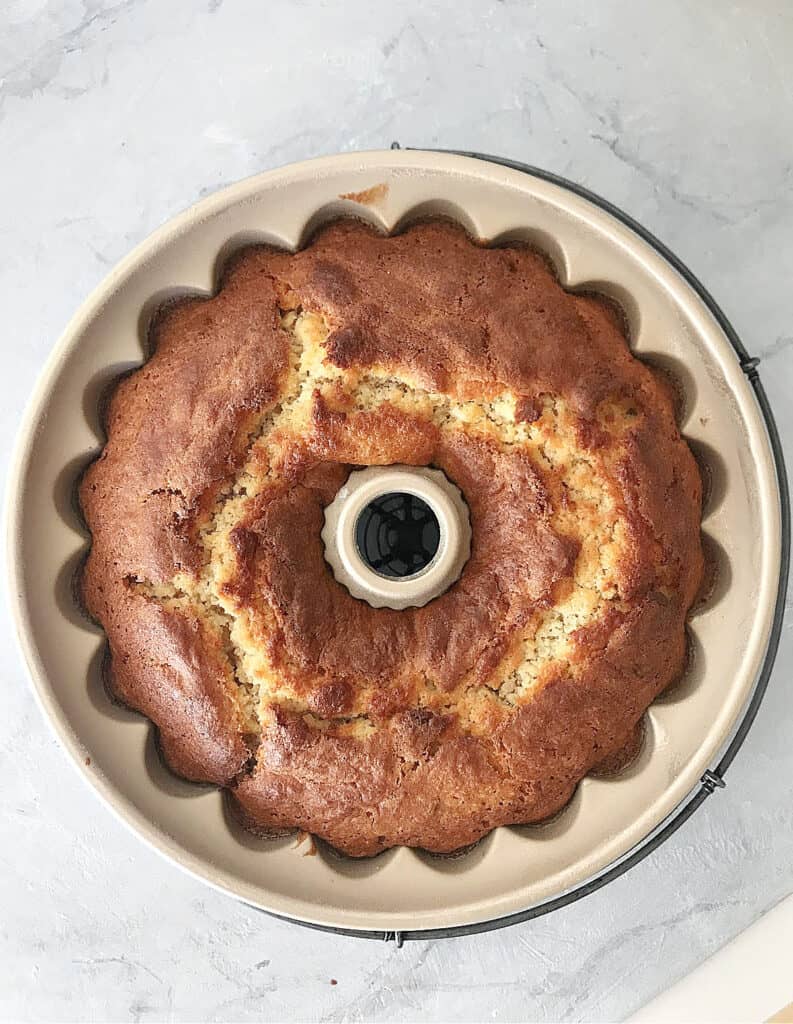
Bundt pan
The bundt cake pan should be filled ⅔ to ¾ of its capacity, no more than that. This way, the batter has space to grow and bake well.
Test for doneness
Use a toothpick or cake tester in the middle of the cake to check that it's done. It should come out clean.
Make sure the oven is preheated and at the right temperature.
White chocolate ganache
This white chocolate glaze gives this cake the extra white chocolate flavor boost it needs to live up to the name.
Ganache is a simple mix of chocolate and cream, in this case, white.
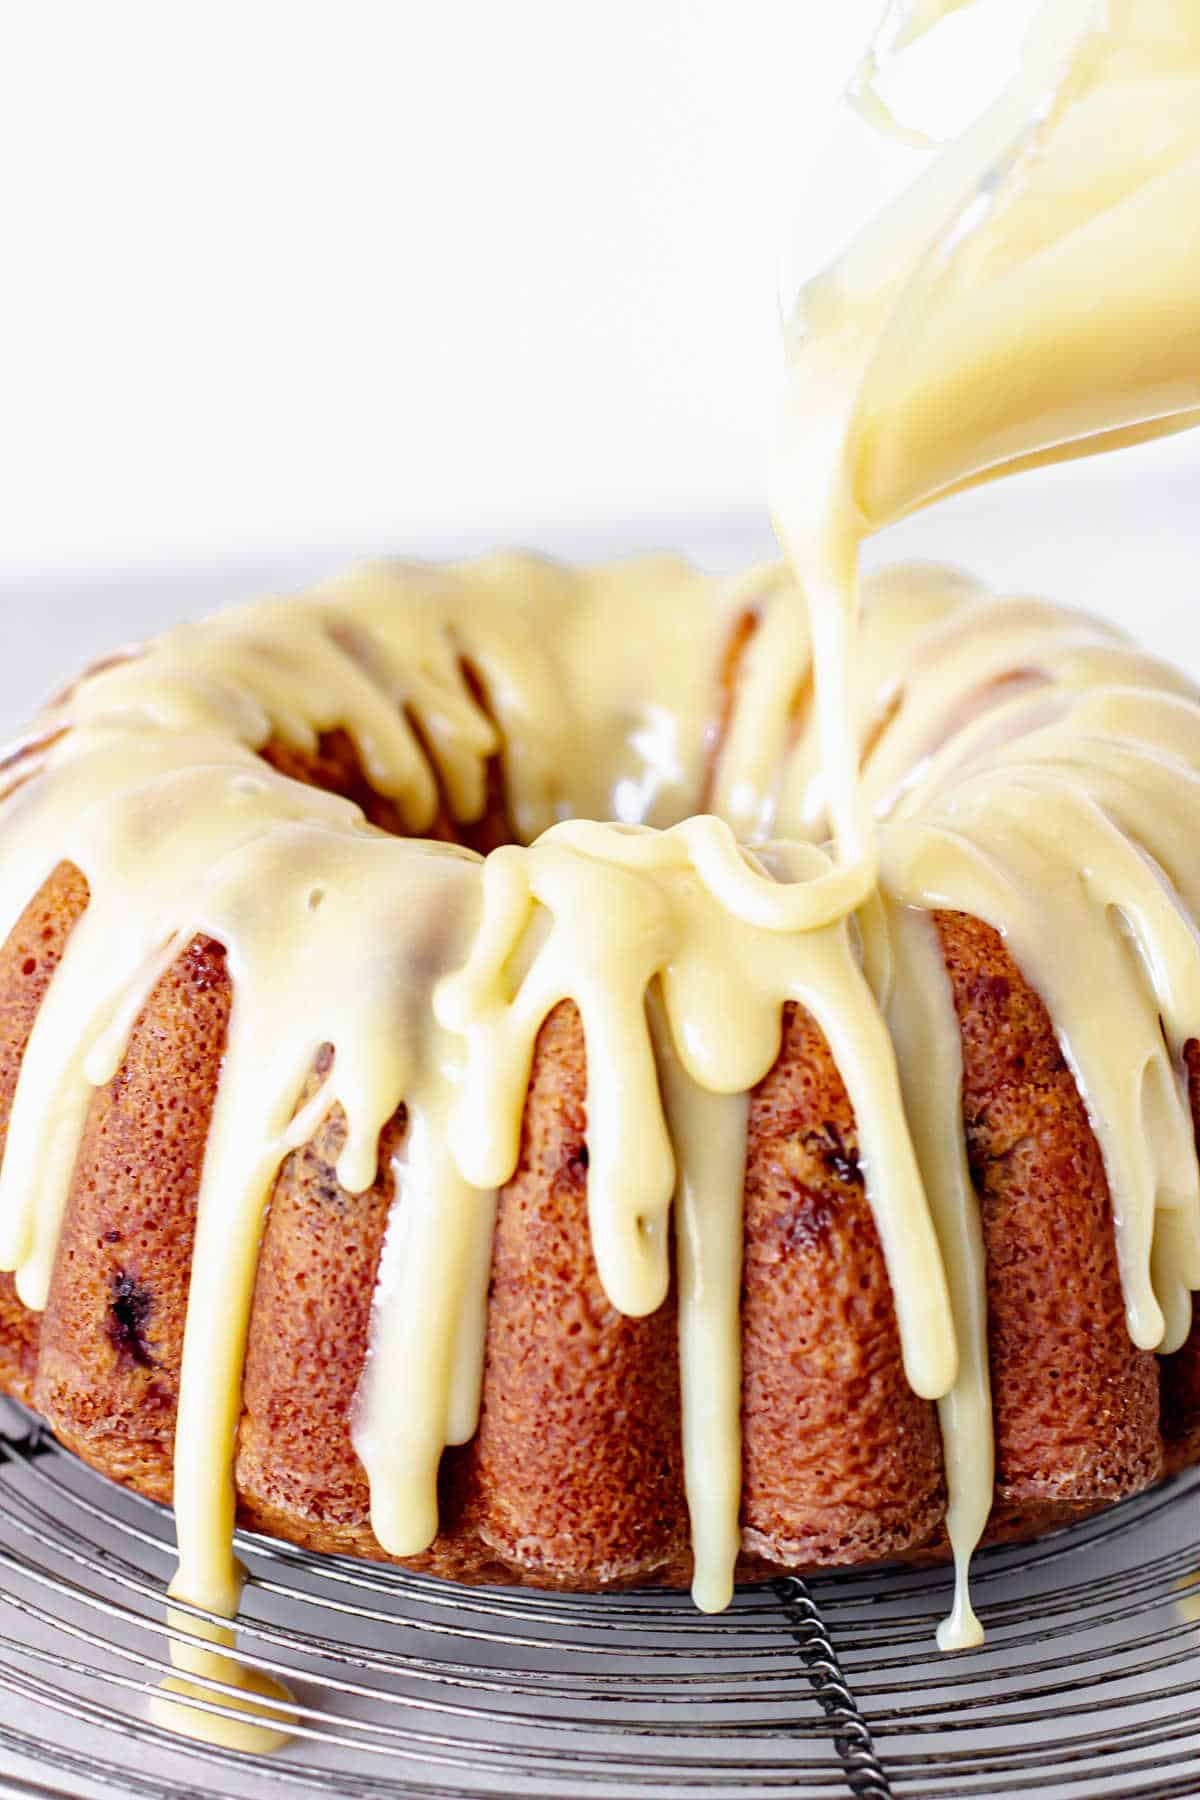
Double drizzle
To achieve a thick layer of icing, I pour it twice, making two layers.
I found that it was harder to make a single thick layer if I added more chocolate (or less cream) because the mixture was not fluid enough.
So, place the cake over parchment paper on a wire rack and drizzle the warm ganache. Pick up the glaze that dripped with a spatula to reuse it. You might need to warm the ganache slightly again before going the second time.
Raspberries
For this recipe, I use raspberries because they pair fantastically with white chocolate. And it's that time of the year when we want to see some holiday colors, isn't it?
Using berries in cakes, and bundt cakes in particular, can be tricky, as they tend to go to the bottom. The type of batter has a lot to do with it: the denser the batter, the better it holds the berries in place.
- Fresh raspberries: stir them with a few tablespoons of the flour amount in the recipe before adding them to the batter. That way, they will move less when the cake is baked and will be better distributed.
- Frozen berries: It's a great way to make this cake year-round, especially around the holidays. Use them directly, without thawing.
Variations
- Flavor variations: Though I love this particular combination, you can use blueberries or blackberries with great results.
- Birthday cake: You can make this as a layer cake, more suited for celebrating a birthday, some might say. It is more laborious as you have to fill and frost. I suggest this white chocolate raspberry layer cake, a two-layer 9-inch beauty with white chocolate buttercream. Another filling can be a good raspberry jam with cream cheese frosting with raspberries, and simpler to make than buttercream.
- Cake mix: Someone asked if you could use store-bought white cake mix and add raspberries and white chocolate to create a similar cake. You can, of course, but the batter might be too thin to hold the raspberries. Maybe use sour cream instead of the liquid stated in the instructions to create a thicker batter. I never tried it, but I leave it as an idea. Please give me a shout-out if you do!
As an Amazon Associate, I earn from qualifying purchases. Read my disclosure policy.
Raspberry White Chocolate Bundt Cake (white ganache frosting)
Ingredients
White chocolate berry cake:
- 1 or 2 tablespoons soft shortening or margarine, to grease the bundt pan
- 2 ½ cups all-purpose flour
- 2 ½ teaspoons baking powder
- ½ teaspoons salt
- ¾ cup unsalted butter, at room temperature
- 1 ½ cups white granulated sugar
- 3 eggs, at room temperature
- 1 ¼ cup buttermilk, or whole milk with 1 tablespoon lemon juice. See Notes below for substitutions.
- ½ teaspoon vanilla extract
- ¾ cup raspberries, fresh or frozen
- ¼ teaspoon lemon zest, optional
- 3 ounces white chocolate, very finely chopped or grated (or use mini white chocolate chips)
Topping:
- 6 ounces white chocolate, chopped
- ¼ cup heavy or heavy whipping cream
- ⅓ cup raspberries, to decorate
Instructions
For the cake batter:
- Preheat oven to 350ºF (180°C).
- Grease with 1 or 2 tablespoons soft shortening or margarine a large 10 or 12-cup bundt cake pan. I use my fingers, but you can use a brush. Make sure every nook, cranny and angle is covered. Flour it, shaking off excess. Reserve.
- If using fresh raspberries, transfer 2 tablespoons from the total flour amount and put them in a bowl. They will be used to coat the raspberries right before adding them to the batter so they don't sink to the bottom. If using frozen ones, add them directly.
- Sift the rest of the flour, 2 ½ teaspoons baking powder and ½ teaspoons salt. Set aside. I have the ingredients measured and sift them directly over the batter.
- In a large mixing bowl, beat ¾ cup unsalted butter until creamy. Slowly add 1 ½ cups white granulated sugar and beat for 2 minutes. Use an electric mixer or a stand mixer with the paddle attachment.
- Add 3 eggs one at a time, beating well after each addition, and then beat for 1 minute.
- Beginning and ending with dry ingredients, add them in 3 parts alternating with 1 ¼ cup buttermilk and ½ teaspoon vanilla extract in 2 parts.
- Stir ¾ cup raspberries with the reserved flour. Add them to the batter with the ¼ teaspoon lemon zest and 3 ounces white chocolate, and fold them gently with a spatula. Don't use the beater, and don't mix it too much. We want the chocolate to be incorporated but the raspberries to remain whole, coated as much as they can in flour, and not stain the batter much.
- Pour the batter into the prepared bundt pan, spreading evenly.
- Bake for 45-50 minutes, or until a tester inserted in the center comes out clean. Depending on the oven and pan you're using, it might take more.
- Let cool for 10 minutes on a wire rack, then move and lightly shake the pan, grabbing it by the sides with both hands (and a kitchen towel since it's hot!). That way, the cake starts to loosen. If it doesn't, I use a small, smooth-bladed knife to separate the batter from the sides and center tube. The raspberries sometimes stick to the walls of the pan. Do this carefully.
- Once you make sure it can be removed, do so over a wire rack and let cool completely.
For the white chocolate ganache:
- Finely chop 6 ounces white chocolate and put it in a medium bowl.
- Heat ¼ cup heavy or heavy whipping cream until it is about to get to the boiling point, remove and add immediately to the chocolate, covering it. It will seem like too much chocolate for so little cream, and there is a point there. But it will melt, and you will be able to mix it. We want a thick ganache, and for that, we need more chocolate than cream.
- Let stand for a minute and whisk until smooth. If bits of chocolate remain, microwave in 5-10 seconds bursts and whisk every time until the mixture is smooth.
- Put the cold cake on a wire rack with a parchment paper underneath or on a smooth surface like the kitchen counter or marble.
- Let the ganache cool until it thickens but is still pourable. Otherwise, it will be too thin. Drizzle it over the cold cake and let it drip down the sides. It will fall onto the paper or surface. I often scrape the drippings into the bowl and use them again to add a second layer or fill some holes or thin parts. You can also pour half of the ganache, wait until it almost stops dripping and then pour the other half. That will create a double and thicker layer of glaze.
- Decorate with ⅓ cup raspberries, chopped or whole. I used frozen for the photo because it was Winter, but I try to use fresh if I can. Keep in mind that most berries lose their shine and start releasing liquid, so, for best results, add the berries right before you serve it.
Notes
Adapted from Kiss My Bundt, by Christa Wilson
Margaret says
What a terrific recipe! I made one for dessert for Sunday lunch with our family. I had to make a second one that just came out of the oven. That is how much it was loved. Thank you for sharing such a wonderful recipe.
Raissa Hernandez says
Yum yum my Devina and Ava luv3 it
Lesley Harpur O Connell says
Can you convert this to proper measurements pounds or grams
Paula Montenegro says
There’s a button in the recipe card to toggle between US and metric.
Kathryn says
Hi Paula,
Is it possible to substitute oil for butter in this recipe?
Thanks.
Paula Montenegro says
Hi Kathryn! It can be substituted but the texture might be denser and moister, as oil is all fat. This recipe calls for 3/4 cup butter, so I would try it with 9 or 10 tablespoons of oil, and no more than 2/3 cup.
You can also try half a recipe using 5 tablespoons of oil and a loaf pan, and see how it goes before you make a large cake.
Jennifer says
Hi, can you make this without a mixer, by hand?
Thanks!
Paula Montenegro says
Hi Jennifer, you can, but you'll need a lot of arm muscle to cream the butter and sugar well. It's always easier with a mixer and we get more consistent results.
If you do it with a hand whisk, make sure the butter is soft and beat it well for several minutes, until it's well creamed. Then, beat the eggs well, one at a time. Happy baking!
Diana says
This cake was delicious! How many days ahead can I make the cake and how long does it last on the counter at room temperature?
Paula Montenegro says
Hi Diana! You can keep it for about 2 days in a cool environment, wrapped or covered to prevent dryness. It has fruit that can ferment with the passing days, so be careful.
Holly says
Haven’t made yet. But in preparing too, I see a discrepancy in the directions. You state to use shortening, Not butter to grease the pan. Then later you state you always use butter. Which is it?
Paula Montenegro says
Hi Holly! Lately, I've been having better results with shortening than butter. But, in my experience, both work. I'll update the info so it's not contradictory. Thanks for the heads up and have a great weekend.
Gwen Rahn says
Can I use cake flour for this recipe? And if so, what are the tweaks?
Paula Montenegro says
Yes Gwen, you can. No tweaks needed. Happy baking!
Megan says
So excited to make this for a galentines party! Could Ghirardelli white chocolate melting wafers be used in place of chips?
Paula Montenegro says
Yes Megan, you can use them. Happy baking!
Kathy Reimers says
Can you use gluten free flour for this cake?
Paula Montenegro says
Hi Kathy, I don't use it so I can't say from experience. I do know that people use GF 1:1 flour interchangeably in cake recipes. I assume the texture and tenderness will be different.
Jane says
Making this for the first time tonight. Do you think half and half would work for the frosting instead of whipping cream?
Paula Montenegro says
Hi Jane, I never used it, so I can't give an answer from experience. But half and half is less dense and has less fat content than cream, so I imagine the result will not be as unctuous or rich, it will be a slightly different texture. The amount of chocolate probably needs to increase also.
Kim says
Can you sub cranberries for raspberries this would make a great holiday dessert.
Kim
Paula Montenegro says
I think it would be a great substitution Kim. I can't get fresh cranberries here, so let me know how it goes. Happy baking!
Taylor Welsh says
Hi im planning on making this cake for a bday in my fam and i was wondering if i could use cake flour instead or AP flour?
Paula Montenegro says
Hi Taylor! Yes you can.
Chatlotte says
Cake has great texture and it is moist but I found it to be bland. I used salted butter as I always bake with salted but it actually needed more. Also, I think there’s not enough white chocolate in it as I couldn’t taste it. And yes, needs about 1-1/4 cups of raspberries.
Jen says
This recipe is sooooo goof! I made mini bundt cakes, and they tasted and looked amazing!!!! I recommend using way more raspberries though, like another cups worth
Jen says
I meant good not goof 🙂
Paula Montenegro says
haha thanks!
Paula Montenegro says
Hi Jen! Thanks for the comment, I'm so happy you loved it. And I'll keep a not about the raspberries. Have a great 2023!
Erin G. says
The cake tasted fine but it takes about an hour and fifteen, not the length of time in the oven stated in the recipe. It was still soupy inside when I checked it after 50 mins at 350 degs.
Paula Montenegro says
Hi Erin, I explain how baking times can differ due to different ovens, baking pans sizes, etc. I test and give the most accurate info I can, but there are usually variations, and there's nothing I can do about that.
Pauline says
Hi! Can I make in 9 inch rounds instead? And can I make the cakes ahead of time and freeze, frosting after thawed at a later date? Thinking ahead for Christmas Eve! Thank you. Pauline.
Paula Montenegro says
Hi Pauline! For layer cakes, I recommend using 2 round 9-inch pans. There's a birthday cake variation in the post. You'll find different cake pan alternatives.
It can be frozen. Make sure you wrap it well. Happy baking!