
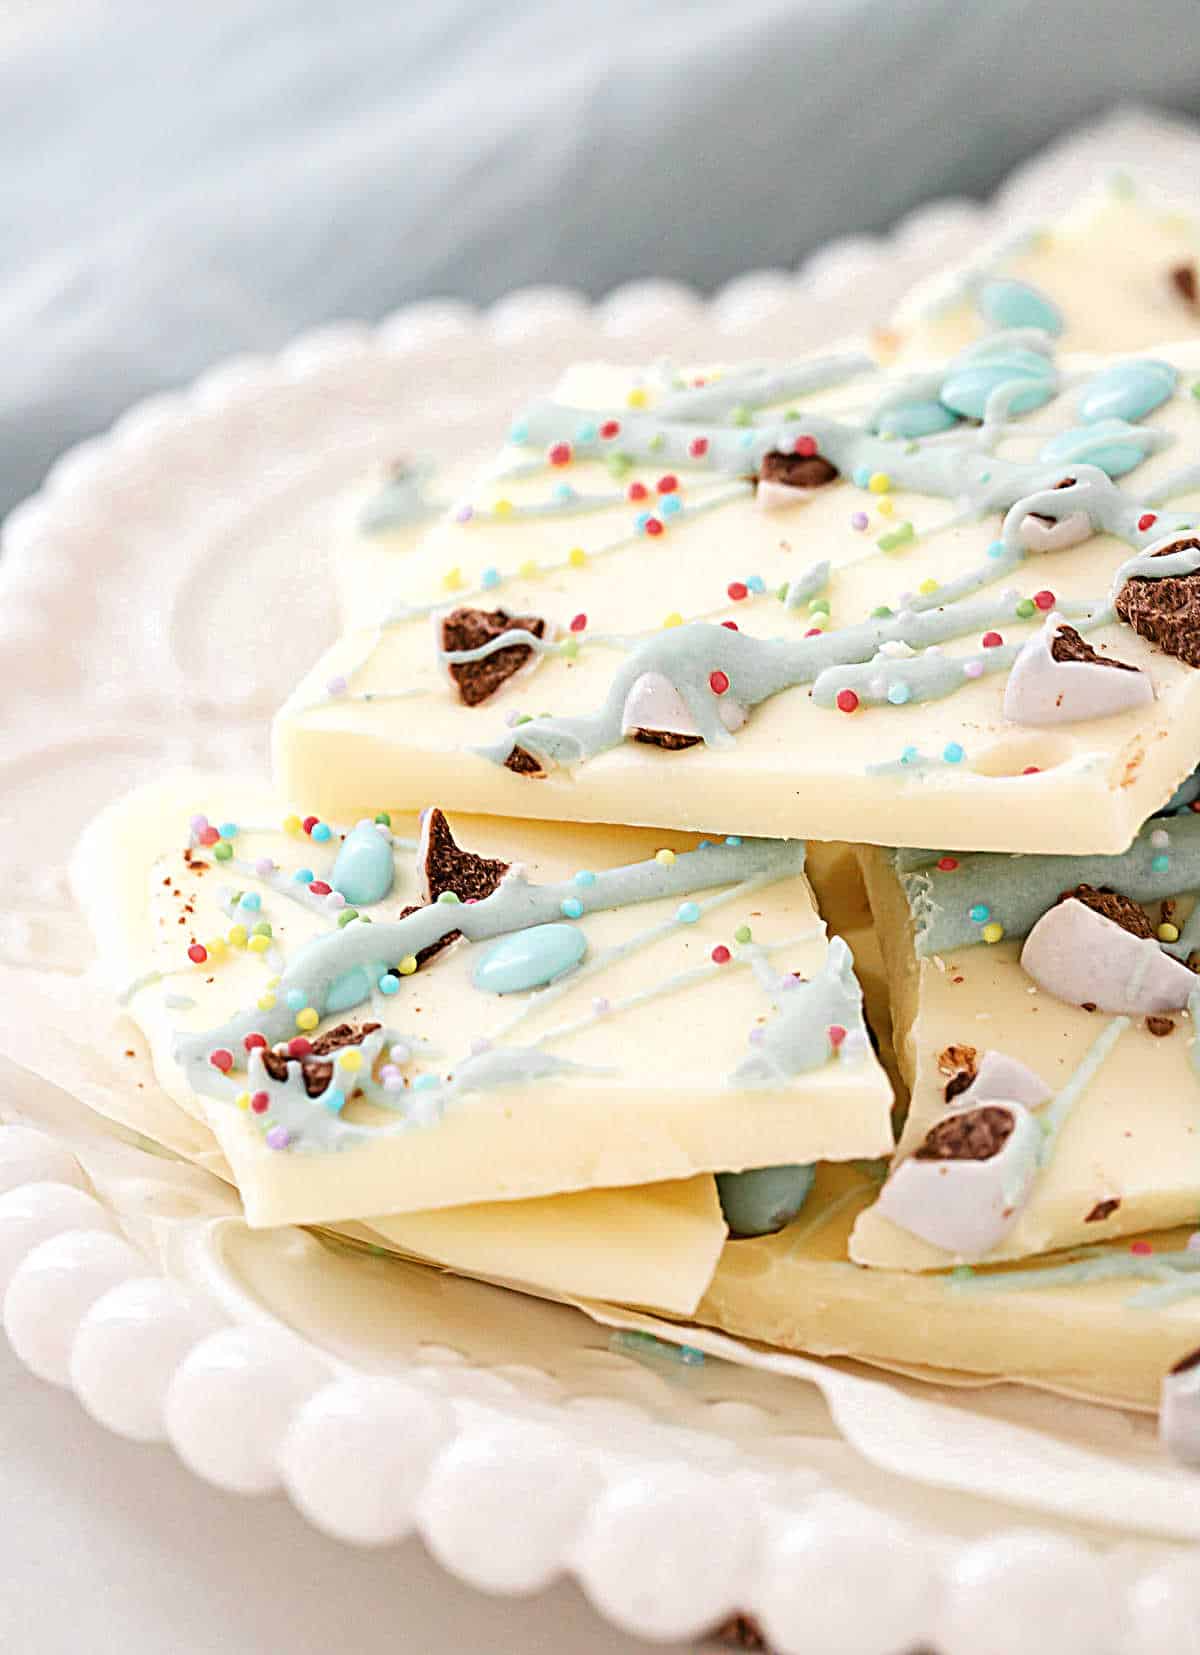
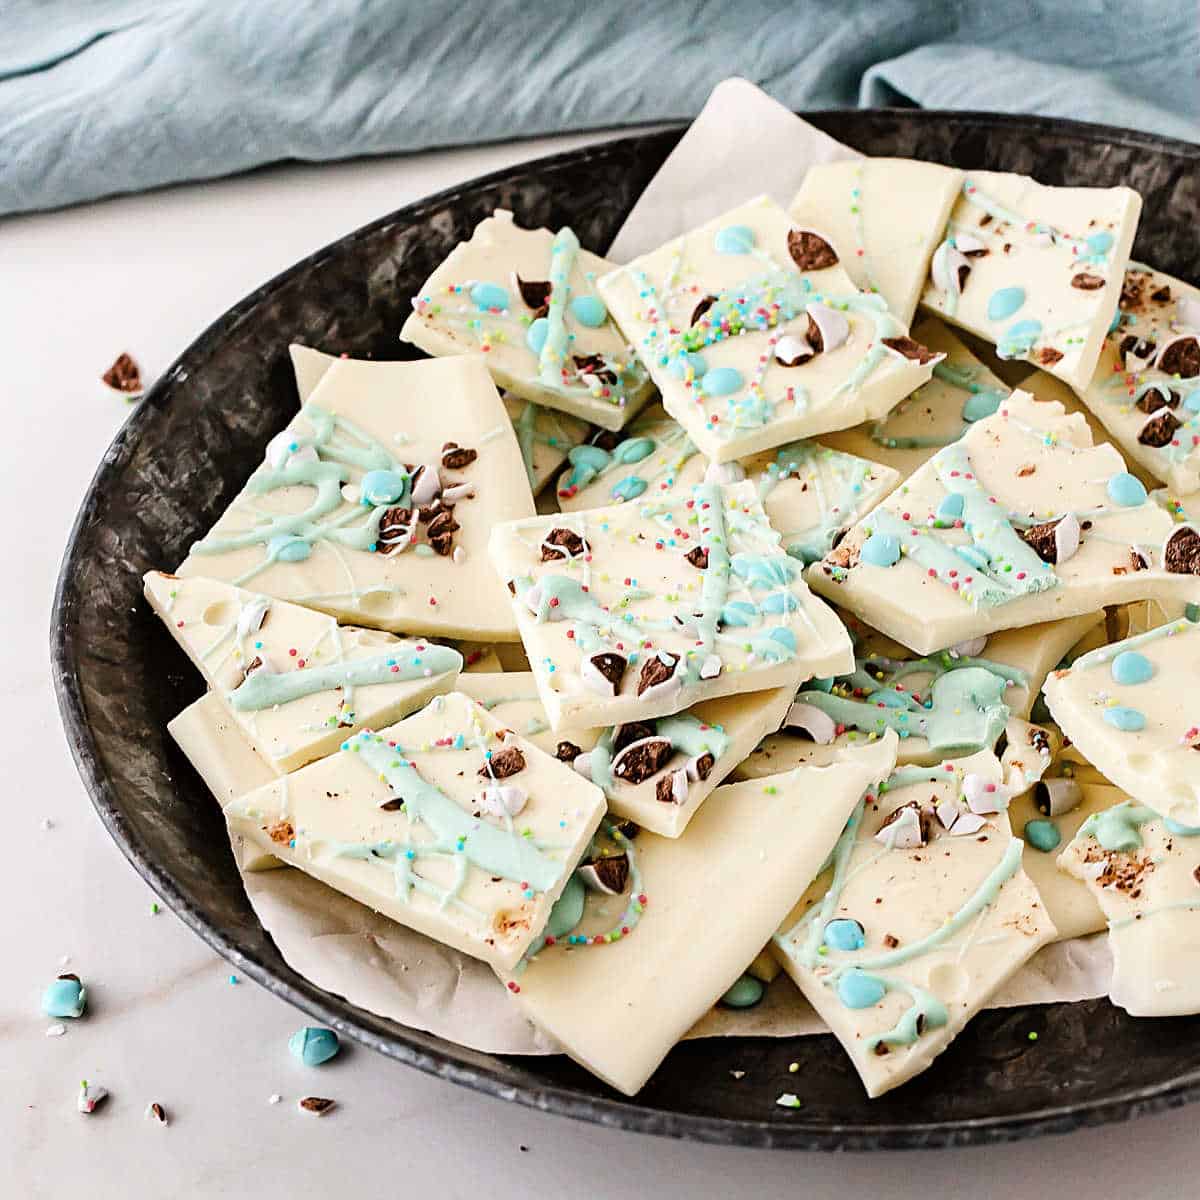
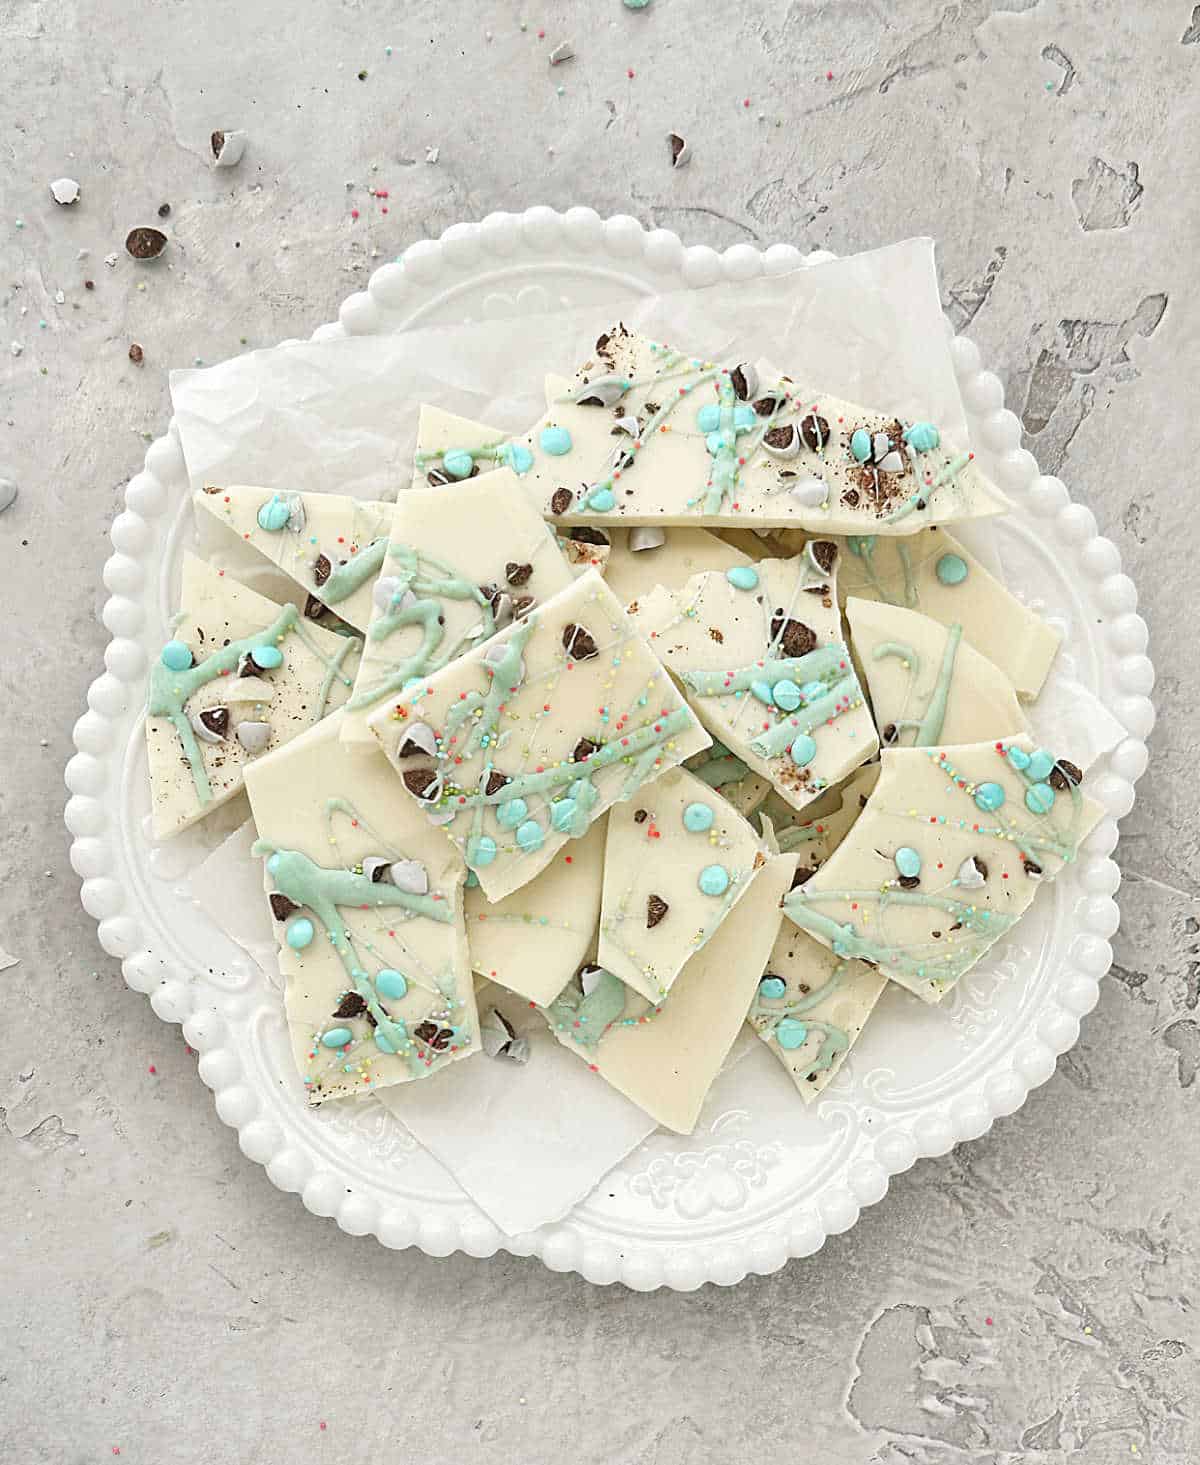
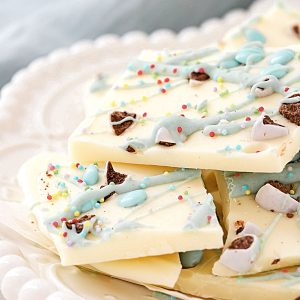
These homemade thin chocolate bars are perfect for celebrations. Top them with colored chocolate, sprinkles, chopped mini eggs, or any other themed decoration you like. They take 15 minutes to put together and extra time to set. This is a great holiday project to make with kids.
SAVE THIS RECIPE
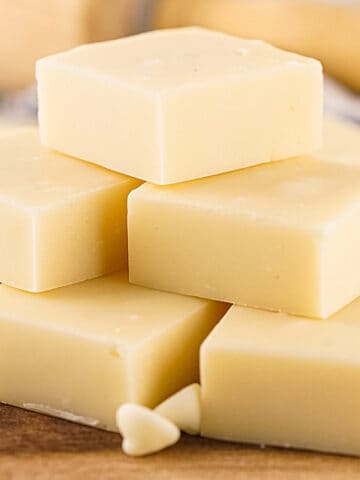
Versatile chocolate bar
This is a quick and easy Easter candy, meaning it's not complicated. It's a simple alternative to chocolate eggs and can be part of your Easter desserts and traditions.
This recipe can be decorated with different toppings, from sprinkles, colored chocolate, your favorite Easter candy or mini chocolate eggs (like the fudgy Easter brownies), crushed cookies, jelly beans, etc. So be creative and choose what you like.
Chocolate bark is a way of making homemade bars with your chosen ingredients. So it can vary with each holiday.
We make double chocolate bark with white and dark chocolate, chopped cookies, and nuts as Christmas gifts. And spooky bark with candy eyes for Halloween and Valentine's bark with dark and pink chocolates.
Ingredient list
I like to use melting chocolate (wafers) for this recipe, the type used for candy-making, because it melts quickly (especially white chocolate, which can be tricky to melt) and has a good shine.
Quantities are listed in the recipe card towards the end of this post. The Ingredients page has more details and lists the brands we use.
- White chocolate: melting chocolate wafers or white chocolate bars you know melt well.
- Food coloring: Make sure it's oil-based or it won't dissolve in chocolate! It can be powder or get. I used Dustcolor powder food dye.
- Decoration: Pastel-colored sprinkles or a mix of Easter sprinkles, mini eggs and M&M's, whole and chopped. Or any other edible decoration you want. There's no right or wrong as long as you like it.
How to make Easter chocolate bark
Toppings: let your imagination flow. There are many color combinations and different decorations to use. There's no right or wrong way.
The best food coloring for chocolate is always oil-based, or it won't dissolve!
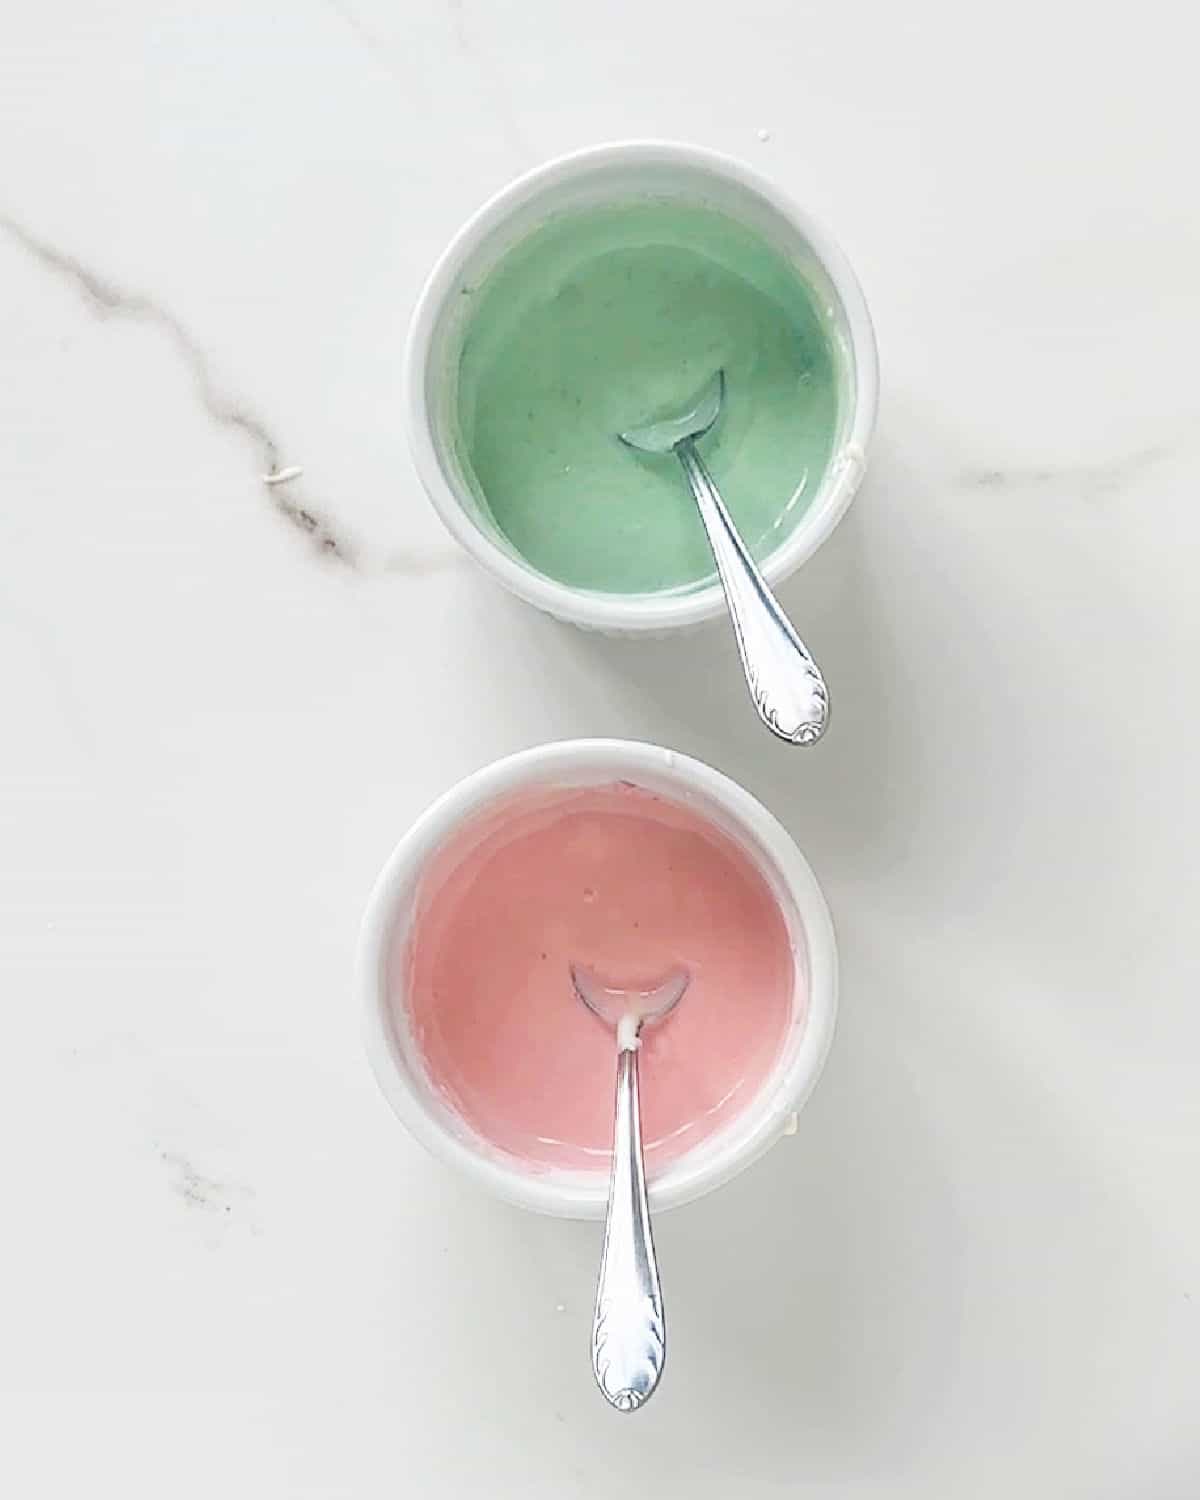
Some melted white chocolate will be mixed with different food colorings to get colored chocolate.
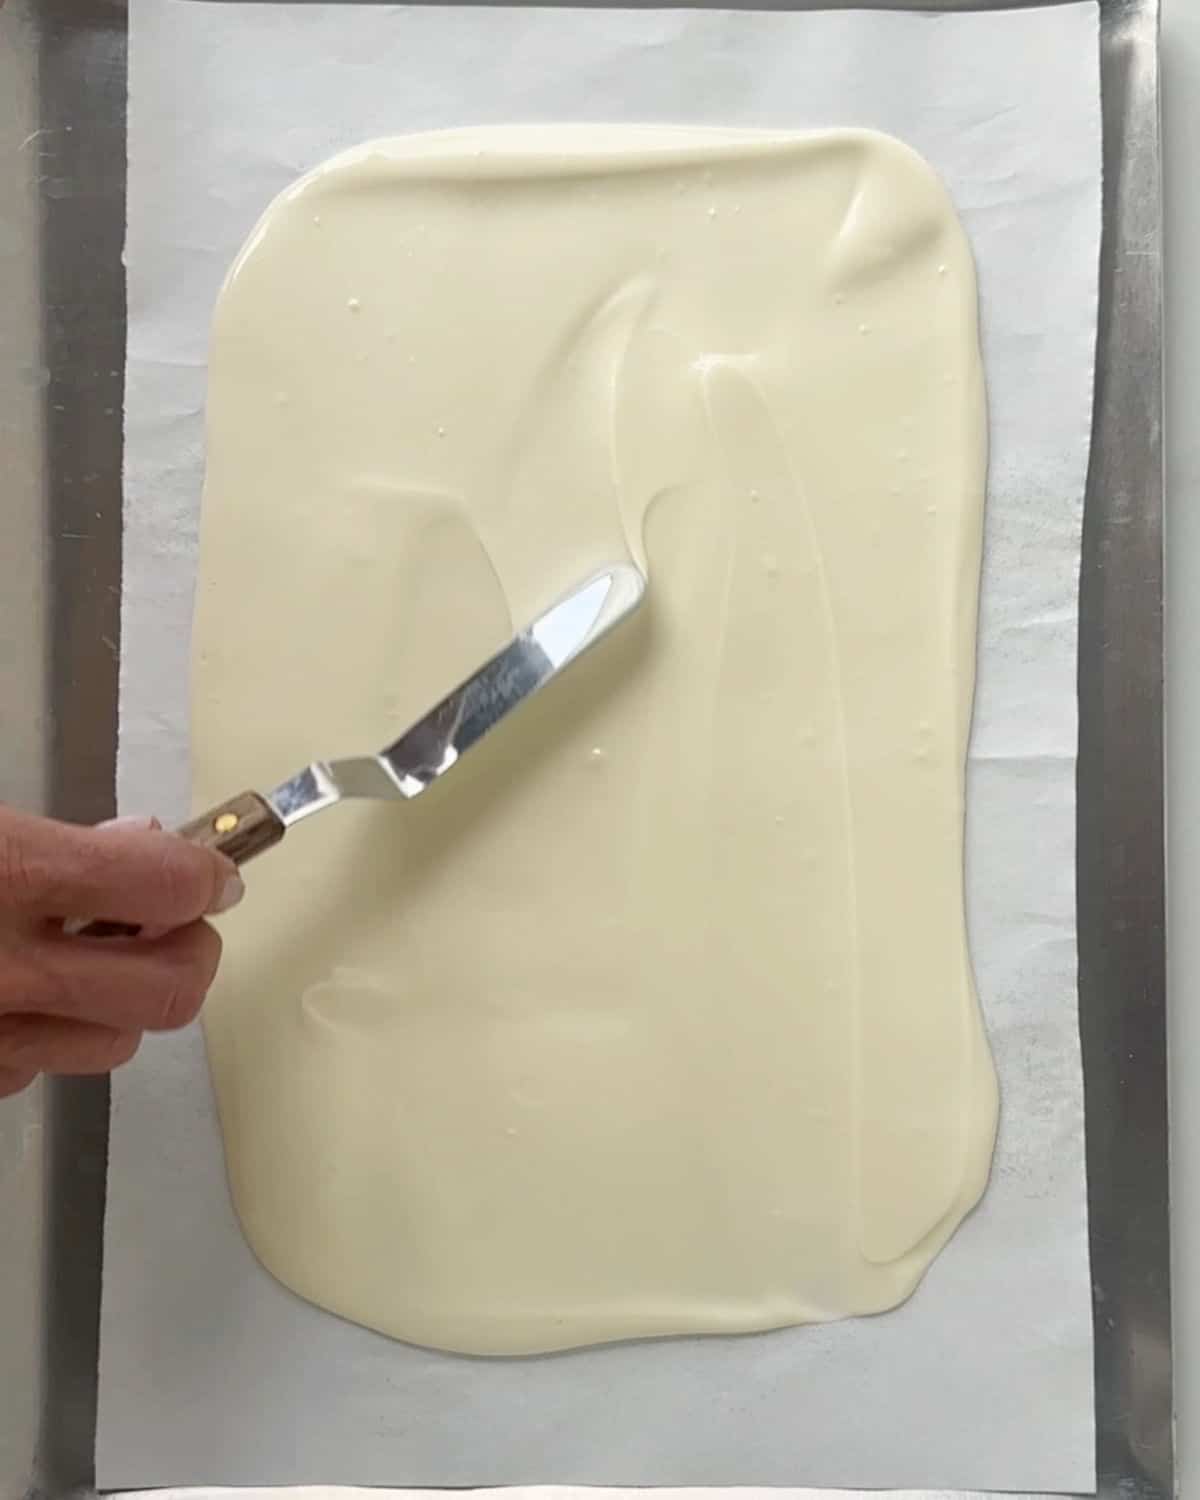
The rest is spread on parchment paper. Don't make too thick of a layer as it will be harder to break up and eat.
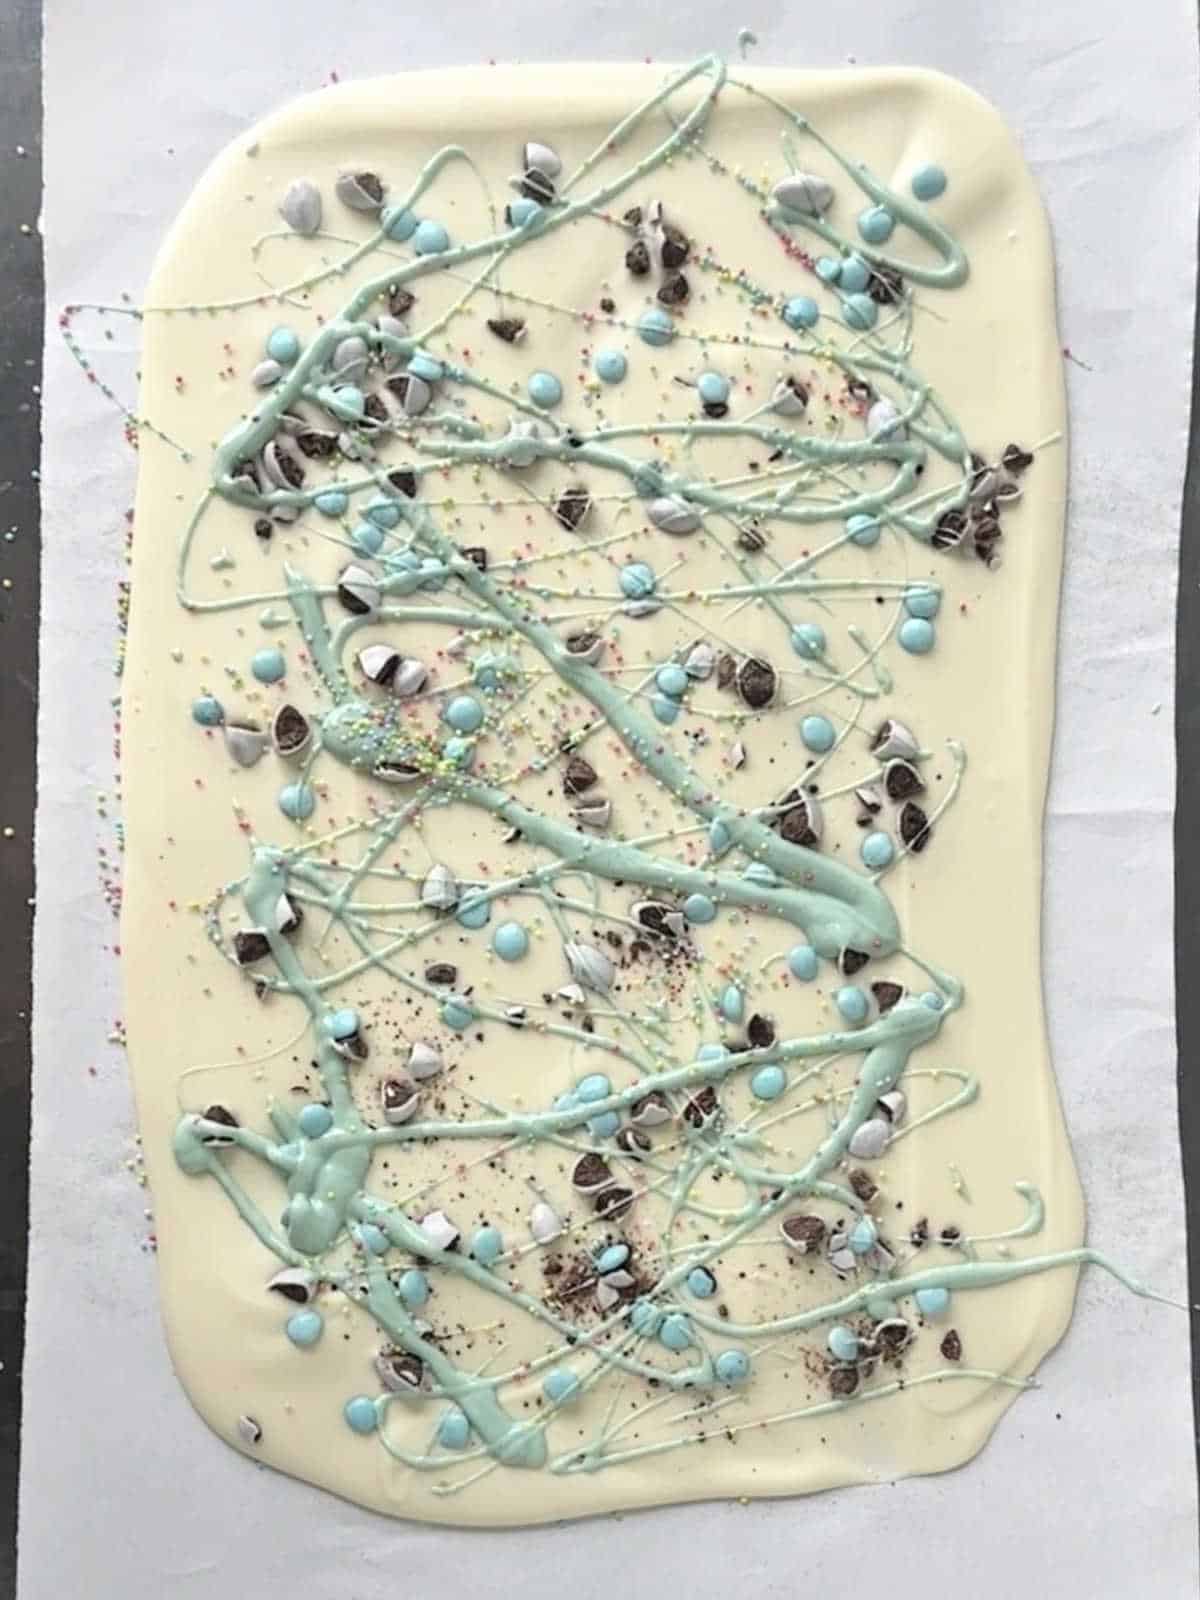
I used chopped and whole white mini eggs, light blue and green candies, pastel green chocolate, and Easter nonpareils.
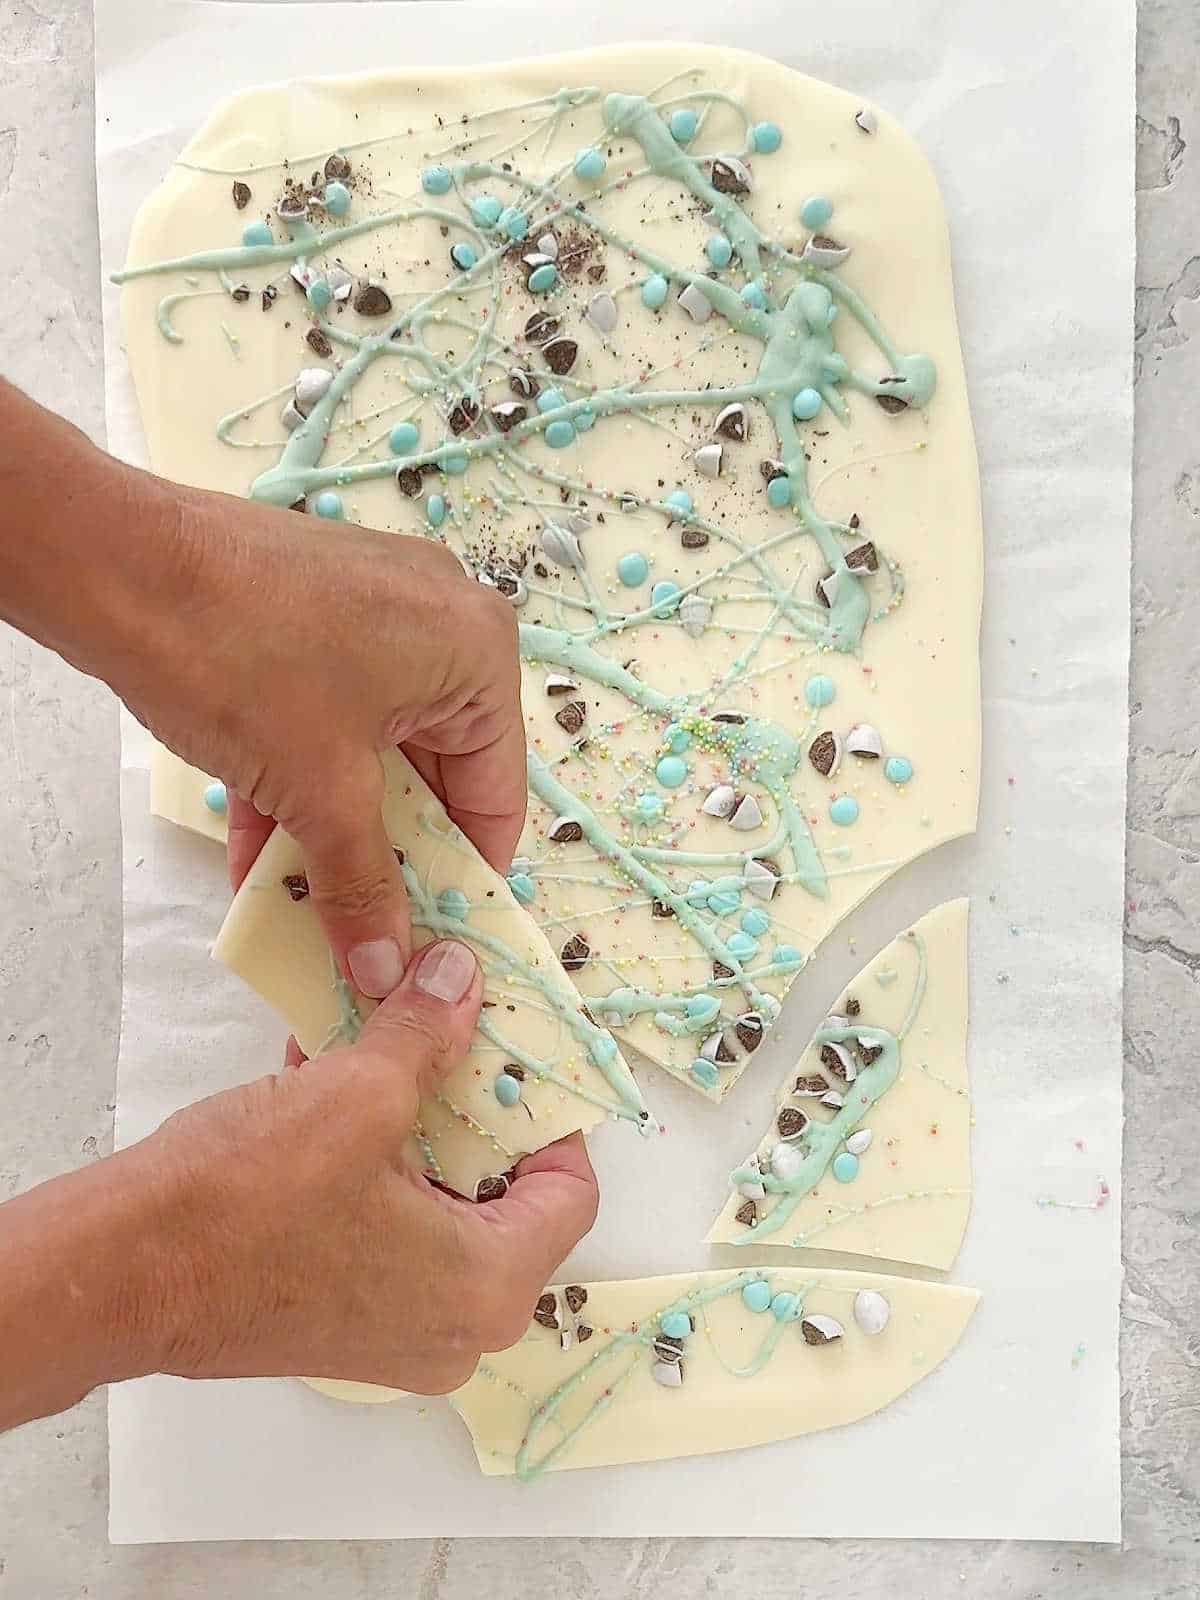
Use your hands to break uneven pieces. This method will make some of the toppings fall from the chocolate.
Or use a kitchen knife to cut pieces of cold chocolate bark. This is the less messy way.
Vintage Kitchen Tip
Chill the bark in the fridge (before breaking it up in pieces) so it sets up faster. But when you remove it, let it stand at room temperature for about 10 minutes or until it's easier to cut.
Kitchen notes
- Organization: read the recipe first and ensure you have ingredients at the correct temperatures, equipment, and enough workspace. This will make the process so much easier!
- Food coloring: make sure it's oil-based. Otherwise, it will not dissolve in chocolate! I use powder color, but you can use gels.
- Refrigerator: chilling the bark is the easiest and fastest way to solidify it. You can also leave it at room temperature, which will take a while (sometimes hours). The freezer also works if you're in a hurry, but be careful it doesn't get too cold, and it's hard to break up.
- Breaking up the bark: If the bark has been chilled, I recommend waiting about 20 minutes before you cut or break it up; it'll be easier. Use your hands or a kitchen knife, which can make it less messier.
Related recipes you might like:


As an Amazon Associate, I earn from qualifying purchases. Read my disclosure policy.
Easter White Chocolate Bark
Ingredients
- 14 ounces white chocolate
- oil-based food coloring in pastel colors, dissolves in chocolate
- ½ cup assorted sprinkles, chopped mini eggs, or other Easter edibles
Instructions
- Line two baking sheets (that will fit in your refrigerator) with wax paper.
- Chop 14 ounces white chocolate if using a bar and not candy melts or wafers.
- Melt the white chocolate. I use the microwave (15-second spurts mixing well between each). Or use a double boiler.
- Pour about ¼ cup of melted white chocolate into a small bowl or more, depending on the number of colored chocolate you want to make. I used light green and sometimes mix it with pink or blue.
- Sprinkle oil-based food coloring in pastel colors and integrate well. Depending on your brand of coloring (mine was a powder), you might need more or less to get the type of hue you want. Start small, with a pinch, mix well and add more if necessary. If you want several colored chocolates, you might need to melt more white chocolate than specified in the recipe.
- Pour the remaining white chocolate on the prepared baking sheet, making a log in the center.
- Spread it on the paper with an offset spatula or the back of a spoon. Don't make it too thick, or it will be hard to break up. Between ⅛ and ¼ inch is what you want.
- Drizzle the colored chocolate/s of choice. Don't overdo it.
- Sprinkle with ½ cup assorted sprinkles, chopped mini eggs or other edibles you might've chosen. You can drizzle some extra chocolate after sprinkling the candies. There's no right or way to do this; whatever you like is fine.
- Refrigerate for about 20 minutes until completely hardened. The time depends on the thickness and the temperature of your fridge.
- Separate the cold chocolate rectangle carefully from the paper.
- Break into pieces by hand or use a kitchen knife to cut pieces.
Rate and review this recipe