


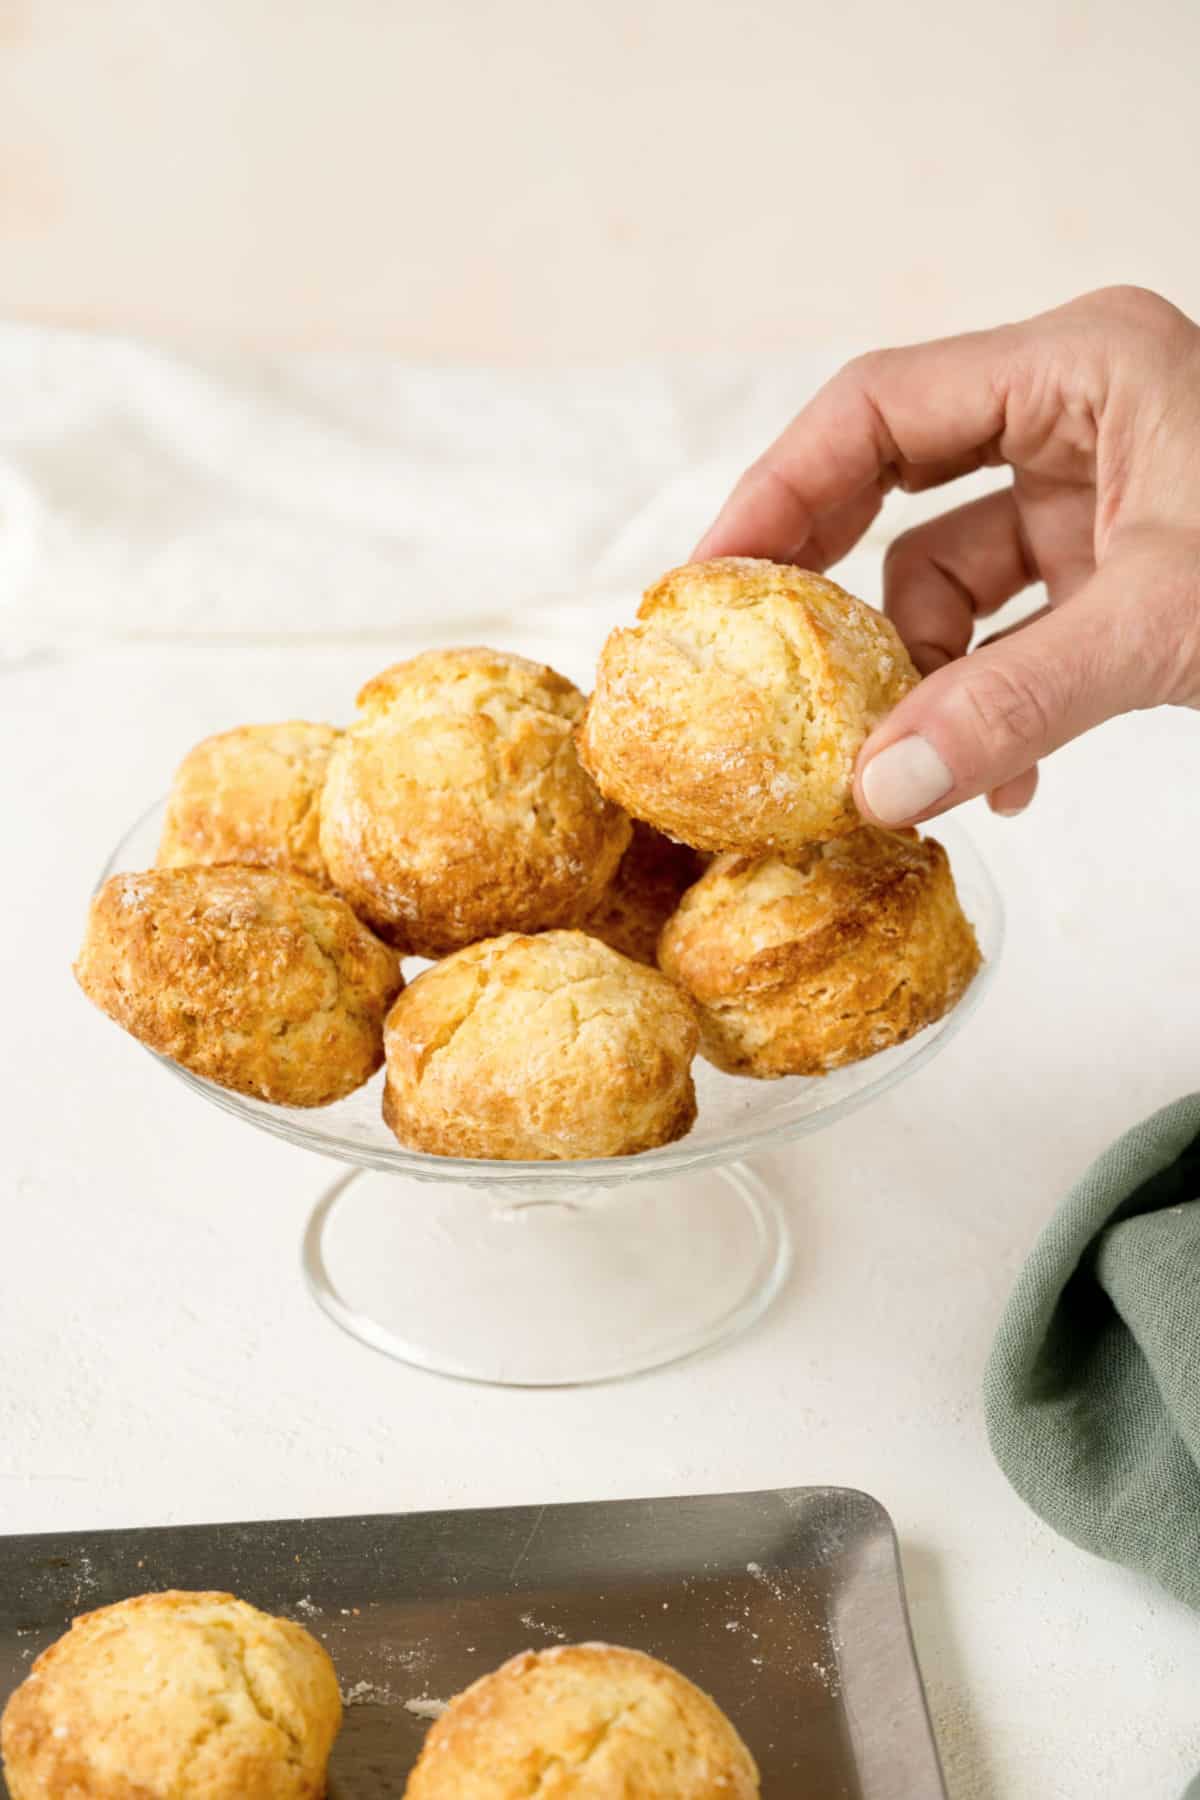
If you're a scone fan like me, you'll love this simple recipe, which is ready in less than an hour. Scones with buttermilk are soft and fluffy, with a tender crumb. All my top tips are included so you can make the best scones, even if you're a beginner. Did you know you can freeze them? That way, you can have freshly baked scones to order.

SAVE THIS RECIPE
A classic recipe
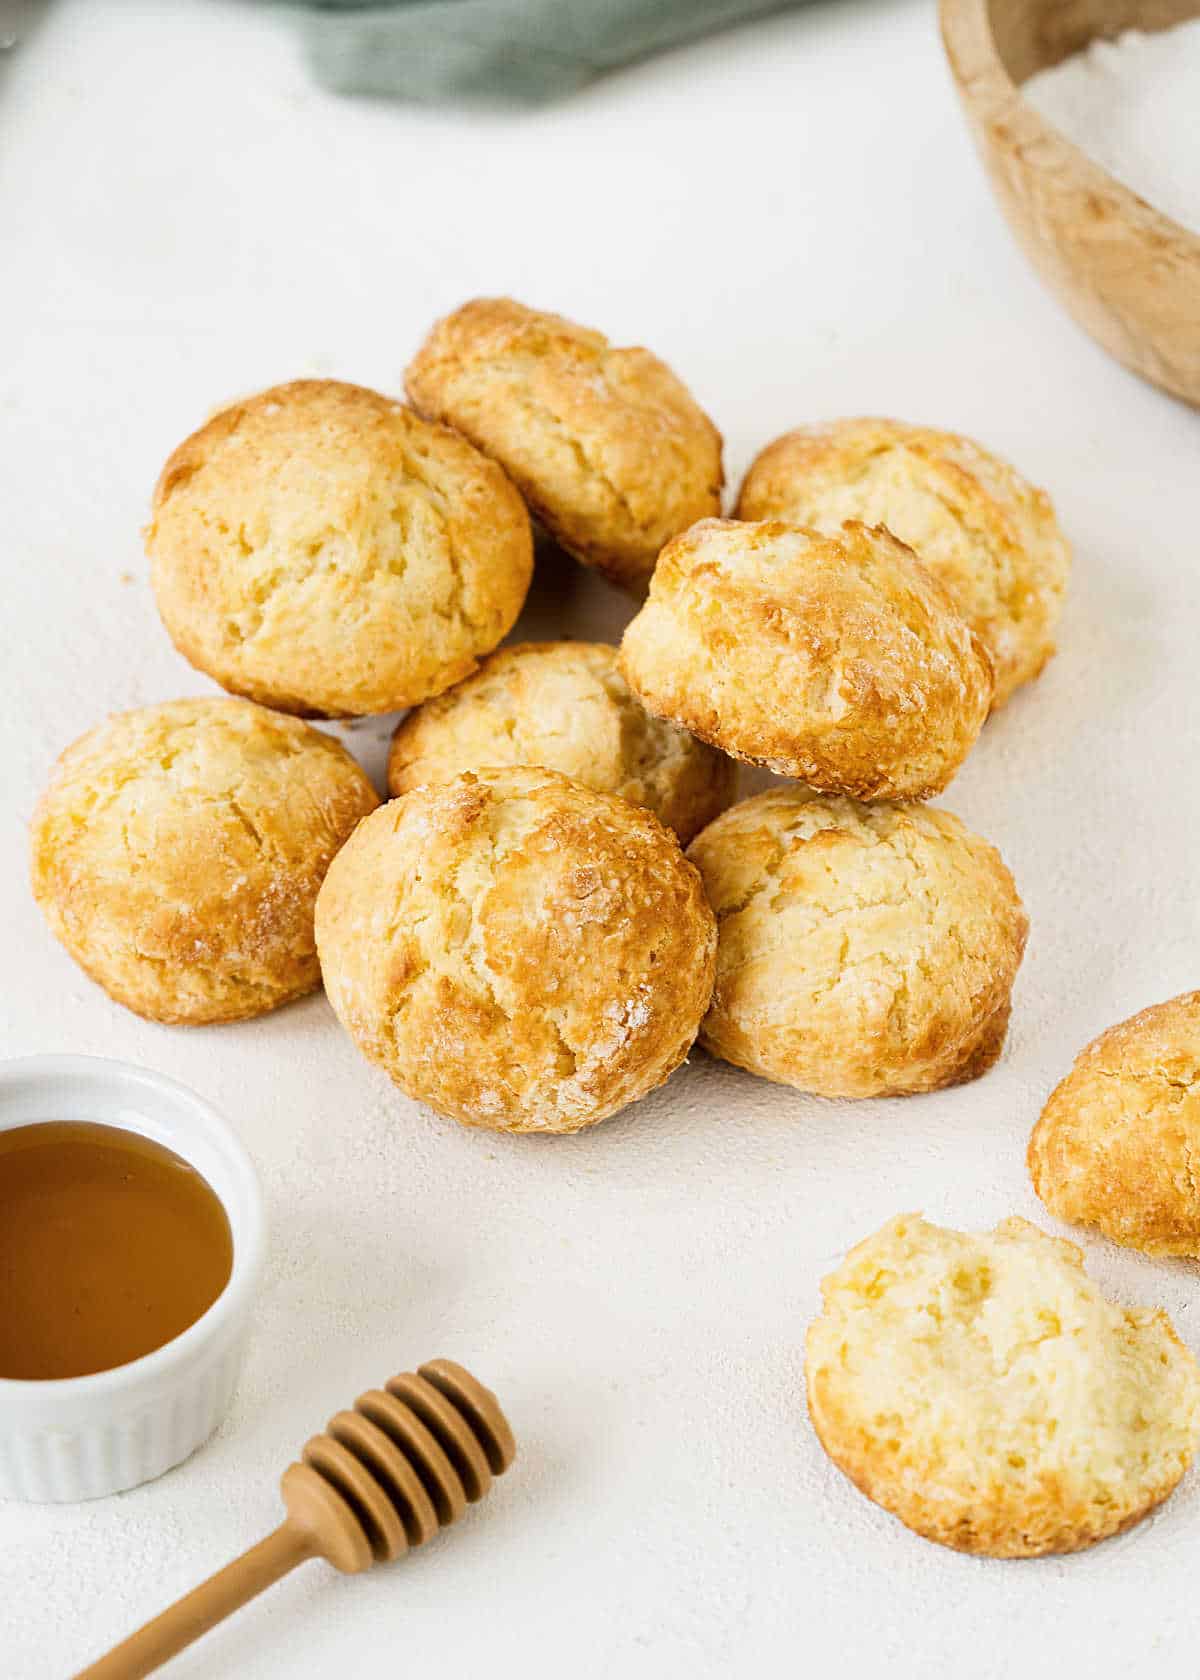
A neutral, very balanced buttermilk scone, neither sweet nor salty. They have a great crumb, dense enough but not heavy, with enough butter flavor to eat them plain.
It's a recipe to eat warm with butter and jam. Or whatever suits your fancy, just like with these mini scones or English raisin scones, two of our top bakes for brunch and afternoon tea.
Scone-making is a big deal in my family. My Irish great-grandmother passed down the recipe, according to everyone, just like she did with the Irish soda bread. But no one got the same results. They were always almost as good.
Or so they say. I never met her. And never ate scones made by her. I had an aunt who made them, and they were good.
Well, they have nothing to envy these buttermilk scones; these might even be better. The nerve, I know, if the family could hear. But it's true.
Why use buttermilk?
It makes scones more tender, so they have a better crumb and a richer texture. Depending on the amount used, it can also add a slight tang. This recipe is very balanced, flavor-wise.
Buttermilk can be purchased in the grocery store or online, or you can easily make your own (find how-to in the recipe card's notes).
- Mary ⭐️⭐️⭐️⭐️⭐️
Excellent recipe! These are the lightest scones I ever made. I put my dough into a cast iron skillet to save time cutting out rounds, and it baked beautifully ☆☆☆☆☆ Thanks for this fabulous recipe!
- Ali ⭐️⭐️⭐️⭐️⭐️
I've tried several scone recipes, and these are the best!
- Swati ⭐️⭐️⭐️⭐️⭐️
Super easy and absolutely delicious scones!! Usually, my scones turn out to be hard, but this recipe gave the absolute perfect scones... no need to buy them anymore. Must try!!
Testing notes
Paula's baking tips that can make a difference.
Baking powder: It's essential to help the scones rise, so make sure it's not expired.
Very cold ingredients: I'm not kidding when I say very cold butter. I cut it and put the pieces in the freezer for 5 minutes before using them. And don't take the liquid ingredients out before you start mixing the scones. They belong in the fridge until you need them.
Don't work the dough much. It should come together, but might still have floury patches. You don't need to work it until it's smooth, like pie dough. It is uneven, with dry spots sometimes, and that's good for flakiness later.
A rather high oven is necessary: they need that extra heat (and baking powder) to rise. If you happen to forget to turn the oven on before you start mixing, please don't leave the baking sheet with the cut scones waiting on the counter. Put them in the fridge or freezer for the ten or fifteen minutes it takes for the oven to reach its temperature.
Chill before baking: To get tender and fluffy results, the scones need to be cold before going into the oven. So put the tray with the cut scones in the freezer for 15 minutes before baking.
These are a blank canvas for other flavors. You can add citrus zest, seeds (lemon and poppy seeds always work), vanilla extract, ground spices such as cardamom or cinnamon, mini chocolate chips, dried cranberries or raisins, or a tablespoon of minced herbs for a savory touch. Don't go crazy; just add ¼ cup or so of dried fruit or nuts and ½ a teaspoon of extracts or spices. This is not a large recipe.
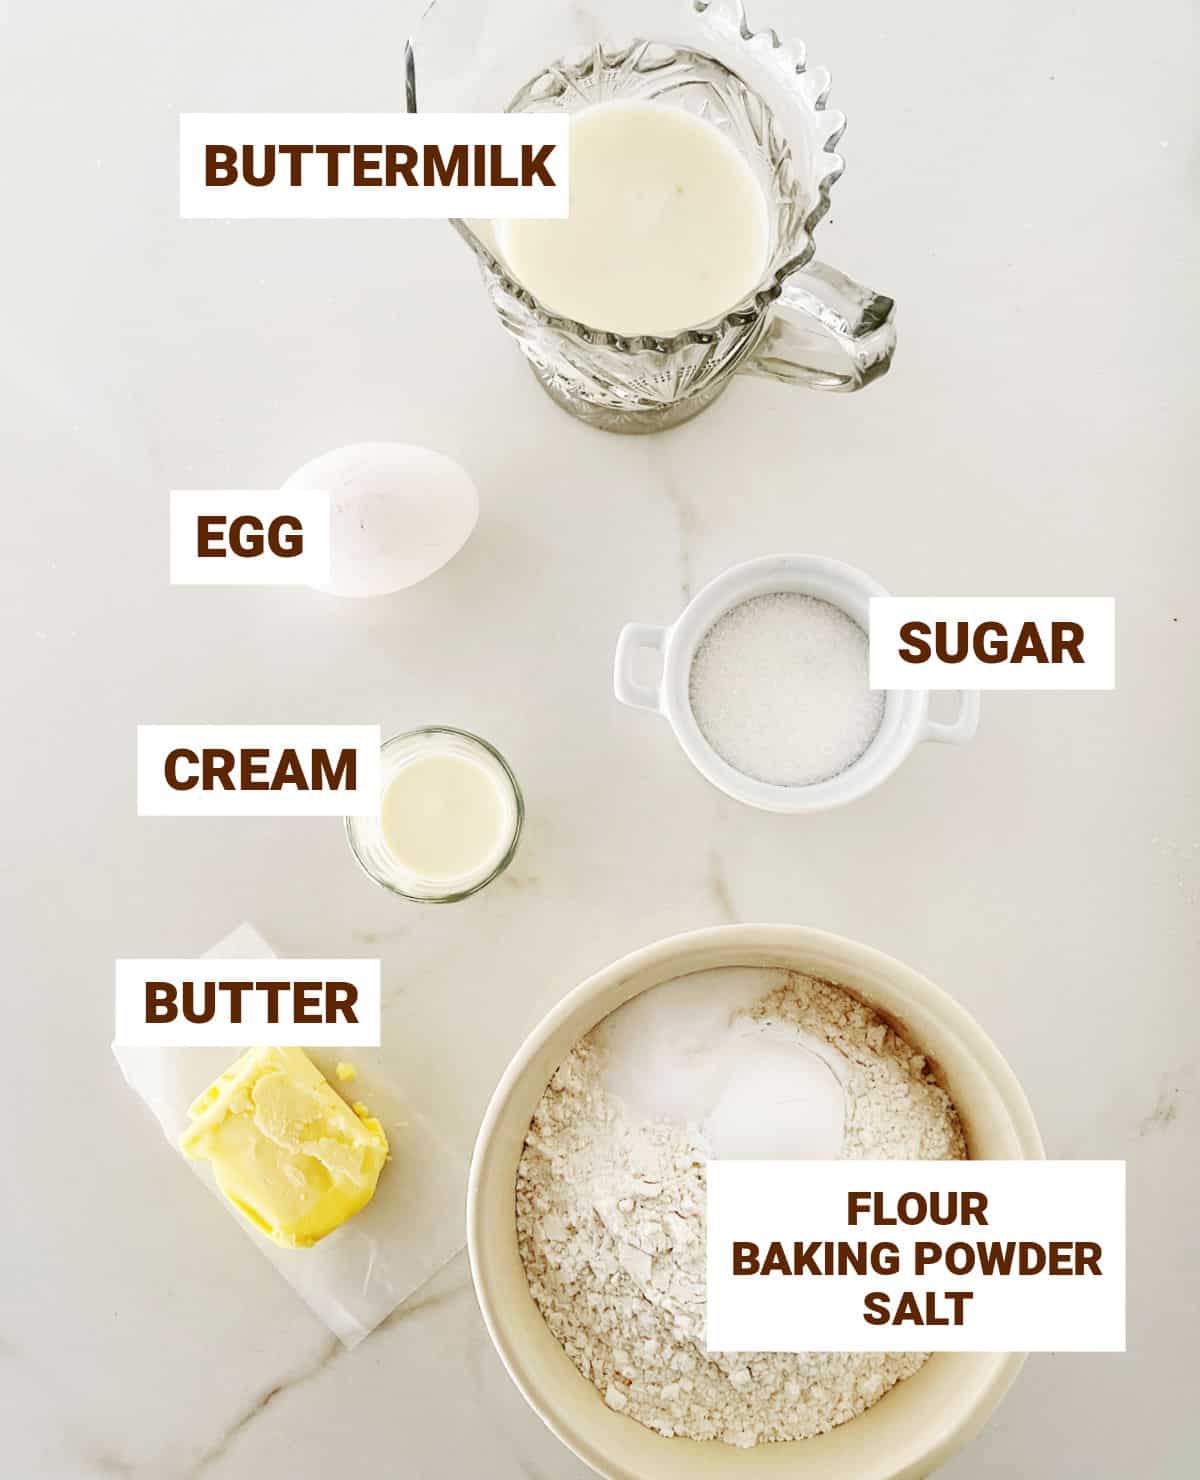
Quantities are listed on the recipe card towards the end of this post. The Ingredients page has more details and lists the brands we use.
Steps to make scones
The mixing of dry ingredients with butter can be done in 2 ways:
- By hand - a bowl where you integrate the cold butter with your hands or with a pastry cutter. This can take a few minutes as the butter needs to be the size of peas and small beans because it will be irregular.
- Food processor - the butter and dry ingredients are integrated by pulsing a few times. This is way faster and less messy (no hands involved), and the only thing to watch out for is not getting carried away and processing too much. The butter pieces should be irregular, the size of peas and beans.
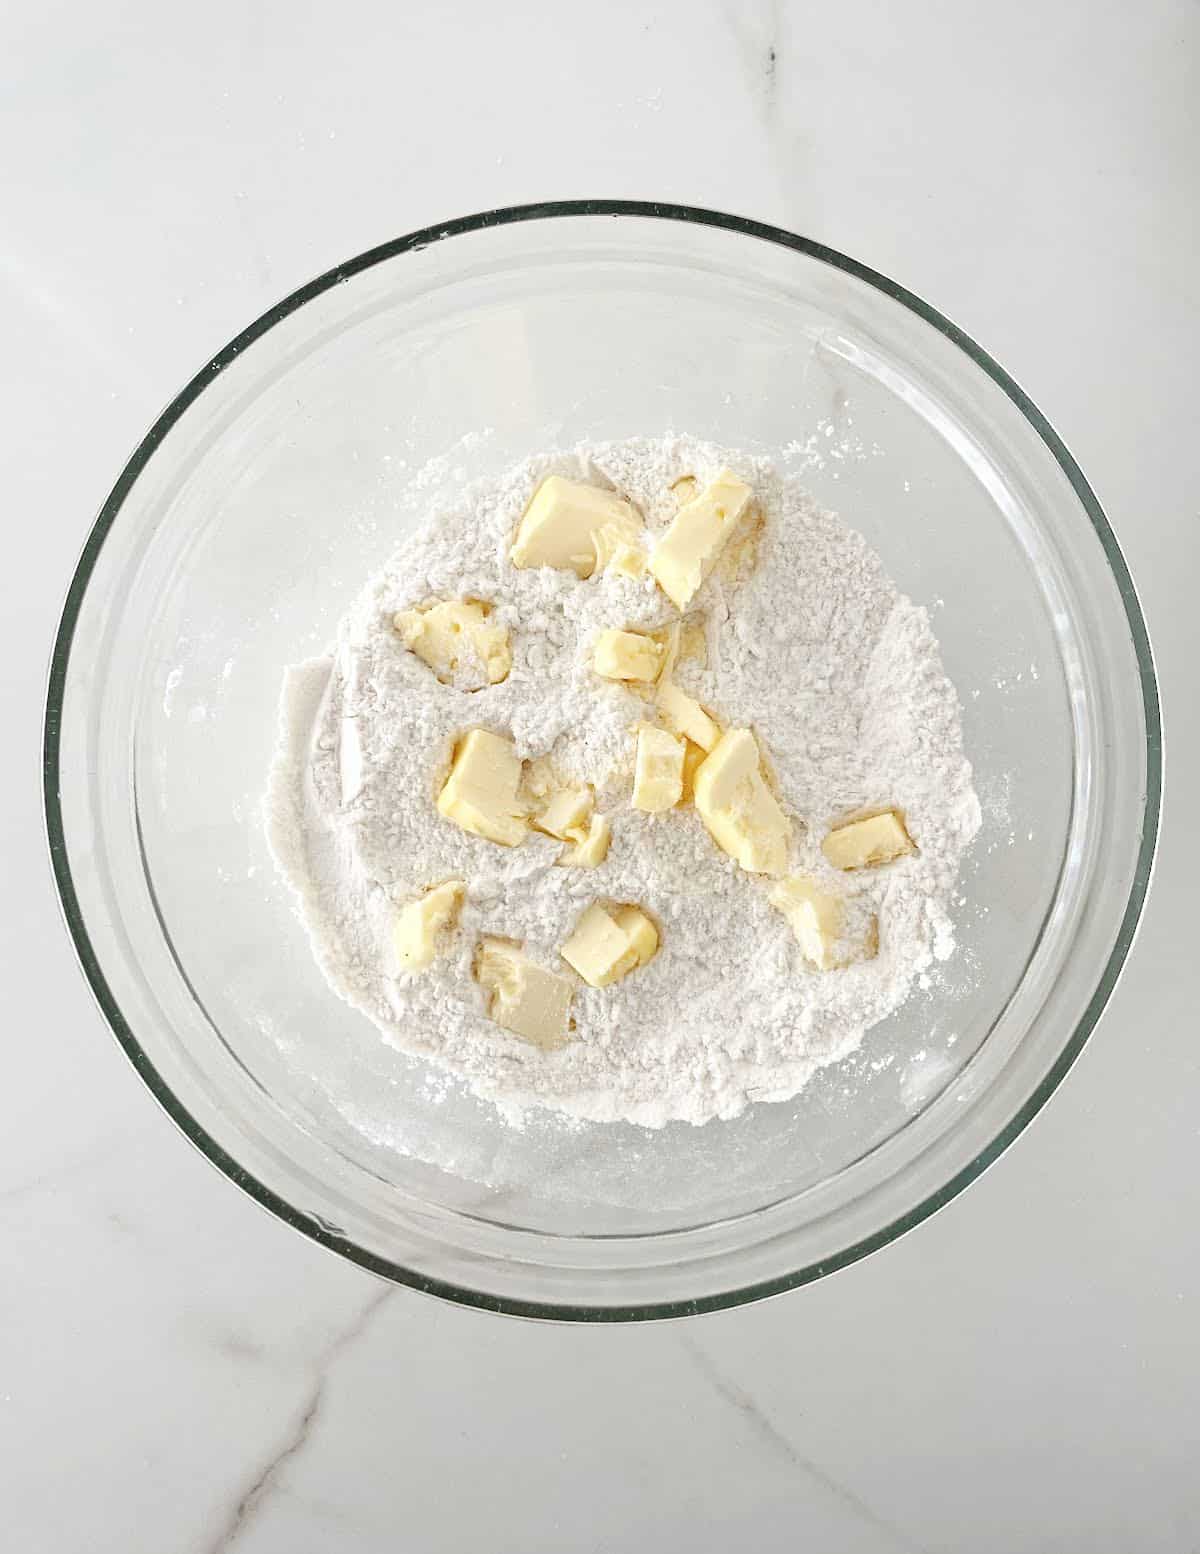
- Stir to combine the dry ingredients in a large bowl and scatter cold butter pieces on top.
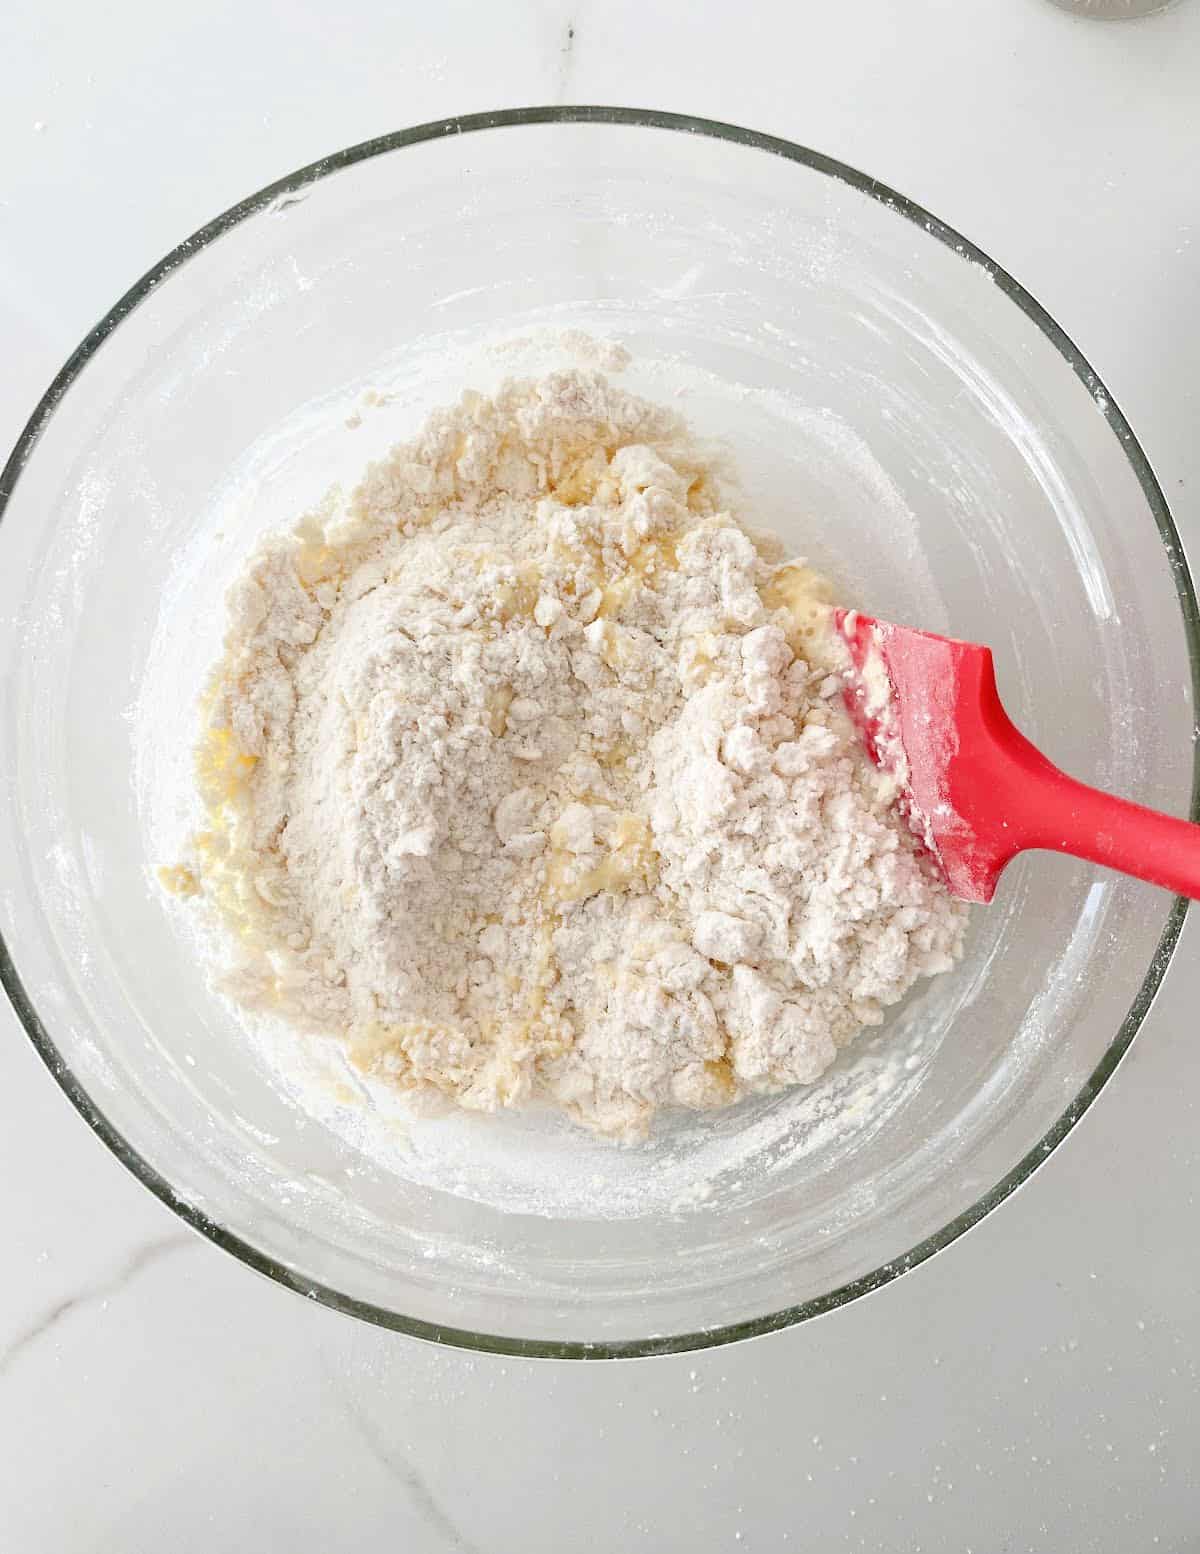
- Work the butter with your hands or a pastry blender until the pieces are the size of small beans. It will be irregular.
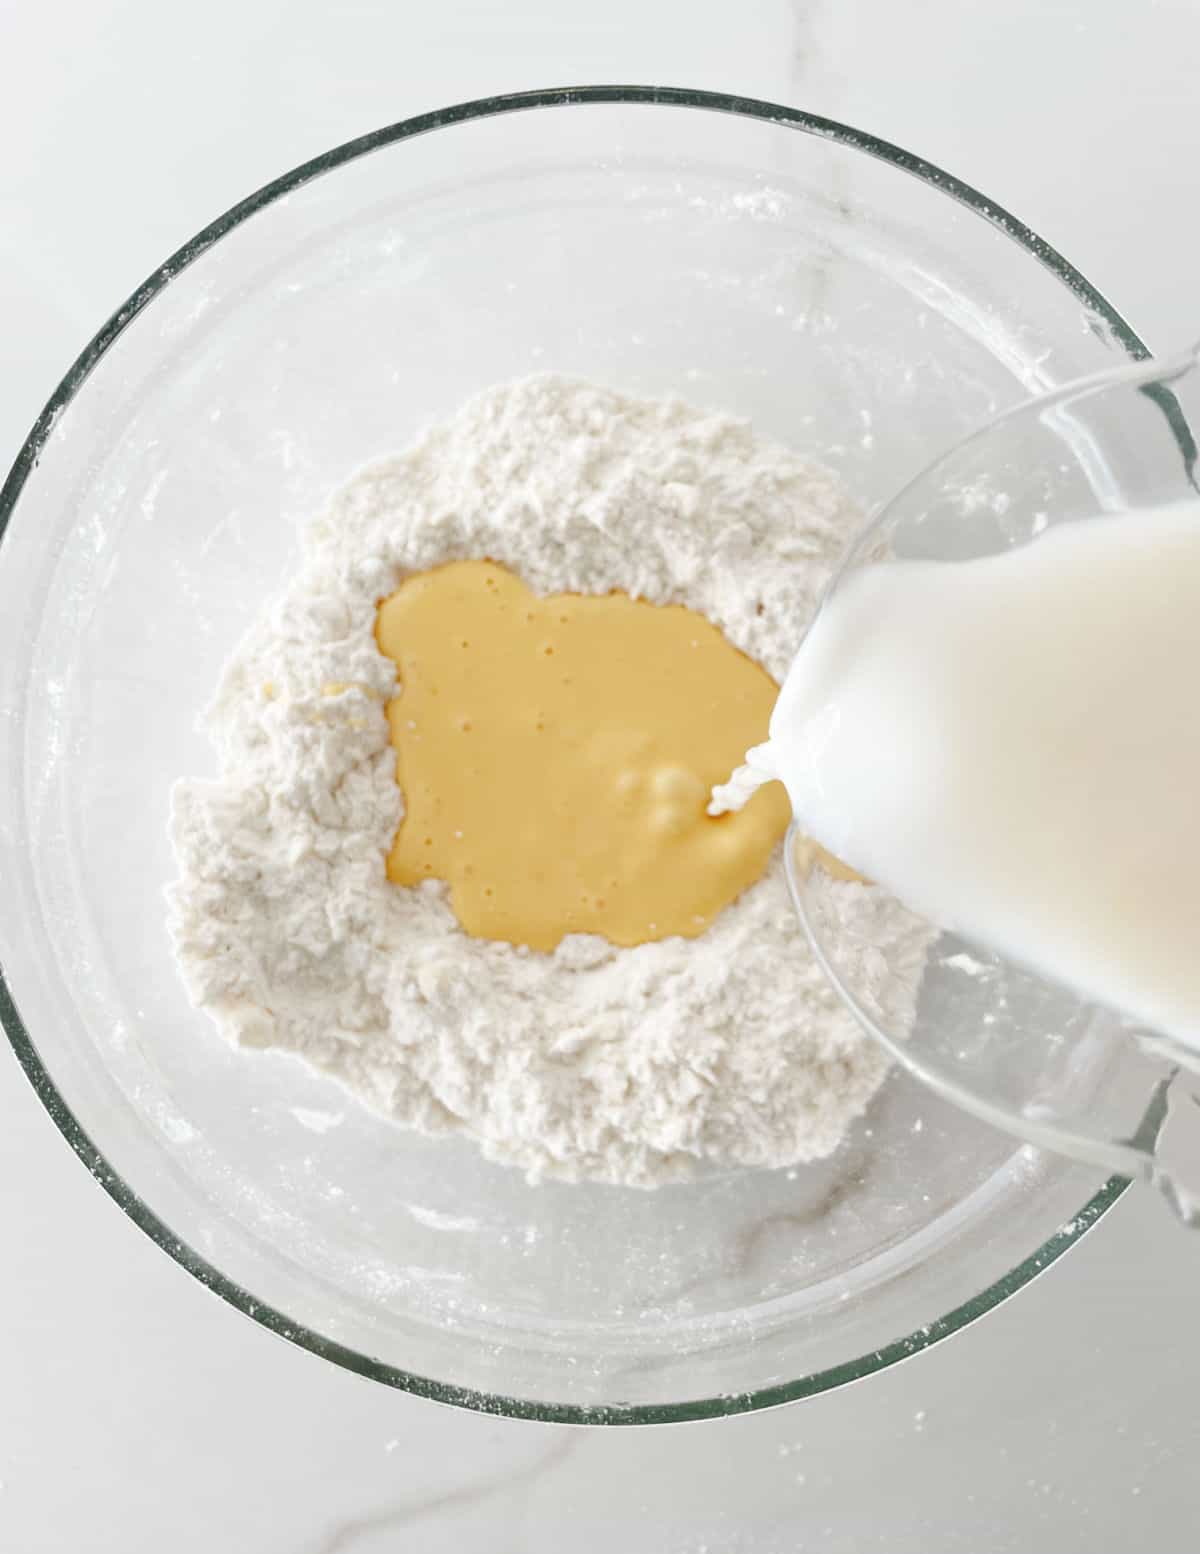
- Lightly beat the egg in a small bowl and mix it with the buttermilk and cream. Add the wet ingredients to the dry ingredients and stir with a fork until a few dry spots are left. Don't overmix!

- Transfer the shaggy scone dough to a lightly floured surface. Gather it into a disc, folding it onto itself (to create layers and thus, flaky scones) and patting it lightly, and working it as little as possible. A dough scraper (like a large spatula) helps with this part. It will be irregular, and some spots will be more floury than others.
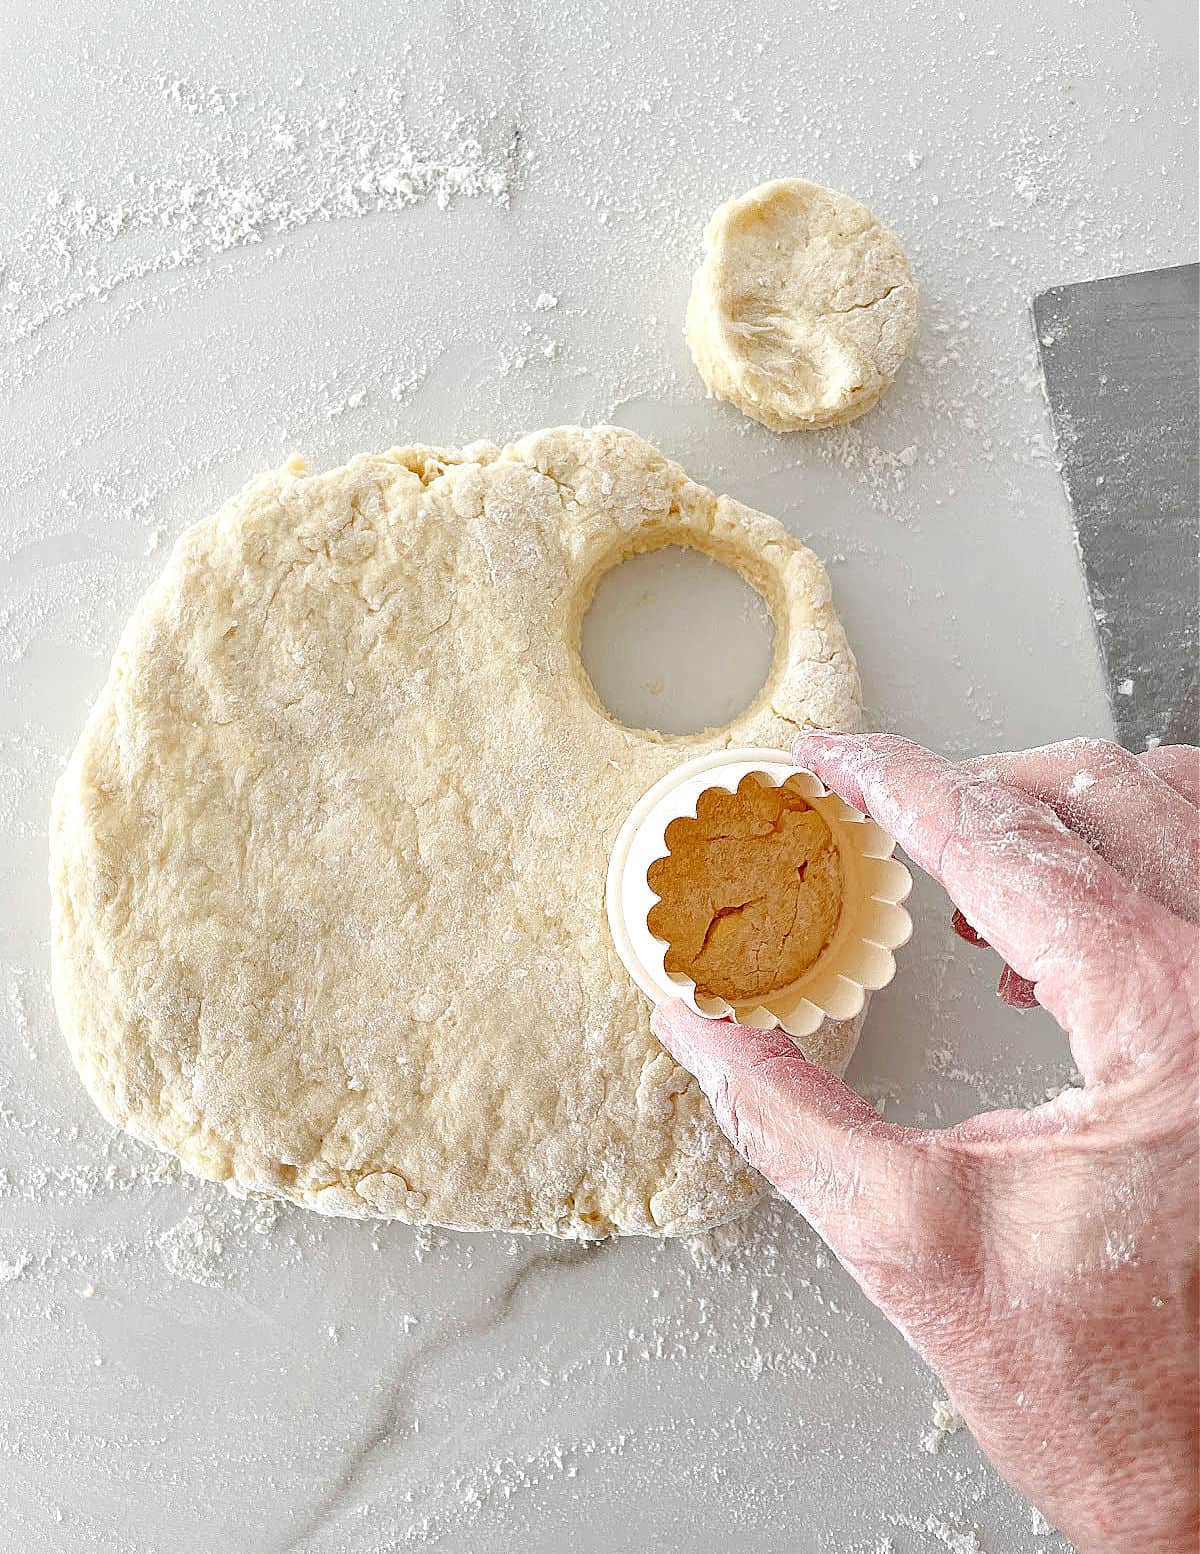
- For classic round scones, use a medium round cookie cutter. For wedges or triangles, use a kitchen knife, as we do with the orange cranberry scones.
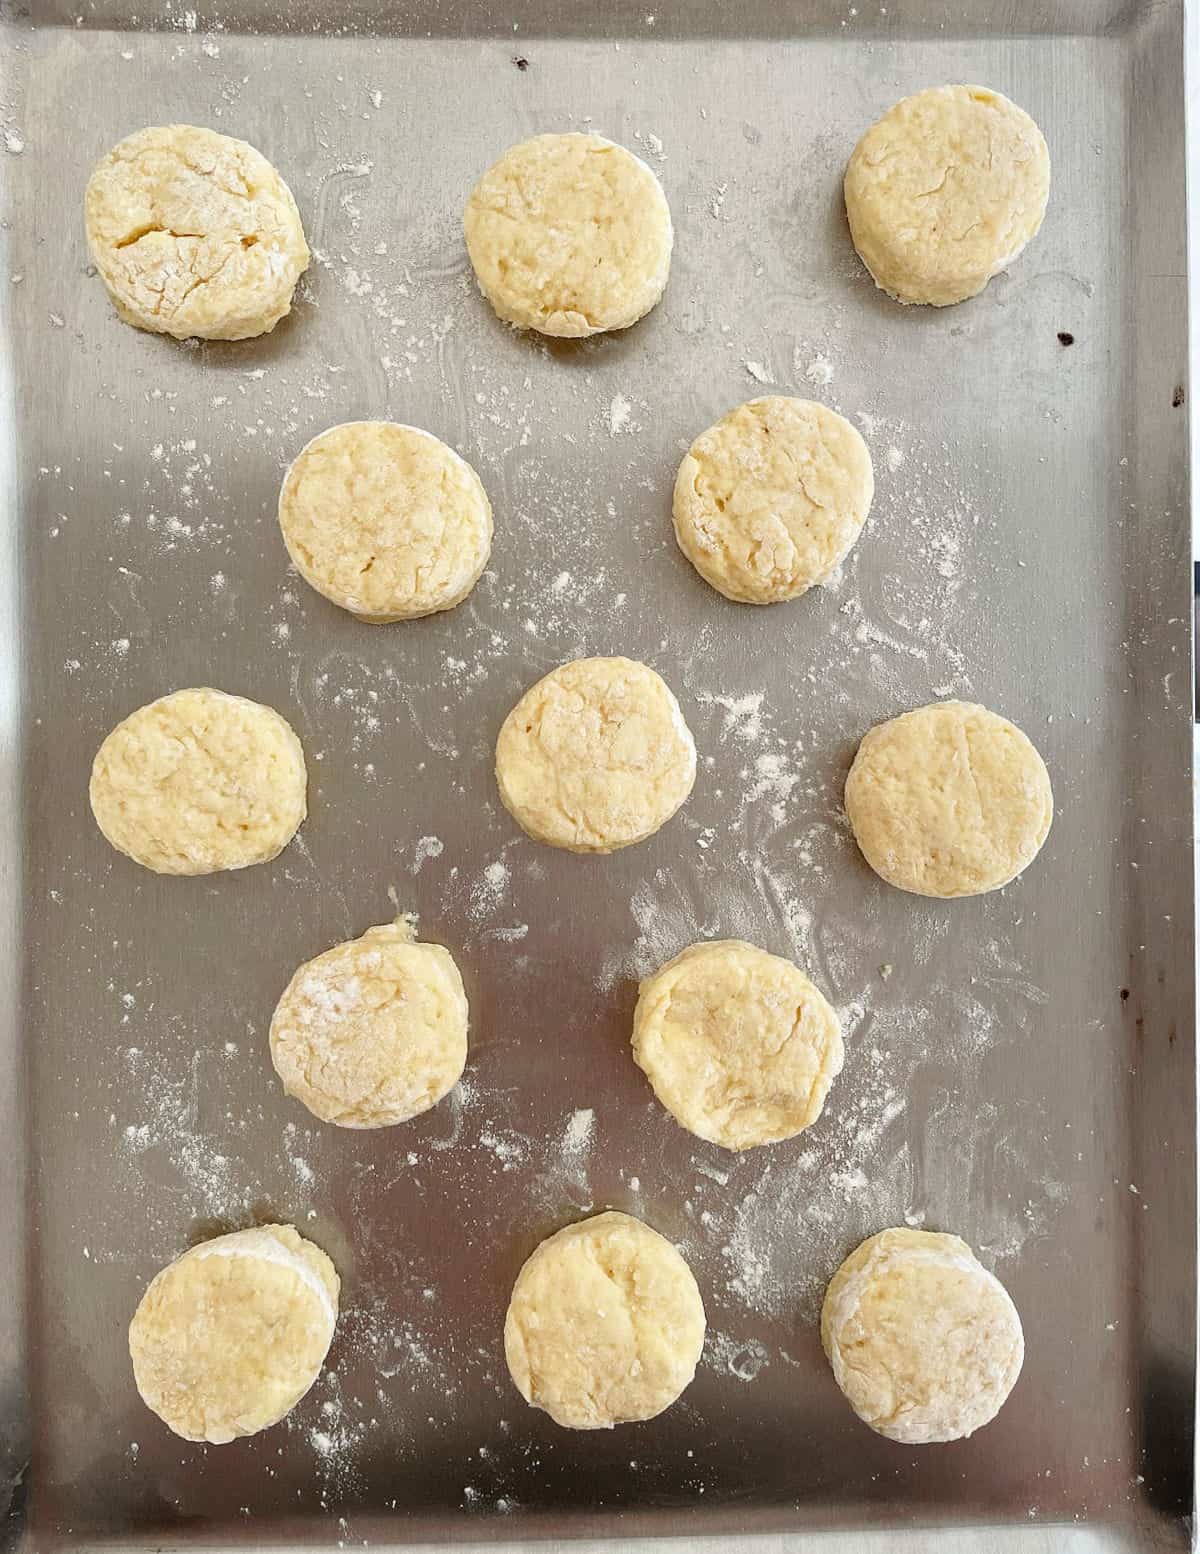
- Place them on a cookie sheet lightly dusted with flour. They should not stick after being baked, but if you're more comfortable lightly buttering the sheet or using parchment paper, go ahead.
Baking
- Preheated oven: this is non-negotiable. Scones need the first spring that the hot oven provides. If you forgot to turn it on, leave the cut scones in the fridge or freezer while the oven preheats to the correct temperature.
- When are they baked? The best way is to lift one a little with a fork and check that the inside is fully baked. It should de dry, not wet.
Freezing scones
Scones freeze like a dream. You can keep a batch frozen at all times and bake to order!
Freeze the already-cut rounds until they are rock solid, then transfer them to a freezer-safe bag. That way, they will be covered and occupy much less space in your freezer.
When you crave warm, fluffy scones, bake them directly from the freezer in a 375°F/190°C oven.
Coatings
I like them plain; they turn out with a matte floury finish that I love. But I think most people prefer a shiny coating before going into the oven, so they bake to a bright golden brown. So here are some ideas:
- Brush them with milk/egg and sprinkle them with sugar for a sweeter and crunchier version
- Brush them with water, and sprinkle with grated Parmesan or sesame seeds to make them savory. Eat them with ham and cheese.
- Brush them with egg wash (an egg, lightly beaten with a tablespoon of water) for a more golden finish.
As an Amazon Associate, I earn from qualifying purchases. Read my disclosure policy.

Fluffy Scones with Buttermilk (freezable)
Ingredients
- 2 cups all-purpose flour
- 2 ½ teaspoons baking powder
- 1 teaspoon salt
- 3 tablespoons sugar
- 4 tablespoons butter, very cold and in small pieces
- 1 egg, cold
- ½ cup buttermilk
- 2 tablespoons whipping or heavy cream, cold
Instructions
- Make sure the ingredients are cold. I put the butter pieces in the freezer for 5-10 minutes, and keep the buttermilk and cream in the fridge up to the last minute.
- Have ready a cookie sheet lined with parchment paper, greased or dusted with a little flour.
- Preheat oven to 375ºF (190ºC).
- In a large bowl, put 2 cups all-purpose flour, 2 ½ teaspoons baking powder (don't forget it or your scones won't rise!), 1 teaspoon salt and 3 tablespoons sugar. Stir to mix.
- Scatter 4 tablespoons butter, cold and in small pieces, on top and start working it into the flour mixture. You can use a dough cutter. Mix it with the dry ingredients, but be careful not to warm it too much. If you feel it starts to soften, pop the bowl in the fridge for a few minutes, or the freezer, until it firms up again. The butter should have some pieces the size of peas.
- Lightly beat 1 egg in a small bowl to mix it, so it integrates better.
- Make a well in the middle of the dry ingredients, and add the egg, half the buttermilk, and 2 tablespoons whipping or heavy cream.
- With a fork or spoon, lightly stir and begin to incorporate the flour. The flour and butter should be wet, but dry spots must be seen. Add the rest of the buttermilk a little at a time. You might end up using all of it or not.
- Transfer to a clean surface or counter that is lightly dusted with flour.
- Gather it and turn it onto itself a few times. The dough will be floury and messy, but you don't want to work it too much or make it as smooth as pie dough. After a few turns, it will come together if you take a bit and squeeze it; it should come together and not be too wet or too dry.
- Press the whole mixture about 1-inch thick. The outer parts might be dry, don't worry.
- With a round cookie cutter (I use a flower shape sometimes because I like how irregular they bake) cut the scones and put on the prepared pan, leaving 2 inches or so between them.
- Repeat with the remaining dough, bringing in the outer dry parts and incorporating them into the dough. Work it as little as possible so the butter stays cold. When all you're scones are cut, take the baking sheet to the freezer for 5 minutes or the fridge for 15 minutes.
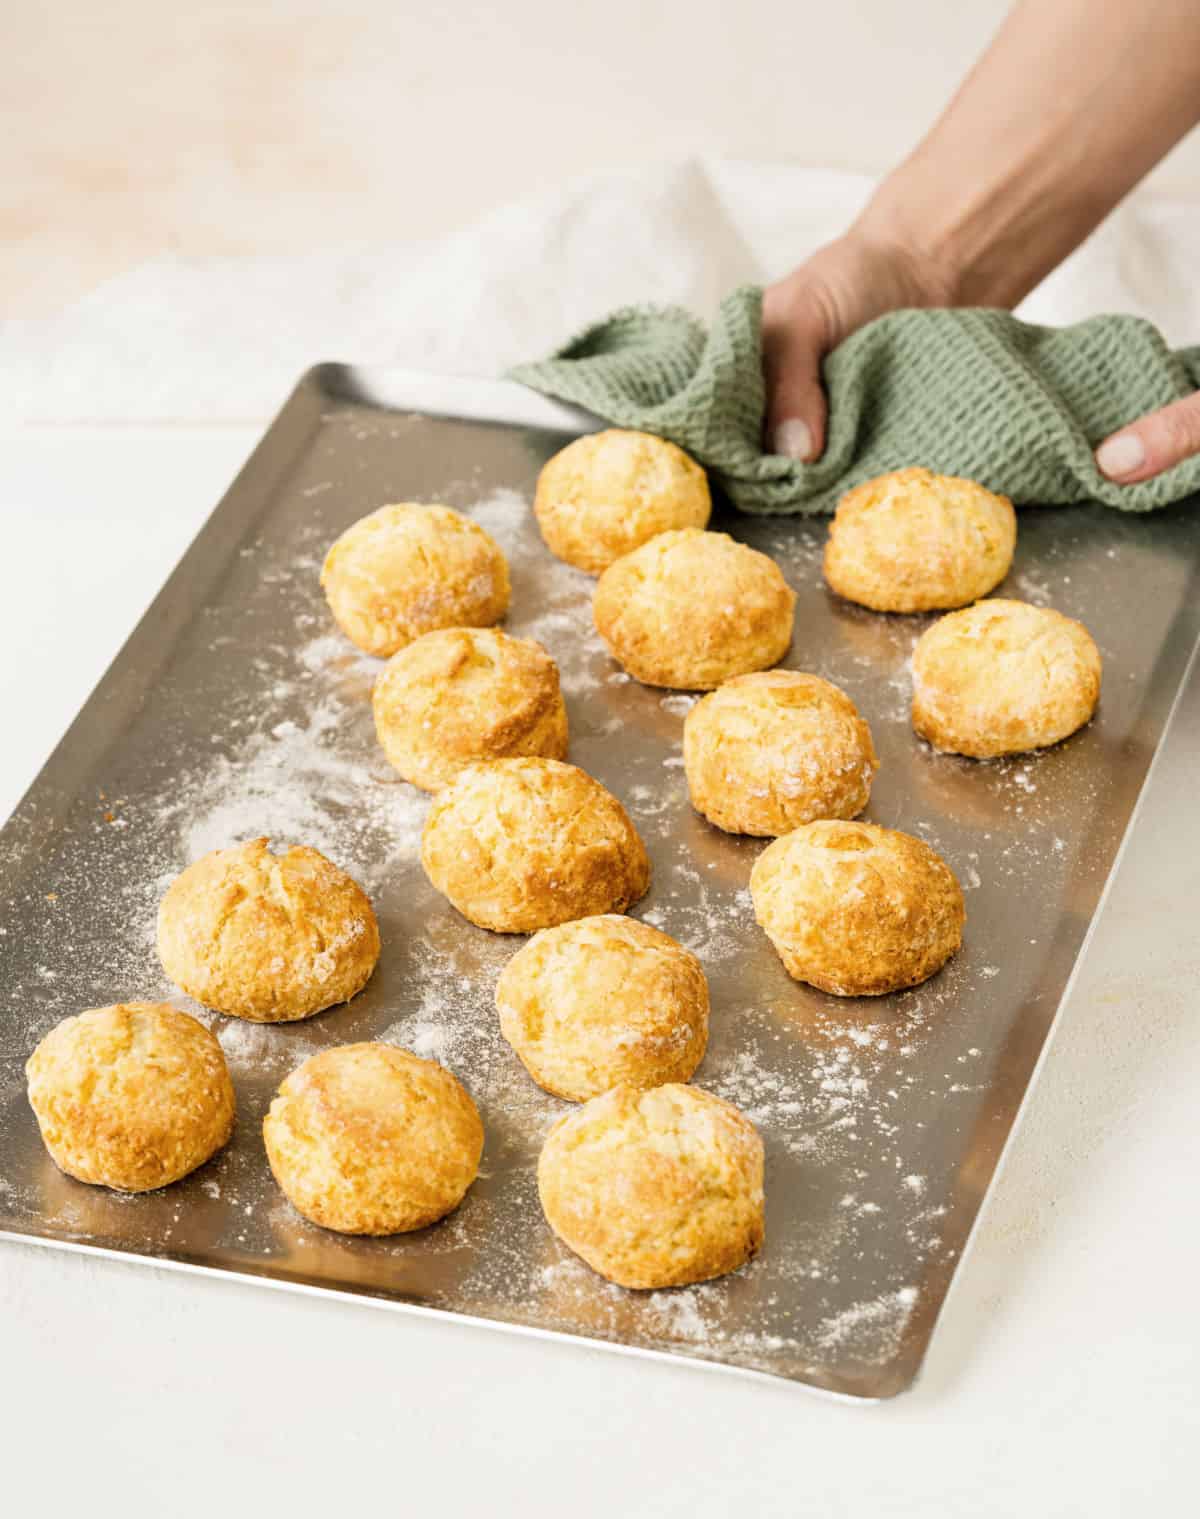
- Then bake the cold scones, directly from the refrigerator or freezer, for 20 minutes or so, until puffed, dry, and a bit golden. If you open one slightly, it should be dry inside.
- I recommend eating them freshly baked. Keep leftovers in tins and re-warm in a medium oven before eating.
Video
Notes
Very cold ingredients. I put the pieces of butter in the freezer for 5-10 minutes while preparing the rest of the ingredients. And butter, cream, and milk belong in the fridge until you need to pour them. Don't work the dough much. You don’t need to work it until it’s smooth, like a pie dough. It is an uneven, rough dough. A rather high oven. They need that extra heat (and baking powder) to rise despite all that butter and cream. Preheated oven! If you forgot to turn the oven on, put the baking sheet with the cut scones in the fridge or freezer while the oven preheats. Freezing: freeze the already cut scones (I pop them directly in the baking sheet) until they are rock solid, then transfer them to a Ziploc bag. That way, they will be covered and occupy much less space in your freezer. Bake them directly from the freezer in a 375°F/190°C oven. Serving: warm with butter and honey or jam never fails. You can eat them plain with a cup of coffee or tea or use them for sandwiches.
Ruth says
I was truthfully disappointed in these. I followed rye instructions to the letter and baked for the least amount of time, yet they were tough.
Paula Montenegro says
Hi Ruth, so sorry they didn't work for you. It's a very tested recipe I make regularly as I grew up eating scones.
If the baking powder was not expired, the main reason for tough scones is overworking the dough. If you want to troubleshoot further, send me an email, I'm happy to see what might've gone wrong. Have a great week.
Brbrendan Solomon says
Great
Swati says
Super easy and absolutely delicious scones!! Usually my scones turn out to be hard but this recipe gave the absolute perfect scones... no need to buy them anymore. To add on I tried this recipe because I had left over buttermilk from the cake:)
Must try!!
Paula Montenegro says
Thanks so much Swati for this comment! We love them here also. Have a great weekend.
Lisa says
I love this recipe but the metric measurements have gone ☹️
Paula Montenegro says
Hi Lisa! I can see them... They are uploaded by hand, they don't have an automatic converter. Let me know if you're still having issues. Thanks.
Macky Mzozoyana says
I will try this recipe my problem everytime I try baking scones they become rock hard even following recipe to the end I don't know what mistake I do in my mixing
Paula Montenegro says
Hi Macky! It's very important not to touch the dough much. That's what makes it tough. You don't have to knead it at all, it doesn't need to be completely smooth before you start cutting the scones. Just gather it until it's cohesive enough to be cut. Hope this helps!
Sue says
I don't like butter or margarine can I use olive oil and in what quantity?
Paula Montenegro says
Hi Sue, I never tried them with oil but it can be substituted. Use less amount of oil, 3 tablespoons (instead of the 4 in the recipe). They probably won't be as fluffy. Sometimes adding a tablespoon more liquid (buttermilk) can help also when using oil.
sue says
thanks will surely try it
Lisa falconer says
I’ve made these scones three times now and they’re the most delicious scones I’ve ever tasted!!! I use half a cup cream and quarter cup buttermilk and I add some vanilla extract too though- OMG they’re soo delicious!!!
Paula Montenegro says
So glad you loved them Lisa!
Bridge says
Hi, I would like to add sultanas what would be the maximum amount of sultanas I could add to the mix please, and do I gave to adjust the other ingredient quantities to allow for the sultanas?
Paula Montenegro says
Hi Bridge! You can add up to 1/2 cup of sultanas using the same recipe. No need to adjust other ingredients.
Anna says
Just curious, what would happen if I used All buttermilk instead of half cream half buttermilk? Have you tried?
Paula Montenegro says
Hi Anna, I haven't specifically for this recipe, but it should be fine. I substitute it a lot in cake recipes. Just be aware that buttermilk is more fluid so you might need less quantity.
Igor says
I have never tried making scones at home but after reading such an informative post, I do want to try. You've covered everything!
Natalie says
My family loves scones. But we always buy them in store. I think it's because I had this vision in my head that making them is super hard and complicated. But you just proved me wrong. I must give your recipe a try! Your scones look absolutely delicious.
Paula Montenegro says
Thanks Natalie!
Zainab says
Just made these. Best scones ever!!
Paula Montenegro says
I agree, lol! SO glad you liked them!
Pam Greer says
This is our favorite scone recipe!! They come out perfect every time and are so easy to make!
Bernice Hill says
There's nothing like a perfectly baked scone...unless it's a second perfectly baked scone!
GUNJAN C Dudani says
The combination of buttermilk in a scone is heavenly. Can't wait to make these. Its in my to do list and I am for sure making them over the weekend.
Ben says
Aww yeah. Those sound really good. I love how easy this recipe is. Easy is the first thing I look for when I'm trying a new recipe.
Amy Liu Dong says
I was looking for an easy afternoon snacks recipe for my kids and it is so timely to see this, I can now make a delicious snacks for them. Thank you for sharing this with us.
Chef Dennis says
I am so loving these soft and fluffy Buttermilk Scones! My sons will surely love to have a taste of this yummy treat.
Jeanne Jorgensen says
Wow, made these. Really, really good. Had them with some homemade crabapple jam.....heaven!
Paula Montenegro says
SO glad you liked them Jeanne! Stay safe!
MARY H HIRSCH says
Last week I was looking for a good scone recipe and none of them were what I wanted. This entire post is perfect. Lucky me.
Paula Montenegro says
Thanks my friend! They are sooo good! Let me know.