
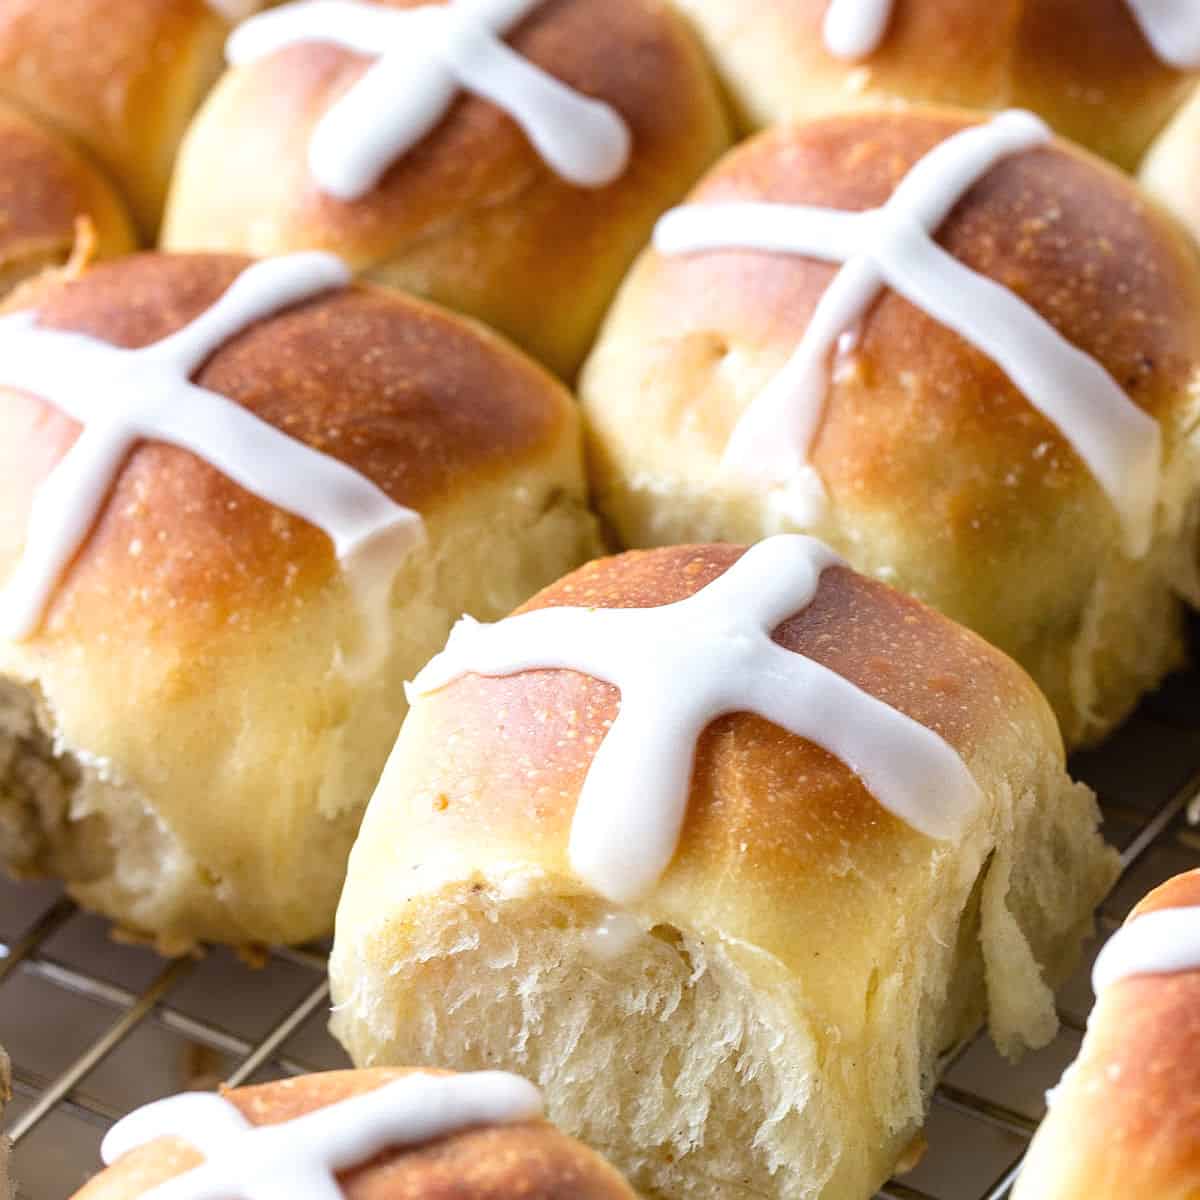
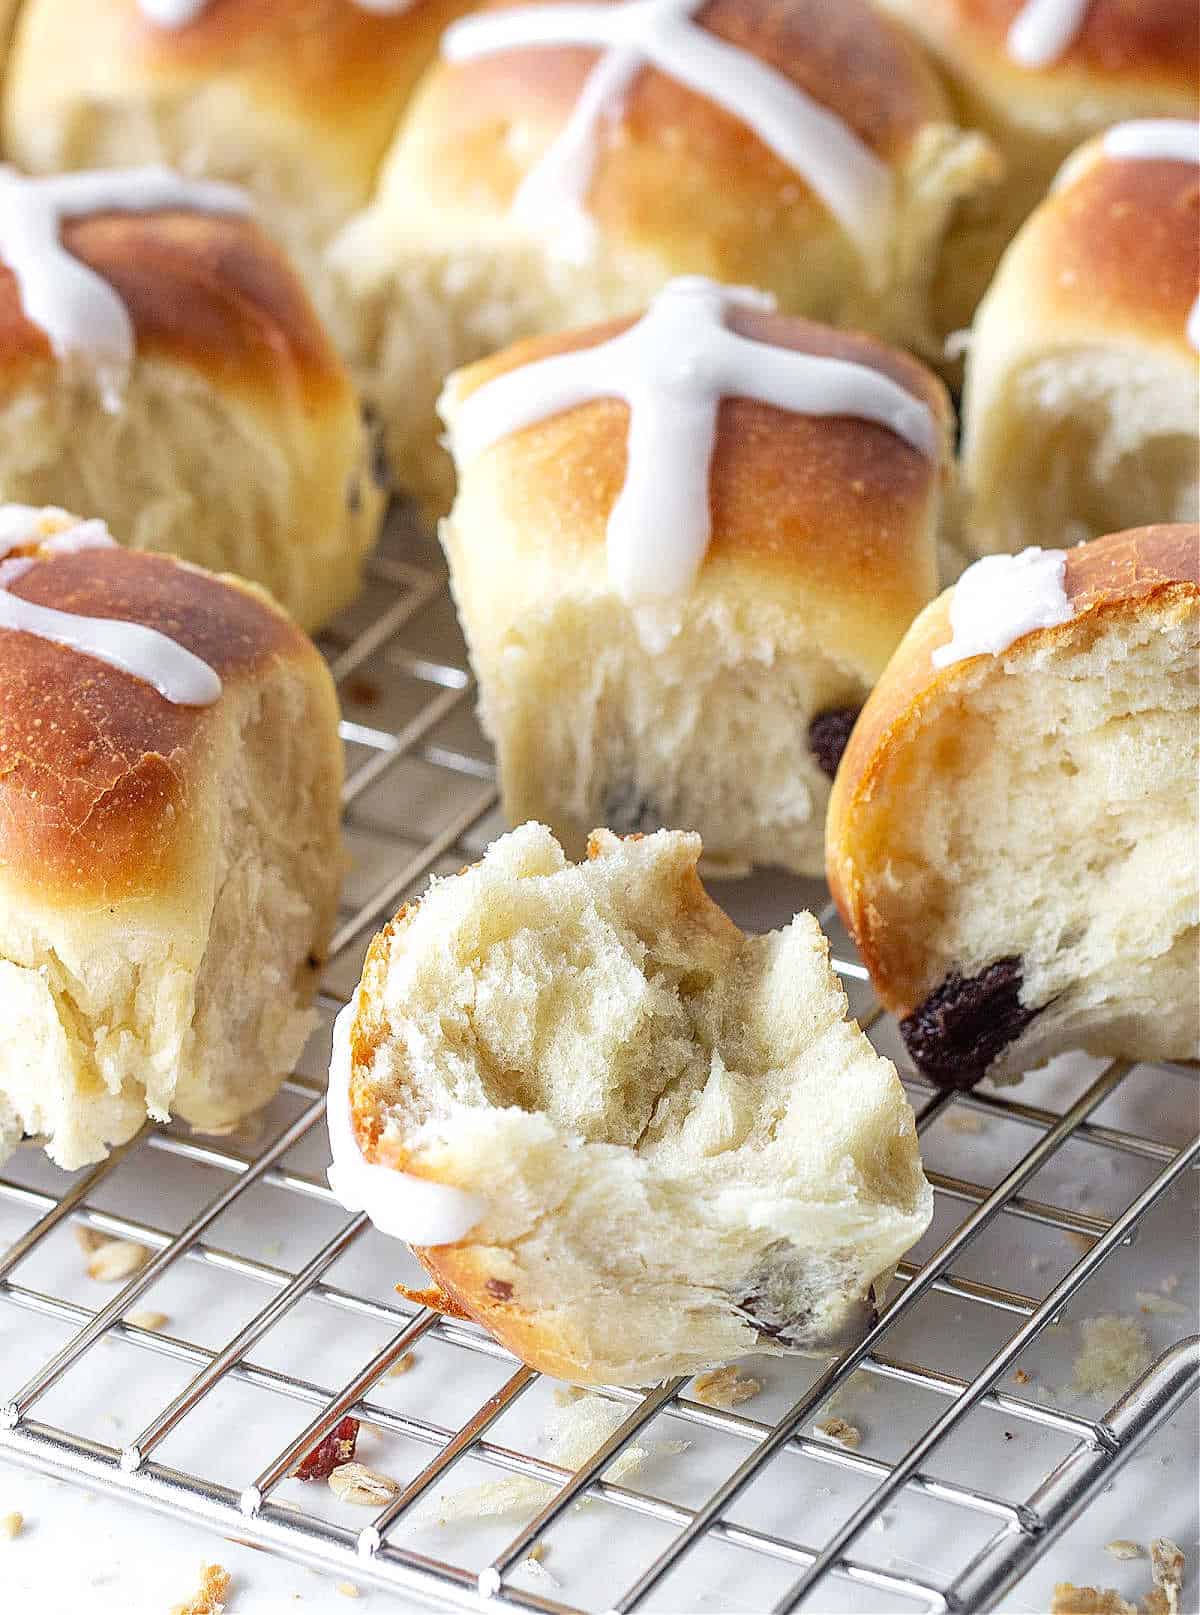
These are sweet, small buns, with a soft and pillowy texture. Tender, with a hint of cinnamon, and studded with raisins, they can be made ahead and frozen. Whether you're an experienced baker or a novice in the kitchen, hot cross buns are a delicious and festive way to celebrate Easter and the start of spring.
SAVE THIS RECIPE
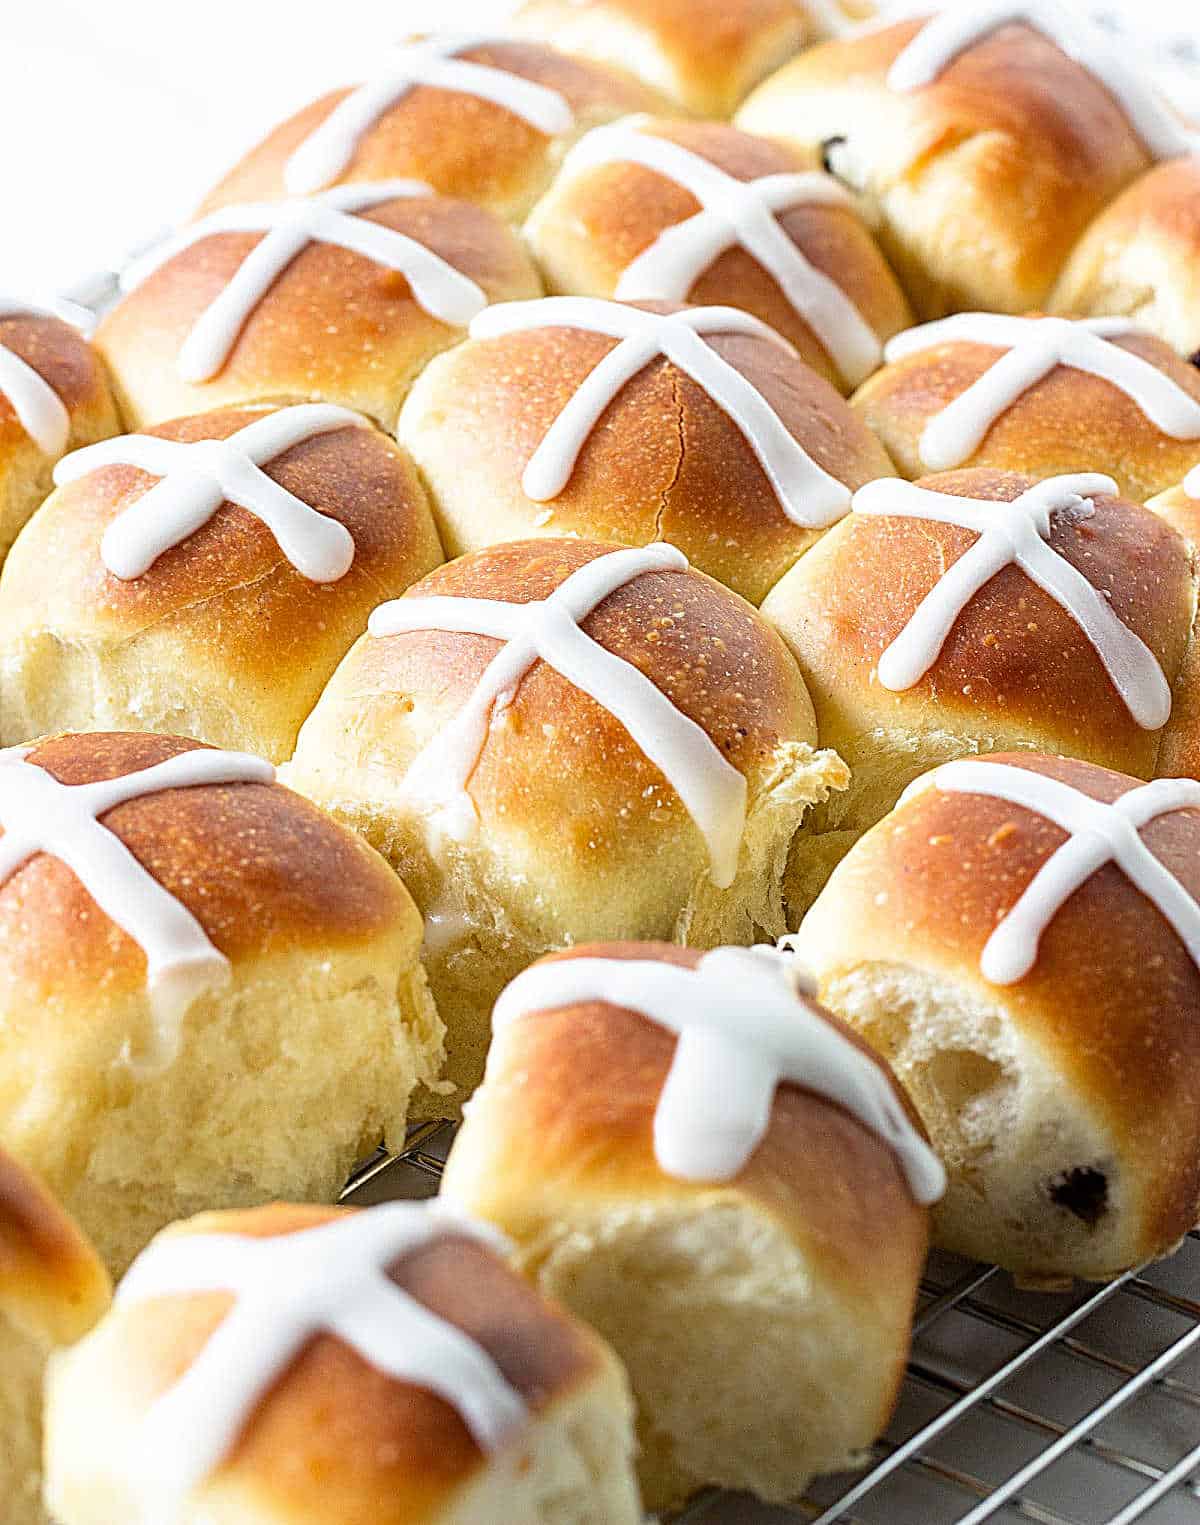
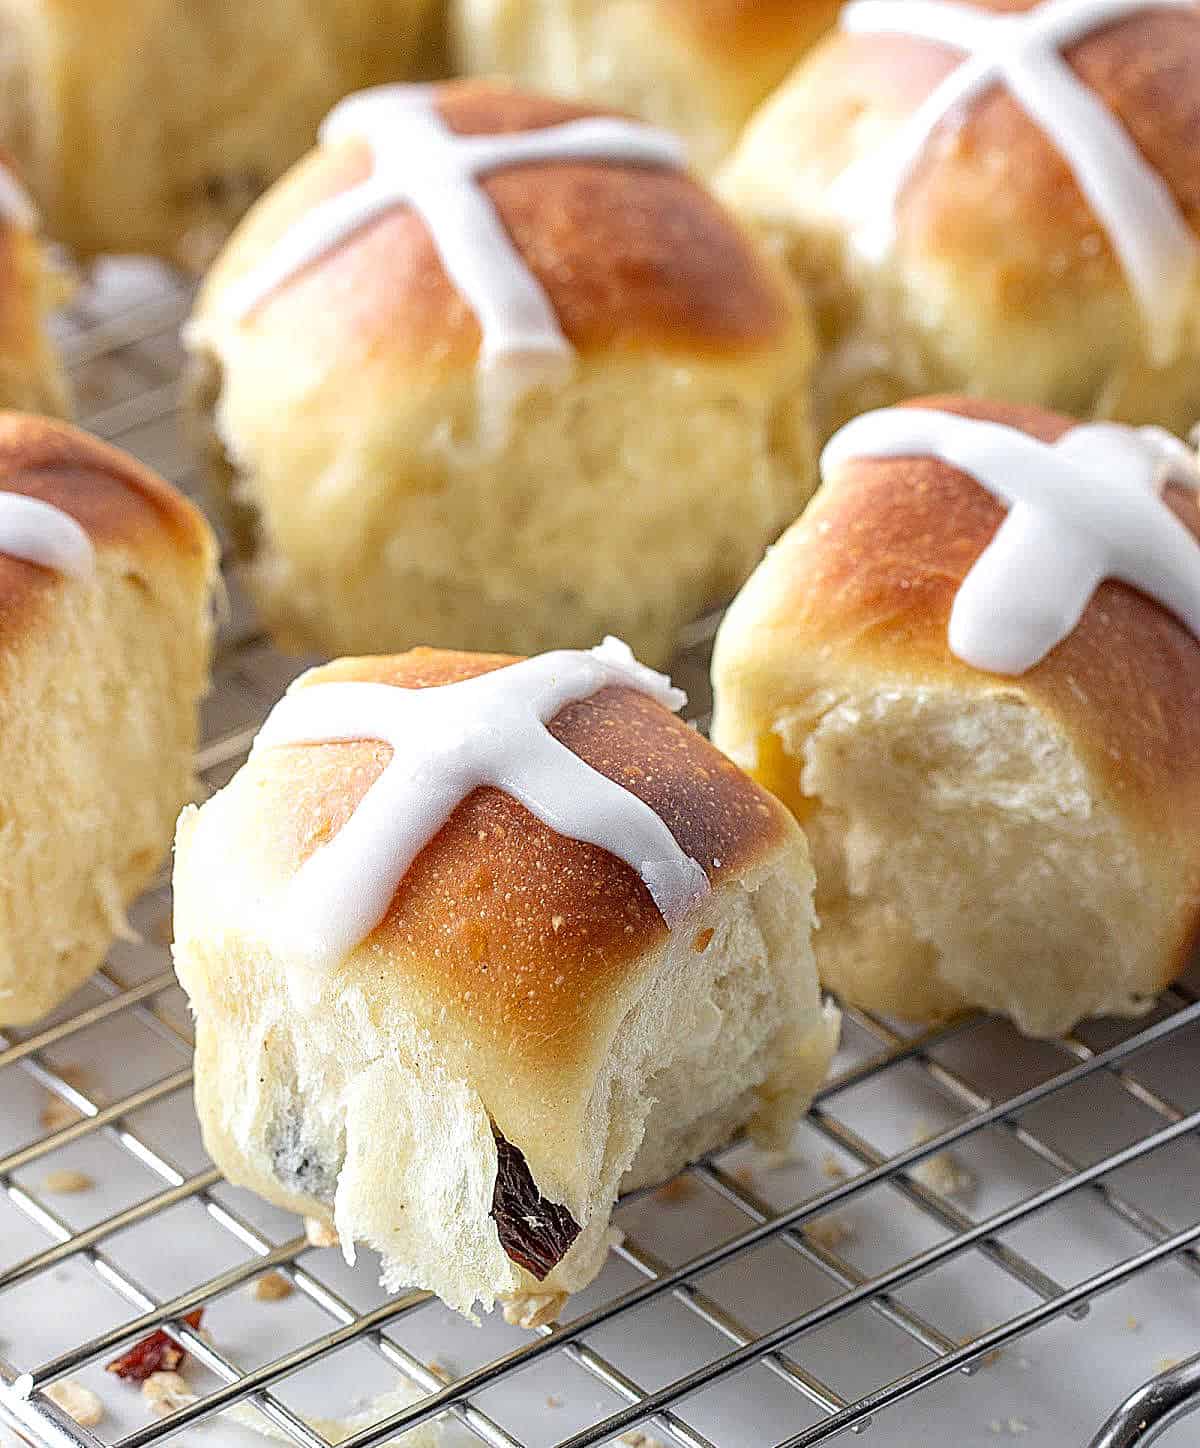
Slightly sweet buns
There's nothing quite like the aroma of freshly baked bread rolls. You can eat them warm; they will always be fresher than if you buy them at the store.
These sweet, spiced buns are the perfect indulgence for breakfast and for the Easter brunch table. I like to serve them toasted with a dollop of butter.
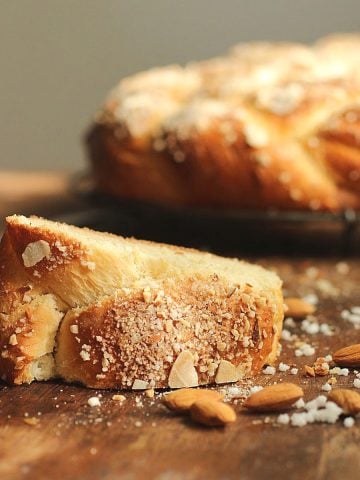
In this house, we alternate between them and our much-loved glazed braided Easter bread recipe, an old recipe we make often for holidays.
Easter project: Besides the egg hunt, baking these traditional buns is a fun activity for the family or just a way to relax if you, like me, find it therapeutic to get your hands in the dough.
They are good to make year-round. They are usually sold at Easter, but why stop there? They're a good alternative for lunch or dinner since the sugar and spices don't dominate the bun. They're also great for small sandwiches when you want a sweeter type of bread.
Watch the video tutorial 👇🏻
Ingredient Notes
Quantities are listed on the recipe card toward the end of this post. The Ingredients page has more details and lists the brands we use.
- Yeast: I use active dry yeast, which needs to be hydrated before (foamed). You can use instant yeast (¾ of the amount given for active-dry yeast) and add it directly to the flour, then add the water; no need to foam it first. If using fresh yeast (the ratio is 3:1 to dry), treat it like the active-dry; you need to hydrate it first and let it foam.
- Flour: Use all-purpose flour or half the amount of bread flour for a tad more rustic bread.
- Oil: Sunflower oil is my first choice, but other vegetable oils work. Melted butter can be substituted.
- Raisins: The buns are small so I like to use currants or small raisins as they distribute better. Golden raisins work well too. Make sure they're seedless.
- Milk: It's a small amount, and whole milk makes the dough richer. But reduced fat also works if that's all you have.
- Ground nutmeg: It's in my original recipe, and I add it, but these buns work well with just cinnamon. Don't stop making them just because you don't have nutmeg.

Variations & substitutions
- Vanilla extract: Use about ¼ teaspoon in addition to the spices.
- Other spices: Instead of or in addition to cinnamon, add ground allspice or cardamom.
- Citrus: It goes very well with cinnamon and raisins and adds a different flavor. I like orange zest as it's a warmer flavor than lemon zest. But both work well. You can also use a little of both.
- Brown sugar: Use it instead of white sugar for a more caramel tone. It also adds moisture and color to the dough.
- Add-ins: Throw some mini chocolate chips or dried cranberries into the dough instead of the raisins.
Steps to make hot cross buns
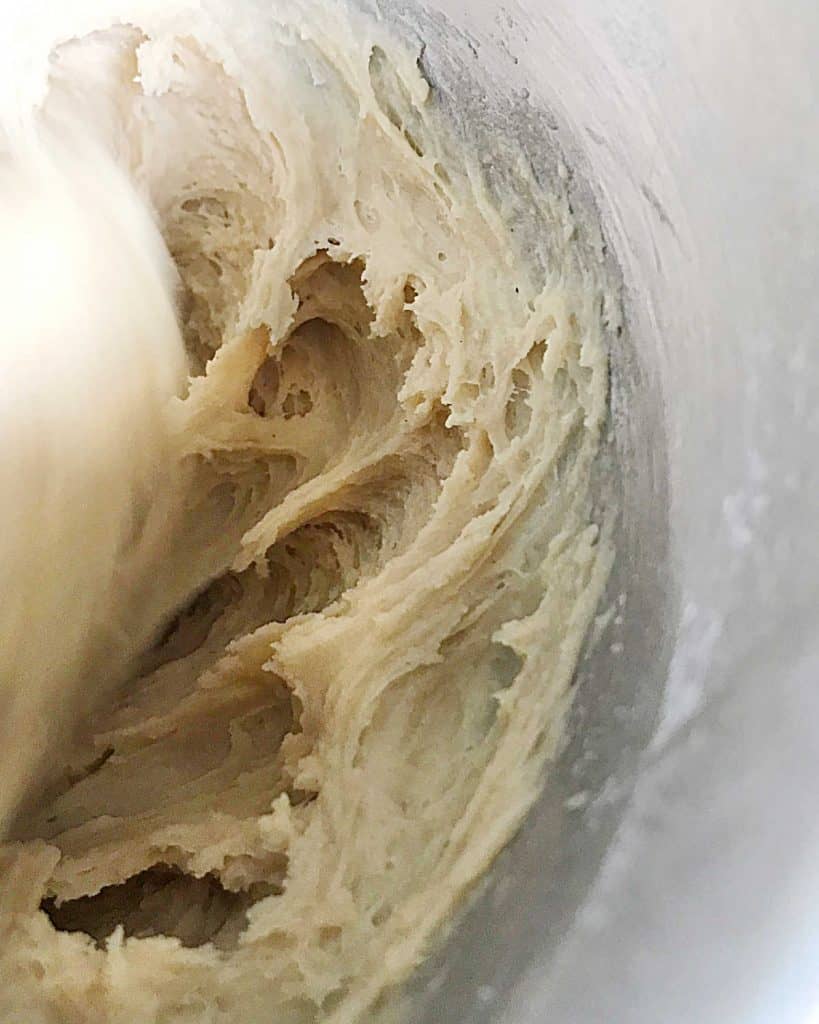
They have eggs, and the dough is very much brioche-like: sticky, slapping around the mixer, and looking like it needs a lot more flour than the recipe calls for. But no. Everything comes together wonderfully.
- Stand mixer: This recipe is easiest to make using a stand mixer. However, it can also be kneaded by hand if there's no other alternative. It will take some time and patience.
- Surface for kneading: I recommend a marble surface or smooth countertop (as opposed to, for example, a wooden surface). It will make your life easier.
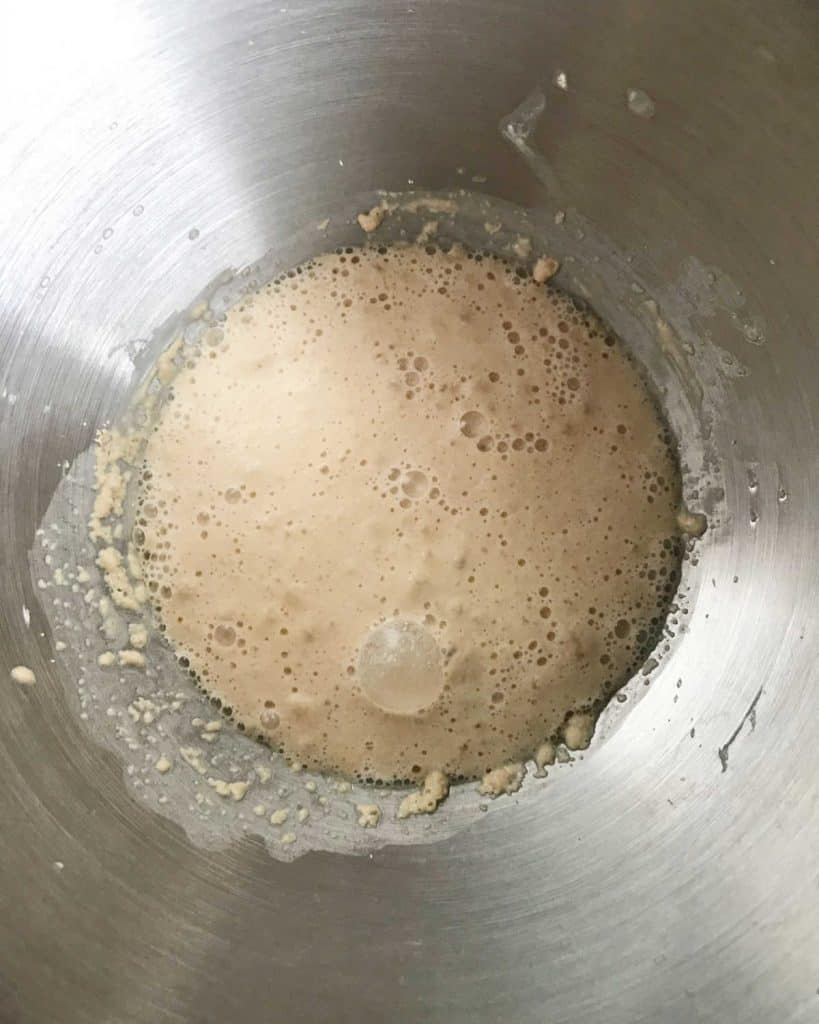
Yeast
Stir the yeast mixture directly in the bowl of the stand mixer only if using active-dry or fresh yeast. If using instant yeast, you don't need this step, as it's added directly to the flour. Make sure it's not touching the salt at the start.
Knead
The dough is super sticky during the first minutes due to the eggs and oil. They take time to integrate. When the dough clings just slightly to the sides of the bowl, that's your cue to stop.
Vintage Kitchen Tip
There's a short resting period in between kneading which helps the dough lose some of its stickiness and gives it an extra boost to grow. Keep in mind that this dough is dense, so it needs time to rest to get the best results. Don't skip the steps!

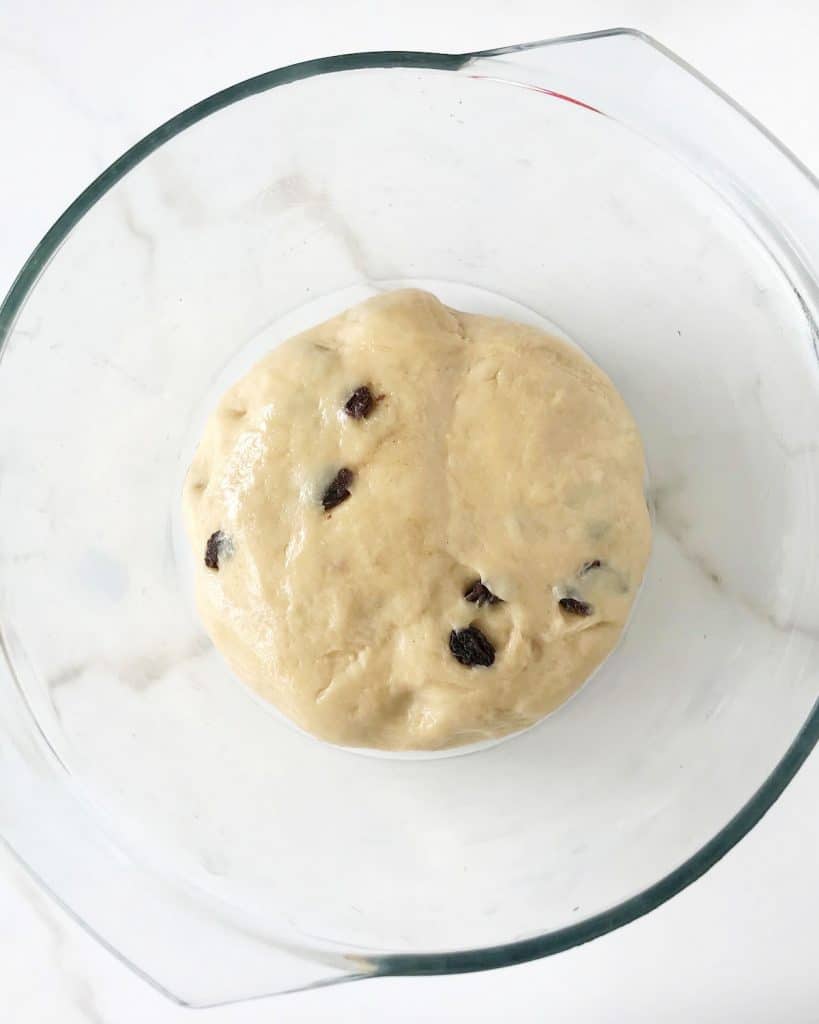
Add the raisins
The easiest way is to do this by hand. It takes a minute. They might pop out of the dough while incorporating; add them back in.
Risings
As I mentioned before, these hot cross buns have several risings. If that sounds like too many, take into account that the result is worth it. And it's resting time, completely hands-off so you don't have to do anything!
In between the kneading, this resting time helps the dough lose some of the stickiness.
Then comes the 'double the volume' rise. This is an essential step that gives the dough a boost. It might take more than the specified time in the recipe, depending on the room's temperature. Cover with a blanket or sweater (not kidding!) if it's not rising much after 30 minutes.
Frist rise
Let it double in a greased, clean bowl in a warm place. I use a large glass bowl covered with a glass lid or plastic wrap.
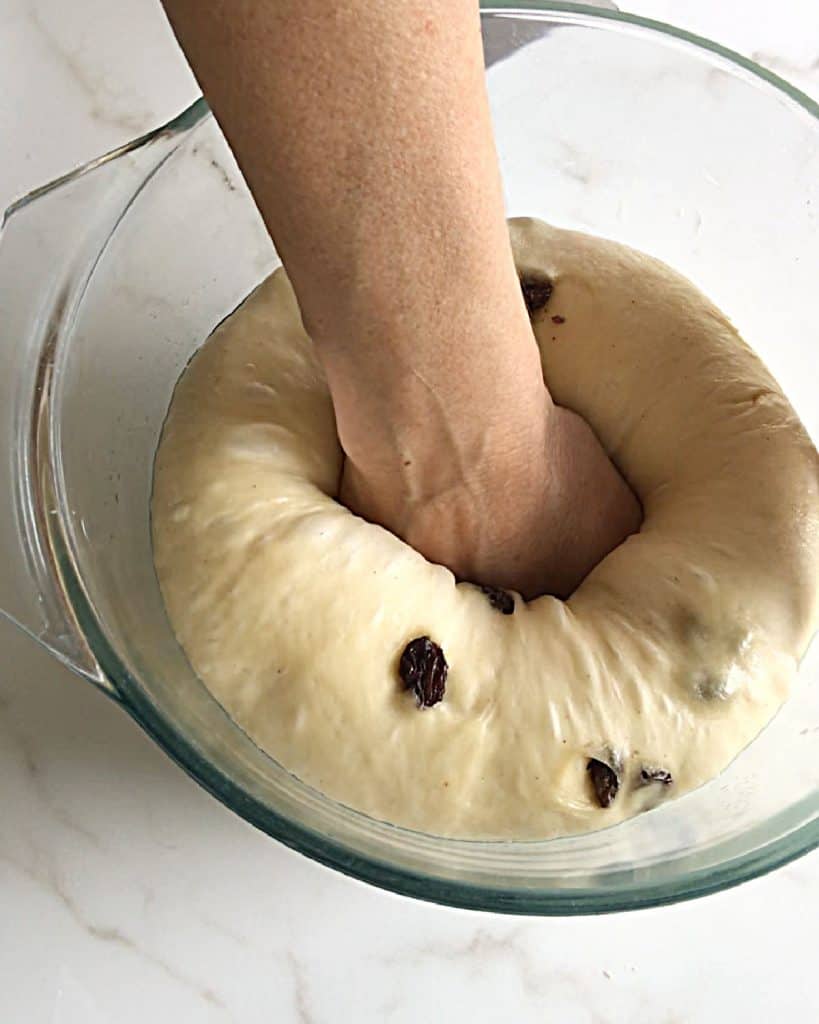
Punch down
After the dough has doubled, deflate it by gently punching it down to release the air (this is called degassing).
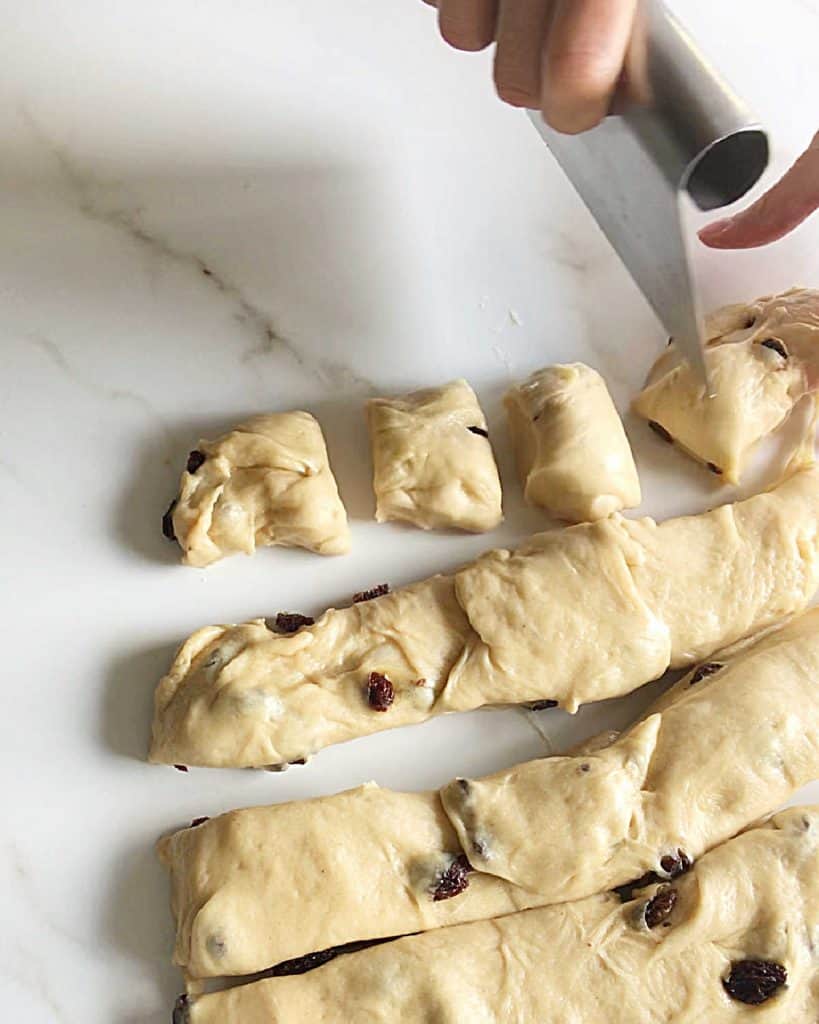
Cut the buns
Transfer the dough to a very lightly floured work surface, knead it slightly a few times, flatten it into a rough rectangle, and cut strips. Then, cut the strips into small pieces.
The easiest way is with a dough scraper. You can also use a smooth-bladed knife for this.
Vintage Kitchen Tip
Regarding the size of the buns, you can eyeball their weight, which will probably result in some buns being slightly larger than others, or you can use a kitchen scale and have equal pieces that all weigh the same.
Forming the buns
These cute little sweet buns are round and smooth.
Take a piece, flatten it slightly, and press the edges to the center so that there are no air bubbles (or as few as possible), creating tension on the surface of the dough.
Turn it over, seam side down, cover the small piece of dough with your hand, and roll in a circular motion until it forms a smooth ball. Be careful not to squash it. You will feel the bun taking shape below your palm. It's easier than it looks!
Repeat this process with each portion of dough.
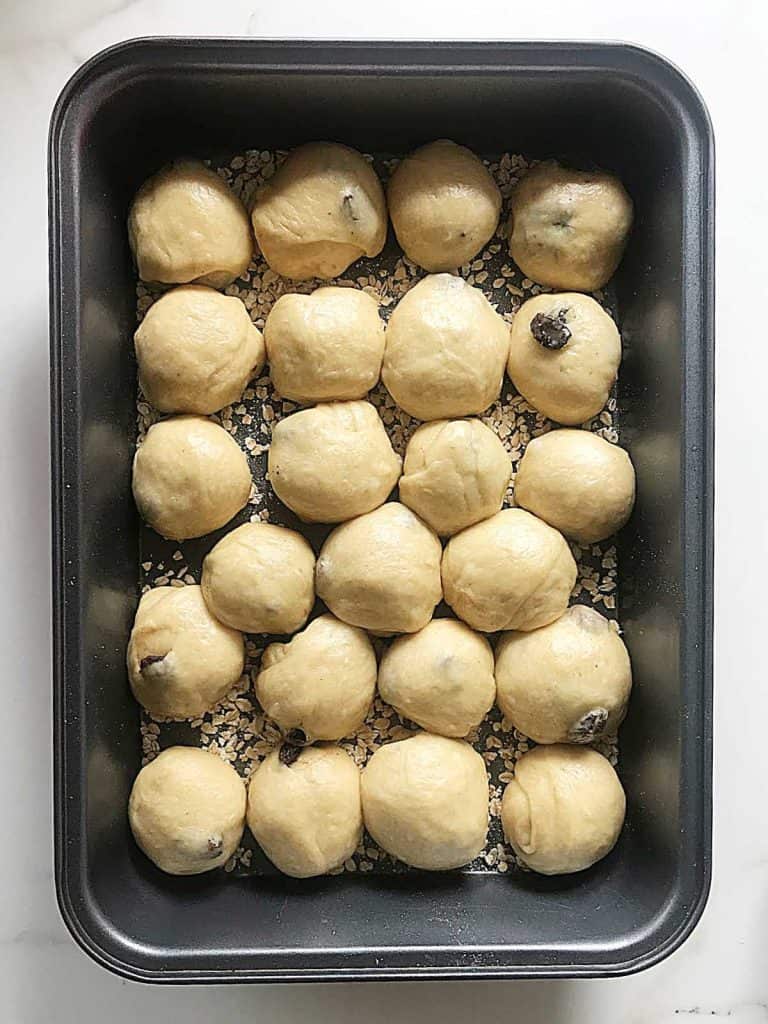
Second rise
This happens in the pan. After forming the buns, we need to let them rise again. They will not double but will be significantly plumped up.
Place the buns in a pan dusted with oats or flour. They should fit snuggly and barely touch.
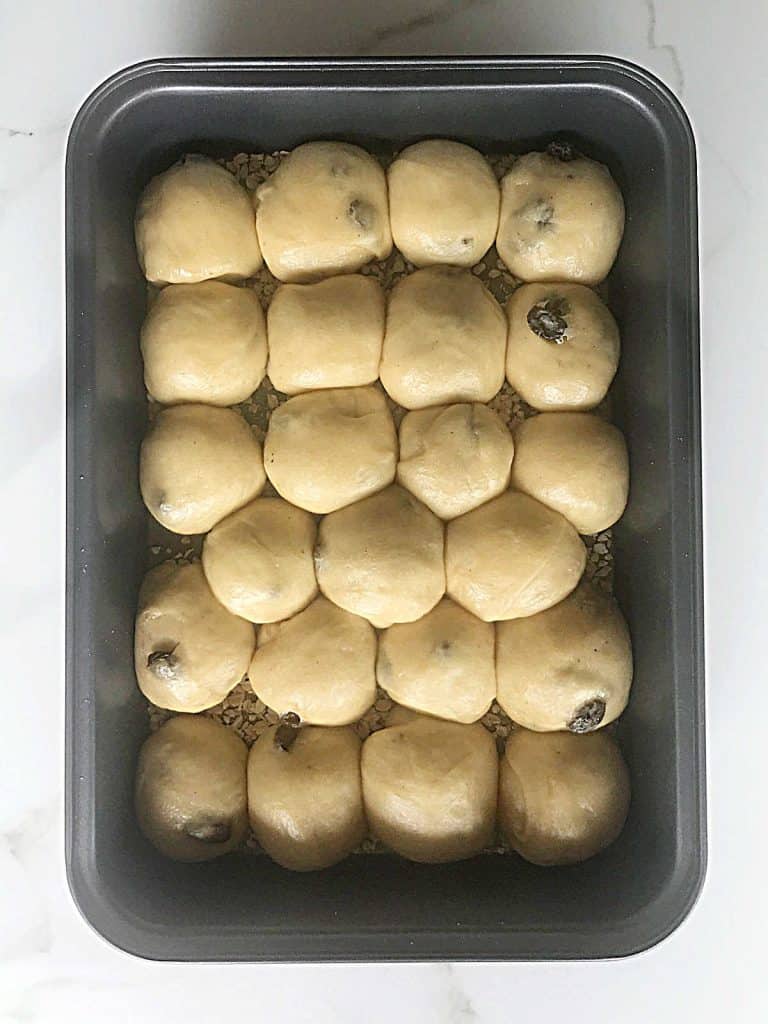
Ready to bake
They don't take much time to be done, so be careful as the tops can brown very quickly. If that happens, you can tent with foil until they're fully baked.
It can also be baked in a loaf pan, like a sandwich bread loaf. It's definitely easier than making small buns. But is it cuter? I don't think so.
Overnight rising
These sweet buns can be left to rise overnight in the refrigerator. How's that for convenience?
- Dough: after you add the raisins and the dough is placed in the oiled bowl and covered, place it in the fridge and let rise slowly until the next day. How much it rises will depend on how cold your fridge is.
- Buns: you can form the buns, cover the pan with plastic wrap (be careful to leave space for the buns to rise if the pan doesn't have high sides), and pop it in the refrigerator. In this case, make sure your fridge is very cold (sometimes, when it's packed, it loses temperature) because this is a shorter rise, and you don't want your buns to rise too much.
Take them out the next day and let them come to room temperature before continuing with the recipe. It might take several hours.
Bonus: slow risings help yeasted doughs develop a better and deeper flavor.
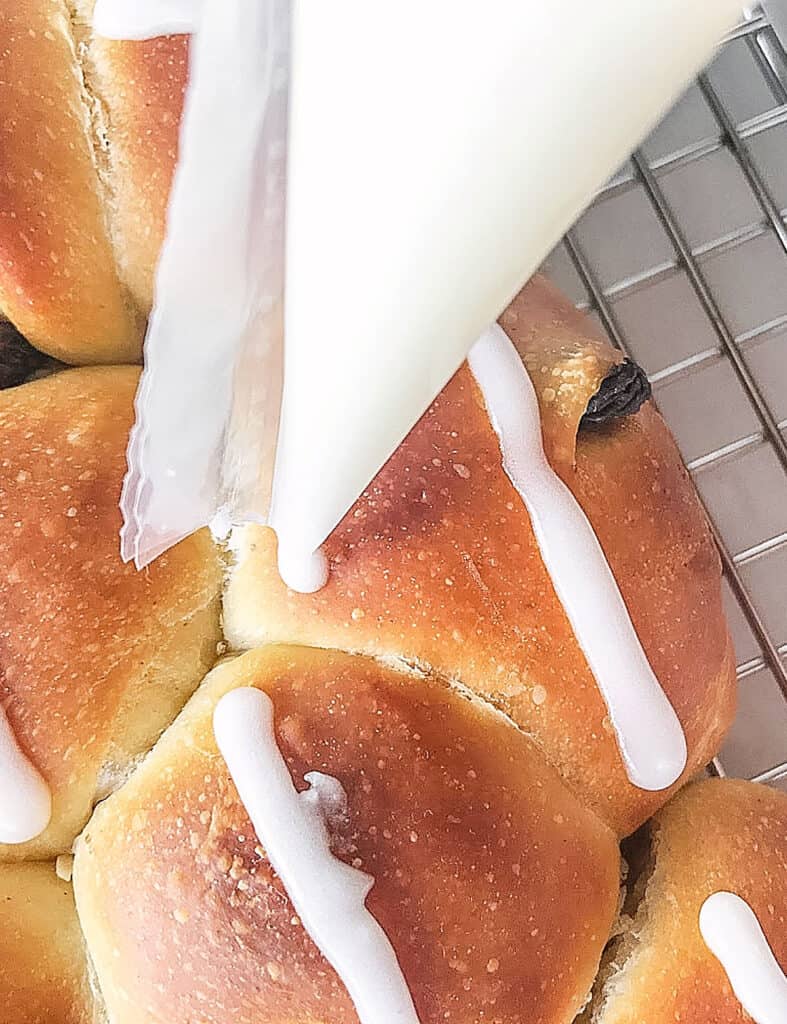
White crosses
Since this glaze is added after the buns are baked, it must be very thick. I use a classic powdered sugar glaze with milk.
I used to make a royal icing and not the traditional flour-based mixture. But raw eggs and all of that made me change. If you're familiar with it, you can use powdered egg whites to make icing.
Piping bag: it's the easiest way to pipe crosses on top of each bun, and you need a very thin tip. No need for a piping tip especially if you use a thick plastic bag, though you can totally use one. Simply cut the tip and pipe those lines!
When cutting the tip of a piping bag always start smaller than what you think you need. It's easier to widen the tip but you can't reverse it.
Spoon: you can use a small spoon and add the glaze slowly. It will probably be less straight or even than with a piping bag, but that's not an issue for most of us if eating these little buns with family.
Kitchen Notes
- Organization: Read the recipe first and ensure you have ingredients at the correct temperature, the utensils and equipment needed, and enough workspace. This will make the process so much easier.
- Baking time: Consider that all ovens and pans are different, even if they look similar. The baking time in my recipes is as accurate as possible, but it might take you more or less time. You can use a thermometer (like the OXO oven thermometer) to check that your oven is at the right temperature. I recommend tracking how your oven works and what tiny details you might need to adjust.
- Milk and water: Make sure they're warm, but just barely. Hot liquids will kill the yeast, and it will not rise as it should.
- Yeast: I use active-dry yeast, which needs to be hydrated before using. You can use instant yeast (¾ of the amount given for active dry) and add it directly to the flour, then add the water; no need to foam it first. If using fresh yeast (the ratio is 3:1 to dry), do so in the same way as the active-dry; you need to hydrate it first and let it foam.
- Glazed crosses: You can use a piping bag with a very thin tip or simply cut the tip of the bag and use it directly. If you don't use a metal or plastic tip, you must use thick, sturdy plastic bags so the cut-out tip holds well. Alternatively, use a small spoon and trace the lines.
- Egg wash: I don't use it, but you can if you want the surface to be shiny. In a small bowl mix an egg yolk with a teaspoon of water. Brush the top of the buns right before they go into the oven being careful not to deflate them, and try not to let it drip to the sides.
Related recipes you might like:
As an Amazon Associate, I earn from qualifying purchases. Read my disclosure policy.

Easy Hot Cross Buns
Ingredients
- 4 teaspoons active dry yeast, see Notes, below, for other types
- ¼ cup warm water
- ½ cup warm milk
- ½ cup sunflower oil
- ⅓ cup granulated sugar
- 4 cups unbleached all-purpose or bread flour, estimated amount
- ½ teaspoon ground cinnamon
- ¼ teaspoon grated nutmeg
- 1 teaspoon salt
- 3 large eggs, at room temperature
- ⅔ cup dried currants or raisins, light, dark, or a mix
For the glaze:
- ¾ cup powdered sugar
- 2 teaspoons milk
Instructions
- Line 9x13-inch baking pan with high sides, spray with oil, and dust lightly with oats or flour. Do not use a baking sheet for these buns as they need sides to contain them and rise upwards and not to the sides.
- Place 4 teaspoons active dry yeast and ¼ cup warm water in the bowl of a stand mixer and stir to dissolve with a fork or spoon. Allow to stand for about 3 minutes until it foams and maybe large bubbles form. If this doesn't happen your yeast is not active as it should be. You need to buy fresh and start again.
- Add ½ cup warm milk, ½ cup sunflower oil, ⅓ cup granulated sugar and 1 cup of flour to the yeast mixture and stir with a fork or spoon to combine.
- Add ½ teaspoon ground cinnamon and ¼ teaspoon grated nutmeg, stirring with a wire whisk until the ingredients are well combined.
- Add 1 teaspoon salt and 3 large eggs and mix well.
- Attach bowl to the mixer fitted with the dough hook and gradually add 2 ½ to 3 cups flour, ½ cup at a time, while kneading on medium-low speed until it all mixed well.
- On medium speed, knead for 5 to 7 minutes. The dough will be wet and sticky but will start to come together. I added about ¼ cup more flour. Cover the bowl with plastic wrap and let rest for 20 minutes.
- Knead the dough for 1 or 2 more minutes, or until it becomes smooth, supple, and elastic but not too firm. Transfer to a lightly floured surface and, with your hands lightly floured also, stretch into a rectangle. It will be sticky but workable.
- Spread ⅔ cup dried currants or raisins evenly over the rectangle. Fold the whole mass like an envelope and knead it gently until the currants are well distributed, about 2 to 3 minutes. Some of the currants may pop out of the dough; incorporate them again.
- Shape the dough into a loose ball and place it in a lightly oiled or greased bowl. Turn to coat the top of the dough with oil and cover the bowl with plastic wrap, a lid or a dry kitchen towel.
- Let the dough rise at warm room temperature until doubled in volume, about 1 ½ to 2 hours. If, after a half hour the dough is barely moving, cover it with a blanket or even a sweater so that it has enough temperature to rise. See Notes, below, for overnight rising.
- When the dough has doubled, gently deflate it with your closed fist and turn it onto a clean work surface, pressing in any loose currants. You probably won't need to lightly flour the counter, but you can it if it's sticking too much that that makes it hard to work with.
- Flour your hands lightly and divide the dough into 15 pieces or so (each weighing about 2 ounces or 50g).
- Shape the rolls, cupping the pieces with your rounded palm and making circular movements until you have a rounded bun. There's a video clip in the post above showing how this is done.
- Place them on the prepared pan, leaving about a half-inch space between them. Cover them loosely with oiled plastic wrap or a dry kitchen towel and let them rise at room temperature until almost doubled in volume, about 45 minutes to 1 hour.
- About 15 minutes before you're ready to bake, preheat the oven to 350ºF / 180ºC.
- If you like to brush with egg wash (for a shinier surface), see Notes below.
- When the buns have doubled, bake them for 15-20 minutes or until the buns have turned a nice golden brown and the surface feels slightly firm but not hard when you press it lightly. These rolls should have a thin soft covering, not a hard crunchy crust.
- Transfer the rolls to a rack and let them cool for 5 minutes.
- Carefully slide a smooth-bladed knife along the sides to make sure they're not stuck, and carefully remove them onto a wire rack. Let cool for 10 more minutes before making the crosses on top.
- While the buns are cooling, make the frosting by mixing ¾ cup powdered sugar with 2 teaspoons milk in a small bowl. It should be very thick. If you feel you need more liquid, add it in drops (literally).
- Put on a pastry bag, fitted with a small plain tip, or don't use a tip and simply cut the plastic bag, or a teaspoon, to make an X of frosting over the cross of each bun. The frosting will harden somewhat as the buns cool.
- They are best eaten the same day they are baked.
- Store leftovers at room temperature in a plastic bag or airtight container, and warm slightly before eating. Or freeze them, wrapped in plastic first and then in foil. Thaw at room temperature before serving. And warm in a medium oven before eating.
Notes
Dough: After you add the raisins and the dough is placed in the oiled bowl and covered, place it in the fridge and let it rise slowly until the next day. How much it rises will depend on how cold your fridge is.
Buns: You can form the buns, cover the pan with plastic wrap (be careful to leave space for the buns to rise if the pan doesn't have high sides), and pop it in the refrigerator. In this case, make sure your fridge is very cold (sometimes, when it's packed, it loses temperature) because this is a shorter rise, and you don't want your buns to rise too much. In both cases, take it out the next day and let it come to room temperature before continuing with the recipe. It might take several hours, especially for the dough. Glazed crosses: you can use a piping bag with a very thin tip or simply cut the tip of the bag and use it directly. You need to use the thick, sturdy plastic ones if not using a metal or plastic tip. Alternatively, use a small spoon and trace the lines. Egg wash: Use it if you want the surface to be shiny. Mix an egg yolk with a teaspoon of water in a small bowl. Brush the top of the buns right before they go into the oven, being careful not to deflate them, and try not to let it drip much to the sides. Variation: You can use brown sugar (instead of white), some other type of dried fruit, or chopped candied lemon or orange zest with the raisins for a spicier variation. Or some citrus zest.
Adapted from Amy's Bread, by Amy Scherber and Toy Kim Dupree
Elaine says
The proportions are completely wrong there is no way you can knead that sticky dough to incorporate the raisins. I used about six cups of flour overall so that I had a workable dough.
Margaret says
Can I make these without any dried fruit or currants?
Paula Montenegro says
Yes Margaret, simply omit them. Happy baking!
Anna M Petryniec says
Hello, I made another Hot Cross recipe from another baker, it was too complicated! They were good, the cross was made with flour & water, in baking disappeared. I love your recipe, so much simpler, directions are easy to understand as written! Thank you for being precise, I'm baking these before Easter.
Paula Montenegro says
Anna, thanks for letting me know! It's what I aim for. Have a great week.
Janie says
What can you substitute for the sunflower oil
Paula Montenegro says
Hi Janie, you can use melted butter, same volume (1/2 cup). Happy baking!
JO says
Love hot cross buns and these are perfect! Absolutely cute and delicious!
Veronika says
I love hot cross buns! but never actually made them myself.... This is a great recipe and I want to try it!
Ben Myhre says
Delicious buns. This is such a great recipe and I am going to be making these for our scaled down Easter celebrations this year. Thanks so much for sharing.
Lori | The Kitchen Whisperer says
Oh man they look so soft and billowy! And the hint of cinnamon with raisins... PERFECT! I'm seriously craving these in a big way right now! Thank you so much for sharing!
Tammy says
Oh these look absolutely perfect!! I love homemade hot cross buns! Happy Easter 🙂
Denise says
Love hot cross buns! It does look easy to make, maybe I will give it a try.
Loreto and Nicoletta Nardelli says
I love yeasted dough! It's thanks to the several rises that those hot cross buns have an amazing texture! They look fantastic, great job!
Anna says
Oh these are exactly what I've been looking for! They look so lovely, airy and fluffy, and your recipe is much easier to make and follow than many others I've come by! Thanks so much for putting this together, I will be making them tonight!
Amy says
These are too cute! I've always loved hot cross buns, but never actually made them. 🙂 This recipe looks too easy and delicious to not give it a shot!
Chef Dennis says
These Hot Cross Buns looks really deliciously baked. I love that these are soft, tender, with cinnamon and raisins. This is perfect!
Gloria says
This is a sure sign of Easter. I made some last year. With all the craziness happening, I need to make my own if I want some.
Toni says
This was so good! Thank you so much for sharing the recipe!
Priya Lakshminarayan says
oh wow..I would love to bake these! They look so good
Carrie Robinson says
This is such a classic sweet treat for Easter! They look perfect. 🙂
Danielle says
Two things I am completely sure about. First, I am going to make a big batch of these because they won't last long. Second, I will definitely make these soon. These buns are too good! 🙂
Soniya says
I always wanted to make hit cross buns and thought they were very complicated... But you have explained it so well .. can't wait to make them!