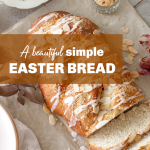
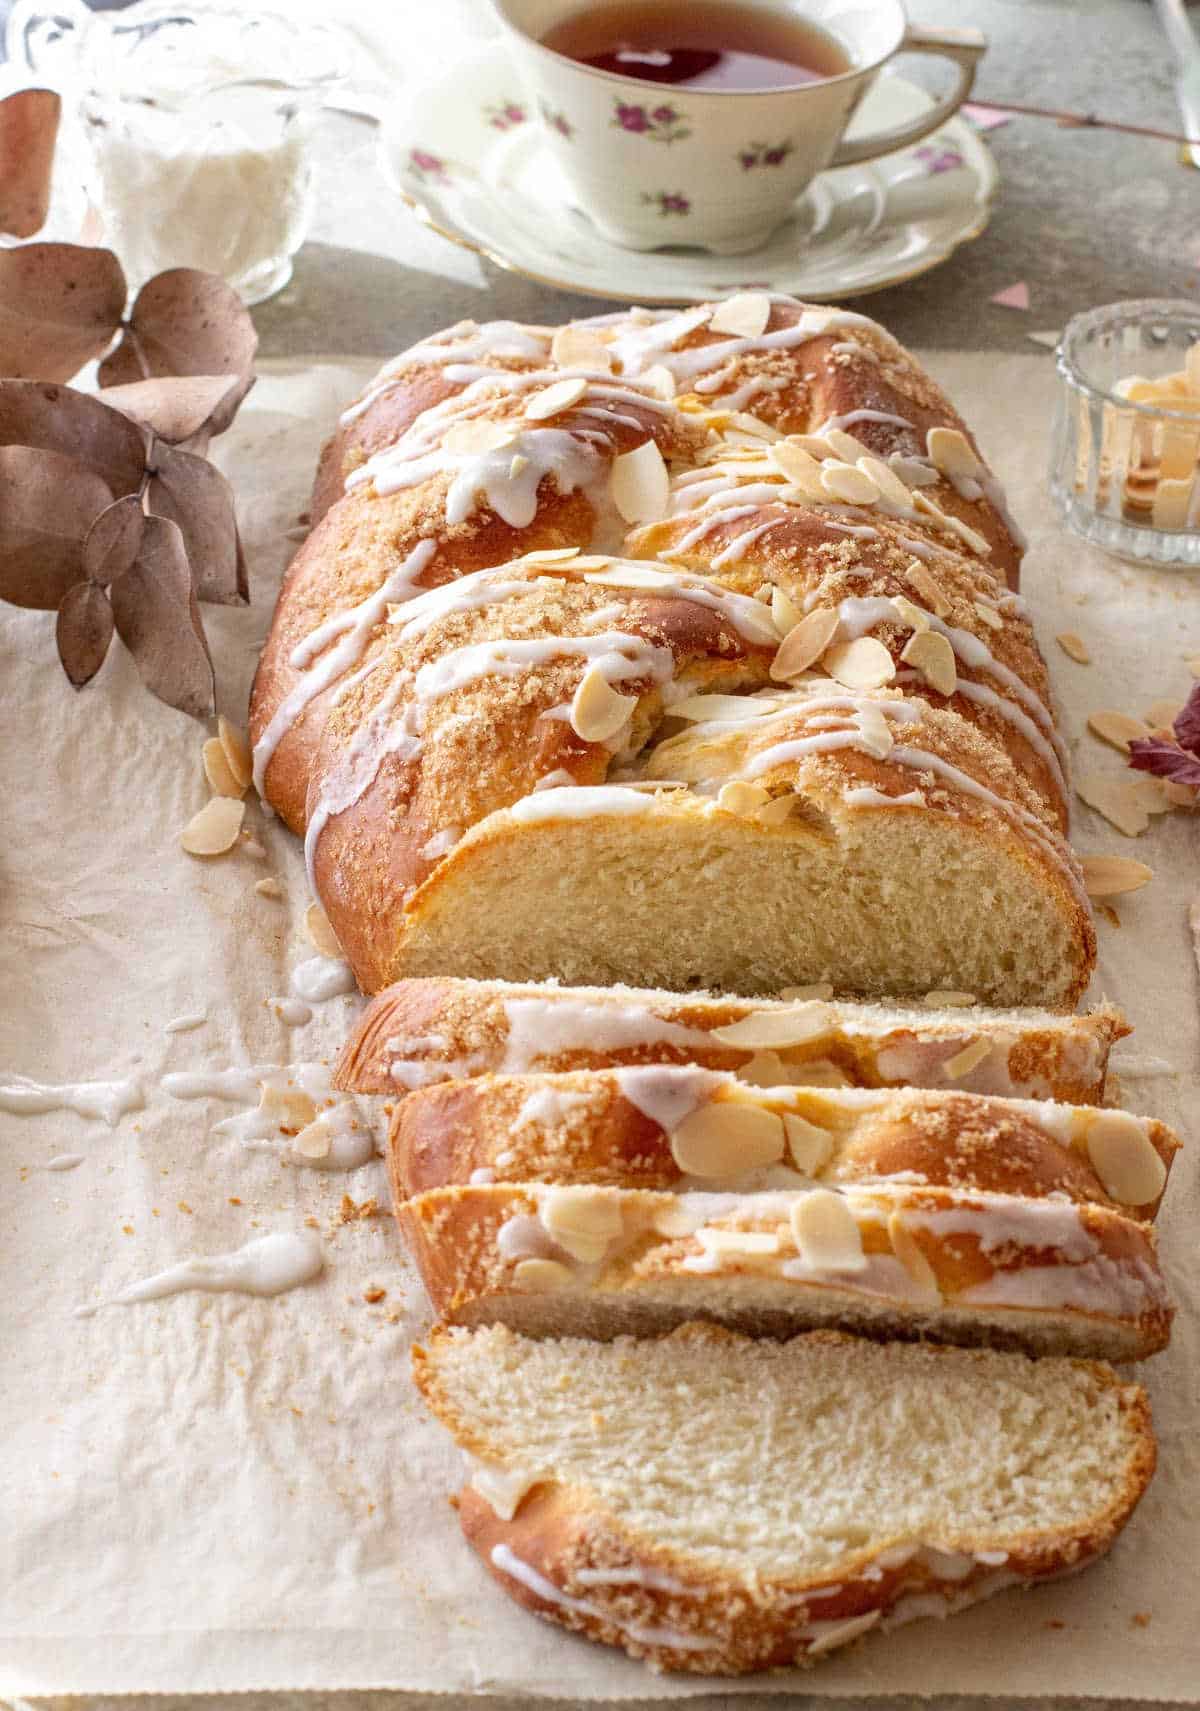
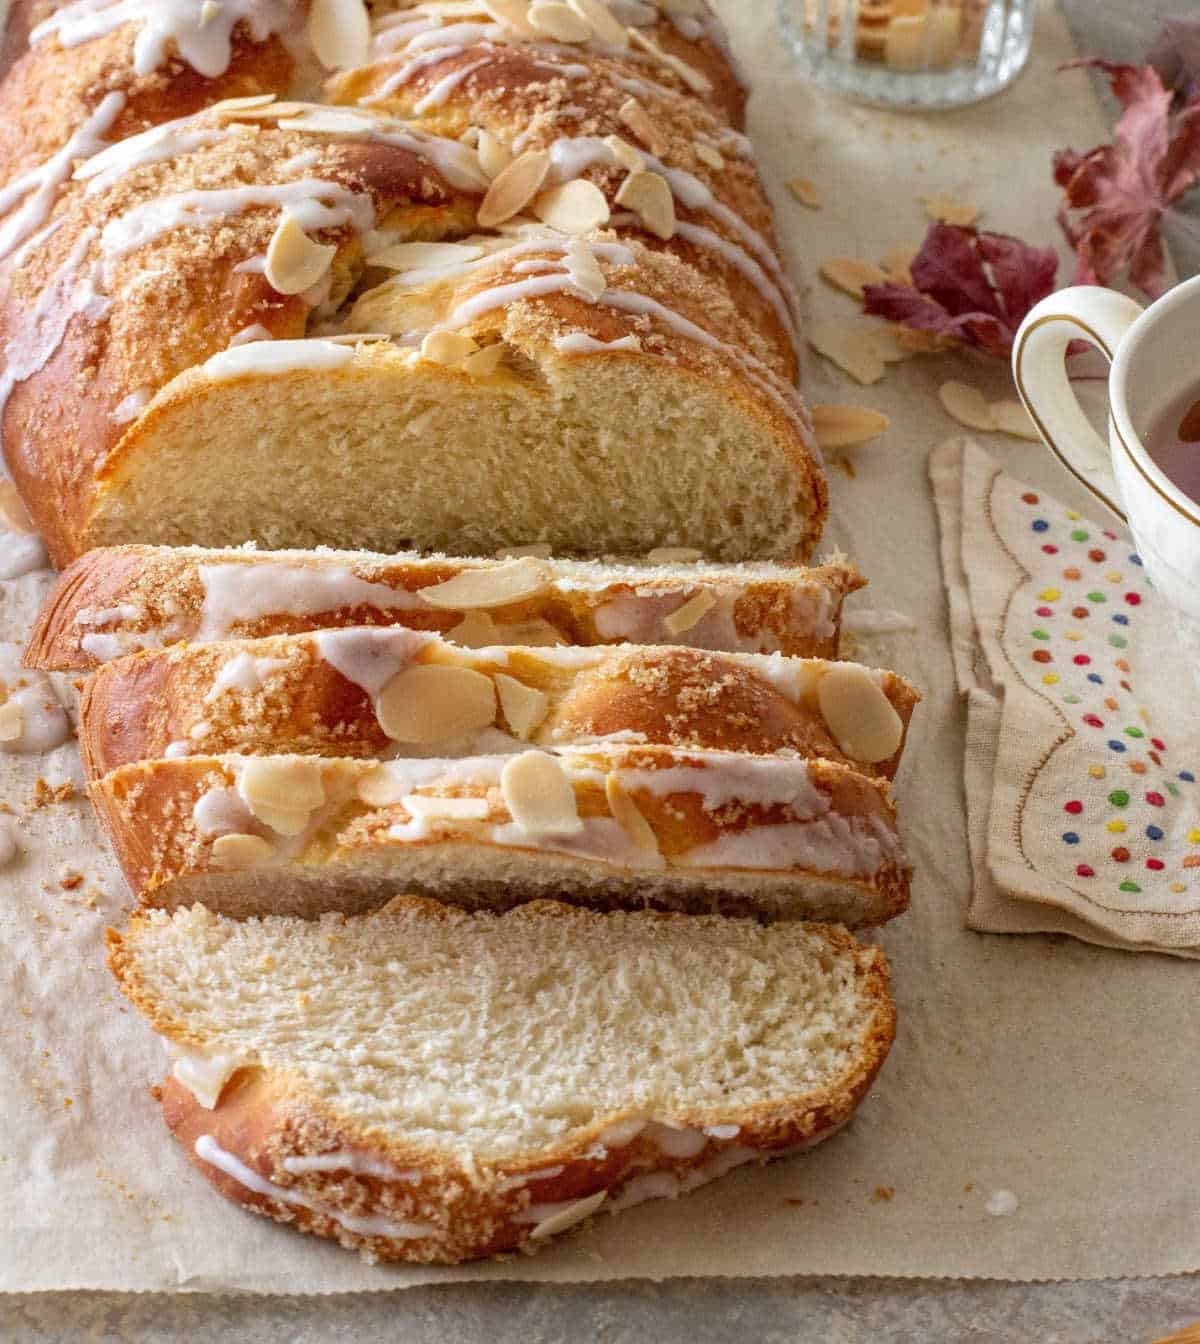
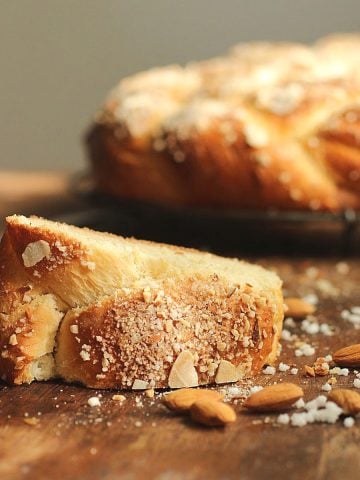
A favorite holiday bread that's braided and glazed, with a hint of lemon and almond. These simple flavors also make it perfect for brunch or a cup of coffee any time of year. The sweet dough is easy to make, great to work with (really!), and versatile enough to add other flavorings or toppings if you want to.

SAVE THIS RECIPE
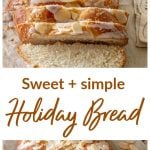
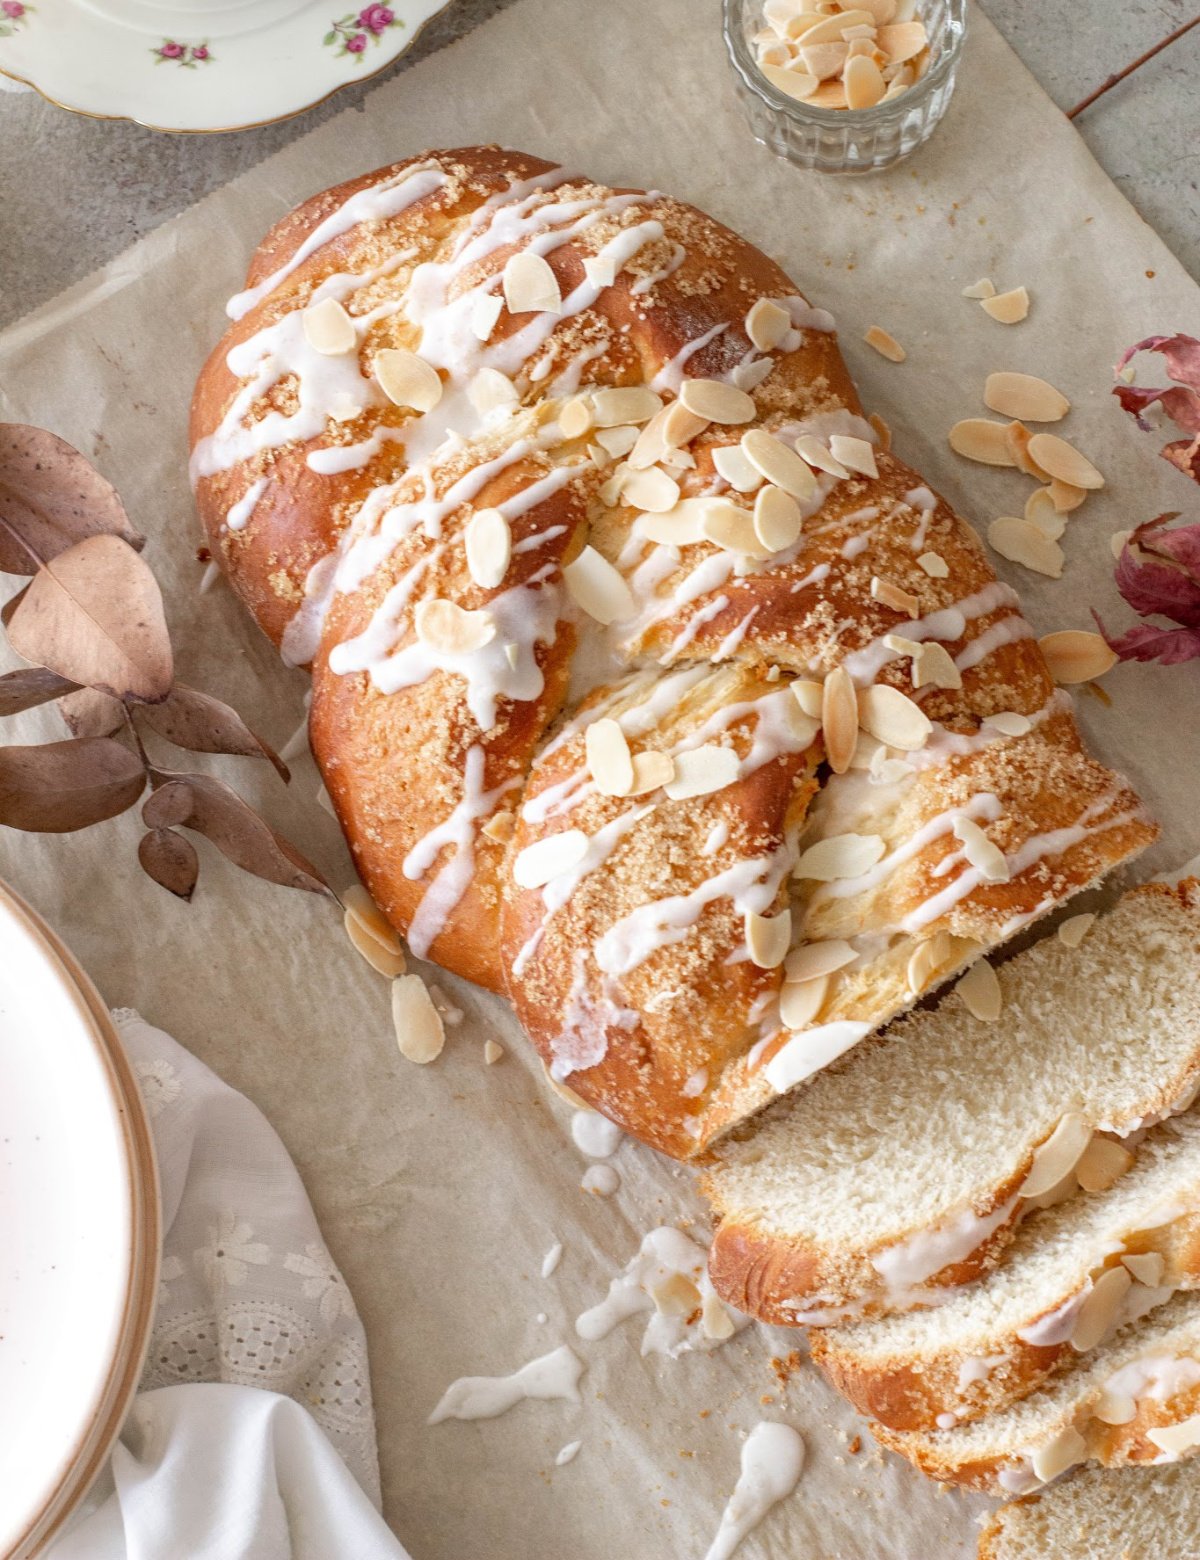
Holiday bread
If you search the web, you will find traditional Easter bread recipes from around the world. The most popular ones are Italian and Greek, which are quite similar. These loaves of bread are yeasted, lightly sweet, and usually braided with dyed eggs on top.
I found a way to make a celebration-worthy holiday bread that is easy to make and perfect for an Easter brunch table.
And using a dough that is similar to the Finnish Pulla, a bread I absolutely adore.
This bread dough has eggs and melted butter added.
So it's very rich in flavor and texture, but not difficult to work with. If you're familiar with brioche, think of this Easter dough as its poor cousin, with fewer eggs and less butter but lots of attitude.
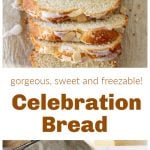
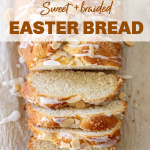
Ours today is simply braided but made into a loaf. A large one, mind you.
It's flavored with almonds and lemon, a festive and delicious combination. If you want a plainer centerpiece, use only vanilla. I alternate between the two, depending on the other recipes that will accompany it.
This sweet bread dough is so amazing that I never looked back after making it only once and decided it would be my go-to recipe for Easter and other holiday bread. Truly a fabulous recipe that you must try because I know you'll feel as I do about it.
Ingredient Notes
Quantities are listed on the recipe card toward the end of this post. The Ingredients page has more details and lists the brands we use.
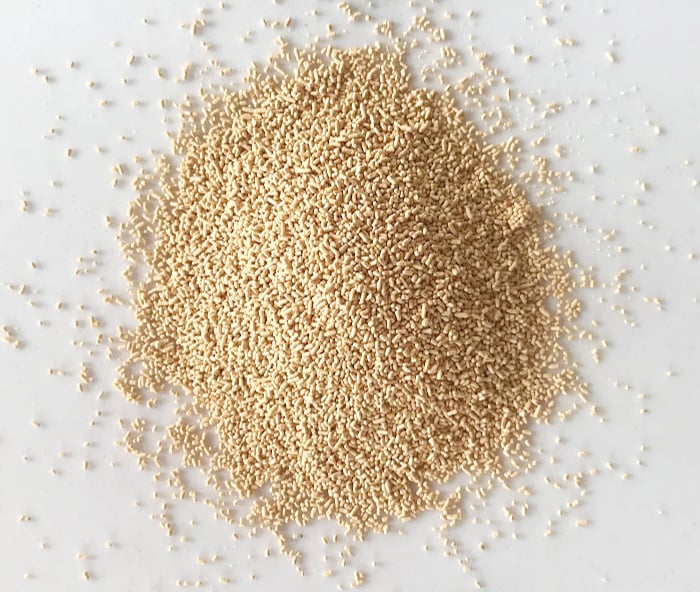
- Yeast: I use active dry yeast, but you can use fresh yeast or instant yeast (also dry).
- Flour: Use all-purpose flour or a mix of bread flour and cake flour, like I do.
- Milk: Though regular, full-fat milk makes a richer dough, reduced-fat milk works just fine.
Types of yeast
A very short answer is that yeast is a living microorganism that, when properly 'fed', metabolizes sugar and produces carbon dioxide and alcohol. It's what makes the bread rise or leaven and gives it that particular flavor.
- Dry yeast: you can buy instant or active dry, which look the same (image below) but are activated differently. The former goes directly into the dry ingredients (flour mostly) and the latter needs a wet environment (water in most cases) to foam and be ready. You can buy active dry yeast and instant yeast online.
- Fresh yeast: it comes in cubes usually and is crumbly and humid. This type has a much shorter refrigerator life than the dry versions, so it's not as popular. You can buy fresh yeast online.
Don't be afraid to work with yeast. It takes a little practice (what doesn't), but the results are amazing! Making your own bread is a one-way journey for many people. Including me.
Steps to make this braid
Most bread recipes can be made either in a stand mixer with the dough hook (like the Kitchen Aid stand mixer or similar) or by hand.
Of course, the former is easier, but sometimes we don't have access to one, so knowing how to bake the old-fashioned way (hands in the dough!) is useful.
Step-by-step VIDEO
Stand mixer
Proof the yeast, that is, check if it's good to use, directly in the mixer bowl. It should foam when mixed with a little liquid, flour, and sugar.
Start adding the rest of the ingredients to the yeast mixture in the order given.
Knead using the dough hook attachment until you have a sticky dough. The dough will stick heavily to the sides of the bowl but eventually will start to gather into a mass around the hook. A small amount of dough will still cling to the sides and bottom. Don't be tempted to add too much extra flour! This dough is sticky, especially before the first rise.
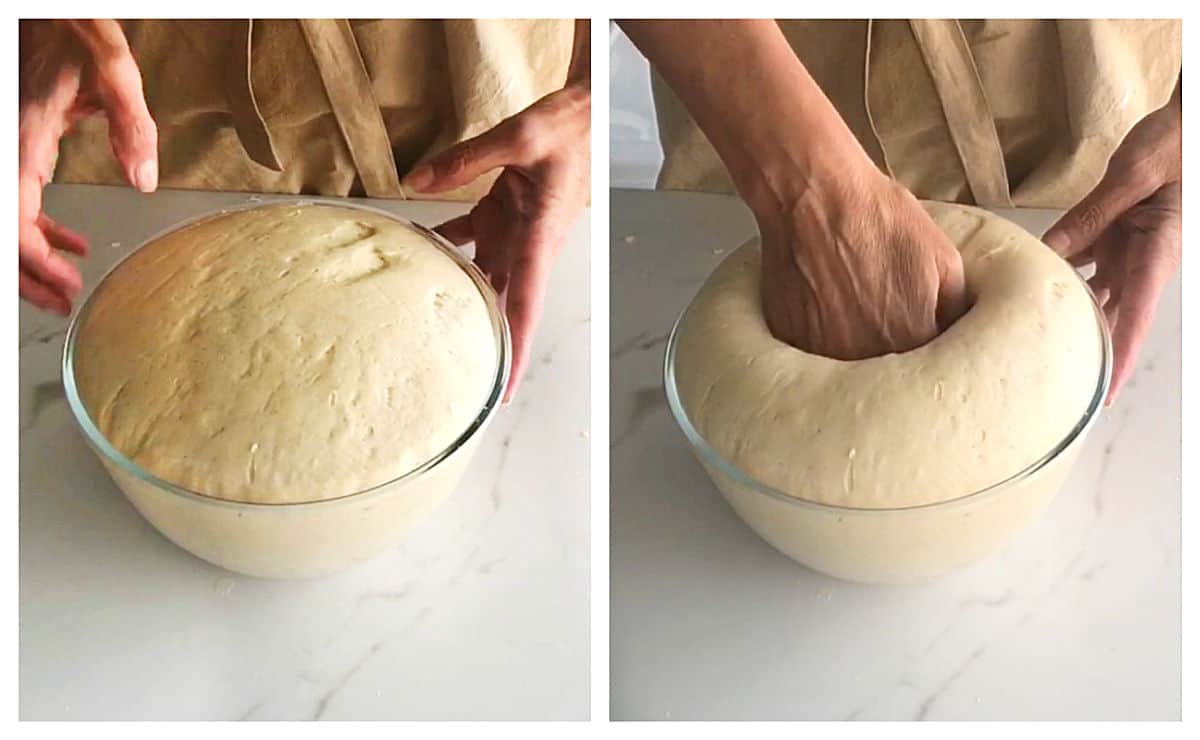
Transfer to an oiled bowl, turn it over so the whole surface is greased, cover with a clean kitchen towel or plastic wrap, and let double in volume.
By hand
The first two steps are the same as above, but you mix everything in a large bowl.
There comes a moment when the dough is still wet, but it's hard to mix in more flour. It looks like a very thick, lumpy pancake batter. At this point, you transfer it to a heavily floured board and get your hands into action.
At first, the dough will be very sticky. This is a wet dough enriched with eggs and butter, so the way to 'knead' it is by lifting it and letting it fall, trying to fold it onto itself when you do that. It will get less sticky as you continue to do that. Add bits of flour only when completely necessary.
First rise
Transfer the slightly sticky mass to an oiled or greased bowl, cover it and let the dough rise until doubled. Depending on the room's temperature, this might take 1 hour or more.
The stickiness will have decreased after the first rise. Gently punch the dough down with your closed fist and turn it out onto a clean work surface.
You will see that it's much more supple and easier to work with.
Vintage Kitchen Tip
If the dough does not rise during the first half-hour, it's probably because the room is too cold. Wrap the bowl with a blanket, a thick towel, or a sweater. You need to create a warmer environment for the yeast to work.
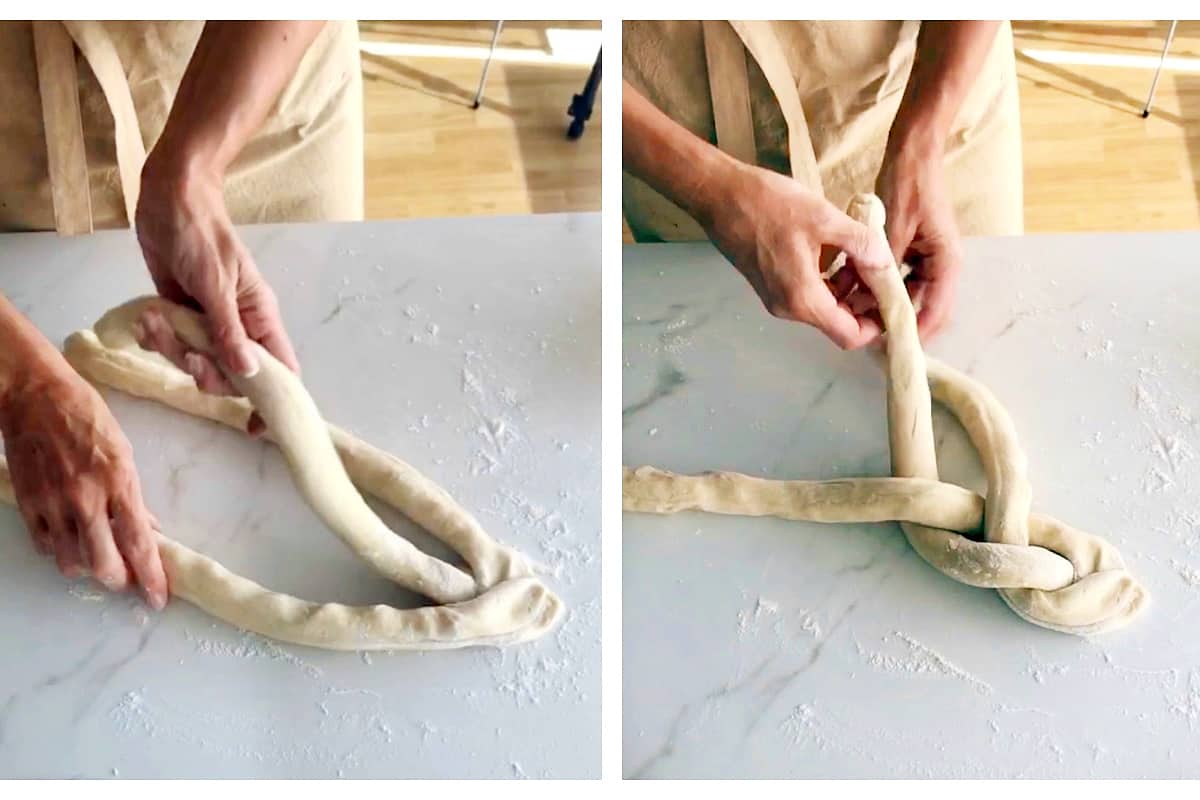
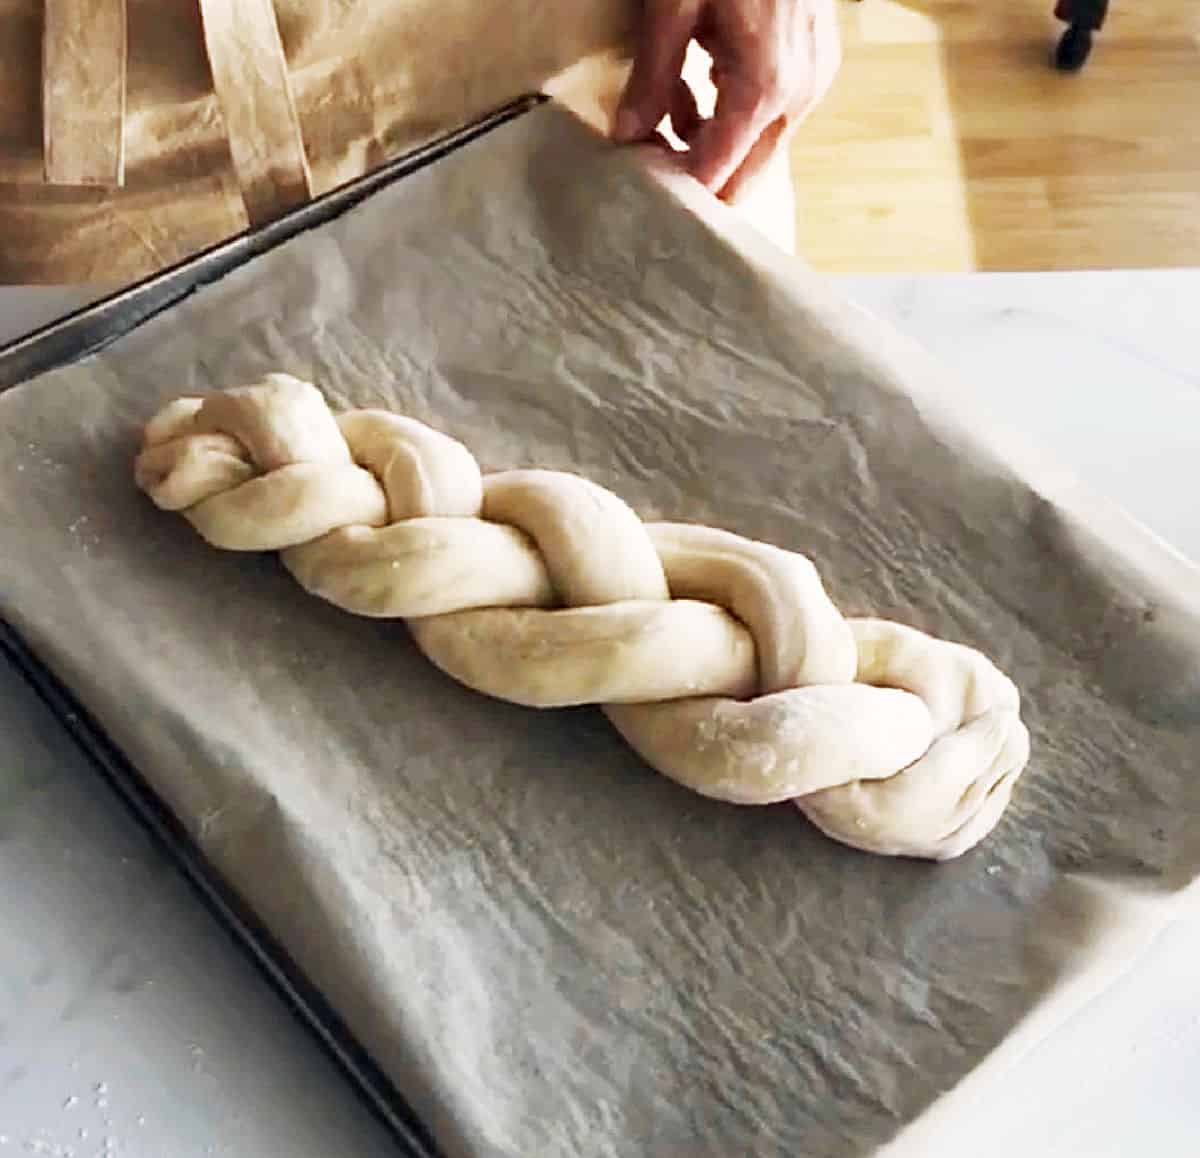
Forming the braid
We're making a simple 3-rope braid, so it's super easy! You can make other more intricate patterns like the ones for challah. There are thousands of tutorials about them on YouTube.
For this one, you make three ropes of roughly the same size and length. The best way is to weigh the whole thing and divide the dough into three equal parts, or eyeball it, as I do. There will probably be slight differences.
Then braid as you would your hair, bringing each outer long rope over the one in the middle, one at a time, and then pinch the ends together.
Egg wash: I use only milk to brush the bread before baking it, but you can use the traditional egg wash that includes an egg mixed with the milk for a shinier and deeper golden color.
Kitchen Notes
Organization: read the recipe first and ensure you have ingredients at the correct temperature, utensils and equipment needed, and enough workspace. This will make the process so much easier.
Baking time: consider that all ovens and pans are different, even if they look similar. The baking time in my recipes is as accurate as possible, but it might take you more or less time. You can use a thermometer (like the OXO oven thermometer) to check that your oven is at the right temperature. I recommend tracking how your oven works and what tiny details you might need to adjust.
Make sure the yeast is not expired. Old or moldy yeast is no good, similar to baking powder. If not kept in the right conditions they will not work correctly. In short, your bread will not rise. All your effort will be wasted. So, buy yeast according to the amount of bread you bake. Keep it in the refrigerator, well covered, so it's not in contact with air.
Don't mix yeast with salt at the beginning of the recipe. They should be added separately and combined after the yeast is working, that is, after it is mixed with some liquid and flour. They are not friends, as salt 'kills' some of the yeast power. You certainly don't want that for your bread. You want the yeast to be powerful and help the bread rise as much as possible.
Variations
- Braiding: traditional Italian Easter bread is formed as a single braid with the ends overlapping, thus creating a round braid. You can top it with pastry cream or colored easter eggs before baking. Or you can make the braid and leave it like that, as in the photos in this post. Alternatively, you can go the challah bread way and do a more sophisticated braiding job. There are many challah braiding tutorials on YouTube.
- Flavorings: you can add ground spices and citrus to the dough - cinnamon, cardamom, even saffron, other citrus zest (orange, lime, tangerine), anise seeds - or make a morning bread similar to this cinnamon sugar challah.
- Glazes: Play with the glaze too, make it orange-flavored, or use liquor or coffee. Top with colorful sprinkles instead of, or in addition to, the sliced almonds. Let your imagination and palate go in any direction you want your finished bread to look.
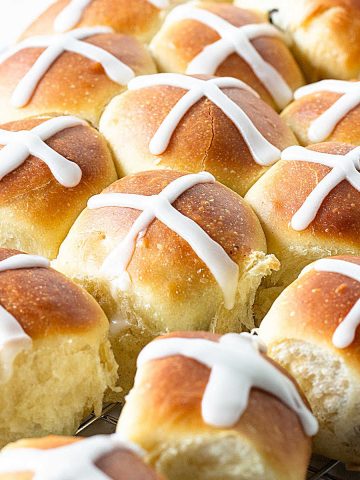
- Individual buns: Alternatively, you can make individual little loaves of bread, similar to the fantastic Hot Cross Buns. Or make individual braids, piece both ends together to make a circle, and use different colored eggs to place in the center of each one.
- Leftovers: It makes excellent French toast the next day (and for Easter morning, of course). We also use it for the apple bread pudding if there's any left after our Easter Sunday brunch.
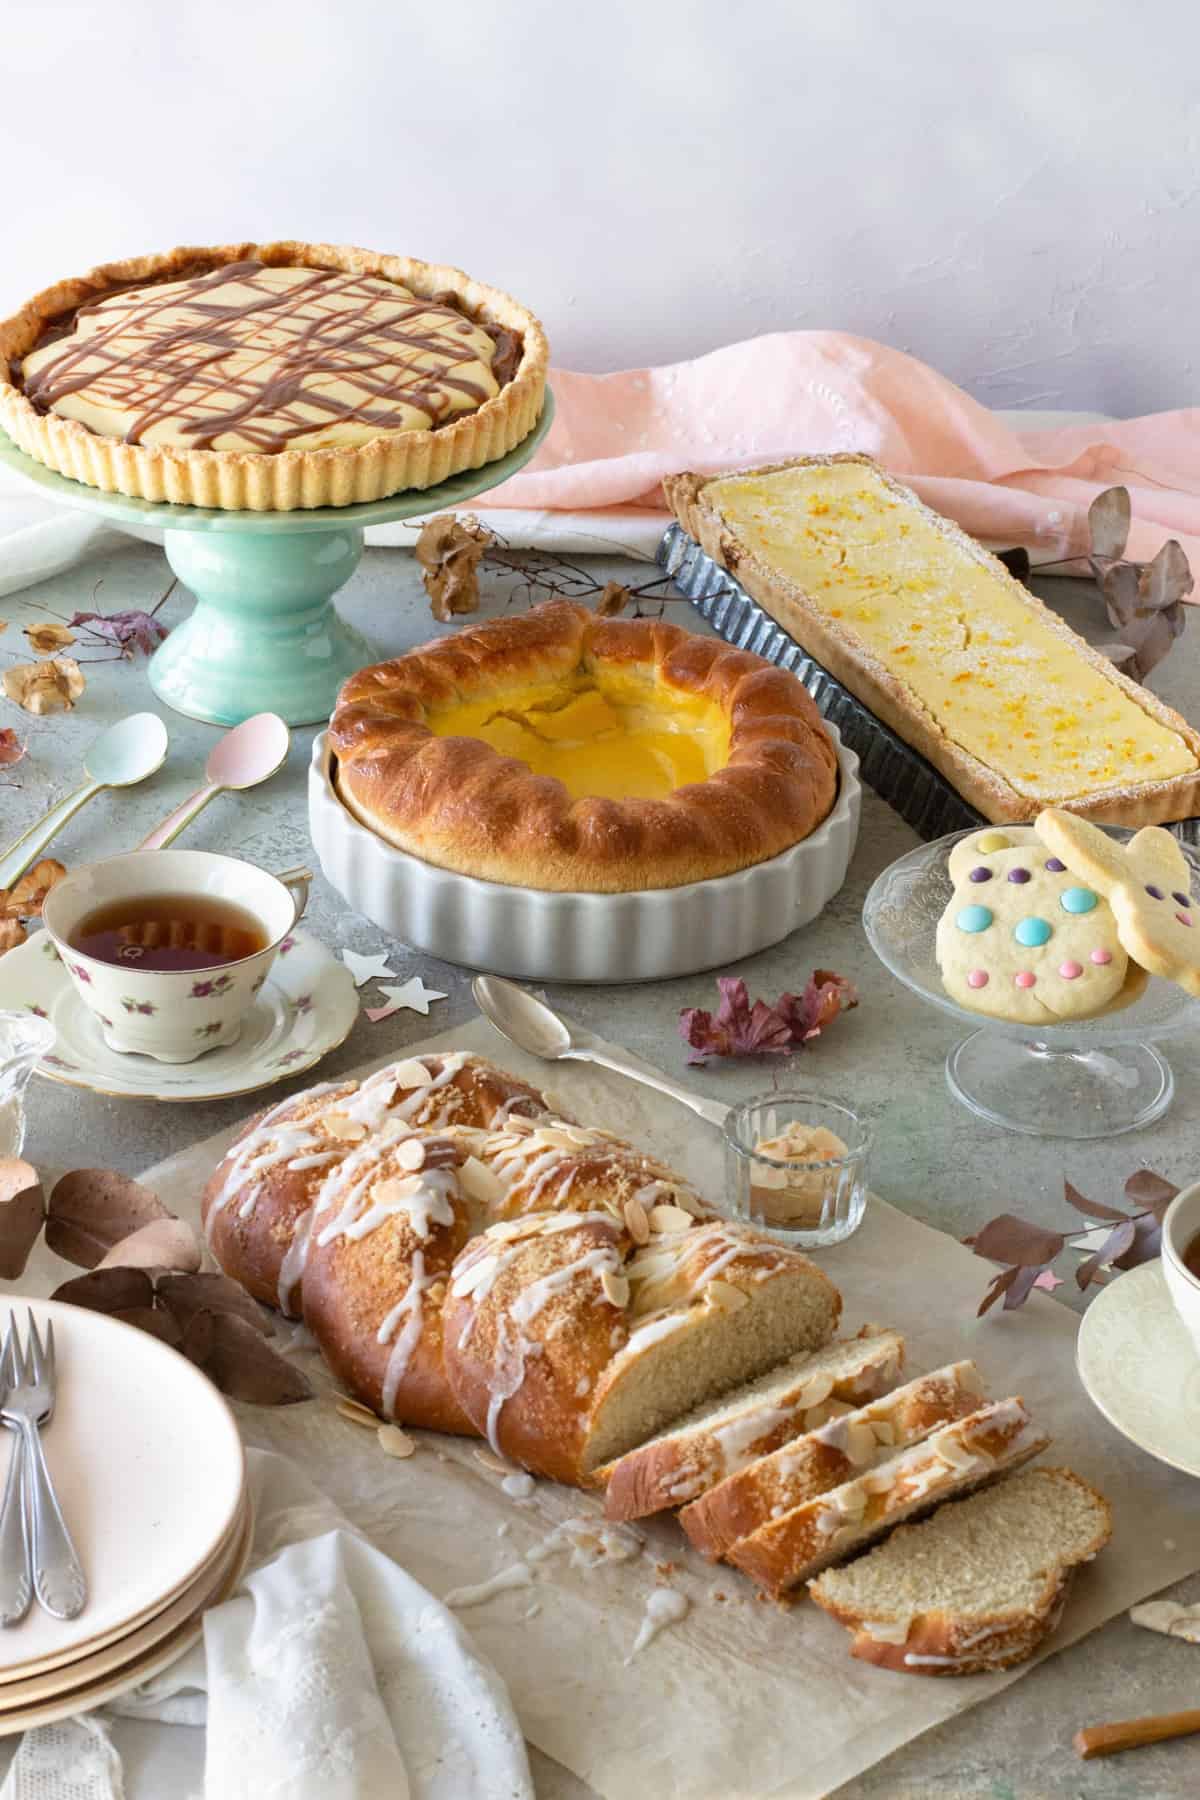
What our Easter table looked like:
Related recipes you might like:
If you made this recipe and loved it, you can comment below and leave a 5-star ⭐️ review. Also, if you had issues, let me know so we can troubleshoot together.
You can also subscribe to our FREE email series 'Baking the Best' and our regular newsletter. Or follow and save my recipes on Pinterest.
As an Amazon Associate, I earn from qualifying purchases. Read my disclosure policy.

Braided Easter Sweet bread
Ingredients
For the dough:
- 1 teaspoon active dry yeast
- ¼ cup water, slightly warm (not hot)
- 1 cup milk, slightly warm (not hot)
- ½ cup sugar
- 2 eggs, at room temperature
- 1 teaspoon vanilla extract
- ¼ teaspoon almond extract
- ½ teaspoon lemon zest, loosely packed
- 1 teaspoon salt
- 4 ½ cups all-purpose flour, you might need more to knead
- ½ cup unsalted butter, melted
- 2 tablespoons milk , to brush before baking
- 1 tablespoon light brown sugar, or white sugar, to sprinkle
For the glaze:
- 1 cup powdered sugar
- 2 tablespoons lemon juice
- ¼ cup sliced almonds, lightly toasted, optional but recommended
Instructions
For the dough:
- Put ¼ cup water in the bowl of a stand mixer or a large bowl (if making this recipe by hand).
- Add 1 teaspoon active dry yeast and mix with a wooden spoon or similar. It will be lumpy and weird. Cover with a clean kitchen towel and let stand 3-5 minutes until frothy.
- Add 1 cup milk, ½ cup sugar and 2 eggs. Mix a few times until eggs are combined.
- Add ⅓ of the flour amount and 1 teaspoon salt. Mix with the spoon. It will be lumpy and rough.
- With the stand mixer: attach the dough hook.
- At low/medium speed add ½ cup unsalted butter, 1 teaspoon vanilla extract, ¼ teaspoon almond extract, ½ teaspoon lemon zest and the rest of the flour (the smaller amount) ½ cup at a time. Stop the mixer, cover the bowl with a clean kitchen towel and let rest for 15 minutes.
- By hand: Add ½ cup unsalted butter, 1 teaspoon vanilla extract, ¼ teaspoon almond extract, ½ teaspoon lemon zest, 1 teaspoon salt and half of the remaining flour and mix well with a spoon. Add the rest of the flour and mix. It will be dry and lumpy.
- Cover the bowl with a clean kitchen towel and let rest for 15 minutes. Now on to the kneading.
- If using the stand mixer use the dough hook at medium speed for 6 to 8 minutes, until you have a shiny, satiny but slightly sticky dough. You might use the extra flour stated above but don't be tempted to add more unless the dough is very wet and sticky.
- If kneading by hand, do it on a clean surface, ideally marble counter or similar.
- Knead while adding the rest of the flour by tablespoons until the dough is shiny, slightly sticky but it's easy to separate it from the counter. It takes a few minutes to start coming together. You should knead for 8-10 minutes. You might need more flour. But don't make it stiff or the bread will be dry.
- Put the dough in an oiled or buttered large bowl and turn it onto itself so the whole surface is greased.
- Cover with plastic wrap and let rise in a draft-free warm place until doubled, 45 minutes to 1 hour, depending on the temperature of the place. Alternatively, you can now refrigerate it for 8 hours. Once you're ready to shape, take it out of the fridge and wait 15 minutes or so, it depends on how warm your space is. Don't wait too much since the cold dough is much easier to shape.
- Have ready a buttered or parchment-lined baking sheet.
- When ready to braid, gently punch the dough down and turn it onto the counter or similar surface cut the dough in 3 parts and make them into ropes.
- Put three ends together pinching them down and braid them. Transfer the braid to the pan. cover with a clean kitchen towel and let rise 30 minutes or so, until slightly puffed.
- Preheat the oven to 350ºF (180ºC).
- Brush the surface 2 tablespoons milk and sprinkle with 1 tablespoon light brown sugar.
- Bake for about 30-40 minutes, until puffed, golden and the bottom sounds hollow when lightly tapped with your knuckles.
- Let cool completely on a wire rack.
- Store leftovers covered in plastic wrap at room temperature for 2-3 days and then refrigerate or freeze, well wrapped.
For the glaze:
- Mix 1 cup powdered sugar and 2 tablespoons lemon juice in a small bowl until very creamy.
- Drizzle over the cooled braid and top with t¼ cup sliced almonds before it dries. Let dry before cutting and serving.
Jeanette says
Please state how long you roll each piece for the braid. Thanks
Paula Montenegro says
Hi Jeanette, I roll them 50cm aprox.
David says
Me again... do you drizzle on the glaze and almonds when the bread is hot/still warm?
Paula Montenegro says
I did it on a room tº bread, but doing it while is an improvement I think!
David says
Thanks - really can't wait to try it! xo
Davdi says
I can’t wait to try this, Paula. Friends from Italy just brought us a Colomba, so I probably will wait and make this when I am craving a sweet treat this summer. I love your instructions - it does seeim really easy!
Paula Montenegro says
I think you'll love it David! It's such a gorgeous dough to work with. Let me know what you think if the Colomba. The last one I had was many years ago.
Juliana says
Such a delicious bread. Can't wait to try it this Easter season