

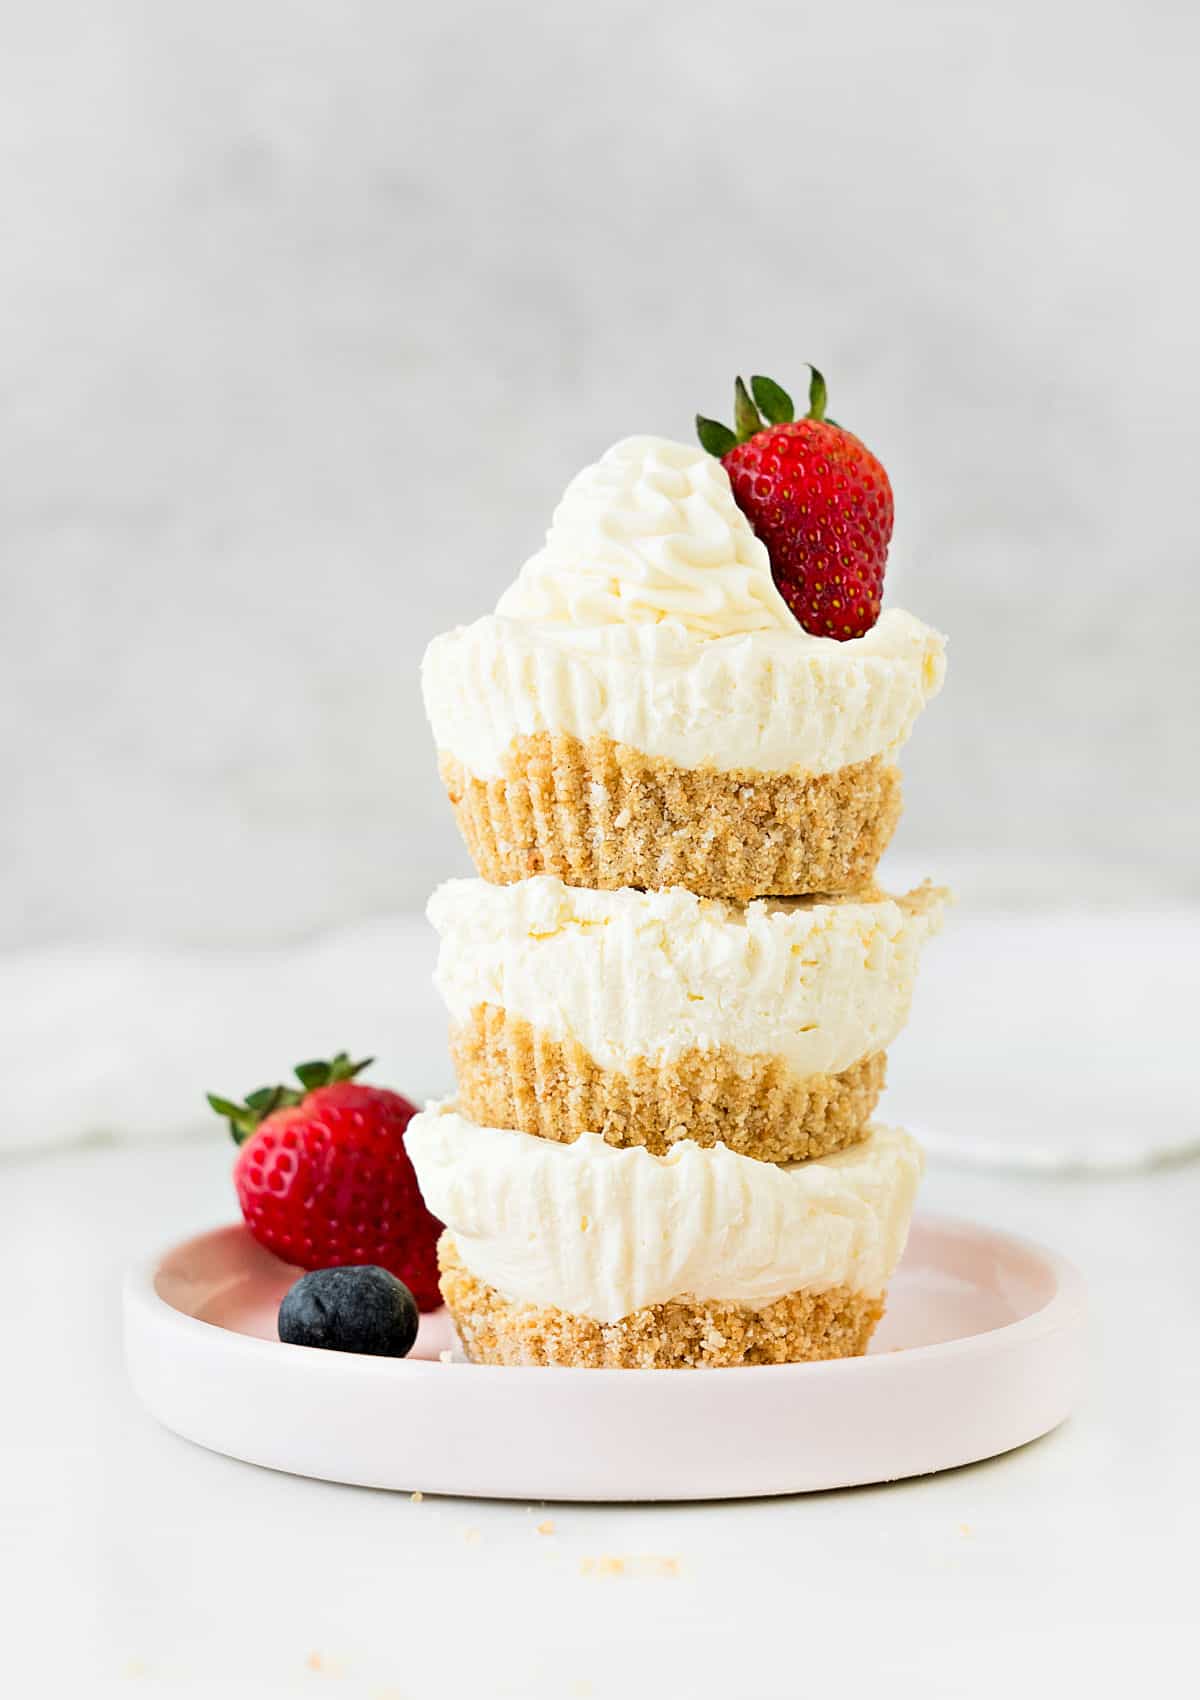
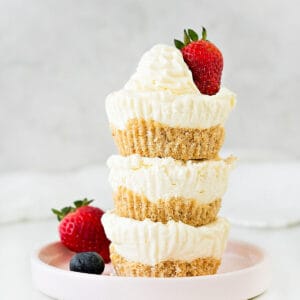
These irresistible small treats deliver the creamy richness of cheesecake without needing an oven. Made with a simple vanilla cream cheese filling (no gelatin!) and a crumb crust, they are a three-bite dessert for when you need cute finger food for a gathering. Top them with your favorite fruit sauce and fresh berries or a drizzle of chocolate or caramel sauce.
Finger-size dessert
These are the no-bake mini alternatives to a classic baked cheesecake that we love, but that requires way more time and effort to make.
Even though they need chilling time to set well, they are simple to put together. And they are a fantastic beginner-friendly baking cheesecake recipe for those new to baking or who may be intimidated by the precision required in traditional baked cheesecakes.
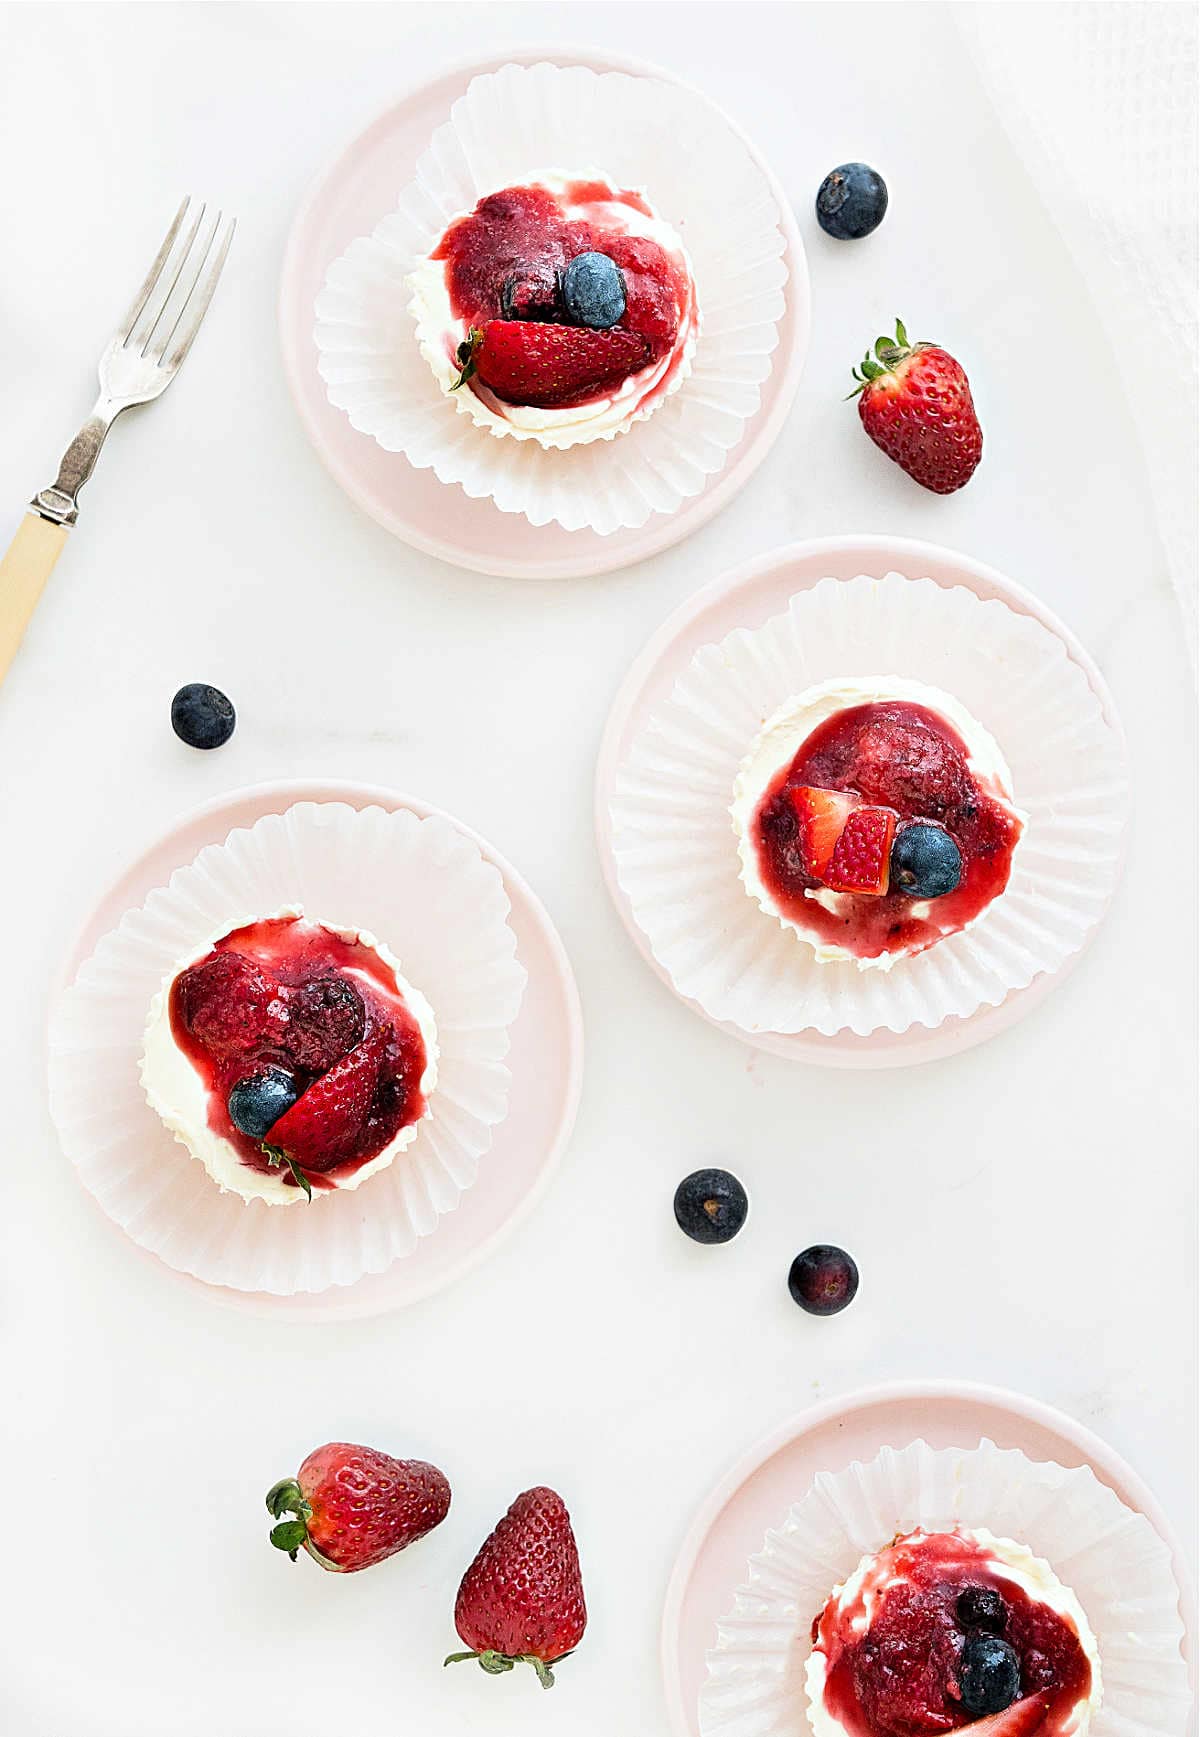
Depending on the occasion, customize them with fruit toppings, fresh fruit and whipped cream with or without a drizzle of gooey caramel sauce, or cooked apple pie topping if needing a Fall dessert. You'll have an effortless and irresistible showstopper dessert.
I love them for Spring occasions like Mother's Day, graduation parties, and Easter. Still, they're also perfect for big holidays, as finger desserts.
Perfect for warmer days or full ovens: If you're baking for a party or occasion and don't have oven space or want to turn it on (hot Summer days!). And the cheesecake itself can be frozen before adding the topping.
Testing notes
I always use and recommend regular, full-fat cream cheese for cheesecakes. If you use low-fat cream cheese, dairy-free substitutions or something along those lines, it may affect the texture and, most of all, the richness of the cheesecake.
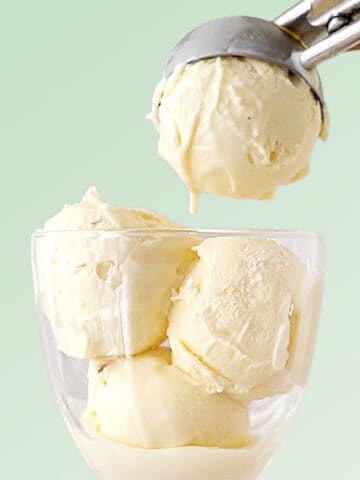
Properly softened cream cheese: Allow the cream cheese to reach room temperature before mixing to ensure a smooth and lump-free texture in your cheesecake filling. An electric mixer is used to make it faster, but if the cheese is softened correctly, it should be easily combined with a whisk or spatula. I don't recommend a blender, as the filling is too thick, and it can be challenging to remove it from the jar.
Make sure the cream is whipped to medium-firm peaks, as it's a key ingredient for the structure of these mini desserts. It will be mixed a bit further when incorporated into the cream cheese.
Quick setting: If you're short on time, placing the assembled mini cheesecakes in the freezer for about 30 minutes can expedite the setting process. That said, refrigerating them until well chilled is the best way to achieve the creamiest texture.
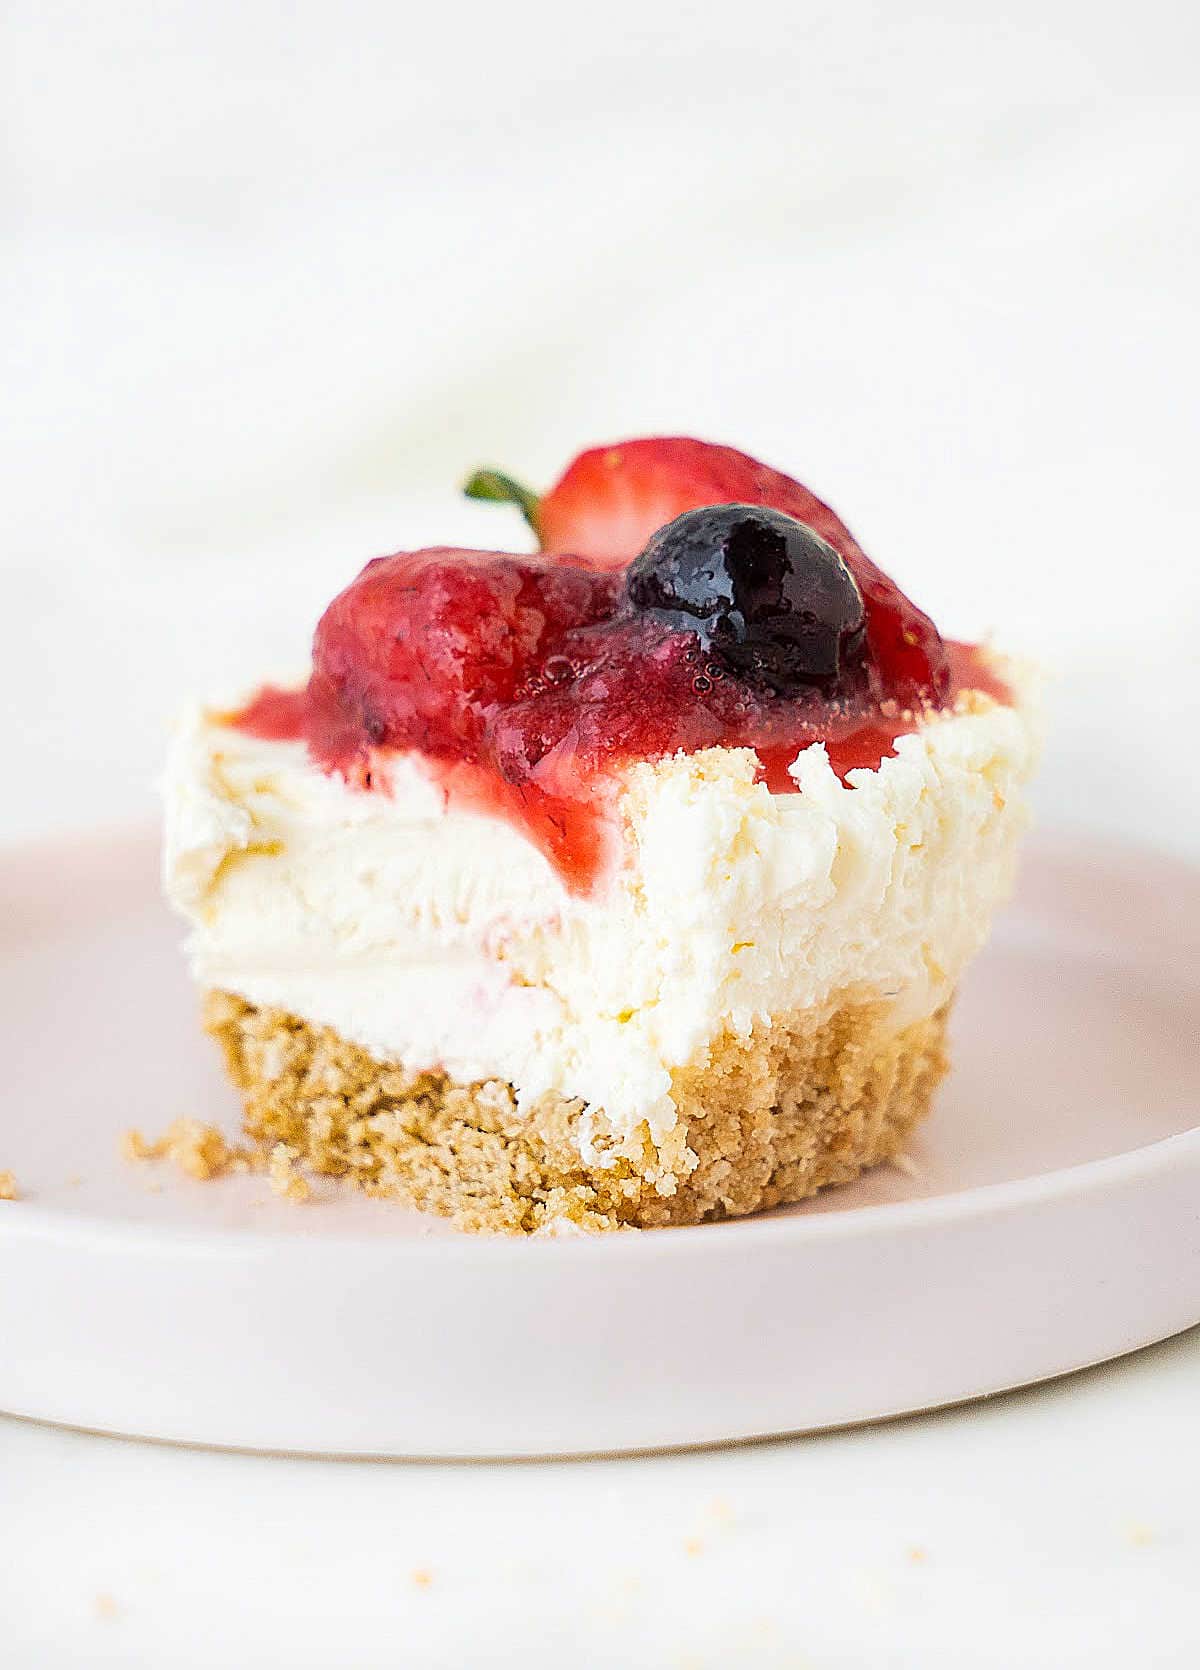
Don't skimp on the sugar or topping. No-bake cheesecakes have a creamier texture and fresher-tasting filling than their baked counterparts, but can be bland on their own. So make sure you use a sweetened fruit topping or some other type, like caramel or chocolate sauce; it's an integral part of this dessert as a whole.
Mini cheesecake pans. Though they're an option, I use cupcakes or paper liners in a regular muffin tin. They work very well for creating mini cheesecakes that are a three-bite dessert without needing an additional type of pan.
Use cupcake or muffin liners (also called paper cups), or it will be almost impossible to remove the mini cakes from the pan. Paper liners act as a small paper plate, and you can also remove the cold cheesecakes from the liners and place them on plates or a platter when ready to serve.
Variations
- Crust: Experiment with different crusts, such as Oreos, ginger cookies, chocolate wafers, or other crumb bases that suit your taste.
- Gluten-free: Use GF cookies or wafers instead of graham crackers, and make sure the topping you use is free of gluten.
- Nuts: Add chopped walnuts, almonds, or pecans to the crumb base or the filling.
Steps for no-bake cheesecakes
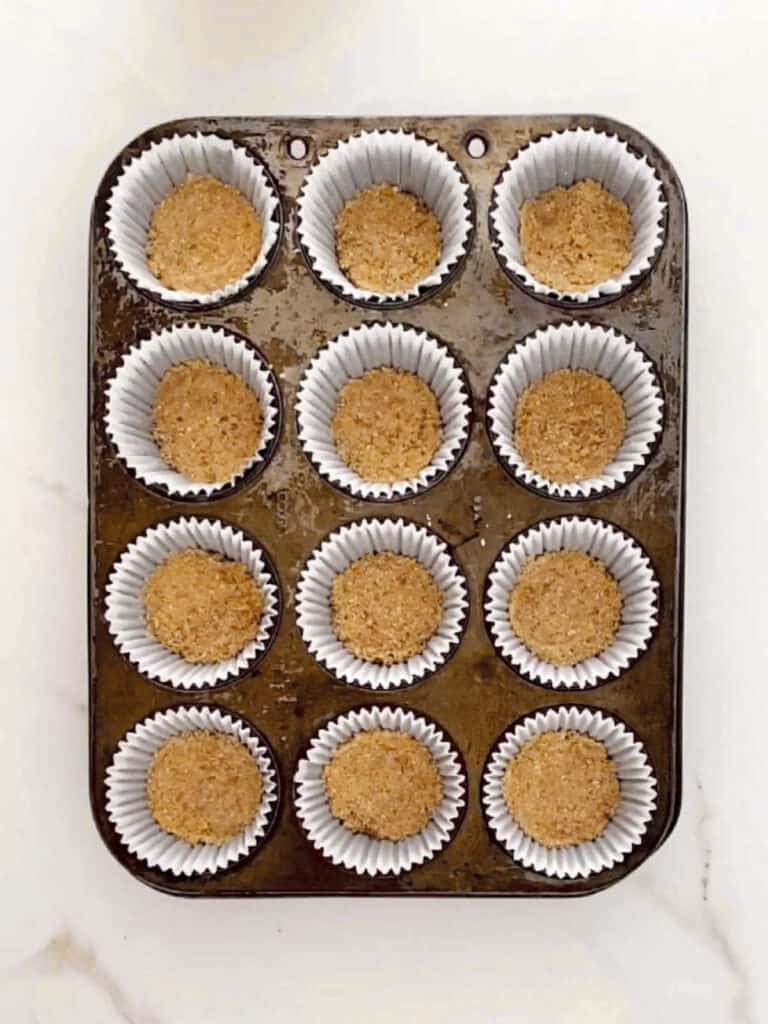
Crumb crust
Divide the graham cracker mixture evenly and press into the paper cups. Chill before adding the filling.

Cheesecake filling
Using an electric mixer is the easiest way to achieve a smooth filling without a lot of arm work.
Don't overbeat after adding the cream, as you don't want to curdle the preparation.
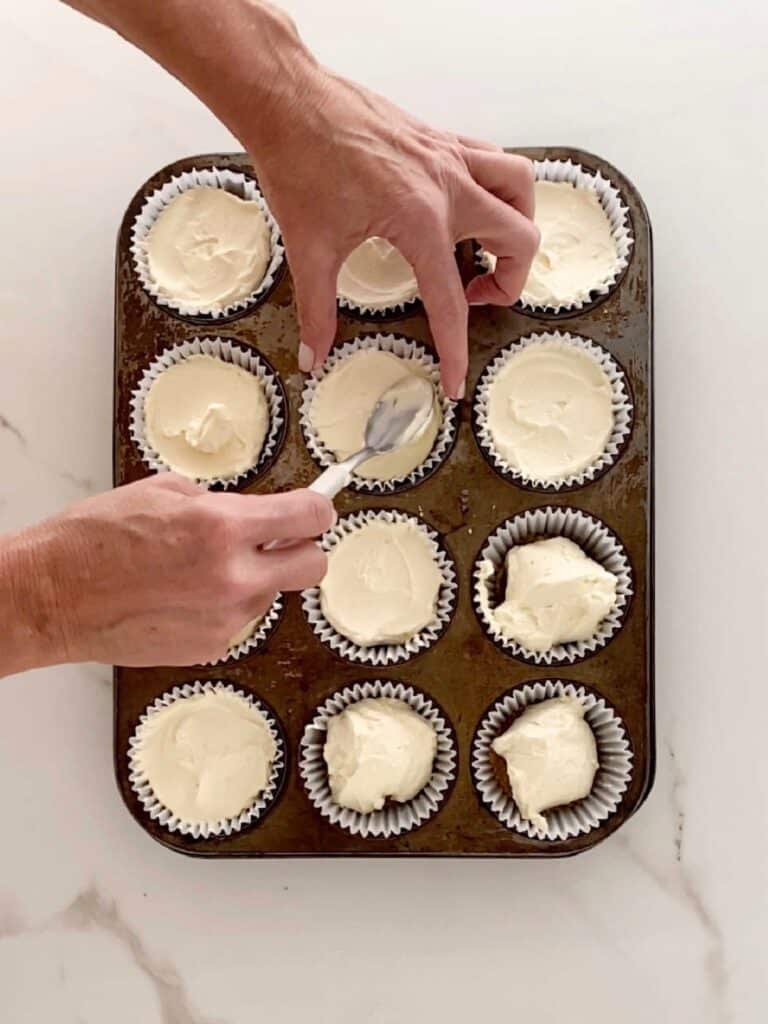
Fill the paper liners
Divide it evenly among the paper cups and use the back of a spoon to smooth it out and make it touch the sides so it fills the container. This is important so you don't have air pockets when you eat the cheesecakes.
Different toppings
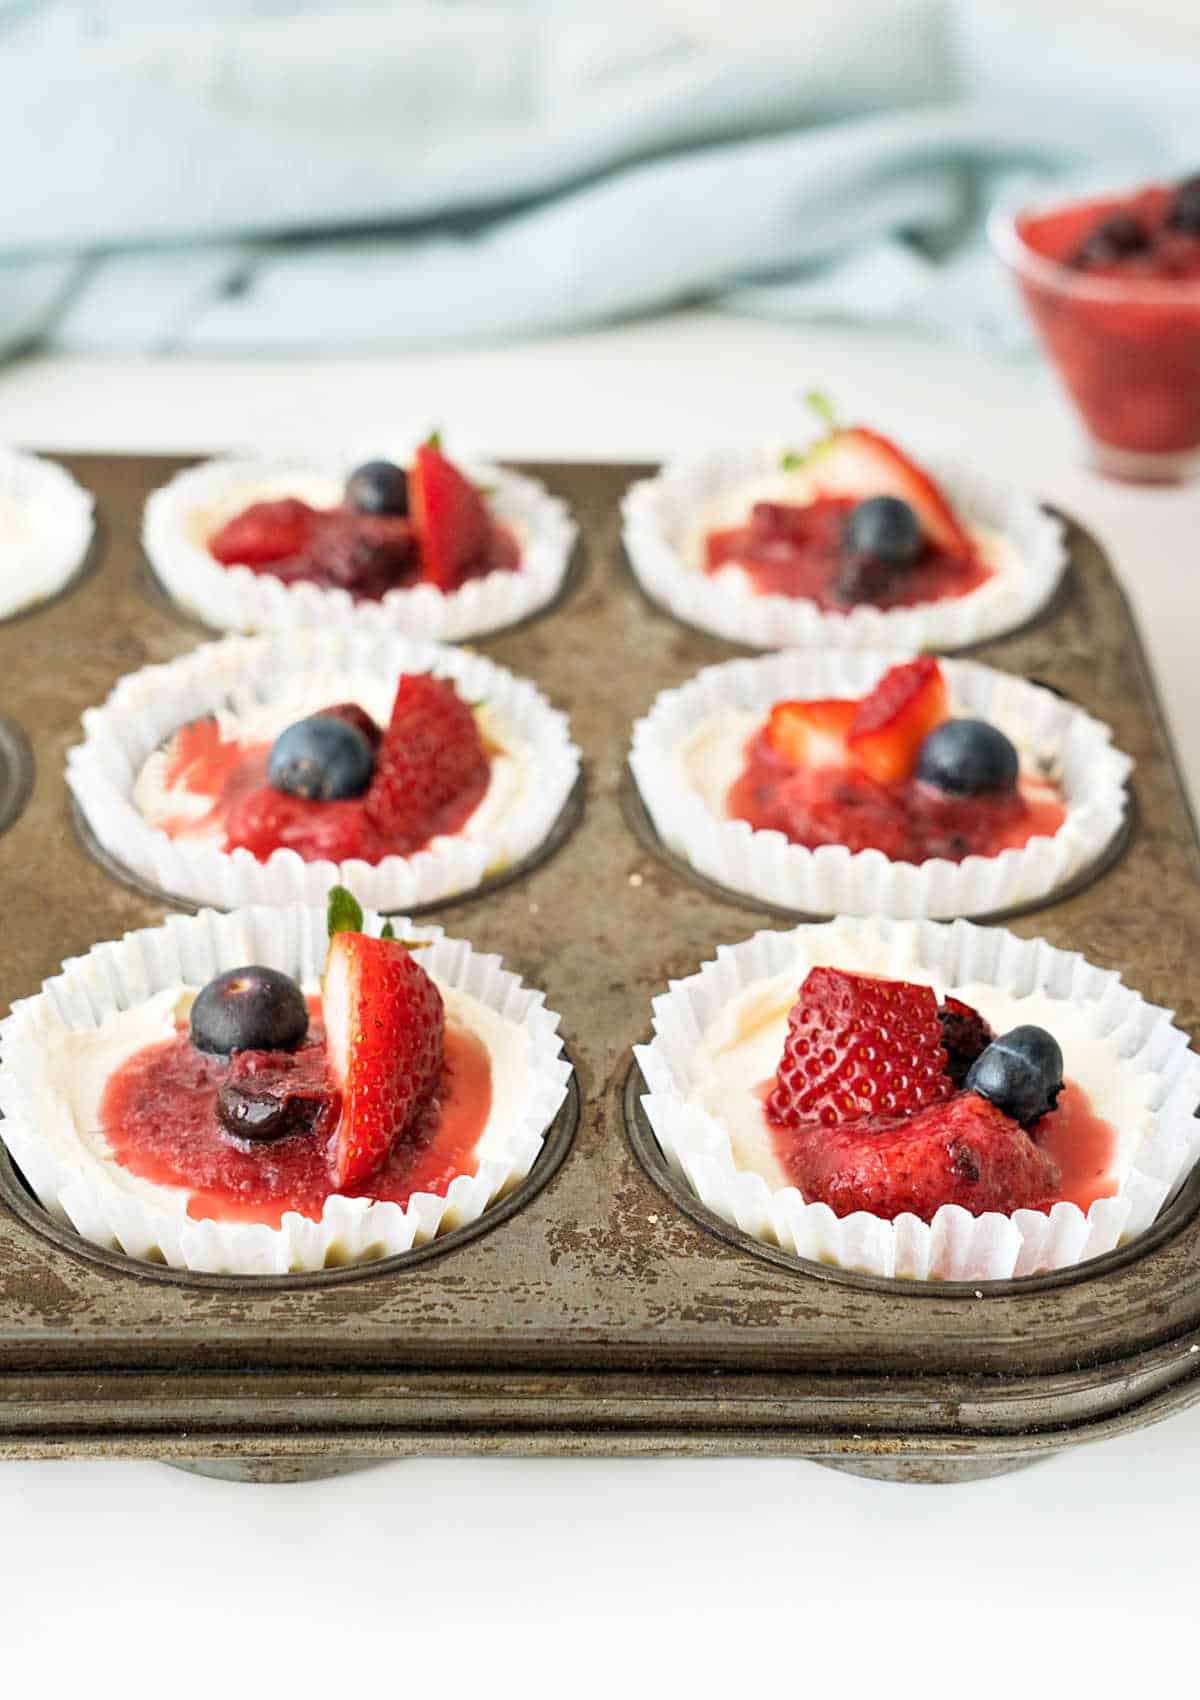
The topping is a must and essential for the overall flavor.
No-bake cheesecakes are like a canvas for almost any sweet topping you want. If you have a party or gathering, you can make different sets with different flavors.
- Whipped cream and strawberries, blueberries or cherries.
- Classic cheesecake toppings like blueberry sauce, strawberry topping or homemade cherry topping.
- Caramel sauce.
- Chocolate ganache.
- Dulce de leche.
- Lemon curd with fresh berries.

Storage
- Refrigerate: allow the cheesecakes to set in the refrigerator for at least 2-4 hours or until thoroughly chilled. Then, cover them with plastic wrap or place them in an airtight container. Refrigerate for up to 3-4 days for optimal freshness. Serve chilled directly from the fridge.
- Freezing: they must be well-chilled and set before freezing them for a month. Place them on a baking sheet, making sure they are not touching. Freeze until solid (it might take a few hours) before transferring them to an airtight freezer-safe container or bag. To thaw, transfer to the refrigerator overnight or let them thaw at room temperature, unwrapped. Don't let them soften much. Serve them cold.
- Make ahead: If preparing the cheesecake mixture in advance but not assembling it immediately, store it in an airtight container or in a bowl tightly covered with plastic wrap to avoid dryness. Refrigerate for up to 24 hours before assembly. Proceed as per the original recipe. Note that the crust may be best assembled before serving to maintain its texture.

If you made this recipe and loved it, you can comment below and leave a 5-star ⭐️ review. Also, if you had issues, let me know so we can troubleshoot together.
You can also subscribe to our FREE email series 'Baking the Best' and our regular newsletter. Or follow and save my recipes on Pinterest.
As an Amazon Associate, I earn from qualifying purchases. Read my disclosure policy.
No Bake Mini Cheesecakes Recipe
Ingredients
For the crumb crust:
- 2 cups graham cracker crumbs
- ¼ cup sugar
- ⅔ cup unsalted butter, melted
For the cheesecake filling:
- 1 cup cold heavy cream, or heavy whipping cream
- 16 ounces full-fat cream cheese, 2 blocks, at room temperature
- 2 tablespoons regular sour cream, at room temperature
- ⅓ cup white granulated sugar
- ⅓ cup powdered sugar
- 1 teaspoon lemon juice
- 1 teaspoon vanilla extract
- fresh berry sauce and fresh fruit, to serve, see Notes below
Instructions
For the graham cracker crust:
- Have ready two 12-mini muffin pans or one 24-mini muffin pan, and line with paper cups.
- Prepare the base by mixing 2 cups graham cracker crumbs with ¼ cup sugar in a medium bowl. Add ⅔ cup unsalted butter, melted, and stir well until it resembles wet sand.
- Press onto the bottoms of paper liners, dividing evenly. Refrigerate while making the filling.
For the cheesecake batter:
- Beat 1 cup cold heavy cream in a medium bowl with ⅓ cup powdered sugar until medium-firm peaks (almost stiff peaks) form when the beaters are lifted. The tip will fall slightly, and the cream will have consistency but not be completely firm.
- Beat 16 ounces full-fat cream cheese, softened, with 2 tablespoons regular sour cream and ⅓ cup white granulated sugar until very smooth in a large bowl. Stir or fold in 1 teaspoon lemon juice and 1 teaspoon vanilla extract, and mix well.
- Add half of the whipped cream to the cream cheese mixture and mix with a spatula. Before fully integrating, add the rest and incorporate until smooth and even colored with no streaks. Don't beat but fully integrate with the spatula.
- Divide the cheesecake mixture evenly on the prepared crusts. Smooth with the back of a small spoon.
- Refrigerate for 2-4 hours, or until firm. Serve cold, topped with fresh berry sauce and fresh fruit. Or topping of choice. See Notes below for ideas.
Cathie says
Delicious, a real hit every time. Thank you for the very detailed instructions!
Paula Montenegro says
Happy to know you loved them Cathie!