
This is another wonderful brownie recipe. Thanks to the combination of cocoa powder and melted chocolate, it has a very deep chocolate flavor. The brownies are fudgy, easy to make, and can be frozen, making them a great last-minute dessert with a scoop of ice cream.
SAVE THIS RECIPE
Extra chocolate flavor
I strongly believe one can never have too many brownie recipes.
And it's my job to test them and share the best ones. I love my job.
As with most brownies, the ingredients are similar, but the results differ.
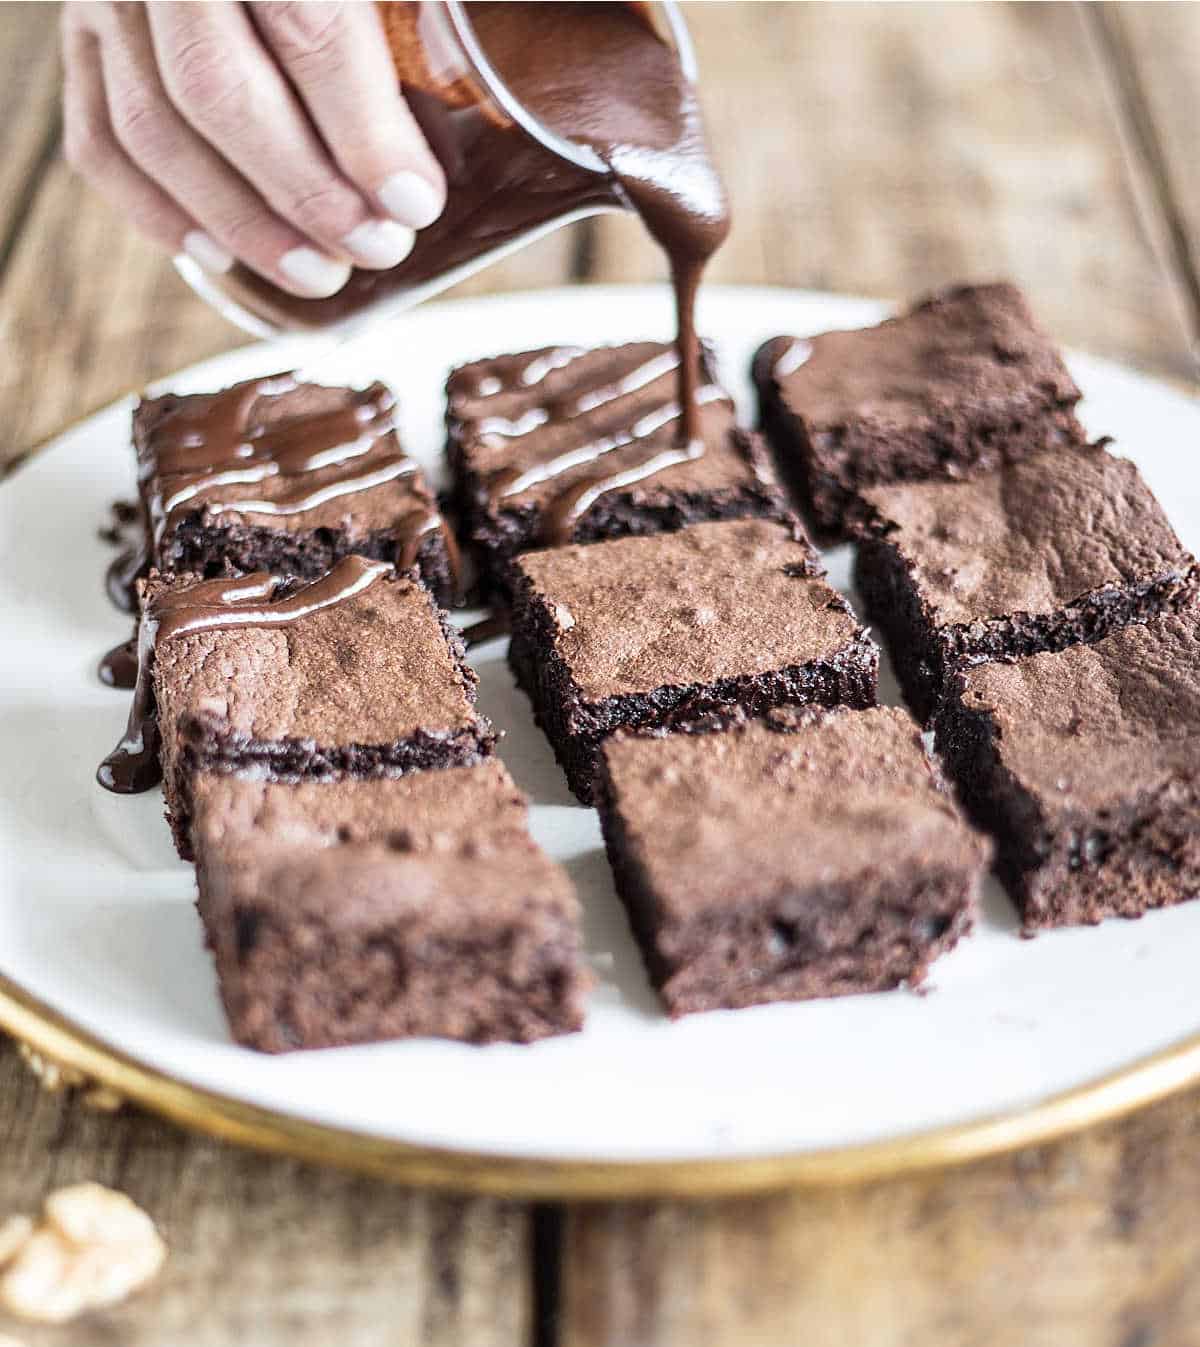
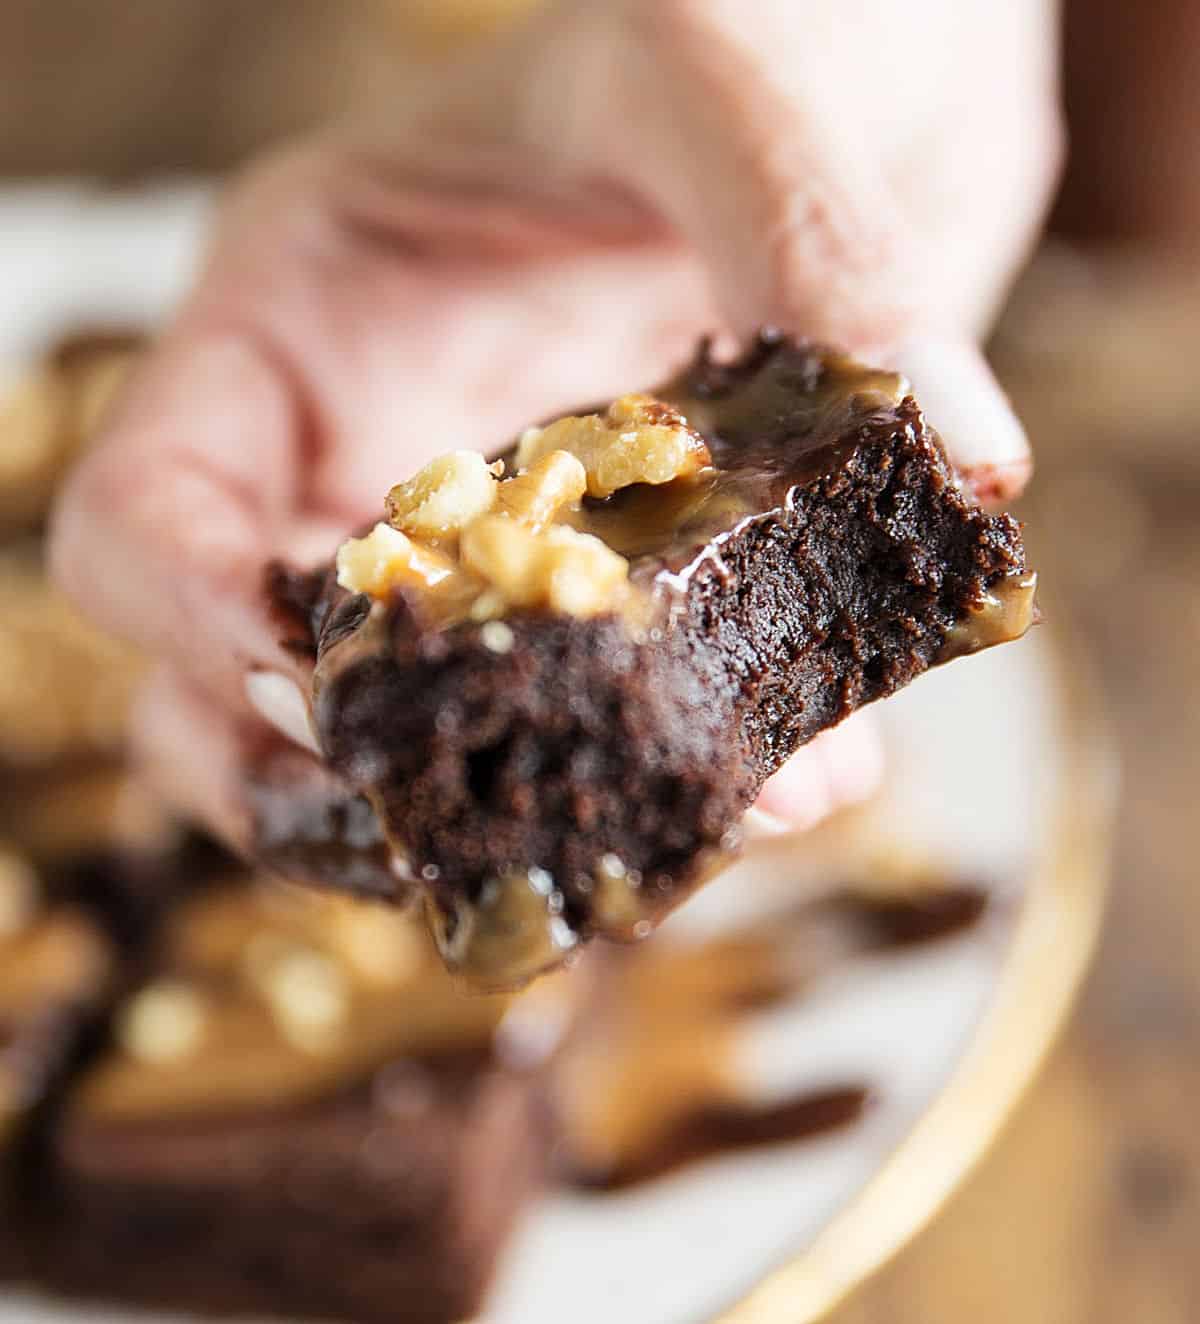
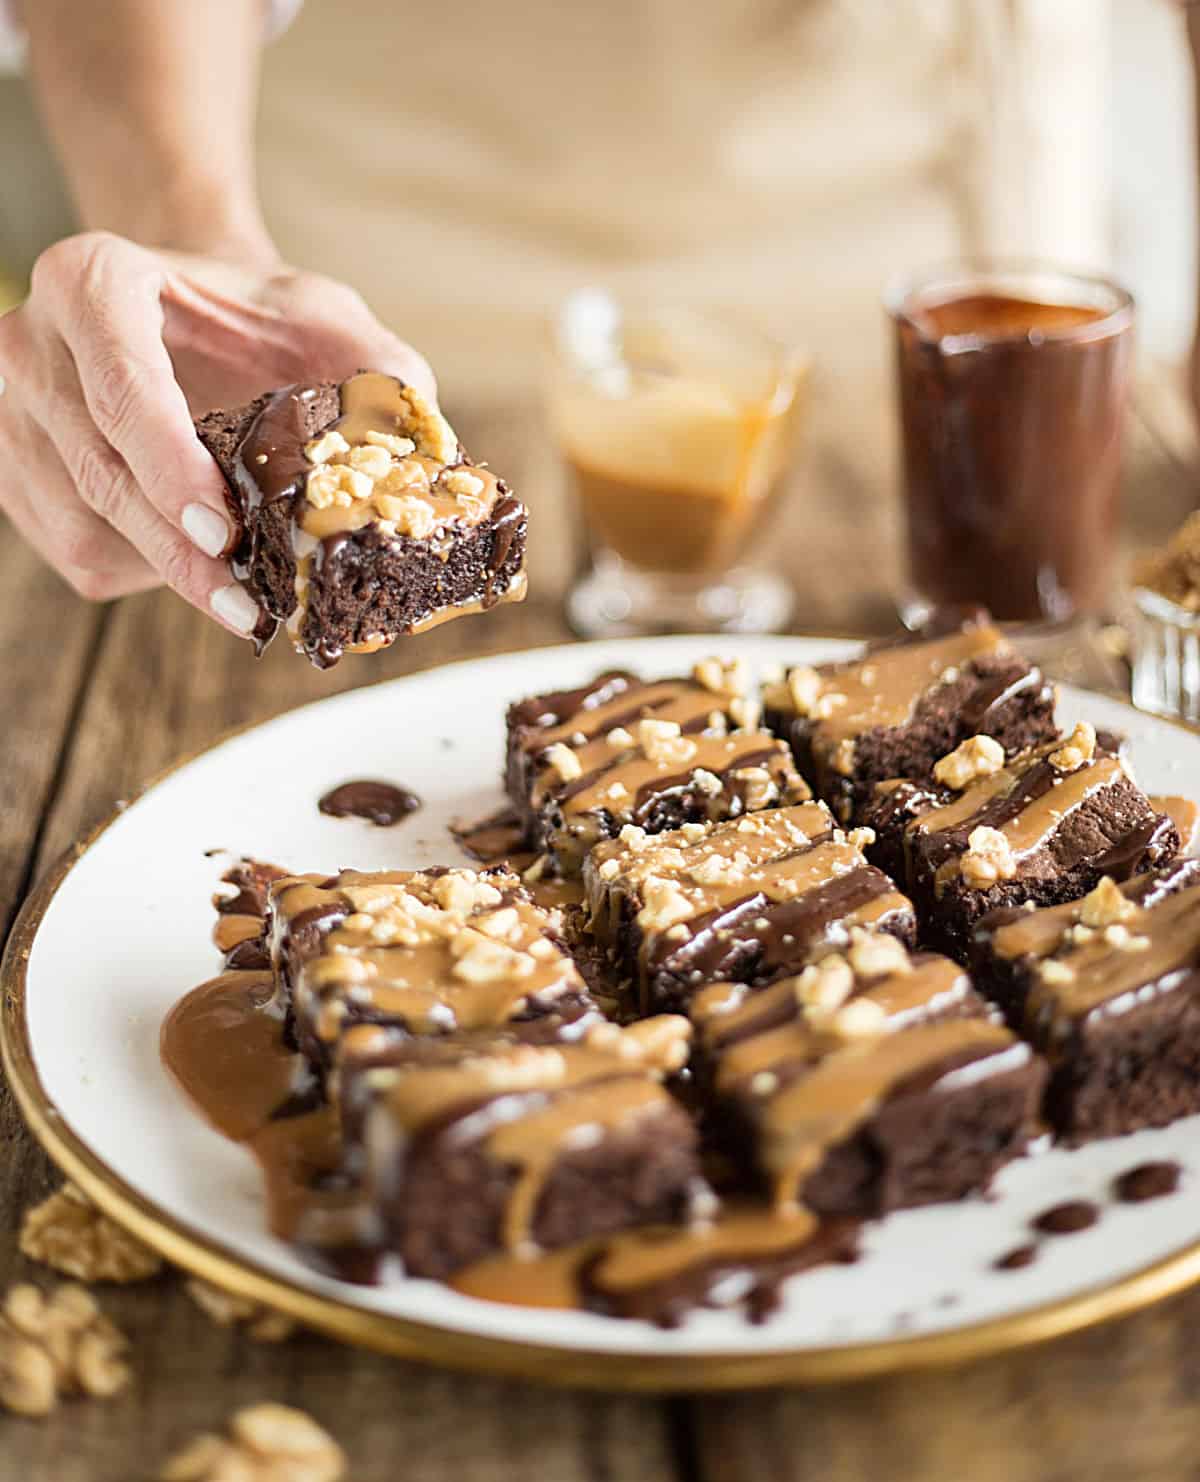
This recipe is decadent and gorgeous, especially if you pour chocolate sauce and store-bought or homemade dulce de leche on top before serving them!
Watch our step-by-step videos
- Easy: although this recipe is not one bowl like the Fudgy Brownies, these bars are easy to make with a hand whisk; no special appliance is needed.
- Deep flavor: using melted semisweet chocolate and cocoa powder guarantees a better chocolate flavor than using only one. A perfect synergy.
- Make ahead: they keep well at room temperature for a few days, several days in the refrigerator and can be frozen. How's that for convenience?
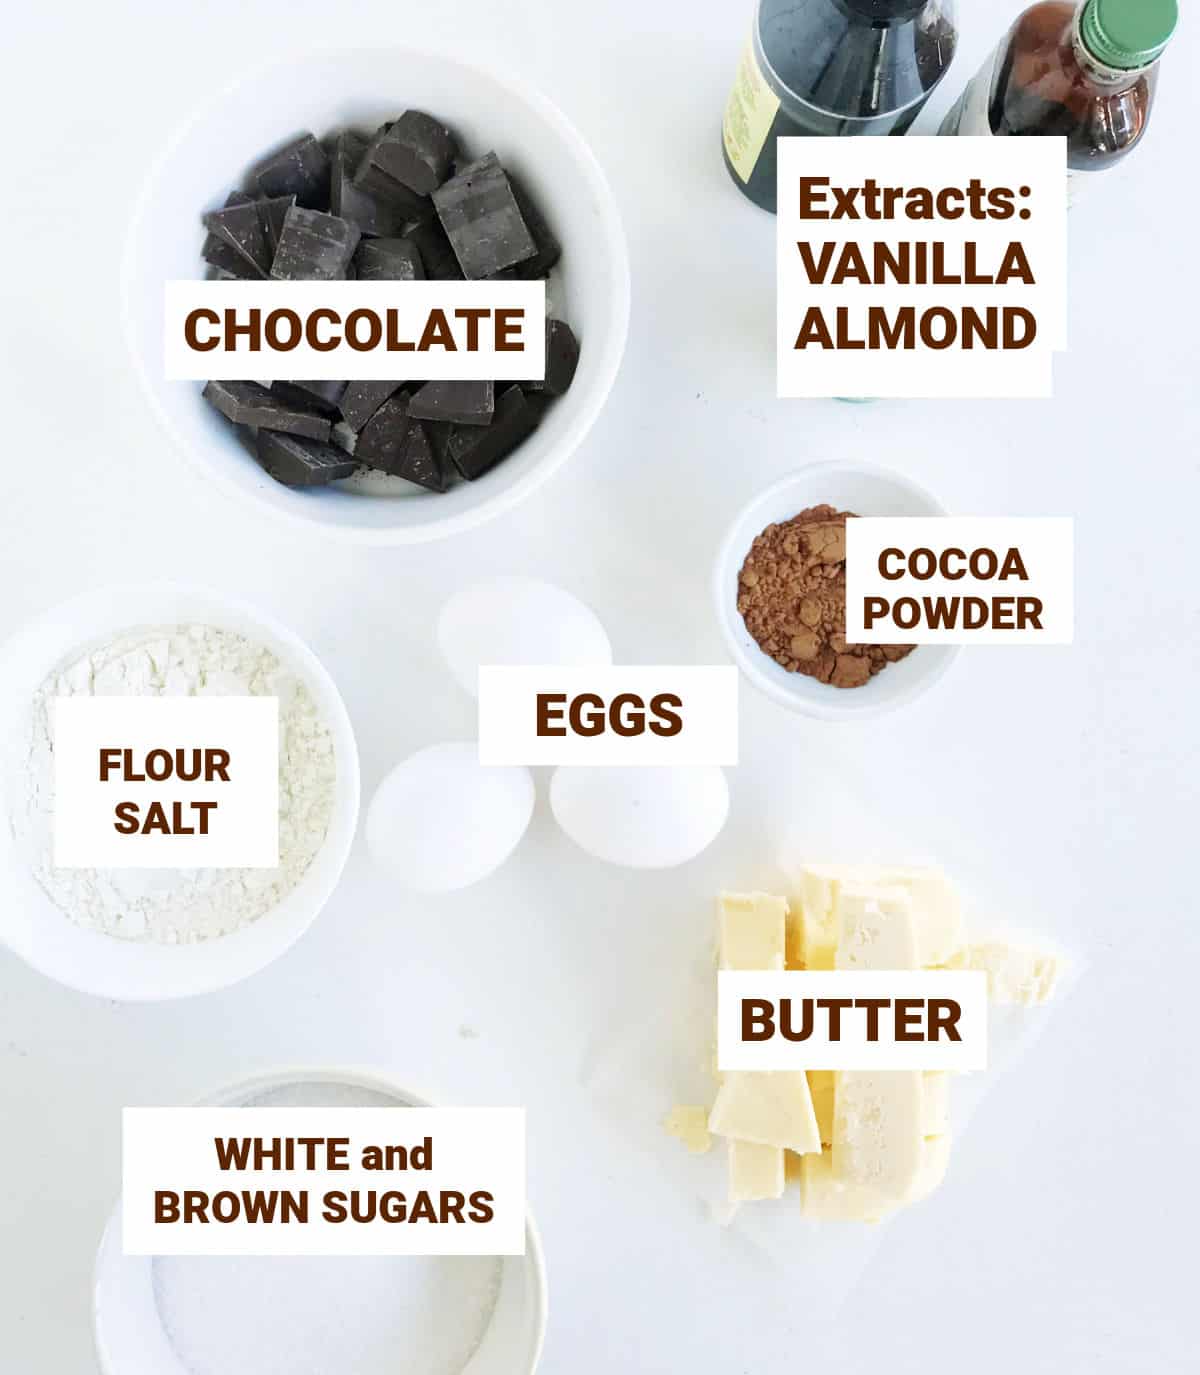
Ingredients
Quantities are listed on the recipe card towards the end of this post. The Ingredients page has more details and lists the brands we use.
- Chocolate: Use your favorite dark semisweet chocolate. I like Ghirardelli or Callebaut 811.
- Unsweetened cocoa powder: In my experience, the dark ones are the best (this does not apply to the super dark used for making homemade Oreo cookies known as dark cocoa powder).
- Brown sugar: light or dark.
- Almond extract: optional but recommended.
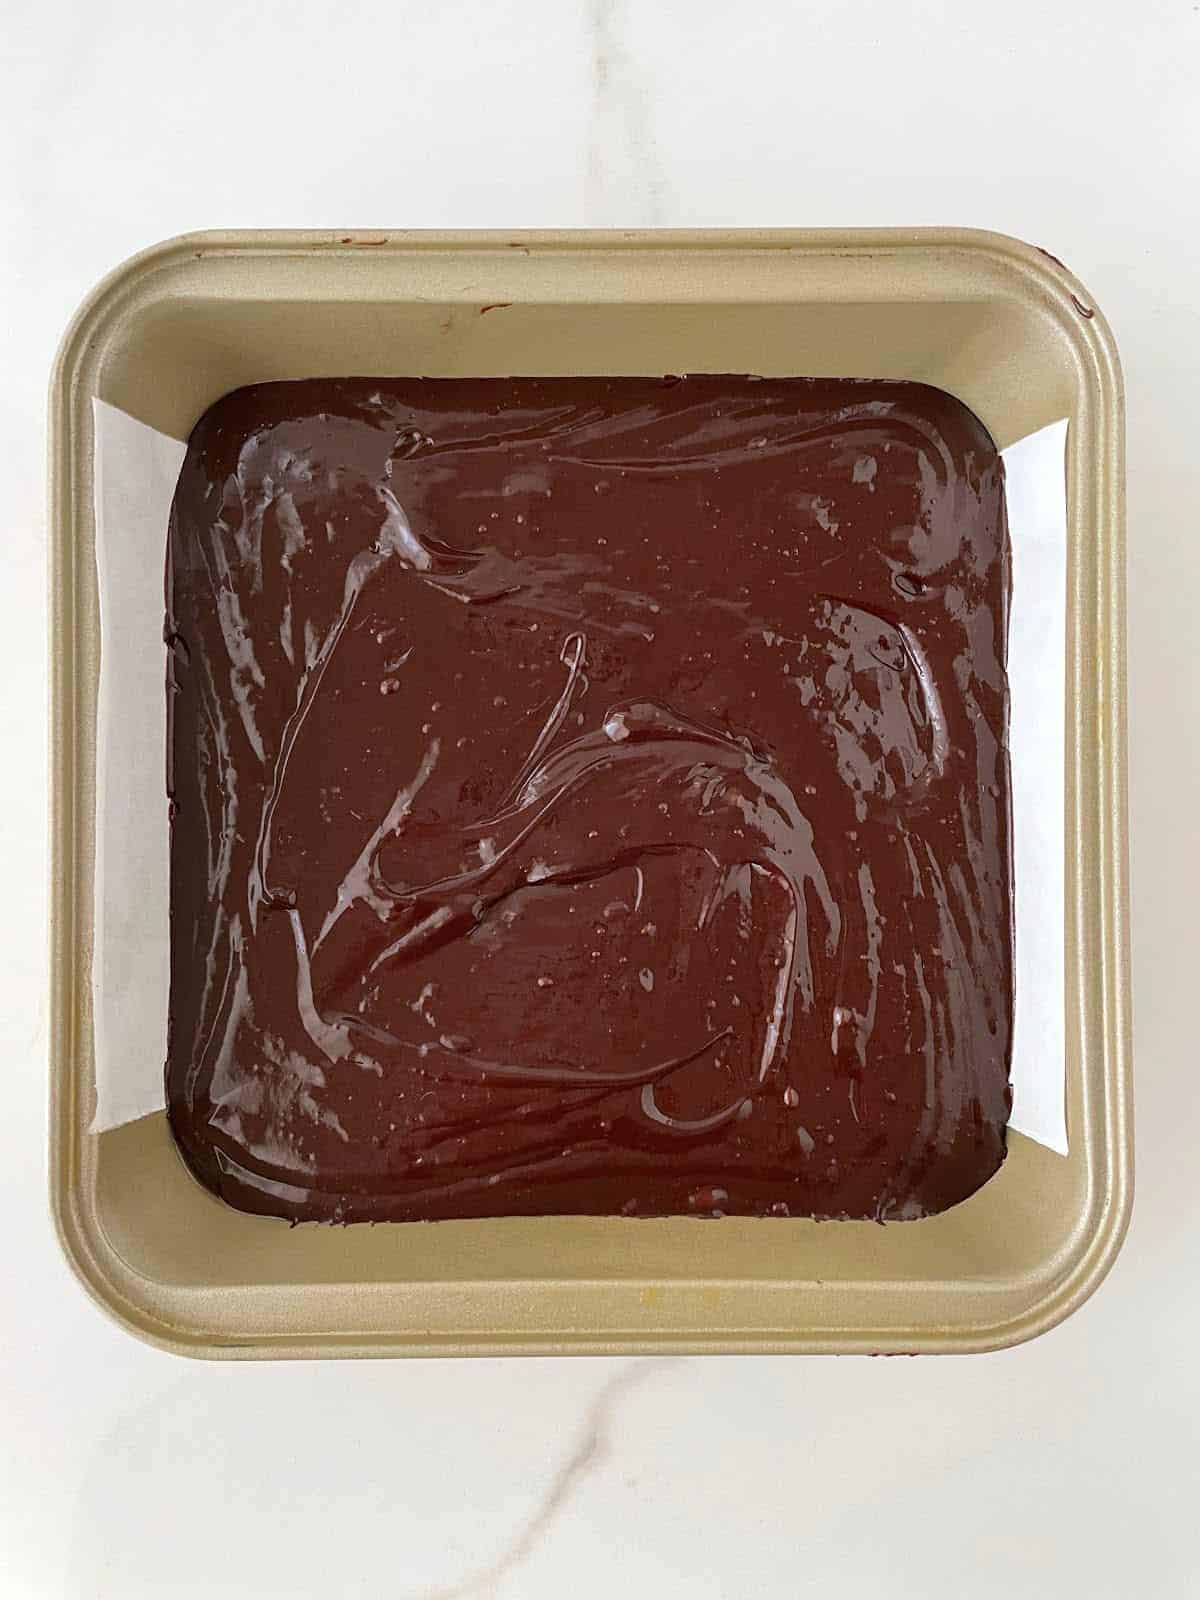
Lining the pan
These are delicious and simple to make.
A couple of bowls, a whisk and a brownie pan get you fantastic results. The batter comes together in no time.
Lining the pan: I like to butter or spray the pan and then take a piece of parchment paper that is wide as the pan and long enough to go up the sides, and line the bottom and two of the sides. The other ones are left greased but not lined. The paper will help when lifting the whole block of cooled brownies.
Kitchen notes
- Organization: Read the recipe first and ensure you have the ingredients at the correct temperatures, equipment, and enough workspace. This will make the process so much easier!
- Baking time: keep in mind that all ovens and pans are different, even if they look similar. The baking time in my recipes is as accurate as possible, but it might take you more or less time. You can use a thermometer (like the OXO oven thermometer) to check that your oven is at the right temperature. I recommend tracking how your oven works and what tiny details you might need to adjust.
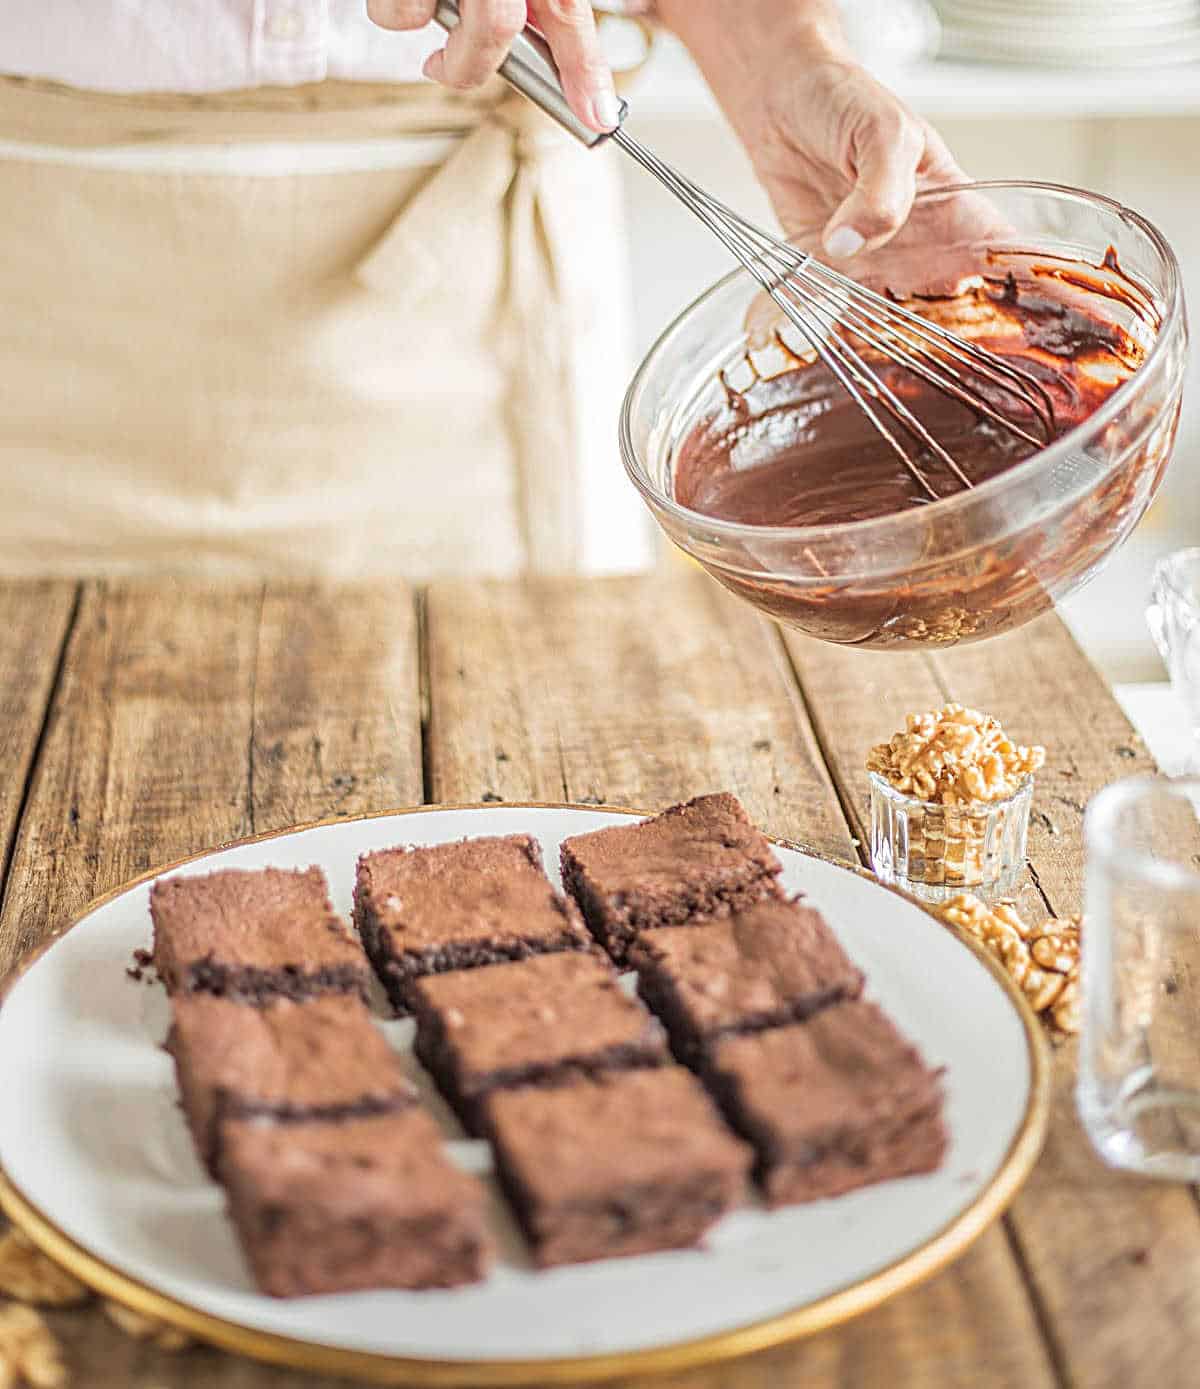
- Sauces: I use chocolate and dulce de leche. If you haven't tried these two flavors together, you're in for a treat of the best kind.
- Resting: I find that most chocolate recipes are better the next day. So, if you can, let these rest in the fridge or at room temperature for a day.
- Flavorings: in addition to the vanilla and almond used, you can add some orange zest, a tablespoon of orange liquor or whisky, a pinch of ground cinnamon, or coffee powder or extract.

Serving brownies
- Plain: like most fudgy and intense chocolate recipes, a small piece goes a long way. I like them cold enough, but not straight from the refrigerator because I think the cold somewhat numbs the flavor.
- Plated dessert: put a square on a plate and top it with a scoop of ice cream (vanilla, dulce de leche, chocolate, even raspberry) or some whipped cream, and then drizzle some chocolate or hot fudge sauce if you're going all the way. This is great when you have one batch of brownies and many mouths to feed.
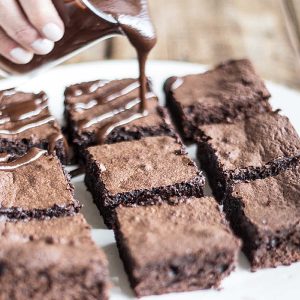
- For over-the-top brownies, do as I did in these images and add chocolate ganache first, then dulce de leche, and finally some chopped walnuts or other nuts. They will be messy to eat with your hand, but then you have the bonus of licking them.
If you made this recipe and loved it, you can comment below and leave a 5-star ⭐️ review. Also, if you had issues, let me know so we can troubleshoot together.
You can also subscribe to our FREE email series 'Baking the Best' and our regular newsletter. Or follow and save my recipes on Pinterest.
As an Amazon Associate, I earn from qualifying purchases. Read my disclosure policy.
Homemade Brownies (with Chocolate Sauce)
Ingredients
- ¾ cup unsalted butter
- 3 ½ ounces semisweet chocolate, in small pieces
- 1 cup white granulated sugar
- 2 tablespoons brown sugar, light or dark
- 3 eggs, at room temperature
- ½ cup all-purpose flour
- ½ cup unsweetened cocoa powder
- ½ teaspoon salt
- 1 teaspoon vanilla extract , or ¾ teaspoon vanilla paste
- ¼ teaspoon pure almond extract, optional but recommeded
Toppings (optional):
- Chocolate ganache, the same one I use for the Chocolate Bundt Cake, or your favorite store-bought chocolate sauce
- Dulce de leche, homemade or you can buy it online (see Notes, below)
- ¼ cup chopped walnuts
Instructions
- Turn the oven to 350°F (180°C).
- Grease or spray an 8-inch (20cm) square pan. Line with a strip of parchment paper wide as the pan, covering the bottom and two sides. This makes it easier to remove from the pan after it's baked.
- Melt ¾ cup unsalted butter in a bowl 3 ½ ounces semisweet chocolate in pieces. You can microwave it in 10 second spurts, mixing well between each one. Or do it in a double boiler making sure the bottom of the bowl is not touching the water.
- Combine 1 cup white granulated sugar and 2 tablespoons brown sugar in a bowl, add the 3 eggs and mix well with a whisk until it's frothy, about 1 minute.
- Add the melted chocolate mixture and stir until fully mixed.
- Add 1 teaspoon vanilla extract , ¼ teaspoon pure almond extract and then the sifted dry ingredients (½ cup all-purpose flour, ½ cup unsweetened cocoa powder and ½ teaspoon salt) in 2 parts. I have them measured and sift them directly over the chocolate mixture, but you can sift them in a different bowl first and then add them.
- Mix well until you have a silky, smooth mixture.
- Pour into the prepared pan and bake for about 20 minutes, until the edges are firm but the center still jiggles. It might take a few more minutes. But don't bake them until the whole surface is firm because they won't be fudgy.
- Let cool on a wire rack. I recommend eating them the next day, but that's hard, I know. So pop them in the fridge for an hour.
- Eat them plain or top with chocolate sauce, dulce de leche and ¼ cup chopped walnuts before eating.
angiesrecipes says
So chocolatey, rich and absolutely irresistible!