
Juicy, buttery and utterly delicious, this pie screams summer fruit and fun days. A layer of cherry filling, a golden brown crumb topping, and a bottom crust (we love our homemade Flaky Pie Crust recipe for this one) make this a great dessert that everyone loves. Though we are partial about fresh, sweet cherries, it can be made with frozen ones.
SAVE THIS RECIPE
Time to make cherry pie!
And I have to admit that eating fresh cherries straight from the fridge is probably my favorite way.
I was very skeptical of baking pies during the Summer as it implies turning on the oven, making homemade pie dough, and all those tasks that I don't exactly thrive on during hot days.
But, there's always room for a juicy pie with a crumb topping, a mix between two of this blog's perennial favorites: the easiest cherry tart ever and the beautifully golden peach crumb pie.
But how will we eat homemade fresh fruit pies if we don't get into the kitchen?
So here we are, making and sharing a fantastic cherry crumb pie recipe that can be a part of your 4th of July desserts, among other outdoor celebrations.
I'm a huge advocate for easy fruit desserts like the cherry crisp or old fashioned peach cobbler, but a pie is a pie, and we might go as far as to say that nothing compares.
Ingredient list
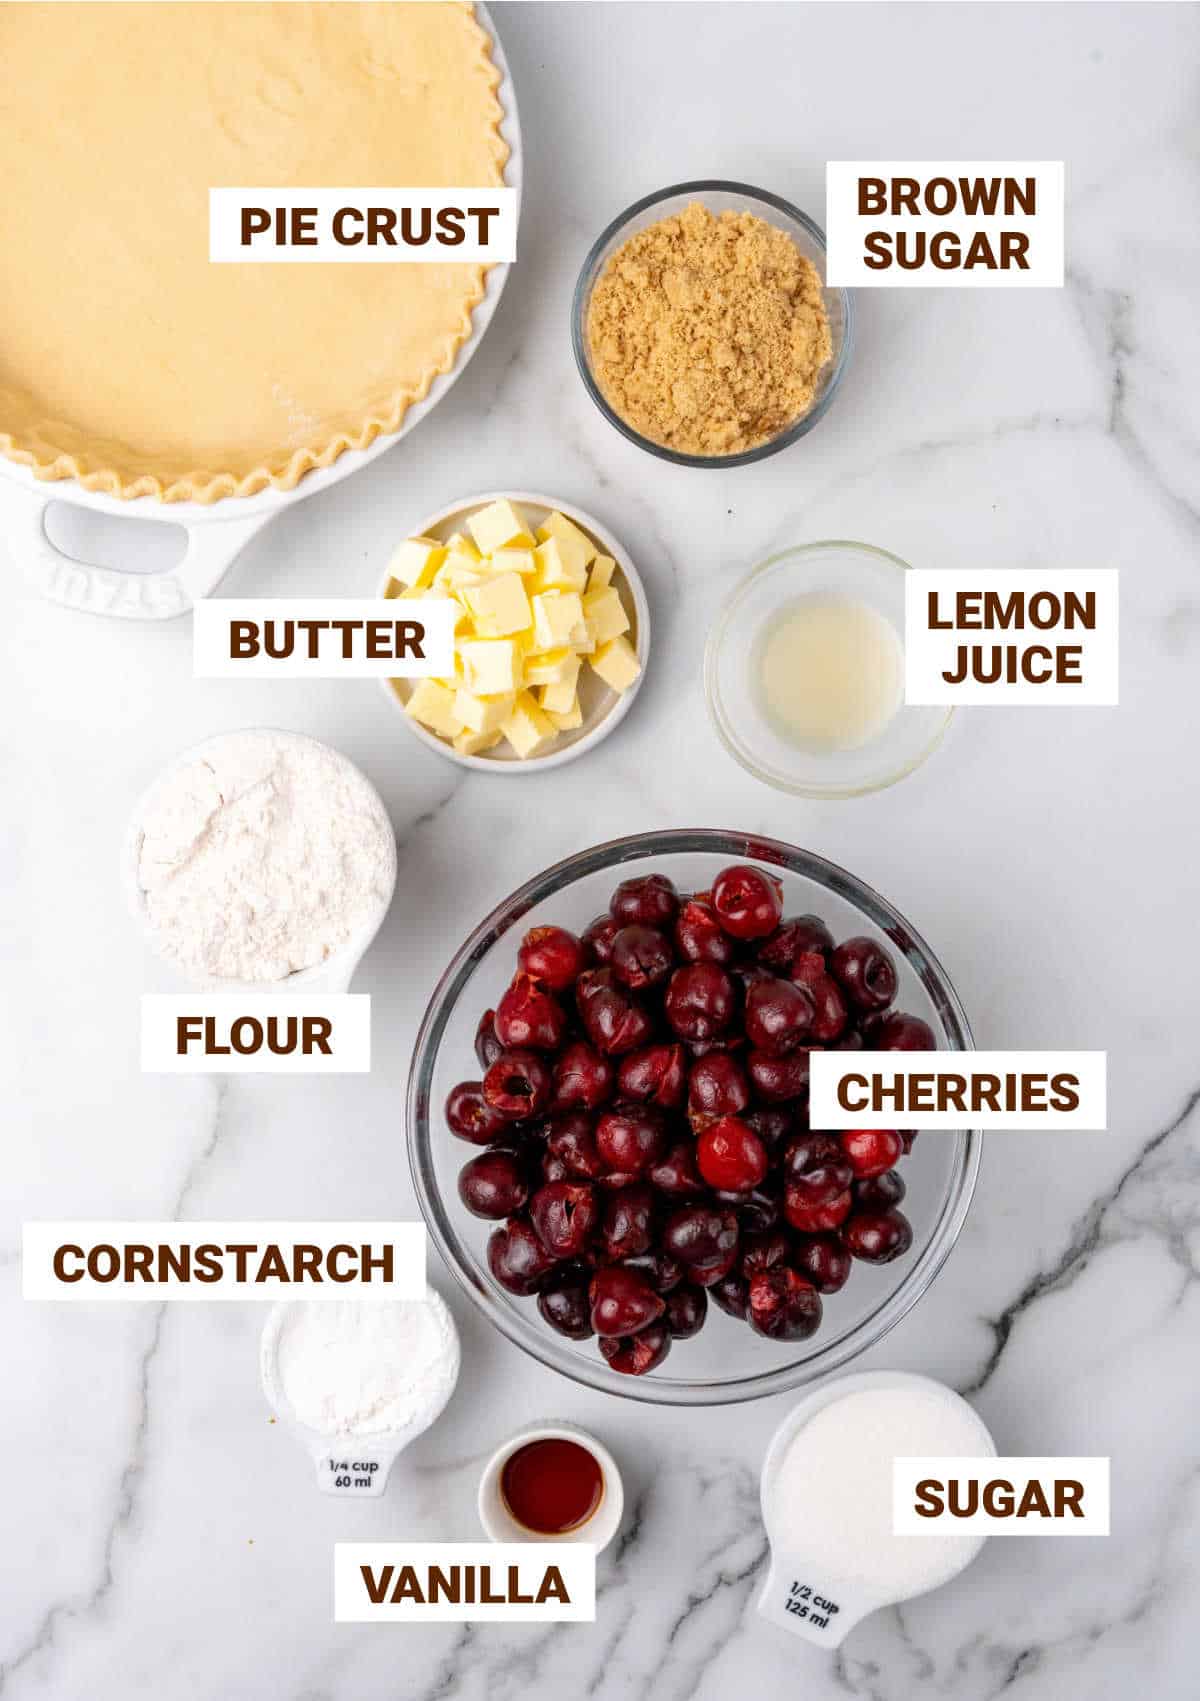
- Homemade crust: if using our flaky pie dough recipe you'll also need shortening. Alternatively, use your favorite easy homemade pie crust recipe or a good quality store-bought one.
- Cherries: I love to use fresh fruit whenever possible. Tart cherries are my first choice but they're hard to find, so I usually make this pie with sweet ones. But know that frozen cherries work just fine.
- Unsalted butter.
- All-purpose flour.
- Brown sugar: used for the crumble topping or streusel.
- White granulated sugar.
- Cornstarch: it's used as a thickener for the filling.
- Lemon juice: fresh.
- Vanilla extract.
Quantities are listed on the recipe card towards the end of this post. The Ingredients page has more details and lists the brands we use.
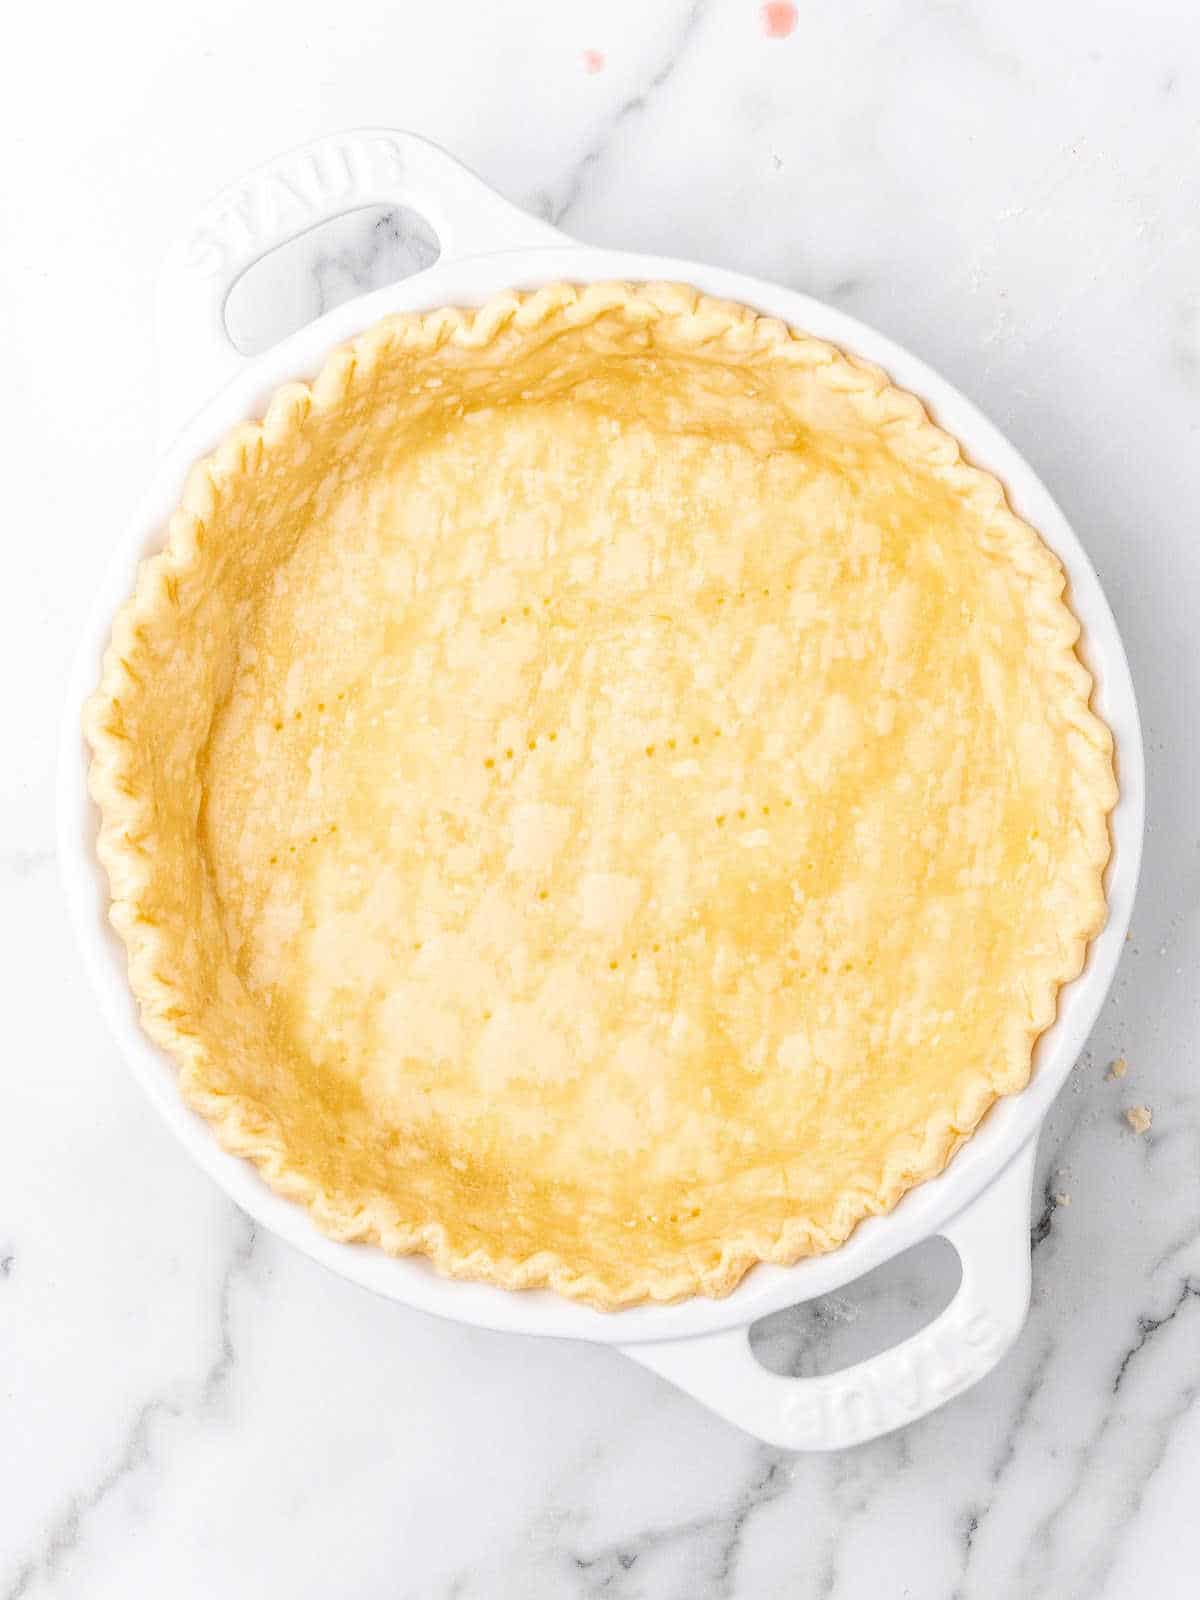
Pie crust
I will always favor a homemade crust if I want to make the best cherry pie I can, like our Perfect Flaky Pie Crust (which can be made in advance and has videos to guide you), over a commercial one.
BUT, know that a good dough from the bakery will also work very well. Sometimes, we need shortcuts, and hot days require them more than others, right?
Blind baking is a necessary step in which the pie crust is half-baked or pre-baked so that it doesn't lose its shape and get soggy after the cherry filling is piled up and the whole pie is fully baked.
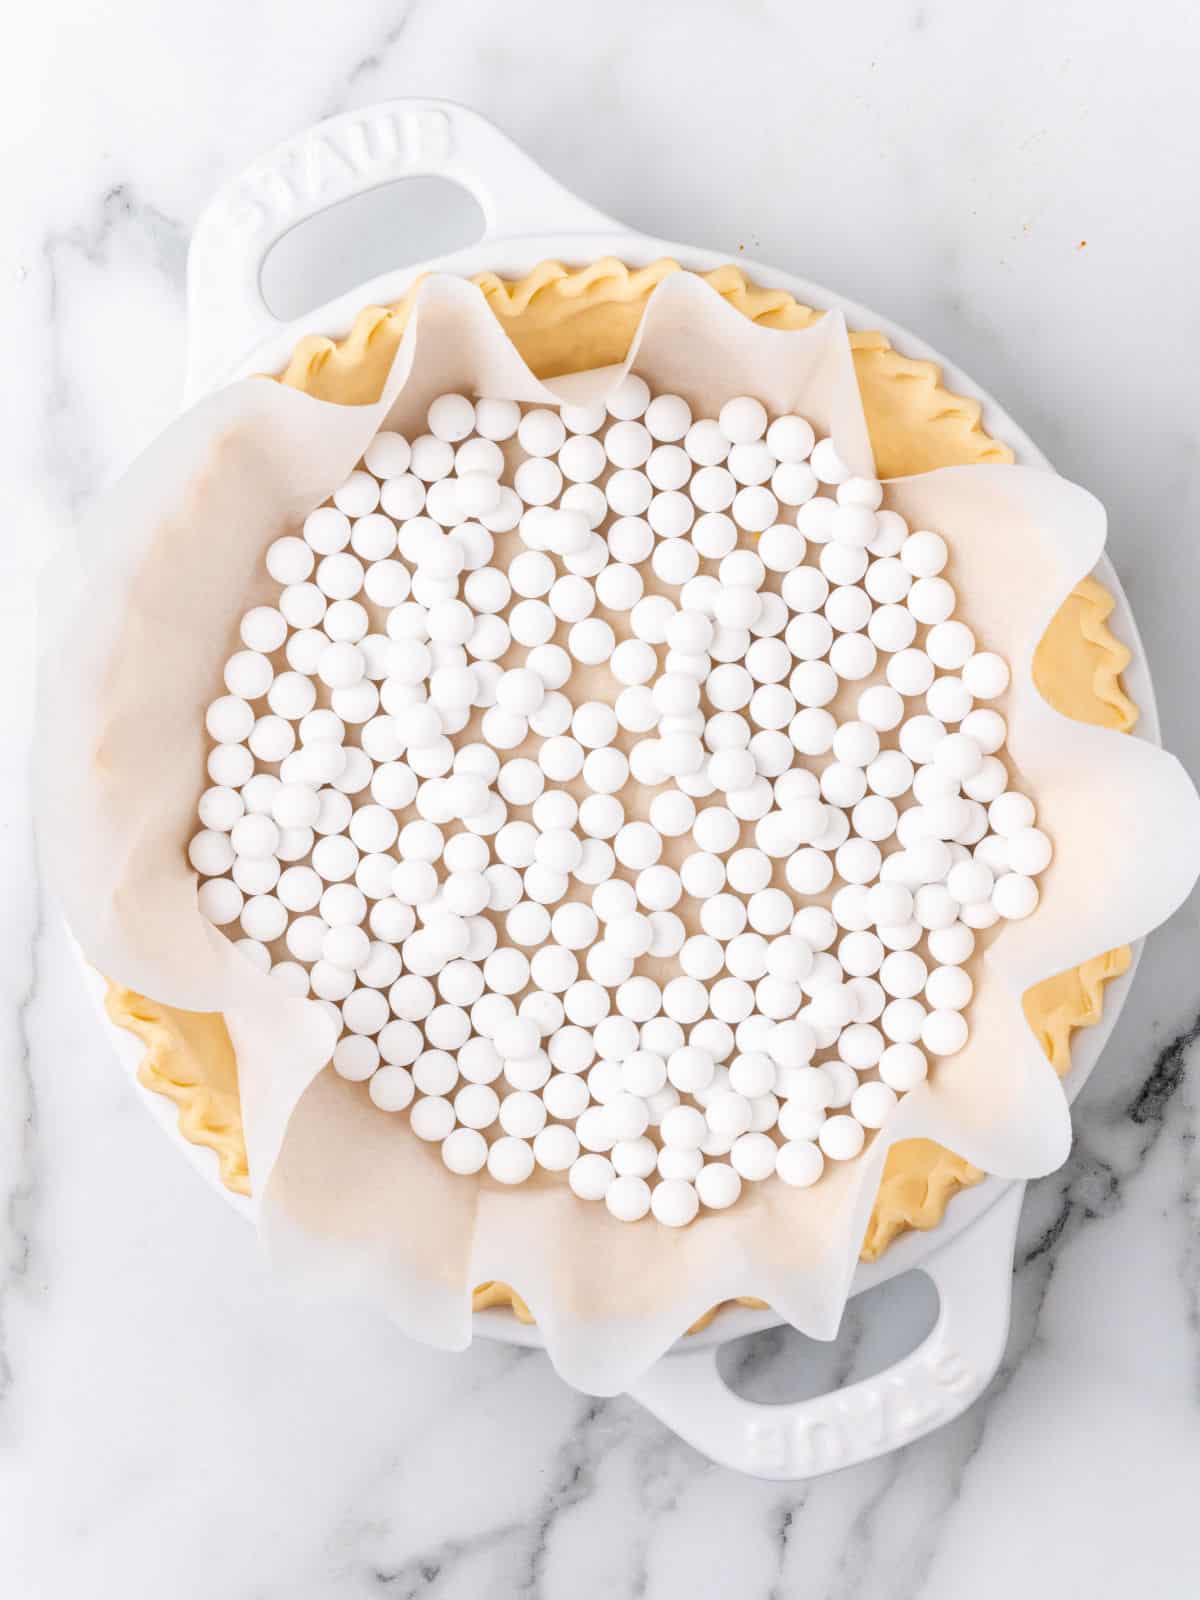
- To prepare the crust for blind baking, cover with a large piece of parchment paper or aluminum foil, add pie weights (or unbaked rice, chickpeas, flour, anything that doesn't burn and that will weight the paper and crust down) and bake for 15 minutes before removing the paper.
- The crust will have dried in parts and the paper will be easily removed. If it's stuck, bake it 5 minutes more.
Cherry filling
- Cherries: as discussed in other parts of this post, you can use sweet or tart cherries. In both cases sugar is added, but I recommend a smaller amount if using sweet cherries. Unless you want a very sweet cherry dessert.
- Pitting cherries: it's the only part of this recipe that takes a little patience and an apron. Make sure your clothes are covered as this step means drops of cherry juice will be flying around. You can buy pitted frozen cherries for convenience.
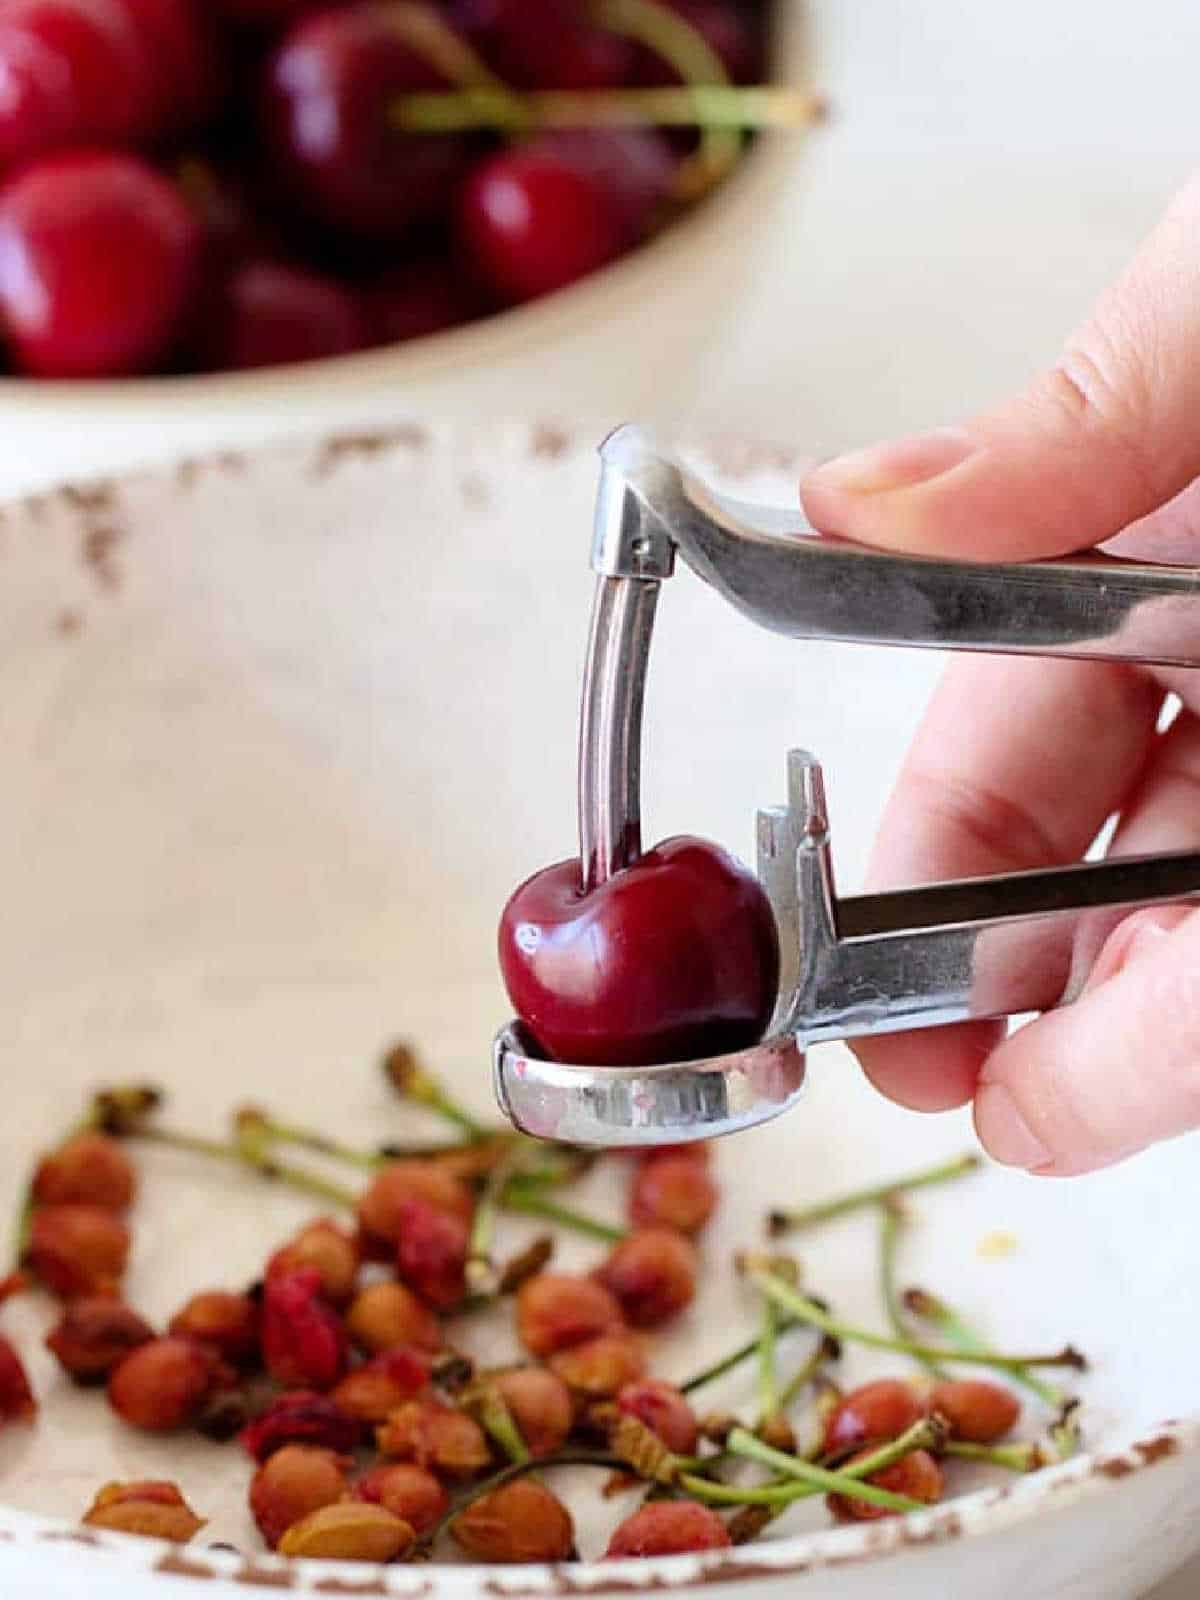
- They must be pitted and a cherry pitter is a must tool for this. You can easily buy them online, and I love the OXO Cherry and Olive pitter.
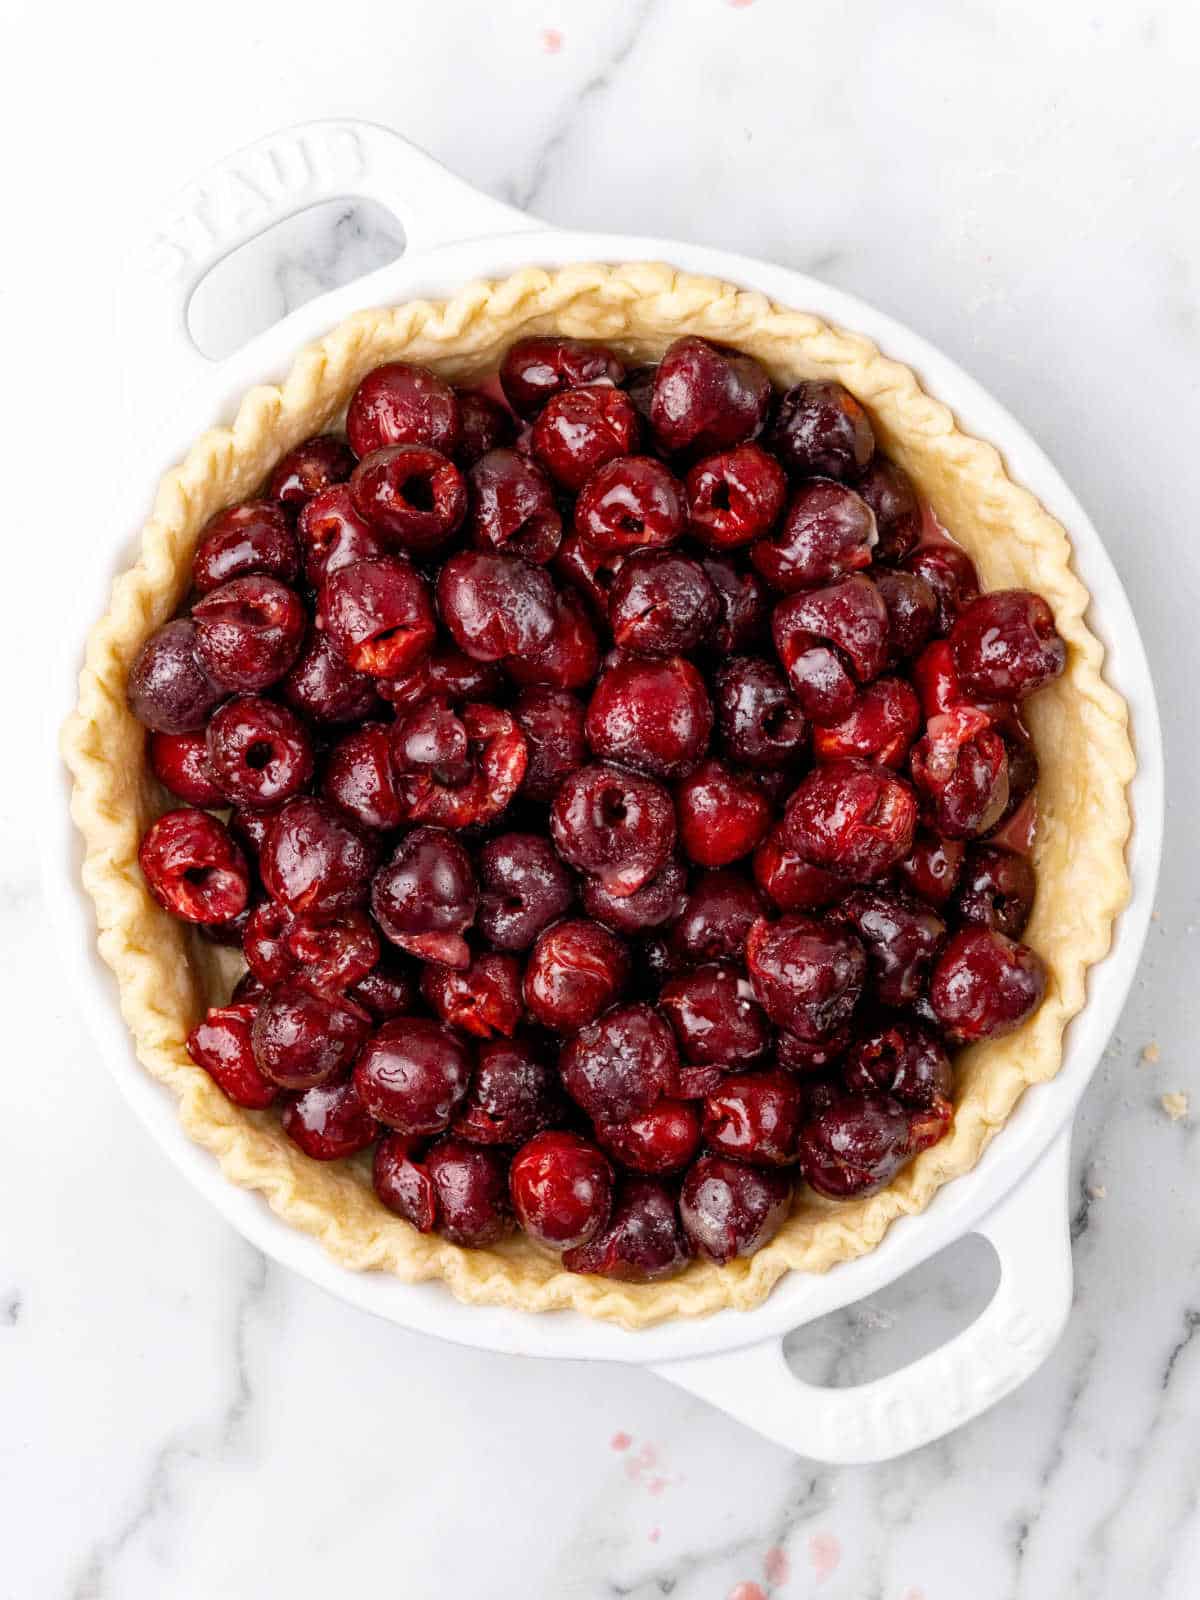
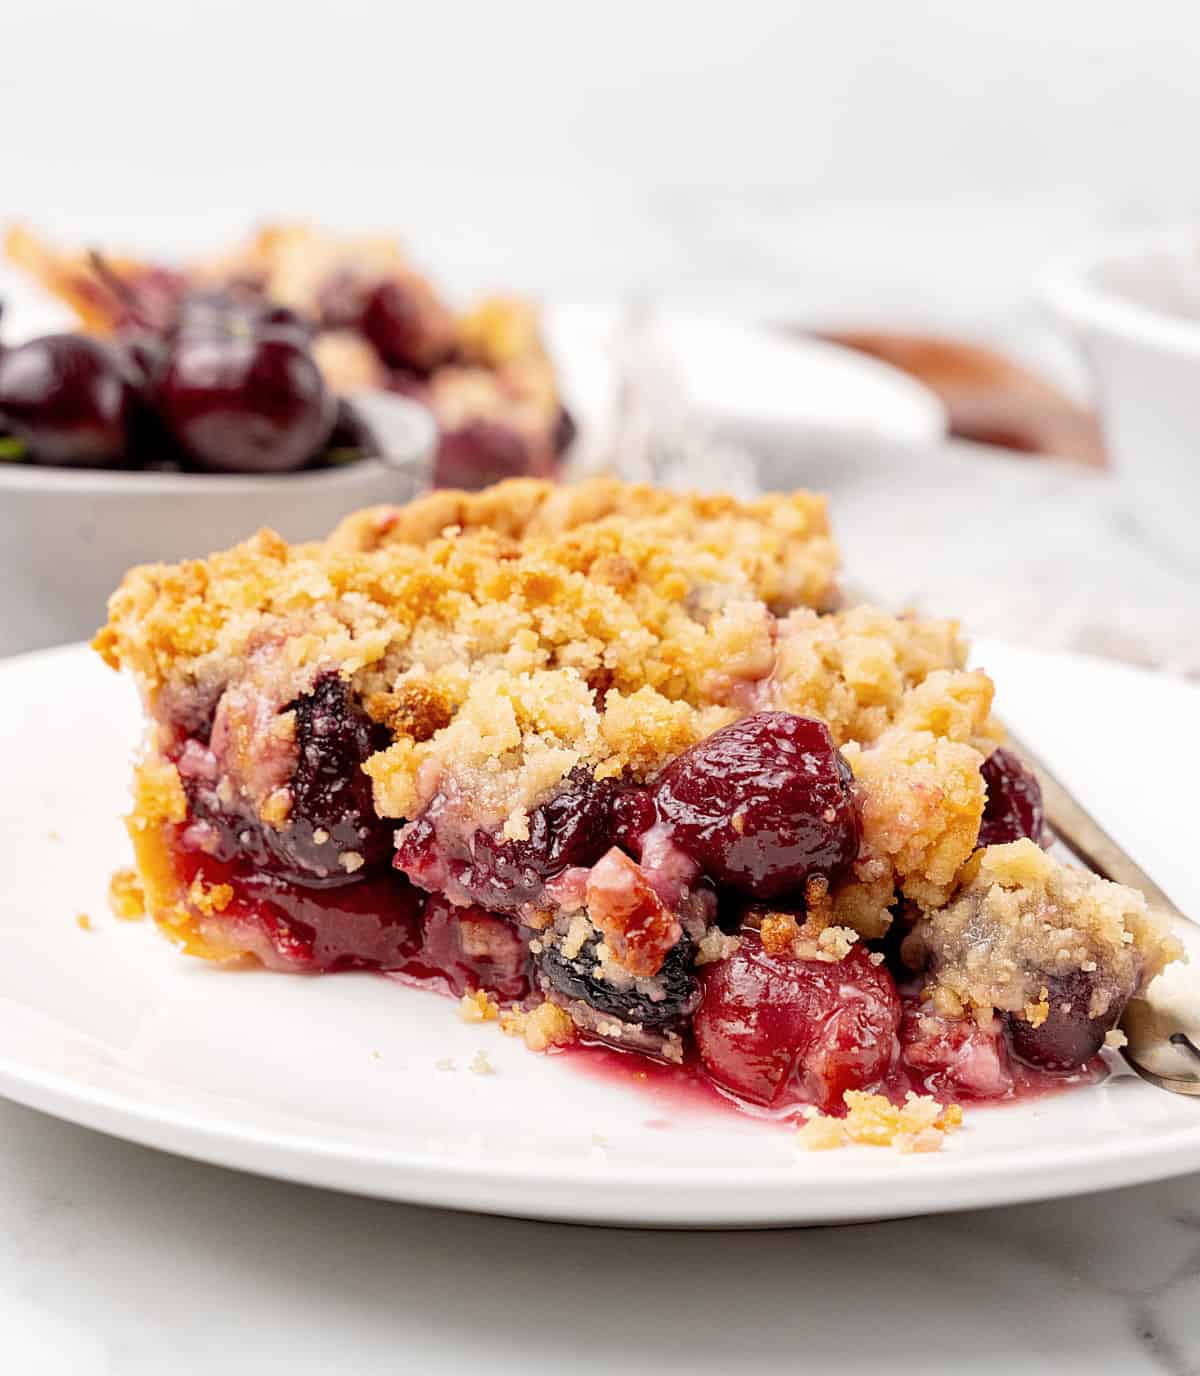
- Filling: the cherries can be whole, halved or a mix of both. They're mixed with the rest of the ingredients and then poured into the pre-baked crust. Make sure all the fruit is well coated.
Crumb topping
We're using the classic mixture of butter, sugar, and flour. Very traditional, very simple and easy to make.
Make it in advance and kept refrigerated or frozen (always with plastic wrap or in an airtight container). When it's time to bake the pie, simply sprinkle the crumb topping over the cherries. You don't need to defrost it or bring it to room temperature.
- By hand: use a large bowl and mix all ingredients together, either with your hands or with a pastry blender. I find that this is the best way if making it only for this pie because it's a small amount.
- With the food processor: this is a great alternative if you're making a large batch of crumble. Mix a few times the flour with the sugar and then add the cold butter in pieces. Process with on/off pulses just until the butter is the size of peas. Don't overprocess! It's a granular mixture.
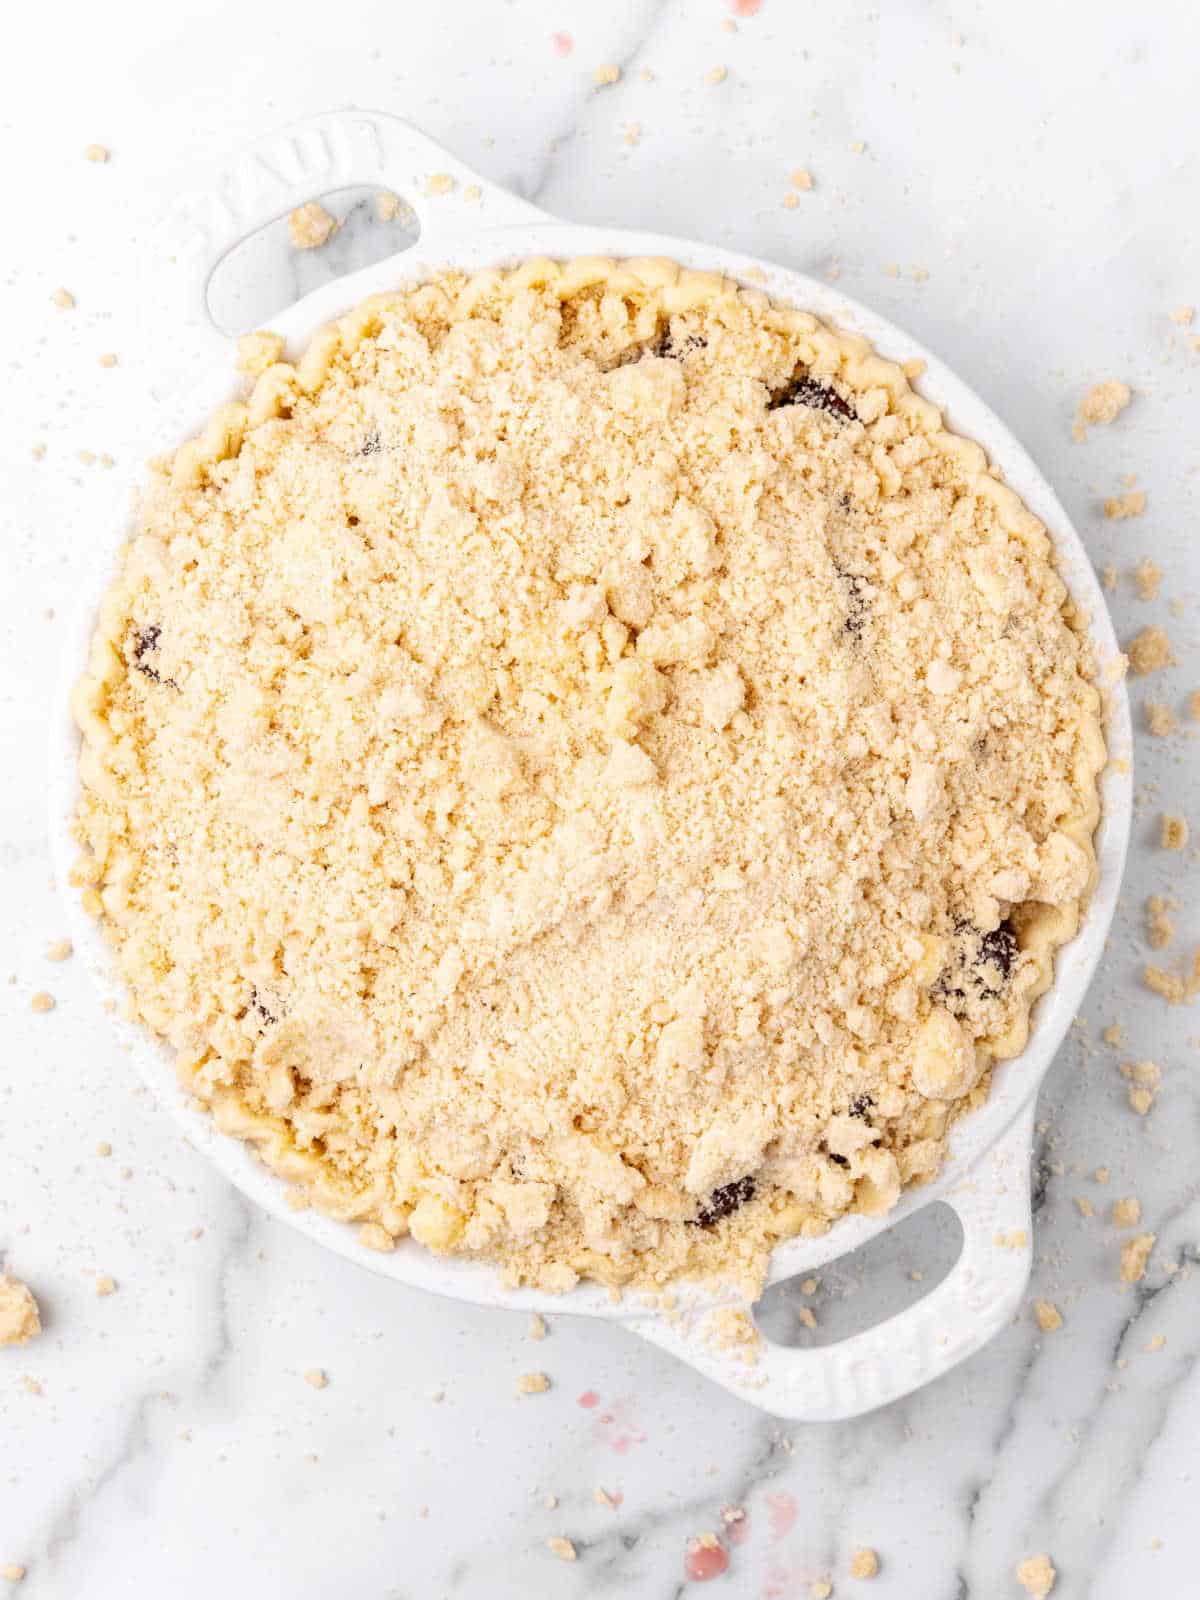
- Combine the dry ingredients in a medium bowl and mix in the cold butter. You can use your hands, a pastry cutter or a food processor. Sprinkle the crumble on top of the cherry filling. You can very slightly patted it down if it's too loose.
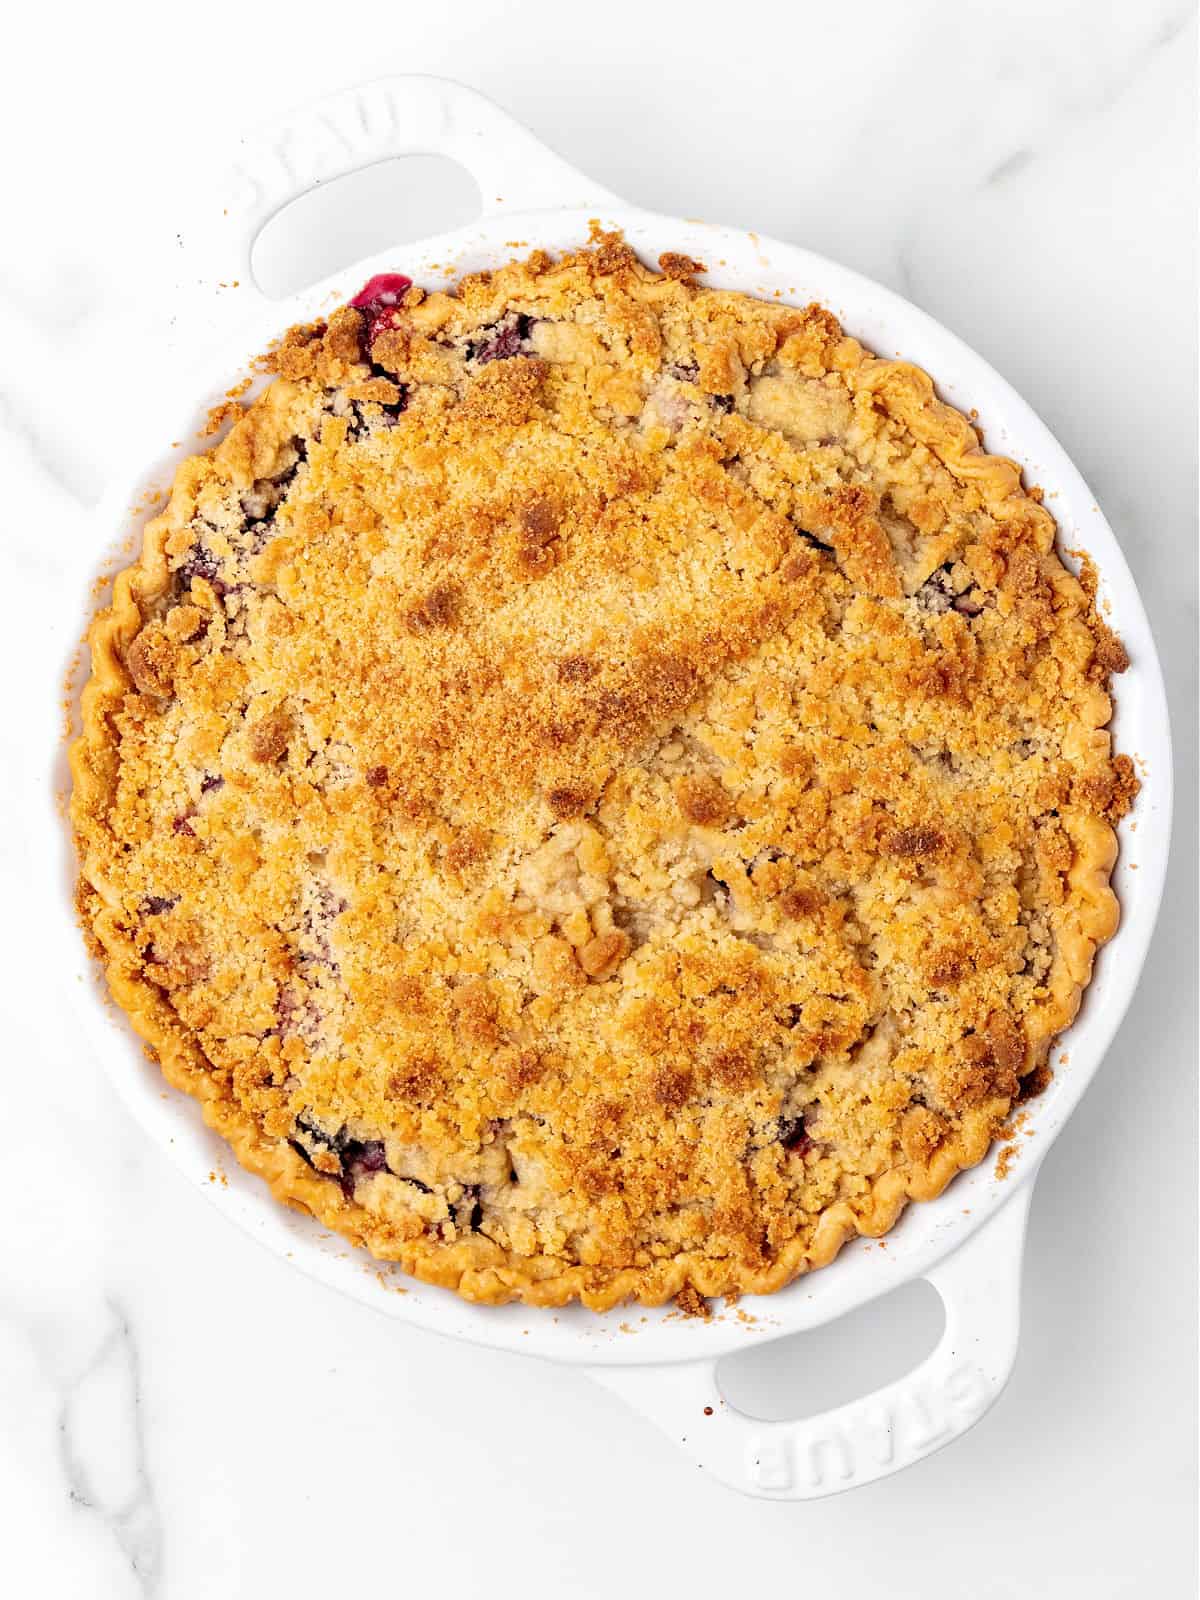
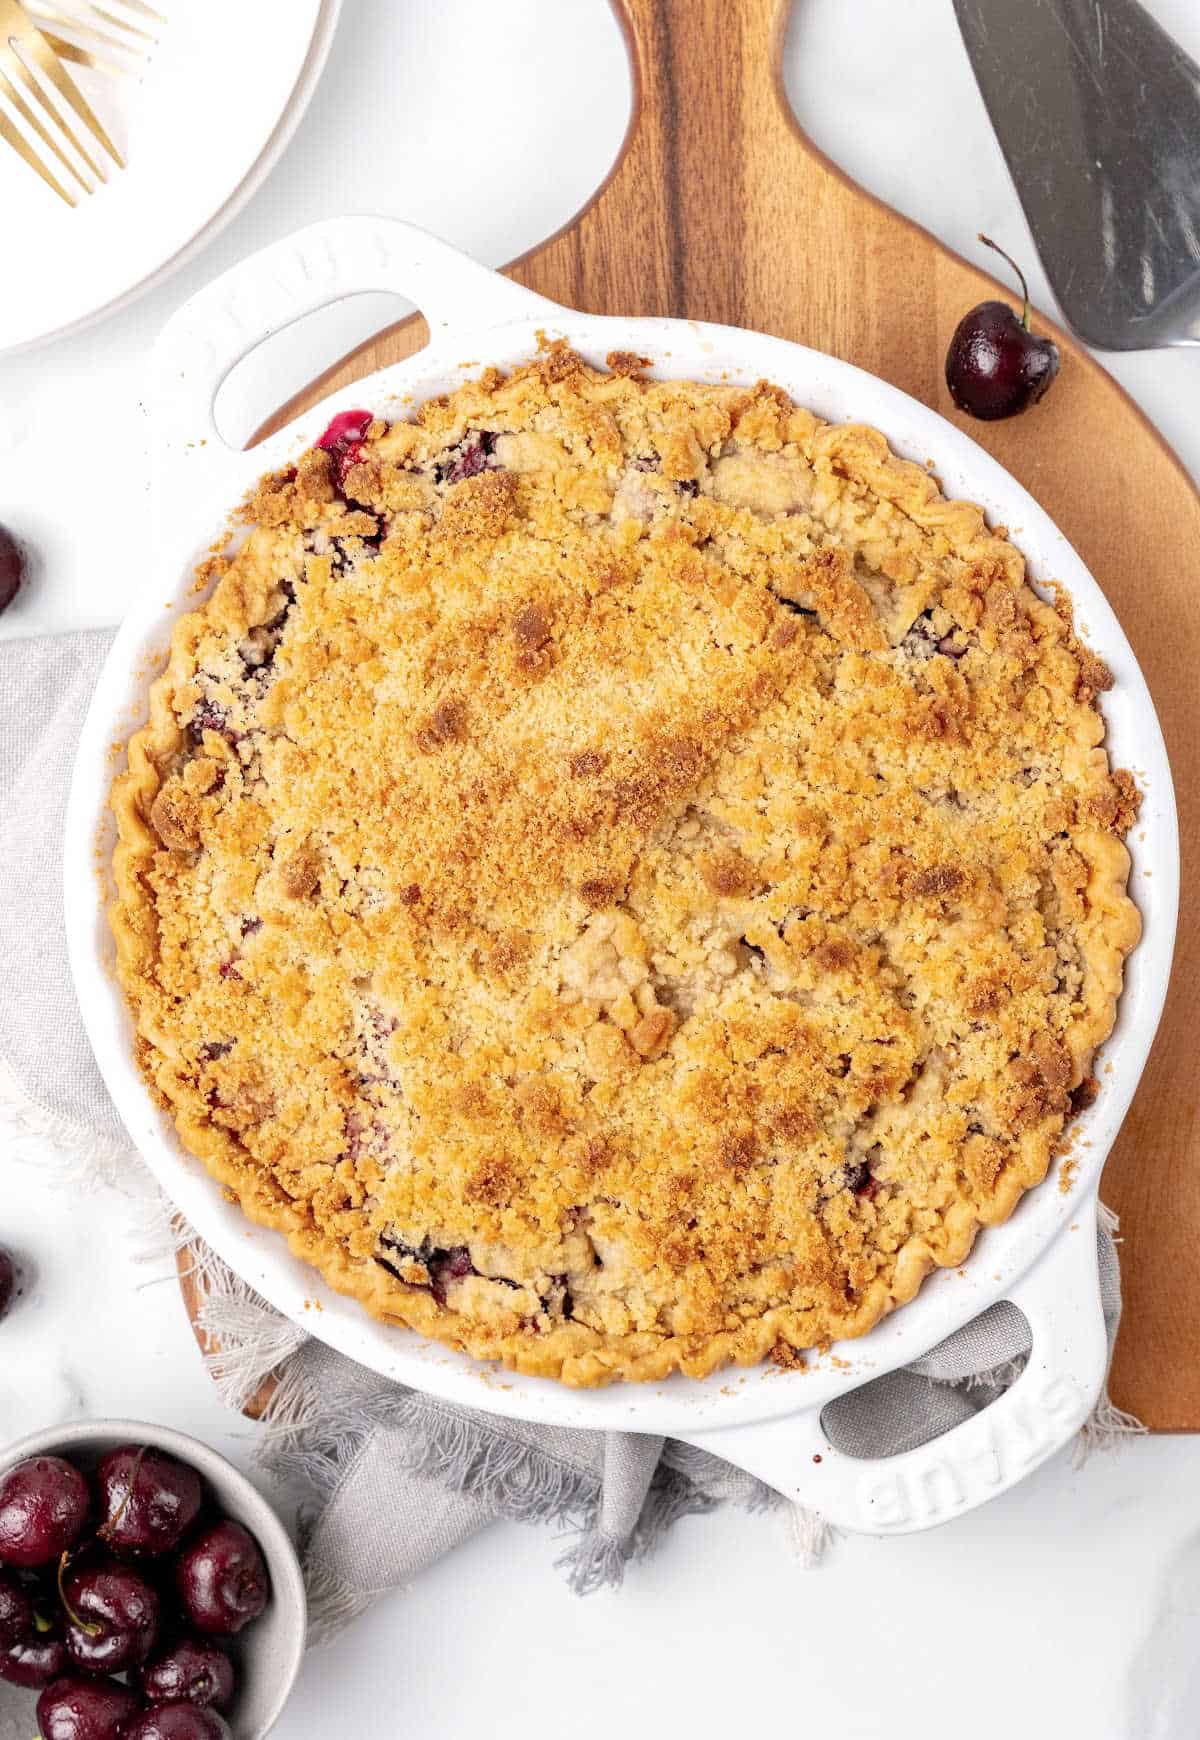
- Baked pie: the juices will bubble up and the topping will be dry and golden brown.
Kitchen Notes
- Organization: read the recipe first and ensure you have ingredients at the correct temperature, utensils and equipment needed, and enough workspace. This will make the process so much easier.
- Baking time: consider that all ovens and pans are different, even if they look similar. The baking time in my recipes is as accurate as possible, but it might take you more or less time. You can use a thermometer(like the OXO oven thermometer) to check that your oven is at the right temperature. I recommend keeping track of how your oven works and what tiny details you might need to adjust.
- Sweetness: if using sweet cherries I recommend ⅓ cup sugar, and if using tart cherries I recommend ⅔ cup of sugar.
- Pitting cherries: you can buy pitted frozen cherries, but need to do it manually is using fresh ones. There are many types, for just one cherry, or for pitting multiple cherries at once. You do need pitted cherries for this recipe.
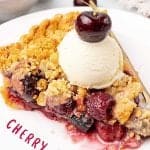
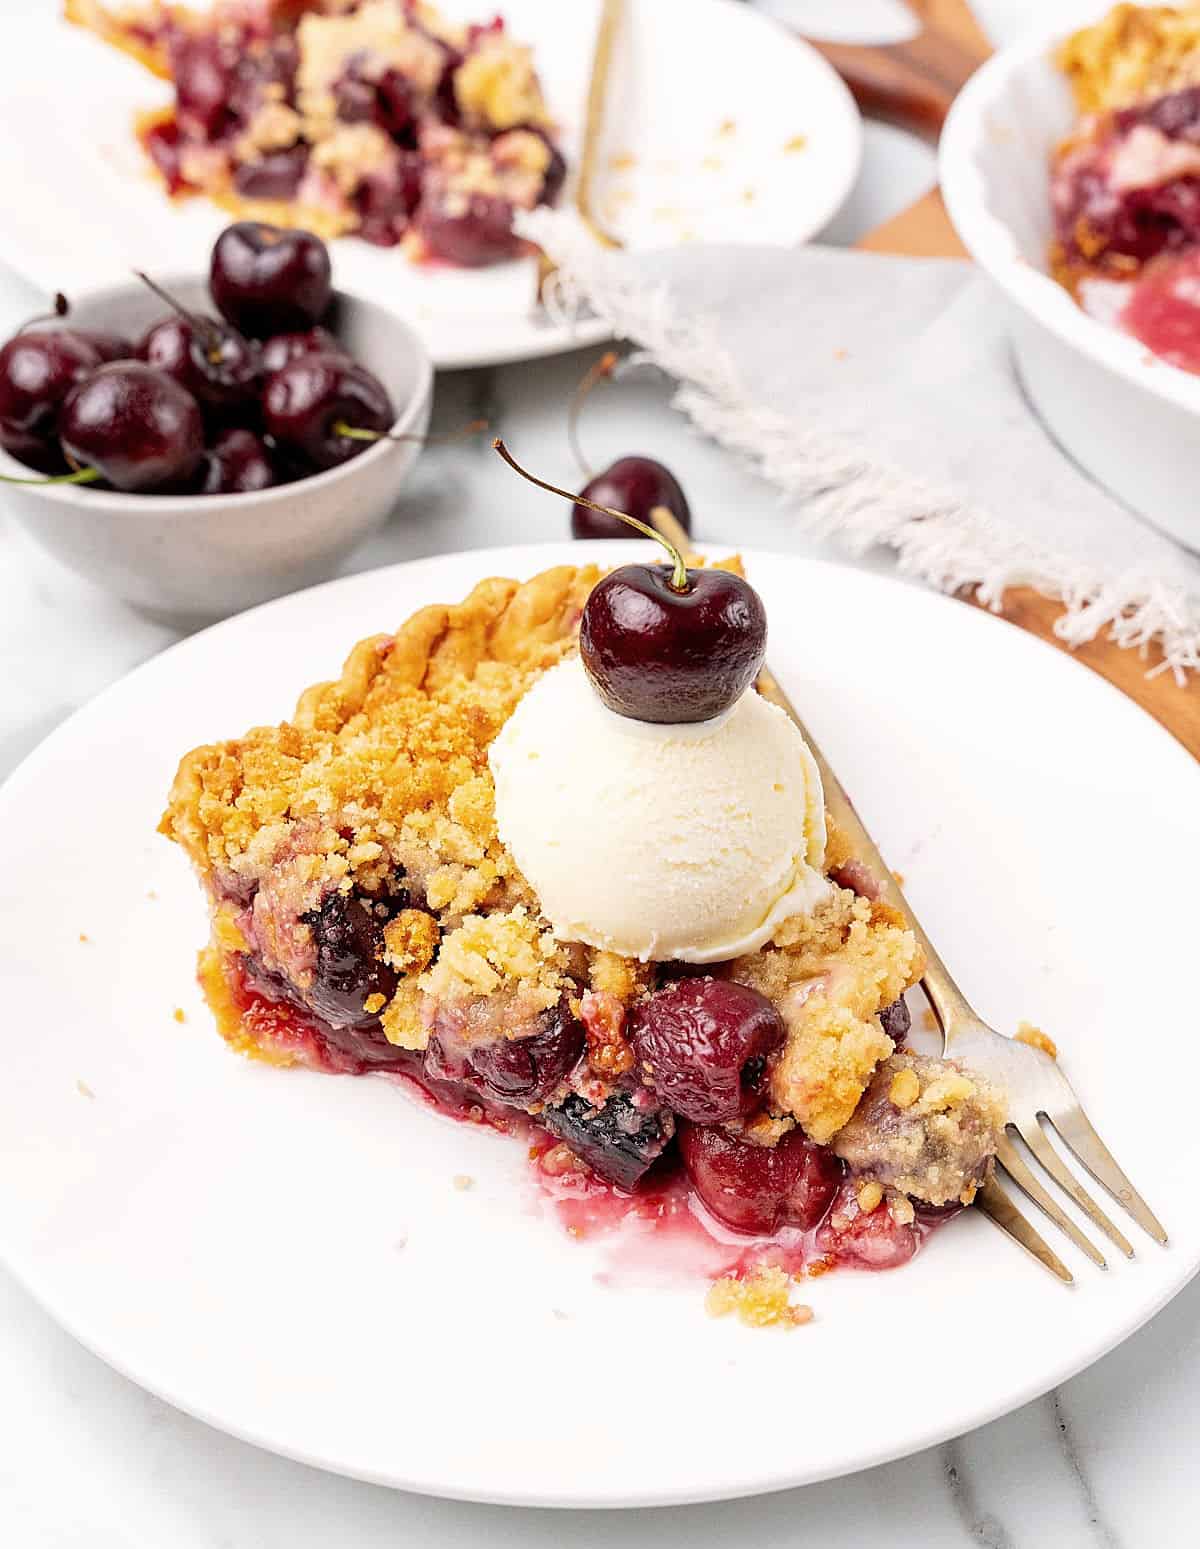
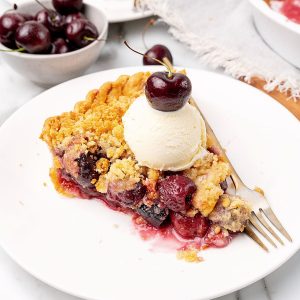
- Serving it: I love this cherry pie plain, at room temperature. But many of my friends ask for it to be served barely warm with a scoop of vanilla ice cream on top of the pie, they say it's the perfect dessert because the ice cream starts to melt a little but not completely. Whatever way you like it will be the best one.
Related recipes you might like:

If you made this recipe and loved it, you can comment below and leave a 5-star ⭐️ review. Also, if you had issues, let me know so we can troubleshoot together.
You can also subscribe to our FREE email series 'Baking the Best' and our regular newsletter. Or follow and save my recipes on Pinterest.
Cherry Crumble Pie
Ingredients
For the crust:
- 1 recipe for homemade Perfect Flaky Pie Crust recipe, or use a good quality store-bought
For the crumble:
- 1 cup all-purpose flour
- Pinch of salt
- ½ cup light brown sugar
- ½ cup unsalted butter, diced and cold
For the filling:
- 27 oz about 5 cups pitted cherries
- ½ cup sugar
- 4 tablespoons ¼ cup cornstarch
- 1 tablespoon lemon juice
- ¼ teaspoon pure vanilla extract or ¼ teaspoon pure almond extract, or both
Instructions
For the crust:
- Roll the crust on a lightly floured surface and line a 9-inch pie plate following the instructions on the pie crust recipe card linked above.
- Blind bake the pie crust according to the directions in the recipe. Reserve.
For the crumble:
- In a medium bowl mix 1 cup flour, a pinch of salt and ½ cup brown sugar.
- Add ½ cup cold butter in pieces and integrate with your hands until grainy and the butter is the size of peas. You can do this in a food processor; make sure you stop processing when it still has butter bits. Don't turn it into a paste.
- If not using immediately, cover and keep refrigerated for up to a week. Or frozen for a month.
For the filling:
- Preheat the oven to 350°F (180°C).
- Pit 5 cups cherries and put in a medium bowl.
- Add ½ cup sugar, ¼ cup cornstarch, 1 tablespoon lemon juice and ¼ teaspoon vanilla or almond extract. Mix well until the cherries are coated.
Assembling the cherry pie:
- Make sure the oven is already preheated and the crumble ready to sprinkle. You don't want the juices to start seeping into the crust or to spend time breaking up the crumb mixture if it's frozen.
- Transfer the filling to the half-baked pie crust.
- Immediately top the cherry filling with the crumble mixture.
- Bake for 40-45 minutes, until the topping is golden brown and the filling is bubbling.
- Let cool on a wire rack for about 1 hour.
- Eat at room temperature or barely warm with a scoop of vanilla ice cream.
- Refrigerate leftovers covering them with plastic wrap.
Rebecca says
The crumble topping was really good but my pie was very soupy also, as mentioned by another commenter. And the cherries were a little too firm if that makes sense. I wished we’d cooked the pie filling before putting in the crust. We did use fresh cherries.
Carole says
How much salt is used when making the crumble???
Paula Montenegro says
Hi Carole, just a pinch.
Carly says
Love this recipe, made it twice so far, not sure about the homemade crust but with the premade store bought crusts it is better to use less than 5 cups of cherries and/or berries. My perfect amount so that it doesn’t spill over is <4.5cups. I love doing half cherries and half strawberries, fresh and cut fairly small for optimal flavor!
angiesrecipes says
Flaky crust with a juicy, tangy and sweet cherry filling plus a die-for streusel topping...heavenly!
Paula Montenegro says
I agree Angie!
Regina says
I made the pie using sweet frozen cherries. However pie was very soupy and I could taste the raw cornstarch coating the cherries. It didn’t thicken up. Maybe you need to add a little juice to cornstarch and boil it on stove to thicken before adding to cherries?
Paula Montenegro says
Hi Regina! Bummer it didn't turn out as you wanted it to. Frozen cherries have extra water and that might account for the soupy outcome. Did you add extra cornstarch because they were frozen? That can account for the taste.