


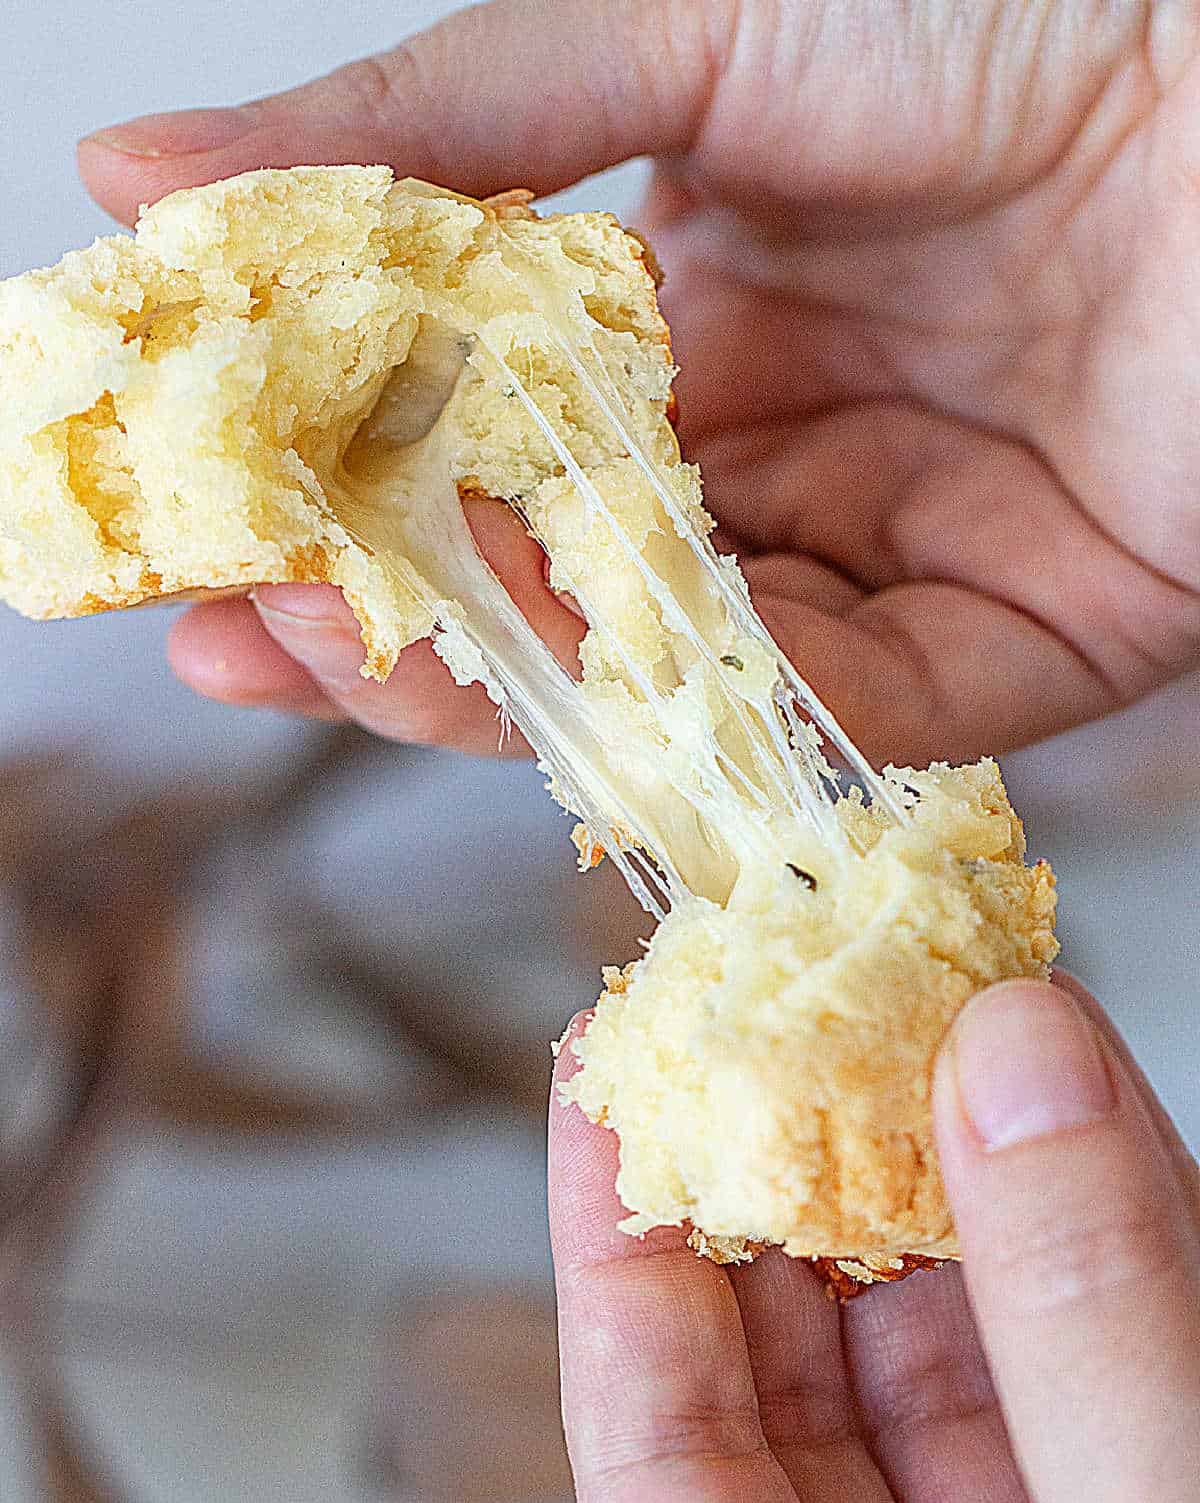
This is the ultimate cheese scone with two types of cheese in each melty bite, different from the usual speckled ones. I spent a few years until I got to what I wanted, which was to bite into a pool of melted cheese and a sharp flavor at the same time. Even if you're a beginner, this detailed post has all my tips and tricks.
SAVE THIS RECIPE
I've been baking them for a few years now, since I used to have a coffee shop.
Scones ranked very high on my list of things to serve, and let me tell you, these became quite famous among the regular crowd.
The only type of cheese scone I had seen around was similar to these savory scones, and they were not what I wanted to serve. I was interested in biting cheese, not only having a cheese flavor.
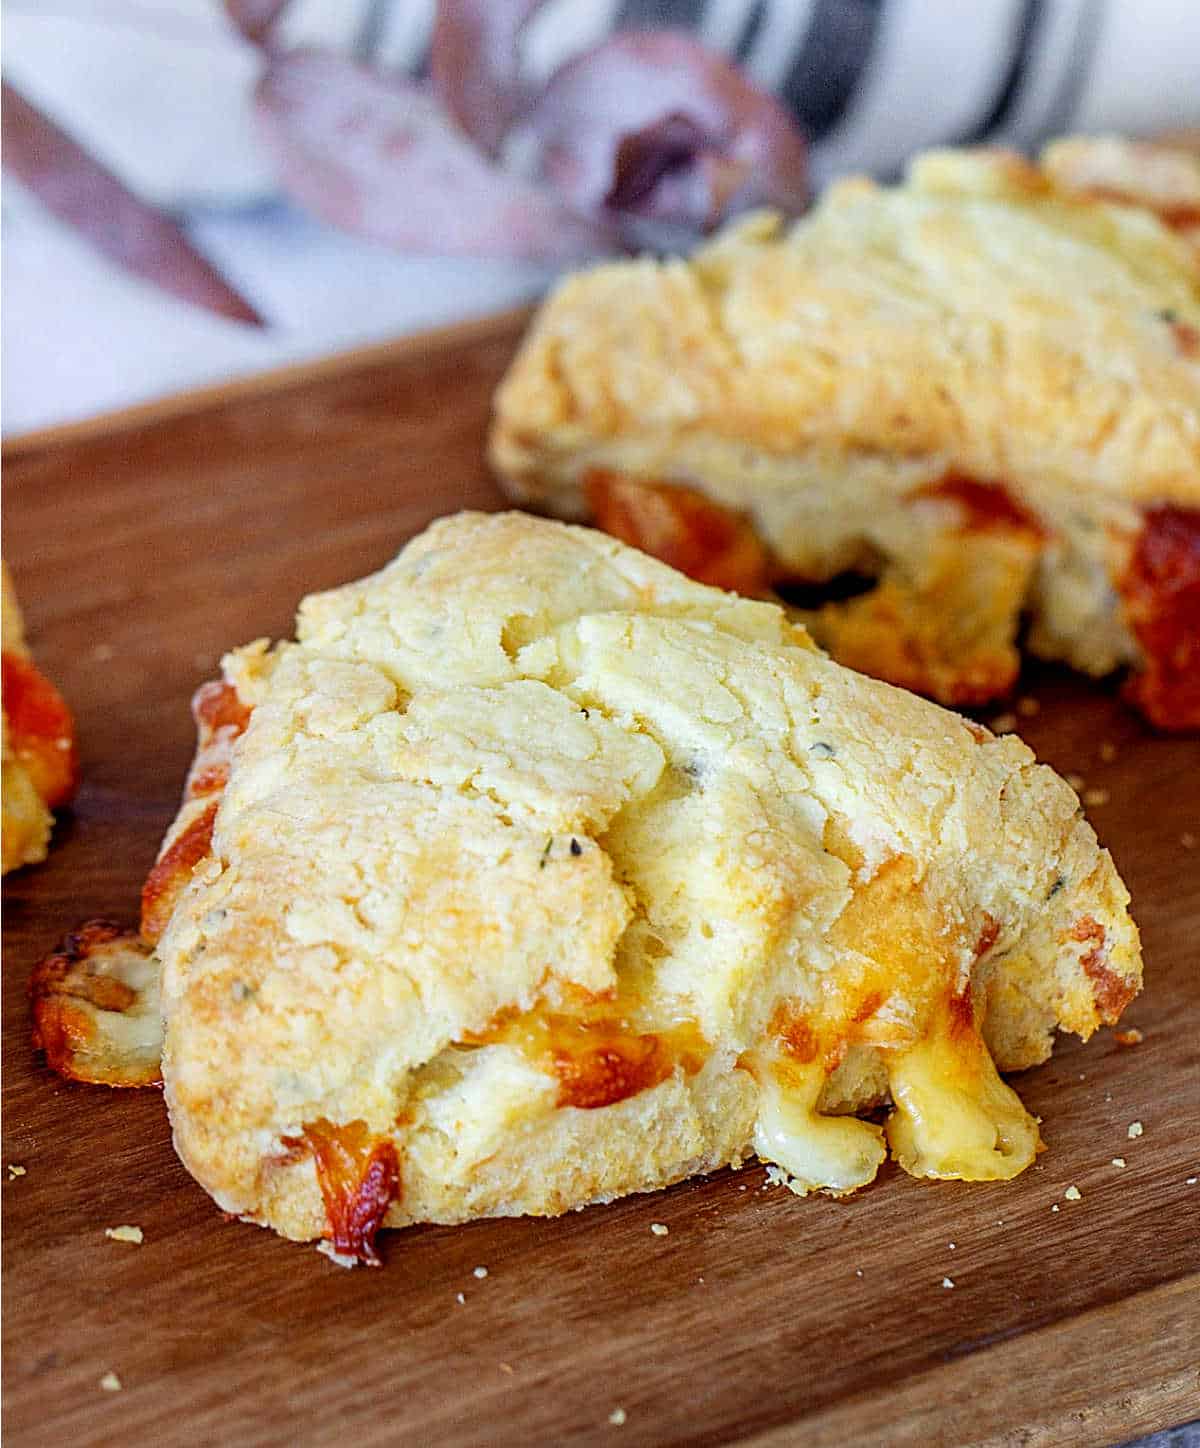
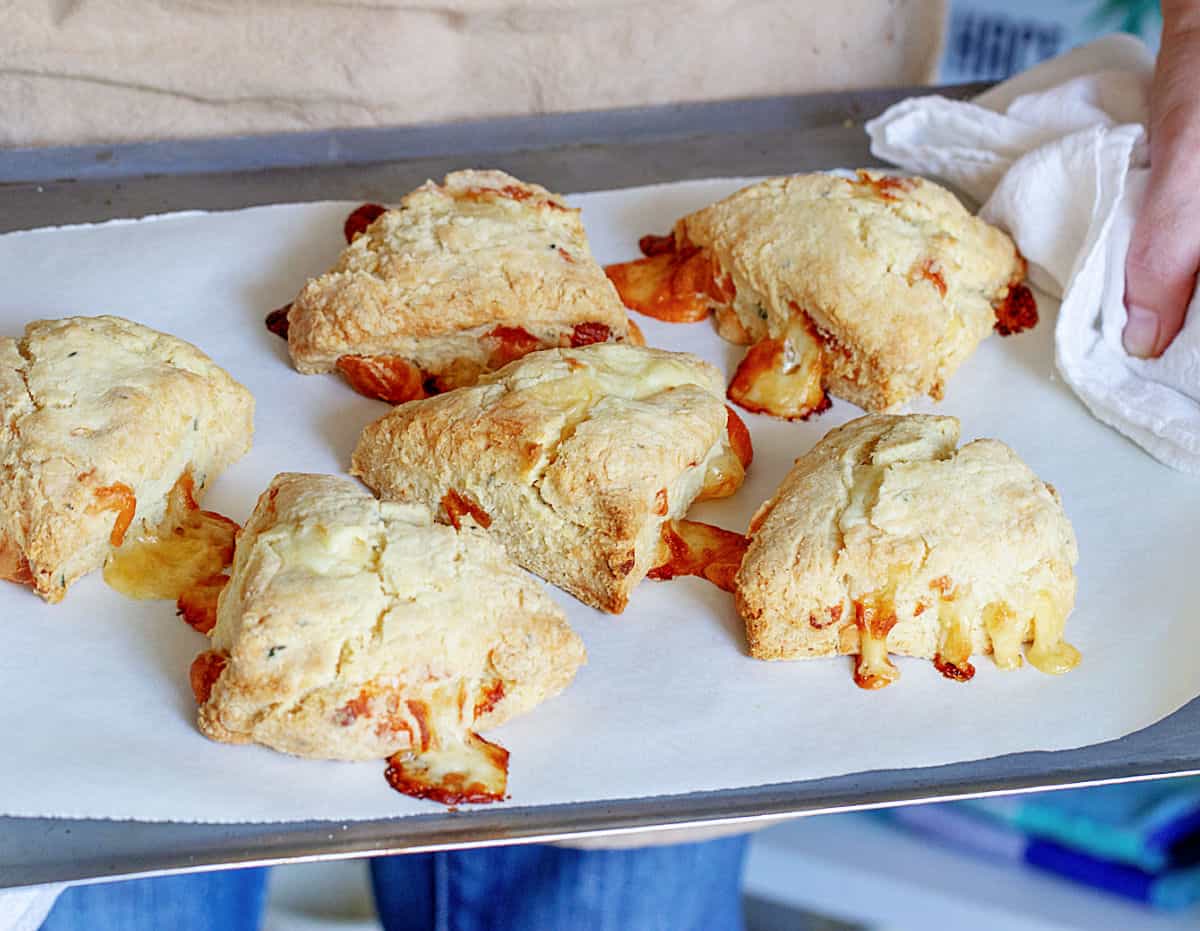
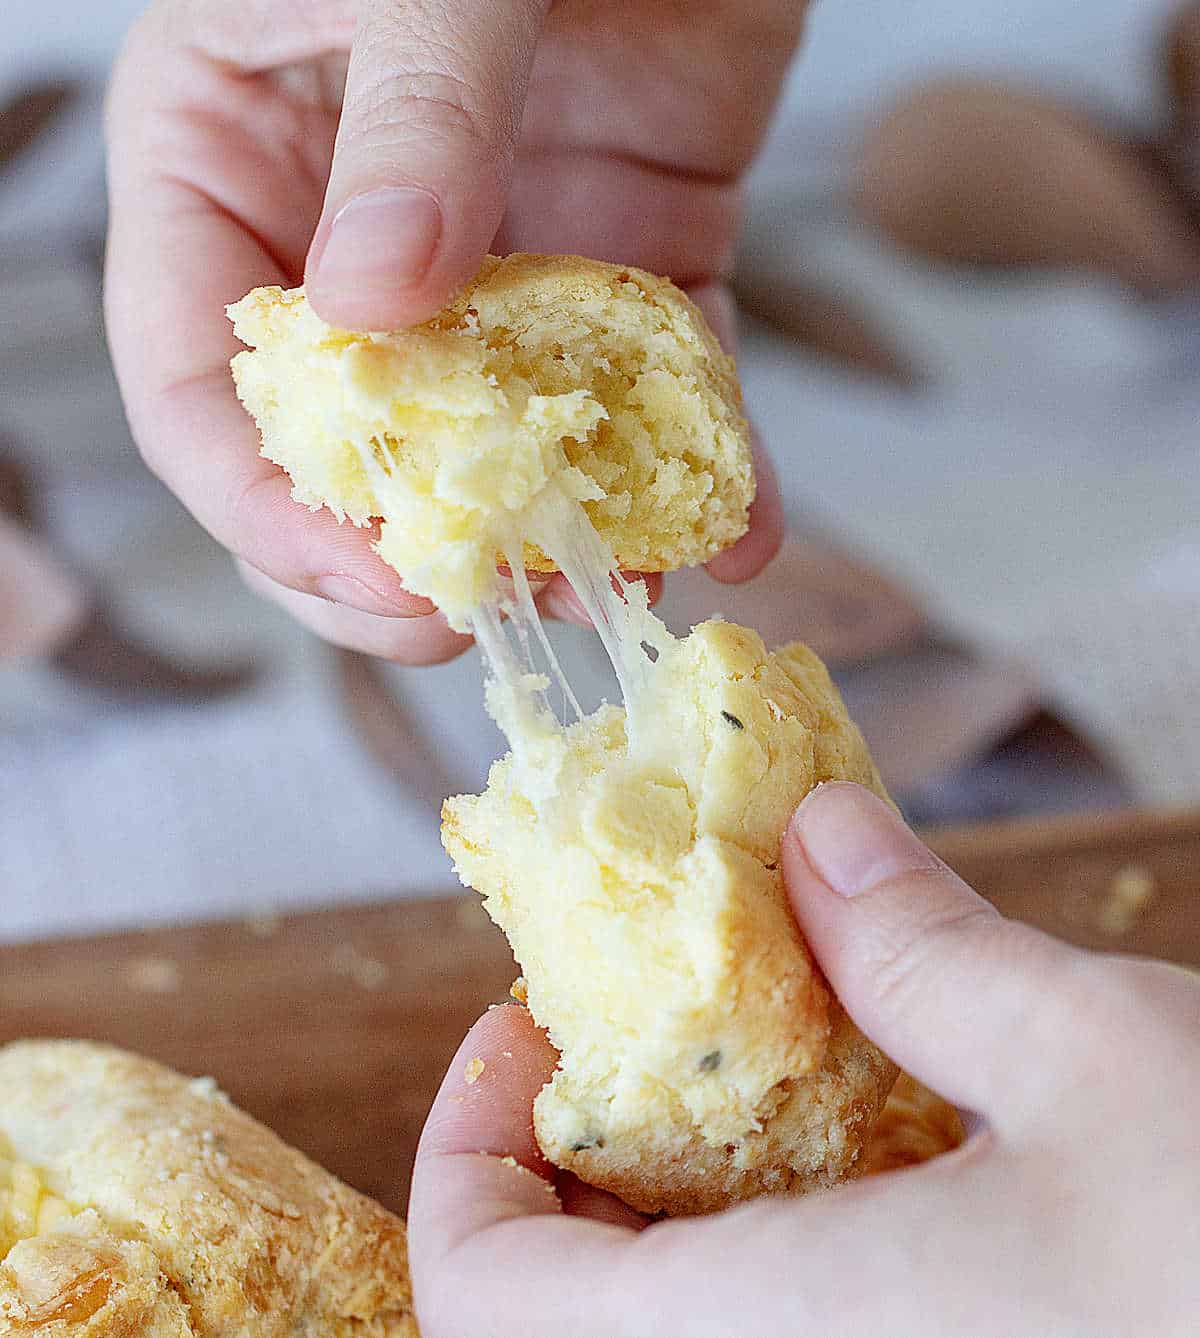
And what did I get? Probably the best scone ever, with a buttery flavor, two types of cheese - each one doing its own thing, one sharp and one melty - a flaky dough that rises and an eye-catching golden top with crunchy bits of cheese around it.
Those crunchy pieces of cheese are by far the best part. The best!
What our readers are saying:
OMG just wanted to say that I made these many times and they are to die for!! So delicious! I freeze them and can eat a whole pan just as they come out of the oven. (Macarena)
Amazing recipe, my family said it was the best scone I ever made! The tips and details were just what I needed I'm not an experienced baker. (Carol)
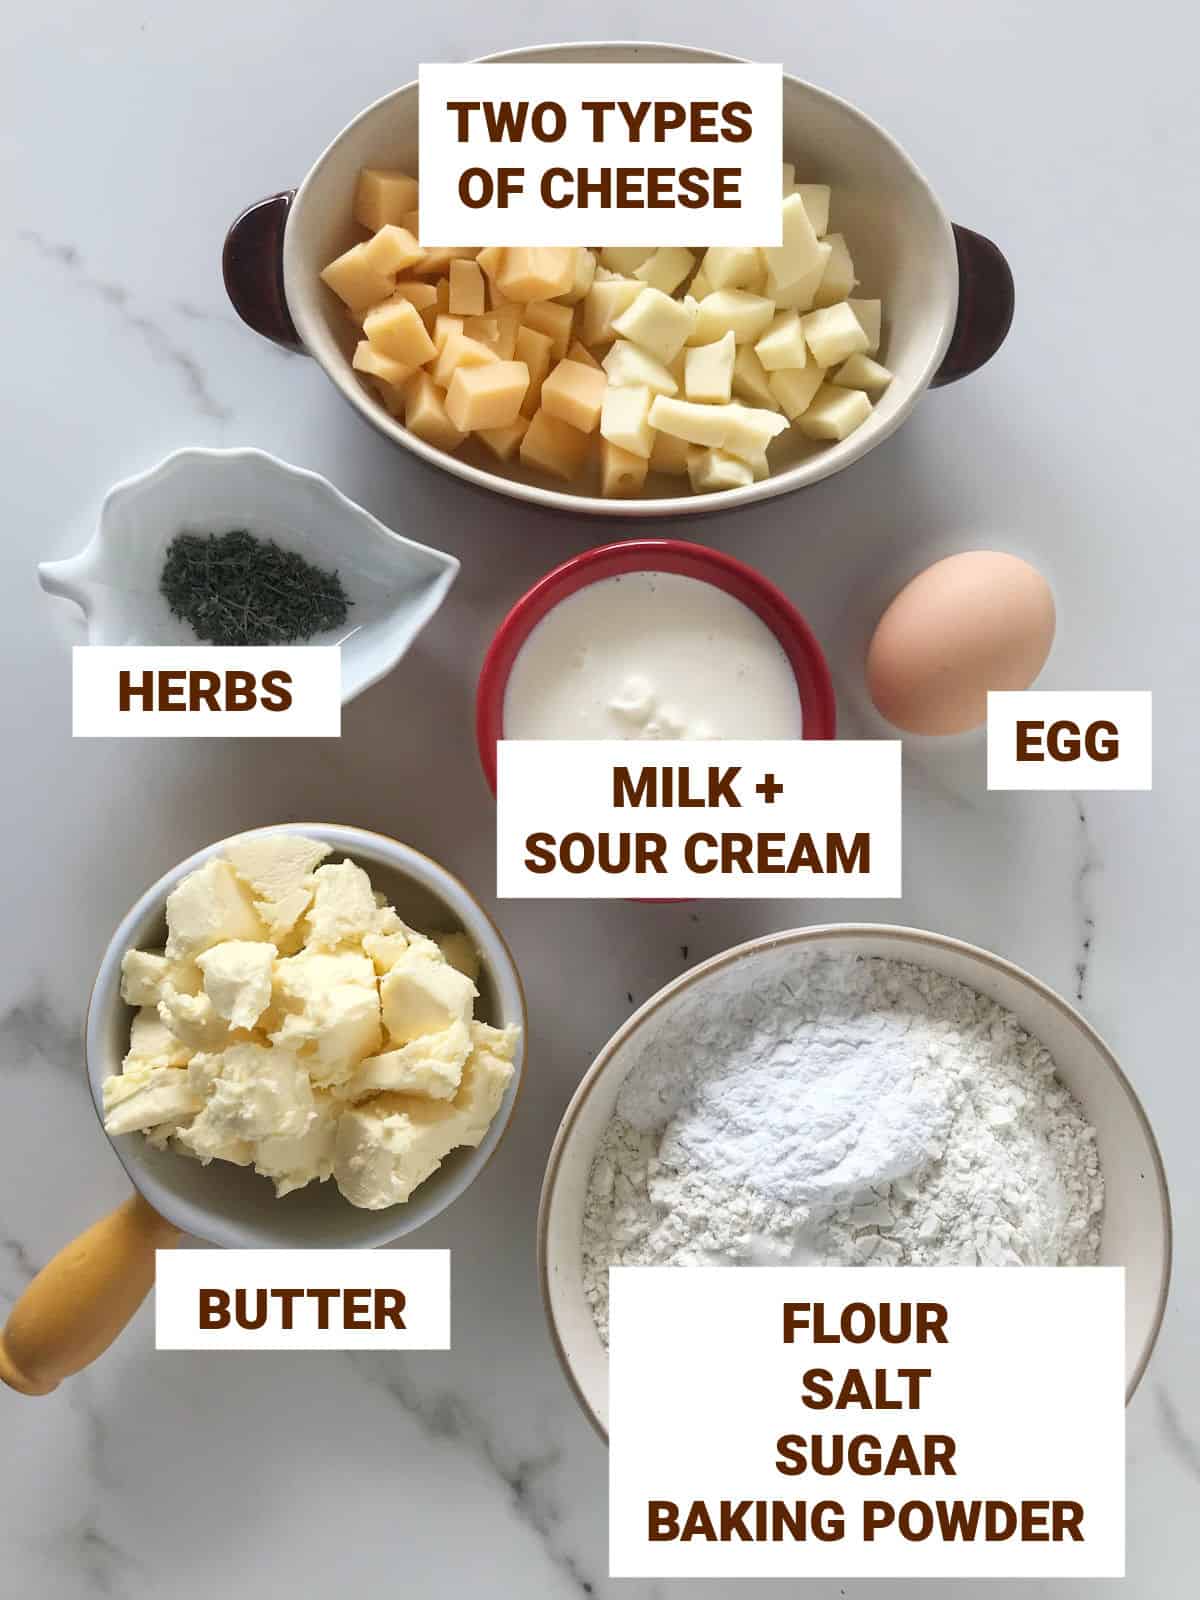
Ingredient list
- Cheeses: what makes these scones different (and better?) are the two kinds of cheese. One has to melt well (I use mozzarella, the pizza type which melts like a charm), and the other has to have a sharp flavor (I use Fontina or cheddar). They each do their thing, adding a much-needed kick and a melty bite.
- Baking powder: it is essential when making scones. Otherwise, they won't rise and you will have hockey pucks rather than fluffy scones. Trust me, I've been there. Make sure it's not expired.
- Sour cream: use the regular type, full-fat sour cream. It adds richness and moisture.
- Whole milk.
- Unsalted butter.
- Salt: I like using kosher salt or fine sea salt when baking. But regular table salt works just fine.
- Egg: fresh, large.
- All-purpose flour.
- White granulated sugar.
- Herbs: I love how dill works with the cheeses. But you can certainly use another herb like thyme. It can also be omitted.
How to make cheese scones
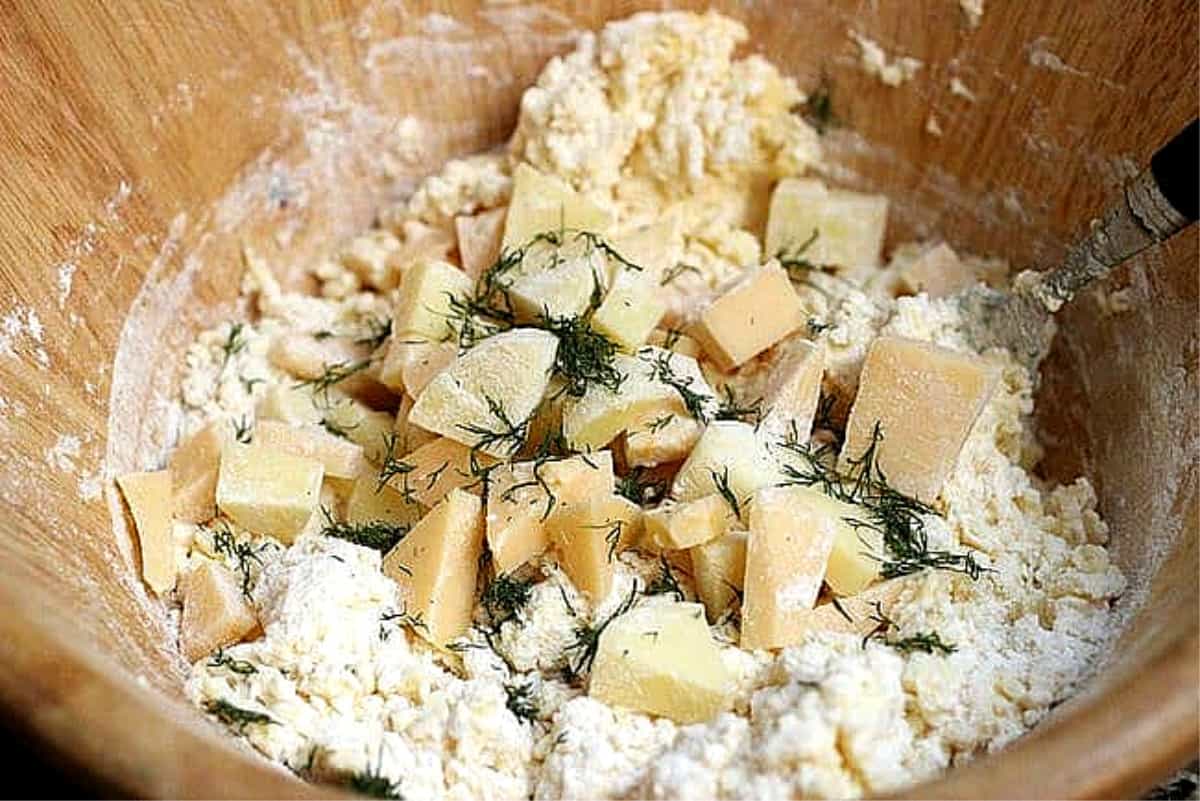
- By hand: I like to make them this way. So I use a large bowl (image above) and a fork or a pastry cutter for mixing the first part. First, I add the liquids to the dry, I mix lightly with a fork, add the cheeses and herbs and mix a bit more. The rest is finished on the floured counter.
- Food processor: you can make the dough (before adding the cheese) in the processor. The butter has to be processed only until the size of beans or peas at the most. This is handy if you tend to overwork the dough or have hot hands. Remember that this dough needs to be as cold as possible.
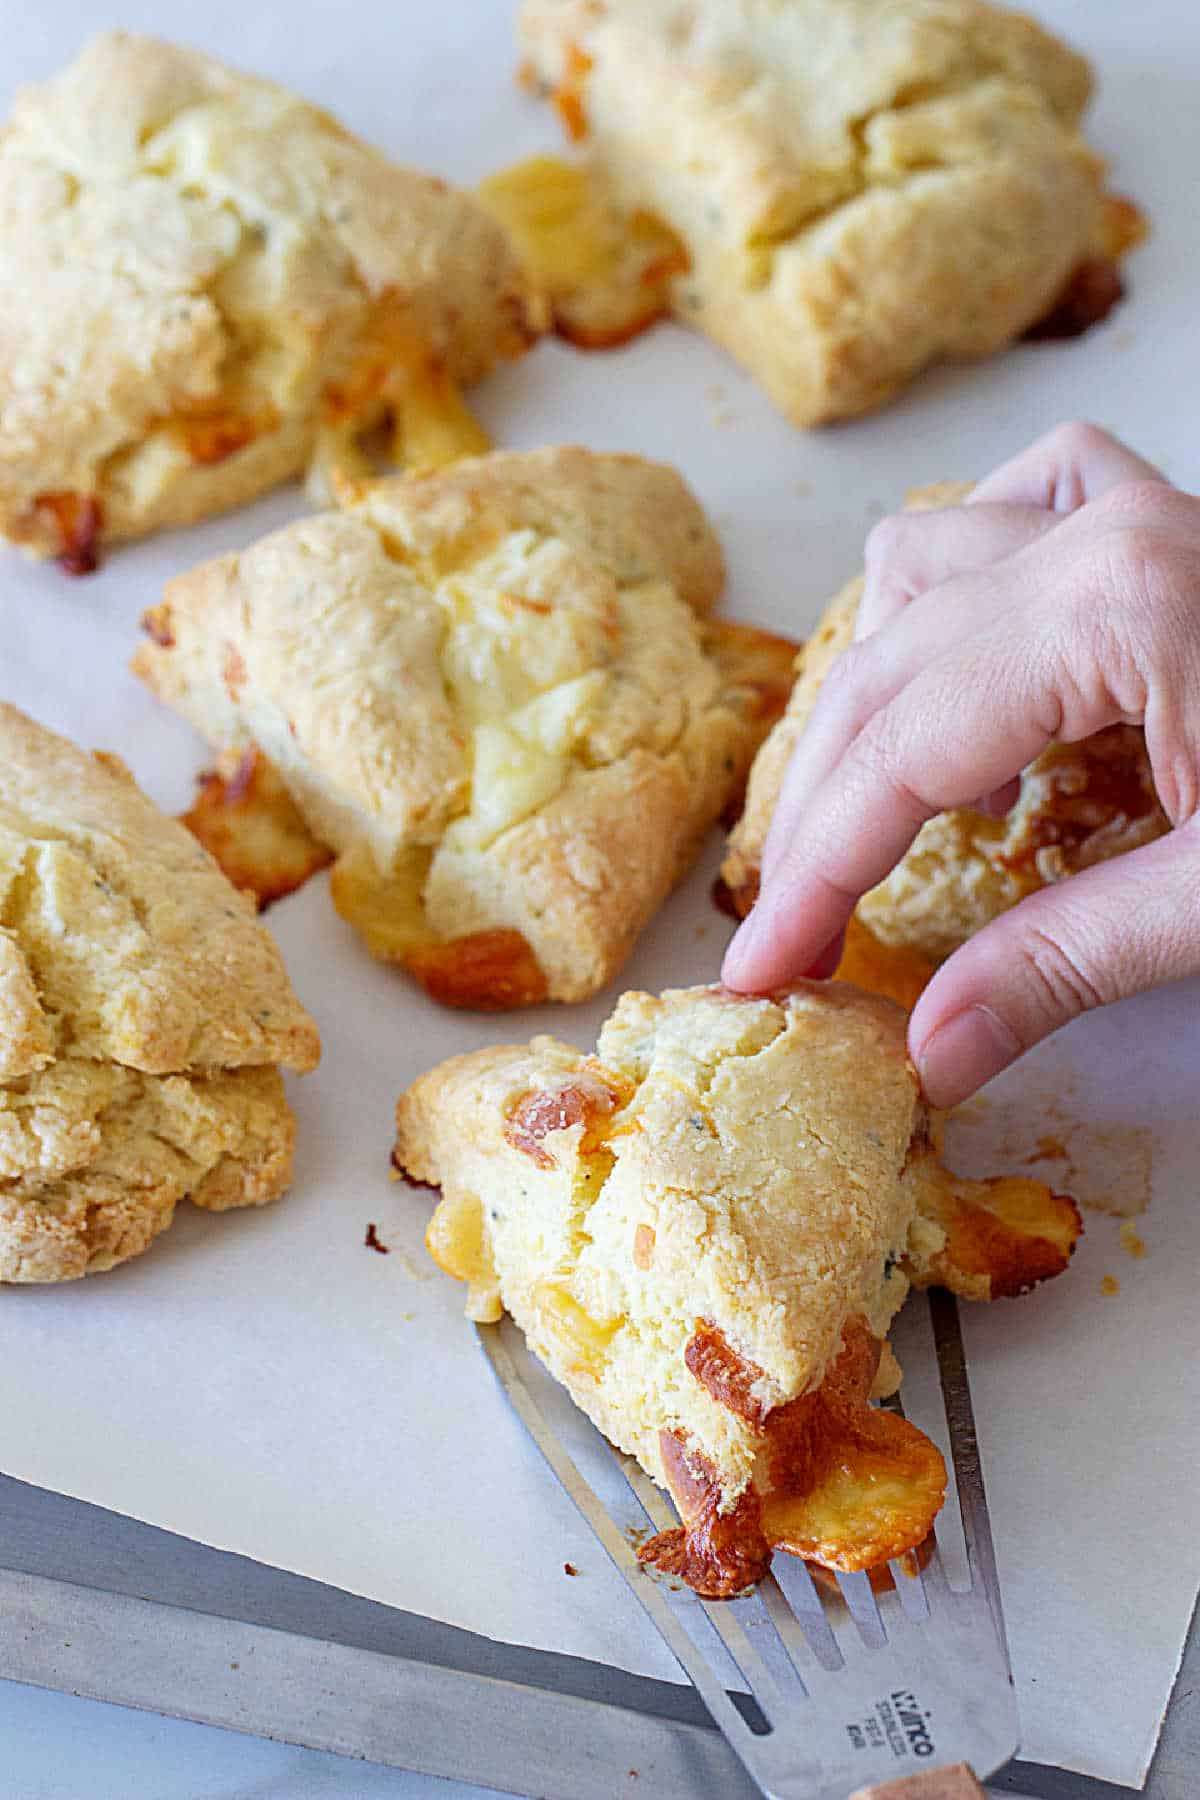
Forming scones
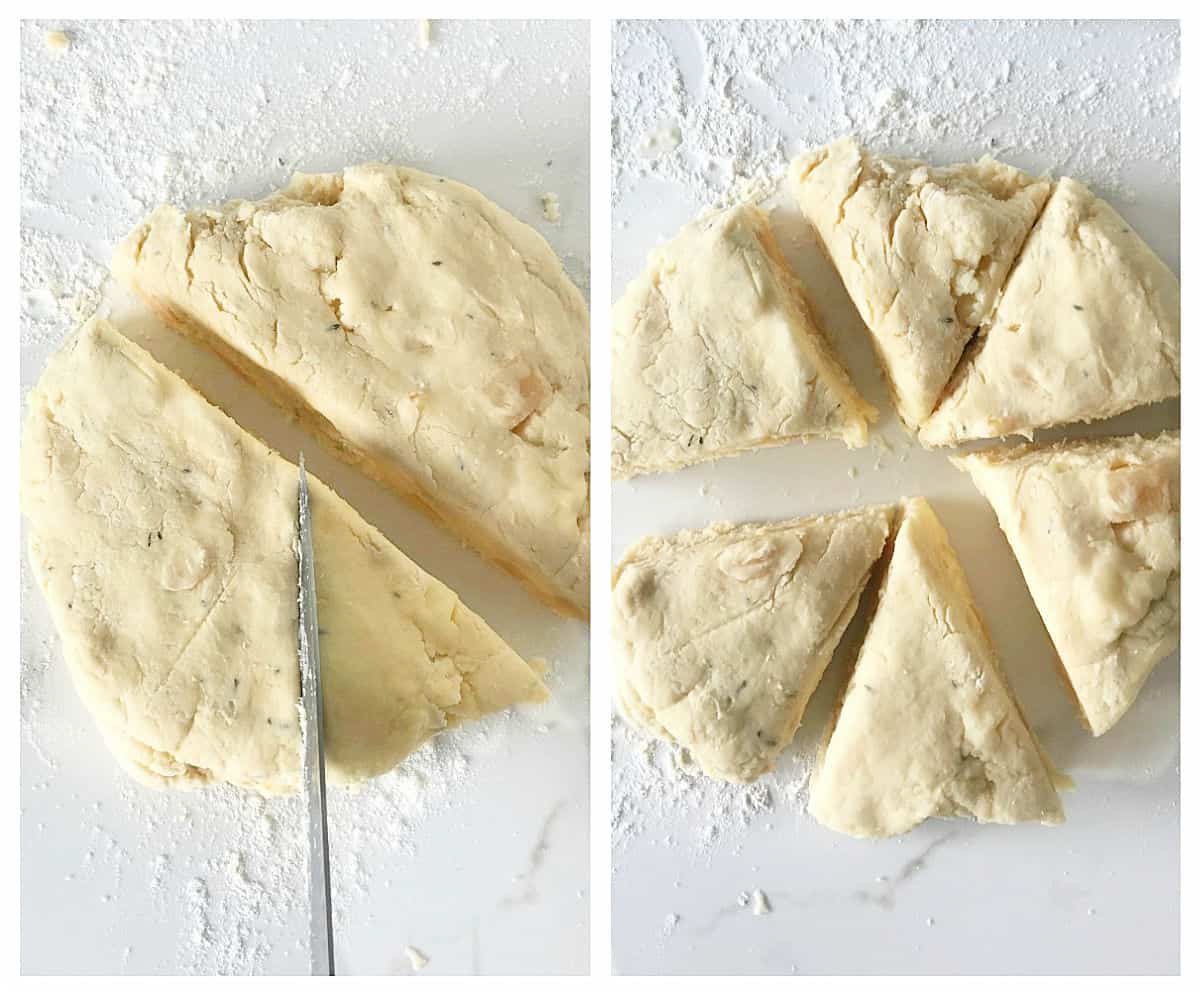
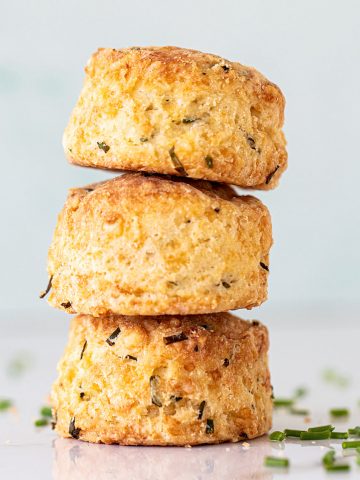
In the second place, I like triangles like the ones in this post. They can be uneven too. I make a rectangle and cut them with a kitchen knife.
Don't overwork the dough when shaping.
You can, in theory, use any cookie cutter.
But plain round ones or triangles are the best in my opinion.
If you use a shaped cookie cutter - like the flower shape I used with the Buttermilk Scones - you will see that they lose most of the shape after baking. So I don't see the point.
If you do want shapes, choose large ones like starts or those that have few details and sharp angles. They will probably hold the shape better.
Top tips for making scones
Scones have simple everyday ingredients, but a few pointers should be followed if you want soft, tender ones that are nicely risen.
- Very cold ingredients. I measure but leave the ingredients in the fridge until it's time to use them. Don't take the cream for half an hour before mixing the scones. Butter, milk cream and other wet ingredients belong in the fridge until you need to scatter and pour them.
- Handle the dough lightly. Don't overwork the dough. It needs to remain cold so the butter doesn't start to melt. It's the way to get soft, tender scones that rise well.
- Very cold dough before baking. Pop them in the freezer for 15 minutes after shaping them and before baking them. That ensures that they bake and rise as much as they can.
- A rather high oven. They need that extra heat to rise however they can despite all that butter and cream. And if you forgot to turn the oven on before you start mixing, please don't leave the baking sheet with the cut scones waiting on the counter. Put them in the fridge or freezer for the ten or fifteen minutes it takes for the oven to reach its temperature.
Kitchen notes
- Organization: read the recipe first and ensure you have ingredients at the correct temperature, equipment, and enough workspace. This will make the process so much easier.
- Baking time: consider that all ovens and pans are different, even if they look similar. The baking time in my recipes is as accurate as it can be, but it might take you more or less time. You can use a thermometer(like the OXO oven thermometer) to check that your oven is at the right temperature. I recommend you keep track of how your oven works and what tiny details you might need to adjust.
- Variations: use different types of cheese and make sure one of them melts well. Add some spice to the scone dough like cayenne pepper, smoked paprika, chili powder, or mustard powder. Use chopped fresh chives instead of herbs or in addition.
- Make ahead: you can cut and freeze them before baking. When the craving hits bake them directly from the freezer, no need to thaw them.
When you sell food, the visual aspect is very important, so I was somewhat concerned about that cheese melting in the oven and turning dark and crispy around the scones because they looked too rustic and homey.
It ended up being the main reason these cheese scones were a hit; they had to have those cheesy bits or customers would complain. And as we all know, the customer is always right.
I used to serve one of these cheese scones warm, with a bowl of soup (pumpkin or leek/potato) and a small green salad.
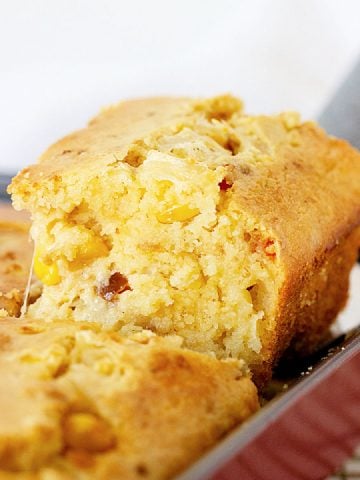
Related recipes you might like:


If you made this recipe and loved it, you can comment below and leave a 5-star ⭐️ review. Also, if you had issues, let me know so we can troubleshoot together.
You can also subscribe to our FREE email series 'Baking the Best' and our regular newsletter. Or follow and save my recipes on Pinterest.
As an Amazon Associate, I earn from qualifying purchases. Read my disclosure policy.

Best Double Cheese Scones
Ingredients
- 1 ⅓ cup unsalted butter, cold
- 4 cups all-purpose flour
- 2 tablespoons sugar
- 2 tablespoons baking powder
- 2 teaspoons salt
- 1 extra-large egg
- ⅓ cup sour cream
- ⅔ cup whole milk
- 5 oz mozzarella cheese, in small cubes
- 5 oz sharp cheddar cheese, in small cubes (I used Fontina before, but cheddar is SO much tastier!)
- 2 tablespoons coarsely chopped fresh dill or 2 teaspoons dried or fresh thyme, optional
Instructions
- Preheat oven to 375ºF (190ºC).
- Cut cheeses into bite size pieces.
- In a small bowl lightly mix egg, sour cream and milk.
- In the bowl of a food processor, mix flour, sugar, baking powder and salt. Add cold butter, cut into cubes and pulse until you have a coarse mixture, the butter the size of peas.
- Transfer to a large bowl, add wet ingredients and mix with a fork until you have a shaggy mass with some dry patches. Add cheeses and dill and mix some more but just to combine.
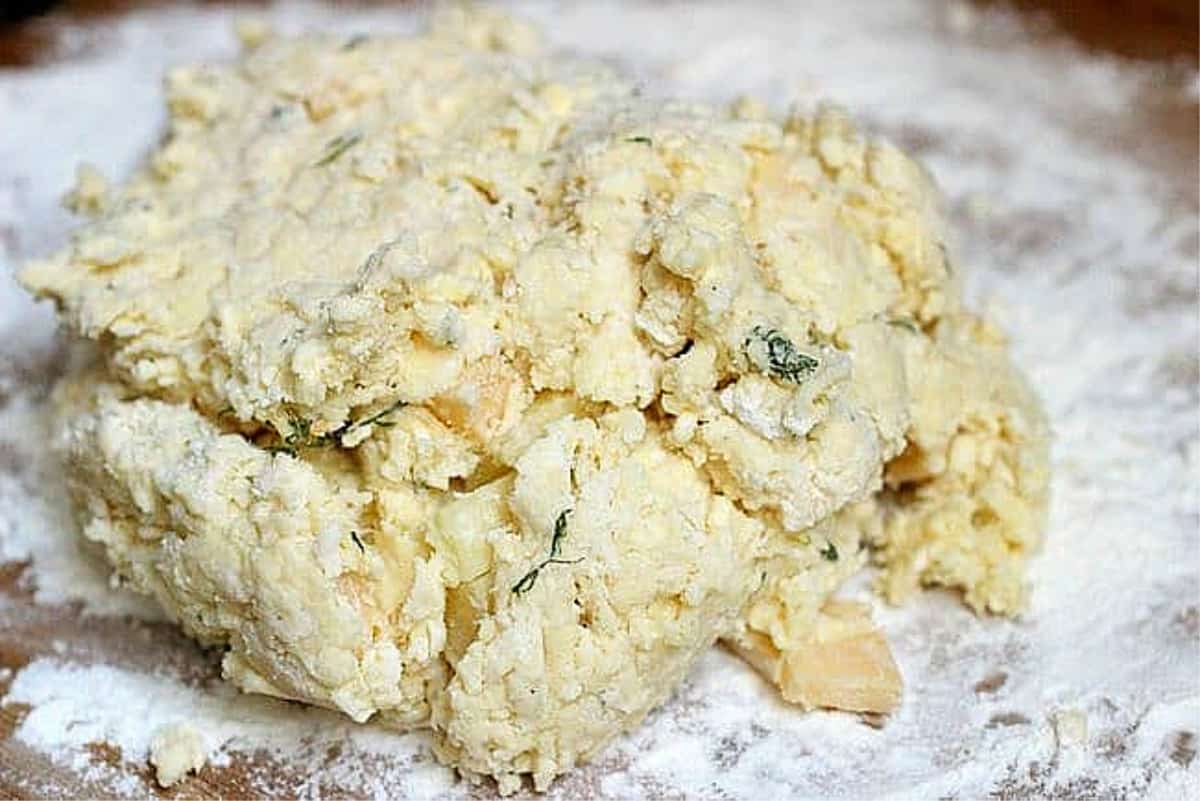
- Dump onto a lightly floured counter, cut in half and form one of the pieces into a rough rectangle. It doesn't matter if it's very irregular and has a dry bit here and there.
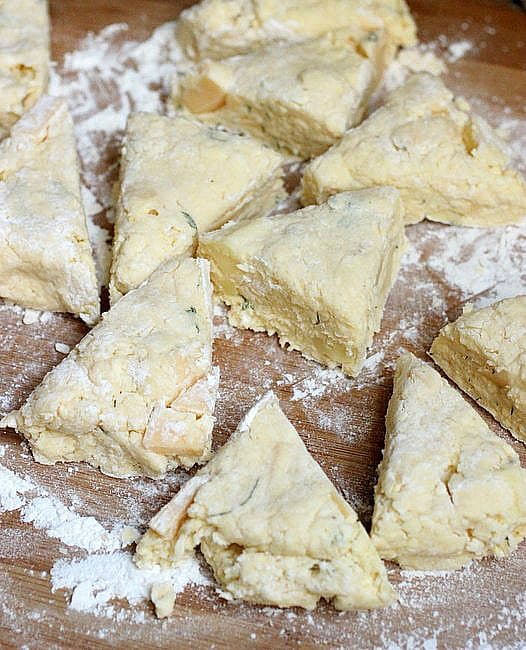
- Cut scones into triangles with a kitchen knife or dough scraper, or use a round cookie cutter (dip it in flour and make one clean press down, don't rotate it left and right when cutting, as it will prevent the scones from rising properly).
- Repeat with second piece of dough, cutting 6 more triangles.
- Transfer to a greased baking pan or lined with parchment paper.
- Bake for about 25 to 30 minutes, until golden, dry and cheese has melted and crusted.
- Cool for 5 minutes and eat warm.
- Store leftovers in the fridge, wrapped in foil. Rewarm for 5 or 10 minutes before eating.
- You can freeze the unbaked scones for 1 month, wrapped in foil. Bake the frozen as directed above.
Notes
Top tips for making scones
Very cold ingredients. I’m not kidding when I say frozen butter, at least very cold. And don’t take the cream half an hour before you start mixing the scones. Butter, cream, and milk belong in the fridge until you need to scatter and pour them. Don't overwork the dough. It should come together but still have floury patches. You don’t need to work it until it’s smooth, like a pie dough for instance. It is an uneven dough, with a dry spot here and there, and that’s good for flakiness later. Very cold dough. Pop them in the freezer for 15 minutes after shaping them and before baking them. That ensures that they bake and rise as much as they can. A rather high oven. They need that extra heat (and baking powder) to rise however they can in spite of all that butter and cream. And if by any chance you forgot to turn the oven on before you start with the mixing, please don’t leave the baking sheet with the cut scones waiting on the counter. Put them in the fridge or freezer for the ten or fifteen minutes it takes for the oven to reach its temperature.Very adapted from The Barefoot Contessa Cookbook by Ina Garten
Leaette McCallister says
FANTASTIC!!! I did not use dill. So yummylicious!!!
Fran Bowen says
Sounds delicious, can’t wait to try making them!?
ANDREA RODGERS says
Well, I came to this recipe from the buttermilk scones because I needed to use up some buttermilk. After gathering all ingredients I found it doesn't use buttermilk! I made it with buttermilk anyway. It was very dry, I needed to add about a half cup of milk just to get the ingredients incorporated. They came out tall and flaky and flavorful! Hubby loves them!
Carol says
Amazing recipe, my family said it was the best scone I ever made! The tips and details were just what I needed I'm not an experienced baker.
Ida says
Hi Paula
These cheese scones look so delicious. Thanks for sharing the recipe and tips!
May I know what is the the measurement (in grams) if I am use buttermilk in replacement of sour cream and milk?
Paula Montenegro says
Hi Ida, use 1 scant cup of buttermilk.
Marwin Brown says
Have never tried cheese scones and these looks delicious! The dill adds a nice touch as well.
Laura Arteaga says
My husband will definitely LOVE this recipe. He loves cheese and these scones look just delicious. Will pin the recipe and try making it soon, will let you know how it turns 🙂
Kathryn says
I love making scones but don't make a savory version very often. This recipe sounds delicious so I'm going to have to give it a try!
Megan says
love how simple the ingredients are! Can't wait to try these!!!
Eva says
I bake scones at my summer job, and I feel like this summer I may have to up my game a bit. I mean plain scones are fantastic, but we have our own dairy there so it just feels like we totally should make cheese scones! Thank you for the recipe!
Paula Montenegro says
Oh, thanks so much! Glad you like them. They are my favorite also.
Laura Hunter says
I love cheese scones, the addition of dill sounds perfect.
Nancy @ gottagetbaked says
WOW! These are such beautiful scones, Paula. Super high, fluffy, crispy, cheesy. I've only made scones a few times and I've never been happy with how they turned out. Your words always paint such lovely photos for me, Paula. Everytime I read your posts, I feel like I'm right there, in the situation, living it with you. Now if only I were because I'd kill for one of these right now!
mividaenundulce says
Paula, esta es la receta de scones que de seguro mi esposo y mi hijo estaban esperando que les haga, es que salado bien definido y con queso, será de todas maneras su favorito
Sarah | Curious Cuisiniere says
Your pictures are beautiful, but you describe them so vividly, I'd be craving one even without the pictures!
Lori @ Foxes Love Lemons says
Did I read correctly? You're a book jacket hater, too? I HATE them. I immediately take them off all cookbooks (and other books) and recycle them. I'd much rather just see the plain-colored binding 🙂
And totally agree about Ina's recipes. I've never had one of her recipes turn out poorly. They're always great. But many of them are just TOO MUCH of everything. I love this streamlined scone that you made. I would love to have one of these to dunk into a bowl of soup!