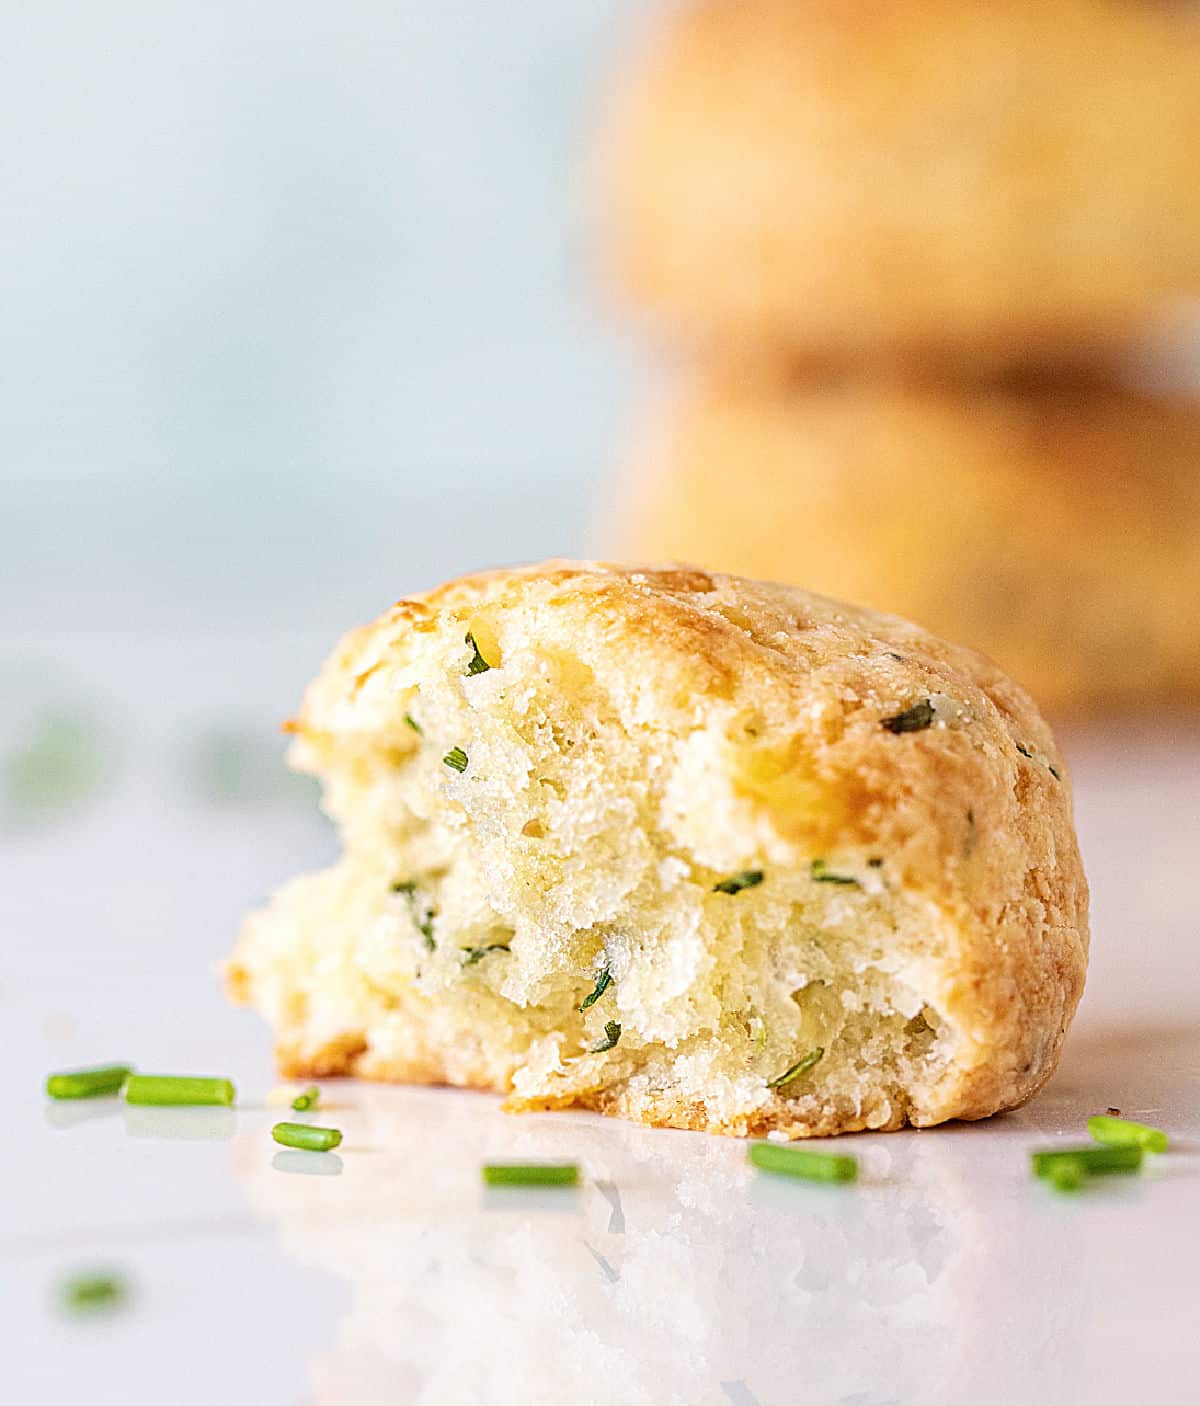
This recipe is stunning and ready in an hour. I use cheese and chives for an amazing flavor but think of it as a master savory scone recipe dough where you can add other ingredients, like bacon. They rise beautifully and bake to a fantastic golden brown. Wait until you smell the aroma in the kitchen!

As an Amazon Associate, I earn from qualifying purchases. Read my disclosure policy.
Originally posted in 2012, this post has been updated with images and text to serve you better. The recipe remains the same but I've added variations!
I have Irish blood from my mother's side, and scone-making has forever been a serious hobby in my family. I had no choice but to take scones very seriously.
And though others point that nothing will ever compare to my great grandmother's recipe - fact or fiction we don't know anymore - of course I went and found my own favorites, like the best buttermilk scones recipe (that admit sweet or savory toppings) or the orange and cream scones.
So the search for the perfect savory scone began. And it took a while. And many pounds of butter and cheese. But it was a good journey.
And rendered this recipe, my favorite. Why? They are balanced, flavorful, easy to make, and have chives that make all the difference between a good savory scone and an amazing one.
Nothing beats these little morsels when it comes to savory scones.
Intense, rich, and on the crumbly or chewy side depending on what cheese you use, you can adjust them to your taste and use other herbs, or add sun-dried tomatoes, bits of bacon, and green onions.
Whatever add-ins you use, I highly recommend you make them.
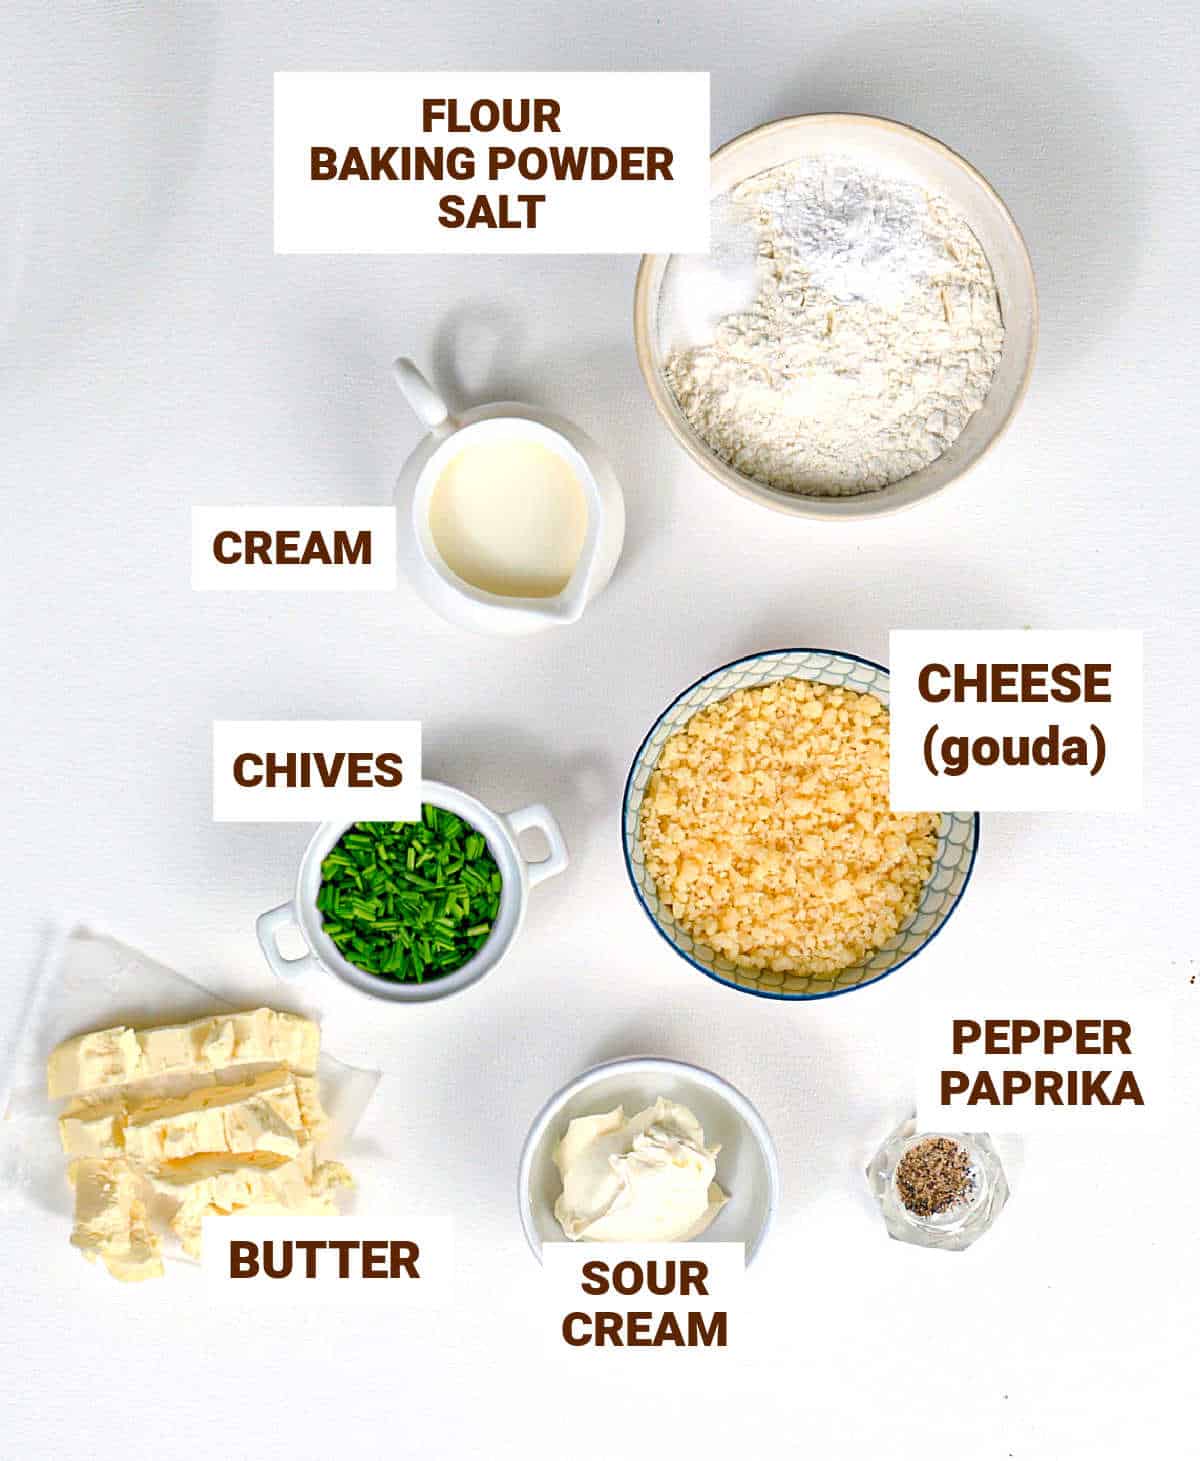
Ingredient list
The basic recipe has simple ingredients, and from there you can customize the savory part to your liking. I will post the substitutions you can make at the end of this post and in the Notes section of the recipe card.
Basic recipe
- Unsalted butter: scones are buttery and the flavor comes through, so the better the butter, the better the result.
- Sour cream and milk: they are the liquid ingredients of the recipe
- Baking powder: it's an essential ingredient for this recipe, used as leavener to help the scones rise, so make sure it isn't expired.
- All-purpose flour: or mix bread and cake flour (depending on the country, that's what you'll find).
- Salt: I like to use kosher salt when baking. But regular table salt works just fine.
Add-ins
- Cheese: my favorites are white cheddar and gouda. I used to make these savory scones with parmesan and they are also good, but saltier. Other sharp cheese work, like gruyere, fontina, and asiago.
- Chives: they add a unique flavor that is magic together with cheese. So I always use them. Scallions or green onions also work well.
- Pepper, paprika: freshly ground black pepper is a must for me. And smoked paprika whenever I have some around, especially merken, a condiment from Chile that is phenomenal. Ground chili also works if you like a spicy kick.
How to make savory scones
First part
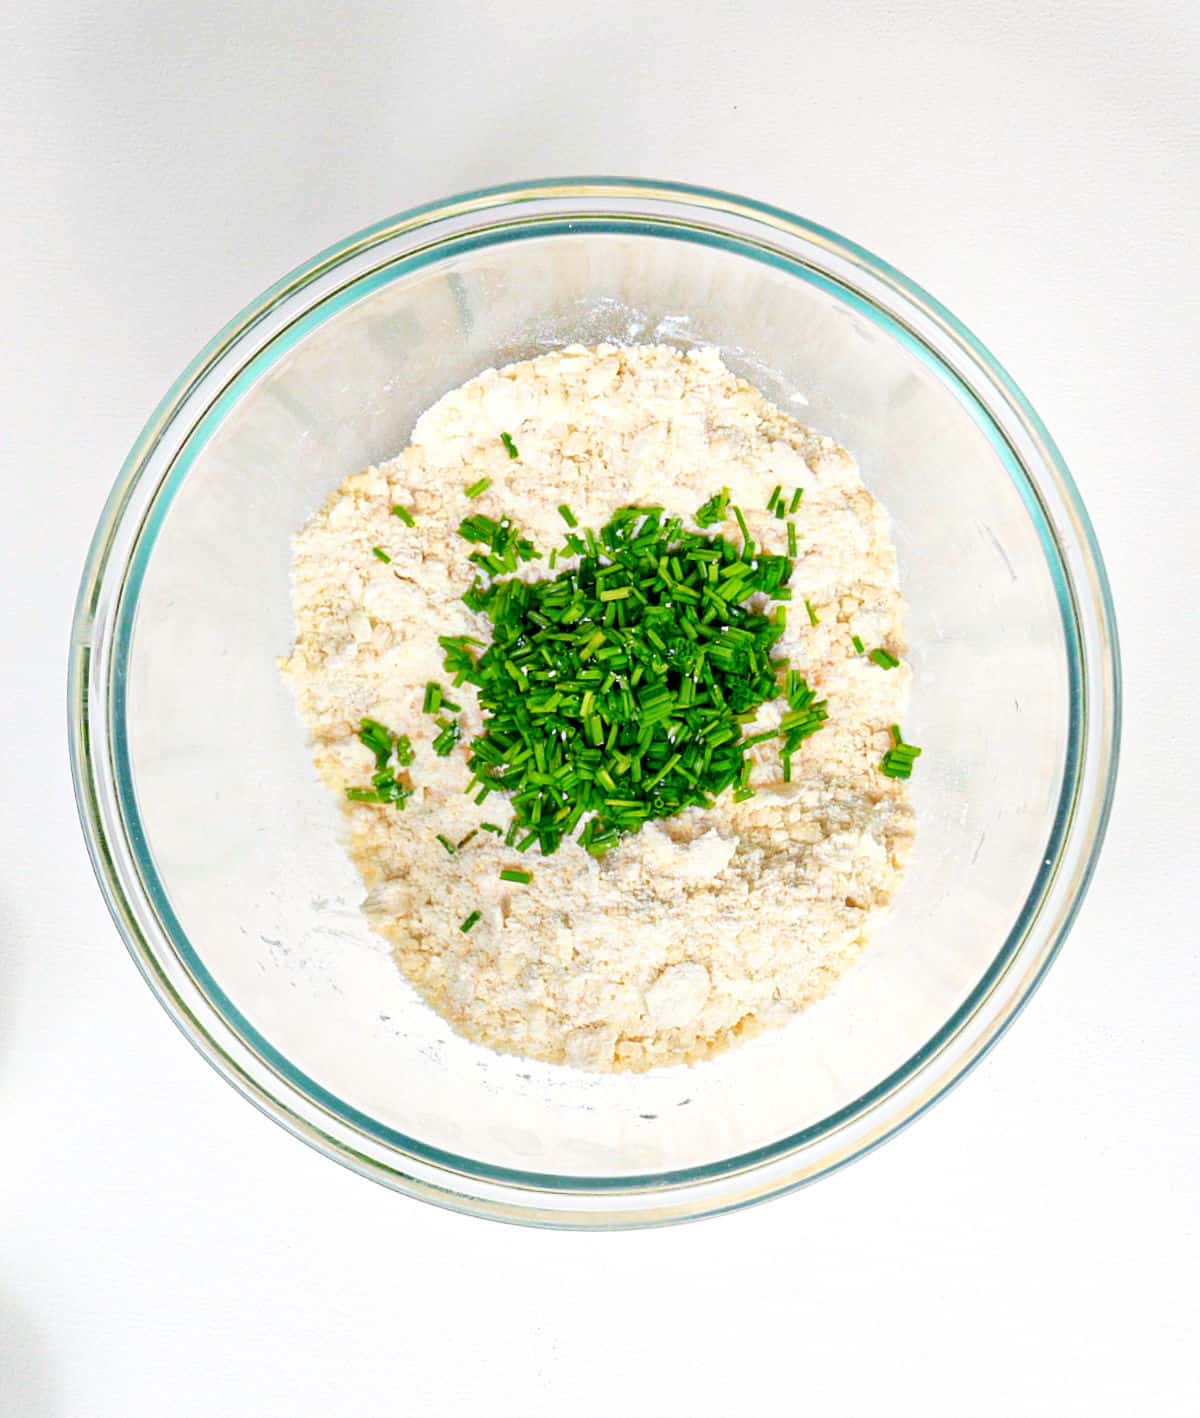
It includes mixing the dry ingredients (flour, salt, and baking powder) with the butter which should always be very cold, and cut into small pieces.
- By hand: I make scones this way because it's something I love. The key thing is not to overwork the dough as it will start to melt the cold butter (which should remain that way) and that is not good if we want a nicely risen, soft scone. But I have been making them for decades.
- Pastry cutter: it's an alternative if you don't want to use your hands. You cut the butter into the flour with a pastry cutter (also called pastry blender) in a large bowl (don't use a small one as it will be more constricting and difficult to work). This way you avoid the messy butter and have little chance of touching it too much with warm hands.
- Food processor: you can use this gadget to make the first part of the flour mixture, just before adding the wet ingredients. The key here is to use on/off quick pulses, just enough to cut the butter and integrate the dry ingredients. You don't want to process the whole thing and make a dough. Not at all! So you might want to try this method if you don't have much success with doughs (they end up being tough because you overwork them).
Second part
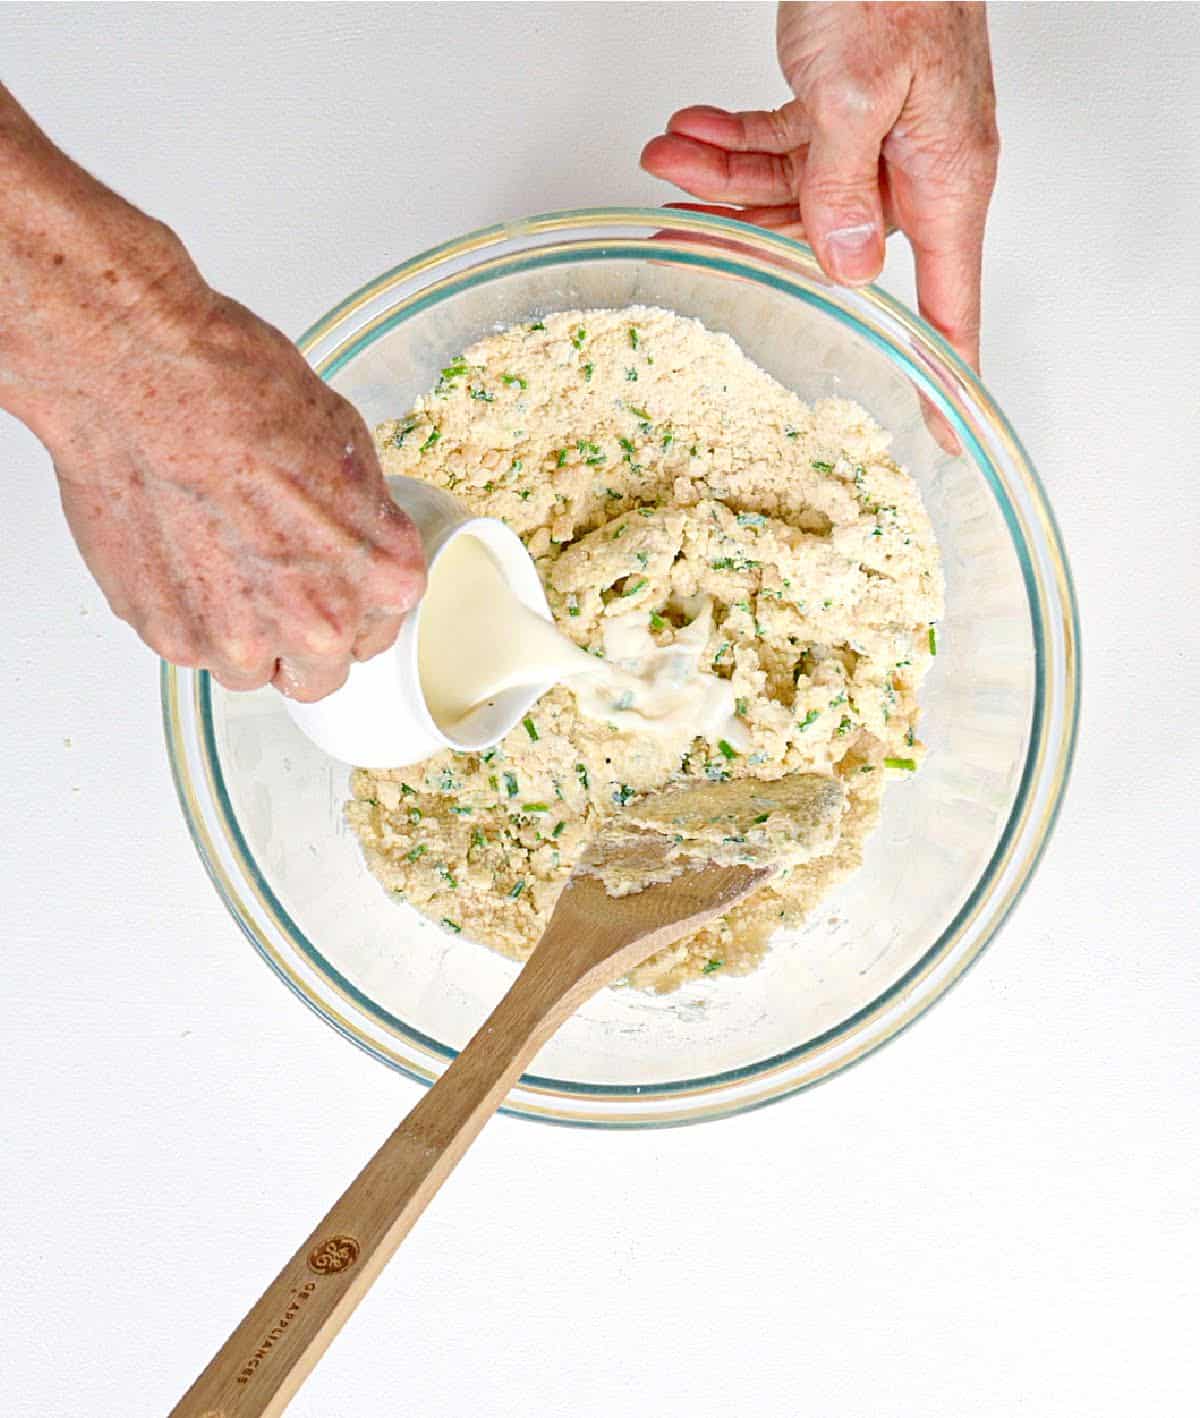
For this recipe, they are cold milk and sour cream.
- Milk: use whole milk for best results. The scones will be richer and taste better.
- Sour cream: it has to be used cold, so I like to mix it with a spatula or fork in the bowl before transferring the whole shaggy dough to the counter and forming the scones. You can also use cream cheese if that's all you have.
- Heavy cream: I have used only cream instead of milk and sour cream with good results. But remember that they will be way richer and denser and lose some of their fluffy texture. I like it when making very small, bite-sized scones.
Add-ins
- Cheese: the way you grate the cheese is important. I recommend a box grater, a large-holed Microplane (don't use a small-holed one because it will be clumpy), or a food processor, which is my favorite.
- Chives: you can chop them however you want. Green onions can also be used and they add a fabulous flavor also. Chop them small.
- Sun-dried tomatoes: this is another ingredient that works really well with cheese and chives or green onions. Make sure they are drained and chopped small. Two tablespoons should be enough.
- Bacon: make sure it's cut into small bites and crisp before adding it. Two or three tablespoons is a good amount to add.
Shaping the dough
A clean, smooth work surface is essential for the last step of this recipe, forming the shaggy dough into a nice rectangle, smooth enough to cut. The key here is not overworking it. I know I repeat this a lot, but it's important that it stays as cold as possible.
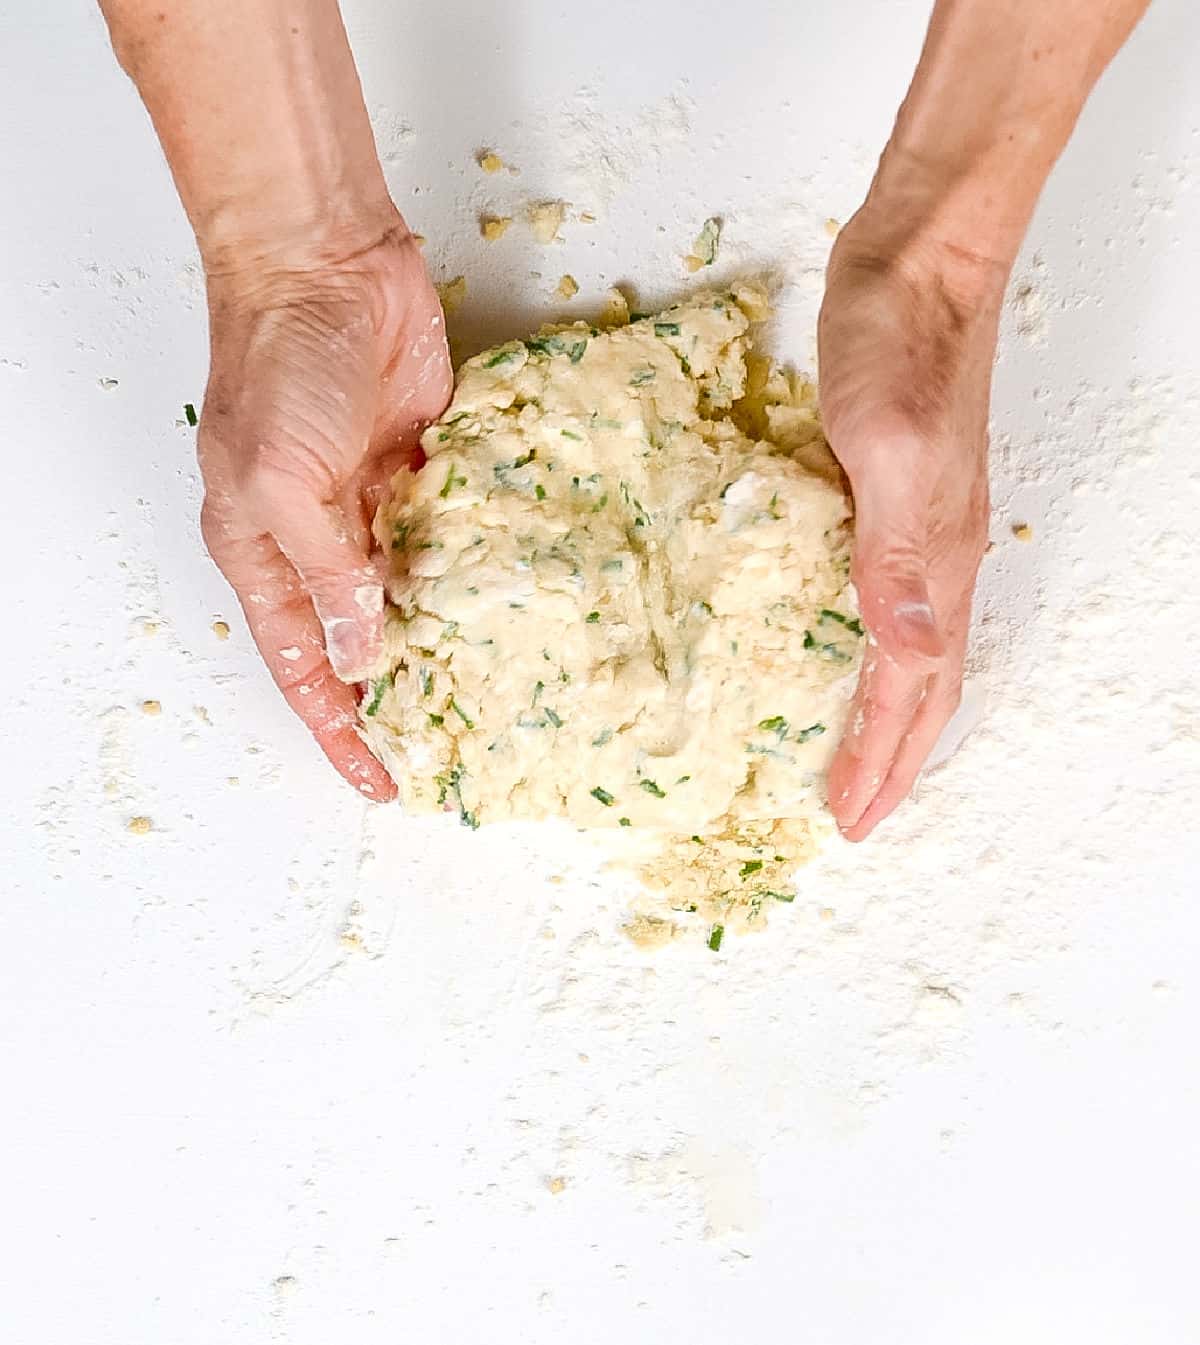
Handle the dough as little as possible. It'll be floury when you dump it onto the counter, but it will come together as you fold it onto itself. Help yourself with a bench or dough scraper, if possible.
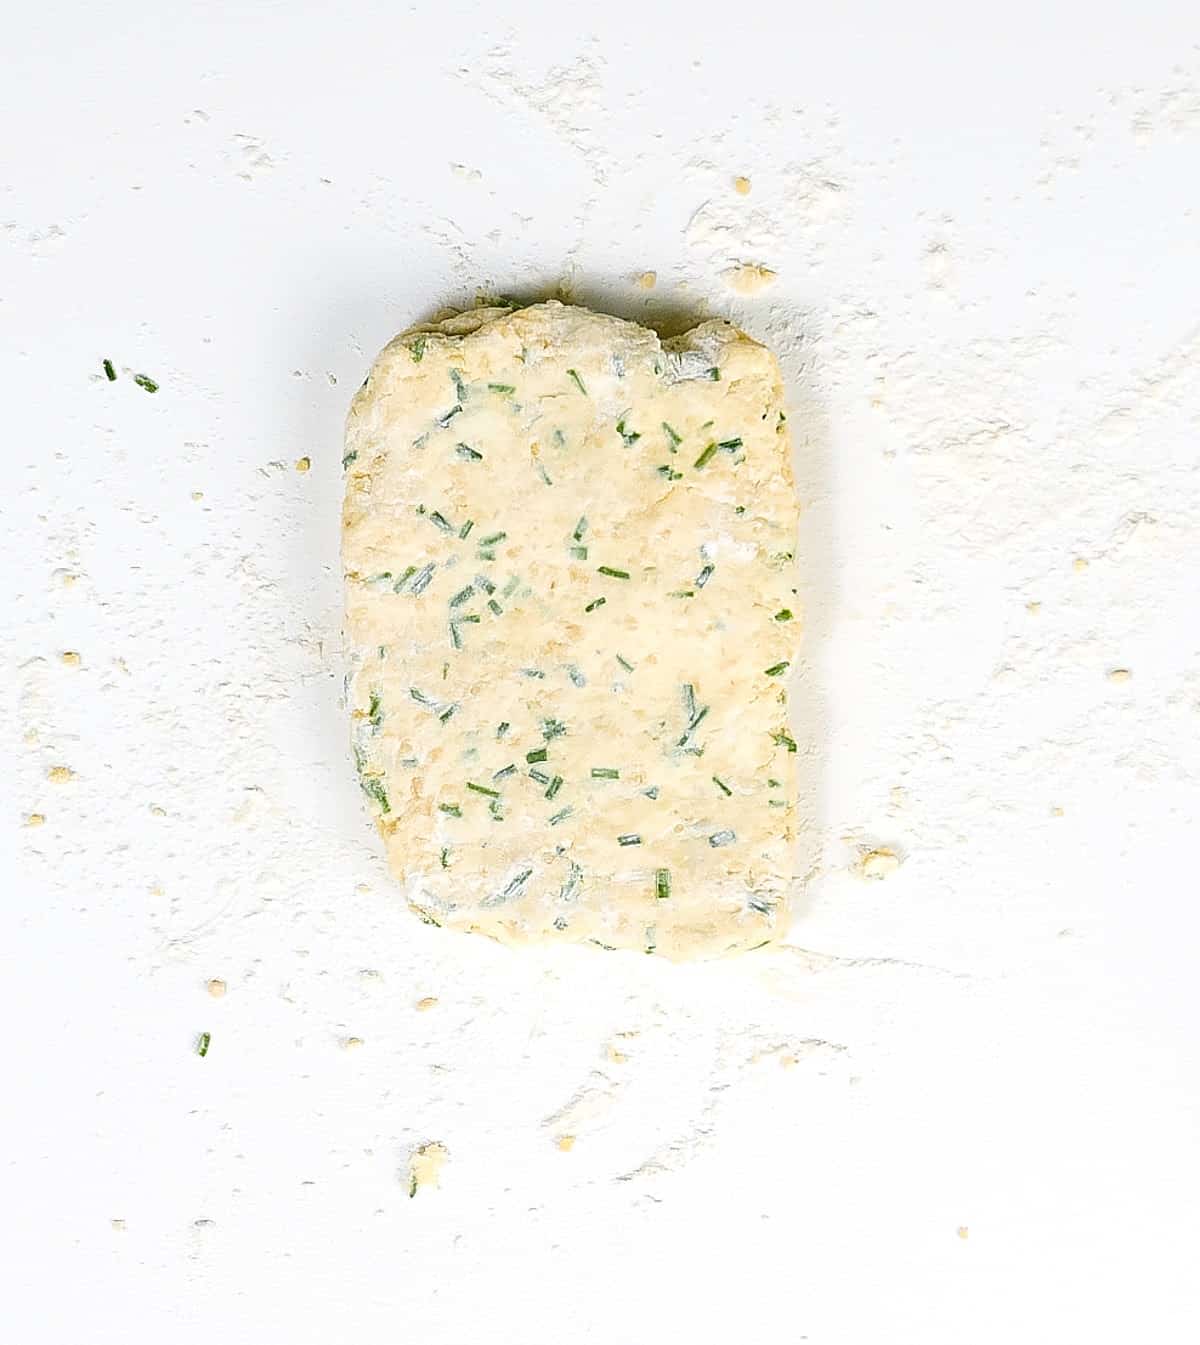
The scone dough will come together eventually. Don't knead it, and don't fold it until it's completely smooth. It's fine to have floury patches and be irregular.
Cutting and baking
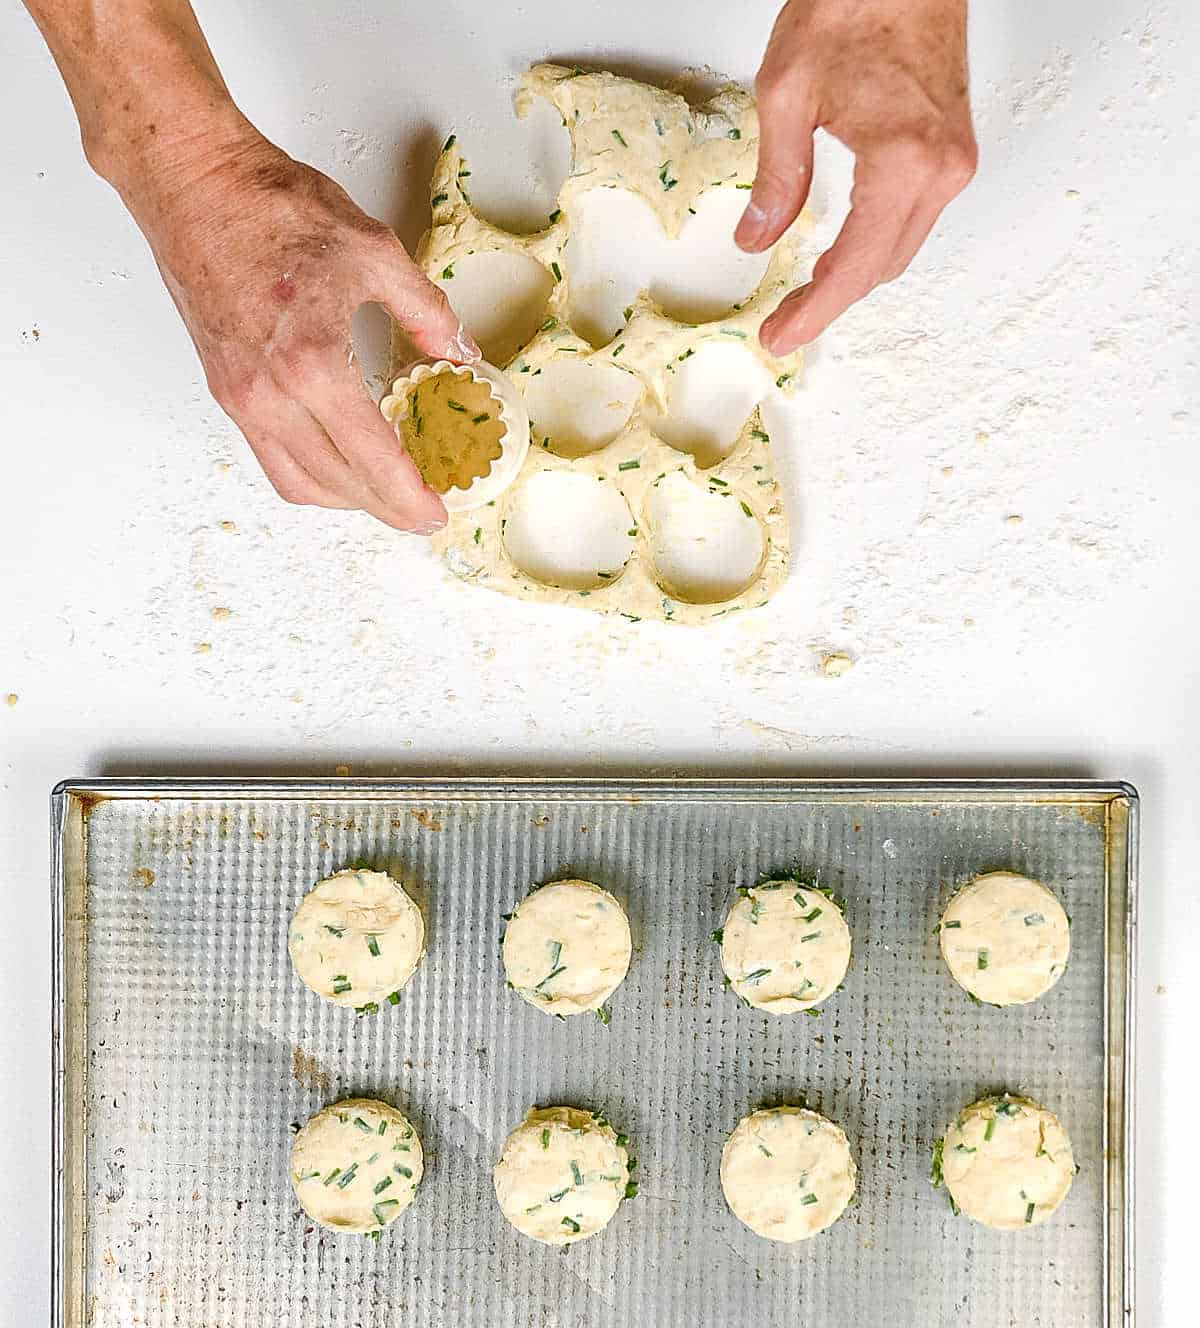
- Forming the scones: I use a round, smooth cookie cutter, usually 2 inches in diameter (image below). But you can make triangles (make a disc with the dough and cut wedges) or squares.
- Parchment paper: I don't normally use one, but you can. I find that they don't stick to my baking sheets.
- Topping: you can brush the tops with melted butter or use an egg wash (a mixture of egg with water/milk) before baking them. It will add a shiny golden crust and works great for traditional scone recipes, but I find that it's too much for this recipe. Also, on top of the butter or egg wash, you can sprinkle some extra grated parmesan cheese for an over-the-top scone.
Kitchen notes
- Organization: read the recipe first and ensure you have ingredients at the correct temperatures, equipment, and enough workspace. This will make the process so much easier!
- Baking time: keep in mind that all ovens and pans are different, even if they look the same or very similar. The baking time in my recipes is as accurate as it can be, but it might take you more or less time. You can use a thermometer(like the OXO oven thermometer) to check that your oven is at the right temperature. I recommend you keep track of how your oven works and what tiny details you might need to adjust.
- Three secrets to making great scones
Very cold ingredients: I’m not kidding when I say very cold butter. I cut it and put the pieces in the freezer for 5 minutes before using it. And don’t take the cream half an hour before you start mixing the scones. Butter, cream, and milk belong in the fridge until you need to scatter and pour them.
Don't work the dough much: it should come together but still have floury patches. You don’t need to work it until it’s smooth, like pie dough, for instance. It is an uneven dough, with dry spots sometimes, and that’s good for flakiness later.
A rather high oven: they need that extra heat (and baking powder) to rise however they can despite all that butter and cream. And if by any chance you forgot to turn the oven on before you start mixing, please don’t leave the baking sheet with the cut scones waiting on the counter. Put them in the fridge or freezer for the ten or fifteen minutes it takes for the oven to reach its temperature.
As with most baking recipes, practicing rules.
Practice, practice, practice! None of us was born making amazing pastries, I know I wasn't.
I still remember my first tough pieces of pie dough, ugh, and be glad you didn't have to taste my first potato gnocchi!
So yes, practice makes perfect. There's no way around it.

What do you eat with savory scones?
Eat them with eggs for breakfast or brunch, with a green salad for a light lunch, or with a hearty stew or soup on cold days. My favorite is eating them plain, warm from the oven because they're irresistible.
How do I get scones to rise and be fluffy?
Don't overwork the dough, preheat the oven, and don't forget the baking powder! Read the whole recipe first, follow the instructions in the recipe and the Notes in the recipe card and you will find all the secrets to making great scones.
Why are my scones hard?
You most probably worked the dough too much and it was not cold when it went into the oven. This is a crucial step. You can read the 3 secrets to great scones above in the post.
What happens if you put too much baking powder in scones?
They can rise too quickly and then collapse, and have a funny taste, almost bitter. Follow the recipe (this and others) and you should be fine. And check that the baking powder is fresh as it will be more active.
What is the best chemical rising agent for scones?
Baking powder, no doubt. Though you can achieve some results with baking soda, they will probably not be great as the acidic balance will be off and it will not rise properly and have a metallic taste. Personally, I don't recommend making scones if you don't have baking powder.
How to store scones
- Room temperature: I highly recommend eating them warm from the oven. If there are leftovers, store them in an airtight container for a day (two at the most). And always warm them before eating, for about 10 minutes at medium temperature (350°F/180°C). It makes all the difference in flavor and they will get some of that tenderness and richness back.
- Freezer: one of the most wonderful things is that they can be frozen raw, already formed. So you can make a big batch, cut them, put them on trays and freeze them. Once frozen, transfer to a freezer bag, container or use plastic wrap, so the tray doesn't occupy freezer space. As they are frozen solid, they can be piled together. This way, you can bake them to order! Directly from the freezer into the hot oven following the recipe. They might need to bake for a few more minutes.
Serving
- Brunch and high tea: this is a savory scone recipe so they are great for brunch and high afternoon tea (similar to a brunch but happening late afternoon and replacing dinner). Serve them with sour cream or deli meats and cheese.
- Sandwiches: you can make small sandwiches with some cold meats or slices of tomato and basil or arugula.
- Warm with soft cheese: I like to split them and add a small dollop of soft cheese, such as goat or even cream cheese.

Related recipes you might like:
Before you go
If you made this recipe and loved it, you can comment below and leave a five-star ⭐️ review. Also, if you had issues, let me know so we can troubleshoot together.
You can also subscribe to our FREE email series 'Baking the Best' and our regular newsletter. Or follow and save my recipes on Pinterest.

Savory Scones
Ingredients
- 5 tablespoons unsalted butter, cubed and very cold
- ¼ cup sour cream, cold
- ¼ cup whole milk, cold
- 1 ⅓ cups all-purpose flour
- 2 ½ teaspoons baking powder
- 1 teaspoon salt
- Black pepper, to taste
- Scant 1 cup grated cheese, I also use the food processor until I get tiny bits
- ¼ cup chopped chives
Instructions
- Preheat oven at 375ºF (190ºC).
- Have ready oven trays or cookie sheets.
- I use the processor at the beginning, but you can do it by hand.
- Put flour, salt, cheese and baking powder in the bowl of the food processor or a large bowl.
- Pulse a few times to mix or mix with spoon or spatula.
- Scatter cold diced butter and pulse until it is the size of peas.
- By hand start mixing the butter into the flour with the palms of your hands. It wil take a bit since the butter is cold.
- If using the processor transfer the mixture to a large bowl.
- Add pepper and chives. Mix a bit.
- Mix together sour cream and milk in a small bowl and add to the flour mixture.
- Mix with a fork until most of the dry ingredients are mixed. There will be dry patches, that is fine.
- Now, you can give it a few turns inside the bowl with your hand or do it on the counter.
- The dough should come together just barely, be careful not to overwork it as it will soften the butter too much and that will prevent the scones from rising properly. It should have some dry spots. It doesn’t need to come together like pie dough.
- Give it a few folds onto itself and pat it about 1 ½ to 2 inches thick.
- Using a round cutter dipped in flour, cut circles. See Notes below for comment on cutter size. Continue dipping in flour to prevent sticking every time you cut a scone.
- Put them on the baking sheets spacing a bit, and put them in the freezer for 5 minutes.
- Make sure the oven is at the right temperature and bake them for about 15 minutes, until puffed and no longer creamy inside. You might need to open one and check.
- The bottoms will be golden but the rest of the scone not so much.
- Let them cool until warm and enjoy.
Notes
Cheese: gouda and white cheddar are my favorites, but I used to make them with Parmesan and also Fontina and Gruyere work very well. Semi-hard cheeses with a sharp flavor are the best.
Herbs: you can add a tablespoon of oregano, thyme or even chopped basil.
Spices: a touch of smoked paprika works really well. Also chili powder or ground jalapeños can add a nice kick.
Sour cream: you can use cream cheese.
Milk: both the milk and sour cream can be substituted for Greek yogurt or buttermilk. They will be more tender and moister. Also heavy cream can be subbed, and they will be denser and richer. 3 secrets for great scones:
Very cold ingredients. I’m not kidding when I say frozen butter, at least very cold. And don’t take the cream half an hour before you start mixing the scones. Butter, cream, milk, they belong in the fridge until you need to scatter and pour them.
Don't work the dough. It should come together but still have floury patches. You don’t need to work it until it’s smooth, like a pie dough for instance. It is an uneven dough, with dry spots sometimes, and that’s good for flakiness later.
A rather high oven. They need that extra heat (and baking powder) to rise however they can in spite of all that butter and cream. And if by any chance you forgot to turn the oven on before you start with the mixing, please don’t leave the baking sheet with the cut scones waiting on the counter. Put them in the fridge or freezer the ten or fifteen minutes it takes for the oven to reach its temperature. How to store scones:
Room temperature: I highly recommend eating them warm from the oven. If there are leftovers, store them in an airtight container for a day (two at the most). And always warm them before eating, for about 10 minutes at medium temperature (350°F/180°C). It makes all the difference in flavor and they will get some of that tenderness and richness back.
Freezer: one of the most wonderful things is that they can be frozen raw, already formed. So you can make a big batch, cut them, put them on trays and freeze them. Once frozen, transfer to a freezer bag, container or use plastic wrap, so the tray doesn't occupy freezer space. As they are frozen solid, they can be piled together. This way, you can bake them to order! Directly from the freezer into the hot oven following the recipe. They might need to bake for a few more minutes. Yield: depending on the size of the cutter you use will be the amount of scones you get. I like to use small and medium ones, from 2 to 3 inches in diameter. But you can use any size really, or cut triangles with a kitchen knife also, like we do with the Blueberry Scones.
Inspired by Pastries from La Brea Bakery by Nancy Silverton





Kitty Boynton says
I have been baking for over 60 years and usually new recipes work out fine for me. But this one was my first flop in a long time. The end result came out very crumbly and tasted only of salt to the extent that I could not taste the cheese (good sharp Cabot) or chives. I am sure this is my failure as so many others have had wonderful results with it. I hesitate to give stars.
Paula Montenegro says
Thanks for the feedback Kitty, it's very valuable! I'll test them again and see how it goes.
Diane Junier says
Very solid recipe. Of course I improvised with cheese, bacon and onion. My husband said it was the best thing I've ever made. (I bake a lot)
Paula Montenegro says
Yes, bacon and onion sound perfect! I will try them out soon Diane.
Margaret Weeks says
Excellent scones! I made these twice and froze both batches after sampling of course! Heats up great from frozen! 375F for 15 mins.
Paula Montenegro says
Sampling is always necessary (wink).
Enjoy the weekend Margaret!
Anne says
Will definitely try your recipe. Your tips are very clear and reassuring. Thank you!
Paula Montenegro says
Let me know how they turn out!
Joy says
Great directions!
Christine E York says
My scones were soft in the middle but dry on the outside and the edges seemed to fall away (I cut them into pie wedge shape). I used frozen butter, grated it directly into the dry ingredients and the milk and sour cream were very cold. Not sure if maybe I underworked the dough? Not super impressed with this recipe.
Kelly says
I patted the dough to only an inch think and only got 6 scones using a 2.5 in. Cutter. Am I reading something wrong? They are in the freezer so I have tasted yet but they smell amazing!
Paula Montenegro says
Hi Kelly! It's a larger cutter. I used one that is between 2 and 2.5 inches. I added that to the recipe card for future reference, thanks for the comment. They will turn out great anyway. Just make sure they're baked all the way through.
Anne says
I just made these scones and doubled the recipe and still only came out with 29. (They're in the freezer, so I haven't baked them yet, but I can tell that they are going to be amazing.) I used my smallest size cutter which was 2" in diameter. What am I doing wrong?
Paula Montenegro says
Hi Anne! Maybe they are much taller? It's the only thing I can think of right now.
Simon says
Amazing taste and texture. Tried baking a few fresh from a batch I made today and it was perfect in all respects. I froze the others and just wanted to ask how much longer they will need in the oven being baked from frozen?
Paula Montenegro says
Hi Simon, so glad you loved them! If baking them frozen 4-5 minutes probably. It depends a lot on the size, but it doesn't take more than ten minutes for large ones. So between 4-10 minutes depending on the size.
Heidy M says
This scone recipe was a total hit at the table. The entire family loved them and I loved the fact they were so easy to make.
Connie says
WOW! These are the tallest scones I've ever seen. The layers in them, amazing! Definitely know what you're doing here with scones so I will be saving this recipe to make.
Jacqui DeBono says
I love any kind of scone, but particularly the savoury ones! I grow so much chive too, so I can get some of the ingredients from the garden.
Marcel Corbeanu says
I simply love these! They resemble a dessert/pate that we use to make all the time, when I was a child. Bringing back great memories ... I bet these taste amazing!
Danielle says
If there is one thing that should be taken seriously, that would be scones, that's for sure. Fantastic chive scones and just the way I like mine. Yum!
Amy Liu Dong says
This scones looks really delicious and such perfect appetizer to prepare in any occasion, deserves to have a stars.
Marisa F. Stewart says
I love the idea of savory scones. I've never been much for sweet desserts but yes for spicy and savory. These scones would make great appetizers. Next gathering we have I'll make these delicious bites for sure.
Leslie says
I have only had sweet scones but I love to mix it up! Would love to give these a try!
GUNJAN C Dudani says
I love this savory take on scones. So far I have seen only the sweet ones. I am totally trying this.