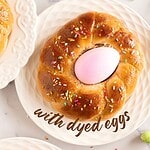

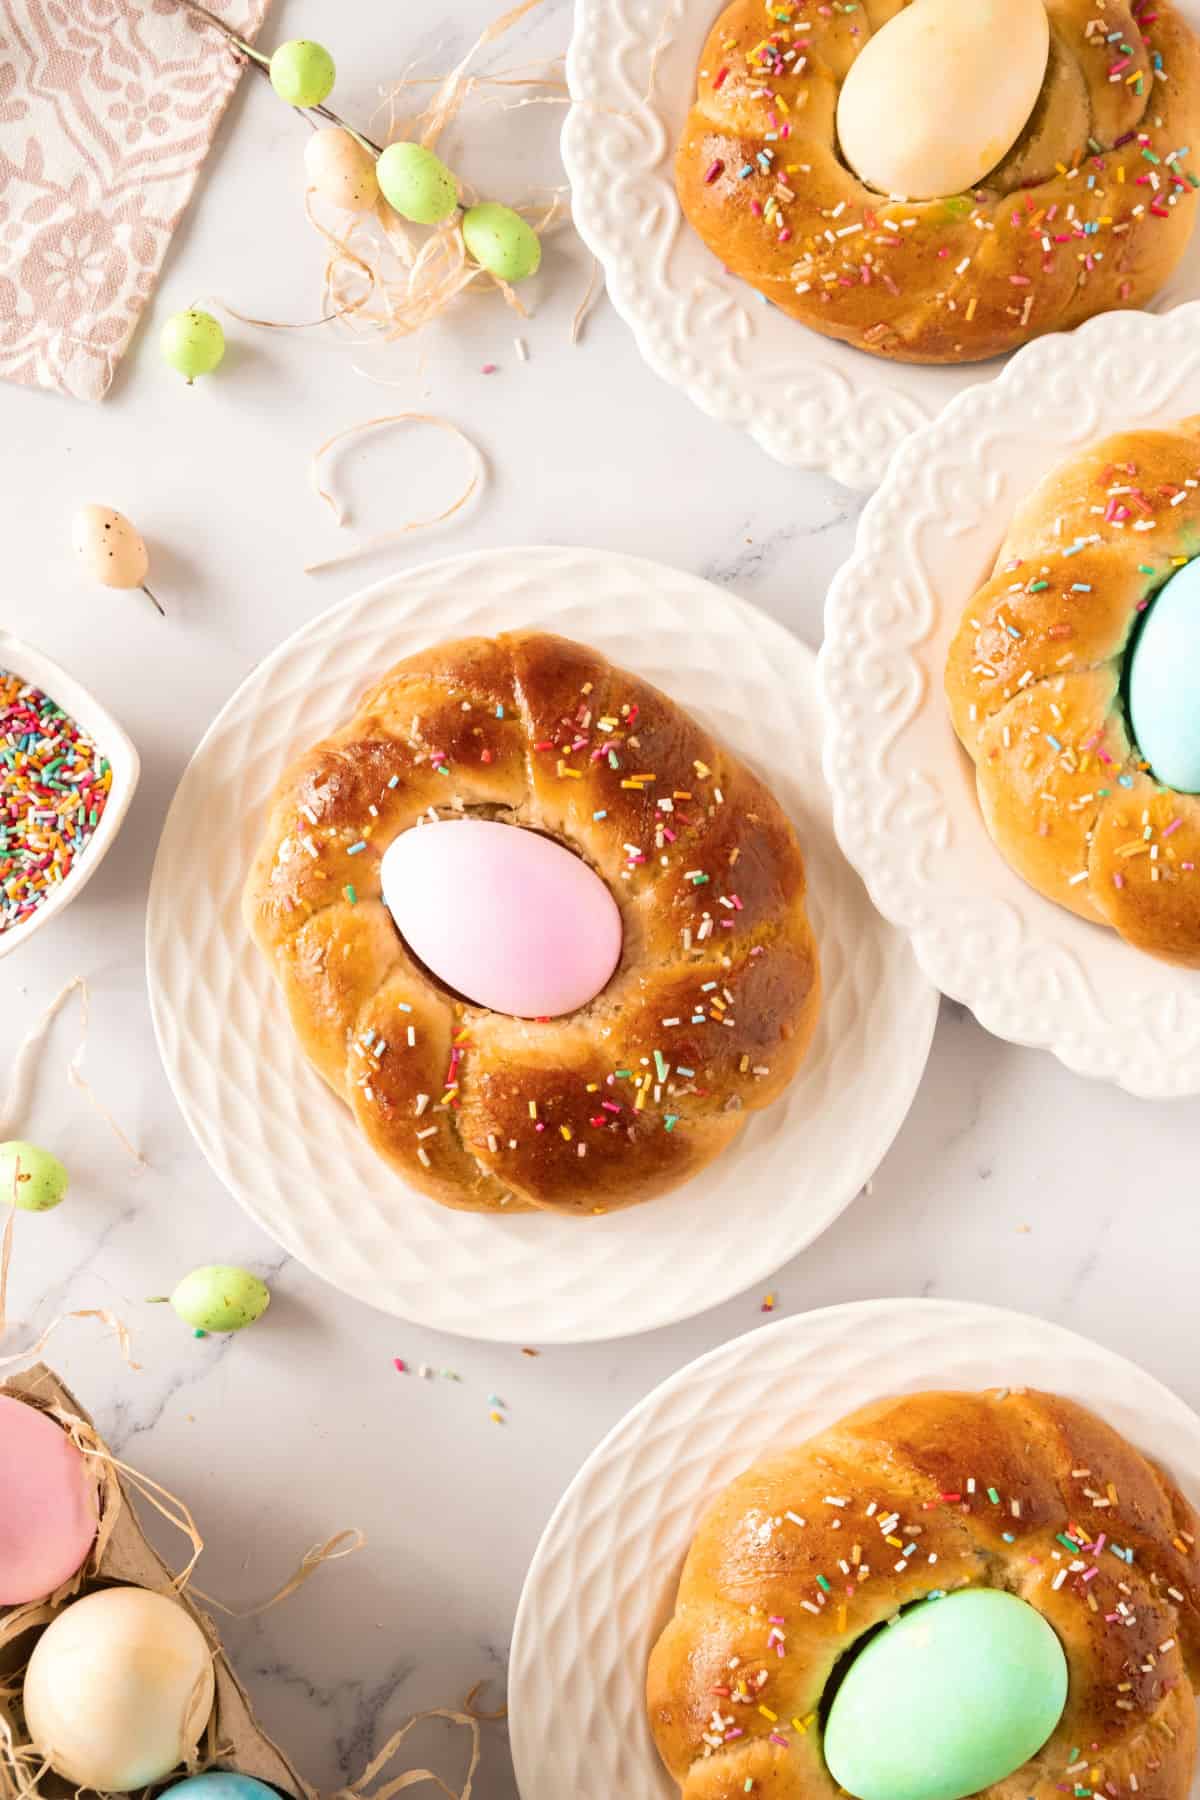
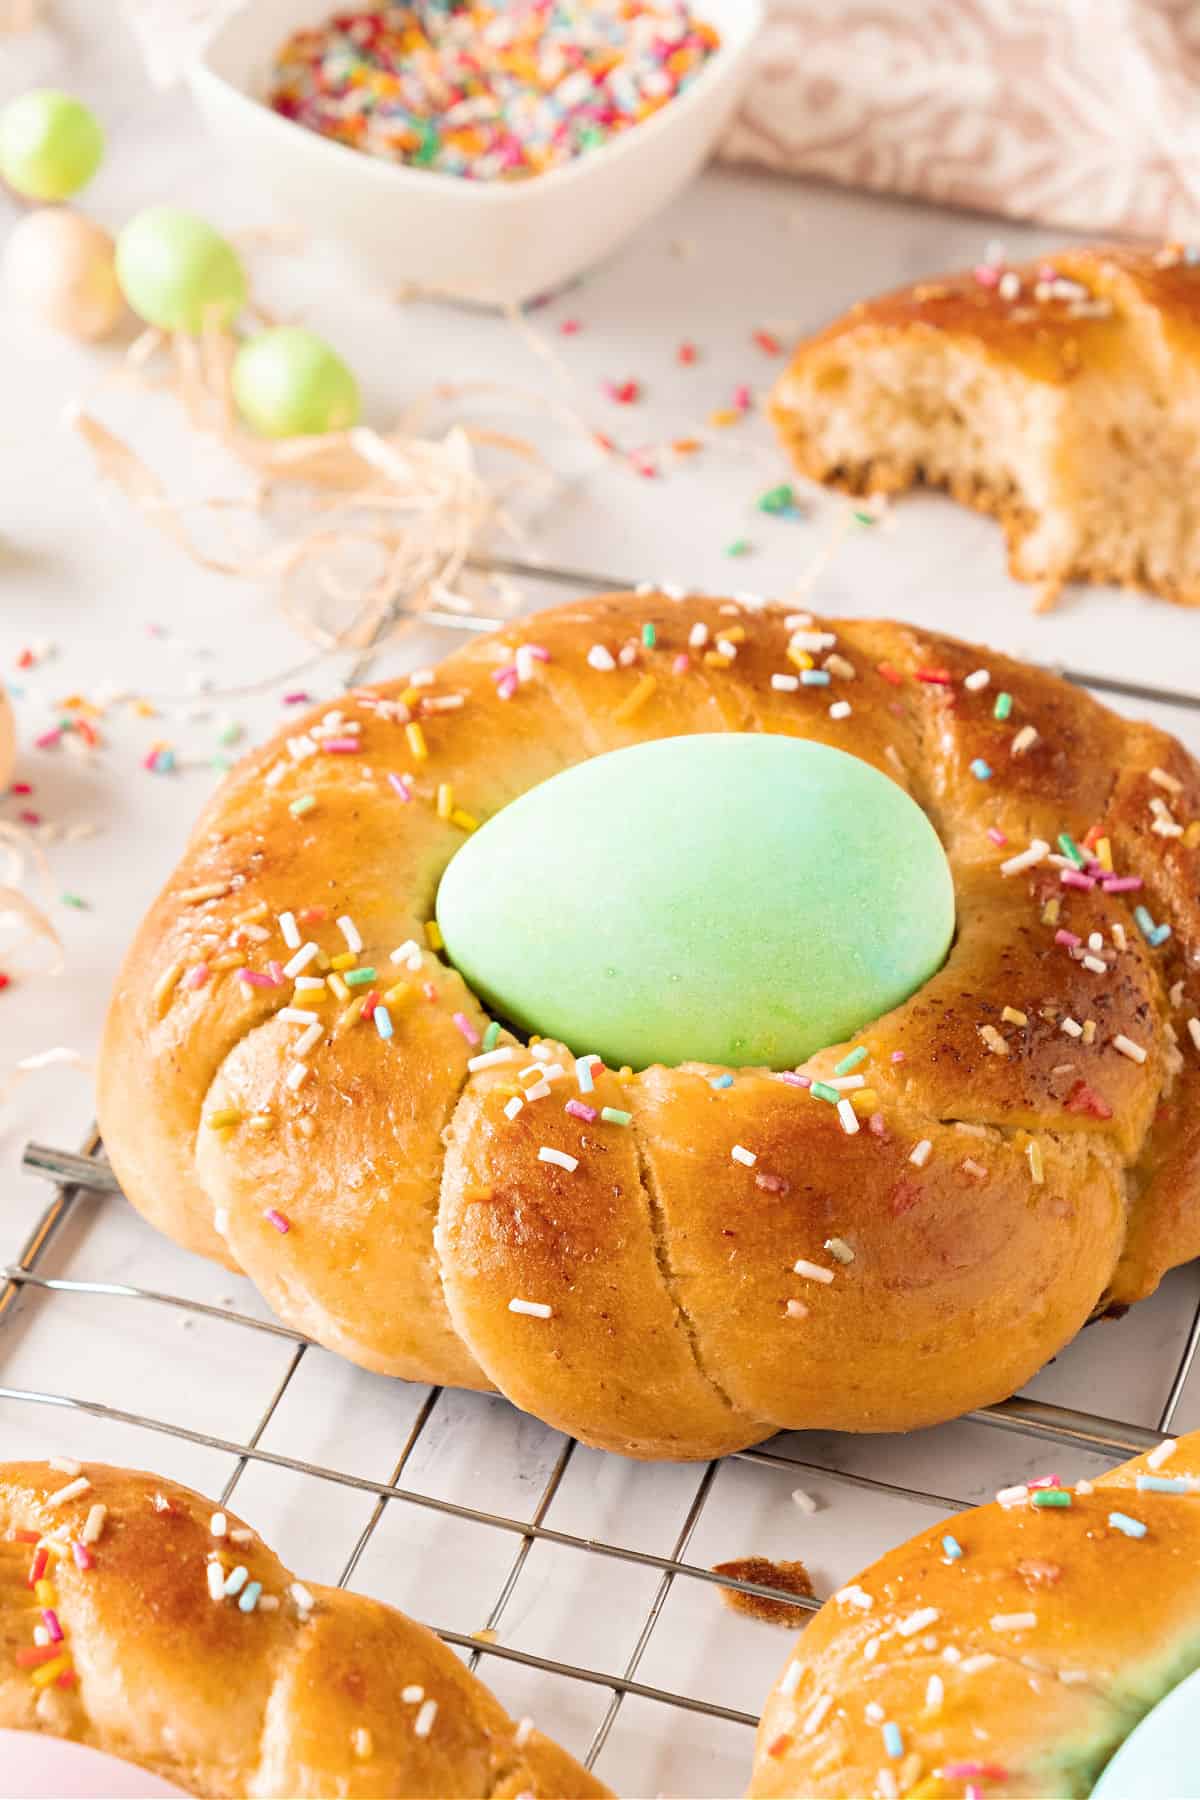
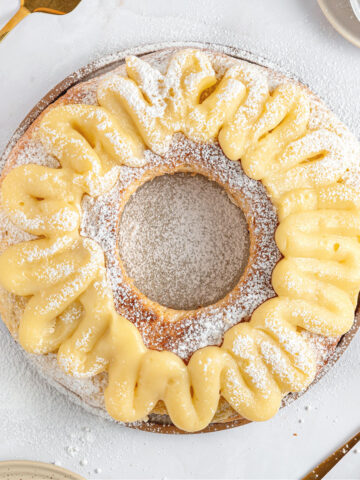
What better way to celebrate Easter than making these cute little braids with dyed eggs in the center? Serve each guest their own or use them as table decorations. This dough is slightly sweet, easy to work with, and versatile; the ring with pastry cream is also made with it.
SAVE THIS RECIPE
Italian holiday bread
When I set out to add new Italian recipes to the ever-growing Easter recipe category, these small breads were at the top of the list.
It's a straight dough (which means it uses dry or fresh yeast and is ready in a few hours), and the best part is that it's easy to knead and work with.
The dough resembles Finnish Pulla and the glazed Easter braid, but they're all cousins. Sweet holiday breads don't differ much, even though each country has its own.
This slightly sweet dough has a soft but rustic texture. It could qualify as a poor man's brioche bread, which means it's not as rich because it uses fewer eggs and butter. Or an enriched challah as it's not as plain.
Don't be afraid to work with yeast. It takes a little practice (what doesn't?), but the results are excellent!
Testing Notes
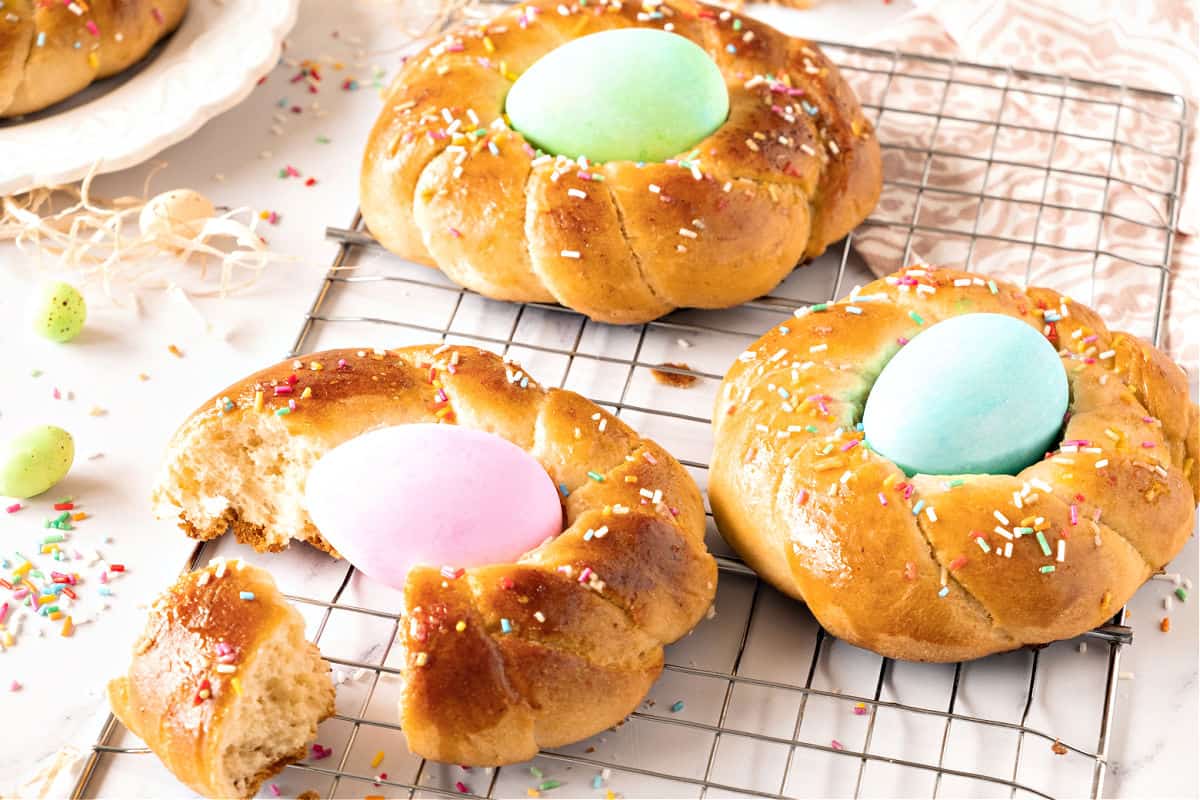
Adding the colored eggs: Do you add them before or after baking? I place them in the center of the bread before if the eggs are raw and after if they're hard-boiled. We don't want overcooked eggs.
All of this is not a factor if you just use them decoratively, and, if that's the case, I recommend already cooked eggs that are easier to manipulate, as there is no chance of them breaking.
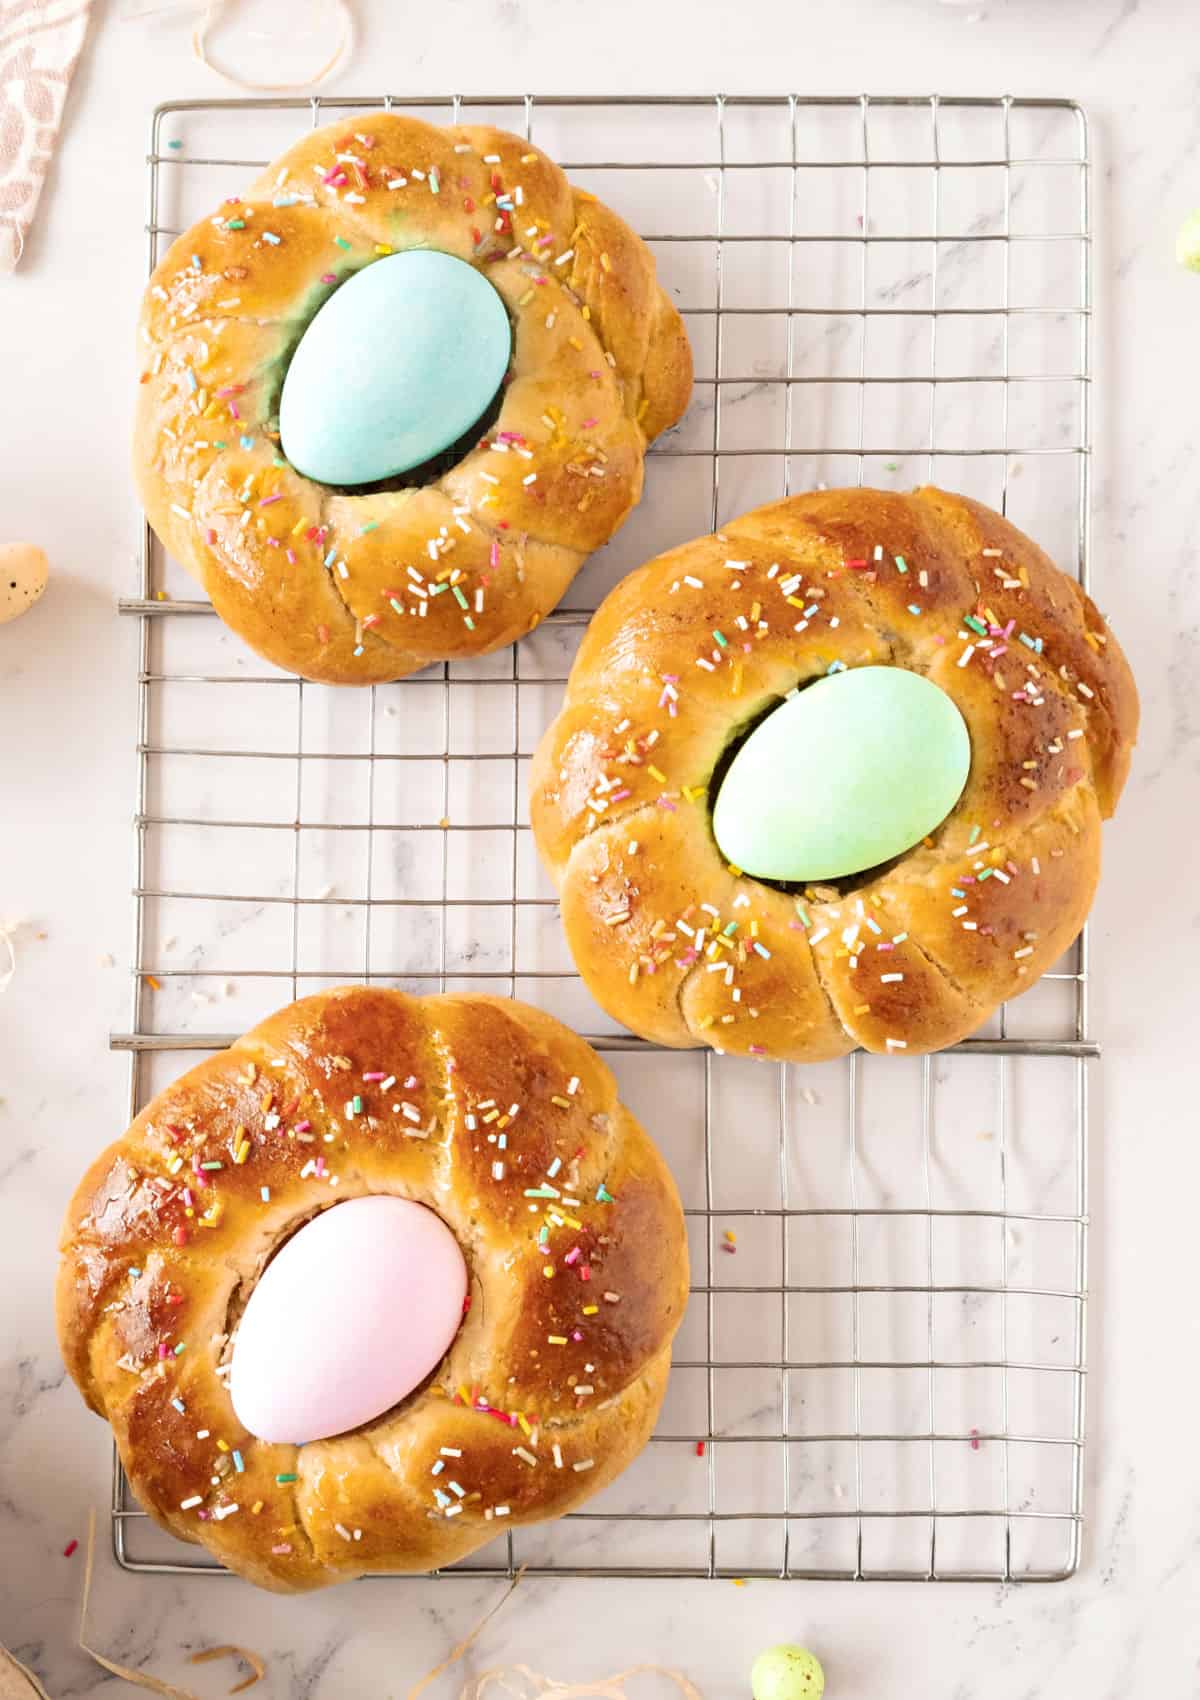
Don't overbake them, or the crumb will start to dry. These are individual breads that bake much faster than a large one. You'll still get a deep golden color from the egg wash that is applied before baking, so take them out as soon as they're puffed, golden brown, and sound hollow when lightly tapped at the bottom.
The sprinkles are a fun finish, but you can omit them. I'm not the biggest fan of biting into them, but it's a classic topping.
Watch our step-by-step videos
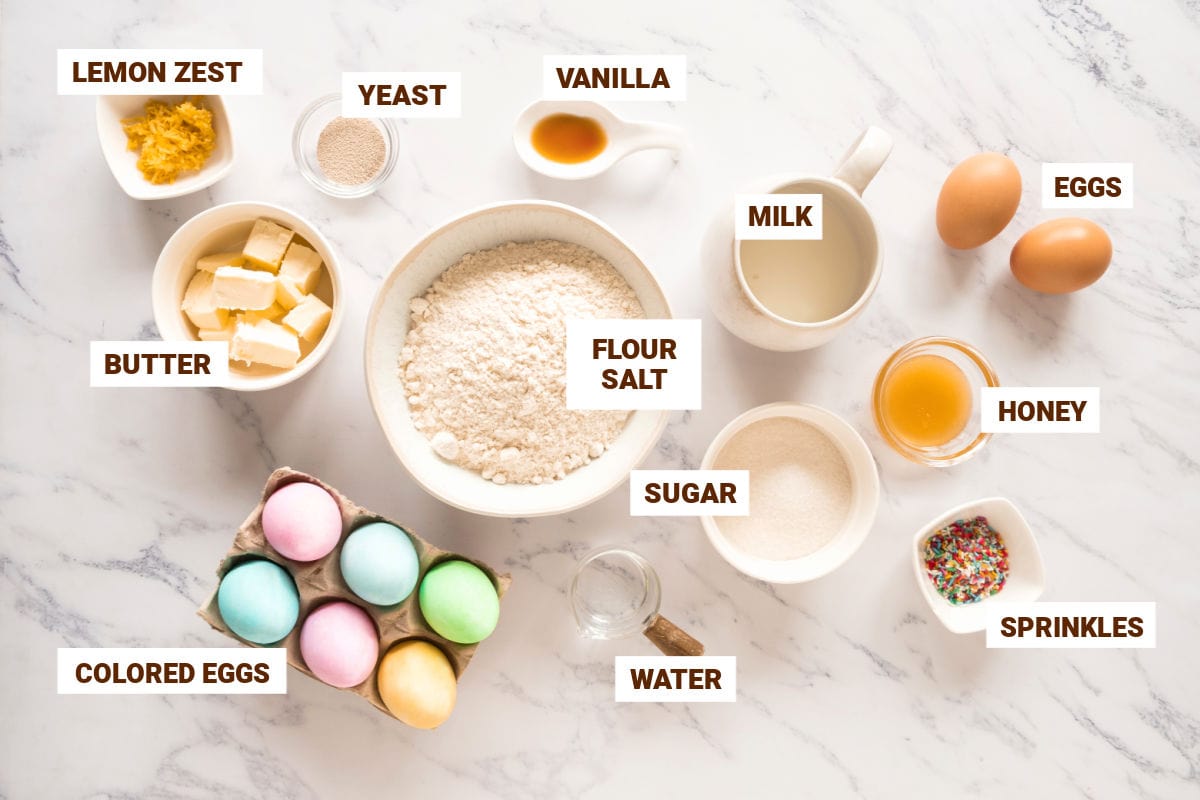
Ingredient Notes
Quantities are listed in the recipe card toward the end of this post. The Ingredients page has more details and lists the brands I use.
- All-purpose flour works very well, but you can also substitute half for bread flour or use a mix of bread flour and cake flour.
- Yeast: I generally use instant dry yeast for this type of bread as it's added to the flour mixture and it's the easiest one. If using active-dry yeast or fresh yeast, they need to be foamed first, and I added the instructions in the Notes section of the recipe card.
- Lukewarm milk: that means slightly warm, but not hot. This is important as hot liquids can reduce the strength of the yeast.
How to Make Sure Yeast Works
- Check expiration date: Replace if expired.
- Visual check: Should be beige to light brown and granular/powdery. Avoid if grayish, clumpy, or discolored.
- Smell test: Should have a mild, slightly sweet smell. Strong or unpleasant odors indicate it's bad.
Proofing test: Mix ½ teaspoon sugar in ¼ cup warm water (comfortable to touch). Sprinkle ½ teaspoon of dry yeast on top and stir gently. Wait 5-10 minutes until you start to see some activity. Fresh yeast will foam and bubble more while instant yeast bubbles less than active dry yeast.
Golden Rule: When in doubt, buy new! It's better to be safe than to have your baked goods fall flat and be inedible. You'll have to throw it out and start again.
Make the sweet dough
Most bread recipes can be made either in a stand mixer with the dough hook (like the Kitchen Aid stand mixer or similar) or by hand.
Of course, the former is easier, but sometimes we don't have access to one, so knowing how to bake the old-fashioned way (hands in the dough!) is useful.
Stand mixer
Proof the yeast, that is, check if it's good to use directly in the mixer bowl.
Start adding the rest of the ingredients to the yeast mixture in the order given.
Knead using the dough hook attachment until you have a sticky dough. The dough will stick heavily to the sides of the bowl but eventually will start to gather into a mass around the hook and will eventually clear the sides and bottom of the bowl after it's kneaded more. Don't be tempted to add too much extra flour! This dough is supple and not really sticky, but it might feel that way slightly, especially before the initial rest, as it will become less sticky after it relaxes.
By hand
The first two steps are the same as above, but you mix everything in a large bowl. Use a wooden spoon or spatula. Or your clean hands though it's messy.
There comes a moment when the dough is still wet, but it's hard to stir in more flour. It looks like a very thick, lumpy pancake batter. At this point, you transfer it to a heavily floured board and get your hands into action. Use flour from the amount given in the recipe. We don't want to incorporate extra flour unless needed.
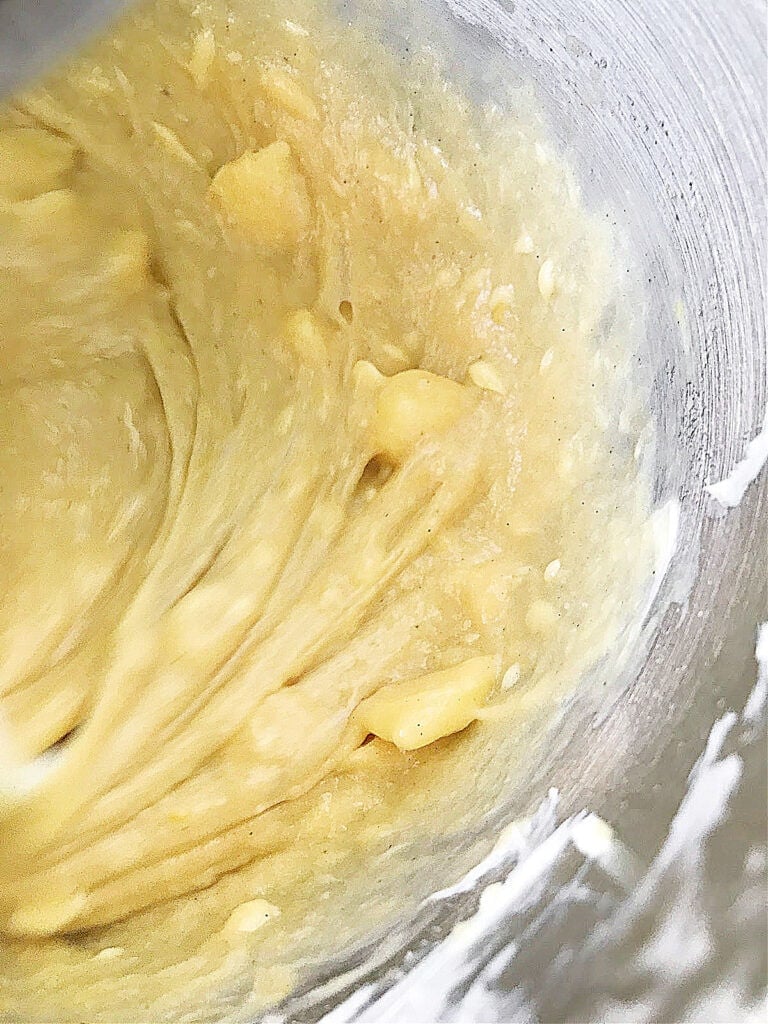
At first, the dough will be very sticky. This is a wet dough enriched with eggs and butter, so the way to 'knead' it is by lifting it and letting it fall, trying to fold it onto itself when you do that. It will get less sticky as you continue to do that. Knead it for about 7-8 minutes first, and add more flour, a tablespoon at a time, when necessary.
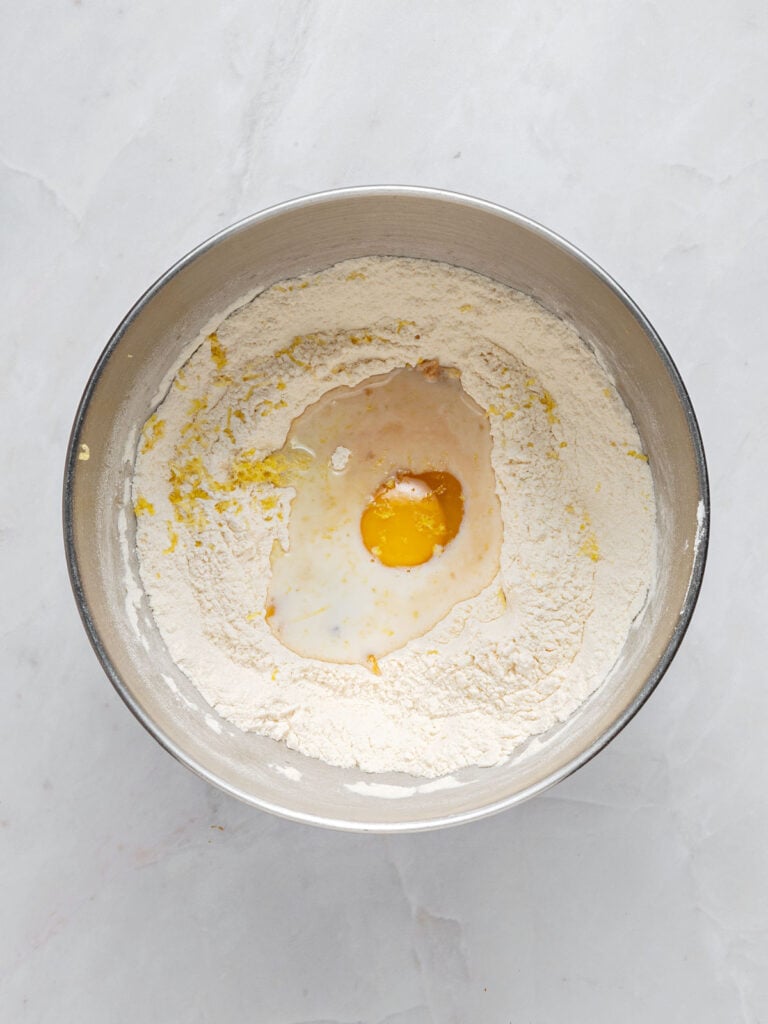
Wet ingredients
Add them to the dry ingredients except for the salt, which is added after you knead them a little to avoid mixing it with the yeast from the beginning.
Butter pieces
Make sure they're at room temperature, soft but not greasy, and add them in 3 or 4 parts, leaving about 30 seconds between each. This helps integrate the butter better than adding just one large piece.
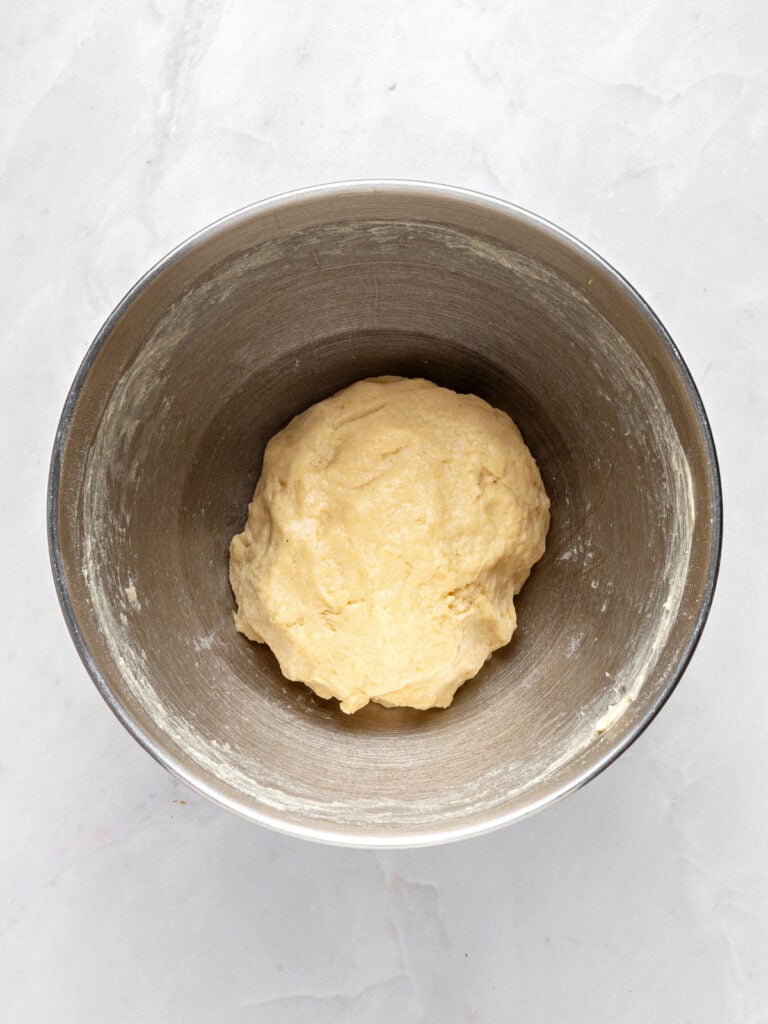
Let it rest
It's not a full rise; it just needs to rest for about 15 minutes to relax. You can leave it in the mixer bowl or on the counter if you knead it by hand.
Always cover it with a clean towel to prevent dryness.
Form the breads
We're making individual braided circles or crowns, as they're also called because they symbolize the crown of thorns.
I like to make 4 small breads, but you could make 5 or 6, depending on the size you want each one to be. The more you make, the smaller they will be.
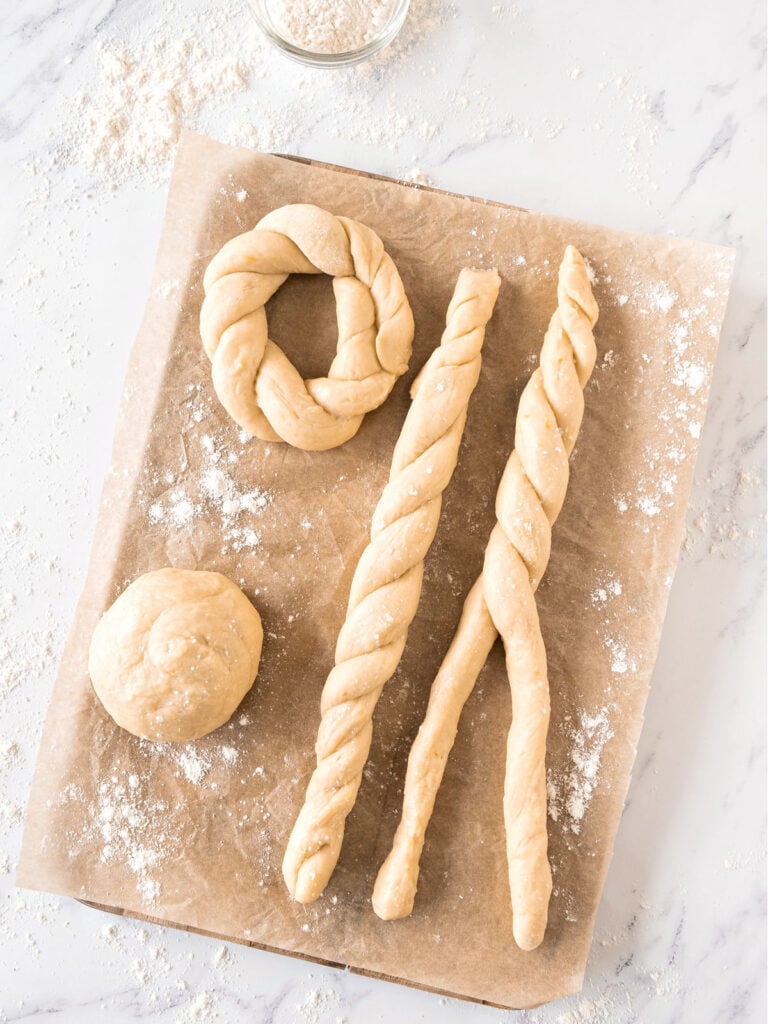
Braided ropes
Each dough ball should be cut in half, rolled into a rope, braided together, and looped to make a circle.
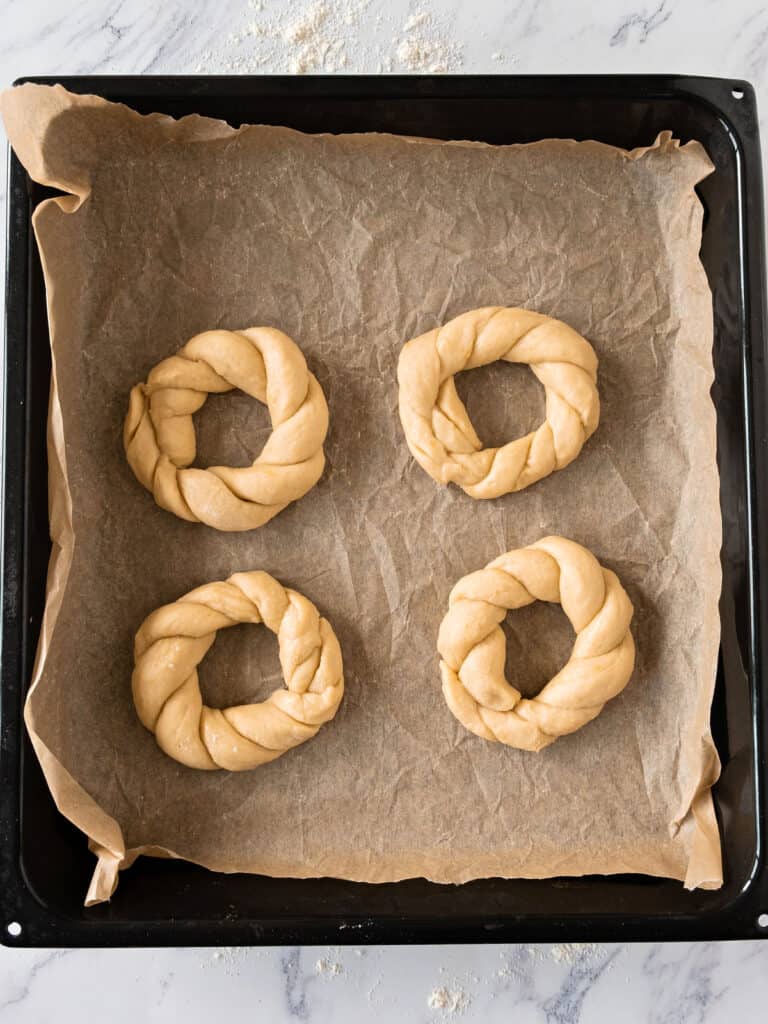
Let them rise
The crowns need to rise until doubled, or almost. It will take between 45 minutes to 1 hour.
Cover with a clean kitchen towel to prevent dryness.
Vintage Kitchen Tip
If the dough hardly rises during the first half-hour, it's probably because the room is too cold. Loosely wrap the tray with a blanket, a thick towel, or a sweater, or place it in a warmer place of your house. You need to create a warmer environment for the yeast to do its work.
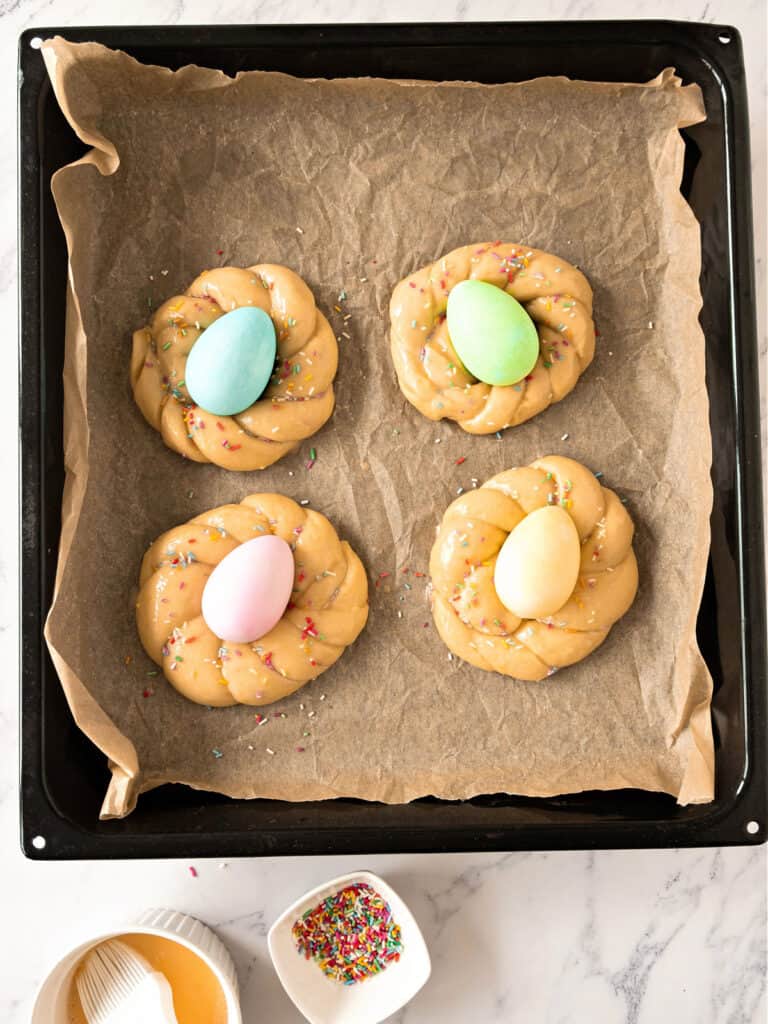
Egg wash
I use egg and water to brush the braids before baking them for a shinier and deeper golden color.
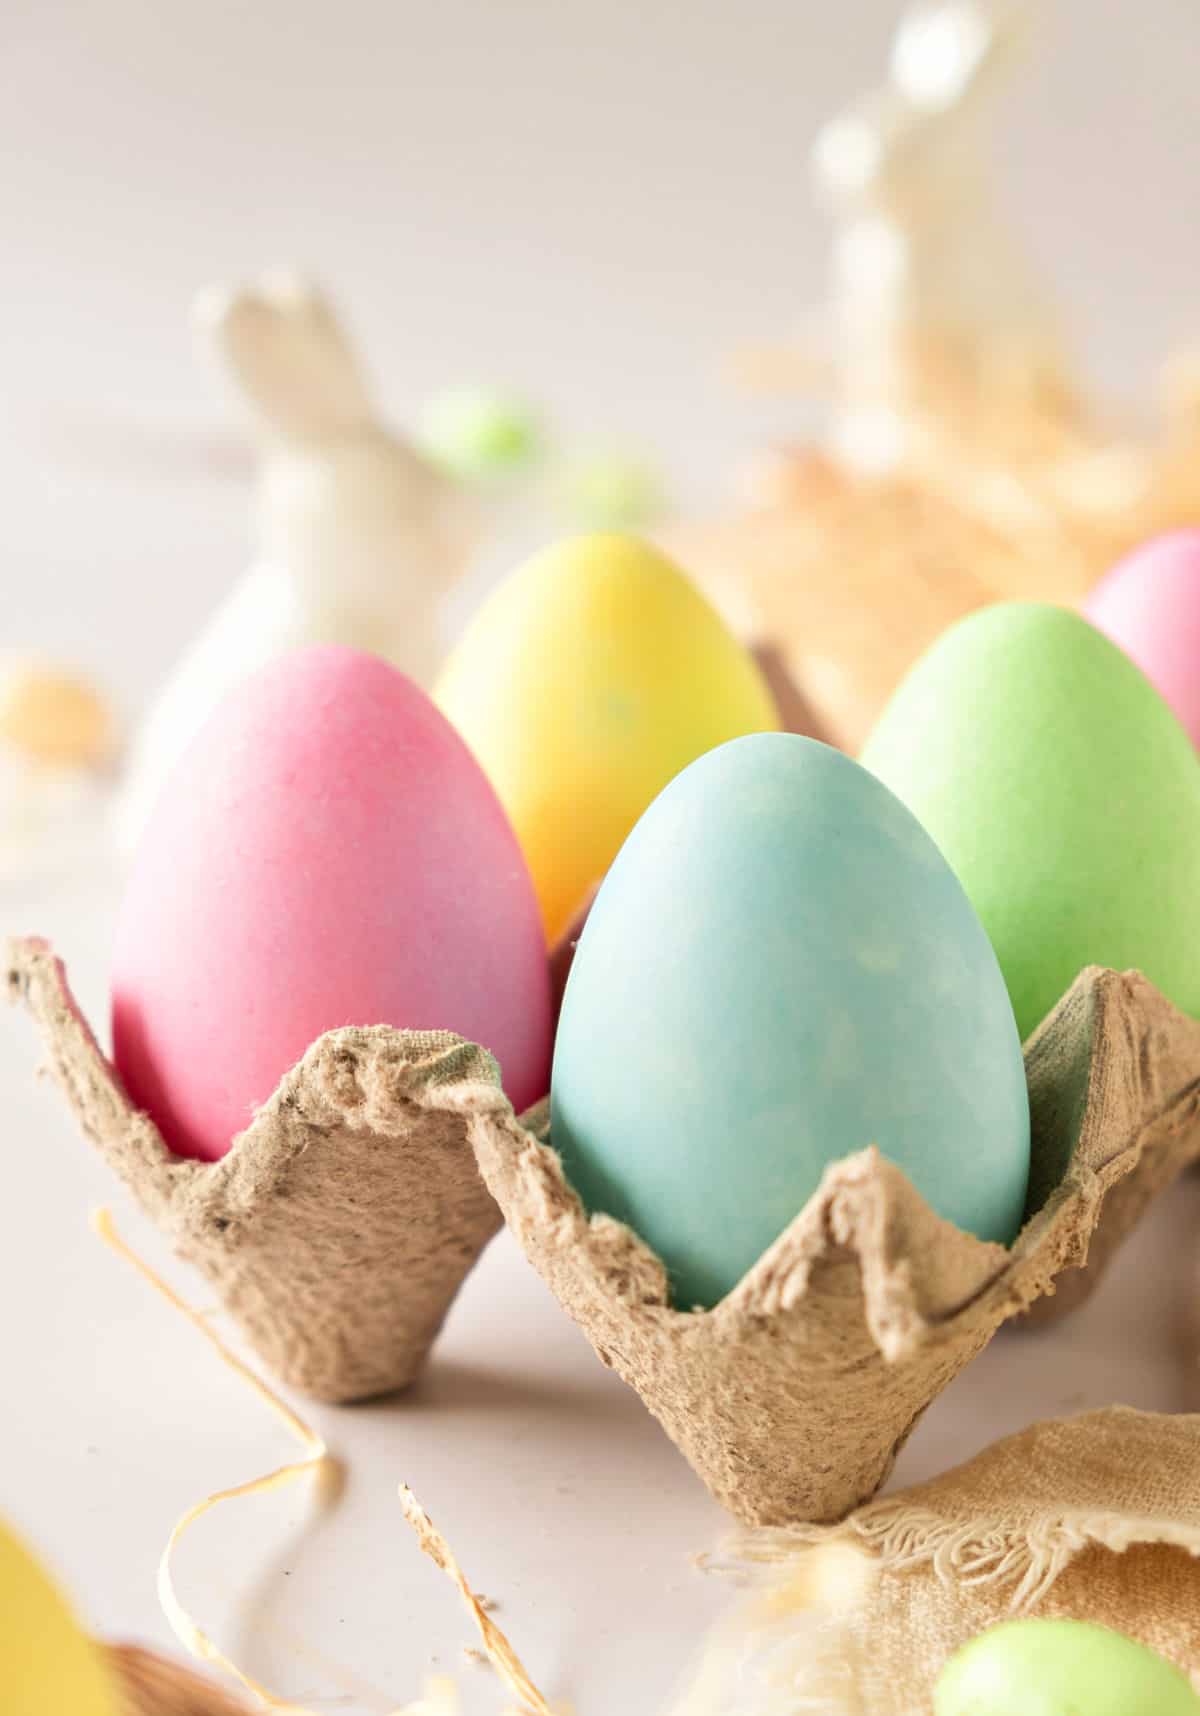
Dyed eggs
These are what make these little breads so special, colorful and whimsical.
It's not hard to dye eggs for Easter, but make sure you plan ahead, as they need to be completely dry.
Pastel colors: Easter is all about soft shades, so go easy on the food dye you use and experiment with a few eggs at the beginning if you're dyeing for the first time.
Kitchen Notes
- Organization: Read the recipe first and ensure you have the ingredients at the correct temperature, the utensils and equipment needed, and enough workspace. This will make the process so much easier.
- Baking time: consider that all ovens and pans are different, even if they look similar. The baking time in my recipes is as accurate as possible, but it might take you more or less time. You can use a thermometer (like the OXO oven thermometer) to check that your oven is at the right temperature. I recommend tracking how your oven works and what tiny details you might need to adjust.
- Make sure the yeast is not expired. Old or moldy yeast is no good, similar to baking powder. If not kept in the right conditions they will not work properly. In short, your bread will not rise. All your effort will be wasted. So, buy yeast according to the amount of bread you bake. Keep it in the refrigerator, well covered, so it's not in contact with air.
- Don't mix yeast with salt at the beginning of the recipe. They should be added separately and mixed after the yeast is combined with some liquid and flour. They are not friends, as salt reduces some of the yeast's power, and you certainly don't want that for your bread.
- The flavorings I use are traditional, lemon and vanilla, and they combine to create a unique flavor once you get used to eating this every year. This is where you can iterate and use different ones. Cinnamon and cardamom are two other popular ones, as well as orange zest.
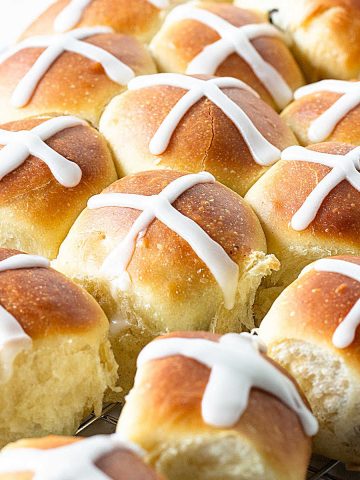
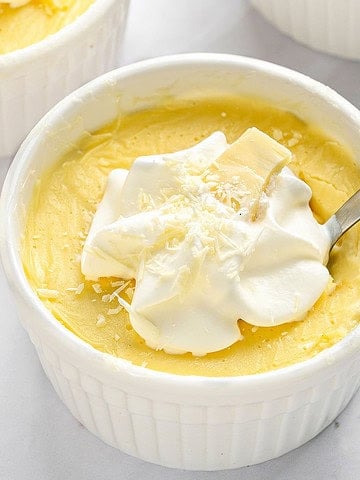
More Easter recipes:

If you made this recipe and loved it, you can comment below and leave a 5-star ⭐️ review. Also, if you had issues, let me know so we can troubleshoot together.
You can also subscribe to our FREE email series 'Baking the Best' and our regular newsletter. Or follow and save my recipes on Pinterest.
As an Amazon Associate, I earn from qualifying purchases. Read my disclosure policy.

Italian Easter Bread (Pane di Pasqua)
Ingredients
For the dough:
- 2 cups all-purpose flour, you might use a little more or less
- ¼ cup sugar
- 1 ½ teaspoons instant dry yeast
- ¼ cup lukewarm whole milk, but not hot!
- ½ tablespoon liquid honey
- 1 egg, at room temperature
- ½ teaspoon vanilla extract
- ½ teaspoon lemon zest
- ½ teaspoon salt
- ¼ cup unsalted butter, at room temperature
For the egg wash:
- 1 egg, at room temperature
- 1 tablespoon water
To decorate:
- 4 dyed eggs, raw or hard-boiled, see Notes below. Follow the homemade colored eggs post
- colorful nonpareil sprinkles, optional
Instructions
For the dough:
- Place 2 cups all-purpose flour and ¼ cup sugar in the bowl of a stand mixer (KitchenAid or similar). Or in a large bowl if kneading by hand.
- Add 1 ½ teaspoons instant dry yeast and mix. If using active-dry or fresh yeast, see Notes below.
- Incorporate ¼ cup lukewarm whole milk, ½ tablespoon liquid honey, 1 egg, ½ teaspoon vanilla extract and ½ teaspoon lemon zest. Start kneading and add ½ teaspoon salt. Continue to knead for 2-3 minutes until all the ingredients are integrated.
- Add ¼ cup unsalted butter, soft and in pieces, one at a time, and continue kneading until a smooth and soft dough is formed. It is very elastic and barely sticks to the fingers.
- Form a ball, cover with a kitchen towel, and let it rest for 15 minutes. Once the dough has relaxed, divide it into 8 parts, forming rough balls.
- Roll each piece to form a rope about 1 inch thick and 12 to 14 inches long. Braid two ropes of dough together, pinch the ends, and then loop into a circle. Join the two strips at one end and twist them, making a sort of braid. Form a circle with the braid and join the other end again. I recommend you test one and see that the length of the ropes is right to make a round braid with an egg that fits well in the center.
- Place on a greased baking sheet, cover, and let rise in a warm place for approximately 1 hour.
For the egg wash:
- In a small bowl, mix 1 egg, lightly beaten, with 1 tablespoon water.
- Brush the top of each braid and place 4 dyed eggs, one in the middle of each bread. See Notes below first.
- Sprinkle colorful nonpareil sprinkles on top if you want to. Not too much, just a hint of color. You can omit them.
- Bake for about 20 minutes, until it grows, turns golden brown, and sounds hollow when you tap the bottom with your fingertips. Don't overbake them. Let them cool on a wire rack and keep covered in an airtight plastic bag (Ziploc-style) or container to prevent drying. They can be frozen without the eggs.
Notes
Place the slightly warm milk and 1 teaspoon of the total amount of sugar in a small bowl and add the yeast. Stir a few times to combine. Allow the mixture to stand for 5 to 10 minutes so yeast can bloom. Dyed eggs: If you're going to bake them with the bread, you need raw dyed eggs. If you have colored hard-boiled eggs, place them after the bread is baked, just as you remove them from the oven, so they don't overcook. Baking time: Consider that all ovens and pans are different, even if they look similar. The baking time in my recipes is as accurate as possible, but it might take you more or less time. You can use an oven thermometer to check that your oven is at the right temperature. I recommend tracking how your oven works and what tiny details you might need to adjust.
Rate and review this recipe