Also called cookie crumb crust, this is the simplest homemade pie crust you can make. It's a basic recipe that you can choose to bake for just 10 minutes or go the no-bake route and simply refrigerate until firm. It can be made with and without added sugar. It keeps well frozen. Substitute it for the traditional crust in most pies.
The easiest pie crust?
The answer is yes.
It's the best way to make a pie when you don't want to work too much (but still manage to make a pumpkin pie for the holidays), turn on the oven, or are just starting, and traditional pie crust intimidates you.
With this recipe, you can make the perfect graham cracker crust, that much I know.
Why make it at home
- Easy recipe: it involves little work and uses few ingredients, which might be the perfect combination.
- No-bake: you can only chill it in the refrigerator (and omit the 10 minutes in the oven) and have a hundred percent no-bake crust. Ideal for summer pies whose filling doesn't require baking.
- Make ahead: you can make it, cover it and keep it in the fridge for a week or frozen for a month.
- Fillings: it's a perfect base for different kinds of pies, from this easy baked cheesecake pie to the popular no-bake Banoffee Pie that's a staple for Father's Day. Other fillings and cream pies that I usually make with sweet dough can be made with this one, like my family's fresh strawberry cream tart. Also great for an ice cream pie, frozen strawberry or no-bake pineapple pie in the Summer when we want no-bake desserts.
- Versatile: you can vary this basic recipe by adding spices, ground nuts, citrus zest, or a handful of oats. The possibilities are endless.
Step-by-step VIDEO
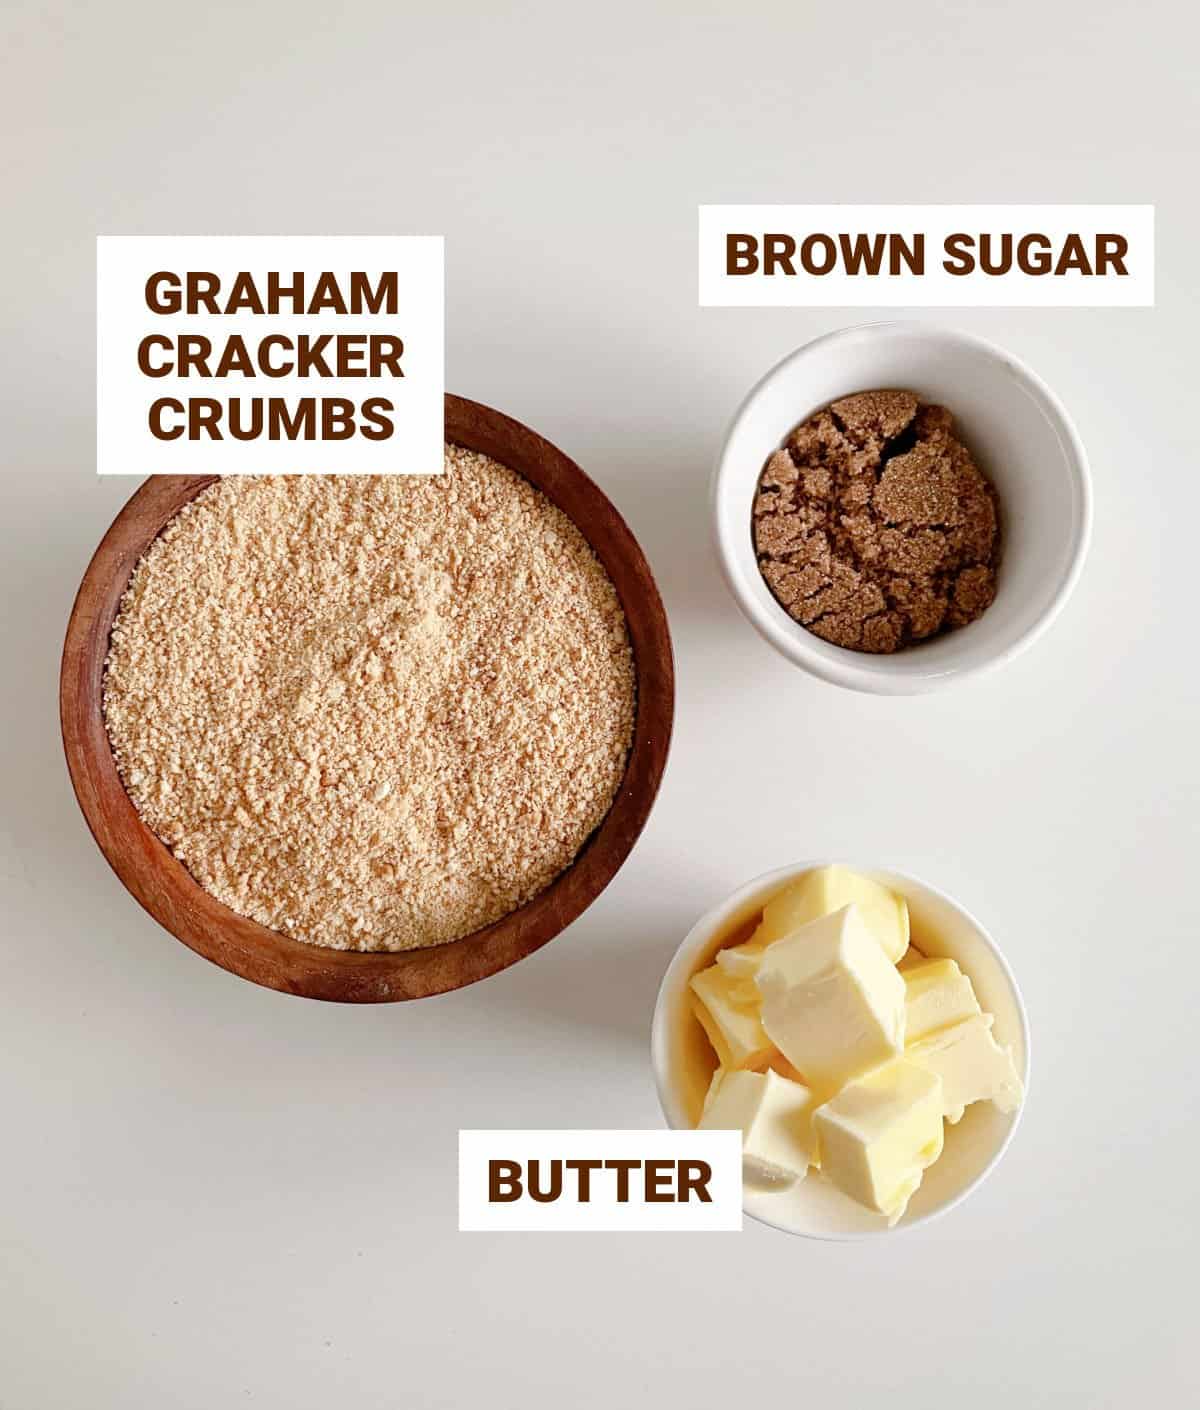
Ingredient list
You can make it with or without sugar, so just 2 or 3 ingredients are needed to make this easy graham cracker crust recipe. Told you it was perfect for hot months!
Quantities are listed on the recipe card towards the end of this post. The Ingredients page has more details and lists the brands we use.
- Graham cracker crumbs: You need fine crumbs, so using a food processor is the best choice. I use homemade graham crackers or regular graham crackers, and there are other types you can experiment with.
- Sugar is optional, and I usually recommend it, unless the filling is too sweet. I use brown sugar because it gives the crust a fantastic caramel tone that works perfectly with graham crackers, but white sugar works fine.
FAQ
Make sure the mixture is like wet sand with no dry spots, and bake it for 10 minutes in a medium oven. This will ensure it doesn't fall apart when you remove it from the pan and cut it. If in doubt, err on the side of more melted butter than less. A crumbly mixture is usually the result of too many cookie crumbs in relation to the amount of butter.
It's not necessary. The mixture has a lot of butter, so adding more to the pan is not recommended. However, if your pan is old or doesn't have a smooth finish, you might want to lightly butter it just to be safe.
Key points for success
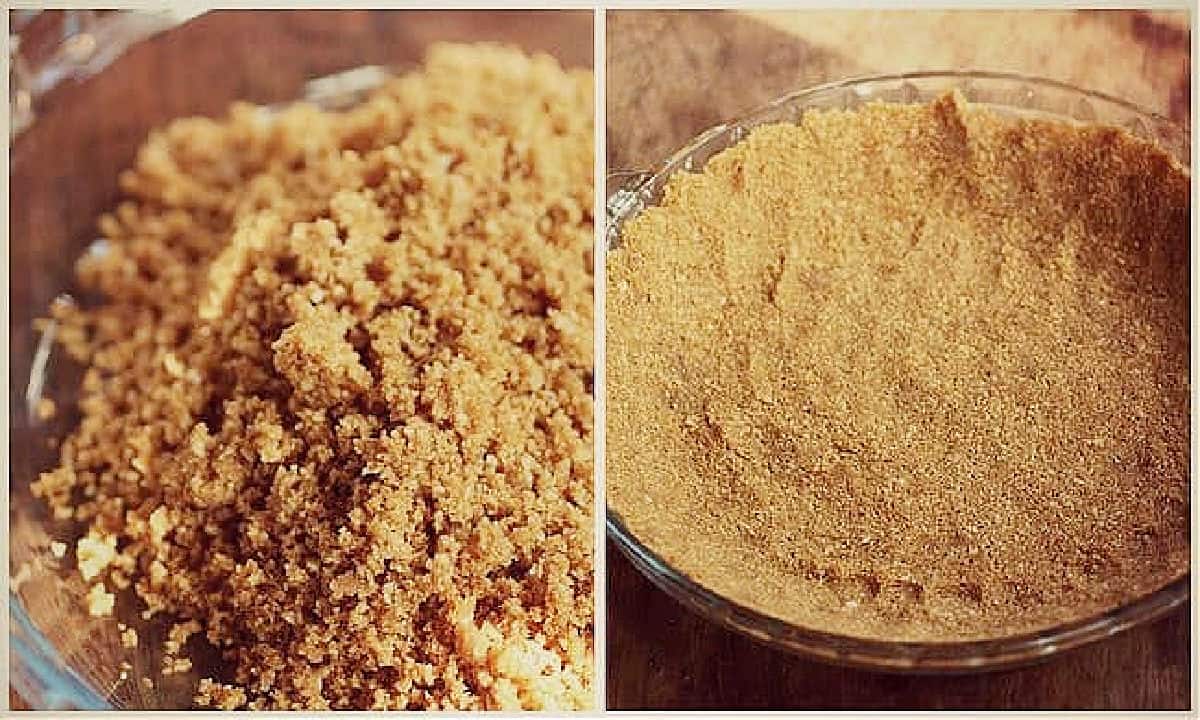
- Fine crumbs: you mustn't have large pieces or very coarse crumbs. I always use the food processor and suggest you do the same, as it's the easiest and fastest way to achieve the consistency needed. But they can also be crushed with a rolling pin. This will take a little while, and the best way is to put them inside a large Ziploc-style plastic bag, leave it open a little, and roll the pin until you have very fine crumbs. Don't be tempted to stop when you still have coarse pieces because the crust might not be compacted as it should.
- Wet sand: make sure the mixture of melted butter and crumbs is moist, like when you make a sandcastle. Not dripping or with butter pooling anywhere. But all of the crumbs must be fully coated. If you doubt whether it's too dry, err on the side of more butter rather than less.
- Pressing the mixture: the key is not to overpress it.
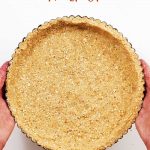
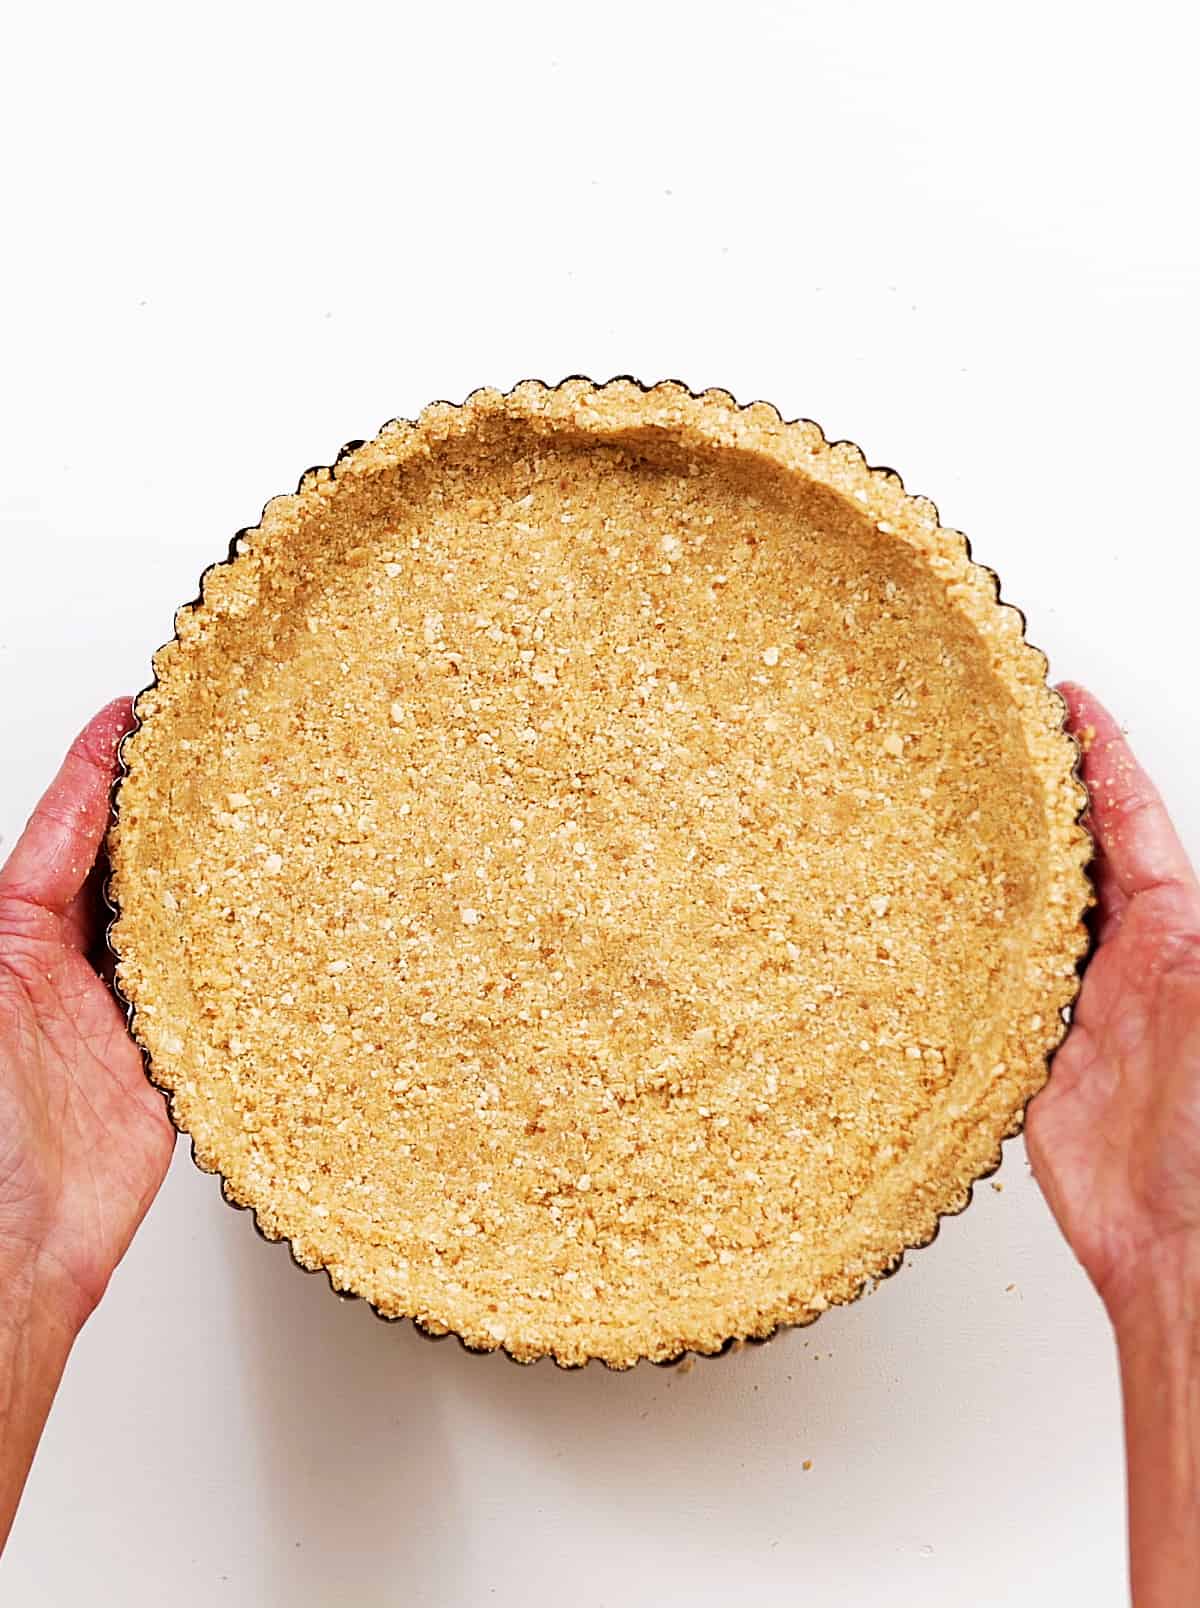
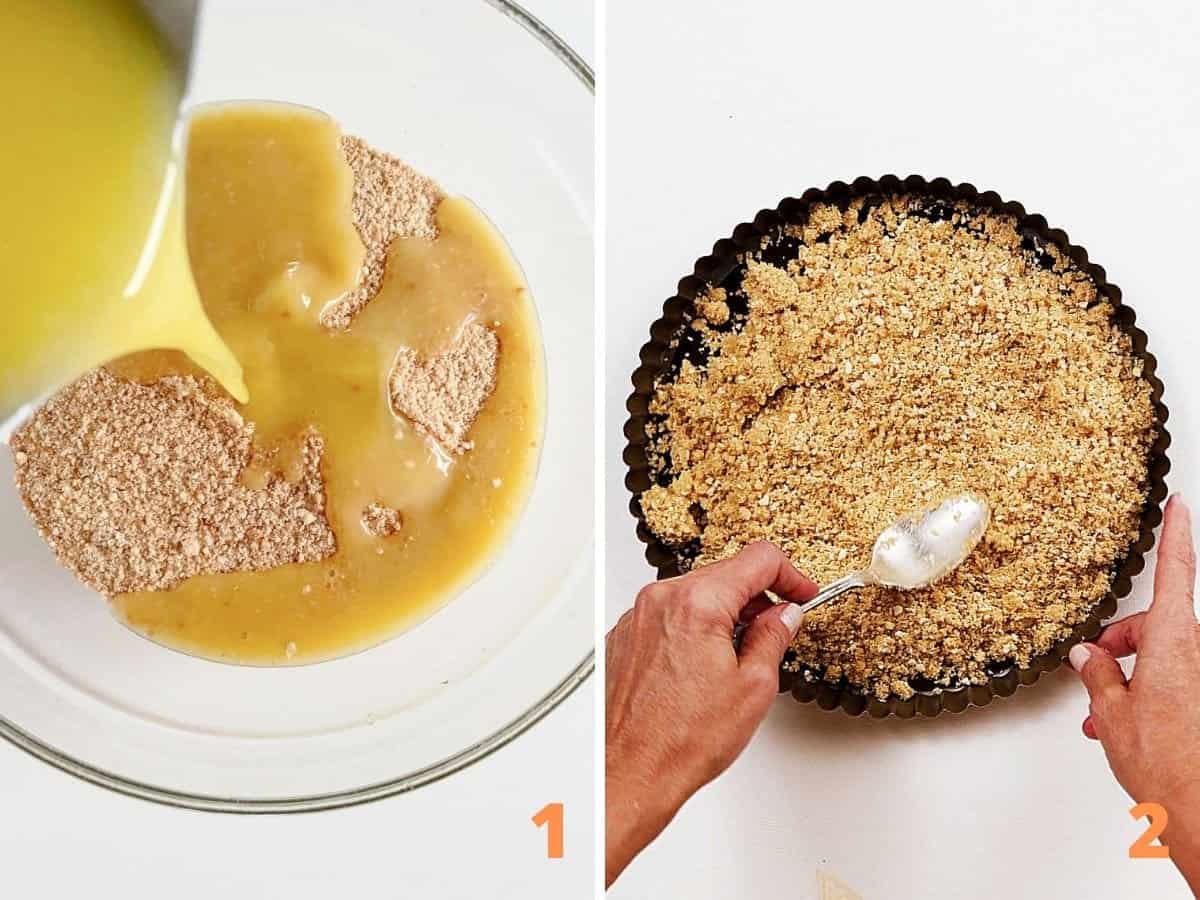
Scatter the wet crumbs first in the pan you're using with a spoon. Eyeball the amount to distribute on the sides and the bottom of the pie plate (image 2) so you don't press half of it and realize there's not enough for the rest.
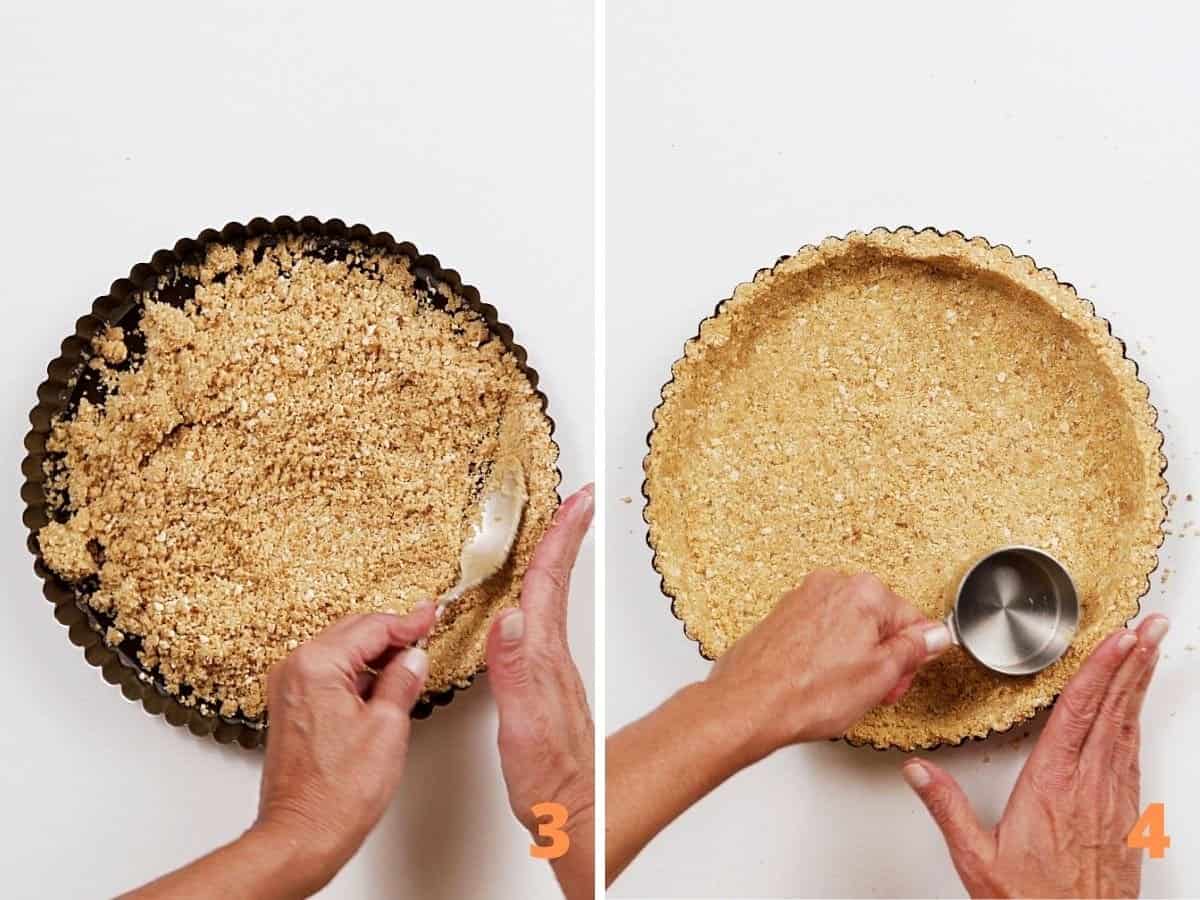
Start with the sides (image 3) and make sure the whole thing is compacted, especially the angles where the sides meet the base. That angle must be thicker than not to ensure the entire crust has structure. Leave the bottom of the pan for last.
Use a spoon or a measuring cup to aid you and your hands (image 4).
Types of pie pans
Glass or ceramic pie dish: It's traditional and we love them, but the pan doesn't have a removable bottom, so it also acts as a serving dish. The way to press and make the crust is the same. You can buy ceramic pie plates online.
Springform pans: they come in various sizes and are like tart pans with short sides or high sides for deep-dish pies (known as quiche pans). They allow the final pie to be removed from the pan, which is nice, depending on how you want to serve it.
Kitchen Notes
- Organization: Read the recipe first and ensure you have the ingredients at the correct temperature, equipment, and enough workspace. This will make the process so much easier.
- Baked graham cracker crust: This is optional, but highly recommended because you get a more solid crust. About 10 minutes at 325°F/170°C for baked fillings and 15 minutes for unbaked fillings. A baked crust will have fewer chances of crumbling when you cut it.
- Make ahead: You can assemble the pie crust a few days before you use it (with or without baking). Keep it well-wrapped in the refrigerator or freezer.
- Other cookies: Though graham crackers have a unique flavor, this recipe works with other plain cookies or digestive biscuits, no matter the flavor. It just has to go well with the filling. I've made it with chocolate wafers for a baked cheesecake, with gingersnaps and a sweet potato pie filling, and vanilla wafers for the Margarita Key Lime pie.
What are graham crackers?
They are old-fashioned commercial cookies from the US made with graham flour (or whole wheat flour).
They are wildly popular for cheesecake bases but also for bars and pies. Besides the regular kind, there are honey graham crackers (love them), cinnamon graham crackers, and even chocolate graham crackers that work very well for this type of crust.
Years ago, I tried two of the most popular recipes to see how they measured against each other, and it's all in this homemade graham crackers recipe post.
If you made this recipe and loved it, you can comment below and leave a 5-star ⭐️ review. Also, if you had issues, let me know so we can troubleshoot together.
You can also subscribe to our FREE email series 'Baking the Best' and our regular newsletter. Or follow and save my recipes on Pinterest.
As an Amazon Associate, I earn from qualifying purchases. Read my disclosure policy.

Homemade Graham Cracker Crust Recipe (very easy)
Ingredients
- 1 ¾ cups fine graham cracker crumbs
- 3 tablespoons brown sugar, optional but recommended, see Notes below
- ½ cup butter, melted
Instructions
- Preheat the oven to 350°F (180°C).
- Have ready a 9-inch pie pan with a removable bottom. An 8-inch also works, but the crust will be thicker. You can also use a pie plate without a removable bottom, which is very popular during the holidays.
- For the cookie crumbs, the easiest way is to use a food processor and process until you have fine crumbs. Make sure there are no large pieces or that it's a very coarse crumb mixture. That will prevent the mixture from compressing well. You can also make the crumbs by hand, but it takes a while and some patience. Crush the cookies with a rolling pin. It's easier if you put them in a large plastic bag, like a Ziploc bag, leaving it a little bit open to let the air out as you roll.
- By hand: mix 1 ¾ cups fine graham cracker crumbs with 3 tablespoons brown sugar in a medium bowl. Add ½ cup butter, melted, and combine everything until it resembles wet sand and no dry spots remain.
- Food processor: You can make the mixture directly in the bowl of the processor. Process 1 ¾ cups fine graham cracker crumbs with 3 tablespoons brown sugar and add ½ cup butter, melted, to the bowl of the processor. Pulse a few times, and you have your graham mixture ready.
- Press mixture onto a 9-inch (24cm) springform pan, starting at the edges and the angles where the base and sides join together, and make sure it's pressed and compacted. This will help when removing the pie from the pan.
- Bake for 10 minutes, until lightly golden and dry. Let cool completely on a wire rack before filling.
- For a no-bake pie or dessert: place the crust in the refrigerator for at least 1 hour to allow the butter to firm up. This will make it less sturdy and might crumble here and there when you cut it.
Caroline zoccoli says
your recipes are simple and easy to make i am going to try the cheesecake which is my husbands favorite dessert. He just found out that he has cancer so i will do and make anything he likes. Thank you for the
recipes. Keep them coming
Paula Montenegro says
Thanks for your comment Caroline and I'm sorry for the moment you're all going through. Will keep you in my thoughts ❤️