
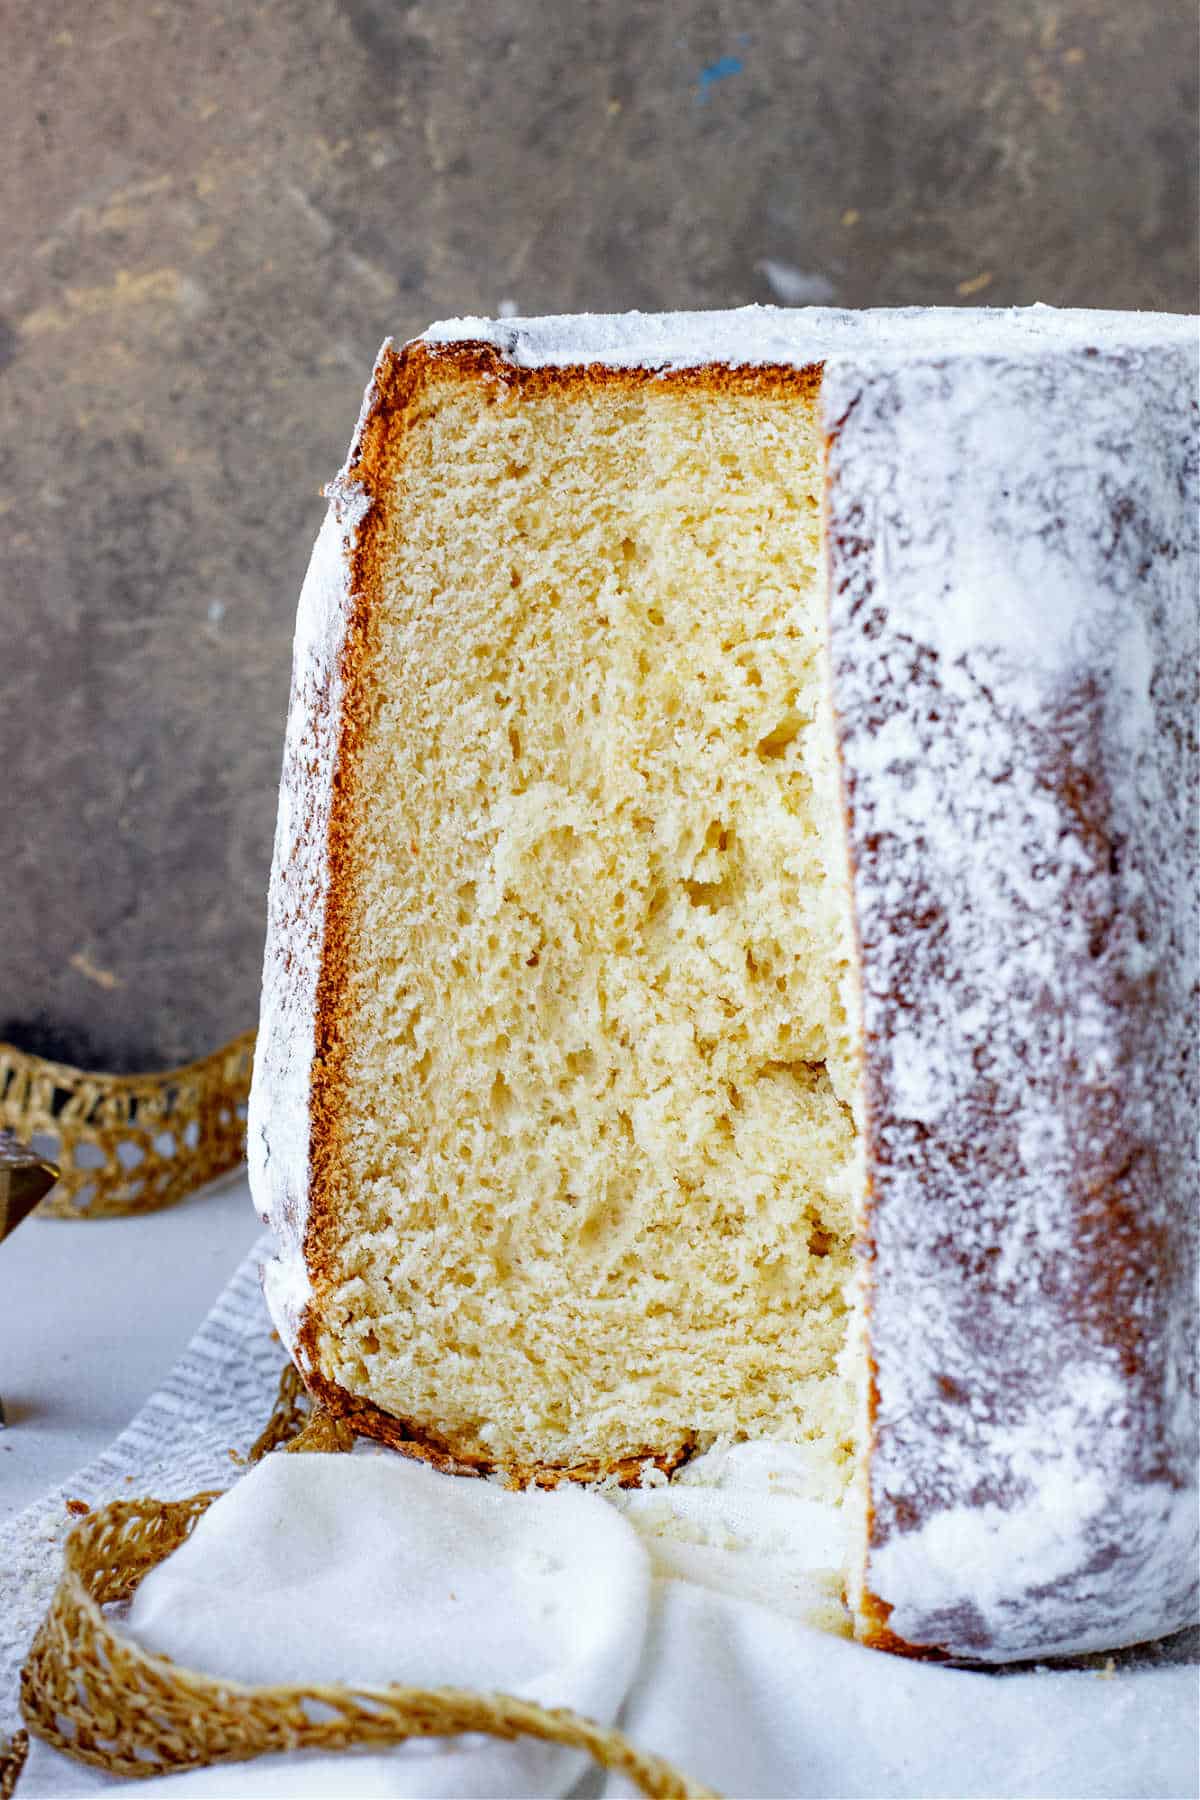
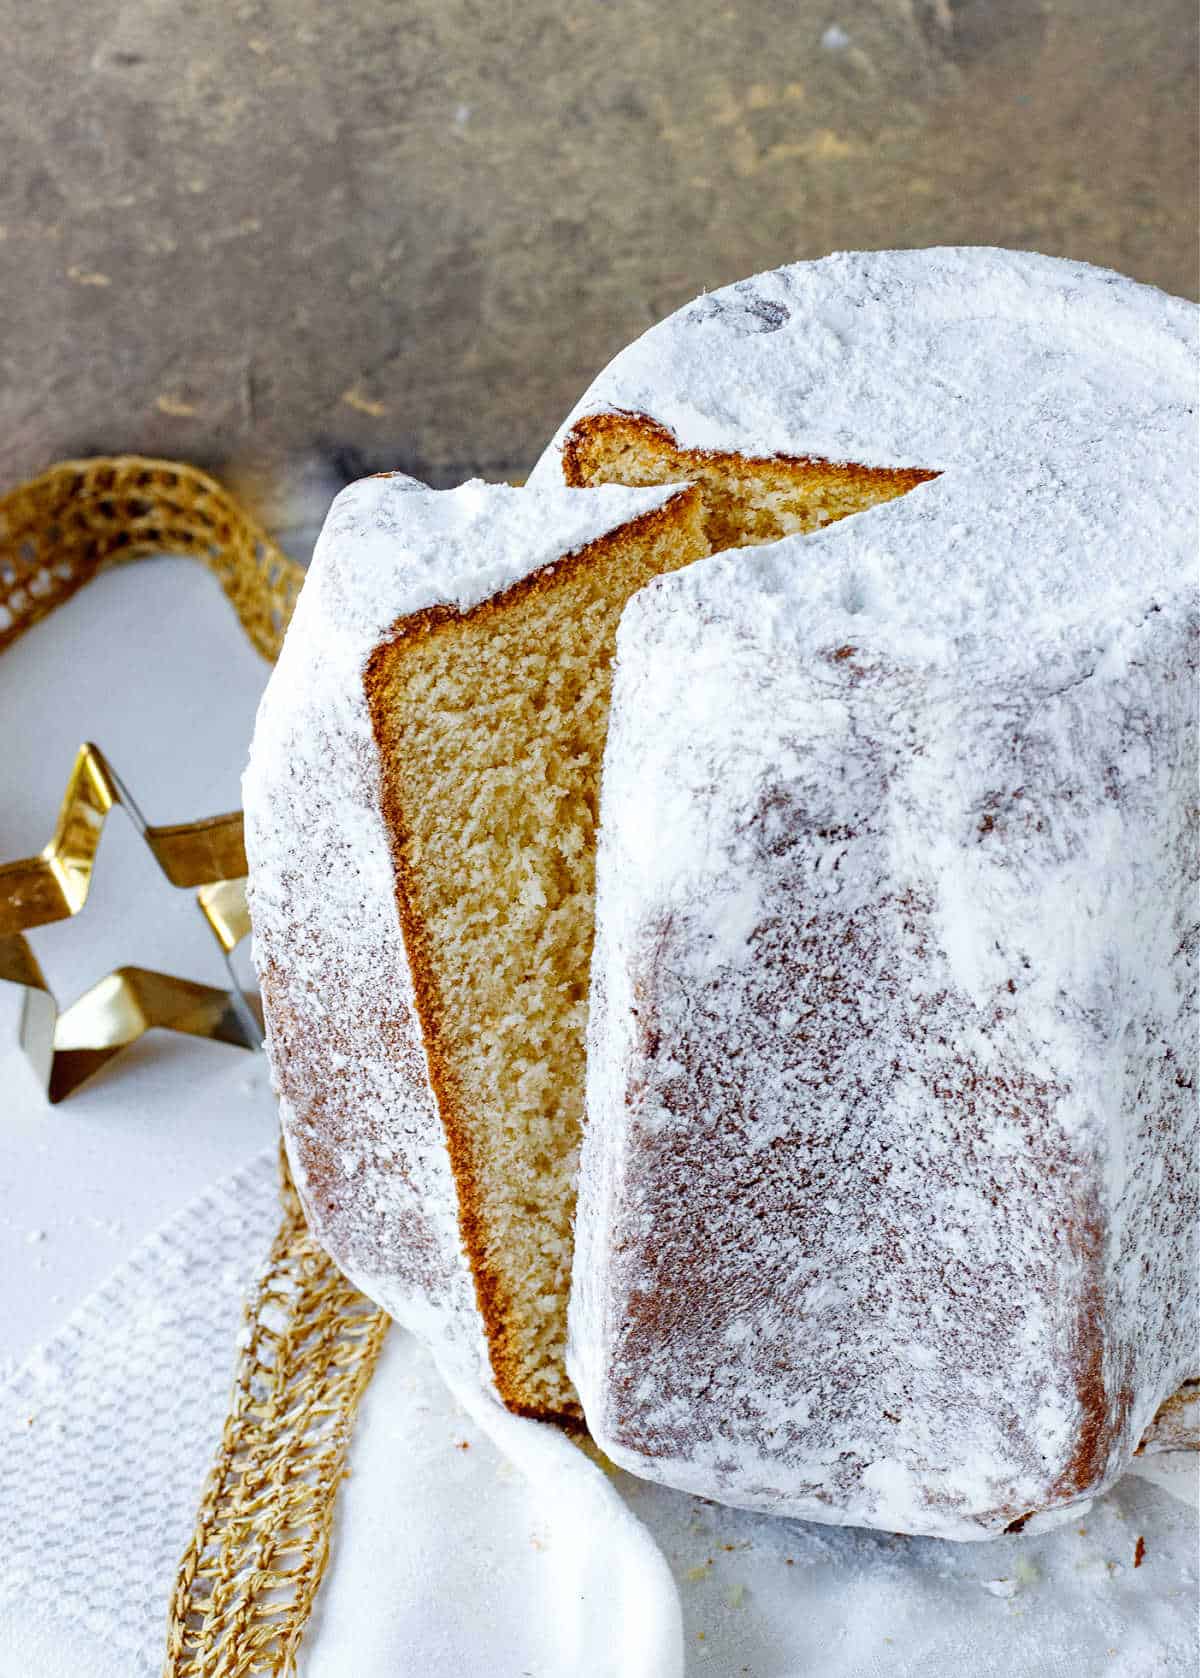
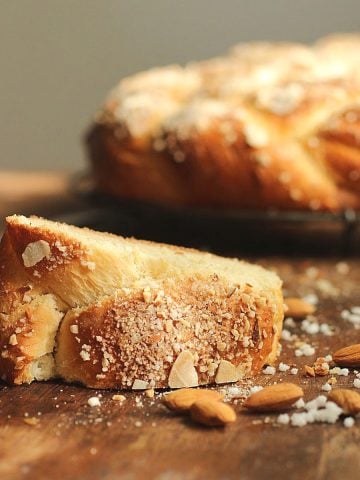
Pandoro is a golden holiday bread, plain but with a wonderful flavor and texture. It's enriched with eggs and butter, so you know it will be delicious. It's a favorite around here to give as a gift. It makes great bread pudding and sweet French toast.
SAVE THIS RECIPE
Golden bread
Pandoro is an Italian holiday bread (pan means bread and d'oro means golden), egg and butter based, like brioche or pulla. But the texture and flavor are completely different.
It's a very simple bread, sweet and plain, yet utterly delicious. Some say it's the plain counterpart to holiday panettone, the most popular Christmas bread around here.
It's magical and festive. And makes a fantastic gift! I think one of the best by far.
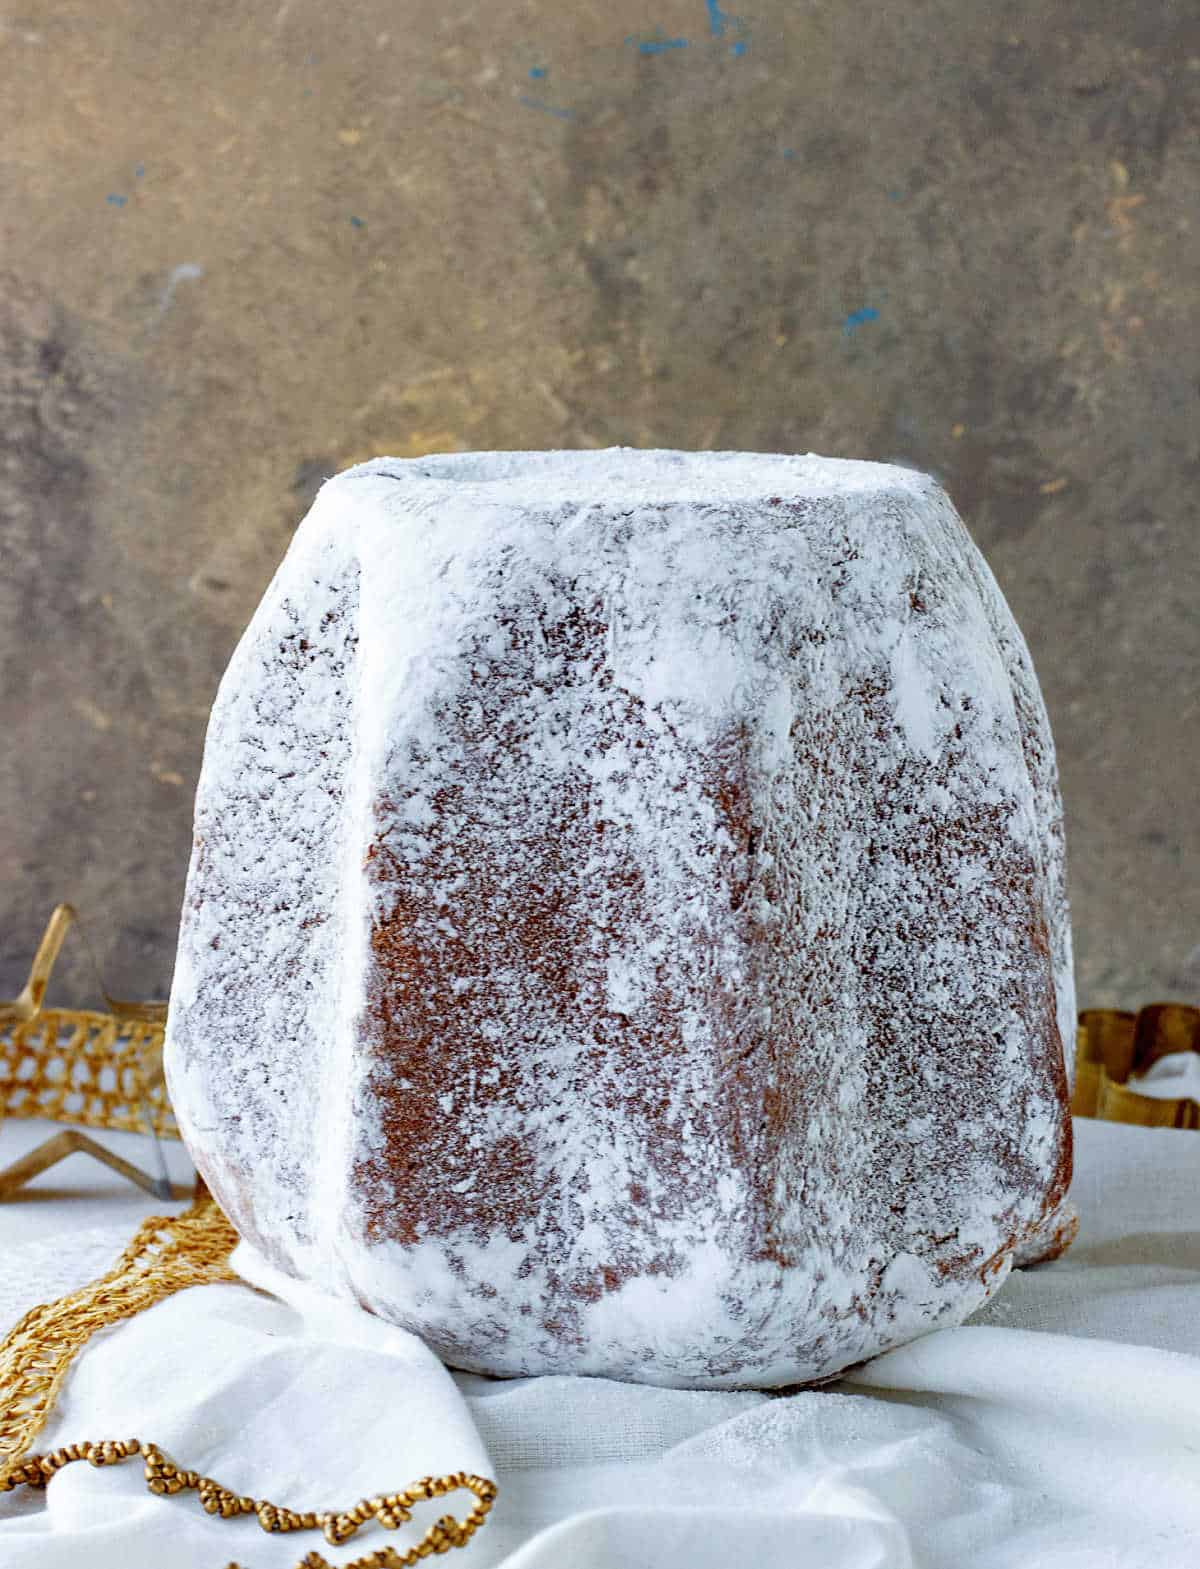
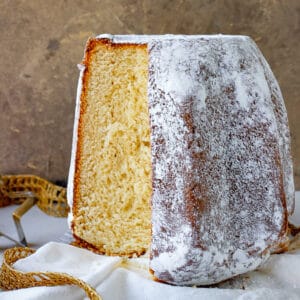
Pandoro is wrapped inside a clear bag with a packet of powdered sugar (usually vanilla flavored) attached. When you're ready to eat it, you empty the packet inside, close the bag, give it a few shakes and out comes a white bread, completely covered in the sugar.
It reminds me of snow globes, those glass balls with fake snow inside that you turn upside-down and make come alive.
Ingredient list
- Yeast: I use active-dry yeast, which needs to be hydrated before. You can use instant yeast (¾ of the amount given for active dry) and add it directly to the flour, then add the water, no need to foam it first.
- Flour: both all-purpose and bread flour are used. If you can find the latter, use only all-purpose.
- White granulated sugar.
- Eggs: fresh, large.
- Unsalted butter.
- Salt.
- Vanilla extract.
- Lemon zest.
- Powdered sugar or vanilla sugar: to serve.
Quantities are listed in the recipe card towards the end of this post. The Ingredients page has more details and lists the brands we use.
How to Make Sure Yeast Works
- Check expiration date: Replace if expired.
- Visual check: Should be beige to light brown and granular/powdery. Avoid if grayish, clumpy, or discolored.
- Smell test: Should have a mild, slightly sweet smell. Strong or unpleasant odors indicate it's bad.
Proofing test: Mix ½ teaspoon sugar in ¼ cup warm water (comfortable to touch). Sprinkle ½ teaspoon of dry yeast on top and stir gently. Wait 5-10 minutes until you start to see some activity. Fresh yeast will foam and bubble more while instant yeast bubbles less than active dry yeast.
Golden Rule: When in doubt, buy new! It's better to be safe than to have your baked goods fall flat and be inedible. You'll have to throw it out and start again.
How to make Pandoro (golden bread)
This bread consists of a yeast starter and two more steps until the dough rests a final time and is then baked. There's little hands-on time and several hours of waiting for the yeast to act, as it usually happens with yeast breads.
The ingredients are simple and easily available and divided into three parts.
This bread is rich and dense, so a sponge and two rises are needed to create that soft but chewy texture.
Sponge and first dough
Have the ingredients measured and at the right temperature before starting.
Stand mixer: it is highly recommended. Although pandoro can be made by hand, well, it will be somewhat messy and laborious, and you'll need some arm power and patience.
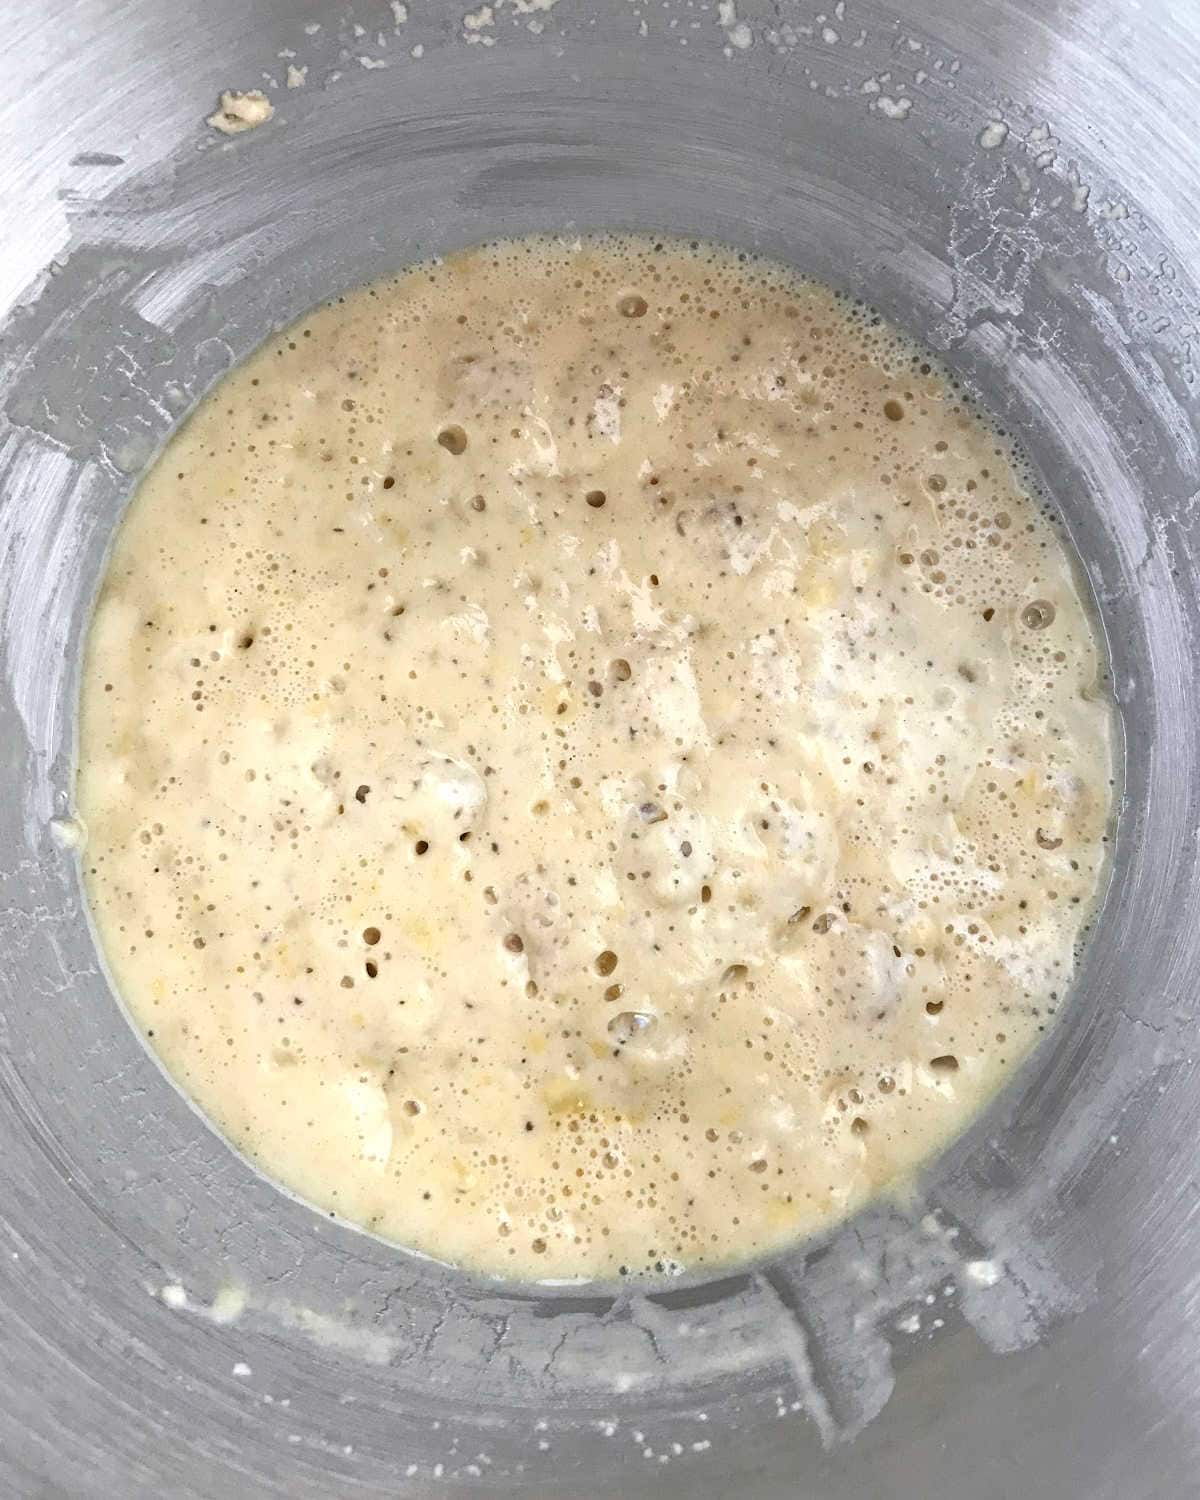
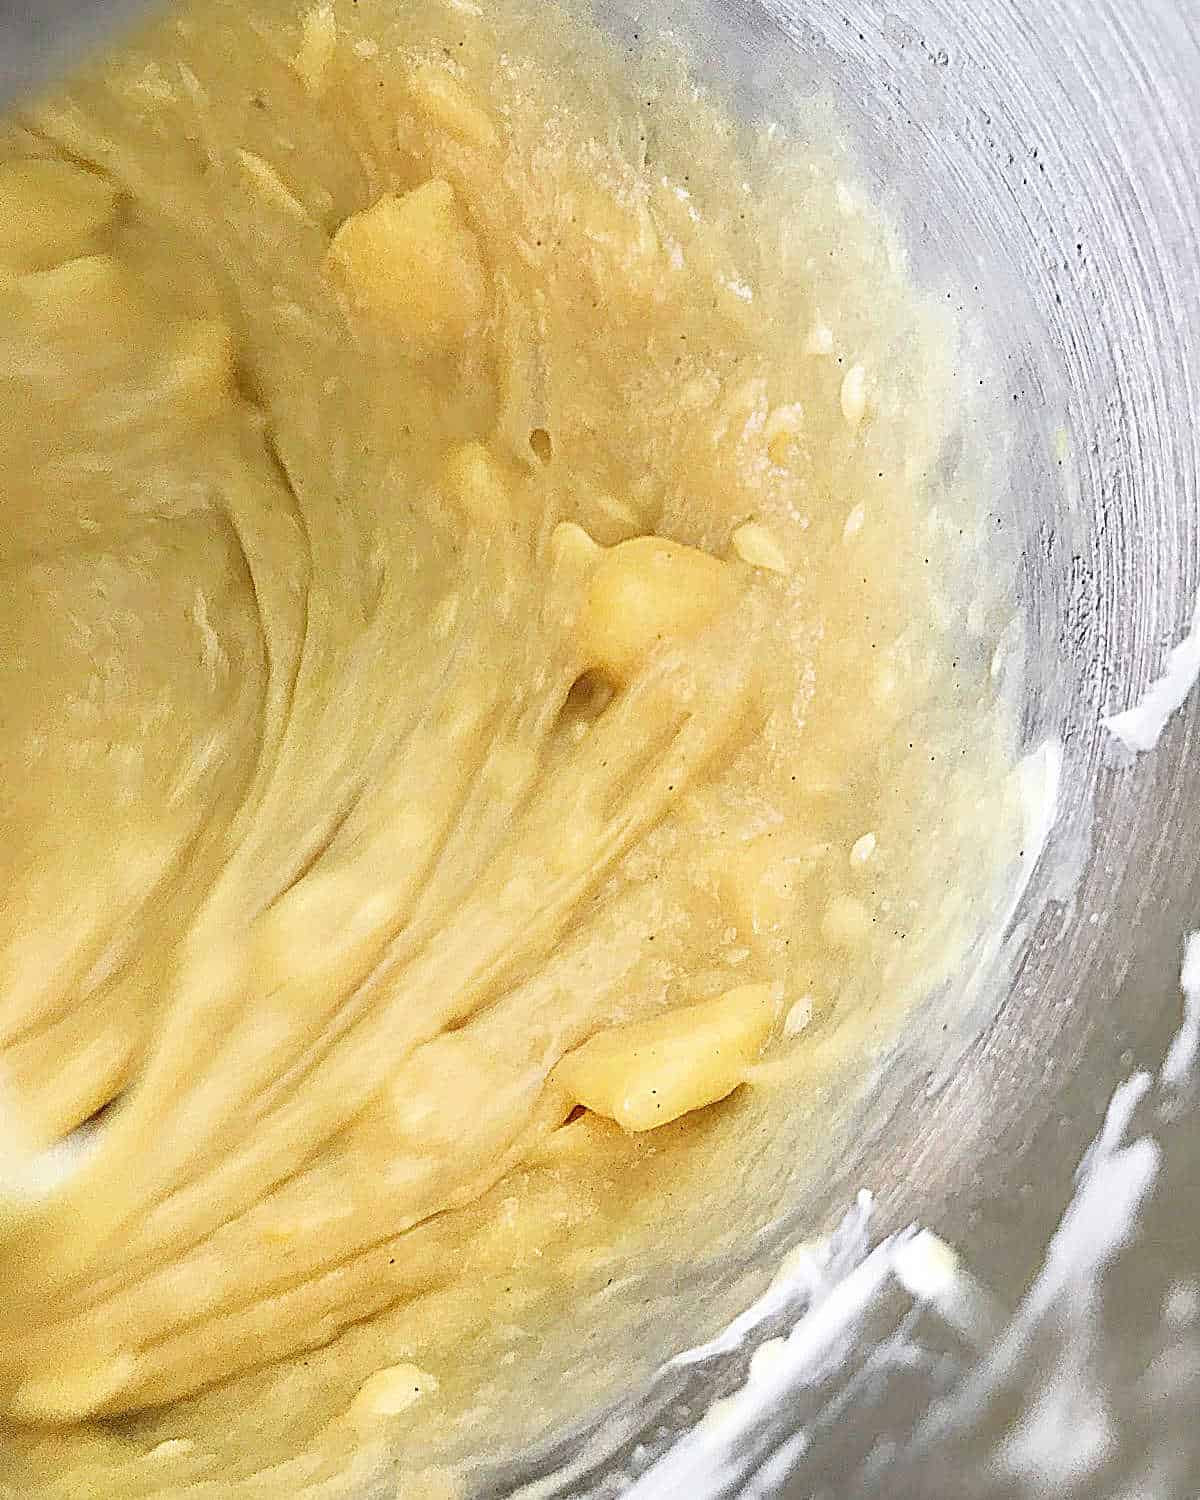
- The sponge: it takes 3 minutes to make it, and then we have to wait half an hour until it's frothy and bubbly.
This is the first step to help strengthen the final bread dough, so it rises as it should despite all the heavy ingredients, like eggs and butter.
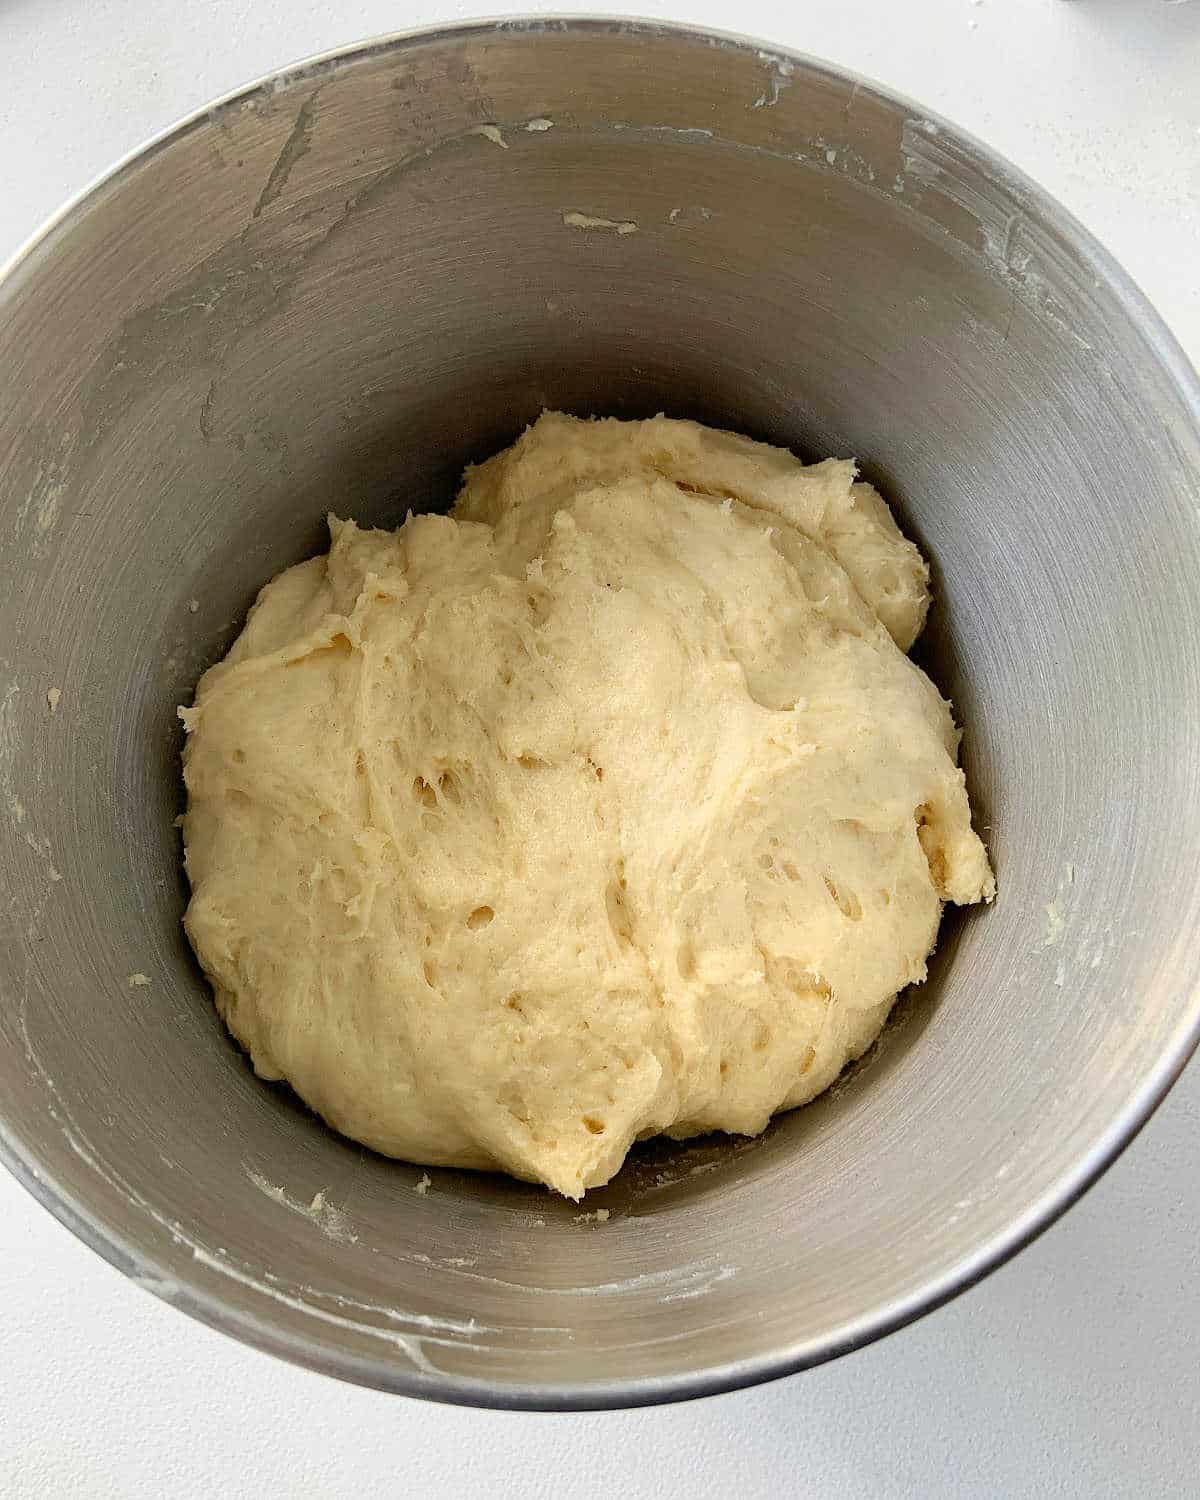
- Mixing: this is easy to do with a stand mixer. The final dough (image below) is soft and quite sticky. To proof, simply leave it in the same bowl and cover it.
Resting: the yeast starts working its magic and the dough doubles in size. It should not increase more than that. So keep an eye after 45 minutes to 1 hour.
Second dough
The final step, it continues to build on the other two.
You'll see that, besides the flavorings, almost the same ingredients are added, building the final rich dough that will become our fantastic golden pandoro bread.
- Flavorings: lemon zest and vanilla are the traditional ones and, similar to the great Alfajores recipe, the final flavor is amazing.
- Adding butter: make sure it's soft and add it in pieces, a few at a time, allowing it to be integrated a bit before adding the next. Eventually, it will all be completely dissolved and part of the dough.
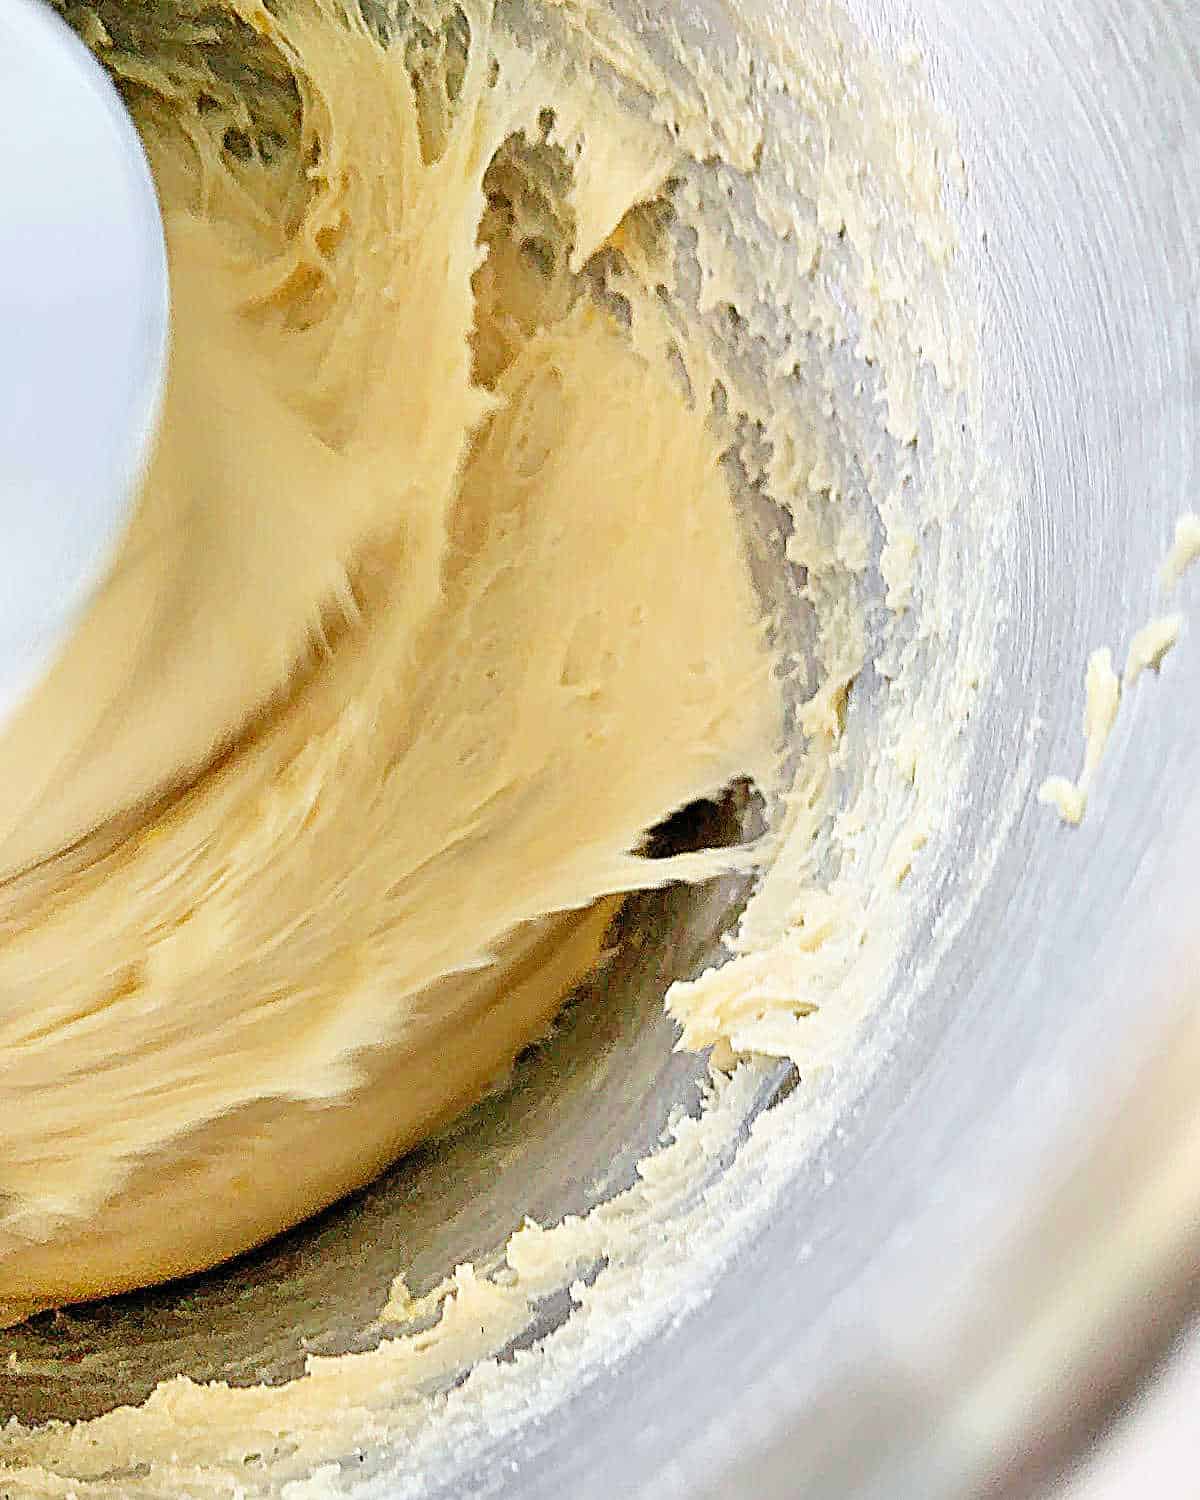
- When is the dough ready? Knowing how much flour a dough needs is probably the most critical part of bread making and something that happens with practice.
But a good parameter is when the dough starts to create 'strands' that regularly leave the sides of the bowl but not completely. Don't be tempted to add flour until a ball forms because that is too much and the bread will be tough.
Proofing the dough
It's the process where the dough is allowed to rest and double in size one last time before baking after it's fully kneaded.
Make sure the pan is covered with a clean kitchen towel and in a place with a mild temperature and no drafts. This is important for the dough to rise as it should.
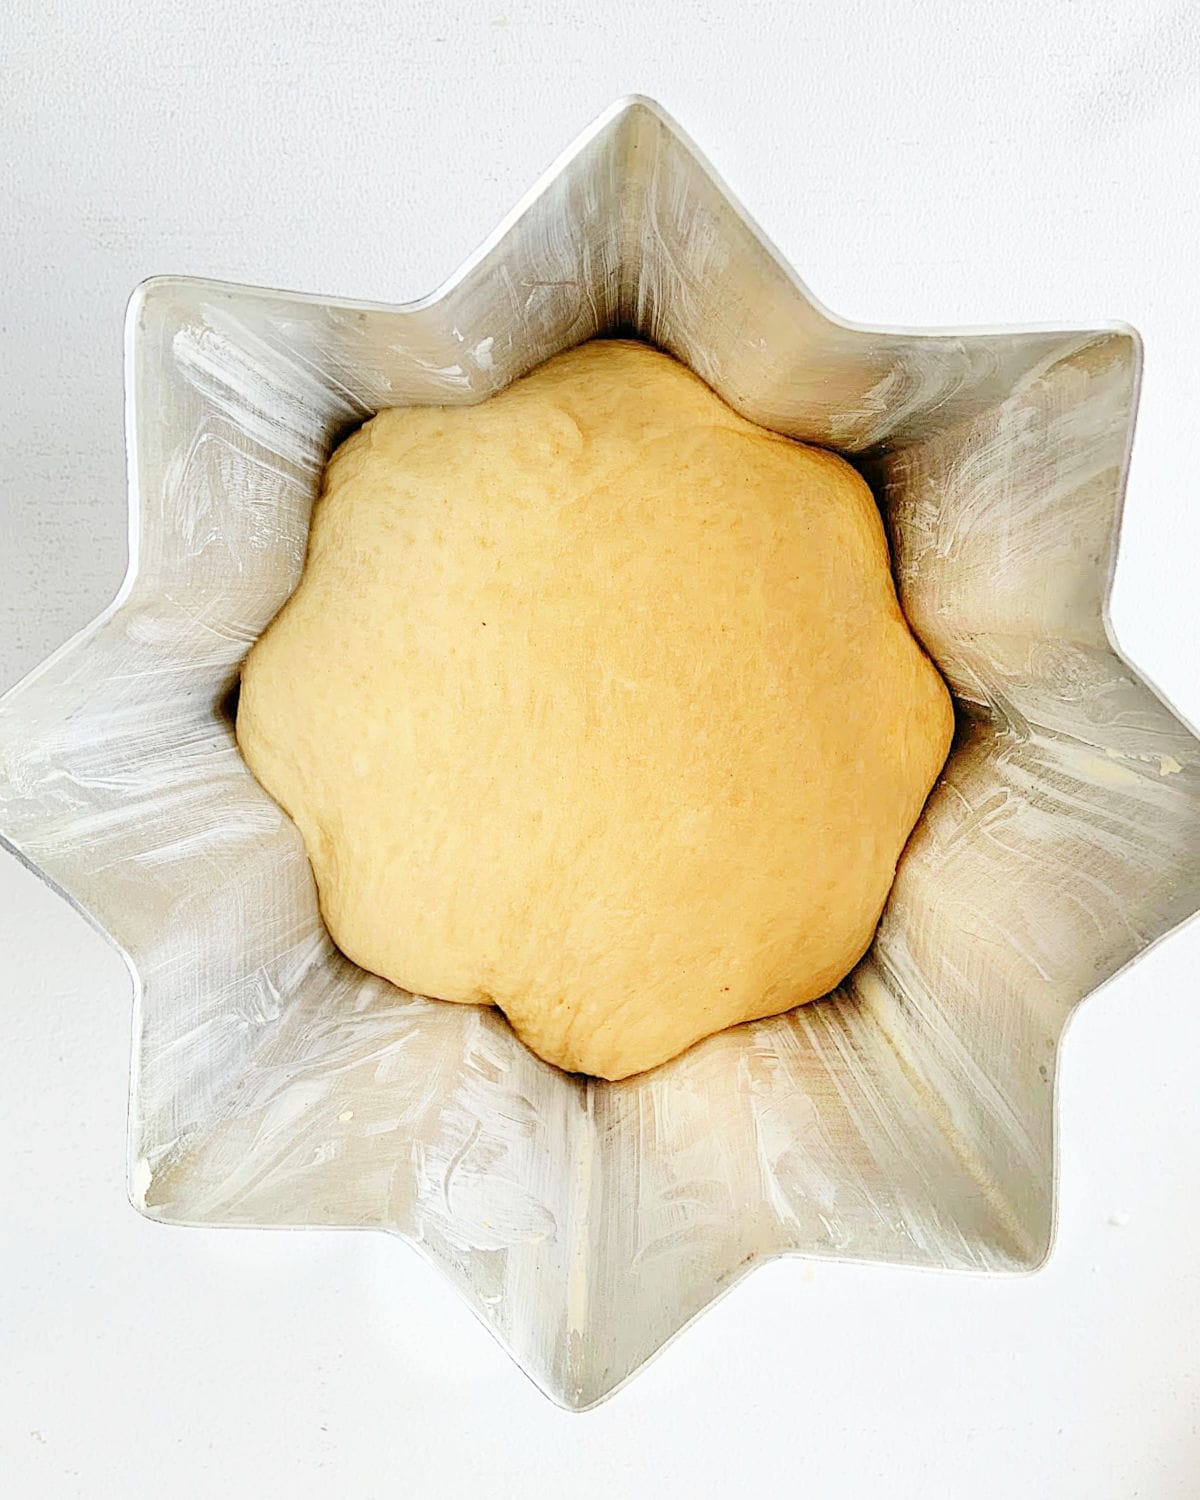
- Star-shaped pan: it's the traditional one for this bread and should be buttered before you place the dough.
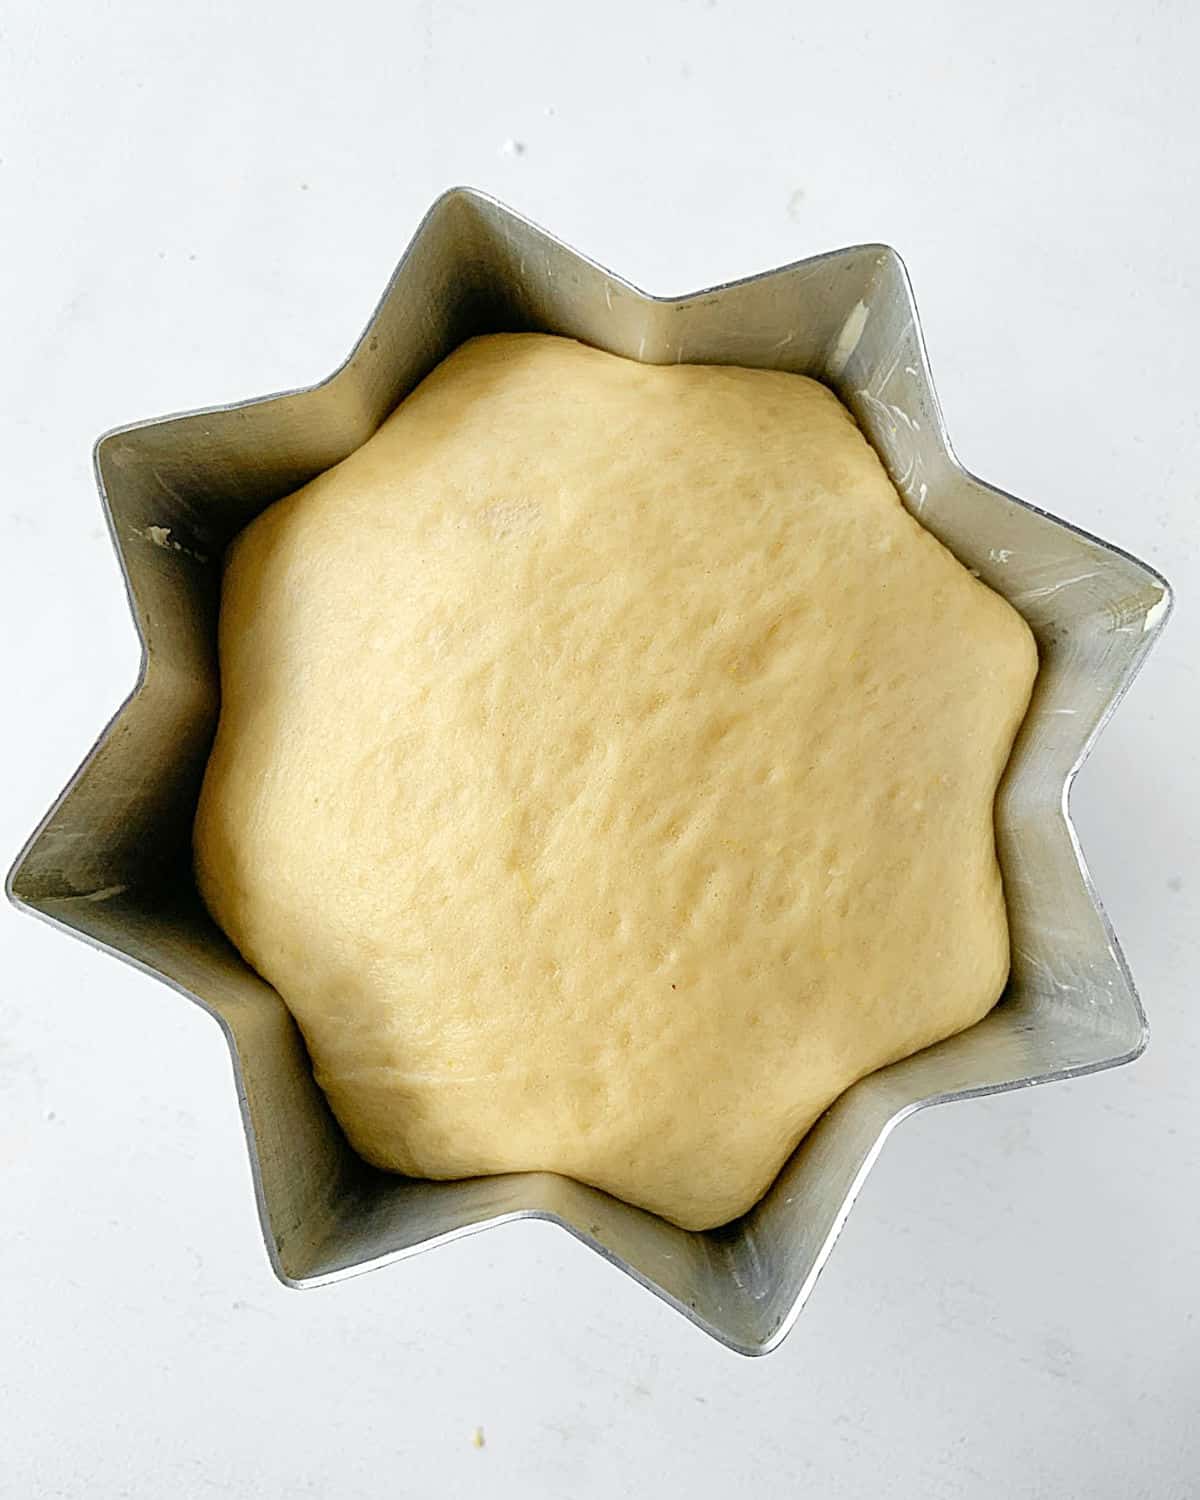
- Let it double in size: depending on how strong the yeast you use is and the room's temperature, it will take between 1 to 2 hours to double.
Serving it
- Traditional way: the way to eat it is dusted with powdered sugar, preferably vanilla sugar, as explained in the Notes section of the recipe card.
I like to put it in a plastic bag, add the sugar, close the bag with my hand and shake it until the sugar coats most of the bread; it resembles a snow globe. - Gifting it: put the Pandoro bread in a cellophane bag with a nice holiday ribbon, add a packet of vanilla sugar (or put it outside the bag), and instructions to serve it.
Kitchen notes
- Organization: read the recipe first and ensure you have ingredients at the correct temperature, utensils and equipment needed, and enough workspace. This will make the process so much easier.
- Baking time: consider that all ovens and pans are different, even if they look similar. The baking time in my recipes is as accurate as possible, but it might take you more or less time. You can use a thermometer (like the OXO oven thermometer) to check that your oven is at the right temperature. I recommend tracking how your oven works and what tiny details you might need to adjust.
- Yeast: any type can be used. Be careful when using the instant or one of those fast-rising ones, as they usually leaven faster than the time frames in this recipe.
- Vanilla sugar: it can be bought online like Dr. Oetker vanilla sugar or Alsa vanilla flavored sugar. You can make your own by adding some vanilla beans to a jar of powdered sugar. Or, easier than the latter, mix powdered sugar with some pure vanilla powder, which will instantly flavor the sugar.
- Flavoring: you can add some chopped candied lemon or orange and orange zest, but I think the beauty of it resides in its clean, unassuming appearance and the extraordinary flavor you discover when you take a bite.
- Flour: all-purpose works very well, but you can also use half bread flour and half cake flour. They both do their own thing, so the bread will have texture and softness.
Related recipes you might like:
If you made this recipe and loved it, you can comment below and leave a 5-star ⭐️ review. Also, if you had issues, let me know so we can troubleshoot together.
You can also subscribe to our FREE email series 'Baking the Best' and our regular newsletter. Or follow and save my recipes on Pinterest.
Pandoro Recipe (Italian Holiday Bread)
Ingredients
For the sponge:
- 2 teaspoons active dry yeast, or instant yeast
- ¼ cup water, tepid or warm (not hot)
- 1 tablespoon sugar
- ⅓ cup all-purpose flour, or bread flour
For the first dough:
- 2 ½ cups all-purpose flour, see Notes for alternative
- 1 teaspoon active dry yeast, or instant yeast
- 1 tablespoon water, tepid or warm (not hot)
- 2 tablespoons sugar
- 2 eggs, at room temperature
- 2 tablespoons unsalted butter, at room temperature
For the second dough:
- 2 eggs, at room temperature
- 1 egg yolk, at room temperature
- ½ cup sugar
- ½ teaspoon vanilla extract , or vanilla paste
- 1 teaspoon lemon zest, ½ teaspoon pure lemon extract also works
- ⅔ cup unsalted butter, at room temperature
- 1 ½ cups all-purpose flour, plus extra if necessary for kneading
- ½ teaspoon salt
- powdered sugar, to serve (if you have vanilla powdered sugar much better)
Instructions
For the sponge:
- In the bowl of the electric mixer, stir 2 teaspoons active dry yeast into ¼ cup water and stir.
- Add 1 tablespoon sugar and ⅓ cup all-purpose flour and mix with a wooden spoon until well combined.
- Let stand, covered with plastic wrap, until bubbly and foamy, about 30 minutes.
For the first dough:
- Attach the bowl with the sponge to the stand mixer with the paddle attachment.
- Stir 1 teaspoon active dry yeast with 1 tablespoon water in a small bowl. Add it to the sponge mixture in the bowl together with 2 tablespoons sugar and 2 eggs.
- Start the mixer at low speed. Add 2 ½ cups all-purpose flour, half cup at a time. Mix with the paddle attachment until combined.
- Add 2 tablespoons unsalted butter, one piece at a time, and beat at medium speed until well blended and the butter has dissolved. It will be thick and maybe a little stiff.
- Cover the mixer bowl with plastic wrap or a clean kitchen towel and let rest until doubled, about 45 minutes.
For the second dough:
- Add 2 eggs, 1 egg yolk, ½ cup sugar, ½ teaspoon vanilla extract and 1 teaspoon lemon zest to the first dough and beat with the paddle attachment until it's all well integrated.
- Change to the dough hook. Gradually add ⅔ cup unsalted butter, softened and mix until well incorporated.
- Add 1 ½ cups all-purpose flour and ½ teaspoon salt in ½ cup additions.
- Knead for 10 minutes at medium speed. The dough should be soft and buttery. It should not clean the sides of the bowl completely, but add up to ½ cup more flour if the dough is still too wet and pools in the bottom and sides like a thick cake batter.
- Transfer the dough to a buttered bowl and cover tightly with plastic wrap. Let it rest in a warm place until doubled in volume, between 1 to 2 hours.
- Turn out the dough onto a clean surface and, with lgihtly floured hands, deflate first and then gather it to make a loose ball. The dough should be soft and elastic, sticky but easy to work with.
- Shape into a loose ball and place in a well-buttered pandoro pan (see Notes for alternatives). Cover with a clean kitchen towel, and let rise until doubled, between 1 to 2 hours.
- Preheat oven 30 minutes before baking to 350ºF (180ºC).
- Bake pandoro bread for 20 minutes on the middle oven shelf.
- Reduce oven temperature to 300ºF (150ºC) and continue baking for another 30 minutes. The top should be golden brown and the bread sound hollow when lightly tapped with your knuckles. If the top is browning too quickly, cover it loosely with aluminum foil. If unsure, insert a cake tester or brochette stick; it should come out clean with no wet crumbs attached.
- Let cool on a wire rack and then remove from the pan.
- Place the cold bread inside a large cellophane bag. Before serving, dust with powdered vanilla sugar, close the bag tightly and shake the bag so the pandoro is completely covered in the sugar. To gift: place the bread with a small pouch of powdered sugar attached and written instructions to shake before serving.
Notes
Adapted from The Italian Baker, by Carol Field
Carola says
I just made this bread which was new to me and it’s really wonderful. I’m making your bread pudding again ❤️ and will be using it for that but so far I’m loving it on its own, especially toasted. Thank you Paula, you have a lovely blog.
Paula Montenegro says
SO happy to know you loved it Carola! We make it every year. It's so great for bread puddings. Have a great week.
Kathy F says
I did make this bread and although the taste was really good, I found the bread was very heavy not like traditional panettone (Pandoro) where it was light and shred in layers apart. I may try it again but any thoughts on what went wrong?
Paula Montenegro says
Hi Kathy, pandoro is not panettone, they're different. Maybe you didn't knead it enough or too much, and/or not let it proof enough before baking so it didn't rise as it should in the oven.
Cocoa and Lavender says
The mold is purchased and will arrive by the 15th! I know what I am doing next weekend! ~ David
Cocoa and Lavender says
Step one: I am going on Amazon.com right now to buy a pandoro mold. Step two: I am going to make this even though the holiday has passed. I love pandoro and have never even thought to look for a recipe. I may not be italian but, like John Cleese in A Fish Called Wanda, "Sono Italiano in spirito
Jamie says
Really beautiful! We ate Pandoro every year at the holidays when we lived in Italy and it was a hard habit to break once we moved back to France. I have never dared to actually try making it myself but yours is so perfect I should really try! Happy New Year!
cakewhiz says
that is the coolest bread shape ever! and it looks super soft too 😀
Amy says
I have just discovered your blog via The Little Loaf and am glad that I have! I am looking forward to browsing more through past posts and expect I will become a regular reader. This bread looks and sounds delicious and I love the 'snow globe' element. Have you ever made it in a regular cake pan? I just can't justify buying any more pans, mainly due to storage issues! Panettone can be made in a regular tin, so I am guessing this would work too (?).
wp_vknotes_admin says
Hi Amy, so nice to meet you! Do you have brioche molds? I never used them for this bread, but I don't see why they won't work. The next best thing would be a rather tall and slim mold. Do tell me how it went if you make it!