
With its unique flavor and color, this old-fashioned red velvet cake is soft, moist, and utterly delicious! It comes together quickly and can be frozen. Spread it with cream cheese frosting for a luscious finish, just in time for a special celebration.
SAVE THIS RECIPE
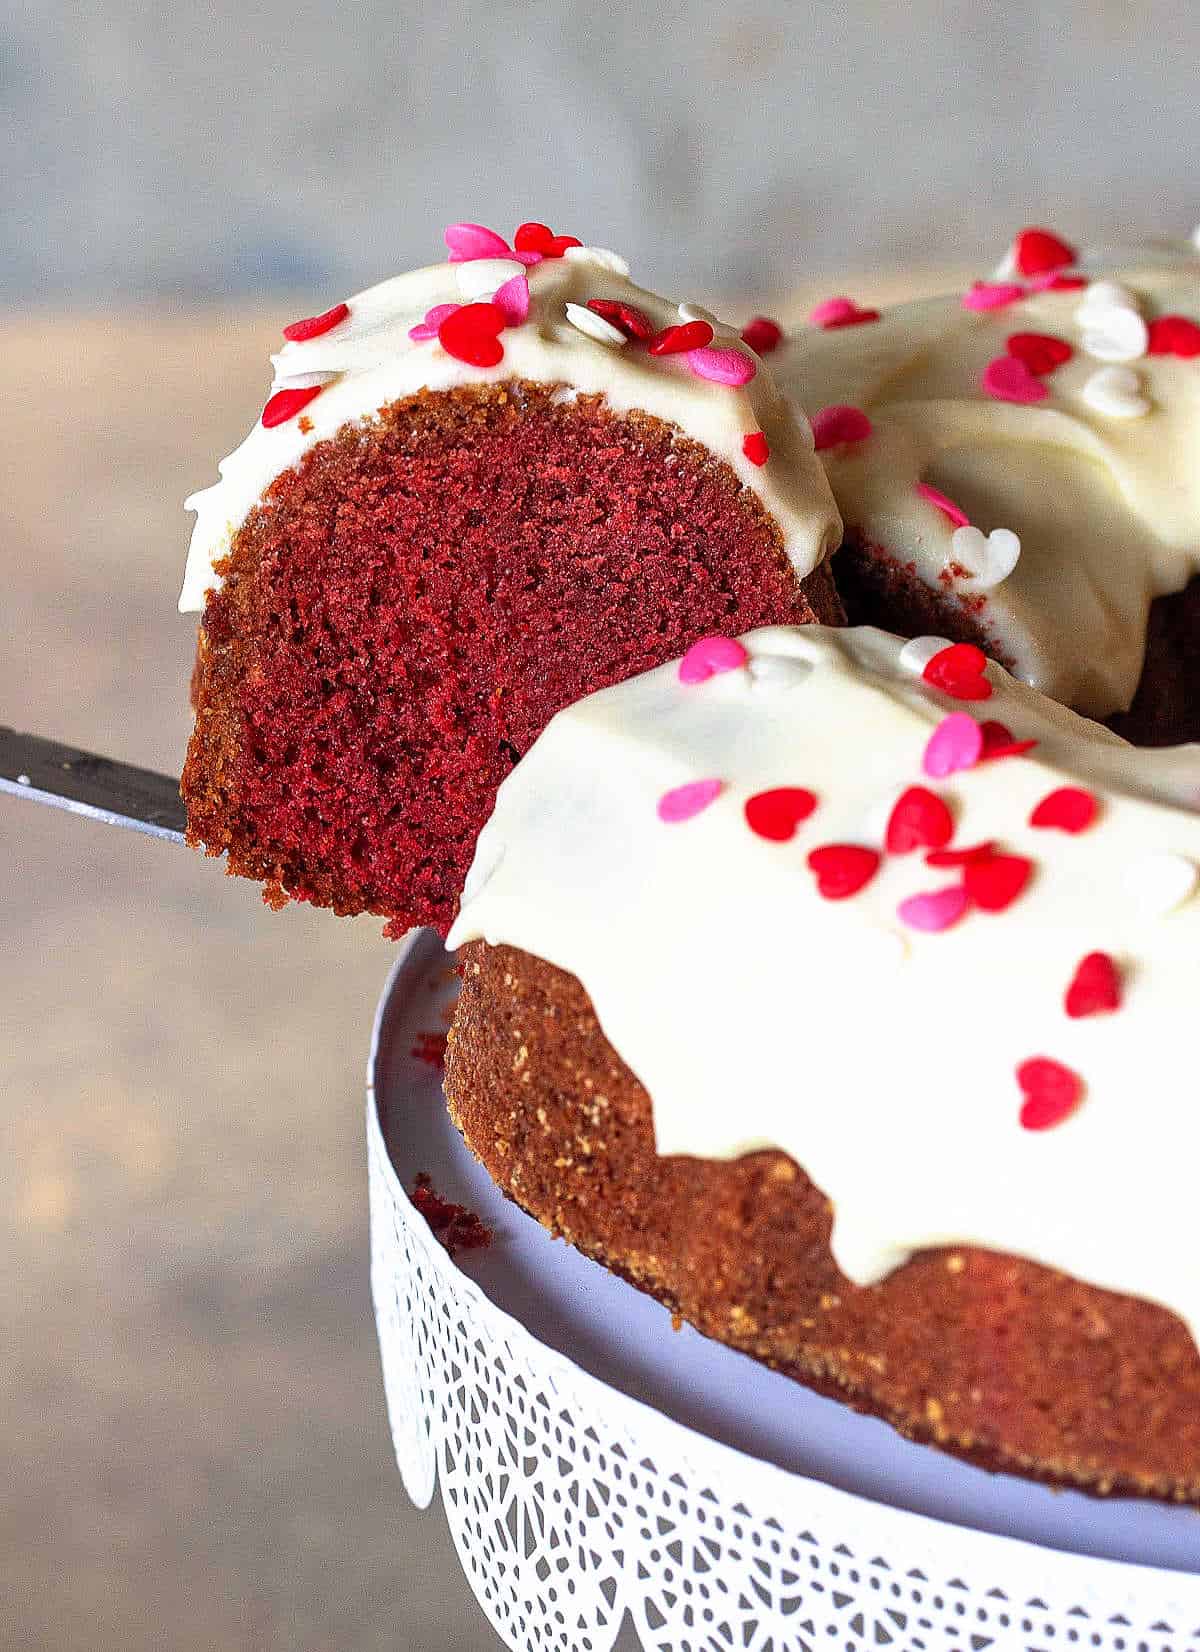
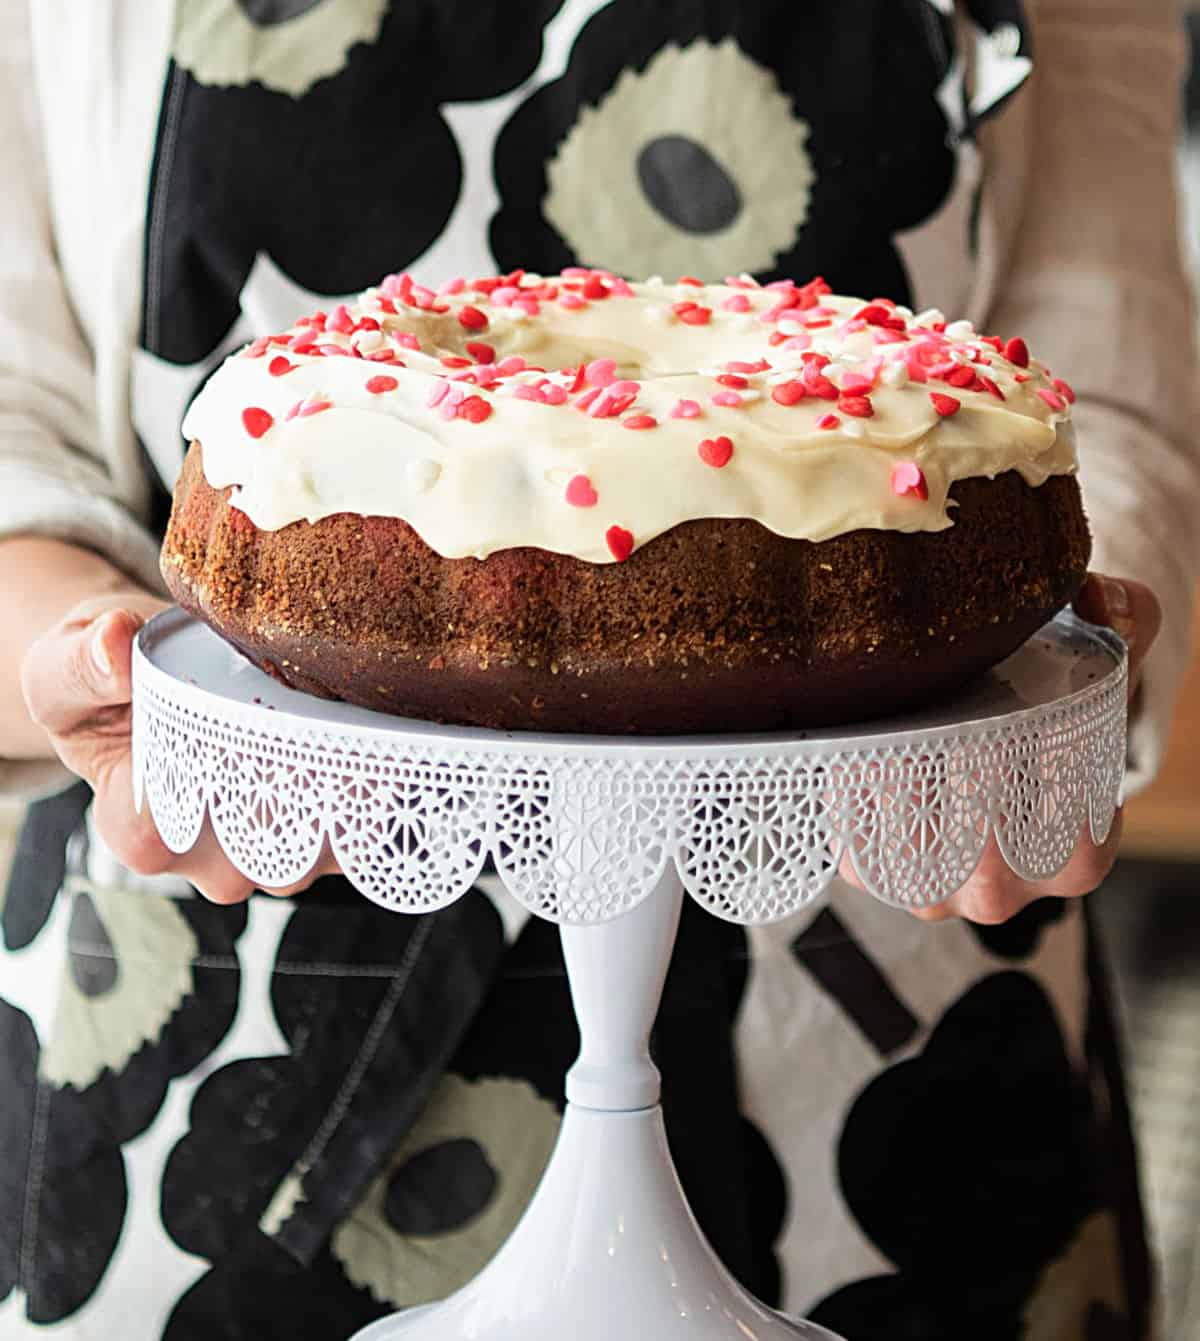
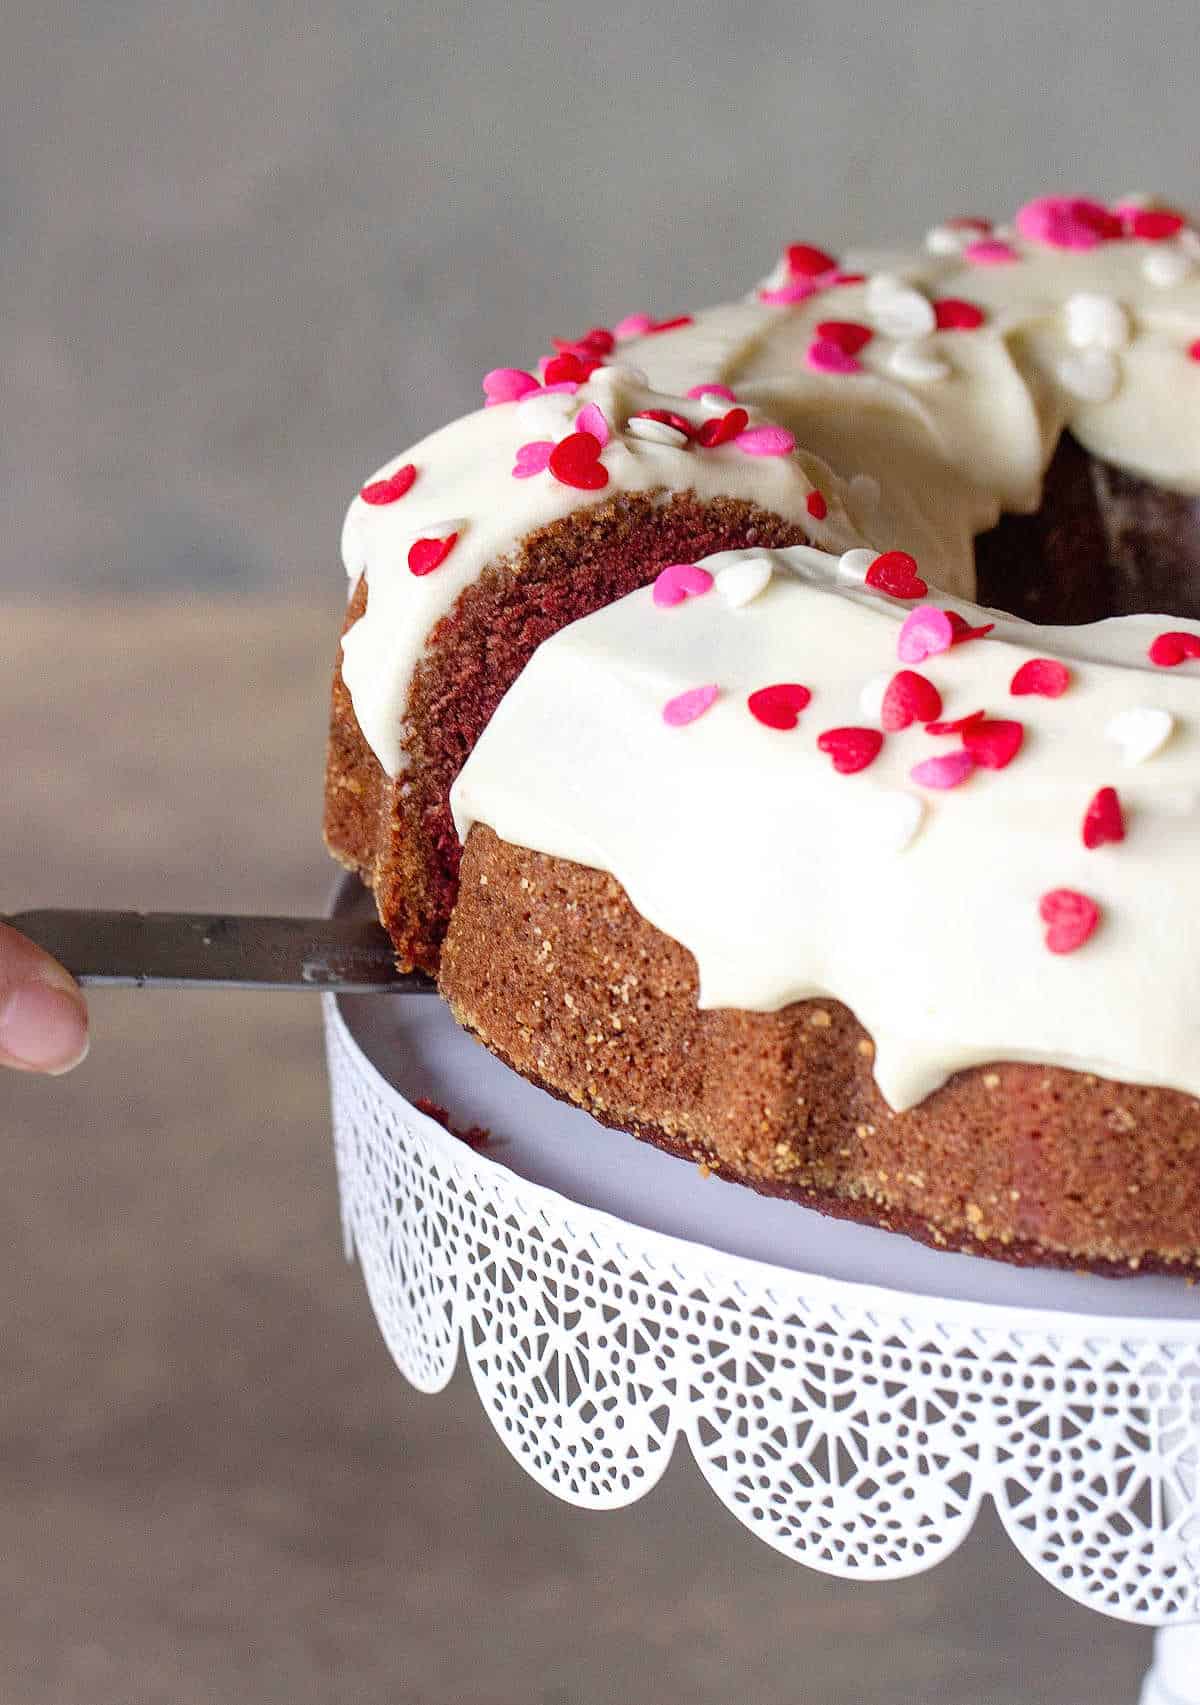
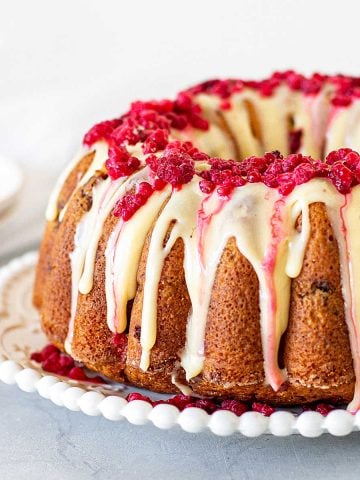
A stunning red velvet cake
Traditional red velvet cakes are a must in any home baker's repertoire. So, if you never made one before, this recipe is very straightforward.
It's a pretty classic recipe baked in a bundt cake pan, so it has more cake and less frosting than its layer counterpart. But its velvety texture more than makes up for it.
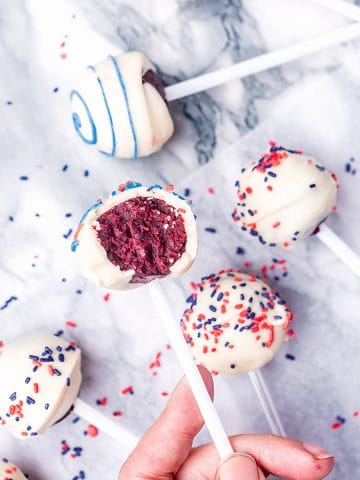
We bake it for different occasions and birthdays using different types of cake pans, and is the one we use to make cake pops. A very versatile cake recipe.
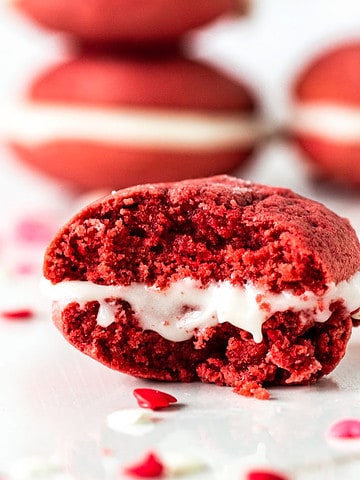
If you like the red velvet Nothing bundt cake, you'll love this incredibly moist homemade version. Other red velvet recipes in the archives are the red velvet cake pops and the red whoopie pies.
- Easy to prepare: making this cake is straightforward, even for those with little baking experience. No need for complicated techniques or elaborate decorations.
- Visually appealing and a crowd-pleaser: this cake is a timeless dessert that appeals to everybody, making it a reliable choice when serving a crowd. Its iconic red hue adds a visually striking element to the dessert table.
- Distinctive flavor: it's a unique blend of flavors with a hint of chocolate and a subtle tanginess that stands out from typical cakes.
- Texture: all ingredients contribute to a moist and tender crumb, which is one of the appeals of this recipe. And it stays that way for several days when stored properly.
- Make ahead: you can keep it refrigerated for several days or frozen for a month.
FAQ
It's like an old-fashioned vanilla cake with a hint of cocoa powder. It gives this red velvet bundt cake recipe a faint chocolate flavor that can almost be missed sometimes. It's so delicious and unique; no wonder it's such a favorite!
No, it's not. Red velvet cake is vanilla flavored with just a hint of chocolate from a small amount of cocoa powder added to the batter.
The term velvet reflects the cake's soft and tender crumb. It has a tender crumb and a cream cheese icing or glaze. The red color can be brighter or more subdued depending on the food coloring you add.
Yes, you can. It stays moist and delicious when stored properly. To maintain freshness, store the cake in an airtight container at room temperature for up to a day, or refrigerate for longer periods. If frosted, it's advisable to bring the cake to room temperature before serving for the best texture and flavor.
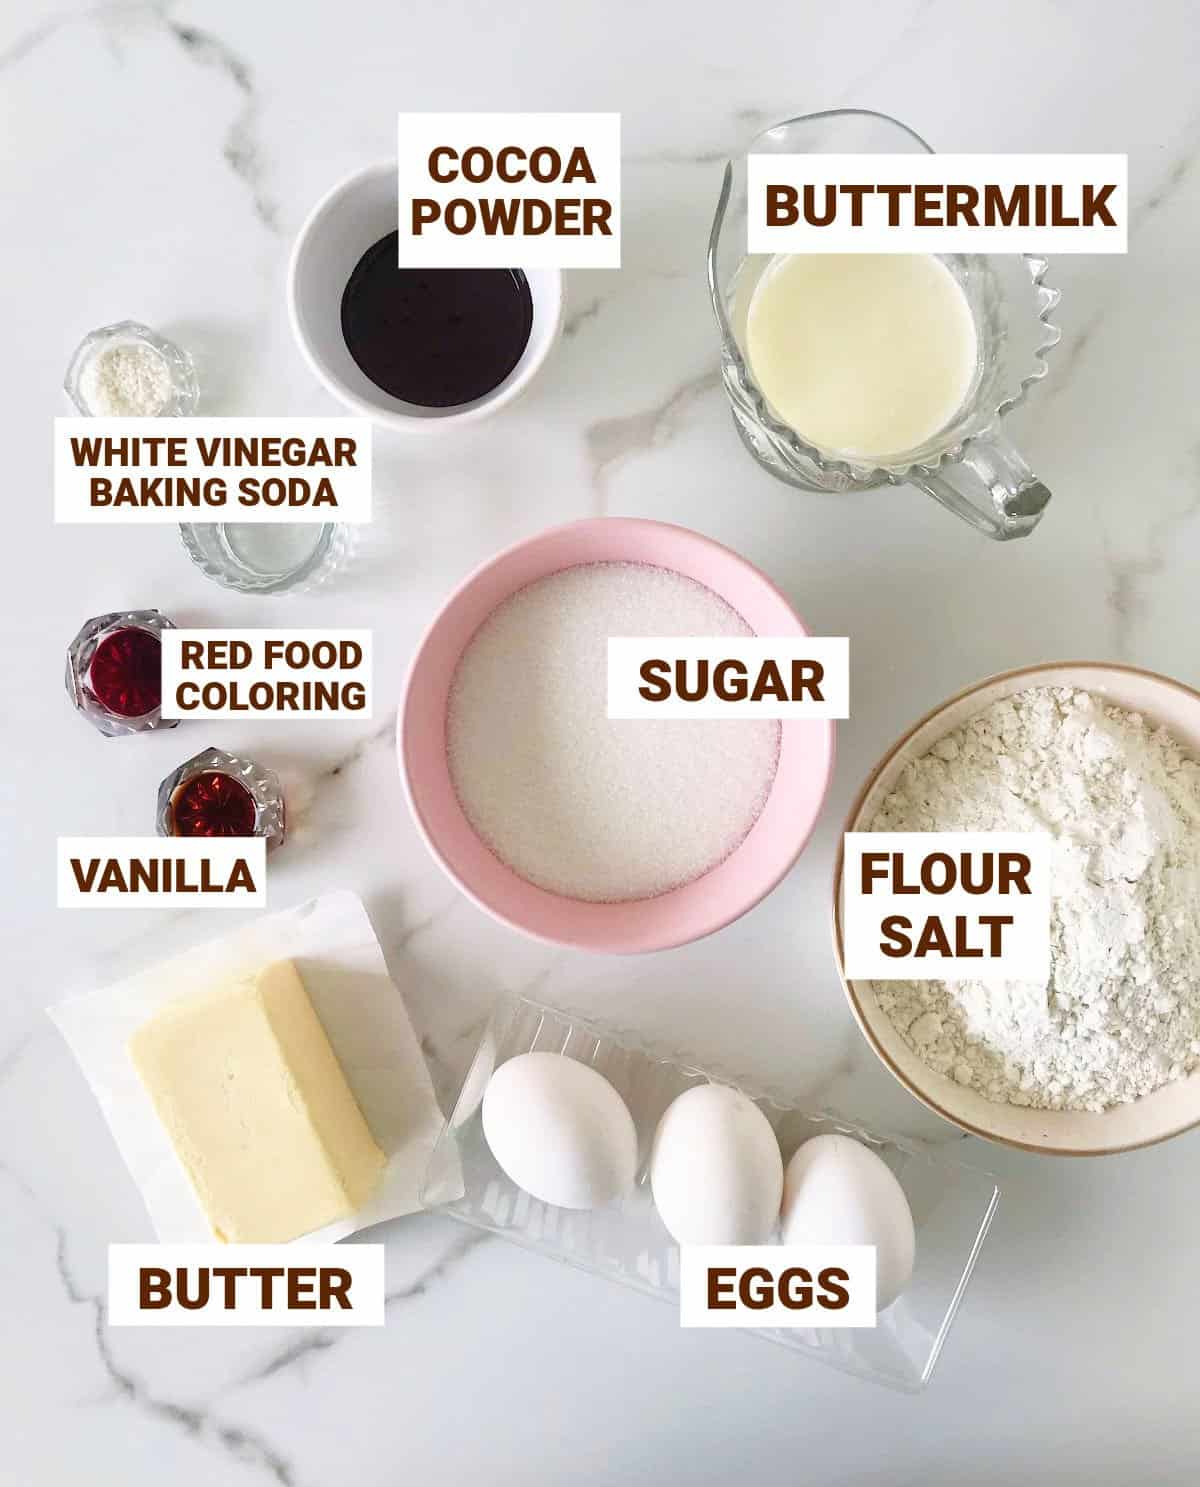
Ingredient list
- Cocoa powder: always use unsweetened.
- Buttermilk: it makes the preparation tender and counteracts the metallic flavor of the baking soda. You can make homemade buttermilk (it's VERY easy, see Notes in the recipe card for details).
- Unsalted butter.
- White, granulated sugar.
- Eggs: fresh, large.
- Flour: I use all-purpose flour or cake flour, and both work well.
- Salt.
- Vanilla.
- White vinegar: it creates a reaction with the baking soda and adds to the color. I use white vinegar whenever possible. Maybe apple cider if I'm out of white.
- Baking soda: make sure it's not expired.
- Red food coloring: there is a section about this below.
Quantities are listed on the recipe card towards the end of this post. The Ingredients page has more details and lists the brands we use.
Achieving the right hue of red
Mixing cocoa powder with buttermilk and baking soda creates a natural but faint reddish tone. It's a chemical reaction.
Nowadays, recipes add red coloring to enhance it.
Brands of red food coloring
- Gel or paste: this is our first choice because the colors are more concentrated so less is needed to achieve a good color. And it's easy to dissolve and distribute. I like and recommend Americolor super red gel and have used Wilton red icing gel/paste with good results.
- Powder: I did use it and love it. When it's good, it's great, but it's hard to find them, so I stick to gels mostly. Look for Red Ponceau.
- Liquid: I don't recommend them as the color is usually not good. They don't have enough concentration of color, so you have to use a lot and that is not what we want.
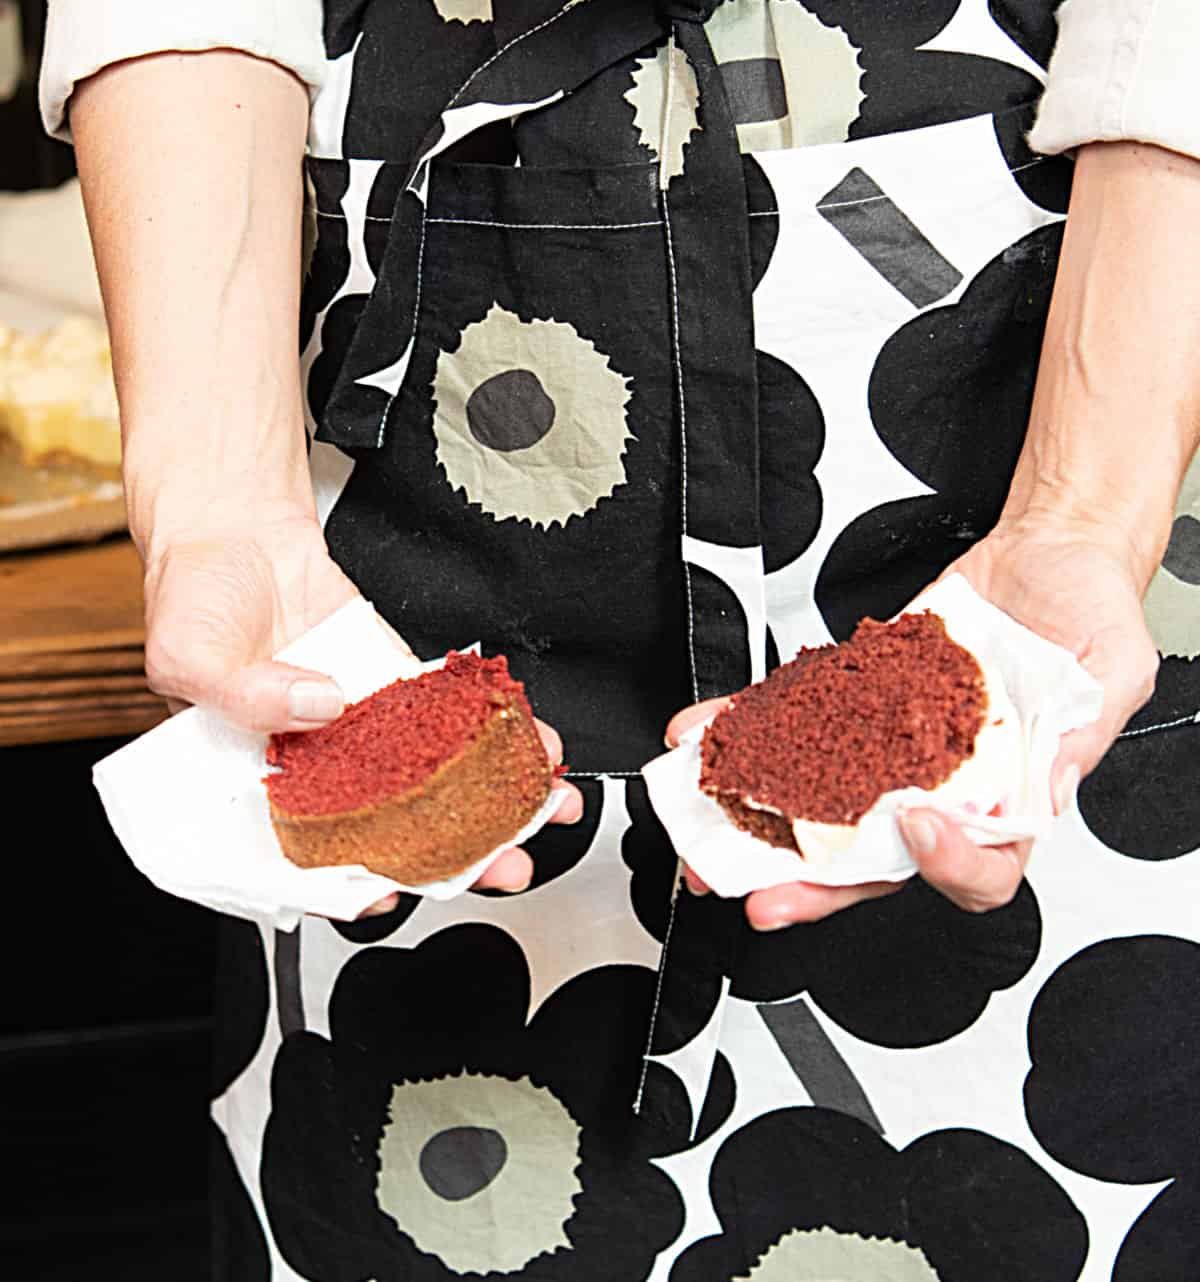
The difference in reddish tones
Different tones of red: in the image below I'm holding the same red velvet cake but the hues are different. I made one after the other during a baking class I gave.
Both have the same amount of red food coloring but the one on the left has 1 tablespoon of cocoa powder and the one on the right has 2 tablespoons.
An interesting color variation from a slight change in one ingredient.
I think the darker hue is more sophisticated and adult, as opposed to the lighter redder tone, which is more apt for children or when you want the cake to stand out more.
Personal opinion: I love red velvet cake's flavor but don't care about the color that much. So sometimes, I don't add food dyes if I don't have the right ones. They can be overpowering and change the texture of the cake a bit if you are not using good quality ones because you have to add a lot to achieve a good color.
Preparing the bundt pan
If you bake bundt cakes often, you've likely had one stick to the pan. It's frustrating, but preventable. Here are three reliable methods:
- Shortening and flour: Coat the pan thoroughly with soft shortening using your fingers or a brush, making sure to reach every corner, including the center tube. Dust with flour, rotating the pan to cover evenly, then tap out the excess over the sink.
- Cake goop (pan-release paste): Mix equal parts shortening, flour, and oil into a paste. Brush it onto the pan. Store leftovers in a jar-1 month at room temp or up to 3 months in the fridge. This is one of my favorite methods.
- Baking spray with flour: Only use baking spray that includes flour. Regular cooking spray isn't enough and often leads to sticking. I rarely use this anymore.
The recipe matters too: When I find a bundt cake that releases cleanly, even without perfect prep, I hold onto it-it's a keeper.
How to make red velvet cake
This recipe for red velvet cake mix or batter is a basic butter cake that turns into the classic favorite with the addition of chocolate milk, vinegar and red food color.
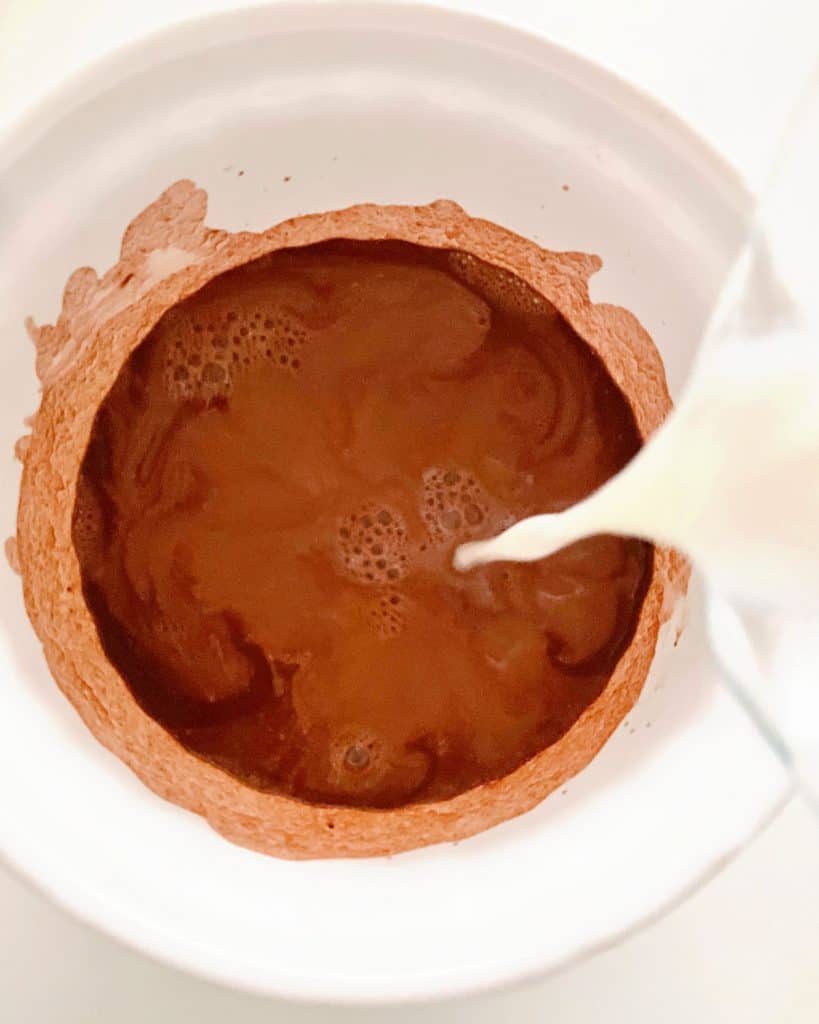
Chocolate milk
By mixing cocoa powder (sift it to integrate more easily) with hot water and buttermilk we get the chocolate mixture that will act as the liquid or wet part of the recipe.
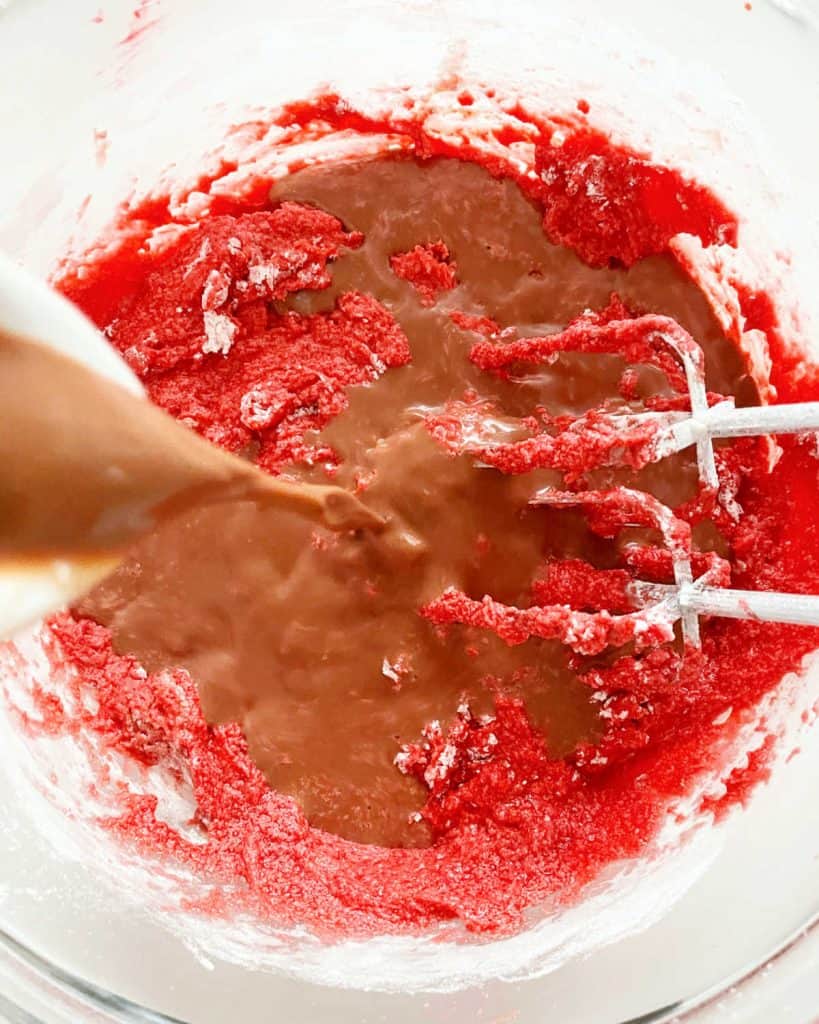
Red batter
Add vanilla, red coloring, and chocolate milk to the flour mixture. This means you start and end with the dry ingredients.
This technique helps integrate the ingredients properly.
Last step
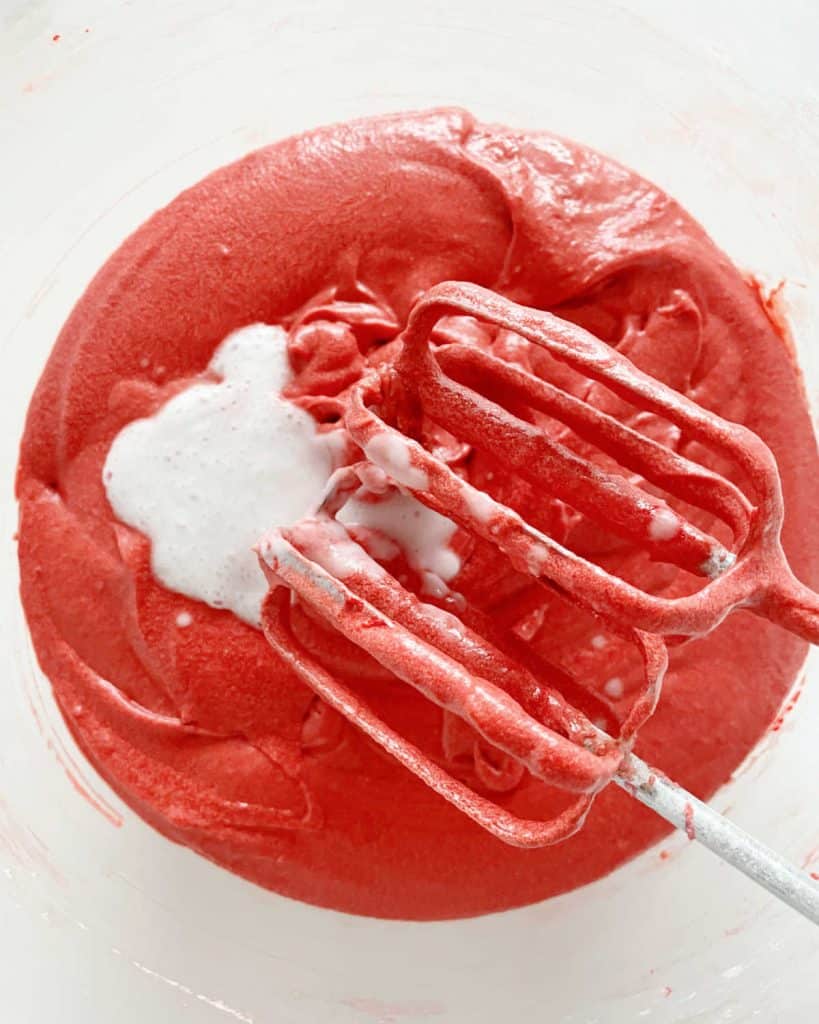
The baking soda is stirred with the vinegar (it will foam) and added to the cake batter immediately.
Baking
Use a cake tester, toothpick or brochette stick to check for doneness.
When should you remove it from the pan? If you unmold it as soon as you remove it from the oven, the cake will be too fragile. If you let it cool completely, the cake might stick. Let it cool for 15 minutes, and then flip it. Carefully remove the upside-down pan and expose the cake.
- I use a smooth-bladed knife to check that no parts of the cake are sticking to the central tube or the sides. Do this carefully, as the cake is tender due to its temperature.
- I use a wire rack over the pan to flip it. Always use kitchen towels to grab both and hold firm while you flip it.
Bundt pan
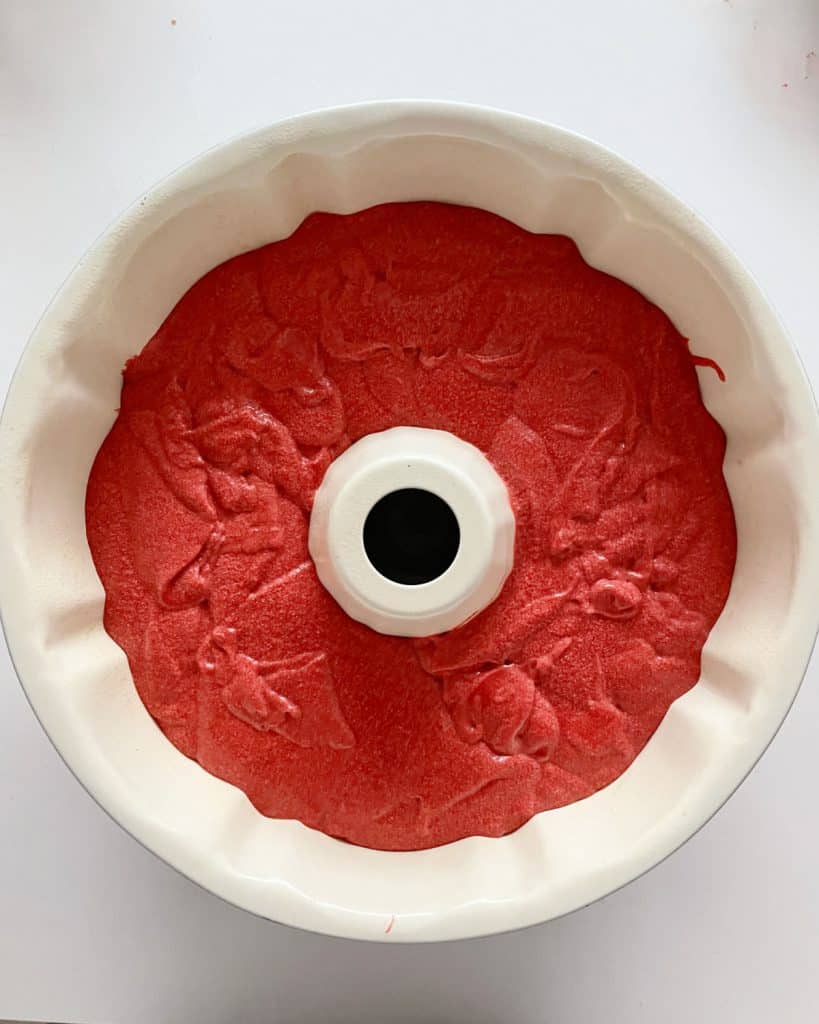
The bundt cake pan should be filled ⅔ to ¾ of its capacity, no more than that. This way, the batter has space to grow and bake well.
Baking
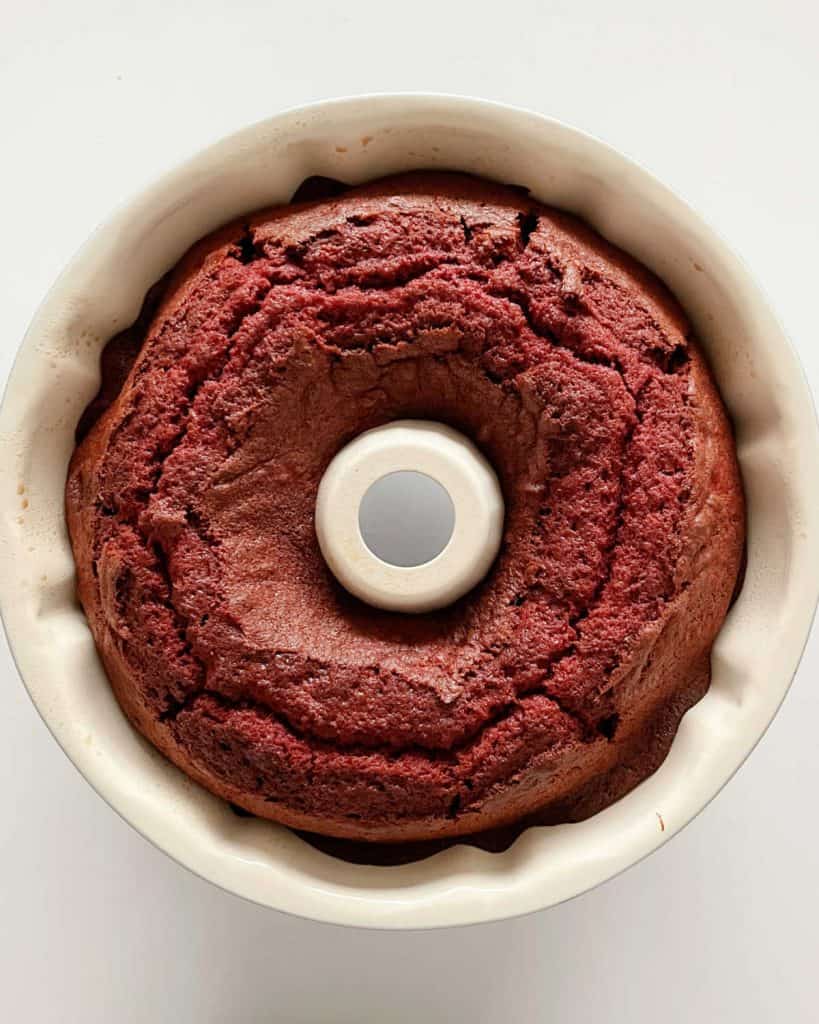
Bake in a preheated oven as directed. Cracks on top are normal.
Use a cake tester or toothpick in the center to test for doneness. Once it comes out clean, remove the cake.

Removing the cake
This is one of the most and less exciting moments. This cake is famous for sticking and not unmolding in one whole piece. Not a nice moment, let me tell you!
I let it cool down for 15-20 minutes and use a smooth-bladed knife to check that there are not stuck bits of cake to the tube or sides. Then I shake the pan slightly until I feel the cake loosening. That's my cue to flip it.
Fluffy cream cheese frosting
Our homemade red velvet bundt cake uses this traditional frosting, the same one in the Hummingbird cake and chocolate sandwich cookies.
It is one of my favorite frostings in the world, and not only is it easy to make, but it can be refrigerated for several weeks and even frozen.
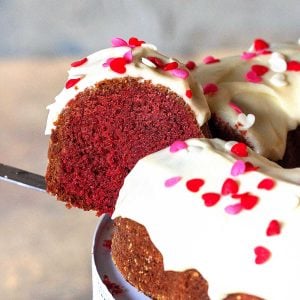
- Frosting variation: add some red coloring to the frosting if you want a completely red look. I like a red cake, white frosting, and colored sprinkles, like the images in this post.
- Use different sprinkles: Pink and red heart sprinkles are great for Valentine's Day, white/red/green jimmies work for Christmas, while red, white and blue star sprinkles are perfect for the 4th of July.
- Cream cheese glaze: lighten it up by using less powdered sugar and let it drip down the sides of the cake.
Kitchen Notes
- Organization: read the recipe first and ensure you have ingredients at the correct temperature, utensils and equipment needed, and enough workspace. This will make the process so much easier.
- Baking time: consider that all ovens and pans are different, even if they look similar. The baking time in my recipes is as accurate as it can be, but it might take you more or less time. You can use a thermometer(like the OXO oven thermometer) to check that your oven is at the right temperature. I recommend you keep track of how your oven works and what tiny details you might need to adjust.
- Uneven coloring: inconsistent coloration in the cake is due to uneven distribution of the red food coloring. To achieve a uniform color, mix it thoroughly when incorporating it into the batter. Consider gel or paste food coloring for a more concentrated and even distribution of color.
- Pan size variations: this recipe can be adapted to different shapes or sizes. One recipe yields 1 large bundt, 18 to 24 cupcakes, 2 medium loaf cakes, two or three 8 or 9-inch cake layers, or 1 sheet cake similar to the lemon coconut cake that is perfect for picnics, barbecues, children's birthdays, or a small celebration.
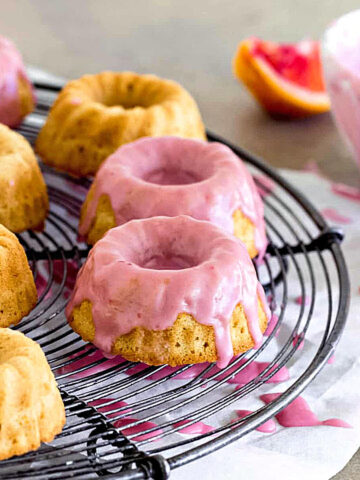
- Red velvet mini bundt cakes: they require special individual bundtlette pans like the ones we use for the Kahlua chocolate cakes. A wonderful idea for celebrations, where each person gets their own bundt cake. The middle hole is perfect for piling up fruit or other extras. This recipe yields 12 small bundt cakes.
- Frosting variations: add some red coloring to the frosting if you want a complete red look. And use the sprinkles according to the holiday, hearts for Valentine's, stars for Christmas, and so on.
Related recipes you might like:
If you made this recipe and loved it, you can comment below and leave a 5-star ⭐️ review. Also, if you had issues, let me know so we can troubleshoot together.
You can also subscribe to our FREE email series 'Baking the Best' and our regular newsletter. Or follow and save my recipes on Pinterest.
As an Amazon Associate, I earn from qualifying purchases. Read my disclosure policy.
Red Velvet Bundt Cake (moist and easy)
Ingredients
For the cake:
- 2 tablespoons shortening, soft, to grease the pan
- 2 tablespoons unsweetened cocoa powder, or 3 tablespoons, see Notes below
- ⅓ cup water, boiling
- 1 cup buttermilk, or whole milk with 1 tablespoon lemon juice
- ¾ cup unsalted butter, at room temperature
- 1 ½ cups sugar
- 3 eggs, at room temperature
- ¼ to 1 teaspoon red gel food coloring, see Notes, below
- 2 teaspoons vanilla extract, or 1 ½ teaspoons vanilla paste
- 2 ½ cups all-purpose flour, or cake flour
- ½ teaspoon salt
- 1 ½ teaspoons baking soda
- 1 teaspoon white vinegar
For the cream cheese frosting:
- 4 ounces cream cheese, at room temperature
- 3 tablespoons unsalted butter, at room temperature
- 1 ½ cups powdered sugar, estimated amount
- 1 teaspoon vanilla extract , or ½ teaspoon vanilla paste
Instructions
For the cake:
- Preheat the oven to 350°F (180°C).
- Grease a 10-inch bundt cake pan (26cm) with 2 tablespoons shortening, covering every nook, cranny and angle. Dust with flour, shaking off excess. Reserve.
- In a small mixing bowl or glass pitcher, mix 2 tablespoons unsweetened cocoa powder with ⅓ cup water, boiling. Let cool a little, and add 1 cup buttermilk. Stir well and reserve.
- Beat softened ¾ cup unsalted butter with 1 ½ cups sugar in a large bowl for 3 minutes until creamy. I use an electric mixer, but you can also use a stand mixer.
- Add 3 eggs, one at a time, and beat well after each addition.
- Add the ¼ to 1 teaspoon red gel food coloring (depending on the brand and how deep you want the color to be) and 2 teaspoons vanilla extract. If using powder color, mix it with the vanilla before adding.
- Add the sifted 2 ½ cups all-purpose flour and ½ teaspoon salt to the butter mixture in 3 parts, alternating with the cocoa mixture in 2 parts. That means you begin and end with dry ingredients. You can sift the flour mixture in another bowl or have it measured and sift it over the butter as you add it (what I do).
- In a small bowl, mix 1 ½ teaspoons baking soda with 1 teaspoon white vinegar. It will foam. Immediately add it to the cake batter and stir to integrate.
- Pour into the prepared pan and smooth the top. Bake for 40-45 minutes or until a cake tester or toothpick comes out clean. If moist crumbs are attached, bake for a few more minutes. Don't overbake it.
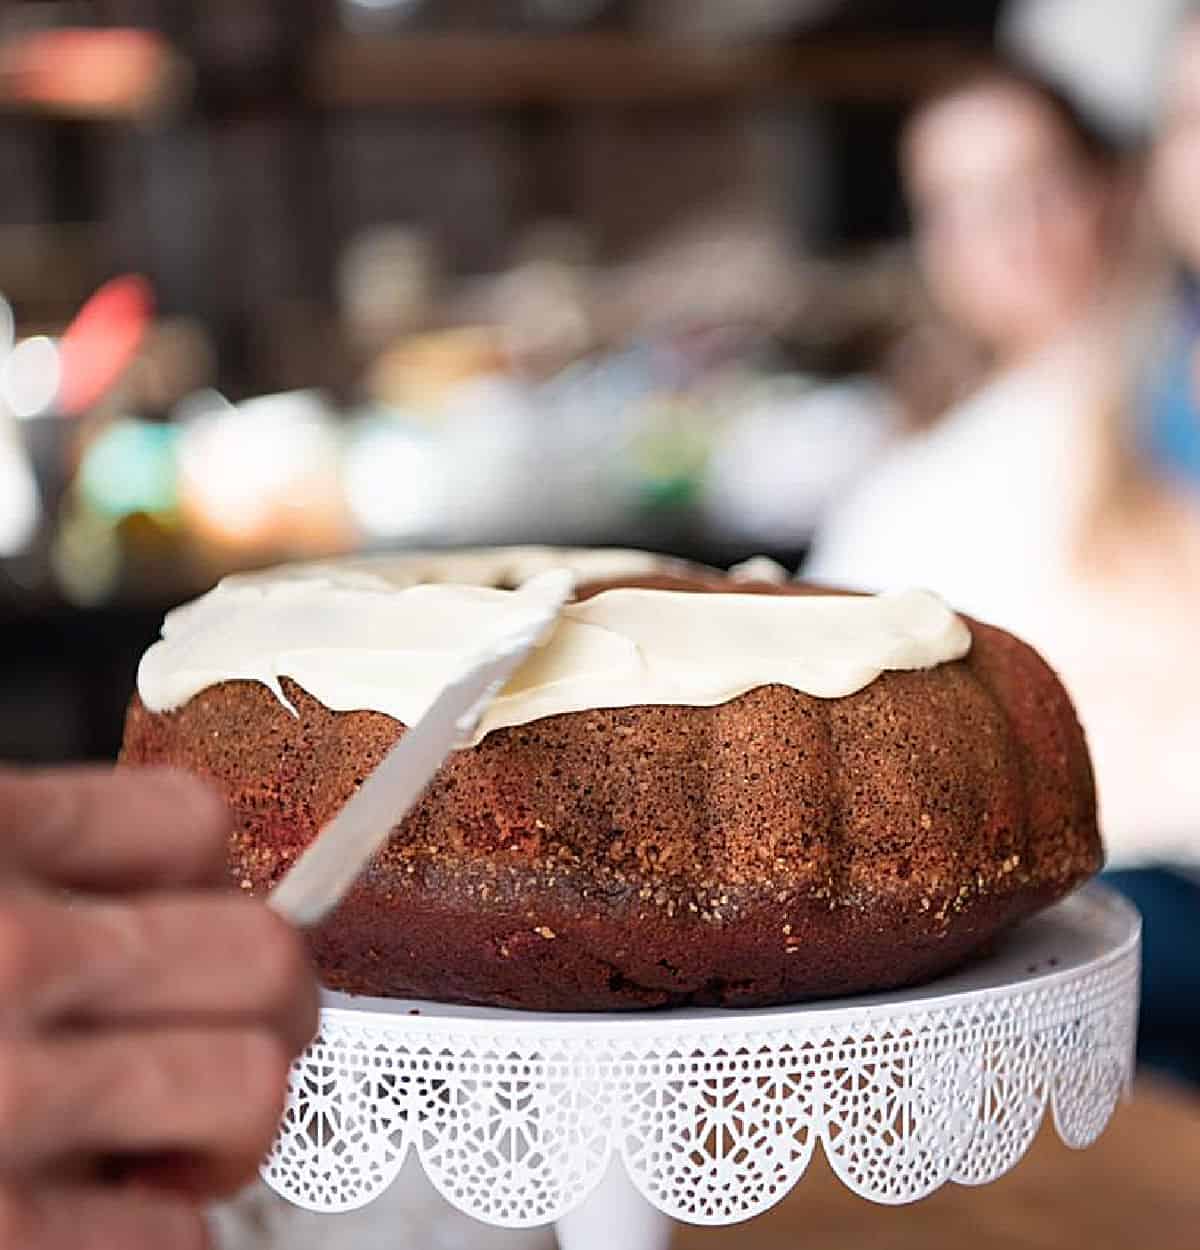
- Let the cake cool for 15-20 minutes, and carefully remove it onto a wire rack. Cool completely before frosting.
For the cream cheese frosting:
- Beat 4 ounces cream cheese with 3 tablespoons unsalted butter in a bowl until very creamy and no lumps remain.
- Gradually add 1 ½ cups powdered sugar and 1 teaspoon vanilla extract until you have a thick, very creamy consistency, good enough to spread. You might need more sugar. If you want a more drippy icing or glaze, use less sugar.
- Spread on top of the cake.
- It keeps well in the refrigerator for a few weeks. Beat again before using to attain a creamy consistency.
Anna says
Absolutely delicious and uniquely velvety. Looks gorgeous. I used red velvet sprinkles on the top. Thanks a lot for the recipe. It will be one of the hits of my baking
Paula Montenegro says
So happy to know you loved it Anna! It does have a beautiful crumb.
doris stuart says
my favorite cake but i put cook frosting on mine not cream cheese
Ronak Mehta says
Thank you for sharing this delightfully easy, mouthwateringly delicious recipe. Have baked this cake several times since I first tried it a few weeks back and it’s been a huge success each time!
Paula Montenegro says
So happy to hear that Ronak! Have a great week
Claire | The Simple says
What a delicious looking red velvet bundt cake! The recipe looks amazing and I love your tip on how an easy change can make such a big difference in the final color of your cake.
Cathleen @ A Taste of Madness says
Wow, this is perfect for Valentine's Day!!
I bought a bundt pan last year but moved before I could use it 🙁 I need to get another one!!
Danielle says
I think I found the cake I need to make next week. It looks absolutely stunning! It was quite interesting to find out about color nuances - can't wait to try it out myself!
Jacqui DeBono says
I have to get a bundt pan! I love the look of a bundt cake and this one is especially pretty.
Veronika says
This is a perfect combo of two of my favorites: bundt cake and red velvet! Will save the recipe to try it next week!
Tammy says
Oh your bundt is SO pretty! A perfect surprise for Valentine's Day! Beautiful photos 🙂
Nicoletta and Loreto says
Such a pretty cake this red velvet bundt cake! We agree the darker red is more appealing than the brighter red. It looks so moist and the cream cheese icing takes it over the top.
Anna says
This is such a beautiful bundt! I just love that pink colour of the sponge, it must taste utterly delicious! And with Valentine's just around the corner, it will be a perfect bake to treat your loved ones to!
Chef Dennis says
This Red Velvet Bundt Cake is making me crave and drool all over! I'm sure this is really delicious beyond comparison. My wife will definitely love a slice of this.
Juliana says
Love this cake, perfect for Valentines! ❤️
The crumb looks so moist and deep red, beautiful!
Macarena says
Your recipes never disappoint, so I'm making this cake for Valentines! wish me luck! The picture is beautiful Paula.
Paula Montenegro says
Let me know how it goes Macarena!