

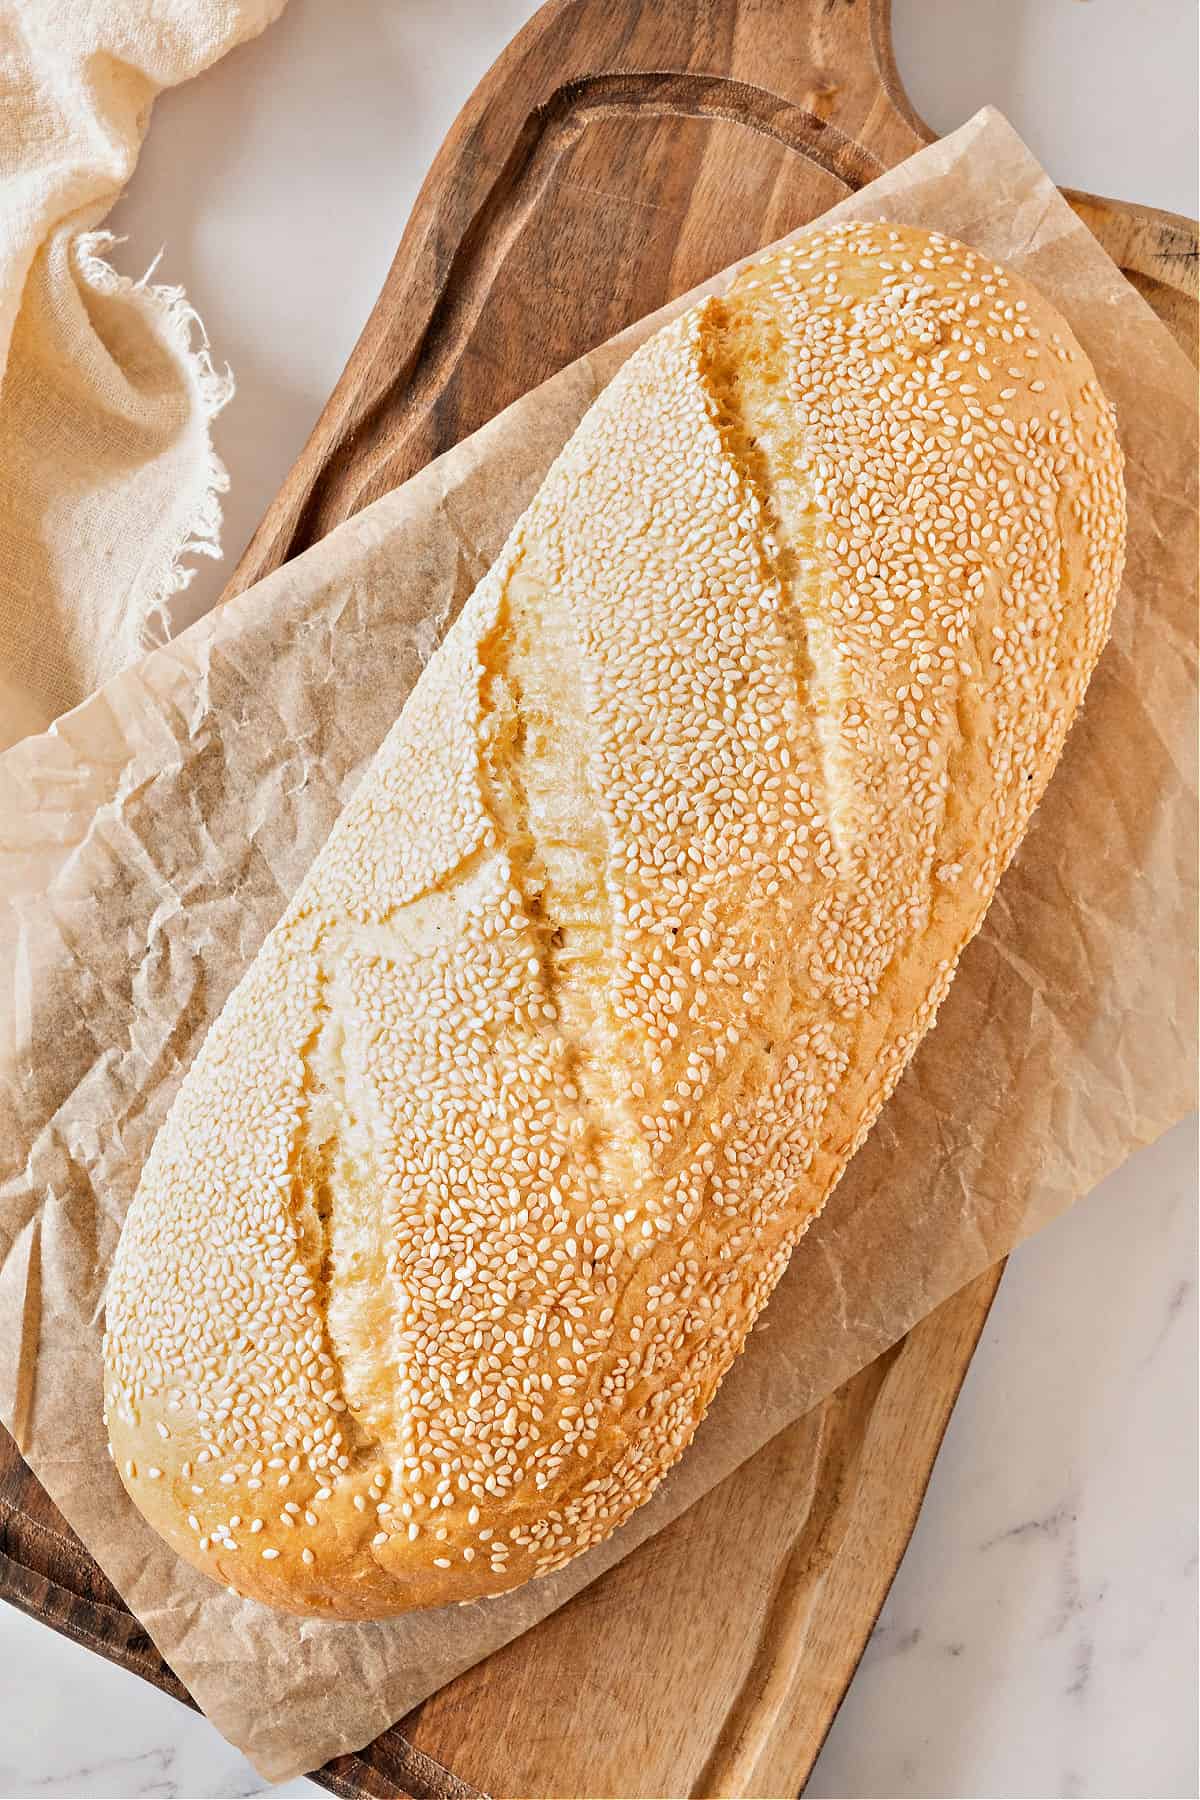
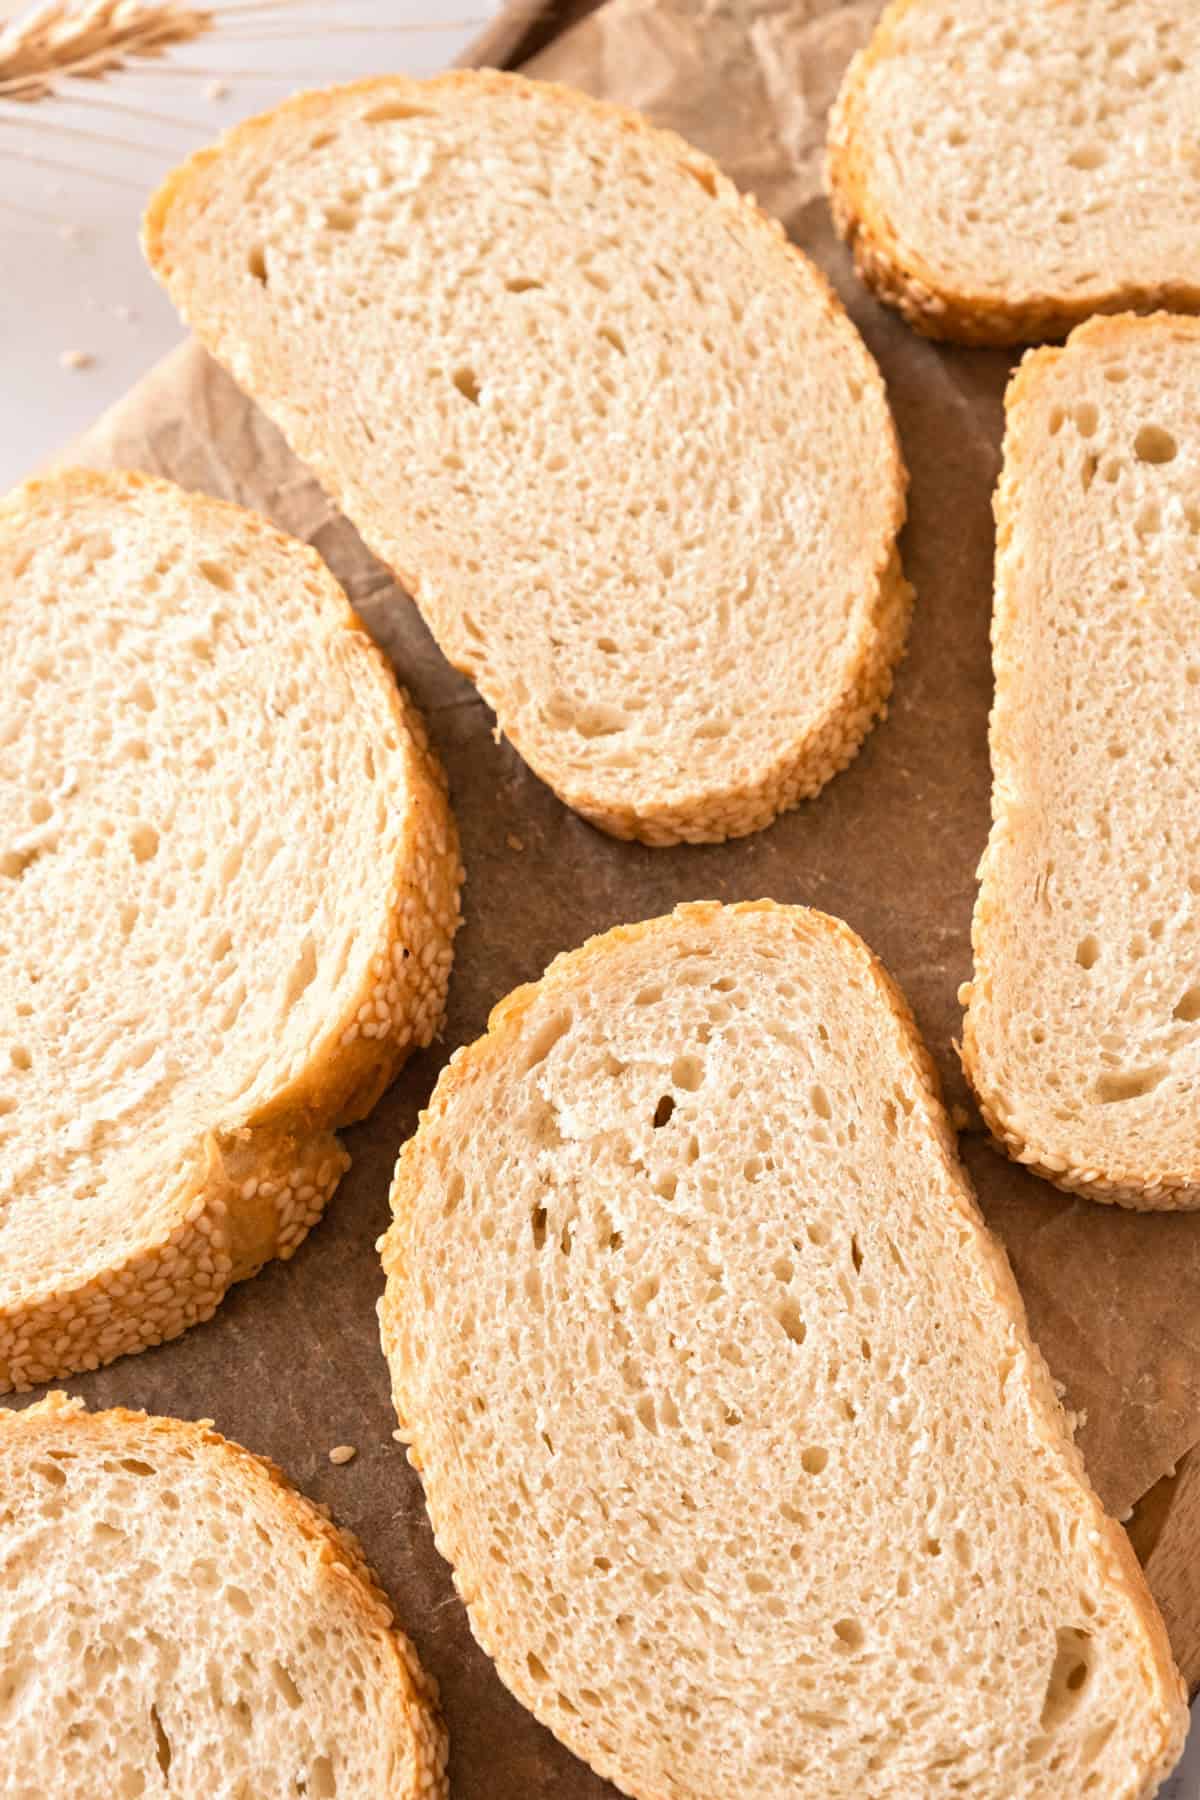
Making homemade semolina bread feels rustic and a little old-world. It has a golden hue, chewy crumb, and a crust that toasts beautifully. This recipe uses a mix of semolina and bread flour to strike a good balance between structure and flavor.
This unique Italian bread is one of our most popular ones on this blog, and I'm updating it with new images, testing notes and tips. If you're not an experienced yeast baker, there are step-by-step instructions to guide you.
SAVE THIS RECIPE
A golden loaf
I must admit this golden, crusty bread is one of my favorite ones to bake and eat! And though baking with yeast is not everybody's thing, some bread recipes are worth the time, dedication and patience. This is one of them, for sure.
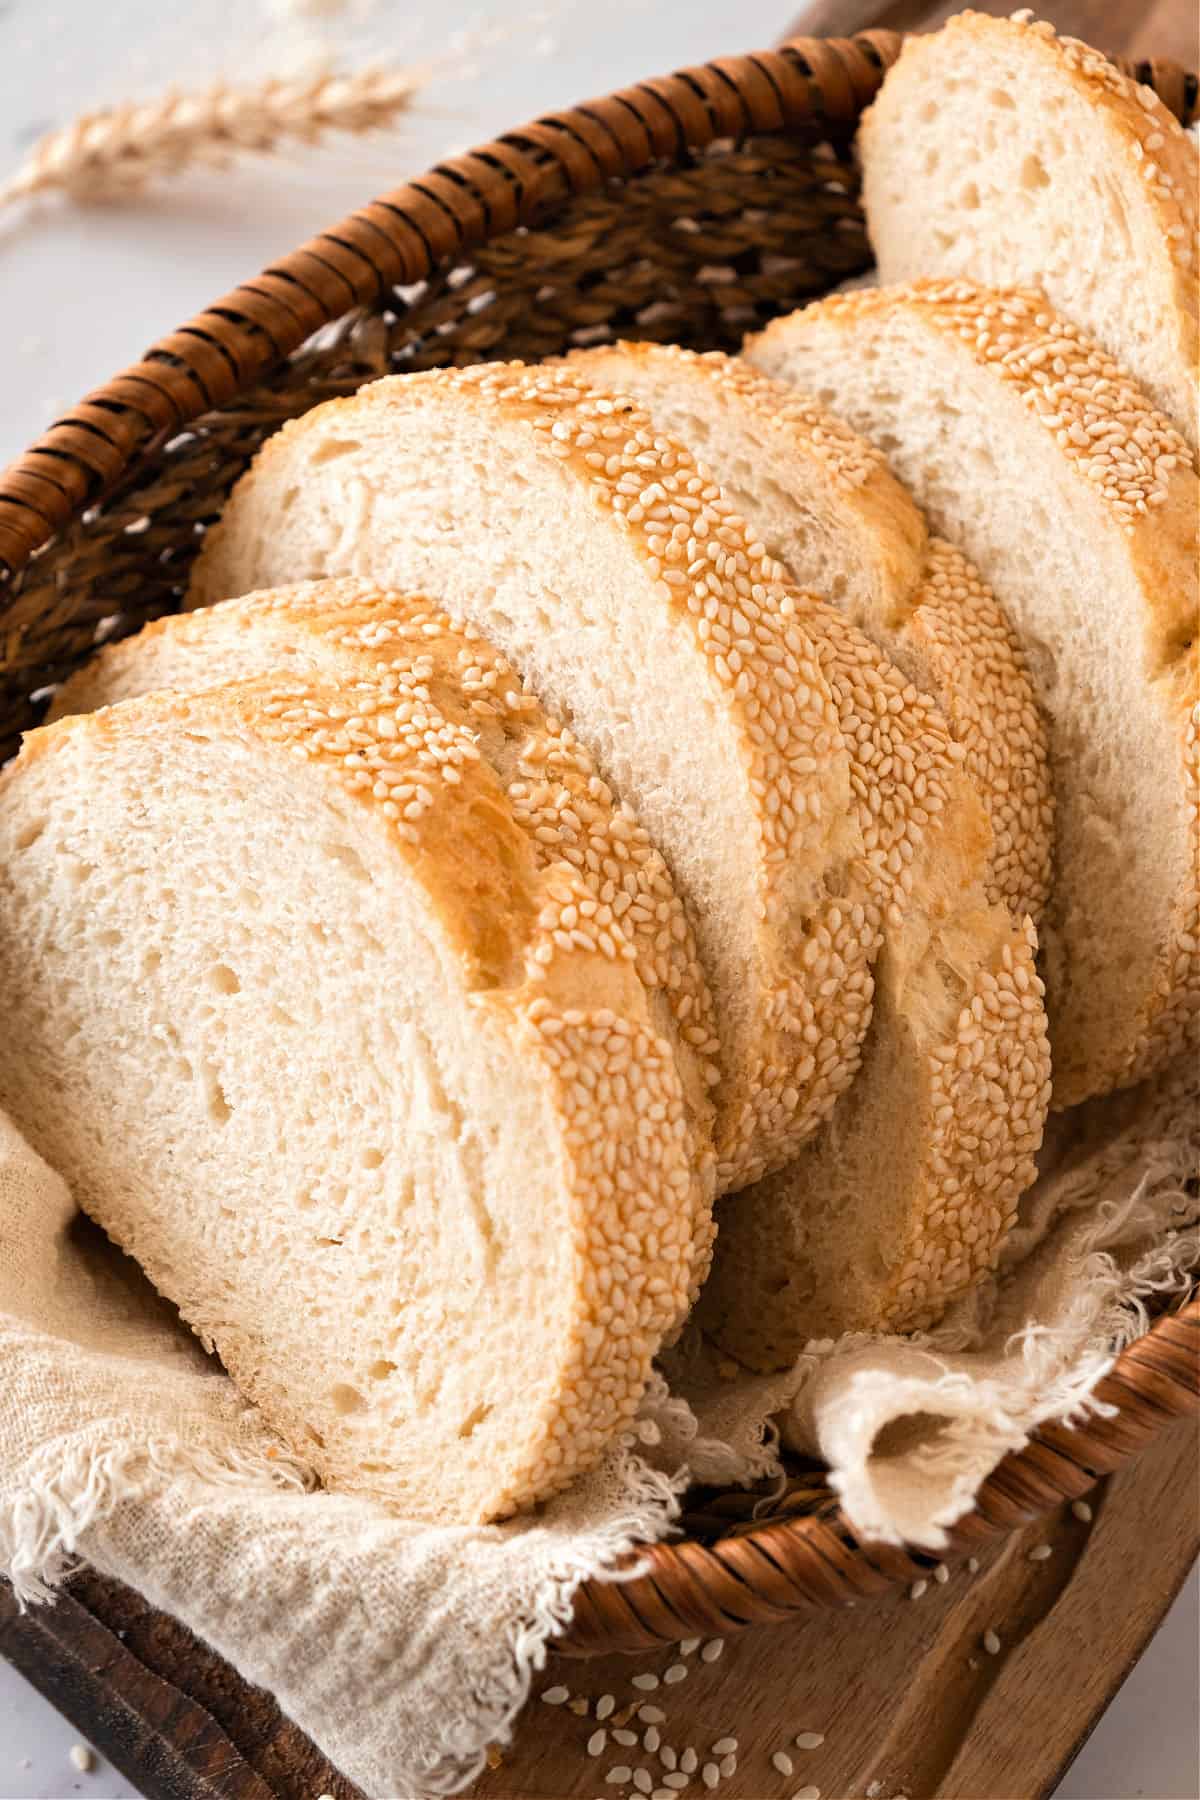
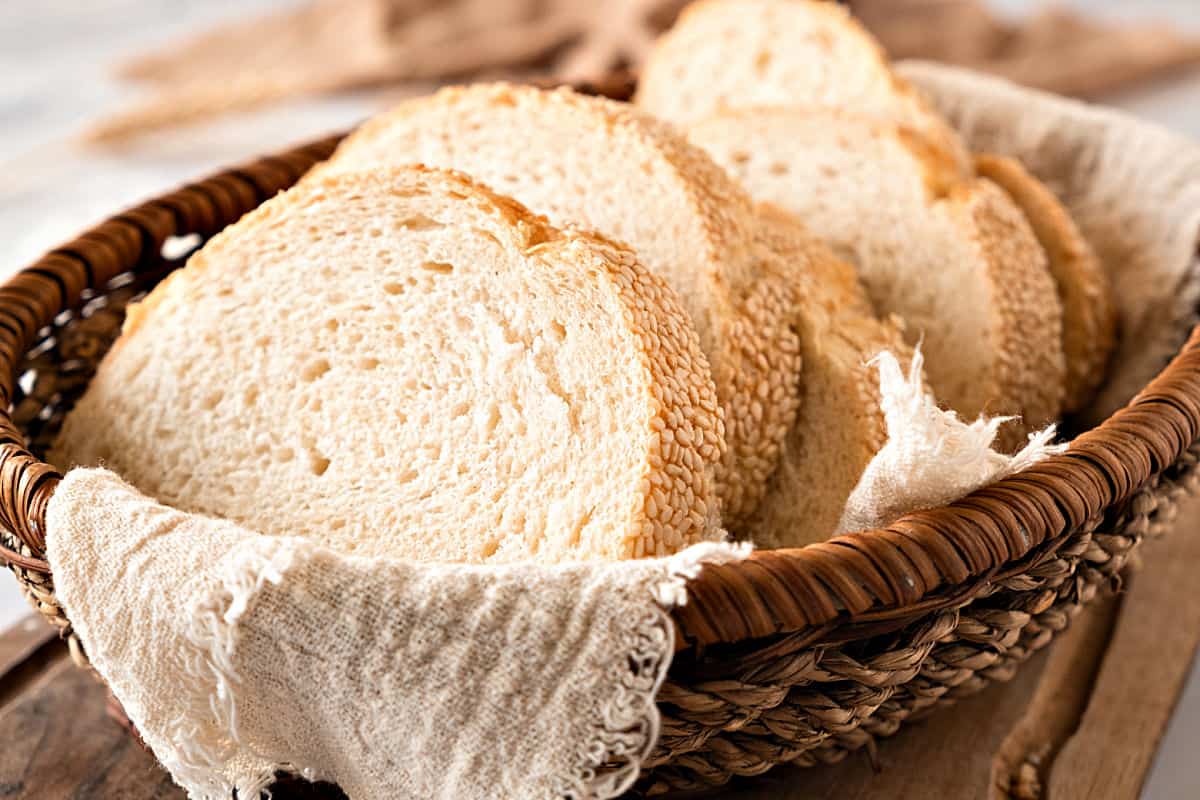
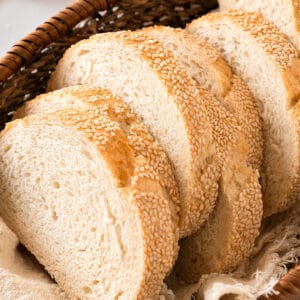
It's everything you want in a crusty bread. I coated it with sesame seeds, but you can leave it plain, as I used to do. Both ways, this semolina loaf is fantastic!
The texture is different from soft sandwich bread and more similar to an artisan bread: firmer, heartier, but still great for slicing, layering with butter, or dipping into soups and olive oil.
What is this rustic Italian bread good for? It's great for buttered breakfast toast, bruschetta and some sandwiches. Use it as an appetizer to dip in olive oil or as part of an antipasto platter. It makes the best croutons, and to pair with a stew or tomato sauce pasta.
Other bread recipes to make after this one are the yeasted beer rolls and semolina rolls, both great for sliders and to accompany saucy dishes.
Testing Notes
- Organization: bread baking takes time. So read the recipe first and plan for it. Ensure you have ingredients at the correct temperature, utensils and equipment needed, and enough workspace. This will make the process so much easier.
- Use fine semolina flour (not coarse): You want semola rimacinata or fine durum wheat flour. Coarse semolina (like the kind used for pasta or porridge) won't hydrate properly in bread dough.
- Combine it with bread flour: Semolina alone doesn't form strong gluten networks, so mixing it with bread flour gives better rise and structure.
- When proofing the dough (letting it rise), make sure the bowl is large enough to hold double or triple the volume comfortably without overflowing.
- Temperature of the room: let it rise in a draft-free, warm place. If the room is cold, take it to a warmer place or wrap it around something that keeps the temperature, like a sweater, blanket, or shawl, like I do.
- Sesame seeds, yes or no? You can go either way. I used to bake it plain, but added seeds when I reshoot it. Covering the loaf with sesame is a classic way of presenting this bread.
- To cover semolina bread with sesame seeds, lightly moisten the surface with water (I don't like an egg wash for this recipe), just enough to help the seeds stick. Use a brush or a spray bottle with water for an even coating. Spread sesame seeds in a flat layer on a tray. Gently roll or press the dough into the seeds until evenly coated. You can also sprinkle extra seeds on top and press lightly so they don't fall off. Then transfer the loaf to the baking sheet or pan with parchment paper and bake as directed. Do this before scoring the loaf.
- The loaves can have slight differences every time you bake them. If proofed correctly, the flavor will always be fantastic. But sometimes the crust might be thinner or slightly thicker, the golden hue of the crumb might vary, and so on. Bread uses yeast, and it's a living organism. So, it can be temperamental depending on the humidity, warmth of the environment, etc.
- If freezing it, slice it first: this is an excellent bread to freeze and have ready to toast. Slice it and wrap it in plastic or put it in a Ziploc bag. It will last for a month.
FAQ
Semolina absorbs more water than regular flour. Let the dough rest for 10-15 minutes after mixing to give it time to hydrate before deciding to add more liquid.
Definitely. Just be prepared to knead for 10-12 minutes to develop the gluten properly. A stand mixer makes it easier, but it's not essential.
Yes. You can shape it however you like. Adjust baking time depending on the size and shape of the dough.
Bake in a hot oven and use steam, either by quickly spraying water in a spray bottle, or throwing a few ice cubes at the bottom of the oven when the loaf goes in. Do this quickly so the steam is caught inside.
Flours you need
- Bread flour: You can buy flour that is specially made for bread. It has more gluten than all-purpose. Gluten is the ingredient that develops during kneading, creating a structure that helps the bread grow. The bread will work with all-purpose flour (but not cake flour), but it's a good idea to use the right one, and you can buy bread flour online.
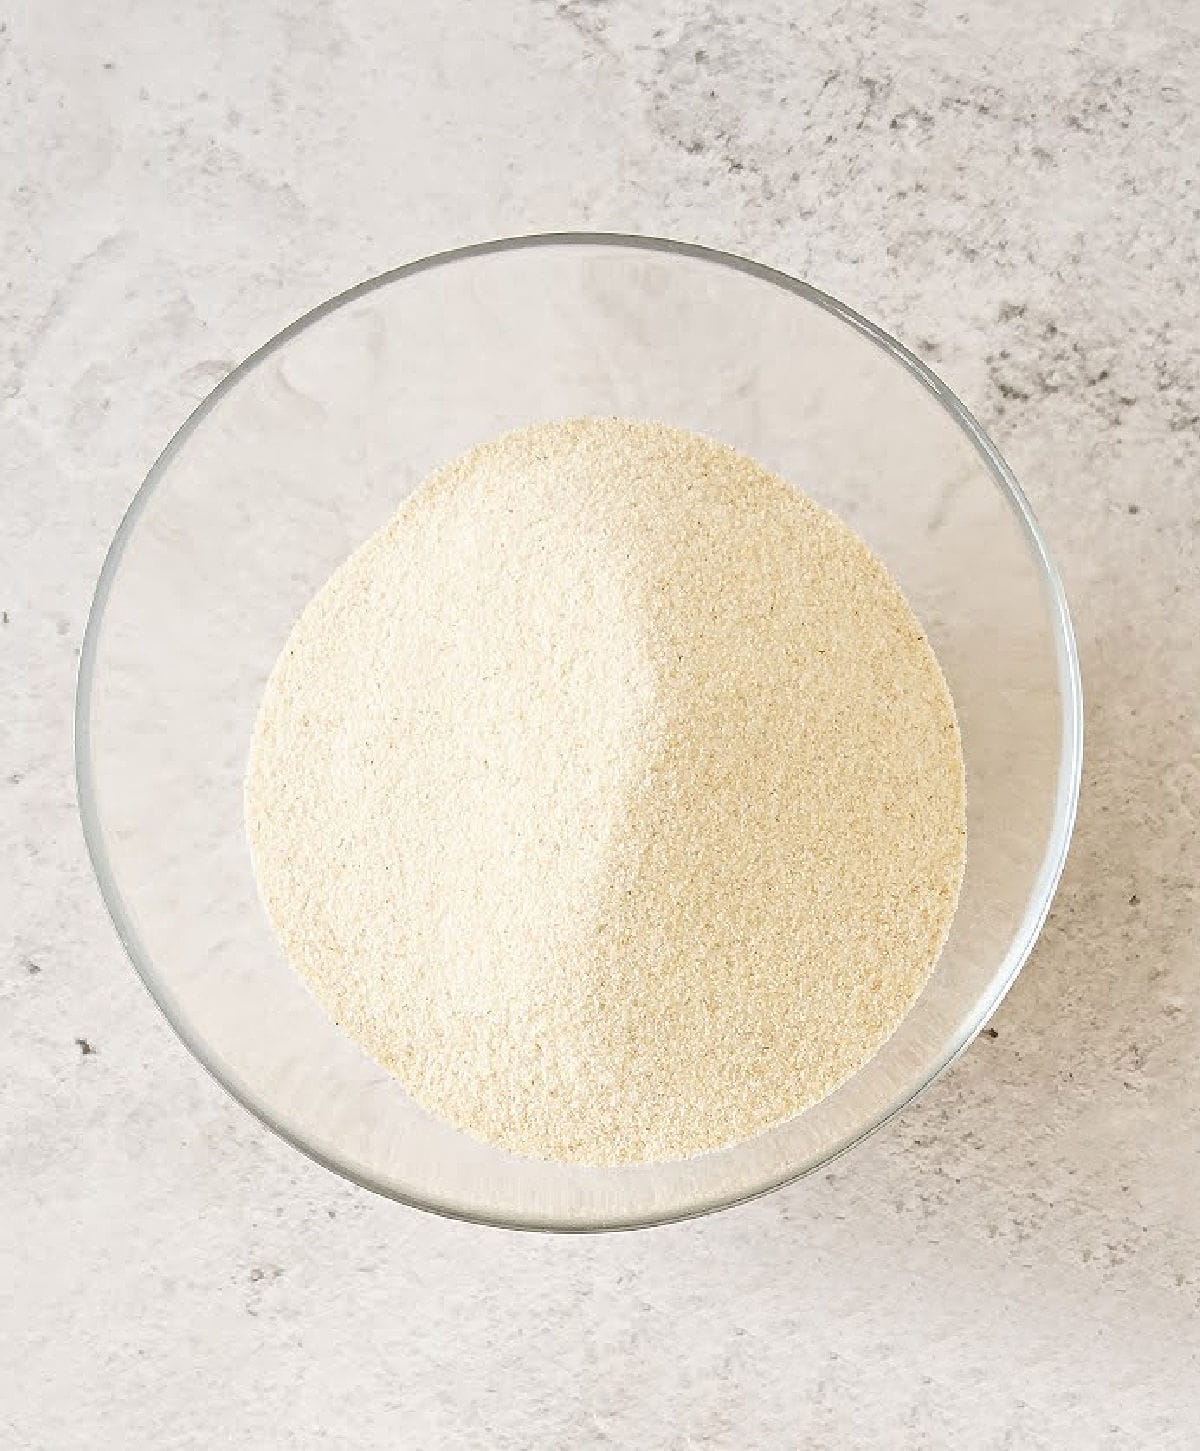
- Semolina flour: It's a fine-textured flour made from durum wheat (also used to make dried pasta). It has a nutty undertone and gives the bread a welcome golden hue. It's similar to very fine sand (image below) and different and much finer than bread flour. You need both for this bread. Semolina (semolin in some countries) comes in various textures and coarseness. Couscous, for example, is also semolina, but not at all what we need for this bread.

How to Make Sure Yeast Works
- Check expiration date: Replace if expired.
- Visual check: Should be beige to light brown and granular/powdery. Avoid if grayish, clumpy, or discolored.
- Smell test: Should have a mild, slightly sweet smell. Strong or unpleasant odors indicate it's bad.
Proofing test: Mix ½ teaspoon sugar in ¼ cup warm water (comfortable to touch). Sprinkle ½ teaspoon of dry yeast on top and stir gently. Wait 5-10 minutes until you start to see some activity. Fresh yeast will foam and bubble more while instant yeast bubbles less than active dry yeast.
Golden Rule: When in doubt, buy new! It's better to be safe than to have your baked goods fall flat and be inedible. You'll have to throw it out and start again.
Process steps
This is a fantastic recipe because it's easy to knead by hand. It is even easier with a stand mixer (using the dough hook).
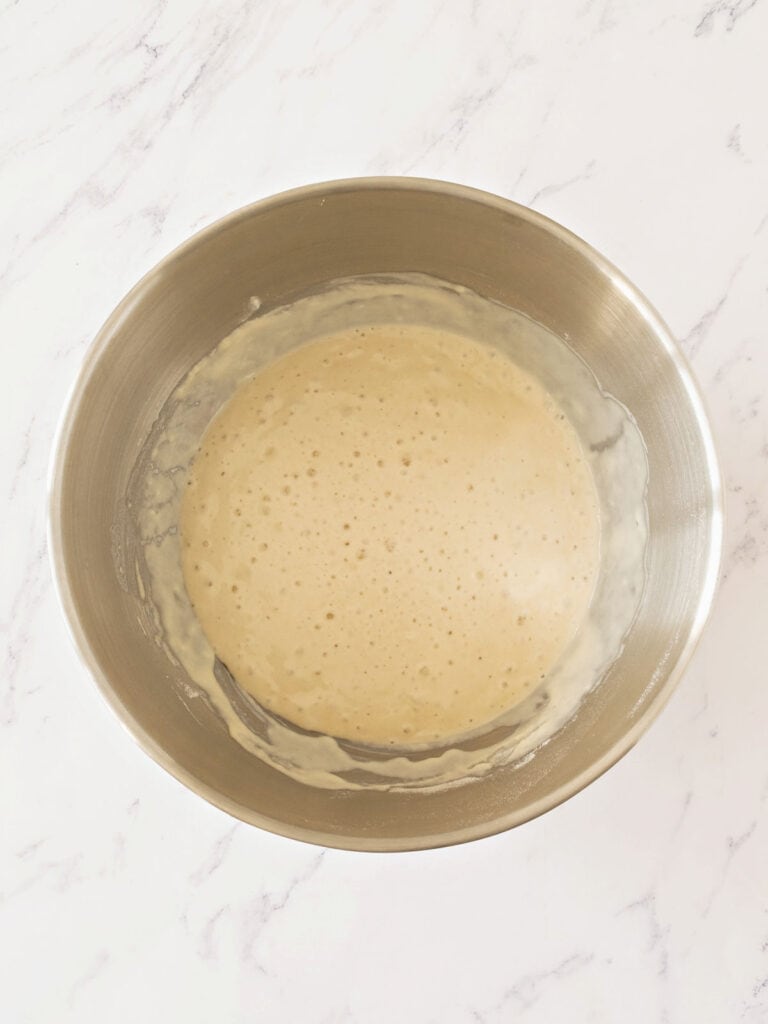
Make the sponge
Active-dry yeast is mixed with flour and water. After resting covered for 1 hour, it will have grown, and air pockets like bubbles will have developed. If this doesn't happen, the yeast is not working. Don't go on. Buy new yeast and start again.
Kneading Bread Dough Tips
By hand:
- Use the base of your palms for better control and pressure
- Flour: Avoid adding too much; sprinkle sparingly, knead first and adjust only if needed. Let the dough absorb added flour before adding more
- Sticky doughs: Use a dough scraper to help fold and turn doughs that are hard to handle.
With a stand mixer:
- Use the dough hook attachment.
- Start on low speed, then increase to medium once the dough comes together.
- Avoid overkneading: most bread doughs, with some exceptions like brioche, need about 5-10 minutes of kneading.
- Avoid overloading the bowl; knead large recipes in batches or smaller portions. Check the capacity of your mixer, as overloading can cause the motor to burn out.
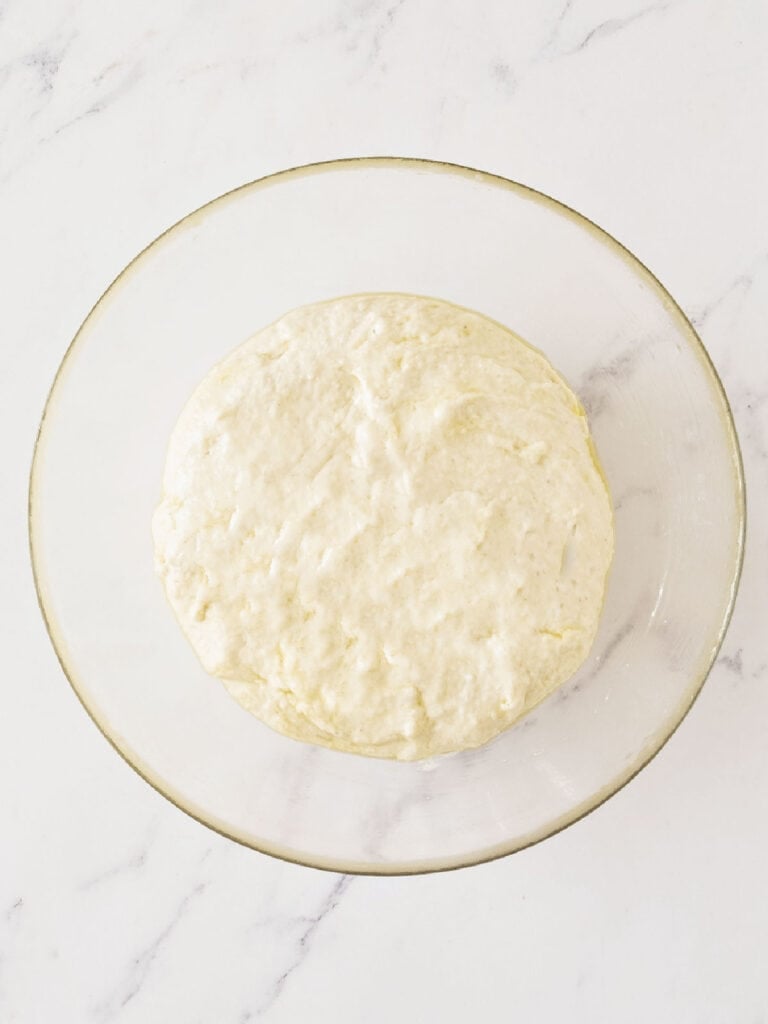
The bread dough
With the sponge ready, we need to add the rest of the ingredients to the yeast mixture.
It will look like there are not enough wet ingredients when you turn it out onto the counter, but the dough starts forming in no time after you start bringing it together and kneading.
After 1 or 2 minutes, the dough is rough but not sticky, and all the ingredients are combined.
How long does it take? About 10-12 minutes to knead it by hand and about 7-8 minutes with a stand mixer.
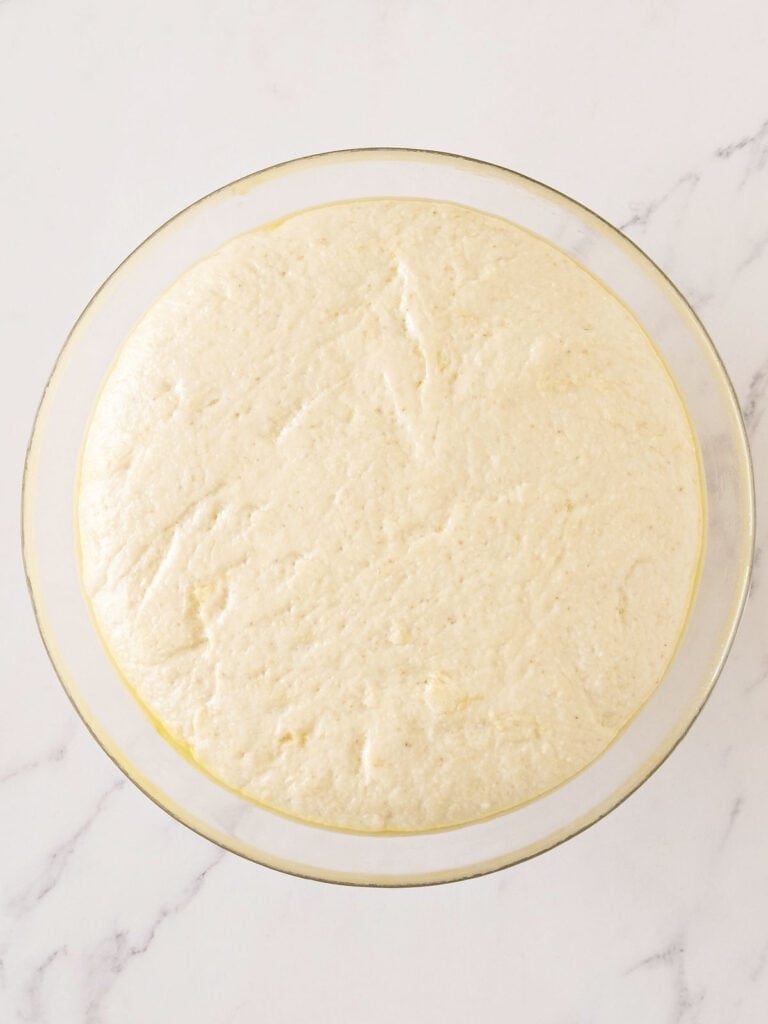
First rise
This is a crucial part of bread-making. Let the dough rise until doubled in size, which takes about 1 hour. So put it in an oiled bowl, turn it around to coat, and cover the bowl with plastic.
Form the loaf
The dough is supple and friendly to work with. It can be shaped differently, and I like the batard, a plump and short baguette.
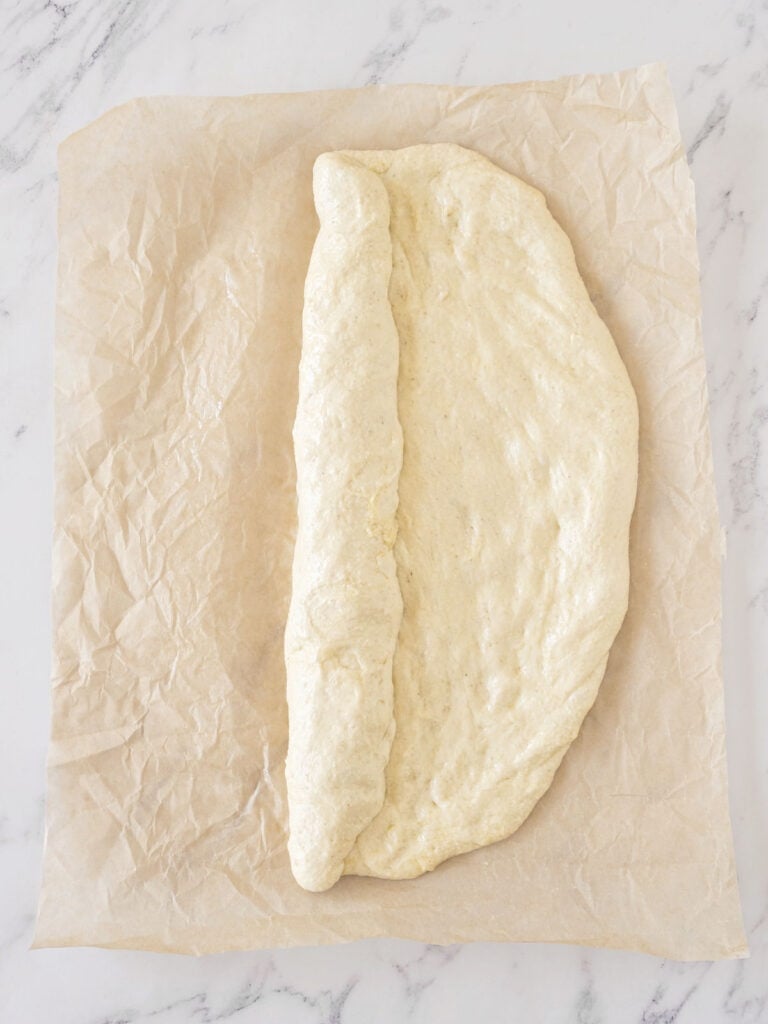
Flatten the dough with your hands to make a rectangle on a piece of parchment paper or a clean countertop.
Fold it like a cinnamon roll, and pinch after each fold. Pinch and seal the whole bread to prevent it from 'unfolding or unrolling' during baking.
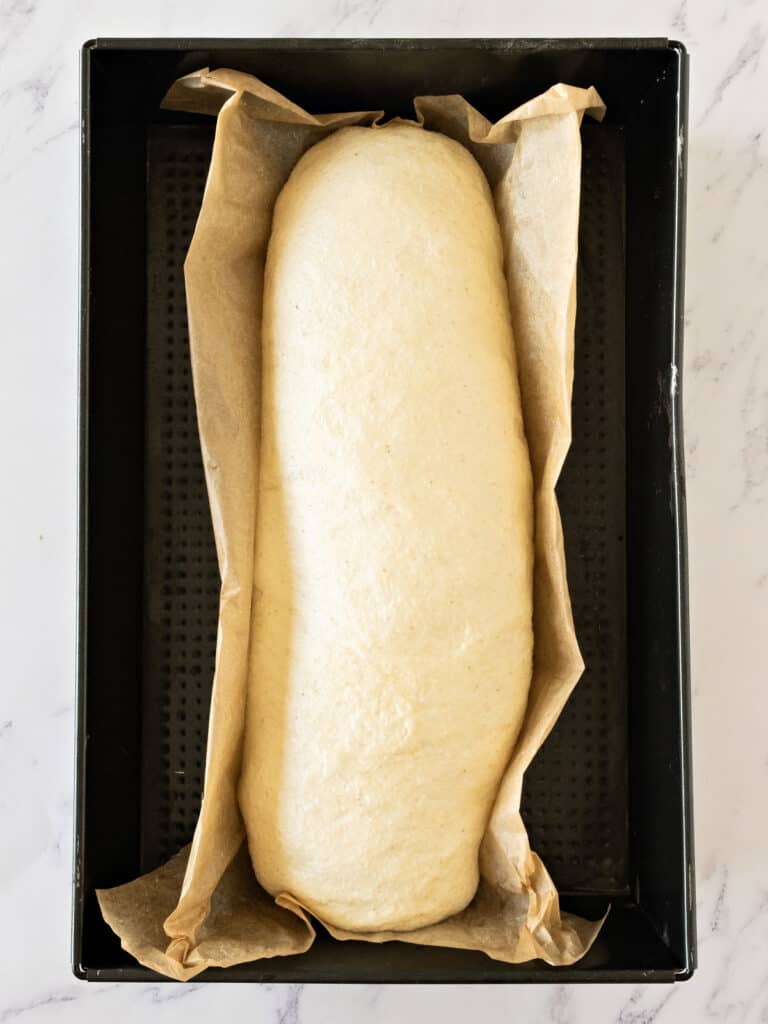
Second rise
Once shaped and on the baking sheet, the bread loaf needs a second rise. Cover it loosely with a clean kitchen towel and place it in a draft-free, warm place.
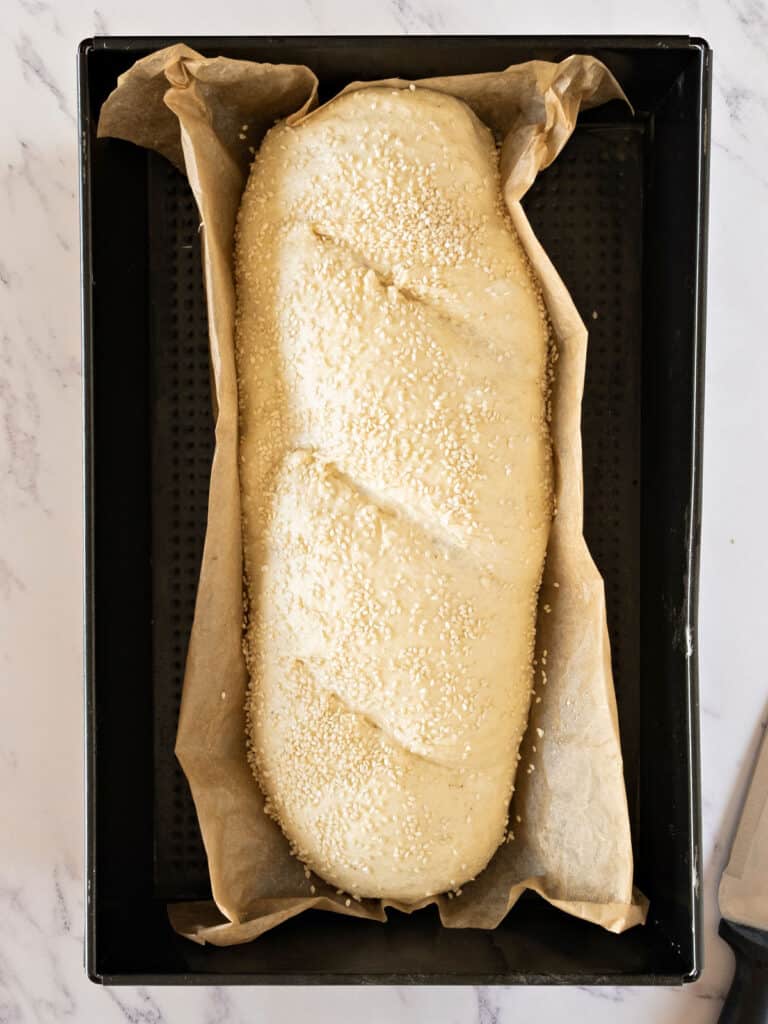
Scoring the bread
To score a loaf is to make cuts or slits right before baking it. They will allow the bread to rise better as it has a place to unfold and grow. You can use a sharp kitchen knife or a special scoring tool called a lame. It is a razor blade on a stick. It might not be a clean cut, depending on how wobbly the dough is. That is fine; be decisive and go for the cut.

Baking
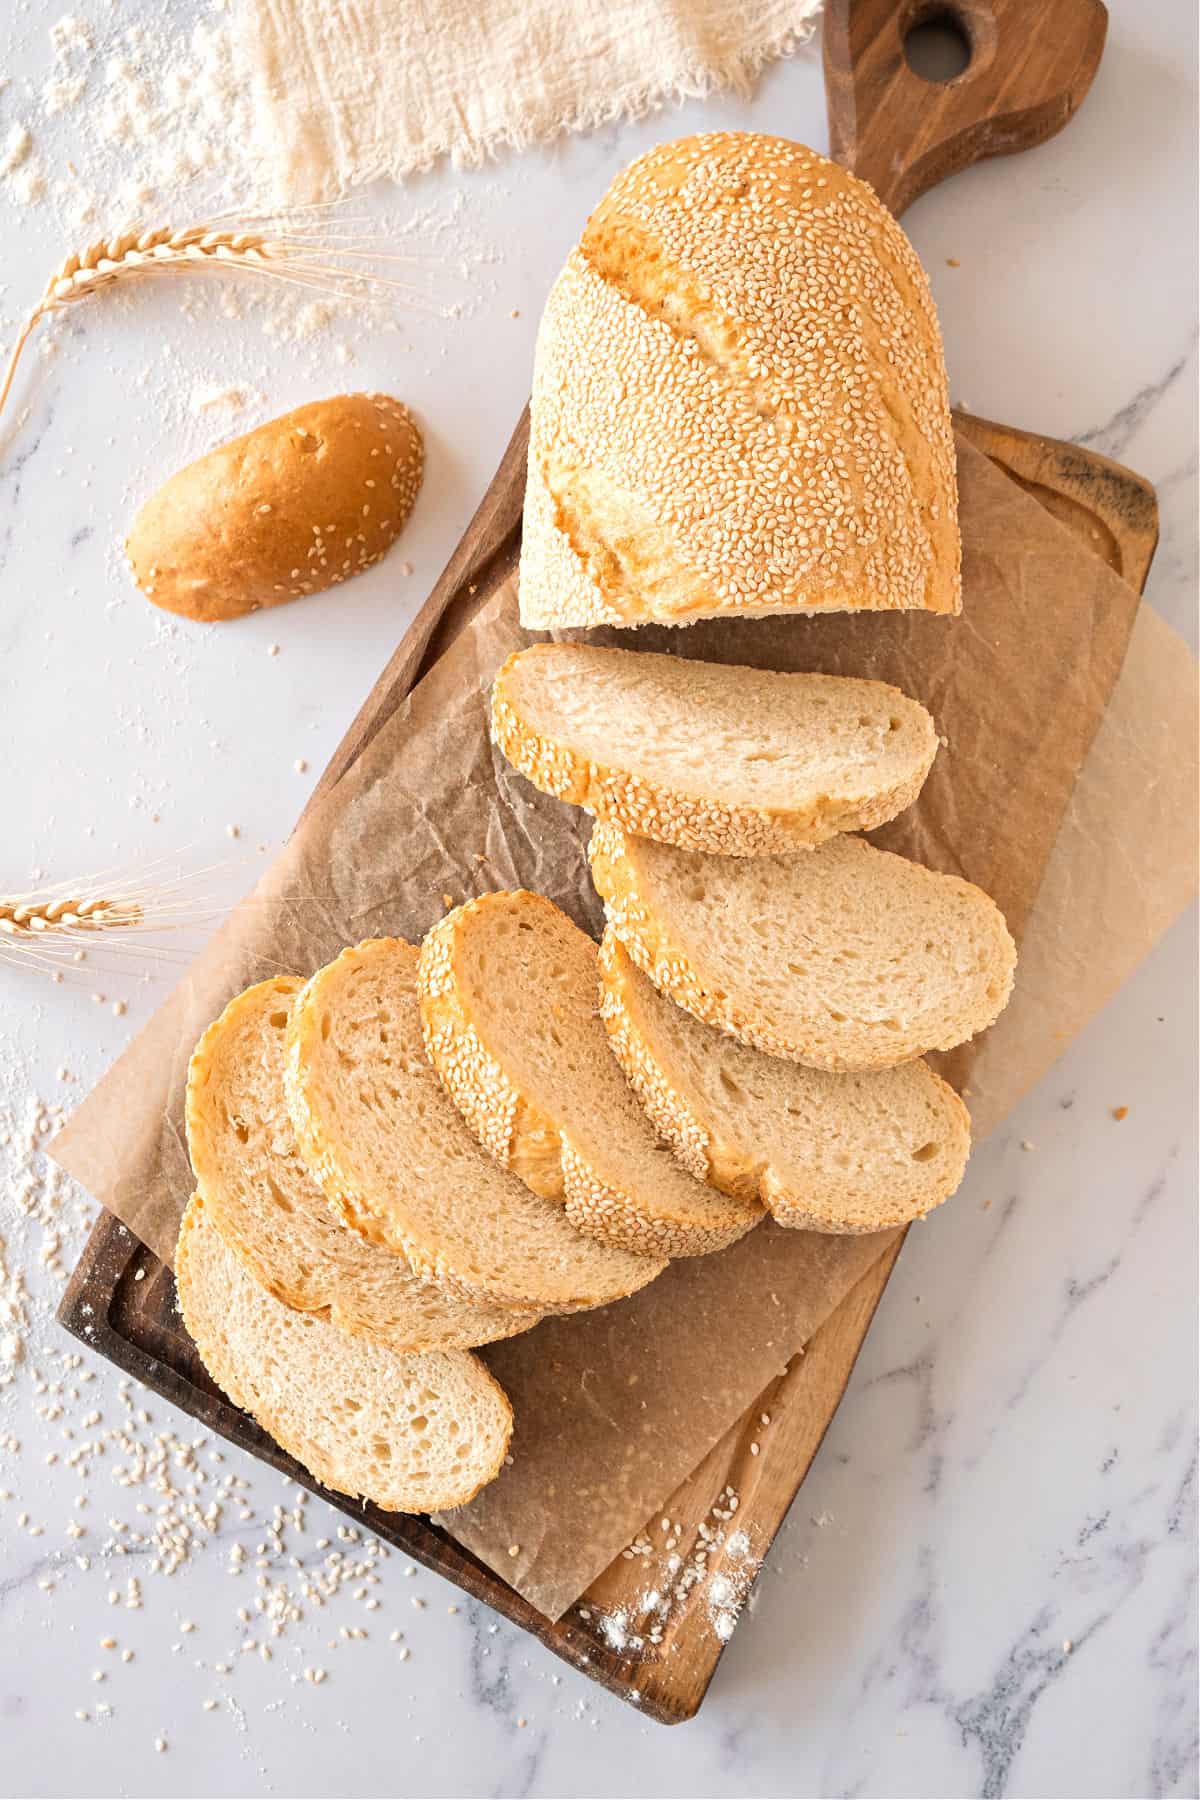
It will puff and rise beautifully, and the slits will open.
When is it ready? The crust will be dry and turn a wonderful golden hue (a characteristic of semolina flour). If you tap the bottom of the loaf lightly with the tip of your fingers or the back of a spoon, it will sound hollow.
If you made this recipe and loved it, you can comment below and leave a 5-star ⭐️ review. Also, if you had issues, let me know so we can troubleshoot together.
You can also subscribe to our FREE email series 'Baking the Best' and our regular newsletter. Or follow and save my recipes on Pinterest.
As an Amazon Associate, I earn from qualifying purchases. Read my disclosure policy.
Best Semolina Bread
Ingredients
Sponge:
- 1 cup lukewarm water, tap is fine
- 1 teaspoon dry yeast, use 1 teaspoon active-dry yeast or ¾ teaspoon instant yeast, see Notes below
- 1 ½ cups all-purpose or bread flour, you can buy bread flour online
Dough:
- the sponge, above
- ½ cup all-purpose or bread flour, you can buy bread flour online
- ¾ cup semolina flour
- 1 to 2 teaspoons salt, If you normally don't use much salt go for the 1 teaspoon
- 2 tablespoons olive oil
Instructions
To make the sponge:
- Place 1 cup lukewarm water in a mixing bowl and whisk in 1 teaspoon dry yeast.
- Stir in 1 ½ cups all-purpose or bread flour, mix lightly and cover the bowl with plastic wrap.
- Set the sponge aside to rise at room temperature (draft-free and warm) until the sponge doubles, about 1 hour. I do this directly in the bowl of the standing mixer and then add the dough ingredients.
To make the bread:
- Have ready a baking sheet lightly dusted with semolina.
- Stir the sponge to deflate, and add ½ cup all-purpose or bread flour, ¾ cup semolina flour, 1 to 2 teaspoons salt, and 2 tablespoons olive oil.
- Adjust the bowl in your stand mixer and knead on low speed with the dough hook for about 5 minutes to form a smooth, elastic, and slightly sticky dough. Alternatively, turn the shaggy dough onto a lightly floured surface and knead by hand for about 6-7 minutes. See the post above for images and further details.
- Transfer the dough to an oiled bowl. Turn the dough, so all the sides are oiled. Cover the bowl with plastic wrap and let rise until doubled, about 1 hour.
- Turn the risen dough out on the floured work surface.
- Press with the palms of your hands to deflate.
- Shape the dough into an oval, folding as you would a cinnamon roll, pinching at the seams after each fold, and place tucked side down on the prepared pan and cover with oiled plastic wrap. I like to use parchment paper or the pan dusted with semolina.
- Allow it to rise until doubled in volume, about 1 hour. About 20 minutes before baking, turn the oven to 400ºF (200ºC).
- Sesame seeds on top: this is optional. Lightly dampen the dough on top (carefully, as you don't want to tear or deflate it) and sprinkle the seeds, pressing gently to adhere. Or transfer it carefully to a tray with sesame seeds and roll to coat (I don't recommend this if you're a beginner and not used to handling proofed loaves).
- Hold a razor blade or sharp kitchen knife at about a 30º to 45° angle to the loaf, and slash 3 lines.
- Bake the loaf for about 35 minutes until well risen, golden brown, and the bottom sounds hollow when tapped. All ovens are different, so if 20 minutes into baking you feel the bread is darkening too much, turn it down to 375°F (190°C) for the rest of the baking.
- Remove from oven and cool on a wire rack until able to lift from the baking sheet with a spatula, and wait until completely cooled to cut.
Notes
Adapted from How to Bake by Nick Malgieri
Christine says
Perusing my local Indian grocery store, I found a big bag of organic semolina (“suja” or “wheat rava”) and I thought I’d give it a try in baking. Searching online for bread recipes, I found your delightful blog. Your recipe is fantastic! I substituted white whole wheat for the AP flour in the sponge and I used AP flour in the dough, along with a teaspoon of vital wheat gluten, which I always add when baking with whole wheat. The finished loaf is so delicious. This came together so easily, I think it will become a weekend staple. Thank you for this wonderful recipe.
Paula Montenegro says
So happy it turned out so well Christine! I never made it part whole wheat but it's a great idea. Have a great week!
Colleen Dahl says
Great recipe.
Paula Montenegro says
Thanks Colleen.
Martha says
I have not made this bread yet, but I have used semolina (farina flour) ground to superfine size in my flour mill. I used it to make an absolutely delectable pancake that is very fragile but perfect for me. I do not like thick, doughy pancakes and this has enough milk &/or yogurt in it to be a slightly thick batter that pours fast, as below:
1/2 cup all purpose flour
1.5 cups superfine farina flour (ground up semolina)
1 tsp baking soda
1 tsp baking powder
1/2 tsp salt
1.5 tsp sugar
2-2.5 cups room temp milk or 50:50 milk/yogurt (+1/2 cup milk if you want thin pancakes)
2 tsp oil
[1 egg optional]
You can use just farina but pancakes will be very fragile and heat up faster, burning easily.
Mix flour, farina, sugar, baking powder, soda, and salt together. In a separate bowl, beat the egg, milk & yogurt, and oil with a whisk, blending well. Stir into flour mixture. Do not mix completely. Lumps will disappear while cooking.
Let stand 15 min without stirring.
Ladle 2 oz of batter into medium hot (4-5 of 10 on dial) non-stick pan (or with 1 tsp oil in it). Cook on first side until edges are dry and beginning to brown. Turn carefully by loosening all edges first. Best to keep pancakes 6-8" in diameter. They are more easily broken up while turning otherwise. I found counting to 30 for first side and 20 for 2nd side a good way to practice until you figure out best timing.
Makes about 8-16 moderately to very thin 6-8" pancakes.
Double the recipe for 16-40 pancakes (they freeze well). All purpose flour does help to strengthen the batter and reduces likelihood of burning, and you can cook on dial at 5 instead of 4 on electric stove. But you can make them with all farina flour (farina ground up to superfine in blender). Do NOT use farina without grinding it up first. It won't work very well otherwise.
Niki says
I made this bread for the first time a few days ago and I am adding my rave review to the rest of them! I make homemade bread all the time and this was by far one of the best loaves I have ever made! I did have one question.... I only had AP flour and while the bread was absolutely wonderful, the crust was very light and didn't brown very much. I used the bread over the course of several days with meals and toasted slices of it as I used it and the cut slices didn't brown in the toaster oven either. Do you think this might be because of the AP flour vs. bread flour? I wasn't sure if the higher protein of bread flour contributes to browning or not. I would love to hear your thoughts and thanks again for sharing this wonderful recipe.
Paula Montenegro says
Hi Niki! Happy to read you liked it so much! As for the toasting, As for the toasting part, I'm not much of an expert, but I know that bread that has too much water takes longer to brown as the water has to evaporate first. All purpose flour is not the ideal for bread and that might be an issue. But I'm more inclined to think it's the amount of moisture in the bread that takes much longer to brown.
Ron says
Comes out great every time. I now double the recipe and give one away to friends. I'll never buy supermarket semolina bread again!
Paula Montenegro says
OMG Ron, I love your comment! Homemade bread is a one way ticket. You never come back from it. When I make more than one loaf, I usually slice and freeze the second one for bruschetta or toast. Have a great week!
Babs says
Followed the directions exactly but found the bread was dry. I thought that the dough seemed dry during kneading but I wanted to stick to instructions. Perhaps I’ll reduce flour amount. Any suggestions?
Paula Montenegro says
Hi Babs! Break making can differ depending on the conditions of where you make it. If the place is humid or too dry the flour might more or less liquid. As a rule, if you feel a dough is dry, add extra teaspoons of liquid. Don't add much, but a little more will help. Another way is to not add all the flour, which is better imo, and see how the dough behaves. I hardly have to change the amounts of this recipe, but we all live in different parts of the world and out kitchen temperatures vary greatly. Hope this helps.
bruce backman says
love the recipe and have made it several times. Today I decided I wanted a higher version baked in a loaf pan for sandwiches so I adapted it as follows.
Semolina Bread measured for loaf pan
Sponge:
• 11/3 cup warm tap water
• Teaspoon honey
• 1 packet active dry yeast
• 2 cups bread flour
Dough:
• All the sponge, above
• 1 cup unbleached all-purpose or bread flour
• 1 cup semolina flour
• 1 1/2 teaspoons salt
• 2 Tablespoons olive oil
To make the sponge:
1. Place the warm water and honey in a mixing bowl and whisk in the yeast.
2. Stir in the flour, mix lightly and cover the bowl with plastic wrap.
3. Set the sponge aside to rise at room tº (draft-free and warm) until the sponge doubles, about 1 hour. I do this directly in the bowl of the standing mixer and then add the dough ingredients.
To make the bread:
1. line loaf with parchment brushed with a few drops of olive oil.
2. Stir the sponge to deflate and add the flour, semolina, salt, and oil.
3. Adjust the bowl in your stand mixer and knead on low speed with the dough hook for about 5 minutes, to form smooth, elastic, and slightly sticky dough.
4. Transfer the dough to loafpan and shape.
5. Boil water and fill pan in bottom of oven.
6. Put loaf in oven on shelf above.
7. Allow it to rise 45 minutes. Remove loaf and water from oven and cover loaf in large enameled roasting pan on counter for 15 more minutes until doubled in volume.
8. preheat to 400 during this 15 minutes.
9. Hold a razor blade or sharp kitchen knife at about a 30º to 45° angle to the loaf, and slash 3 lines. You can glaze top with eggwash and poppy or sesame seeds now.
10. Bake the loaf covered for 20 minutes. Remove cover and bake another 15 to 20 minutes until well risen, golden brown and the bottom sounds hollow when tapped. If bread is darkening too much, turn it down to 375°F/190°C for the rest of the baking.
11. Remove from oven and cool on a rack.
Scarlett Greene says
Made this bread. Covered the top in oregano and rosemary. It's divine!
Paula Montenegro says
Love the idea of the herbs Scarlett! And glad it turned out well. Have a great week.
Ed Kirk says
Excellent recipe, I have made it several times, it is really an exceptional bread.
Paula Montenegro says
Thanks Ed, happy to heat that! We love it also, and use it for everything.
Ruth Hyde says
This is a wonderful recipe! I was looking for one that would replace the Italian bread I have been buying for my father. He loved it (the Italian) for toast in the morning. I starting making this and he comments on it saying "good toast"! I haven't told him it's homemade! I have been making bread since I was a child, helping my mother so I am not afraid to experiment. That being said, I have adjusted the recipe over time to try things. I have found that using King Arthur Italian Flour and their Durhum flour with Milanese Gremolata Olive Oil makes a spectacular bread. Thank you for the recipe. It is now my go to bread recipe. I have also tried Bread flour with both the durhum and the seminola flours, using a Tuscan Herb Olive Oil. Wonderful!
Paula Montenegro says
So happy to hear that Ruth! I also love this bread, it's simple but versatile. I will try some flavored olive oils next time, it's a great idea. Have a good weekend!
zena says
I used roasted garlic infused oil...this is great bread!
Paula Montenegro says
Oh, I love that idea Zena!
F says
Hello! Do you have the nutritional info for this recipe?
Cant wait to try it!
Paula Montenegro says
Hi F, yes, it's at the end of the recipe card.
Hema says
Thanks For Sharing this Amazing Recipe. My Family Loved It. I will be sharing this Recipe with my Friends. Hope They will like it.
Julie says
Is it possible to make this recipe in an electric bread maker?
Paula Montenegro says
I suppose it is possible. If baked in it also, the crust will be very different and I don't know how long it will take to completely bake inside. You can also knead it in the machine and then form by hand and bake in the oven.
Terri says
Like so many others around the globe, I started baking bread at the beginning of the pandemic. I can't even count the number of loaves I've made. Some good, some so bad even the squirrels wouldn't touch it. And this recipe is by far the BEST ever! The tips you provided were appreciated and made all the difference. And the bread ... perfect balance of a crisp crust and soft crumb. I need to go make more. So happy I found your site!
Paula Montenegro says
Terri, thanks SO much for this comment, I truly appreciate it! Bread baking went crazy last year, and I'm glad this recipe turned out so good. Have a great week!
Brian Roan says
First time bread-maker here. This recipe was incredibly well-written. Tips and tricks were actually useful and anticipated all my questions. Measurements in grams made things panic-free. Directions simple and complete. Best of all: this bread is delicious!
Paula Montenegro says
Thanks SO much for this comment Brian! Glad you liked the bread and that the tips were helpful. It made my day. Have a great week!
Ursl says
Made semolina bread today came out just as the baker said' plain amazing' I used 1 teaspoon salt and bake it at 400 f for 40 minutes I did read some of the comments before i got the flour out .Thanks for sharing your passion of baking Cheers .
I have a question though what will be the outcome with egg wash? As most bread ask for it.
Paula Montenegro says
Hi Ursi! Happy to hear it came out well! An egg wash gives it a darker, shinier finish. I don't particularly use it for this bread as I especially love the rustic look. But if you want to use it make very sure it doesn't drip into the slits or cuts because as it bakes it will create a sort of a shield and prevent some parts of the bread from fully rising. Have a great week!
Lizzy says
It looks like when you scored the bread, the cut goes all the way through the bread. Is that correct? Thanks.
Paula Montenegro says
Hi Lizzy! No, it doesn't, but I like to score it about a third so it opens up more. Sometimes I slash it more superficially than others, it depends a lot on how sharp the blade is and the type of knife or cutter you use. Either way it the bread will bake well, but it will open more or less. Hope this helps.
Ursl says
Thanks for your reply Paula, I loved the clour, texture and taste don't want to mess up this wonderful loaf of bread recipe and thanks Have a great week as well. Cheers
Marion says
Amazing! As a Brooklyn born girl living in upstate ny, it’s tough to find the perfect loaf of bread but this does the trick. Perfect ever single time!! Goes great with my Sunday sauce.
Paula Montenegro says
SO happy to hear that Marion! Really appreciate you leaving this message.
AVI Z says
The quantities in grams are off. it will be helpful if it would be fixed.
thanks
A.
Paula Montenegro says
Hi Avi. I respect your opinion but disagree. Where are you having trouble?
I don't live in the US and I use the metric system everyday.
A cup of flour is 135-140g and a cup of fine semolina is 155-160gs. I do the measuring and weighing myself and check them regularly to confirm that I'm not writing something erroneous.
I checked this recipe again and the conversions are fine. Hope this helps. Have a good day!
AVI Z says
Dear Paula, thank you very much for taking the time to respond, and for making me check things out for myself. My problem was that I checked Google for conversion from Cups to grams of flour, and they show 120gr.
Additionally, I did not realize that there is such a big weight difference between WP and Semolina flour. A cup of my WP flour was 143 gr, and Semolina was 175gr. So much for Google, and you are absolutely correct!
Paula Montenegro says
I'm used to it. The info in Google is not always accurate. That's why I measure my own. Glad it helped. Have a good week!
Sarah Eileen ford says
I found using the cup measurements easier as with my eight so bad now using your cup measurements so easy todo
I get them all ready and Putin to my stand mixer as needed
Cheers
Domenick J says
This did not work for me. I followed all of the directions to a T. Everything looked great through the scoring part. It simply did not bake. It remained flat. A crust did not form. It did not rise or brown. It remained the same color as the raw dough I put in the oven.
Could you help me troubleshoot what could have gone wrong? The yeast was brand new and proofed perfectly. Help! I'd like to try this again.
Paula Montenegro says
Hi Domenick, so sorry about your result. I have so many comments about turning out great that of course, let's troubleshoot.
Did you use tepid water and not hot? Hot water kills some of the yeast's power to act as it should.
Did it rise until doubled but not more? Because too much rising time and the bread starts to deflate. Did you have a good dough after kneading it? I assume you followed the kneading time in the recipe.
Domenick J says
The water was 108° F. The yeast was active. It did rise, not sure that it fully doubled, but it did not deflate. I kneaded it for 5 min on low in a stand mixer with a dough hook - the dough felt great after the process.
I did have some trouble with the slashing process. I used a very sharp paring knife, but the cuts did not come out very clean (I will try a razor blade next time). I think the issue is most likely my flours. They were older than I thought (I'm just getting back in to baking). I'm going to try the recipe again with fresh bread flour and semolina flour. Any other tips for my next effort? Thanks.
Paula Montenegro says
I think the process was good and the bread should've risen fine. About the cuts, I sometimes get the same result with the slashes not being deep or easy, but the bread rises anyway. So now the oven: is the temperature accurate or might there be a problem with the thermostat? Was it preheated and prepared according to the recipe? The flours might be old, though I think that might impact the flavor more than the rising. But maybe they had some issues, like mold that is not easy to spot or something that weighed down the whole bread.
AVI Z says
Are you sure you did not bake it at 200F instead of 200C?
Paula Montenegro says
Yes Avi, it's a high oven. You can bake it all a few degrees less if you want, at 350°F/180°C