

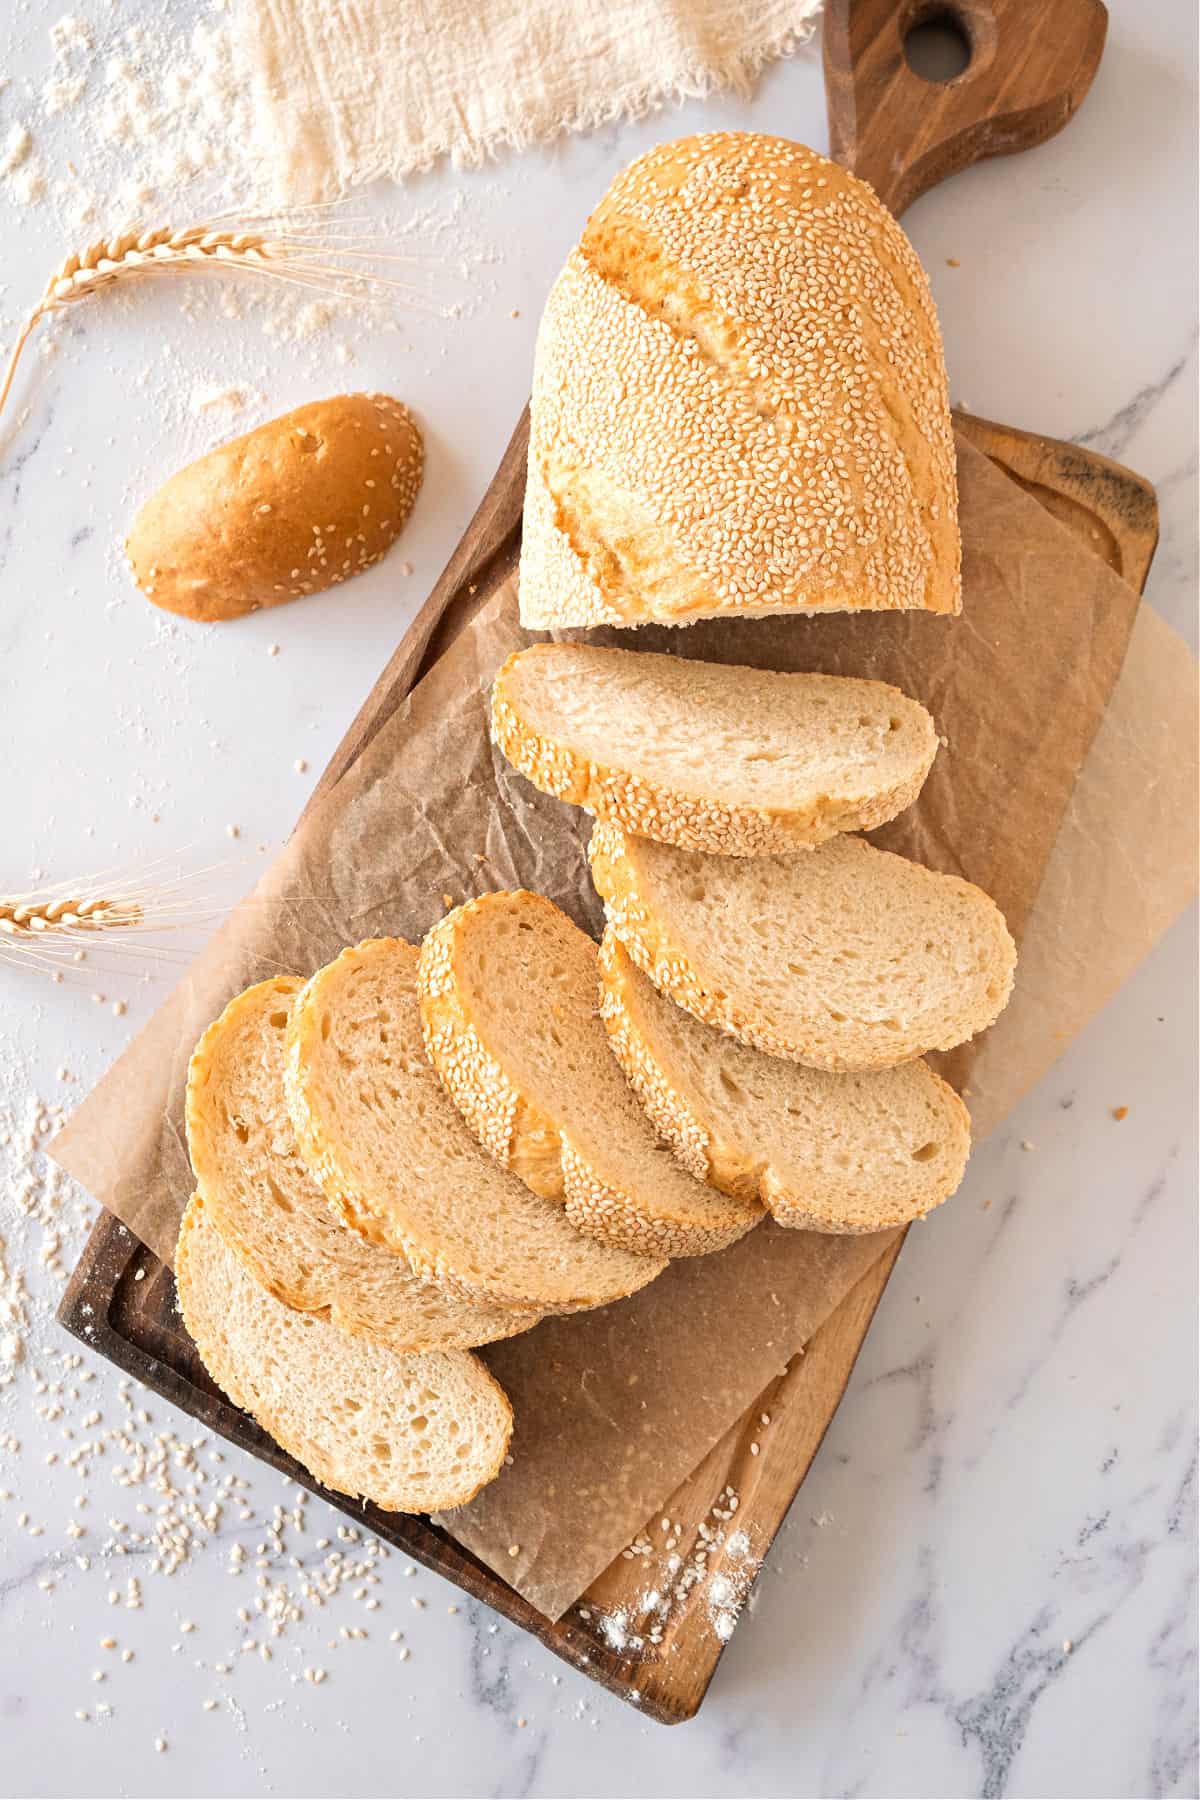
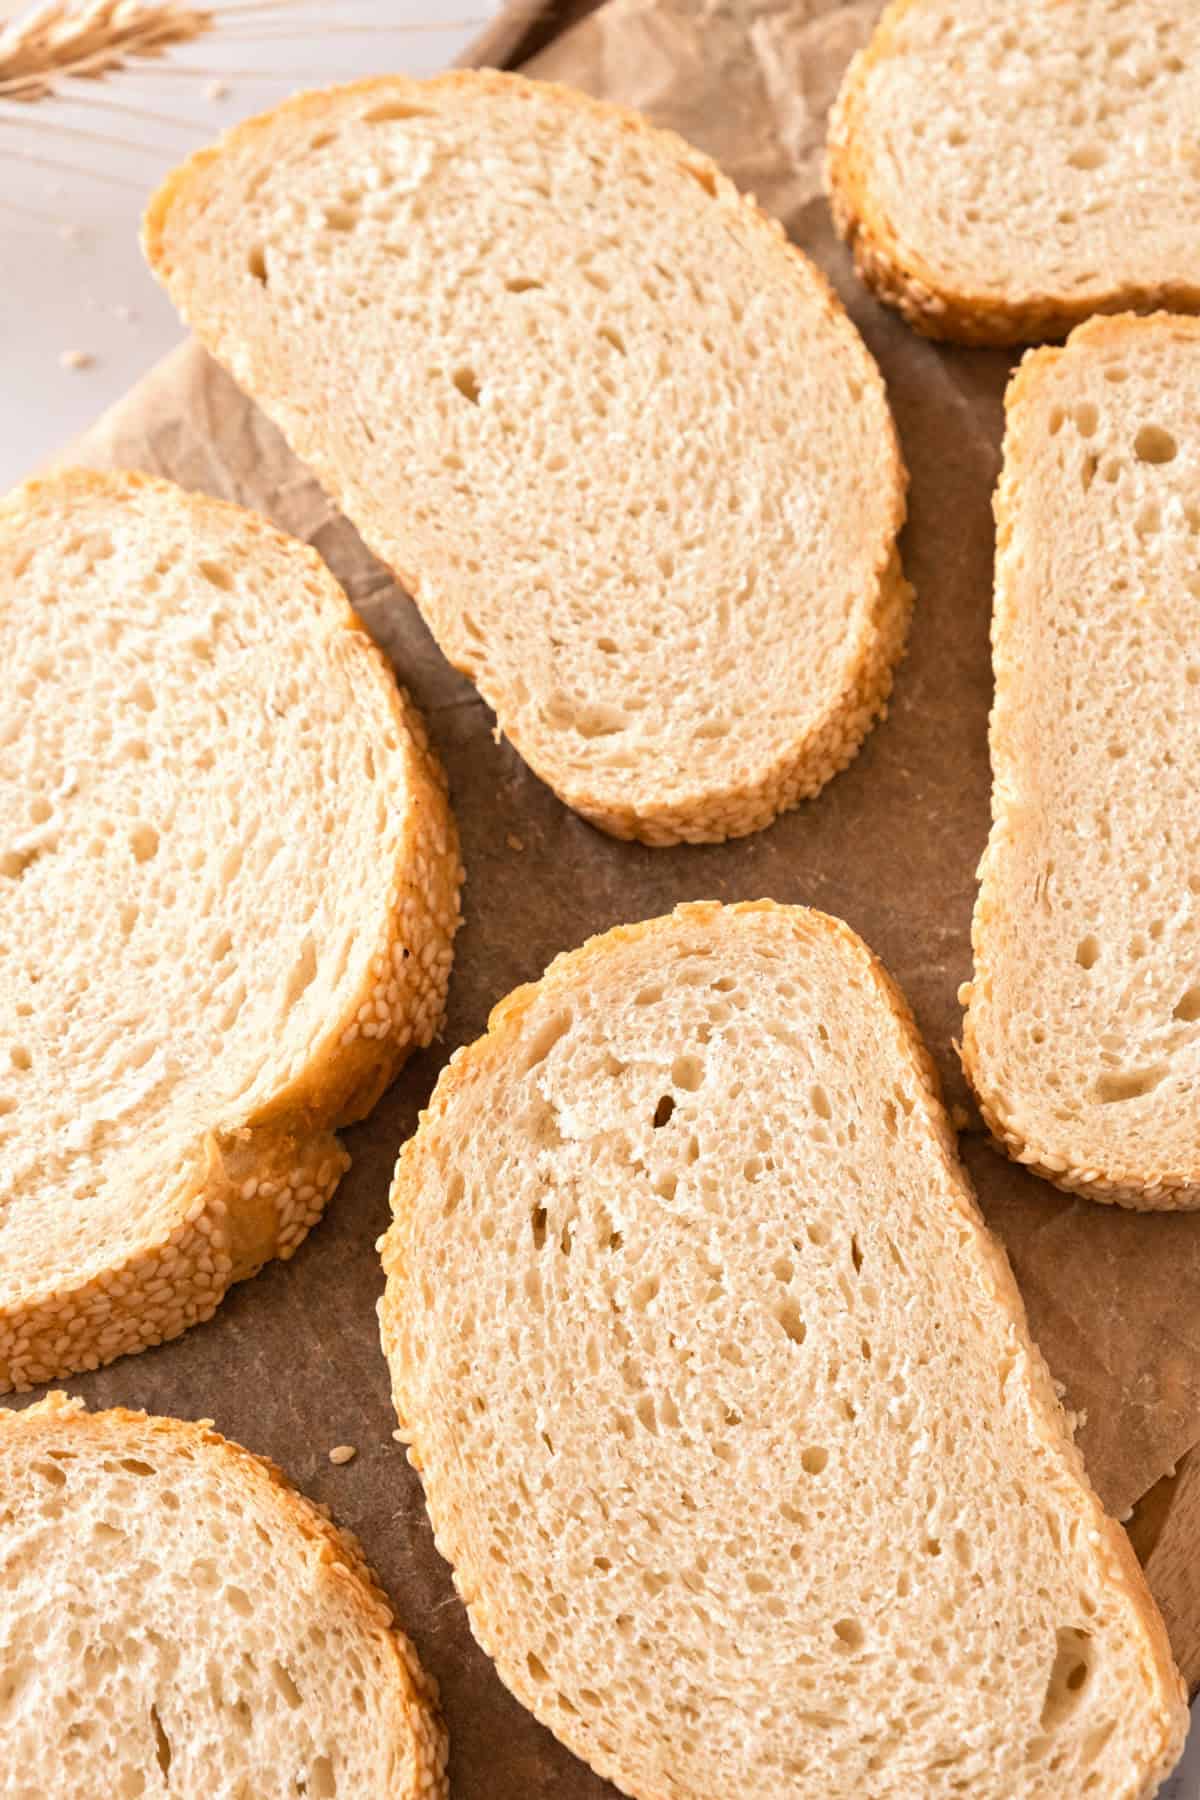
Making homemade semolina bread feels rustic and a little old-world. It has a golden hue, chewy crumb, and a crust that toasts beautifully. This recipe uses a mix of semolina and bread flour to strike a good balance between structure and flavor.
This unique Italian bread is one of our most popular ones on this blog, and I'm updating it with new images, testing notes and tips. If you're not an experienced yeast baker, there are step-by-step instructions to guide you.
SAVE THIS RECIPE
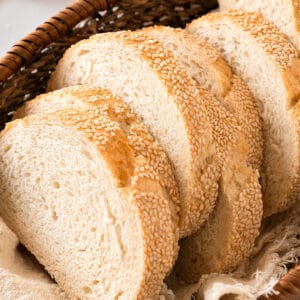
A golden loaf
I must admit this golden, crusty bread is one of my favorite ones to bake and eat! And though baking with yeast is not everybody's thing, some bread recipes are worth the time, dedication and patience. This is one of them, for sure.
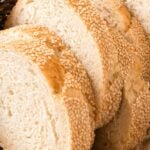
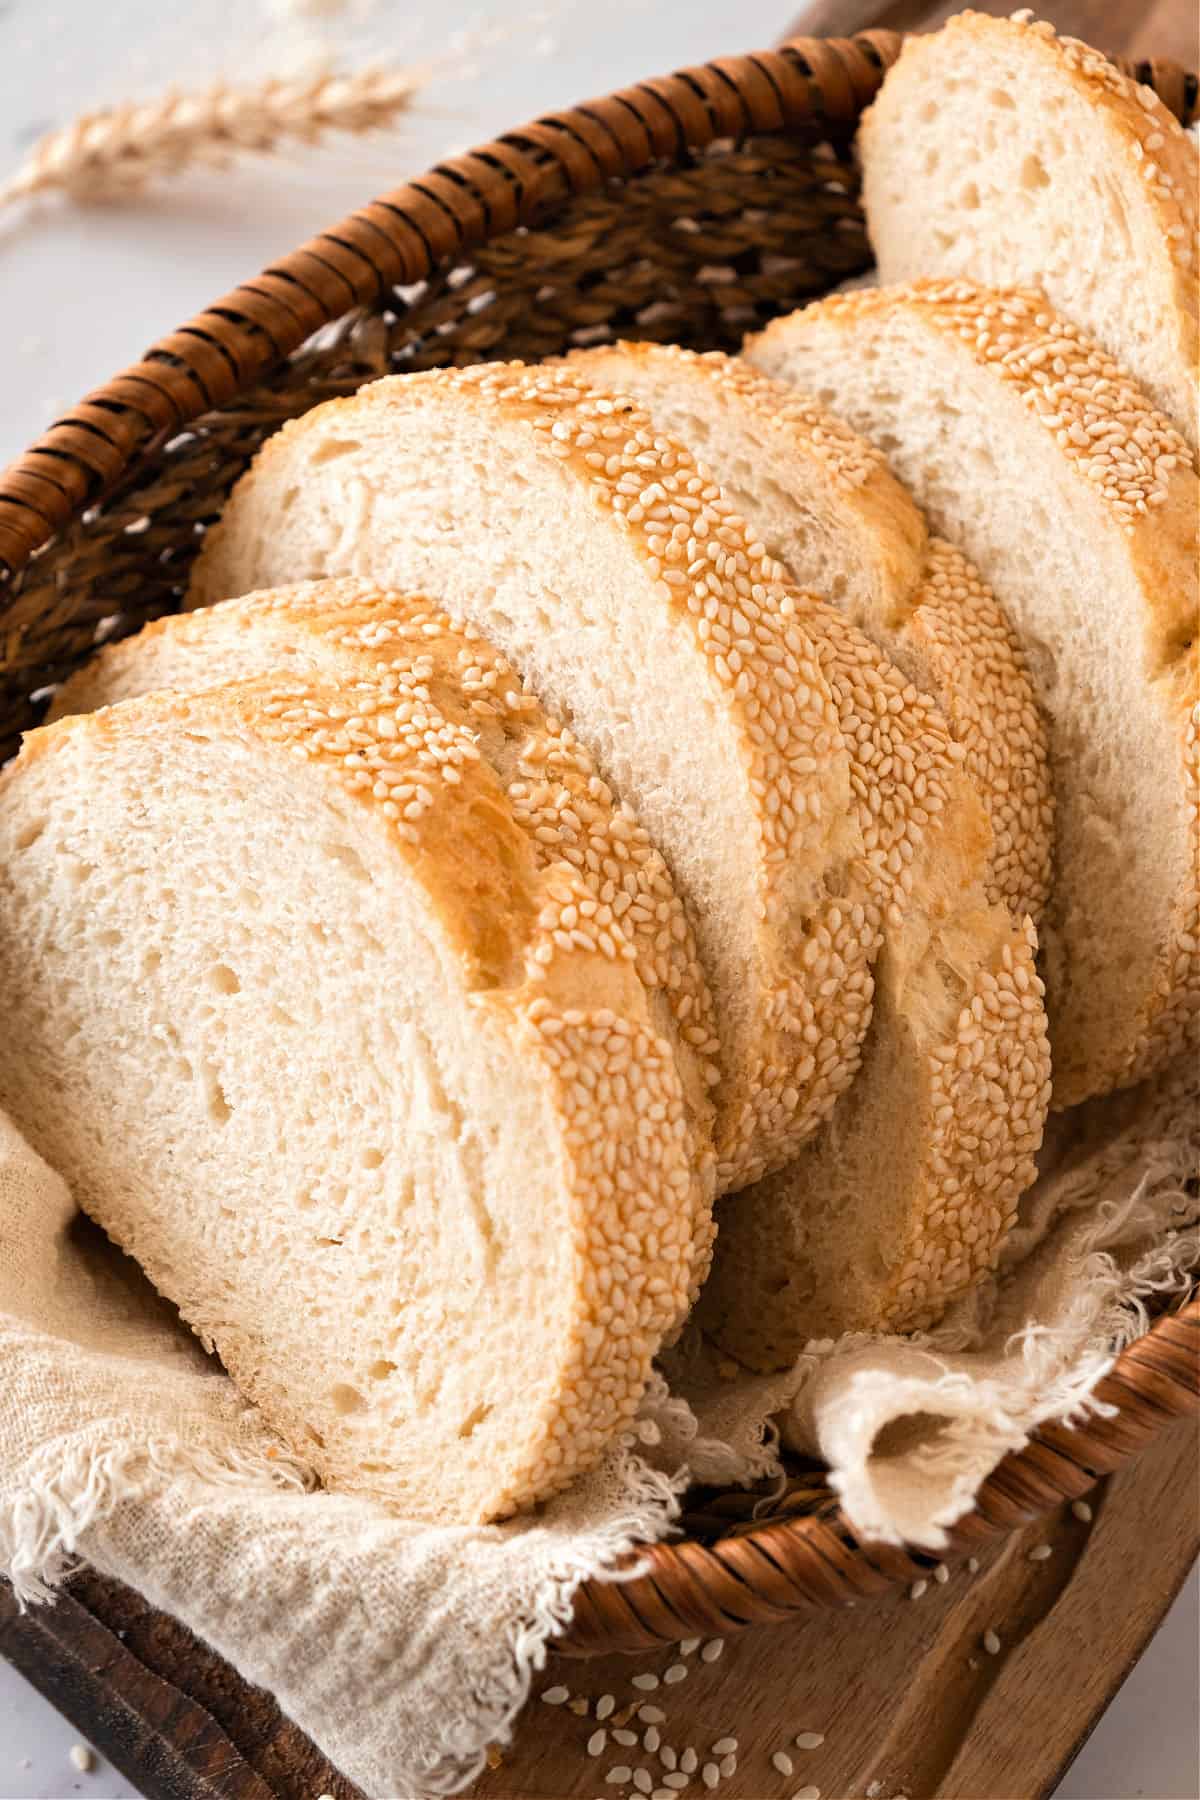
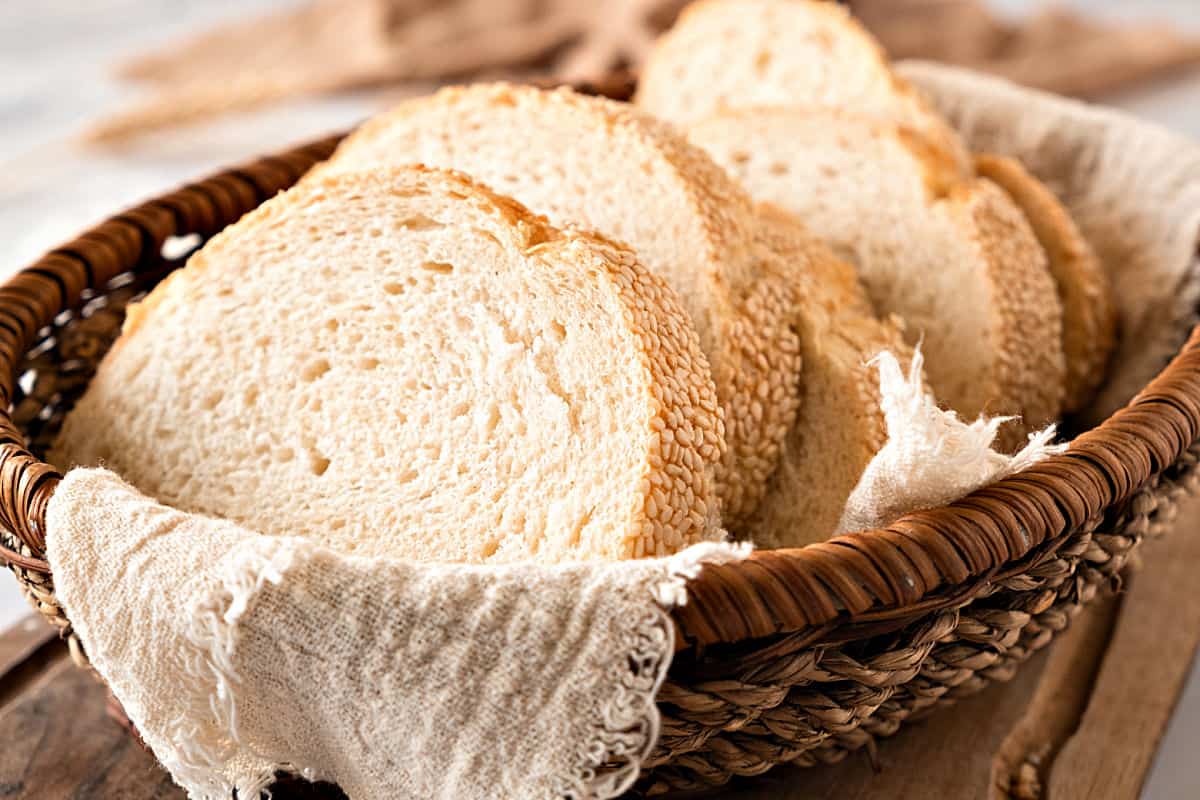
It's everything you want in a crusty bread. I coated it with sesame seeds, but you can leave it plain, as I used to do. Both ways, this semolina loaf is fantastic!
The texture is different from soft sandwich bread and more similar to an artisan bread: firmer, heartier, but still great for slicing, layering with butter, or dipping into soups and olive oil.
What is this rustic Italian bread good for? It's great for buttered breakfast toast, bruschetta and some sandwiches. Use it as an appetizer to dip in olive oil or as part of an antipasto platter. It makes the best croutons, and to pair with a stew or tomato sauce pasta.
Other bread recipes to make after this one are the yeasted beer rolls and semolina rolls, both great for sliders and to accompany saucy dishes.
Testing Notes
- Organization: bread baking takes time. So read the recipe first and plan for it. Ensure you have ingredients at the correct temperature, utensils and equipment needed, and enough workspace. This will make the process so much easier.
- Use fine semolina flour (not coarse): You want semola rimacinata or fine durum wheat flour. Coarse semolina (like the kind used for pasta or porridge) won't hydrate properly in bread dough.
- Combine it with bread flour: Semolina alone doesn't form strong gluten networks, so mixing it with bread flour gives better rise and structure.
- When proofing the dough (letting it rise), make sure the bowl is large enough to hold double or triple the volume comfortably without overflowing.
- Temperature of the room: let it rise in a draft-free, warm place. If the room is cold, take it to a warmer place or wrap it around something that keeps the temperature, like a sweater, blanket, or shawl, like I do.
- Sesame seeds, yes or no? You can go either way. I used to bake it plain, but added seeds when I reshoot it. Covering the loaf with sesame is a classic way of presenting this bread.
- To cover semolina bread with sesame seeds, lightly moisten the surface with water (I don't like an egg wash for this recipe), just enough to help the seeds stick. Use a brush or a spray bottle with water for an even coating. Spread sesame seeds in a flat layer on a tray. Gently roll or press the dough into the seeds until evenly coated. You can also sprinkle extra seeds on top and press lightly so they don't fall off. Then transfer the loaf to the baking sheet or pan with parchment paper and bake as directed. Do this before scoring the loaf.
- The loaves can have slight differences every time you bake them. If proofed correctly, the flavor will always be fantastic. But sometimes the crust might be thinner or slightly thicker, the golden hue of the crumb might vary, and so on. Bread uses yeast, and it's a living organism. So, it can be temperamental depending on the humidity, warmth of the environment, etc.
- If freezing it, slice it first: this is an excellent bread to freeze and have ready to toast. Slice it and wrap it in plastic or put it in a Ziploc bag. It will last for a month.
FAQ
Semolina absorbs more water than regular flour. Let the dough rest for 10-15 minutes after mixing to give it time to hydrate before deciding to add more liquid.
Definitely. Just be prepared to knead for 10-12 minutes to develop the gluten properly. A stand mixer makes it easier, but it's not essential.
Yes. You can shape it however you like. Adjust baking time depending on the size and shape of the dough.
Bake in a hot oven and use steam, either by quickly spraying water in a spray bottle, or throwing a few ice cubes at the bottom of the oven when the loaf goes in. Do this quickly so the steam is caught inside.
Flours you need
- Bread flour: You can buy flour that is specially made for bread. It has more gluten than all-purpose. Gluten is the ingredient that develops during kneading, creating a structure that helps the bread grow. The bread will work with all-purpose flour (but not cake flour), but it's a good idea to use the right one, and you can buy bread flour online.
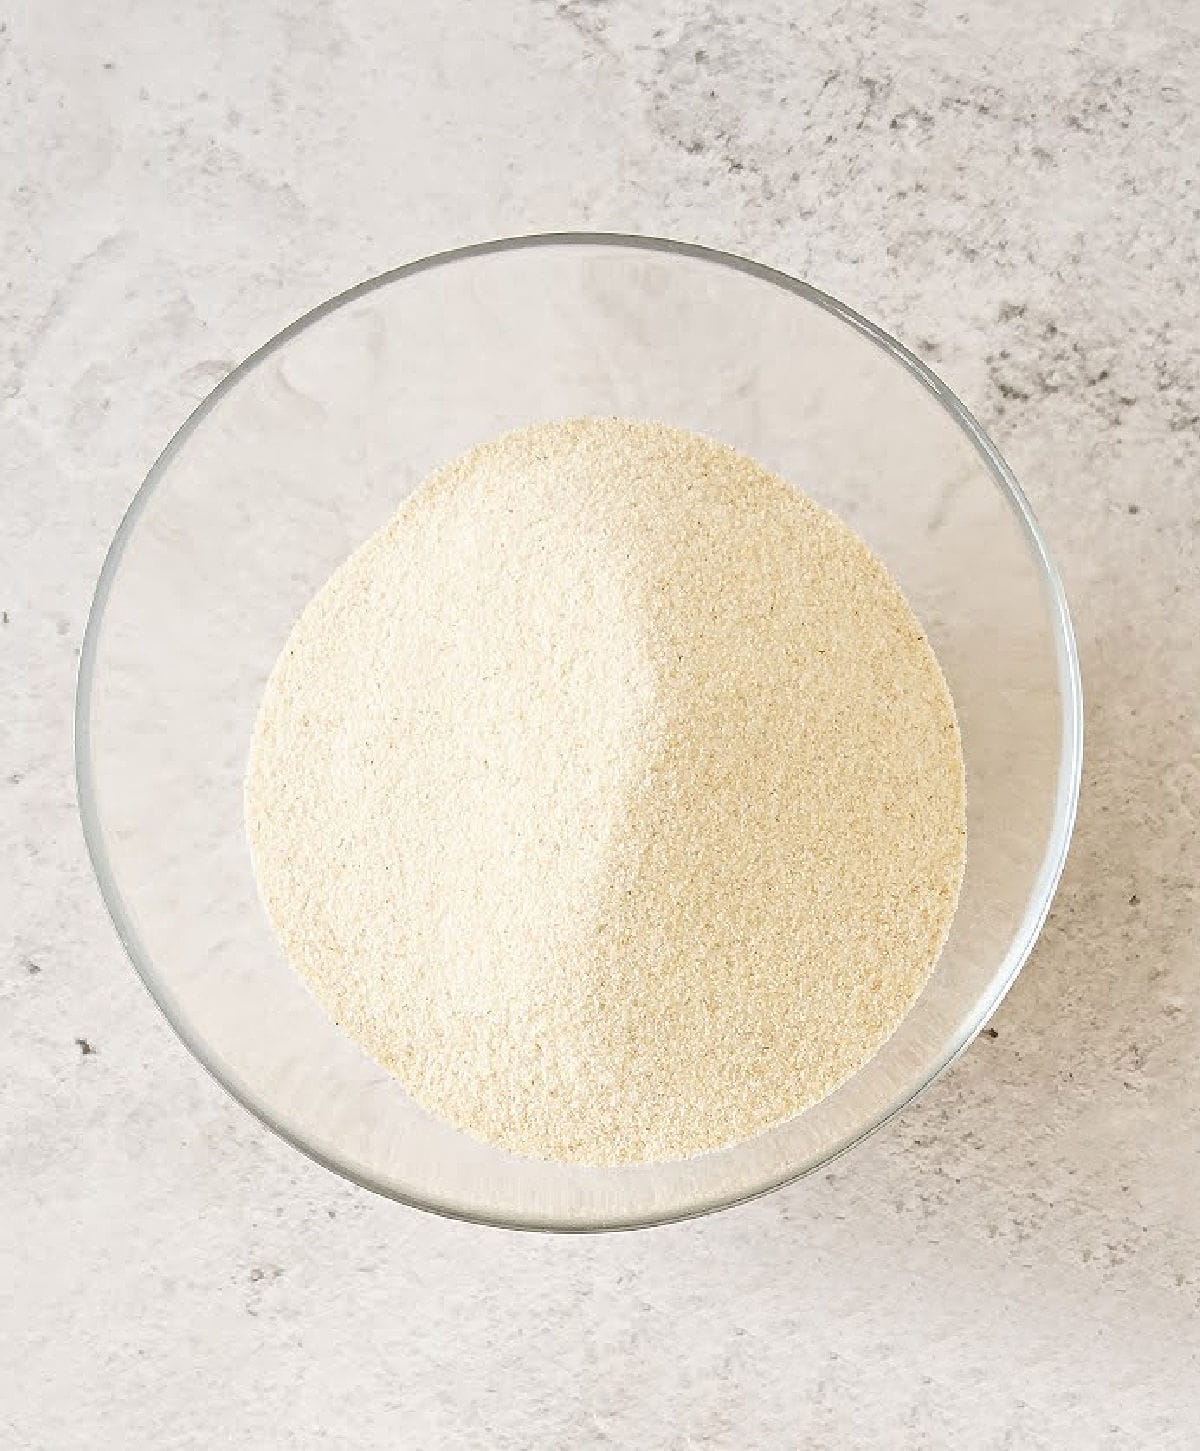
- Semolina flour: It's a fine-textured flour made from durum wheat (also used to make dried pasta). It has a nutty undertone and gives the bread a welcome golden hue. It's similar to very fine sand (image below) and different and much finer than bread flour. You need both for this bread. Semolina (semolin in some countries) comes in various textures and coarseness. Couscous, for example, is also semolina, but not at all what we need for this bread.

How to Make Sure Yeast Works
- Check expiration date: Replace if expired.
- Visual check: Should be beige to light brown and granular/powdery. Avoid if grayish, clumpy, or discolored.
- Smell test: Should have a mild, slightly sweet smell. Strong or unpleasant odors indicate it's bad.
Proofing test: Mix ½ teaspoon sugar in ¼ cup warm water (comfortable to touch). Sprinkle ½ teaspoon of dry yeast on top and stir gently. Wait 5-10 minutes until you start to see some activity. Fresh yeast will foam and bubble more while instant yeast bubbles less than active dry yeast.
Golden Rule: When in doubt, buy new! It's better to be safe than to have your baked goods fall flat and be inedible. You'll have to throw it out and start again.
Process steps
This is a fantastic recipe because it's easy to knead by hand. It is even easier with a stand mixer (using the dough hook).
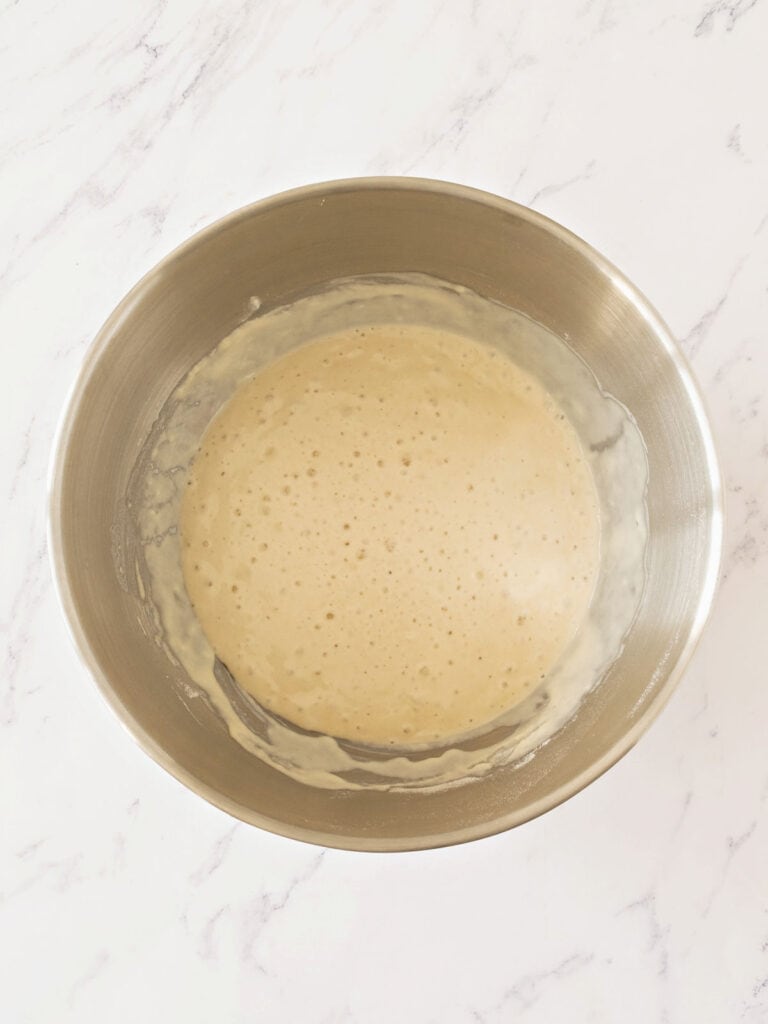
Make the sponge
Active-dry yeast is mixed with flour and water. After resting covered for 1 hour, it will have grown, and air pockets like bubbles will have developed. If this doesn't happen, the yeast is not working. Don't go on. Buy new yeast and start again.
Kneading Bread Dough Tips
By hand:
- Use the base of your palms for better control and pressure
- Flour: Avoid adding too much; sprinkle sparingly, knead first and adjust only if needed. Let the dough absorb added flour before adding more
- Sticky doughs: Use a dough scraper to help fold and turn doughs that are hard to handle.
With a stand mixer:
- Use the dough hook attachment.
- Start on low speed, then increase to medium once the dough comes together.
- Avoid overkneading: most bread doughs, with some exceptions like brioche, need about 5-10 minutes of kneading.
- Avoid overloading the bowl; knead large recipes in batches or smaller portions. Check the capacity of your mixer, as overloading can cause the motor to burn out.
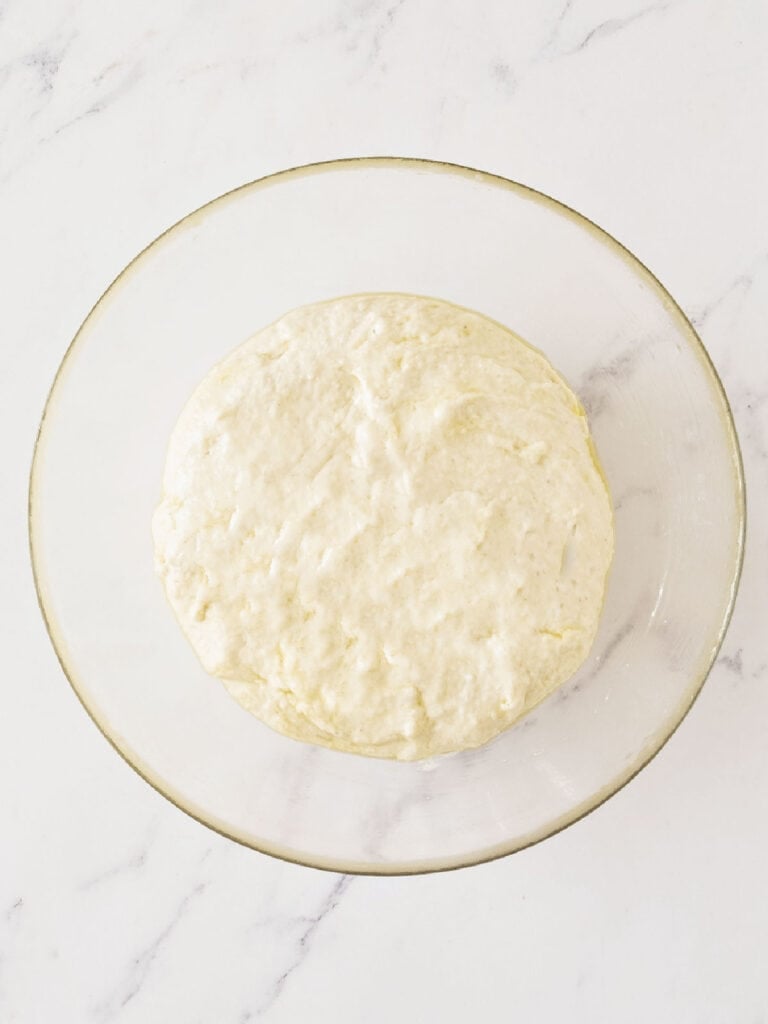
The bread dough
With the sponge ready, we need to add the rest of the ingredients to the yeast mixture.
It will look like there are not enough wet ingredients when you turn it out onto the counter, but the dough starts forming in no time after you start bringing it together and kneading.
After 1 or 2 minutes, the dough is rough but not sticky, and all the ingredients are combined.
How long does it take? About 10-12 minutes to knead it by hand and about 7-8 minutes with a stand mixer.
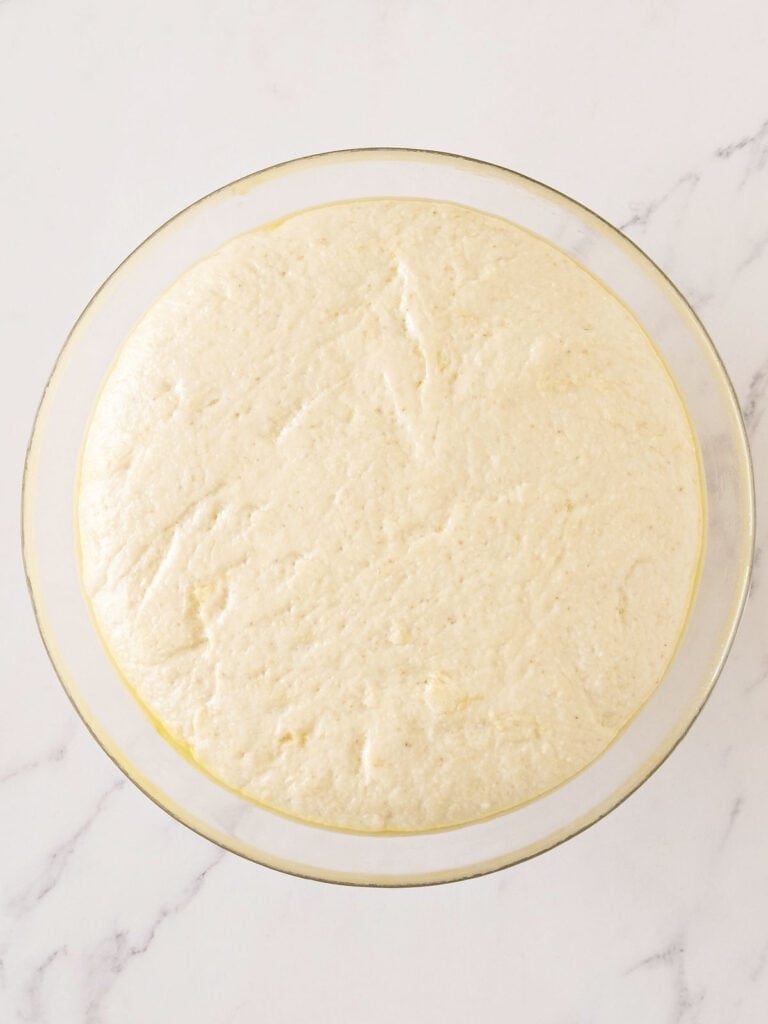
First rise
This is a crucial part of bread-making. Let the dough rise until doubled in size, which takes about 1 hour. So put it in an oiled bowl, turn it around to coat, and cover the bowl with plastic.
Form the loaf
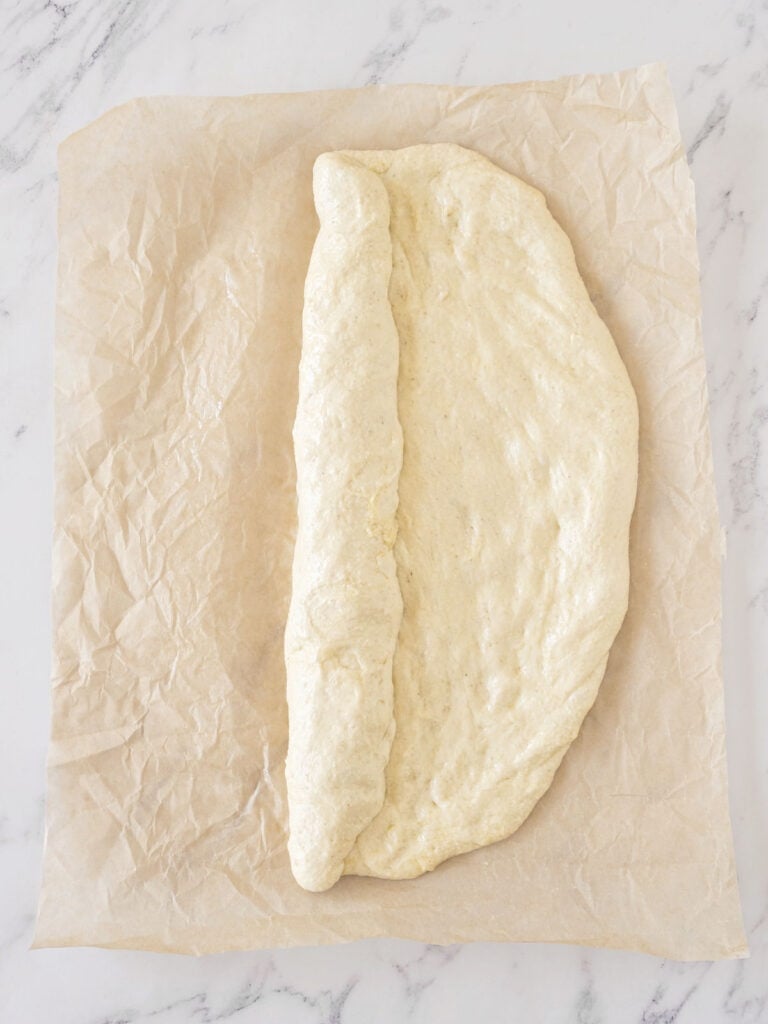
The dough is supple and friendly to work with. It can be shaped differently, and I like the batard, a plump and short baguette.
Flatten the dough with your hands to make a rectangle on a piece of parchment paper or a clean countertop.
Fold it like a cinnamon roll, and pinch after each fold. Pinch and seal the whole bread to prevent it from 'unfolding or unrolling' during baking.
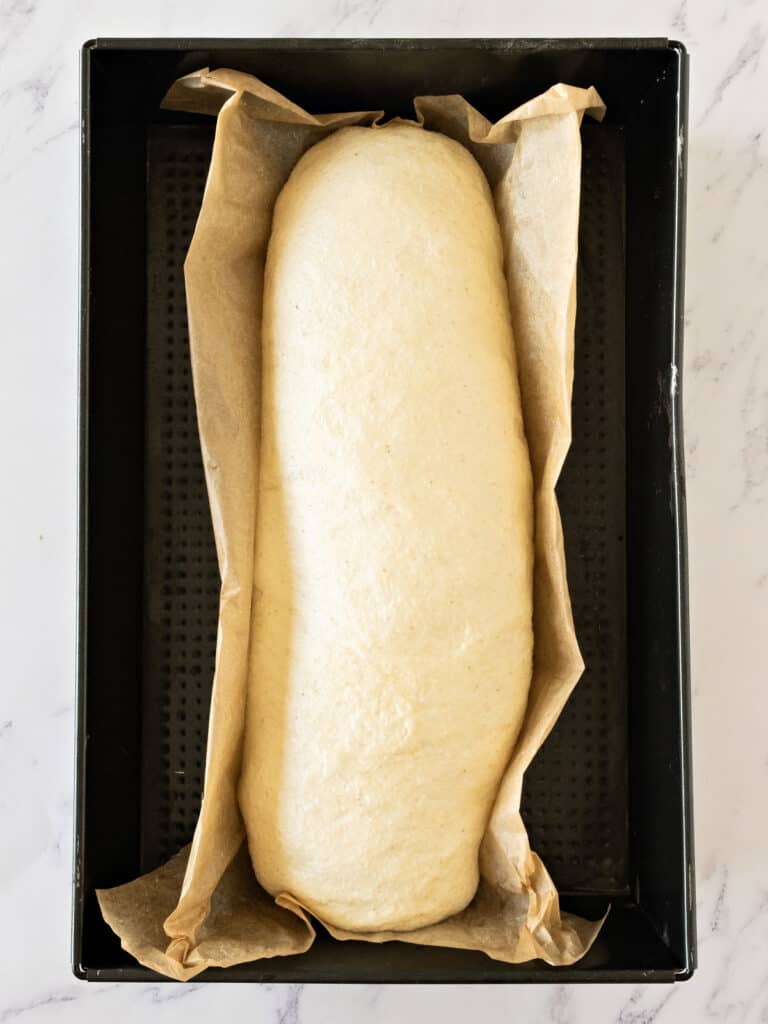
Second rise
Once shaped and on the baking sheet, the bread loaf needs a second rise. Cover it loosely with a clean kitchen towel and place it in a draft-free, warm place.
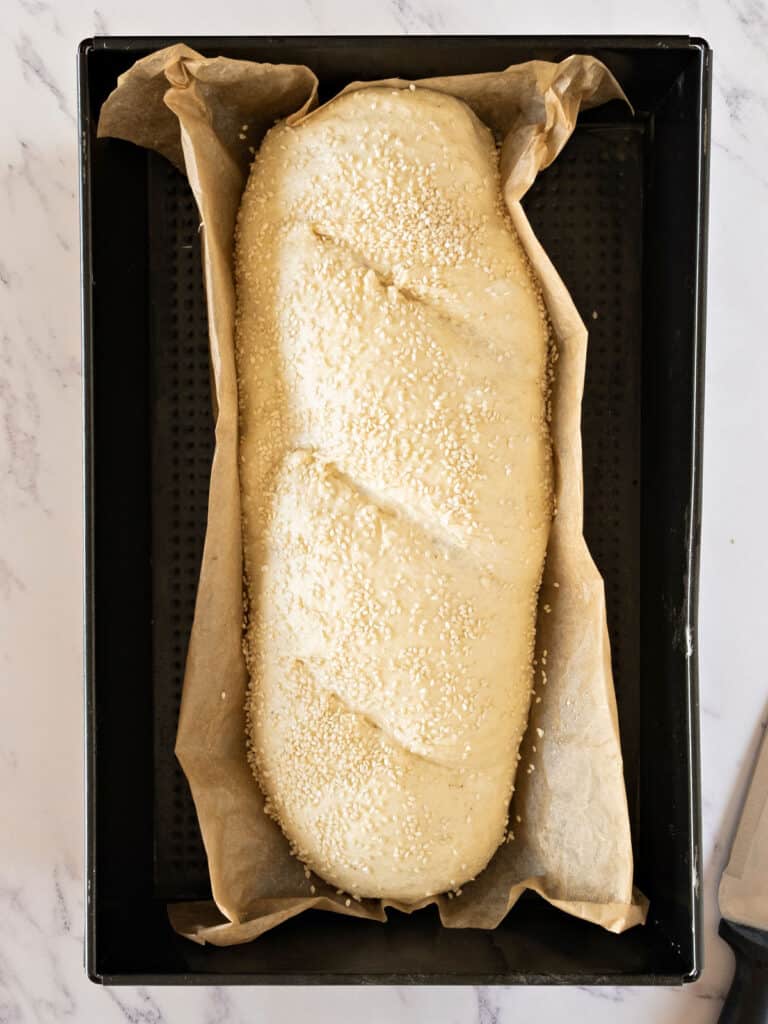
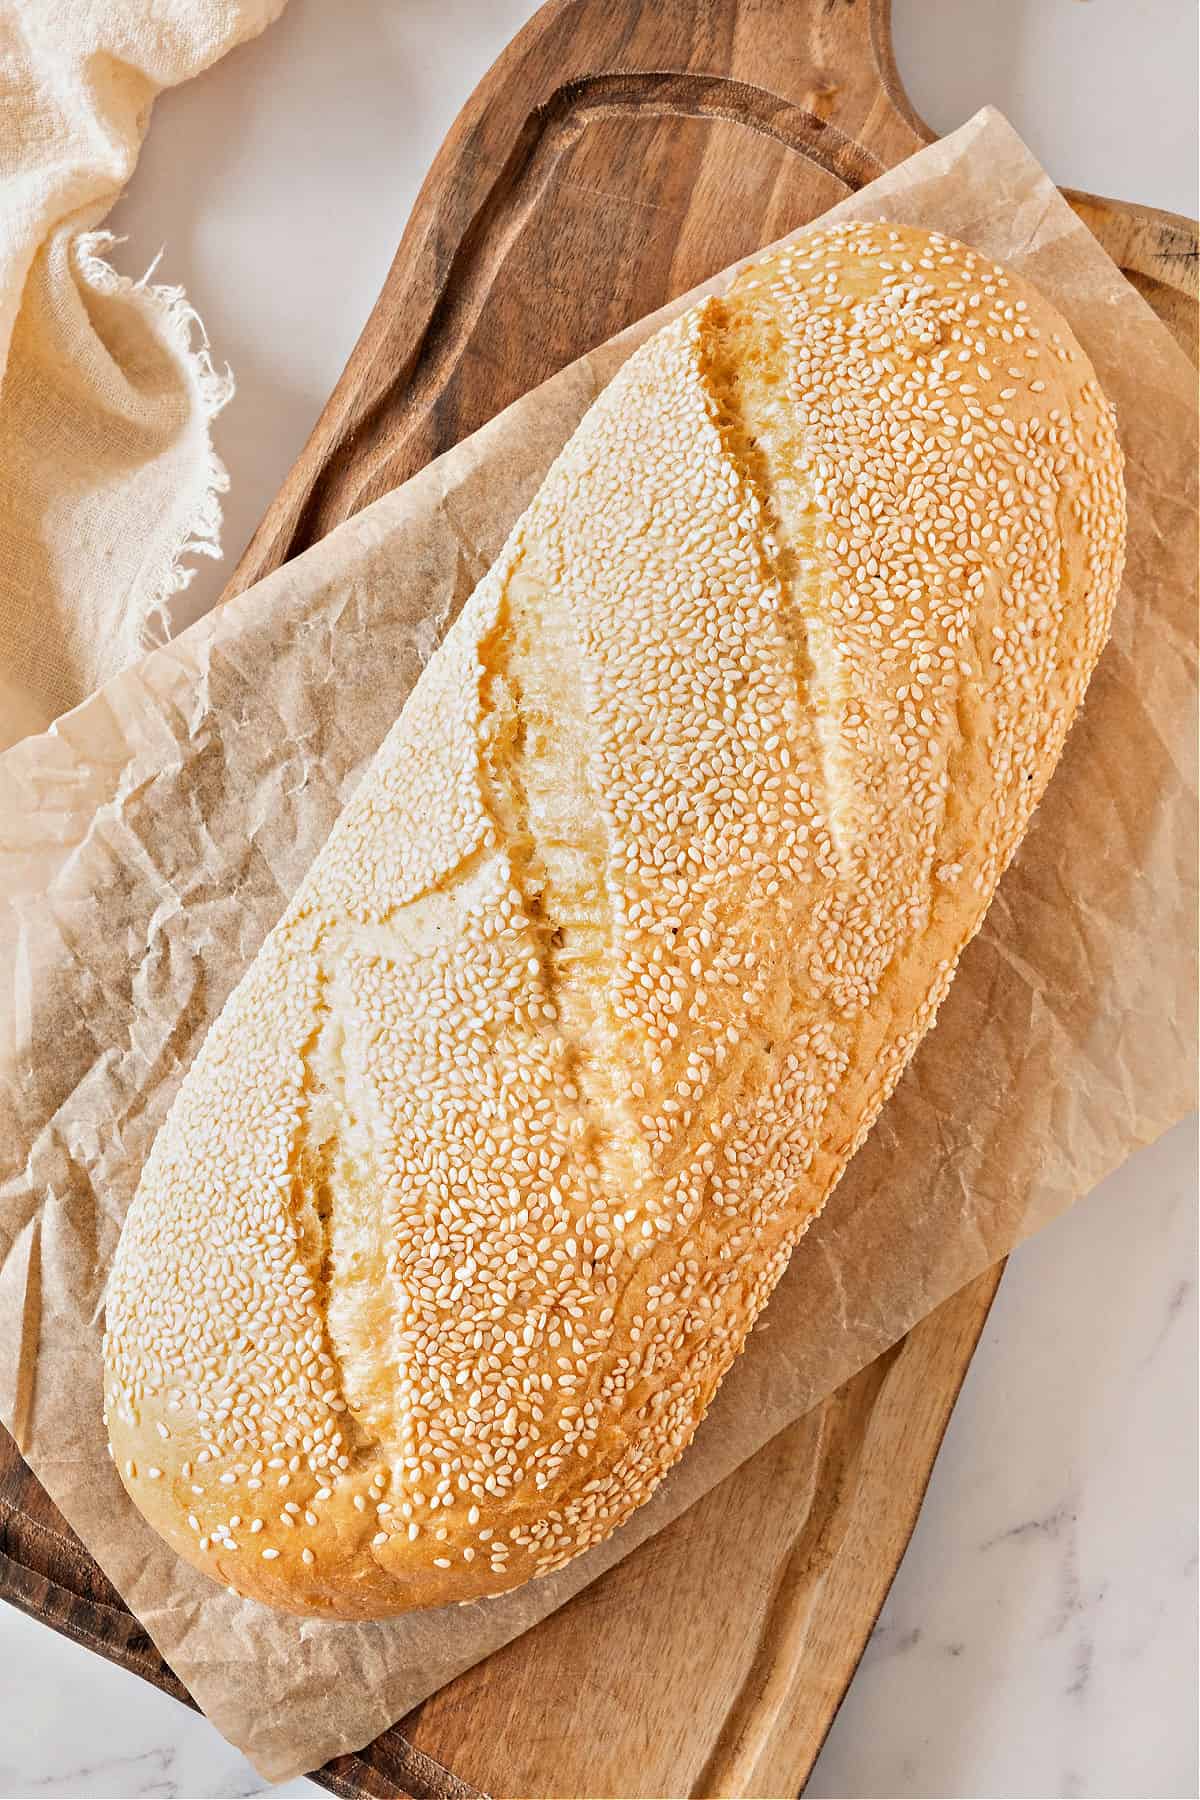
Scoring the bread
To score a loaf is to make cuts or slits right before baking it. They will allow the bread to rise better as it has a place to unfold and grow. You can use a sharp kitchen knife or a special scoring tool called a lame. It is a razor blade on a stick. It might not be a clean cut, depending on how wobbly the dough is. That is fine; be decisive and go for the cut.

Baking
It will puff and rise beautifully, and the slits will open.
When is it ready? The crust will be dry and turn a wonderful golden hue (a characteristic of semolina flour). If you tap the bottom of the loaf lightly with the tip of your fingers or the back of a spoon, it will sound hollow.
If you made this recipe and loved it, you can comment below and leave a 5-star ⭐️ review. Also, if you had issues, let me know so we can troubleshoot together.
You can also subscribe to our FREE email series 'Baking the Best' and our regular newsletter. Or follow and save my recipes on Pinterest.
As an Amazon Associate, I earn from qualifying purchases. Read my disclosure policy.
Best Semolina Bread
Ingredients
Sponge:
- 1 cup lukewarm water, tap is fine
- 1 teaspoon dry yeast, use 1 teaspoon active-dry yeast or ¾ teaspoon instant yeast, see Notes below
- 1 ½ cups all-purpose or bread flour, you can buy bread flour online
Dough:
- the sponge, above
- ½ cup all-purpose or bread flour, you can buy bread flour online
- ¾ cup semolina flour
- 1 to 2 teaspoons salt, If you normally don't use much salt go for the 1 teaspoon
- 2 tablespoons olive oil
Instructions
To make the sponge:
- Place 1 cup lukewarm water in a mixing bowl and whisk in 1 teaspoon dry yeast.
- Stir in 1 ½ cups all-purpose or bread flour, mix lightly and cover the bowl with plastic wrap.
- Set the sponge aside to rise at room temperature (draft-free and warm) until the sponge doubles, about 1 hour. I do this directly in the bowl of the standing mixer and then add the dough ingredients.
To make the bread:
- Have ready a baking sheet lightly dusted with semolina.
- Stir the sponge to deflate, and add ½ cup all-purpose or bread flour, ¾ cup semolina flour, 1 to 2 teaspoons salt, and 2 tablespoons olive oil.
- Adjust the bowl in your stand mixer and knead on low speed with the dough hook for about 5 minutes to form a smooth, elastic, and slightly sticky dough. Alternatively, turn the shaggy dough onto a lightly floured surface and knead by hand for about 6-7 minutes. See the post above for images and further details.
- Transfer the dough to an oiled bowl. Turn the dough, so all the sides are oiled. Cover the bowl with plastic wrap and let rise until doubled, about 1 hour.
- Turn the risen dough out on the floured work surface.
- Press with the palms of your hands to deflate.
- Shape the dough into an oval, folding as you would a cinnamon roll, pinching at the seams after each fold, and place tucked side down on the prepared pan and cover with oiled plastic wrap. I like to use parchment paper or the pan dusted with semolina.
- Allow it to rise until doubled in volume, about 1 hour. About 20 minutes before baking, turn the oven to 400ºF (200ºC).
- Sesame seeds on top: this is optional. Lightly dampen the dough on top (carefully, as you don't want to tear or deflate it) and sprinkle the seeds, pressing gently to adhere. Or transfer it carefully to a tray with sesame seeds and roll to coat (I don't recommend this if you're a beginner and not used to handling proofed loaves).
- Hold a razor blade or sharp kitchen knife at about a 30º to 45° angle to the loaf, and slash 3 lines.
- Bake the loaf for about 35 minutes until well risen, golden brown, and the bottom sounds hollow when tapped. All ovens are different, so if 20 minutes into baking you feel the bread is darkening too much, turn it down to 375°F (190°C) for the rest of the baking.
- Remove from oven and cool on a wire rack until able to lift from the baking sheet with a spatula, and wait until completely cooled to cut.
Notes
Adapted from How to Bake by Nick Malgieri
Frank Craft says
What are the quantities in brackets for ? It’s quite confusing
Paula Montenegro says
Hi Frank, I added the weight manually. But now it has a button you can toggle to change from US measurements to the metric system. So I deleted it. Thanks for the heads up!
Frank Craft says
Ok thanks
Patty says
Delicious recipe and easy to follow.
Joann says
Bread is so yummy, great recipe. I make 2 small loaves at least once a week, we keep 1 & give the other 1 away.
Kim says
I make ALOT of bread and this recipe is probably my favorite!! The crust is fantastic and it makes some of the best toast ever. This is going to be my new go to Italian bread recipe. Great job!
James Pavlock says
There doesn’t seem to be much of an airy crumb. The pics look pretty dense.
Anne Whipple says
I’ve tried this twice out of Nick’s book and both times ended up with a flat loaf (second time bought new yeast). The rise in the bowl worked great but formed loaf hardly rose while proofing, not at all in oven. Any tips? The dough did feel a bit dry … would adding water for a softer dough help? It tastes great, lovely crust but … dense.
Paula Montenegro says
Hi Anne! Some reasons might be that the water where the yeast was dissolved was too hot, the yeast was mixed with the salt from the beginning, the room was too cold so the dough never proofed as it should, the oven was low (sometimes the thermostat is off) and didn't have the initial oven spring it needs before forming the crust. Do any of these sound like something that might've happened?
A dry dough will not rise as much as you can certainly add a little extra water to make it more supple and soft.
Marilyn Cain says
Hi Paula. Can't wait to try this. Can i add rosemary and thyme to my dough?
Pauline says
I have made this bread twice, I thank you for sharing your well developed recipe of this semolina bread. I love the texture and everything about this bread. I have not and would not change anything in this recipe. It’s a keeper in my book.
Paula Montenegro says
Thanks so much Pauline!
Eric says
Can I still use semolina flour and bread flour in a 50/50 mixture?
Paula Montenegro says
Hi Eric! Semolina flour can be used in a larger percentage than the one in this recipe. I never tried it half and half but you shouldn't have issues.
Lidia says
Hi Paula! Great recipe! Can I leave the bread covered overnight at step 11 and put in the oven in the morning? If yes, does it need to stay in the fridge overnight or is it ok to leave it on the kitchen counter covered with the oiled cling film? - Lidia
Paula Montenegro says
Hi Lidia! If you leave it out overnight, it will almost certainly overproof (rise too much and then collapse) and lose strength to rise in the oven. I suggest putting it in the refrigerator after the bread is formed but not scored and taking it out the next day, scoring and baking it. Hope this helps.
Raj Sen says
Thank you for your excellent recipe!
Ken says
This was my second try at a semolina recipe. The first was too heavy but yours is just right
Paula Montenegro says
Happy to know it worked Ken! Have a great weekend.
Russ says
I am 82 and never baked baked before. I followed step by step no substitutions I cant believe I am eating semolina Italian bread like I had growing up in New Jersey. I live in Florida now and the bread is not as good as this. Thank you for a great recipe.
Paula Montenegro says
Hi Russ, I'm so happy you loved it! Have a great week.
Joseph Segari says
Made it today for first time.Fantastic
Paula Montenegro says
Happy to know that Joseph!
Raj says
Hi Paula, I am a beginner!!
Please help! Do I bake in a silicone or metal baking or glass tray/dish?
Thank you!
Raj - Perth WA
Paula Montenegro says
Hi Raj! I always use metal pans dusted with semolina, cornmeal, oats, or whatever the recipe suggests. It works very well when baking bread. So great that you're starting to bake bread! Happy baking.
Raj says
It came out perfect on a baking tray! I am making the second one for my daughter!!!! Thank you
Paula Montenegro says
Glad it worked Raj! Happy baking.
Caro says
A fantastic recipe, thank you! Worked like a dream. A beautiful loaf!
Paula Montenegro says
Happy to know that Caro! Have a great week.
Karen5 says
Made this exactly as written with 2 tsp salt. It’s an excellent recipe; ideal for beginners! Woke up to half the large loaf gone and red pepper flakes, olive oil and parmesan shavings across the counter, so the 13 y o boy approves as well. Made excellent toast that still holds moisture-- VERY nice!!
Next time, I will sub the semolina for the 1/2 cup of bread flour in the “dough” part of the recipe (and try both 3/4c semolina plus 1/2c semolina) and make two tight longer rolls because the rise is just gorgeous!! I would encourage anyone to stretch and fold during the rises. I’m also curious to add a steam pan of water in the oven and see what it does. Maybe I’ll cook them separately-- one with, one w/o water.
Thank you!!
This is a nice technique bread.
Paula Montenegro says
Thanks for the input Karen and so happy you all liked it! This bread is amazing and I'm sure it can accommodate to several ratios of semolina flour. I do bake with steam sometimes and the crust tends to be snappier. Happy weekend baking.
Kathleen says
I live in high altitude, 5200 feet above sea level. Are there any adjustments to the recipe to account for the thinner air?
Paula Montenegro says
Hi Kathleen, I never baked at high altitude so I can't give you an answer from my experience. I think your best bet is to google it. There is a nice chart for high-altitude baking on the King Arthur Baking page.
Raffaela says
Hello could I bake this in a cloche? I could make a round loaf and let it rise in there for the last proof. I love crusty Italian bread!
Paula Montenegro says
Hi Raffaela! I don't see why not. I don't have a cloche, but if you do and know how to use it, you should be fine. This is a simple bread, so there should be no issues.
Charleen says
Hi Paula, I live in South Africa & our Cup sizes are 250ml. I know in the USA it is 240ml. In this recipe 1 Cup Water is required. How much do i use?
Thank you
Paula Montenegro says
Hi Charleen! My USA cups weigh between 235g and 238g with water. There is usually a few grams of difference depending on what you read and the scale you use as they might not all be calibrated perfectly.
So take 240g as the standard, it's what I do, what usually appears on google, it's a round number and a few grams won't make a difference in the types of recipes I post. Hope this helps. Happy baking!
Charleen says
Thank you so much for your prompt reply. I went with the 240g.
Now just waiting for the sponge.
Will let you know how it turns out.
Leah says
Can the dough be formed and the frozen to bake at a later date ?
Paula Montenegro says
Hi Leah, I never tried it with this bread recipe, but I have frozen proofed and formed loaves before. Let them rise as directed and freeze the just formed loaves. Then let them come to room temperature and rise again for the last time before baking them.